Loading cart contents...


We’re delighted that you’re interested in the smartPATTERN “Barrel-Leg Jeans HJ10” multi-size pattern or that you may have already purchased it as a paper or PDF pattern! In these instructions you will find all the information you need to make your new barrel leg jeans step by step.
Take a look at our FAQ – there you will find answers to many questions, tips on buying fabrics and accessories, etc.
If your questions are not answered there or you have feedback for us, please send us an e-mail to hallo@smartpattern.de.
Note for customers outside the EU, GB and CH
For tax reasons, we do not sell the patterns in our online store to all countries outside the EU, Great Britain and Switzerland. You can find a list of which countries are activated in the online store here. We are happy when customers from other countries visit our Etsy store.
We have deliberately decided to make our instructions available online only. This saves a lot of paper, because not everyone wants to use printed instructions. You can also zoom in if you can’t see something straight away or the font is too small. Of course, you can also print out the individual instructions if you wish. To do this, use the corresponding print options in your internet browser. In many browsers, it is also possible to save the respective page so that it is available offline. This means you don’t always need an internet connection while you’re sewing and you can still save yourself the trouble of printing out on paper.
Sizes and measurements
Size selection
The pattern is based on a body height of 168 cm. Choose your size based on the circumference of your buttocks. If you are between two sizes, we recommend the larger size.
Since you have chosen a pattern in ready-made sizes, you may have to adjust the length, waist and leg width of the pattern if the measurements in our tables do not match your body measurements. If this is the case and you are not familiar with pattern adjustments and/or do not want to deal with them, we recommend that you order this pattern according to your exact measurements using our configurator.
Order made-to-measure patterns
To adjust this pattern to your body measurements and/or change the design, you can click on the button below and switch to our configurator. We have summarized the variants to be selected for this pattern in the product description. After the order process, we will generate your individual pattern, which you will then receive by e-mail approx. 0.5 – 10 hours later, depending on the order time and volume.
Body measurement table
You will find a body measurement table here that you can compare with your own measurements. Click on the button for instructions on how to take the right measurements. There you will also find a PDF file in which you can enter your measurements and then save them for yourself.
All measurements are given in cm! If you want to convert to inches, divide the values by 2.54.
| Inch Size (width/length) | 26/31 | 27/31 | 28/31 | 29/31 | 31/31 | 32/31 | 34/31 | 36/31 | 39/31 | 42/31 | 44/31 | 47/31 | 50/31 | 53/31 | 57/31 | 60/31 |
|---|---|---|---|---|---|---|---|---|---|---|---|---|---|---|---|---|
| US Size | 0 | 2 | 4 | 6 | 8 | 10 | 12 | 14 | 16 | 18 | 20 | 22 | 24 | 26 | 28 | 30 |
| UK Size | 4 | 6 | 8 | 10 | 12 | 14 | 16 | 18 | 20 | 22 | 24 | 26 | 28 | 30 | 32 | 34 |
| EU Size | 32 | 34 | 36 | 38 | 40 | 42 | 44 | 46 | 48 | 50 | 52 | 54 | 56 | 58 | 60 | 62 |
| Waistband circumference | 72 | 75 | 78 | 81 | 85 | 89 | 93 | 99 | 105 | 111 | 117 | 123 | 131 | 138 | 146 | 153 |
| Hip circumference | 88 | 91 | 94 | 97 | 101 | 105 | 109 | 115 | 120 | 126 | 131 | 137 | 144 | 151 | 158 | 165 |
| Thigh circumference | 53 | 55 | 56 | 58 | 60 | 62 | 64 | 67 | 69 | 72 | 74 | 77 | 80 | 84 | 87 | 91 |
| Side length to waistband topedge | 100 | 100 | 101 | 101 | 101 | 102 | 102 | 103 | 103 | 103 | 104 | 104 | 105 | 105 | 106 | 106 |
| Inner leg length | 78 | 78 | 78 | 78 | 78 | 78 | 78 | 78 | 78 | 78 | 78 | 78 | 78 | 78 | 78 | 78 |
Finish measurement table
We have listed some of the measurements of the finished trousers in the finished measurements table. The circumference measurements are given as half measurements, i.e. half the waist size etc.. So you can easily compare them with the measurements of existing, well-fitting trousers. Here you will find a sketch where you can see where the respective measurements are taken.
All measurements are given in cm! If you want to convert to inches, divide the values by 2.54.
| inch Größe (Weite/Länge) | 26/31 | 27/31 | 28/31 | 29/31 | 31/31 | 32/31 | 34/31 | 36/31 | 39/31 | 42/31 | 44/31 | 47/31 | 50/31 | 53/31 | 57/31 | 60/31 |
|---|---|---|---|---|---|---|---|---|---|---|---|---|---|---|---|---|
| US Größe | 0 | 2 | 4 | 6 | 8 | 10 | 12 | 14 | 16 | 18 | 20 | 22 | 24 | 26 | 28 | 30 |
| UK Größe | 4 | 6 | 8 | 10 | 12 | 14 | 16 | 18 | 20 | 22 | 24 | 26 | 28 | 30 | 32 | 34 |
| EU Größe | 32 | 34 | 36 | 38 | 40 | 42 | 44 | 46 | 48 | 50 | 52 | 54 | 56 | 58 | 60 | 62 |
| 1/2 Waistband circumference | 35 | 37 | 38 | 40 | 42 | 44 | 46 | 49 | 51 | 54 | 57 | 60 | 64 | 68 | 71 | 75 |
| 1/2 Hip circumference* | 48 | 49 | 50 | 52 | 54 | 56 | 58 | 61 | 63 | 66 | 69 | 71 | 75 | 78 | 82 | 85 |
| 1/2 Thigh circumference | 32 | 33 | 34 | 35 | 36 | 37 | 38 | 40 | 41 | 43 | 45 | 46 | 48 | 50 | 52 | 54 |
| Side length to waistband topedge | 90 | 91 | 91 | 92 | 93 | 93 | 94 | 94 | 95 | 95 | 96 | 96 | 97 | 97 | 97 | 98 |
| Inner leg length | 65 | 65 | 65 | 65 | 64 | 64 | 64 | 64 | 64 | 64 | 64 | 64 | 64 | 64 | 64 | 64 |
| *Hip hight to waistband topedge | 17 | 17 | 18 | 18 | 19 | 19 | 19 | 20 | 20 | 21 | 21 | 21 | 22 | 22 | 23 | 23 |
Product description
The barrel leg jeans HJ10 have a strong leg shape, 7/8 length, a medium waistband height and normal crotch depth. The V-shaped yoke, the side strip insert and the knee darts perfectly accentuate the “barrel shape”.
There are round pockets at the front with a small coin pocket. The back pockets have a square shape – classic for denim pants – and are attached. The 4 cm high shaped waistband ensures optimum support and a comfortable fit. The front fly is finished with a zipper.
The comfortable barrel leg jeans are generally designed for non-elastic fabrics. If you want to use an elastic material, you must ensure that the waistband does not stretch out by fixing it with a suitable interfacing or cutting it at 90° to the grain.
This pattern is based on the following configuration:
- Leg shape: strong
- Length: 7/8 length
- Leg design: strip insert
- Knee darts: 2 knee darts
- Waistband height: medium
- Crotch depth: normal
- Front pockets: round
- Back yoke: V-shape
- back pockets: angular patched on
- Waistband width: 40 mm
- Waistband type: shaped
- Fly: Zipper
General information
Seam allowances
Our patterns already include all seam allowances. The standard seam width is 10 mm. We use wider seam allowances at some seams so that the width can be adjusted if necessary. These wider allowances are marked with a notch at the beginning and end of the seam.
The seam lines are also visible in the paper pattern for the smallest size. You can determine the width of the seam allowances by measuring the distance between the seam line and the cutting line. The seam allowances are the same for all sizes.
If you have bought or would like to buy the pattern as a PDF file, please take a look at these instructions. There we explain how you can show and hide the seam and cutting lines for individual sizes in the PDF file.
Scope of delivery of the PDF pattern
You will receive the following files:
- The pattern as a PDF file in A4 format (also works for letter)
- The pattern as a PDF file in A0 wide format (the width of the pattern is A0 format, but can be longer – depending on how much space is required for the pattern pieces).
You will receive the pattern in two formats and can decide for yourself whether you want to print out the A4 file at home, glue it together and get started straight away. If you don’t feel like gluing, you can give the A0 wide file to a copy store or an online print shop and have a large pattern sheet created for you. Please note the additional printing and shipping costs of the respective provider.
You can open the PDF files with the free Adobe Reader.
Abbreviations
We use these abbreviations in our patterns:
VM | CF = center front
HM | CB = center back
RV | Zip = zipper
SN = side seam
Fabrics and materials
You will need the following materials to sew the barrel-leg jeans. You can find out how much fabric you need for your size and how long the zipper needs to be in the table below.
- Outer fabric: non-elastic denim, e.g. cotton or hemp
- Pocket lining, e.g. thin, firm cotton fabric
- Fusible interfacing, e.g. Vlieseline G 405
- Bias tape 1.2 cm wide, e.g. Vlieseline T12
- 1 zipper, length see below
- 1 button for waistband, approx. 15 mm diameter
- Yarn matching your materials
![]() We strongly recommend that you wash the fabric before sewing to prevent your finished barrel leg jeans from shrinking later on. Therefore, wash the fabric in exactly the same way (temperature, spin cycle, etc.) as you will wash the finished garment later and follow the manufacturer’s instructions.
We strongly recommend that you wash the fabric before sewing to prevent your finished barrel leg jeans from shrinking later on. Therefore, wash the fabric in exactly the same way (temperature, spin cycle, etc.) as you will wash the finished garment later and follow the manufacturer’s instructions.
Take any shrinkage into account when purchasing the fabric! Unless otherwise stated for the respective fabric, assume an addition of 10 %, which should normally be sufficient.
With denim fabrics, it can happen that the fabric gets light-colored stripes during washing, namely where creases form during the washing process. This cannot always be 100% avoided. However, it helps if you place the fabric in a large bowl or similar in water before putting it in the washing machine and allow it to completely soak up the water.
To prevent or reduce bleeding on colored fabrics, you can add a dash of vinegar to the washing machine or water.
The following length specifications per size refer to the usable material width specified in the left-hand column, assuming that the fabric is plain-colored. If you choose a patterned fabric, you may need more fabric depending on the size of the pattern.
| Inch Size (width/length) | 26/31 | 27/31 | 28/31 | 29/31 | 31/31 | 32/31 | 34/31 | 36/31 | 39/31 | 42/31 | 44/31 | 47/31 | 50/31 | 53/31 | 57/31 | 60/31 |
|---|---|---|---|---|---|---|---|---|---|---|---|---|---|---|---|---|
| US Size | 0 | 2 | 4 | 6 | 8 | 10 | 12 | 14 | 16 | 18 | 20 | 22 | 24 | 26 | 28 | 30 |
| UK Size | 4 | 6 | 8 | 10 | 12 | 14 | 16 | 18 | 20 | 22 | 24 | 26 | 28 | 30 | 32 | 34 |
| EU Size | 32 | 34 | 36 | 38 | 40 | 42 | 44 | 46 | 48 | 50 | 52 | 54 | 56 | 58 | 60 | 62 |
| Main fabric, 140 cm width | 150 | 164 | 172 | 179 | 182 | 187 | 188 | 190 | 199 | 207 | 213 | 215 | 218 | 232 | 245 | 251 |
| Pocket lining, 40 cm width | 29 | 29 | 30 | 30 | 31 | 31 | 32 | 32 | 33 | 33 | 34 | 34 | 35 | 35 | 36 | 36 |
| Interfacing, 90 cm width | 16 | 16 | 22 | 22 | 24 | 24 | 27 | 27 | 31 | 31 | 36 | 36 | 45 | 45 | 56 | 56 |
| Zipper length | 12 | 12 | 13 | 13 | 13 | 14 | 14 | 15 | 15 | 15 | 16 | 16 | 17 | 17 | 18 | 18 |
Print the pattern and prepare it for cutting
You can find out how to prepare your pattern for cutting in the instructions Preparing patterns in ready-made sizes. The first part explains how layer printing works for A4 and A0 wide files. If you have already printed out your pattern, you can start directly at point 7. This is about cutting out and sorting the pattern pieces.


Here you can see an example of the labeling of a smartPATTERN pattern piece.

In the legend of your pattern sheet, you can see which line type (=cutting edge) you have to follow when cutting out your chosen clothing size.
Cutting
Below you will find some example cutting plans based on the fabric widths given in the material consumption table. If you are using a fabric that is narrower, you will most likely need more fabric and will have to arrange the pattern pieces differently. If your fabric is wider, you may need less length.
You can arrange the pattern pieces in advance on a large table or the floor, on which you mark your fabric width, to find out exactly what length of fabric you need. Remember to take into account any shrinkage values of the fabric!
The pattern pieces are placed on the open or folded fabric. The right side of the fabric, or in the case of the iron-on interfacing, the side without the adhesive dots, should be facing upwards. You can find out whether you need to cut a pattern piece individually or twice (as a pair or in pairs)
from the label on the pattern piece. You can find more information on this in the instructions for cutting fabrics and materials.

Cutting plans
Main fabric – size 40

Main fabric – size 50

Main fabric – size 60

Pocket lining – all sizes

Interfacing – size 40

Interfacing – size 50

Interfacing – size 60

Sewing instructions
There are detailed sewing instructions for each step in the form of pictures, text and videos. Below you will find the instructions in the order in which you need them for sewing.
Click on the respective link next to the numbering for the illustrated text instructions. You can access the video instructions by clicking on the corresponding image.
We wish you lots of fun and success sewing your barrel leg jeans!
We highly recommend that you do not skip this step. Of course you will need some time – about 1 hour – for stitching and unstitching, but it is much easier to make changes at this stage than later!
12. Optional: Attaching rivets
Show your work
We would love to see your work on Instagram! Link us with @smartpattern and use the hashtag #smartpatternbarrellegjeans so that we can find you.
Browse through our store and discover your next project!
-
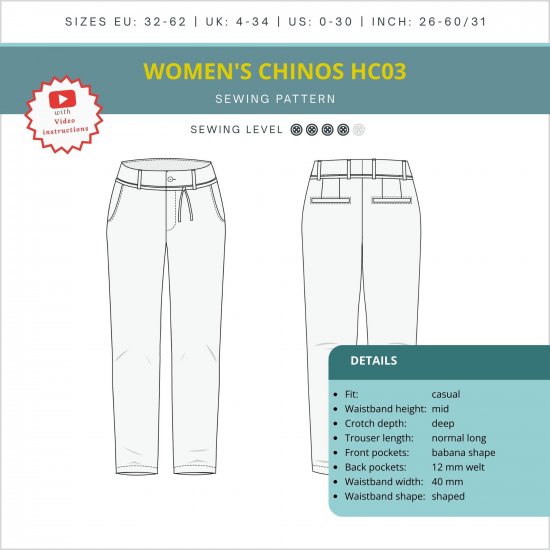
![Title image for sewing pattern “Casual Chino HC03”]()
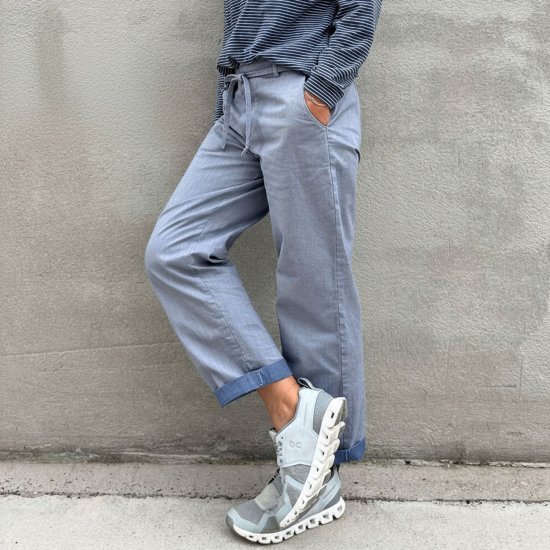
![Chino HC03 - Sketch]() 14,90 €Incl. tax
14,90 €Incl. tax -
![]()
![]() 14,90 €Incl. tax
14,90 €Incl. tax -
![]()
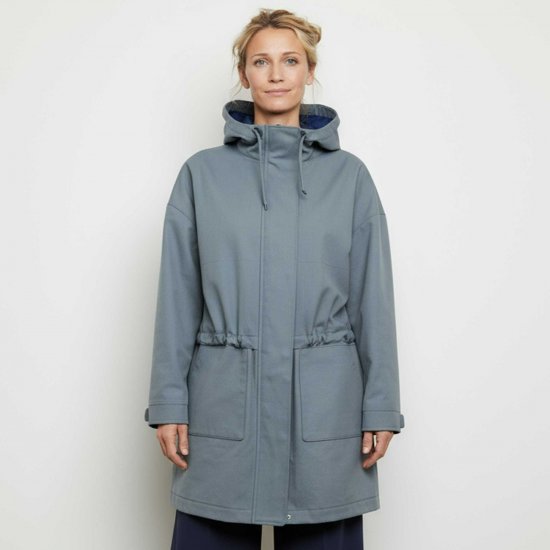
![Parka with hood JM02 Sketch details]() 14,90 €Incl. tax
14,90 €Incl. tax -
![]()
![]() 18,90 €Incl. tax
18,90 €Incl. tax


Legal matters
MISUSE and COMMERCIAL USE
These sewing instructions and the pattern (including all texts, illustrations, photos and graphics) are protected by copyright. Any distribution or reproduction is not permitted. If you would like to sell a product commercially, which is sewn according to this pattern, please contact us by e-mail: lizenzen@smartpattern.de