Sew front jeans pocket #TV02
In the following article, I explain step by step how to sew the front jeans pocket using video and illustrated text instructions. These pockets can be shaped in different ways. I have chosen the rounded shape for the following example, as this requires an additional processing step (7th) compared to a straight shape. The classic coin pocket is attached to the right pocket pouch.
Video instructions:
The video instructions are currently only available in German. Via settings you can have YouTube display the subtitles in your language of choice.
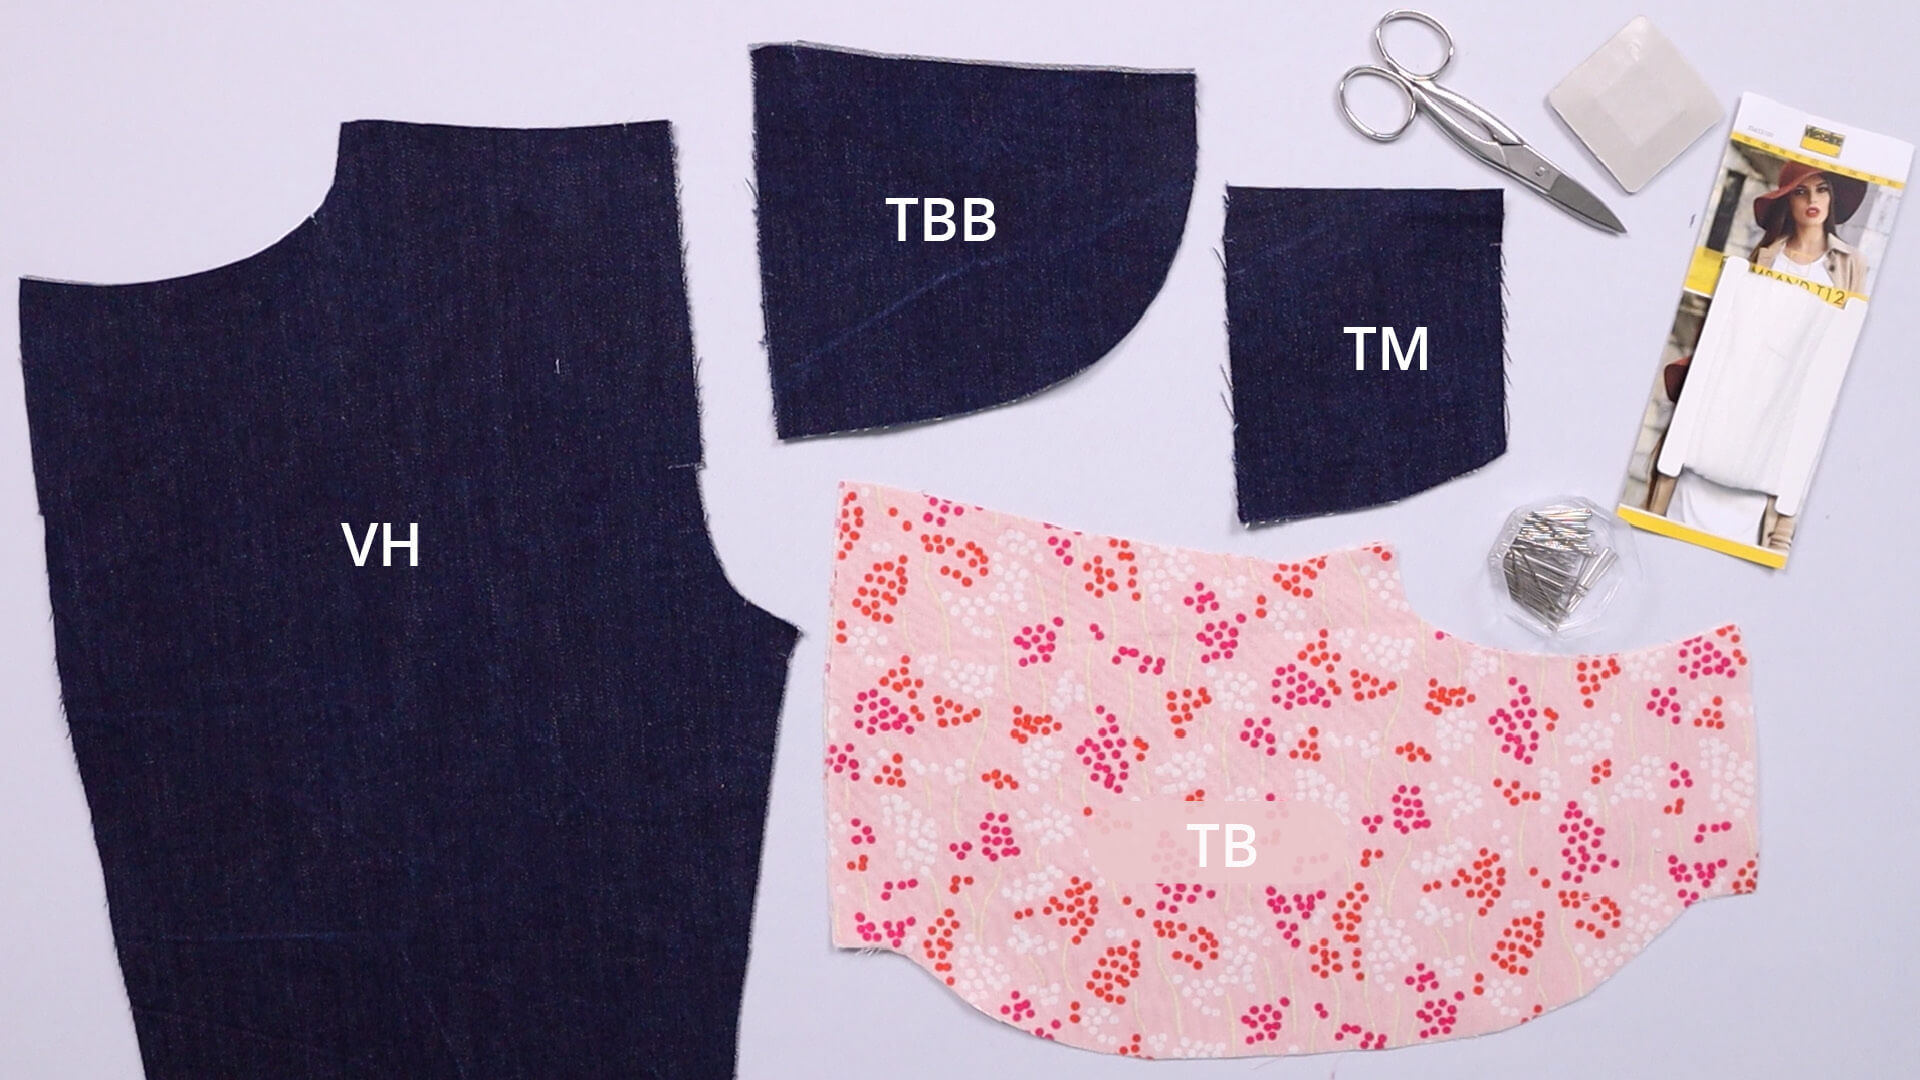
Pattern pieces made from main fabric:
- Front pieces (VH) – 1 pair
- Pocket bag facing (TBB)- 1 pair
- Coin pocket (TM) – 1x
Pattern pieces made from lining fabric:
- Pocket bags (TB)- 1 pair
Made of paper:
- Template for the position of the coin pocket (P-ZTM) (not shown in photo)
Tools and aids:
- Pins or clips
- Scissors
- Chalk or marker pen
- Stay tape (for straight pocket opening: e.g. T20 from Vlieseline; for shaped pocket opening: e.g. T12 from Vlieseline)
2. Prepare the coin pocket
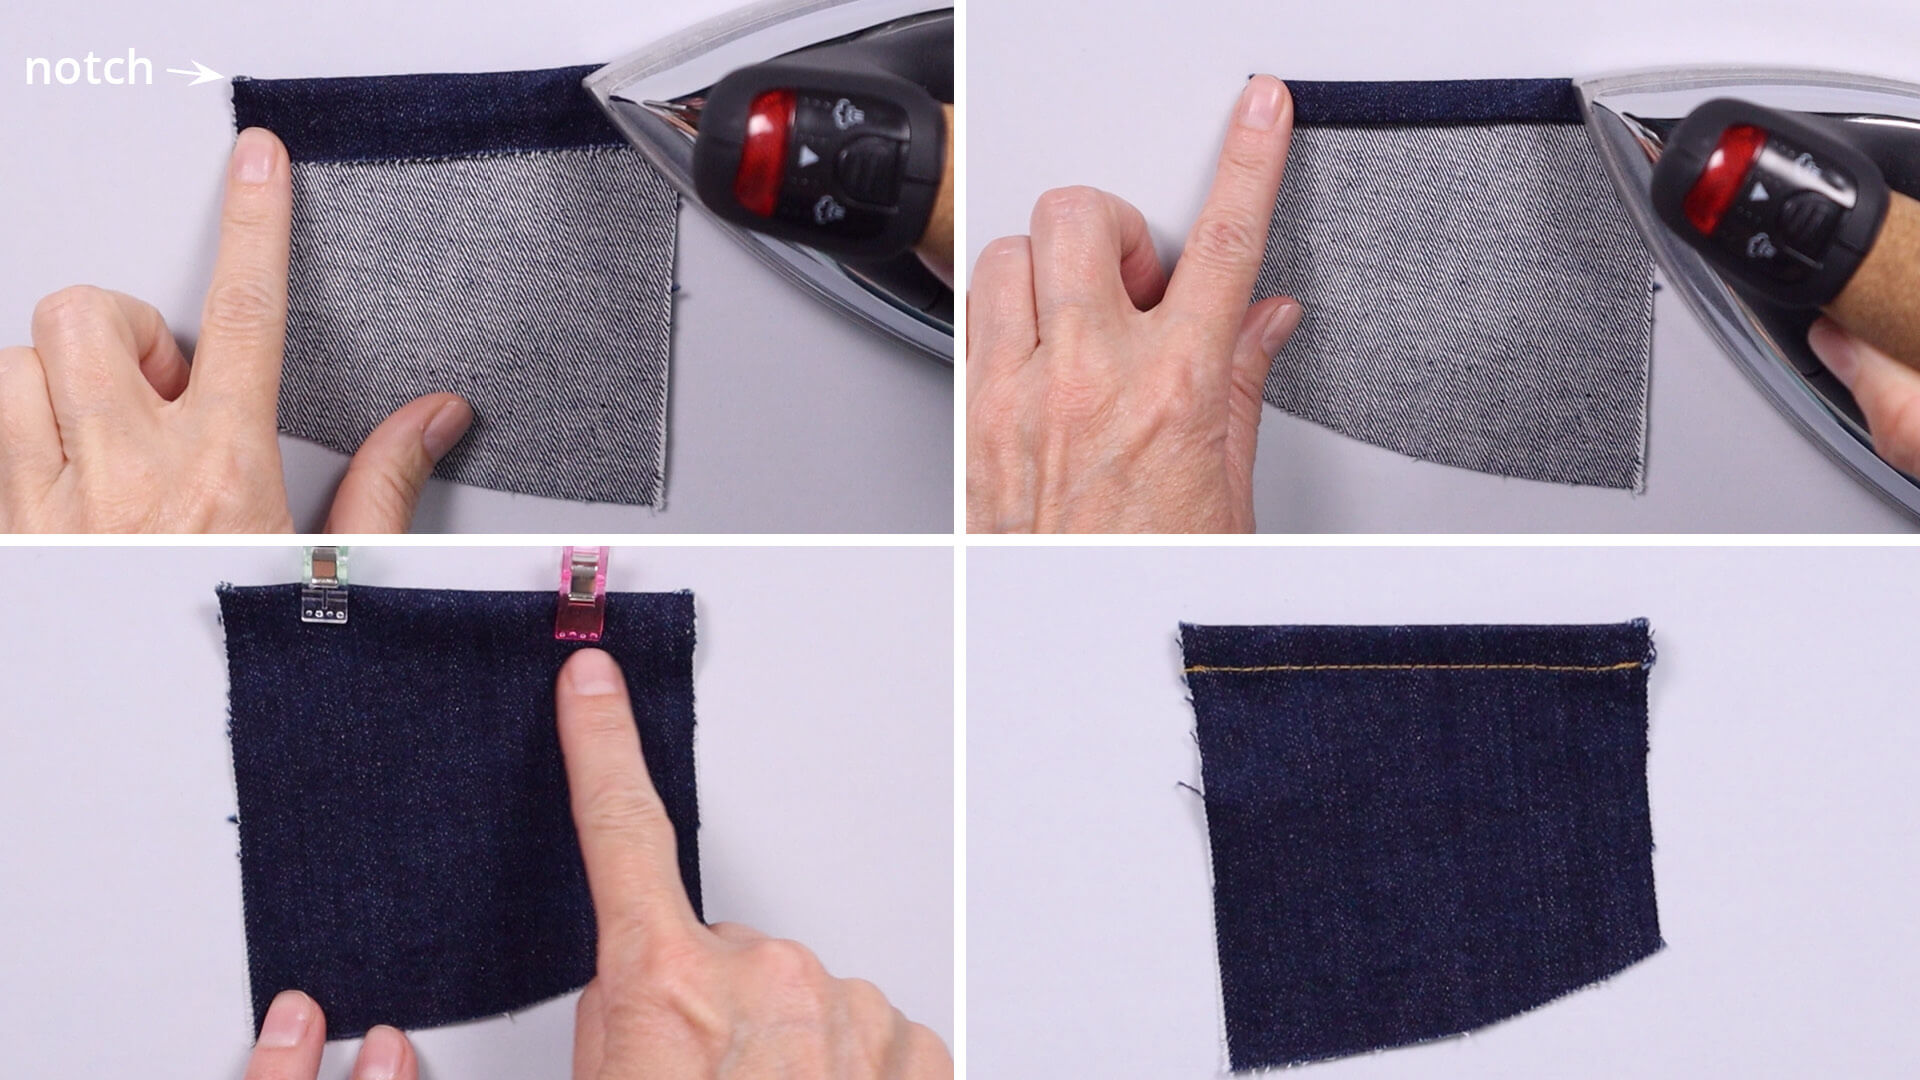
I start by folding in the pocket opening on the coin pocket twice. To do this, I fold the top edge of the notches to the wrong side. Then I fold the fold in half and iron this edge in place too. The double turn-in can now be pinned in place. Sew a row of topstitching along the top of the coin pocket 9mm from the edge. You can also fold over once and finish the raw edge with an overlocker. Before overlocking, cut back the top edge by 10 mm.
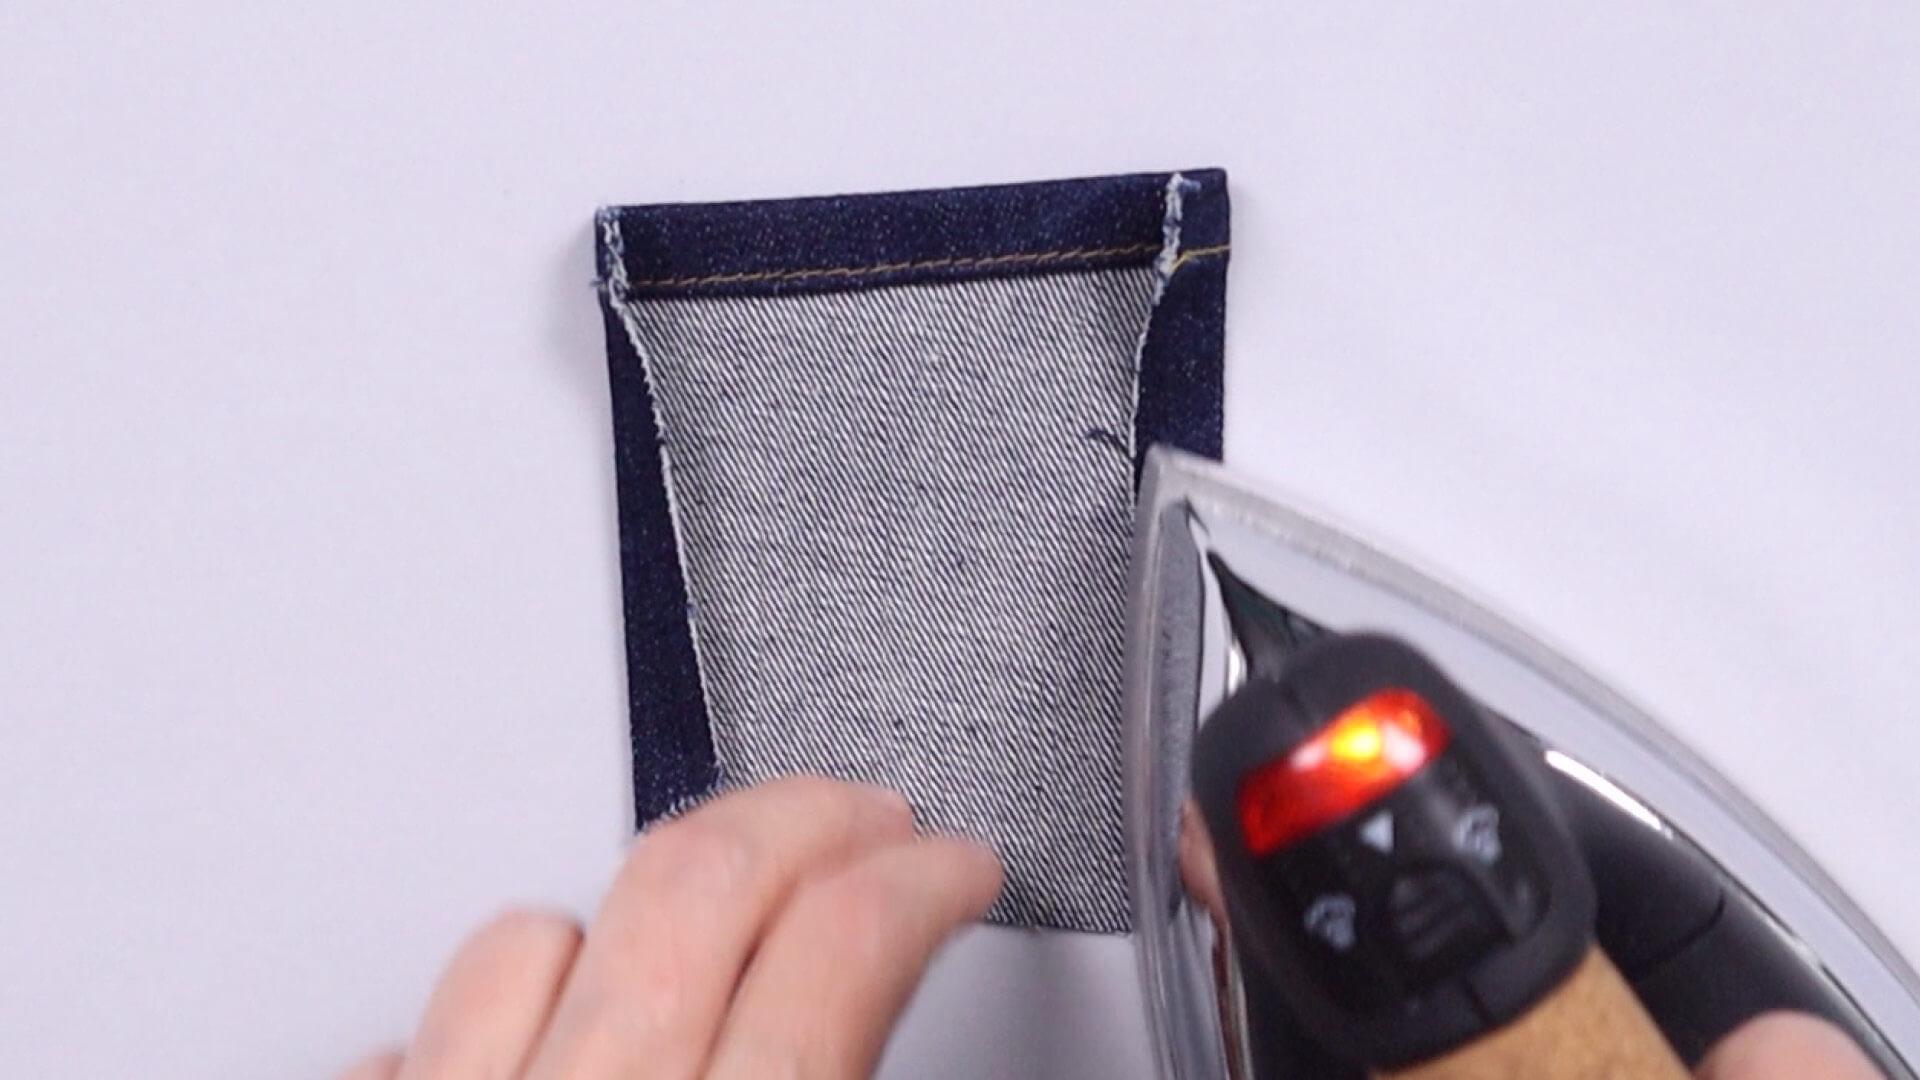
I then press the side edges 1 cm inwards.
Tip
If you are using selvedge denim, you can use the selvedge as the top edge of the coin pocket as an eye-catcher. To do this, fold the pattern piece over at the seam line and place it on the selvedge.
3. Stitch the coin pocket to the jeans pocket
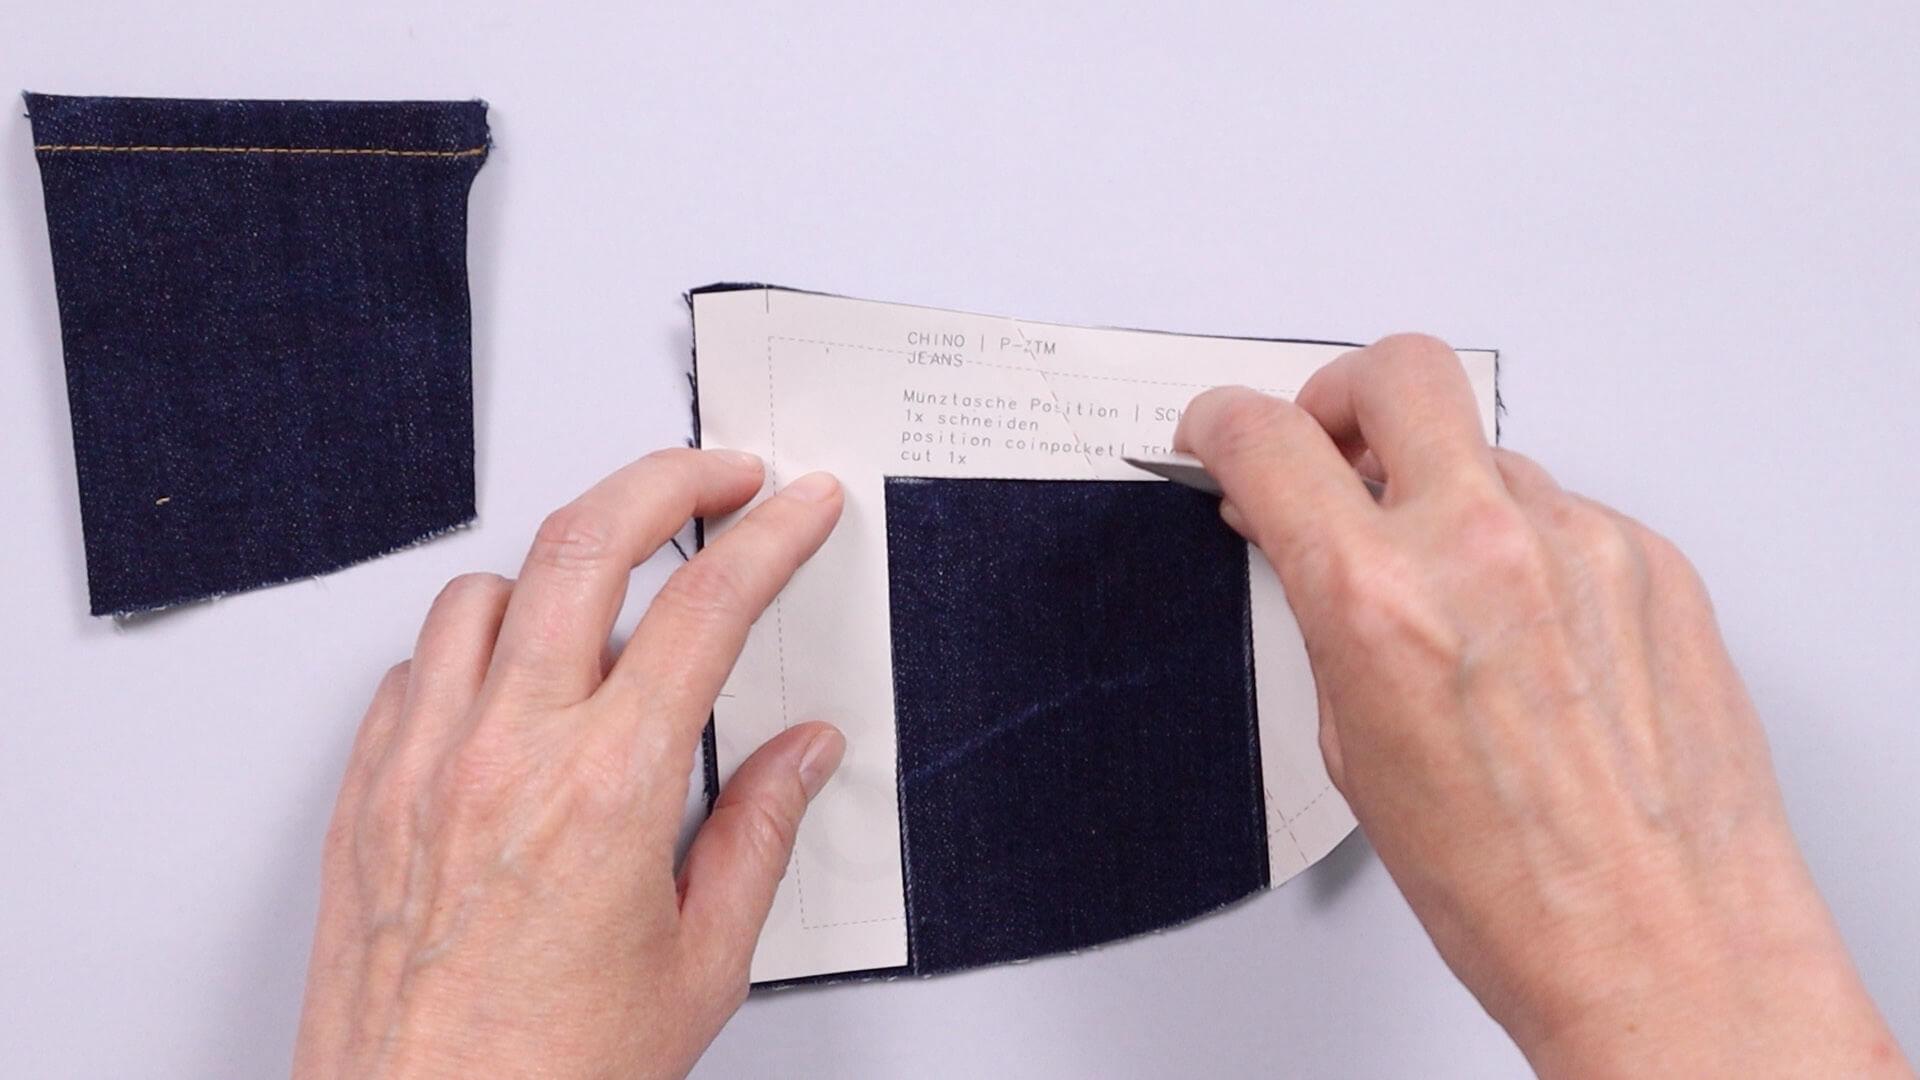
I place the template for the position of the coin pocket on the right pocket facing and mark it with chalk.
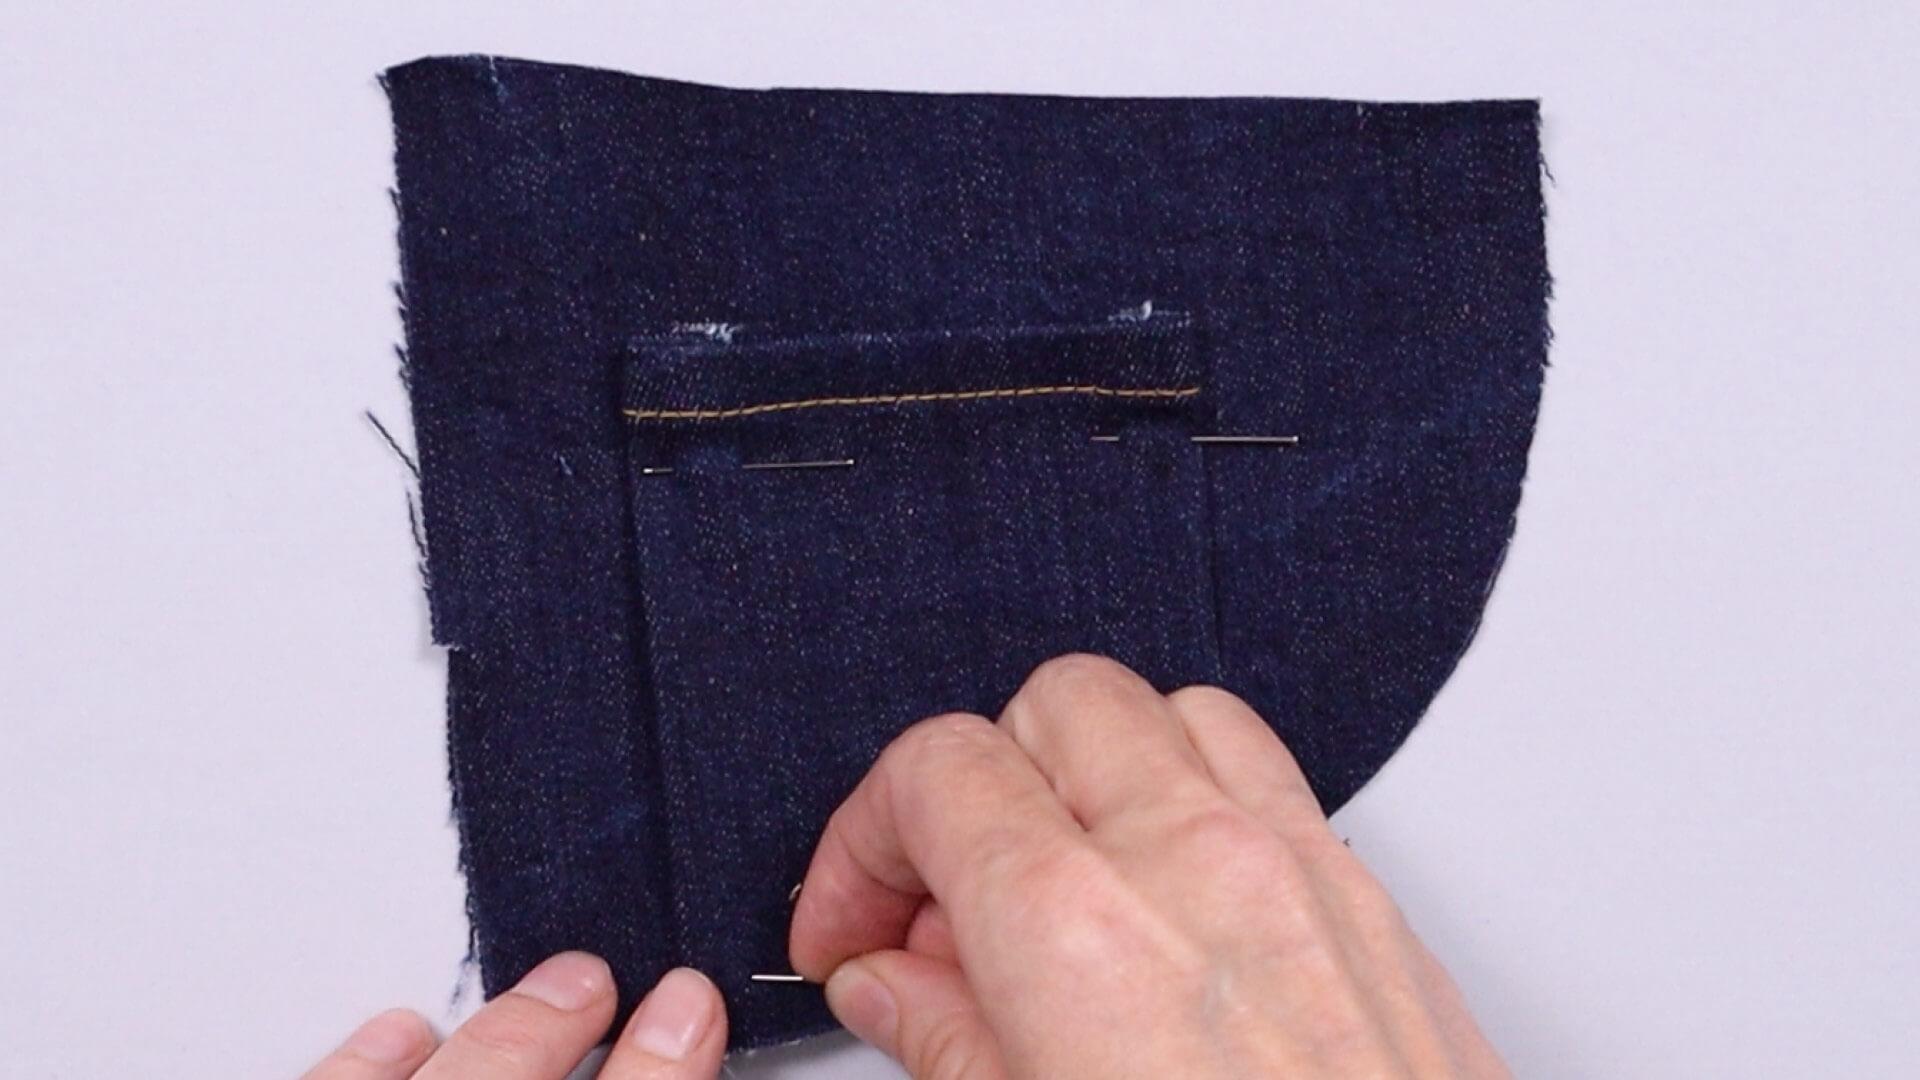
I place the coin pocket on the pocket facing and secure it with pins.
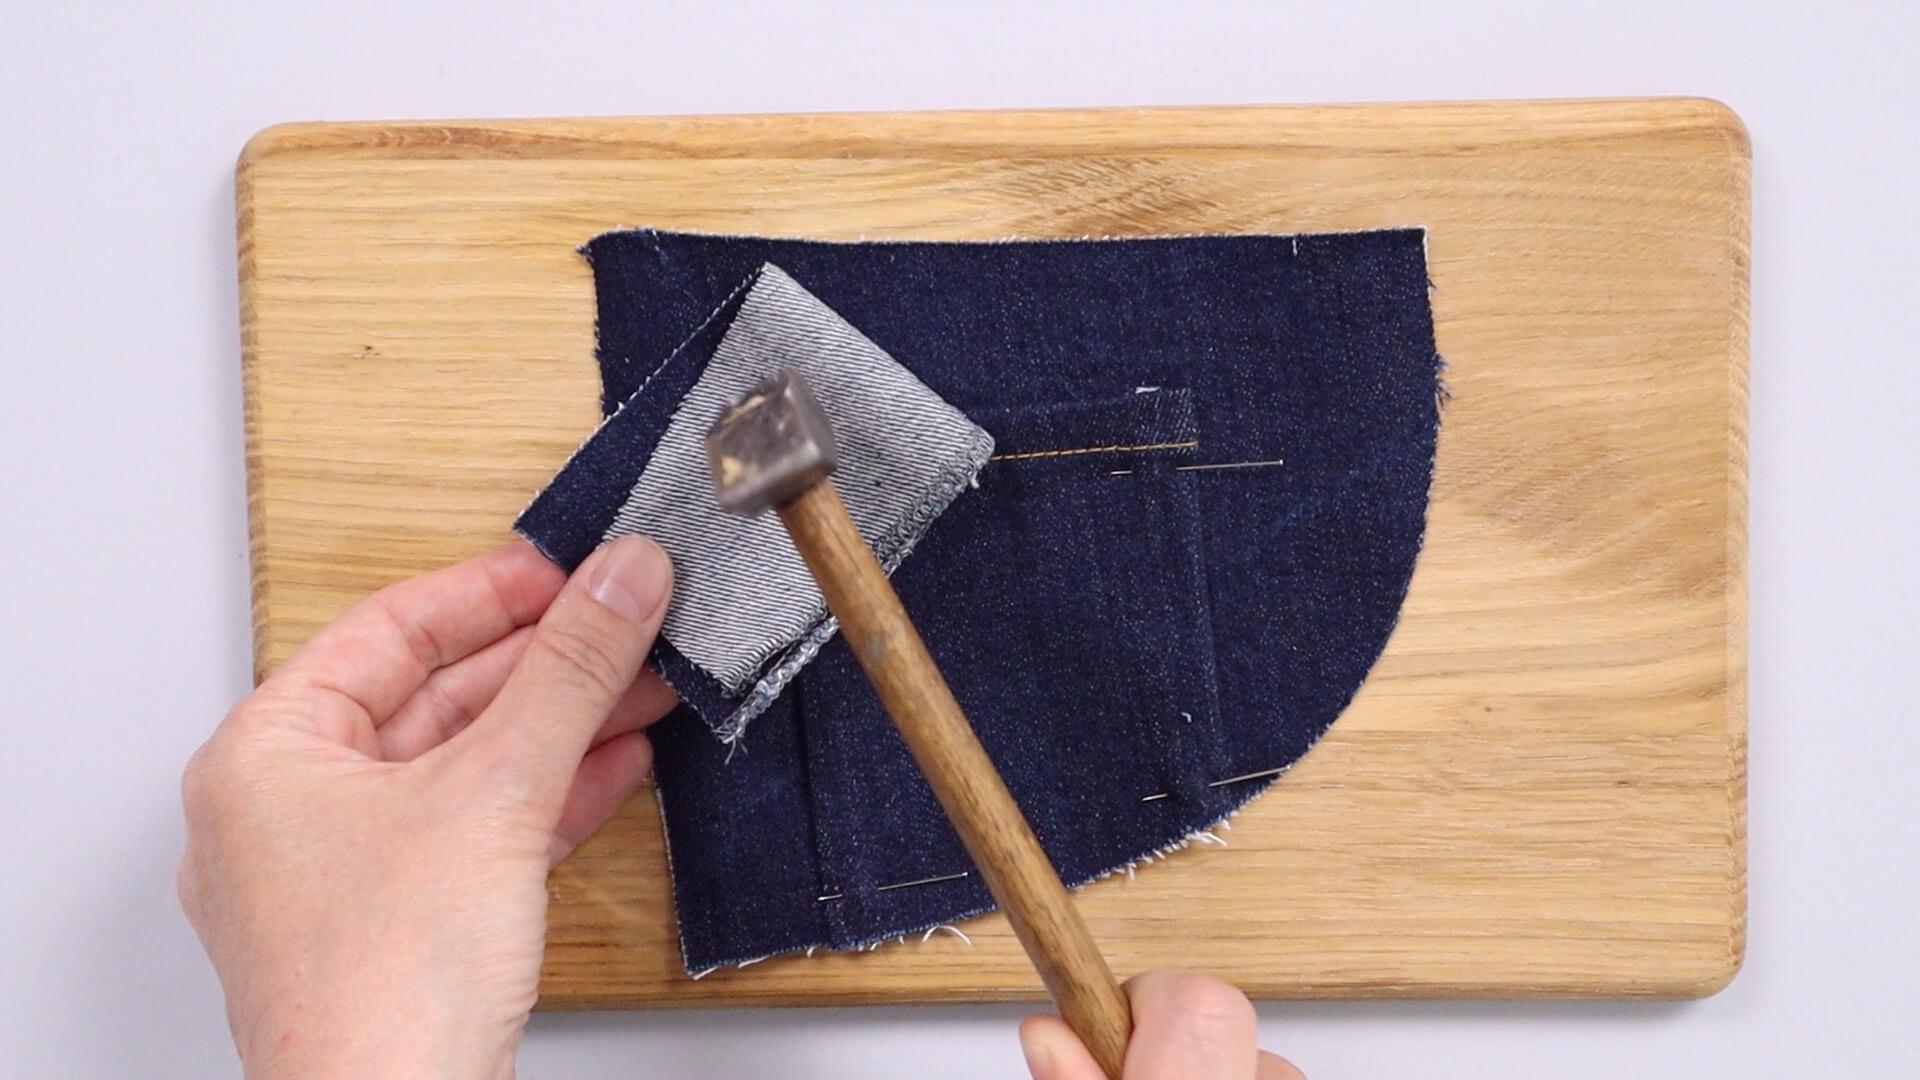
Before topstitching the coin pocket in place, I tap the corners of the pocket opening flat with a hammer. I put a scrap piece of fabric over it so it doesn not damage the material of the coin pocket.
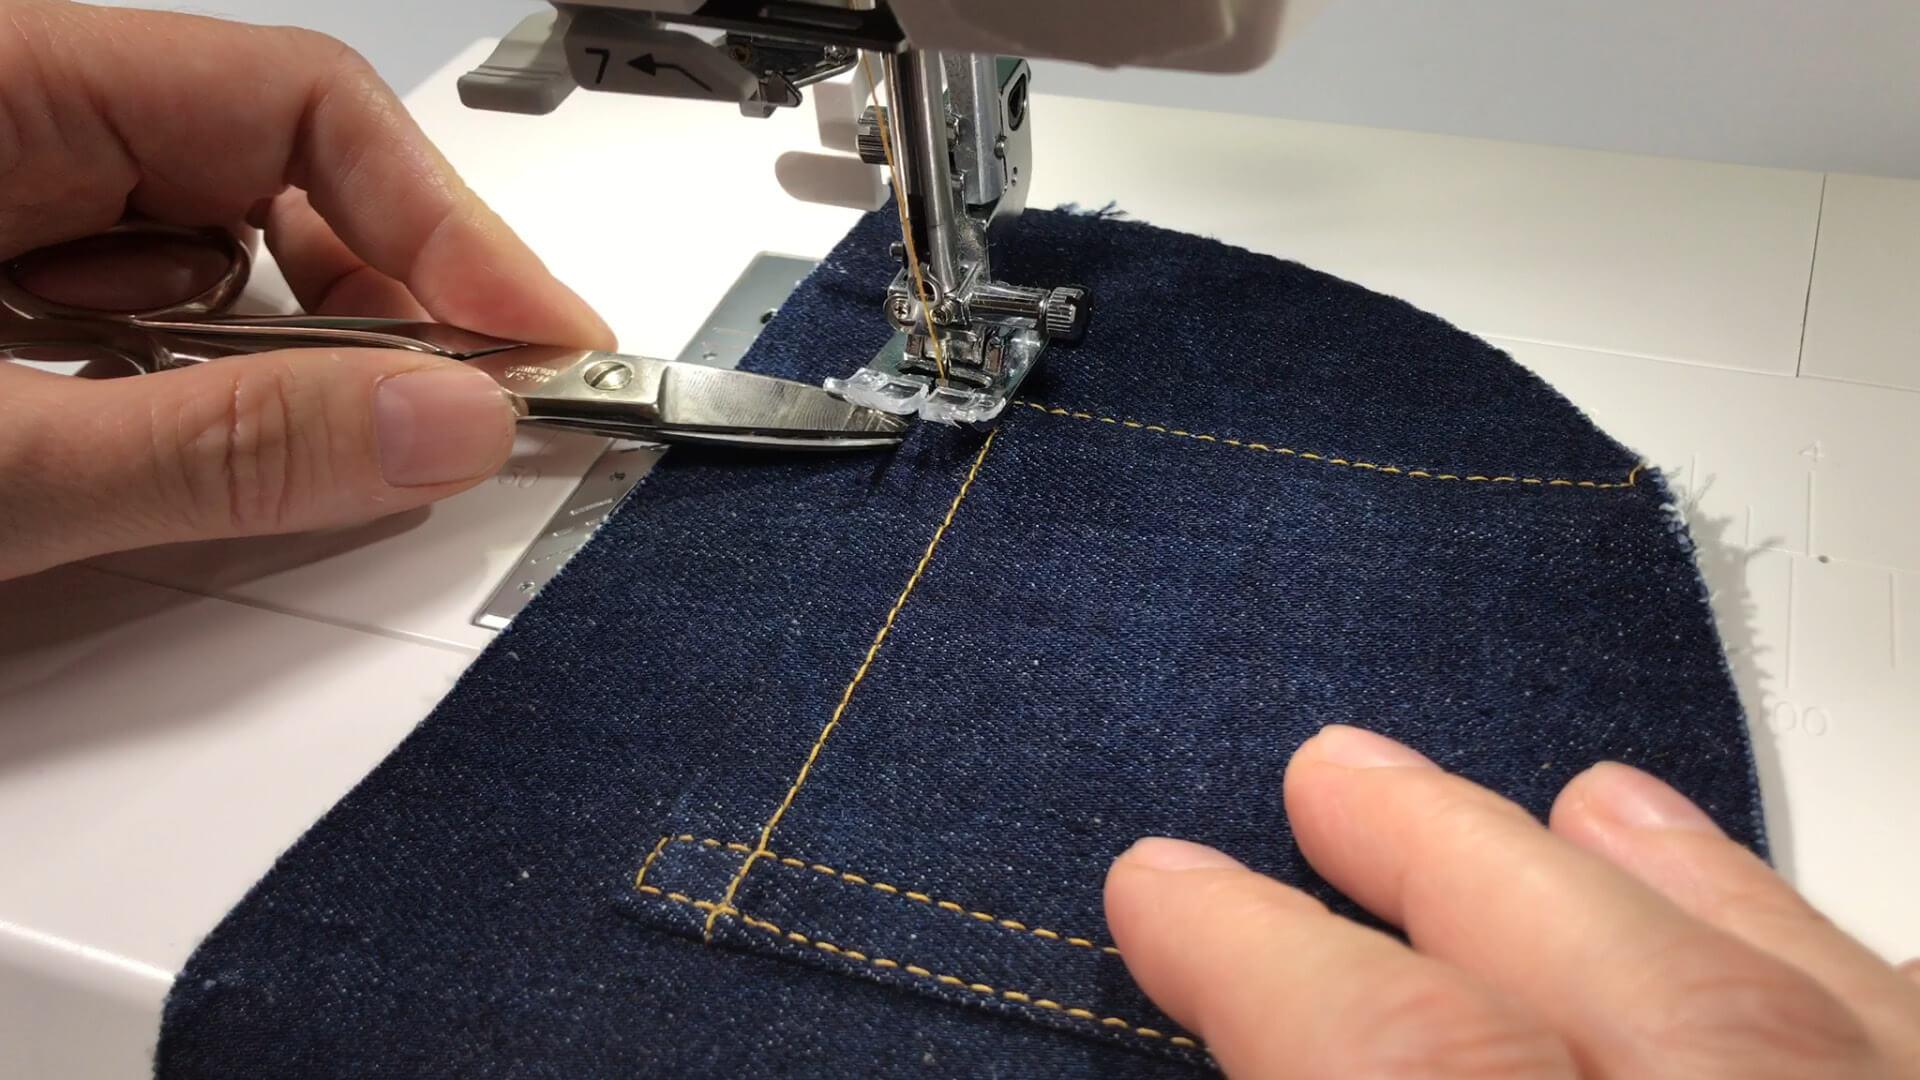
Now topstitch the coin pocket to the sides. Here I choose an edge distance of 2+8 mm and topstitch with the contrasting thread. I use scissors or an awl to push in the seam allowance at the opening edge so that the fold does not show.
Tip
When changing the direction of the quilting or if there is a difference in the height of the fabric, I make sure to keep my presser foot straight. You can put a piece of fabric under the back of the presser foot or use a so-called “leveler” or bulky seam aid. The leveler is already integrated in my presser foot. I can lock the presser foot horizontally by pressing the small button at the rear end.
4. Sew pocket linings onto the pocket bags
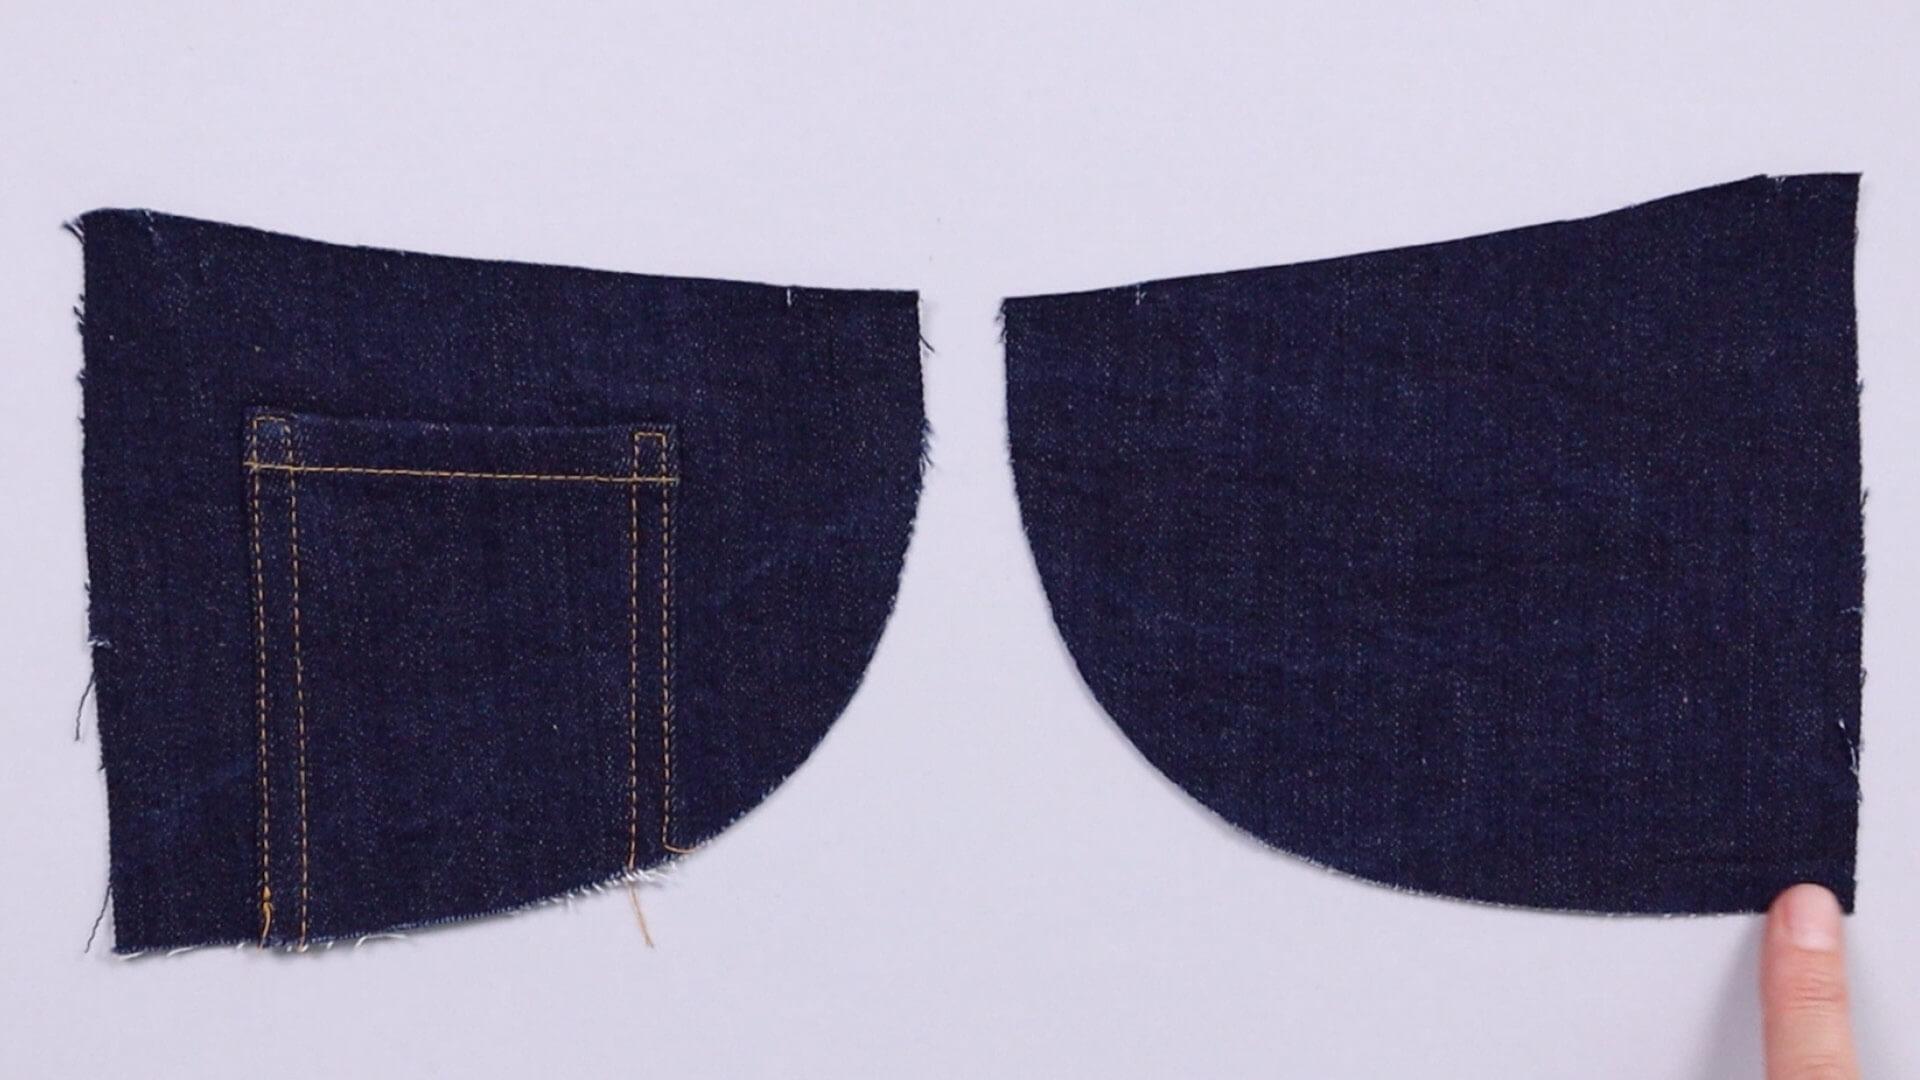
I now finish the lower curved front facing edges with an overlock seam.
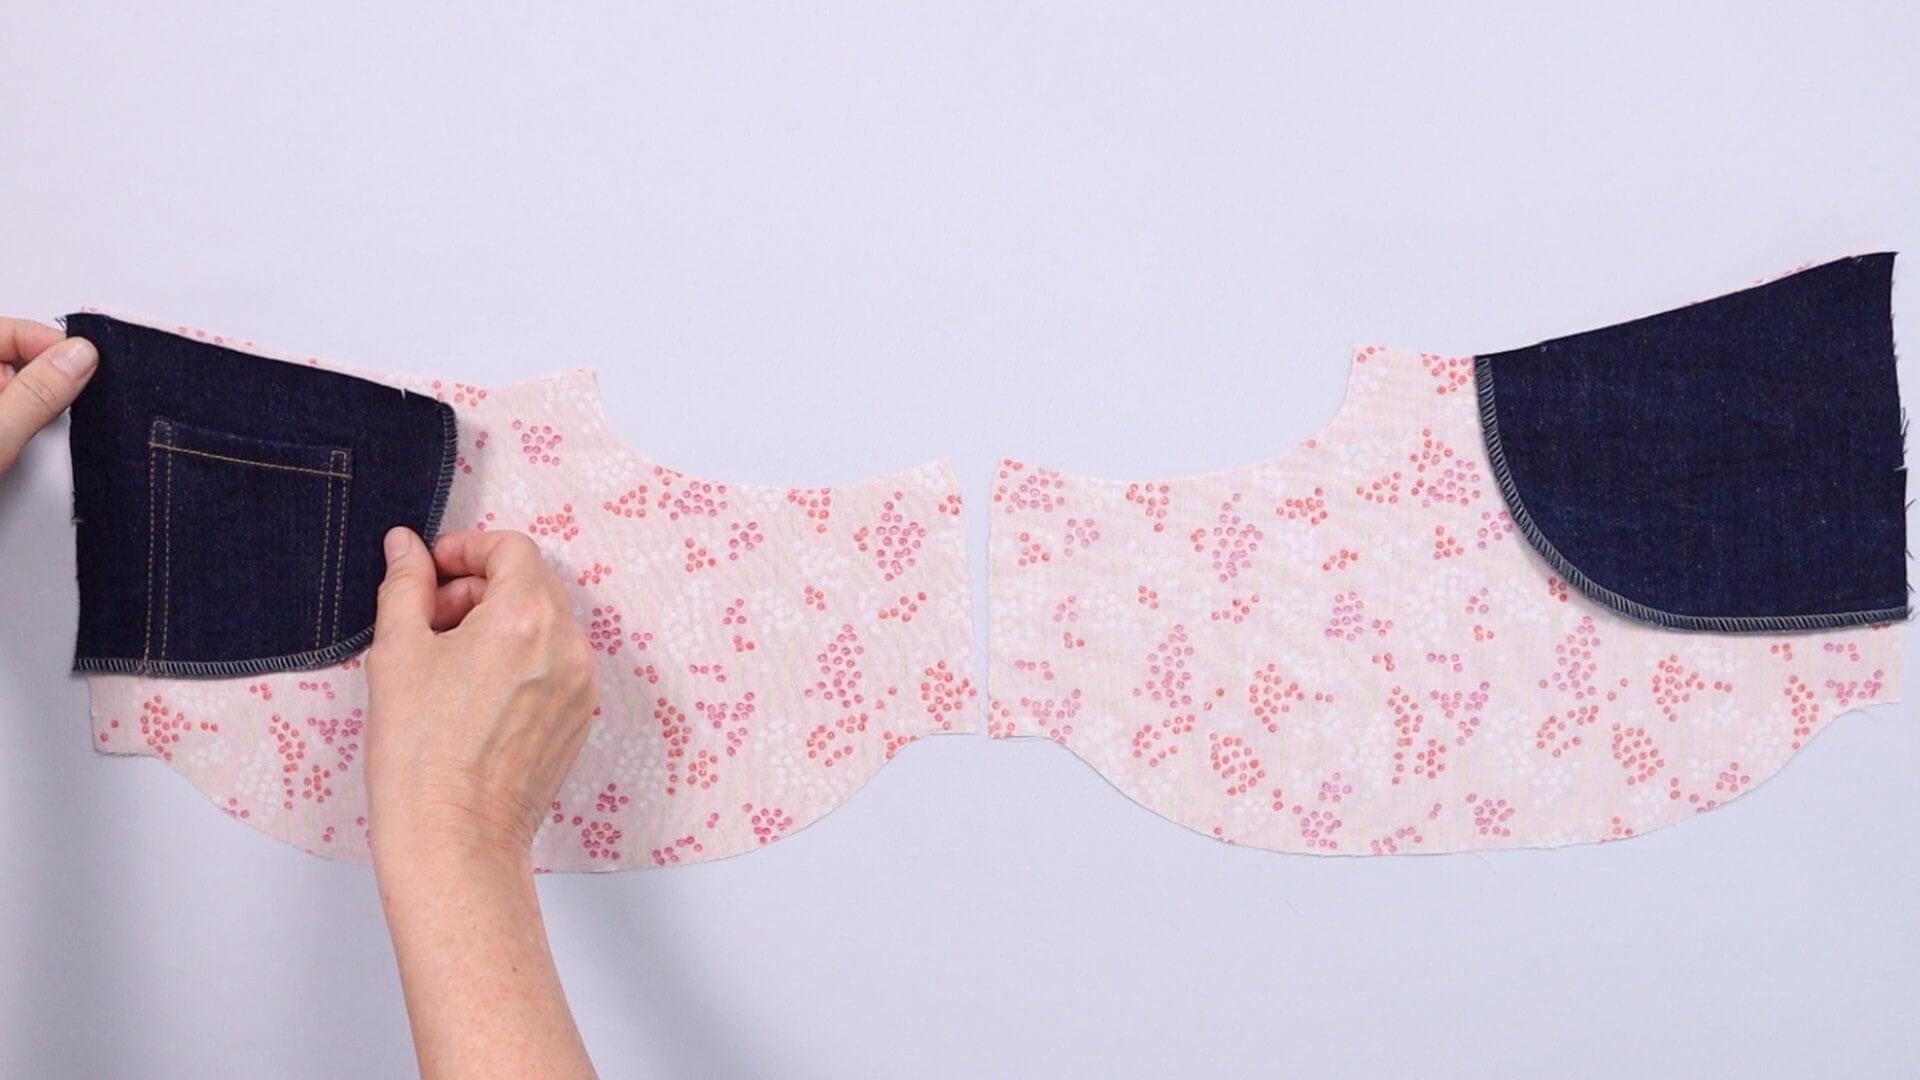
The pocket facings are placed on the pocket bag with the right side of the fabric facing up. The back and top edges should be flush and the notches should match.
I lay the pocket bags in front of me so that the wrong side of the fabric is visible. As a result, the right side of the pocket lining is visible when you look into the trousers and the wrong side of the pocket lining is visible when you look into the pocket opening. But you can also switch sides so that the “nice” right side is visible when you look into the jeans pocket.
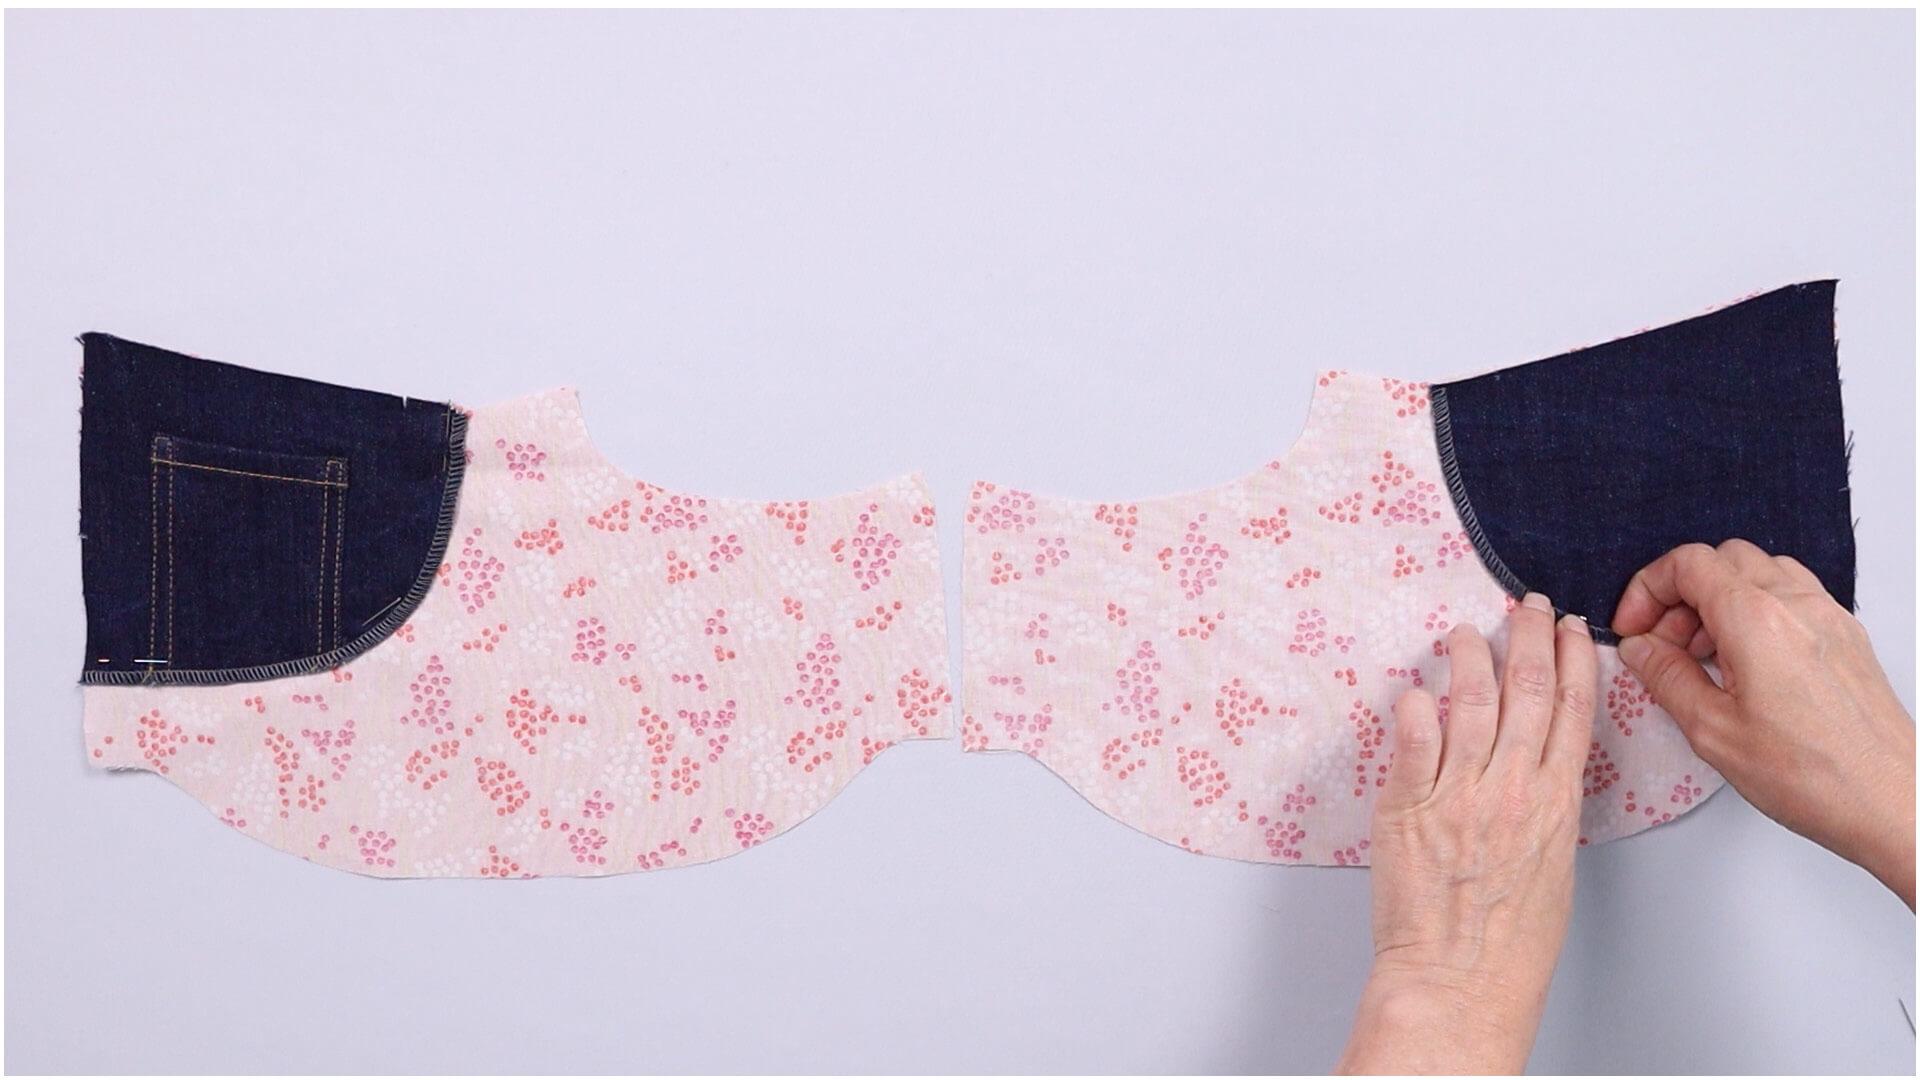
Before stitching, I pin the overlocked facings onto the pocket bags.
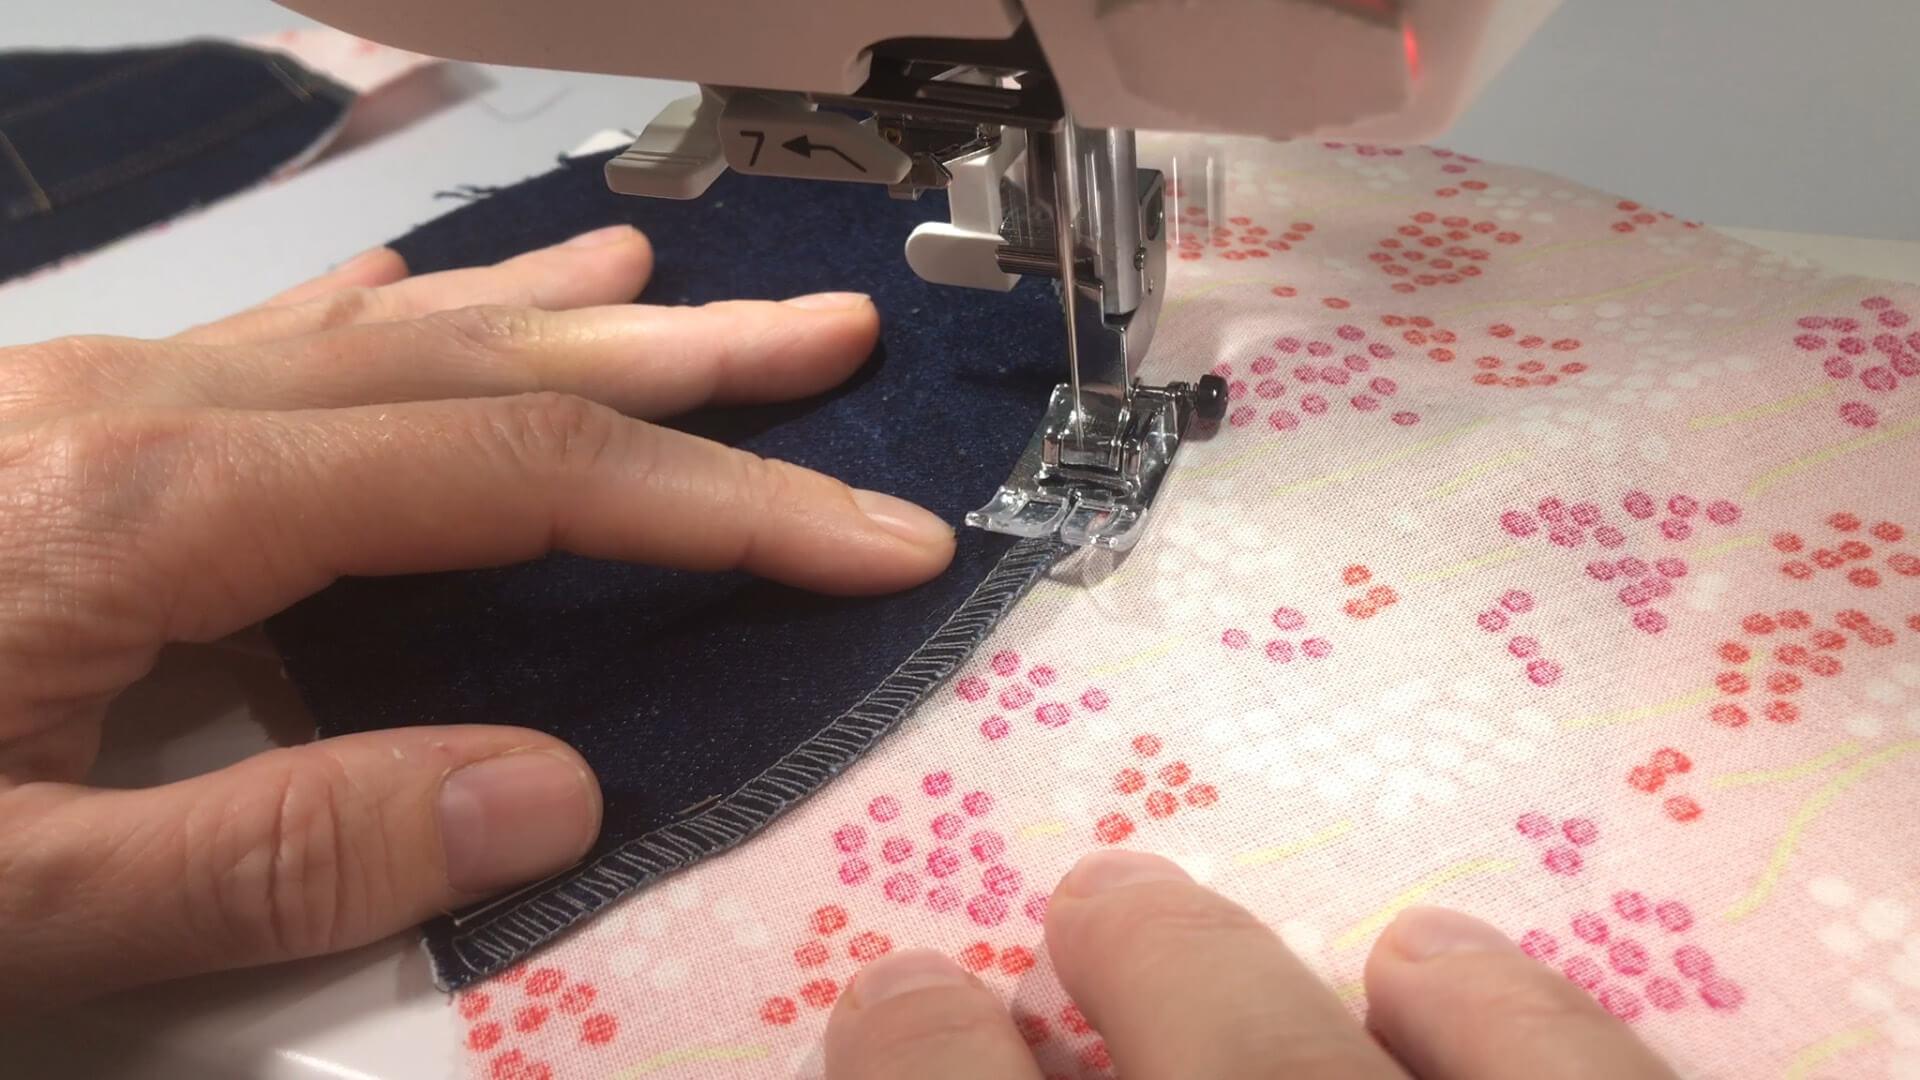
Then I stitch the facing 3 mm from the raw edge inside the overlock seam and iron over the seams.
5. Secure the opening edge on the jeans pocket
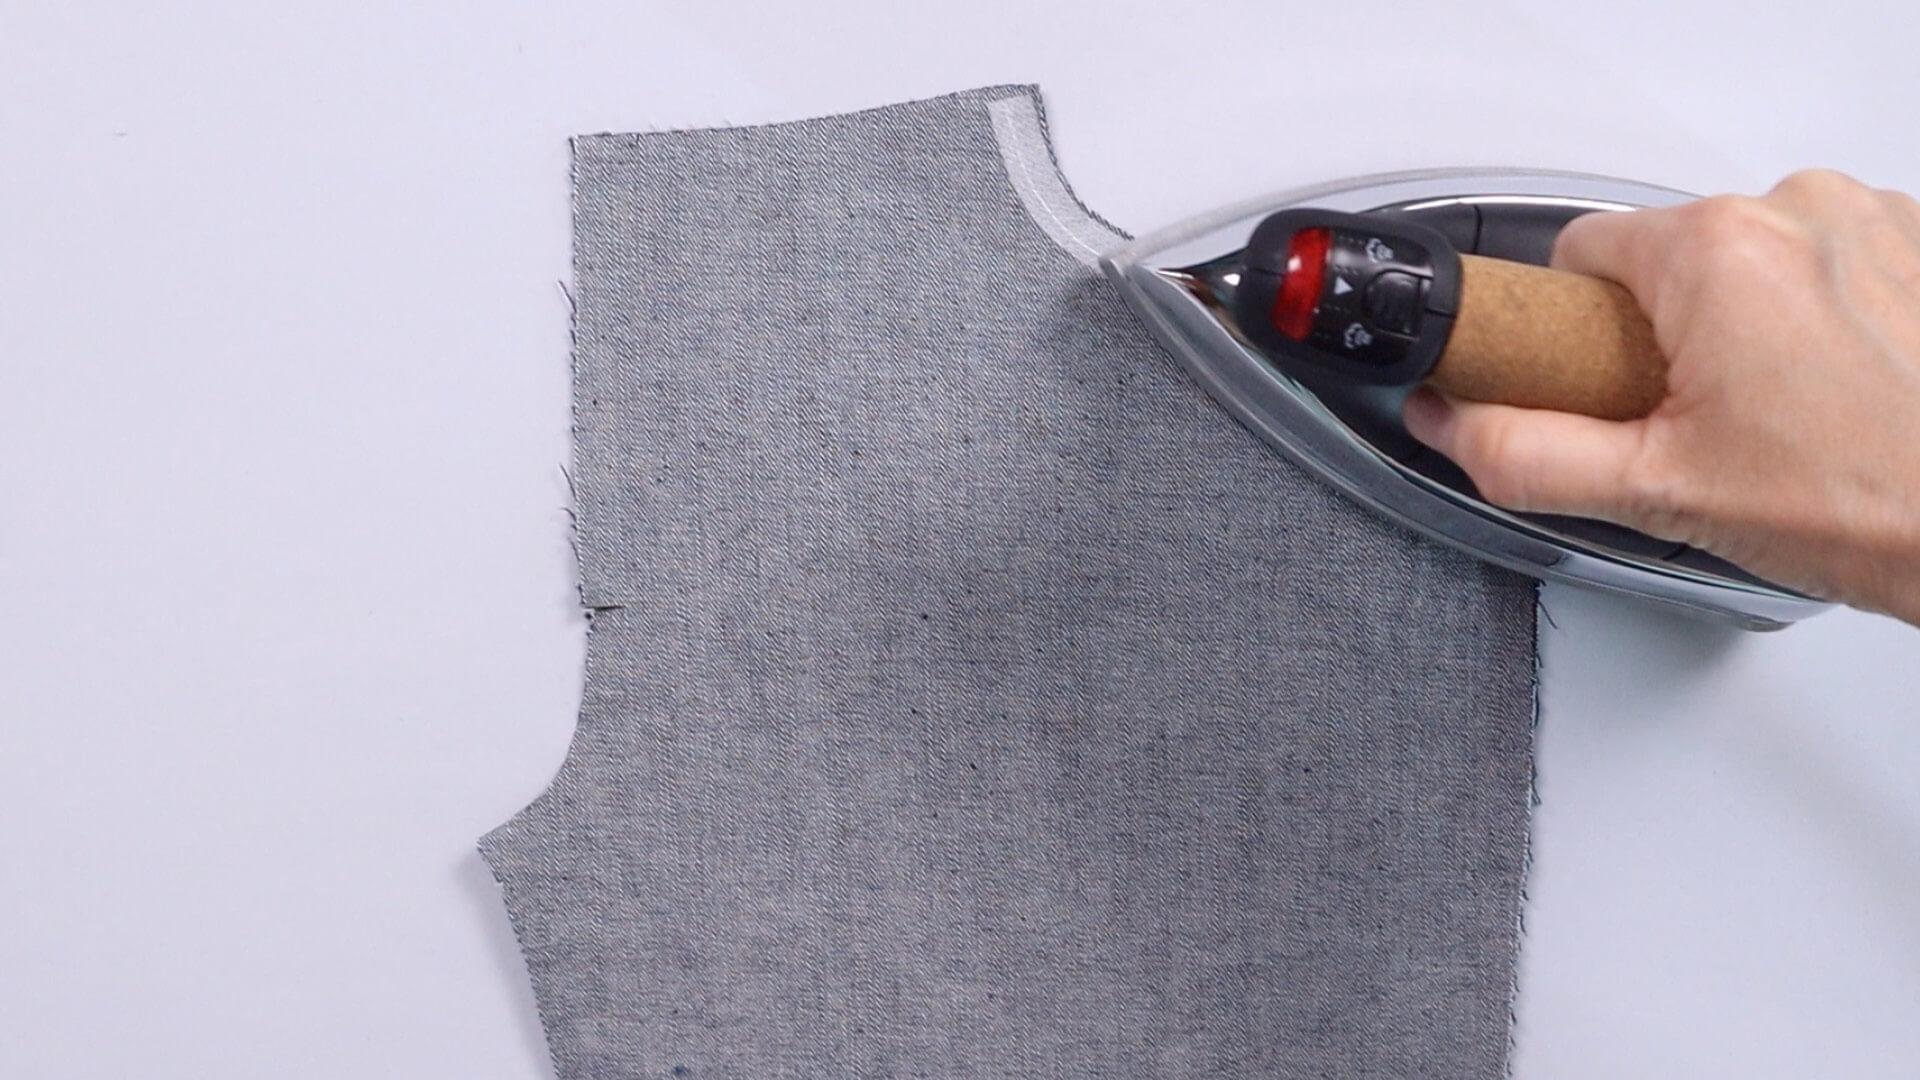
On the front trousers (VH), I iron the bias tape on to the opening edge to prevent stretching. For the rounded version, I chose a shaped tape with thread reinforcement. This slightly slanted bias tape is easy to shape. If you don’t have any tape, you can also cut a strip of interfacing.
6. Sew in the pocket bags
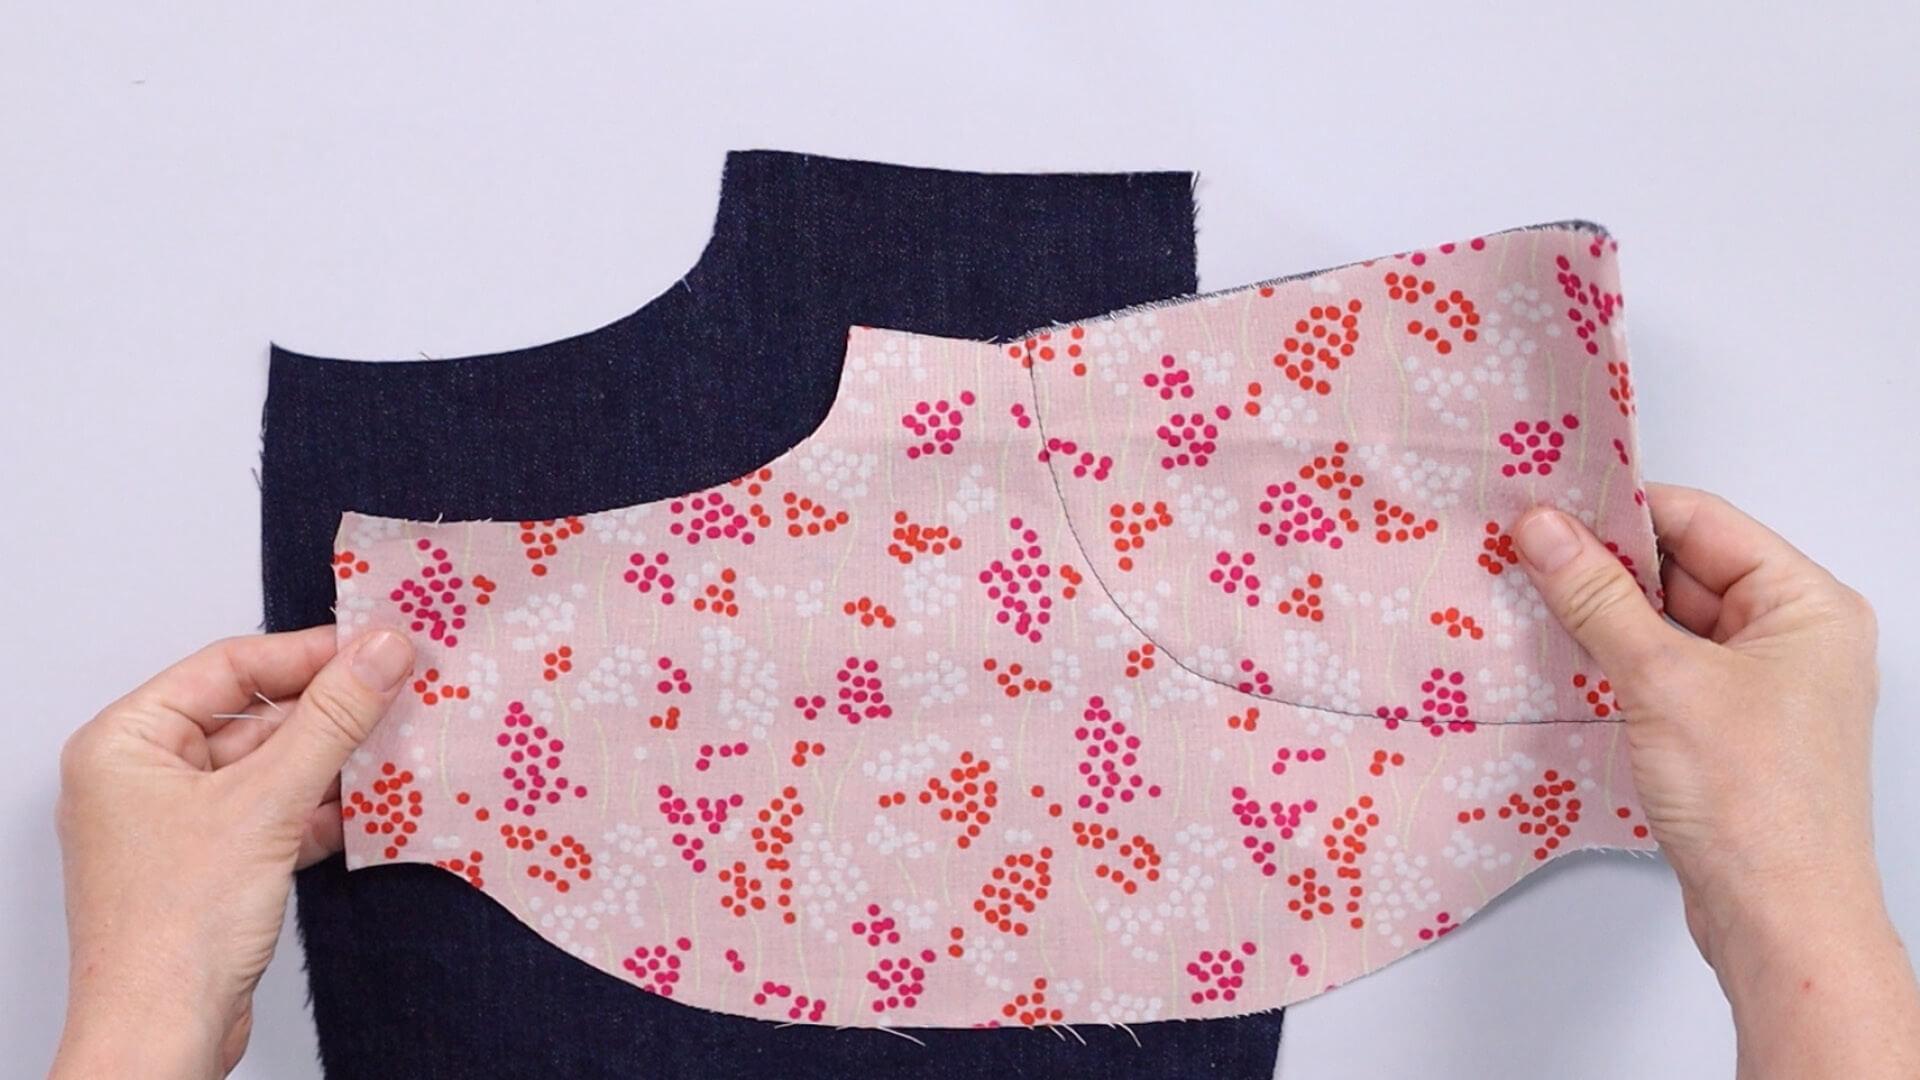
Now sew the pocket bag to the pocket opening of the front trousers. I lay the front trousers so that the right side of the fabric is visible. I position the upper pocket bag on top. The pocket facing faces the front trousers and the edges are flush with each other at the pocket opening. The notch in the curved seam serves as a guide. The pattern pieces also fit together exactly at the side seam and waistband edge.
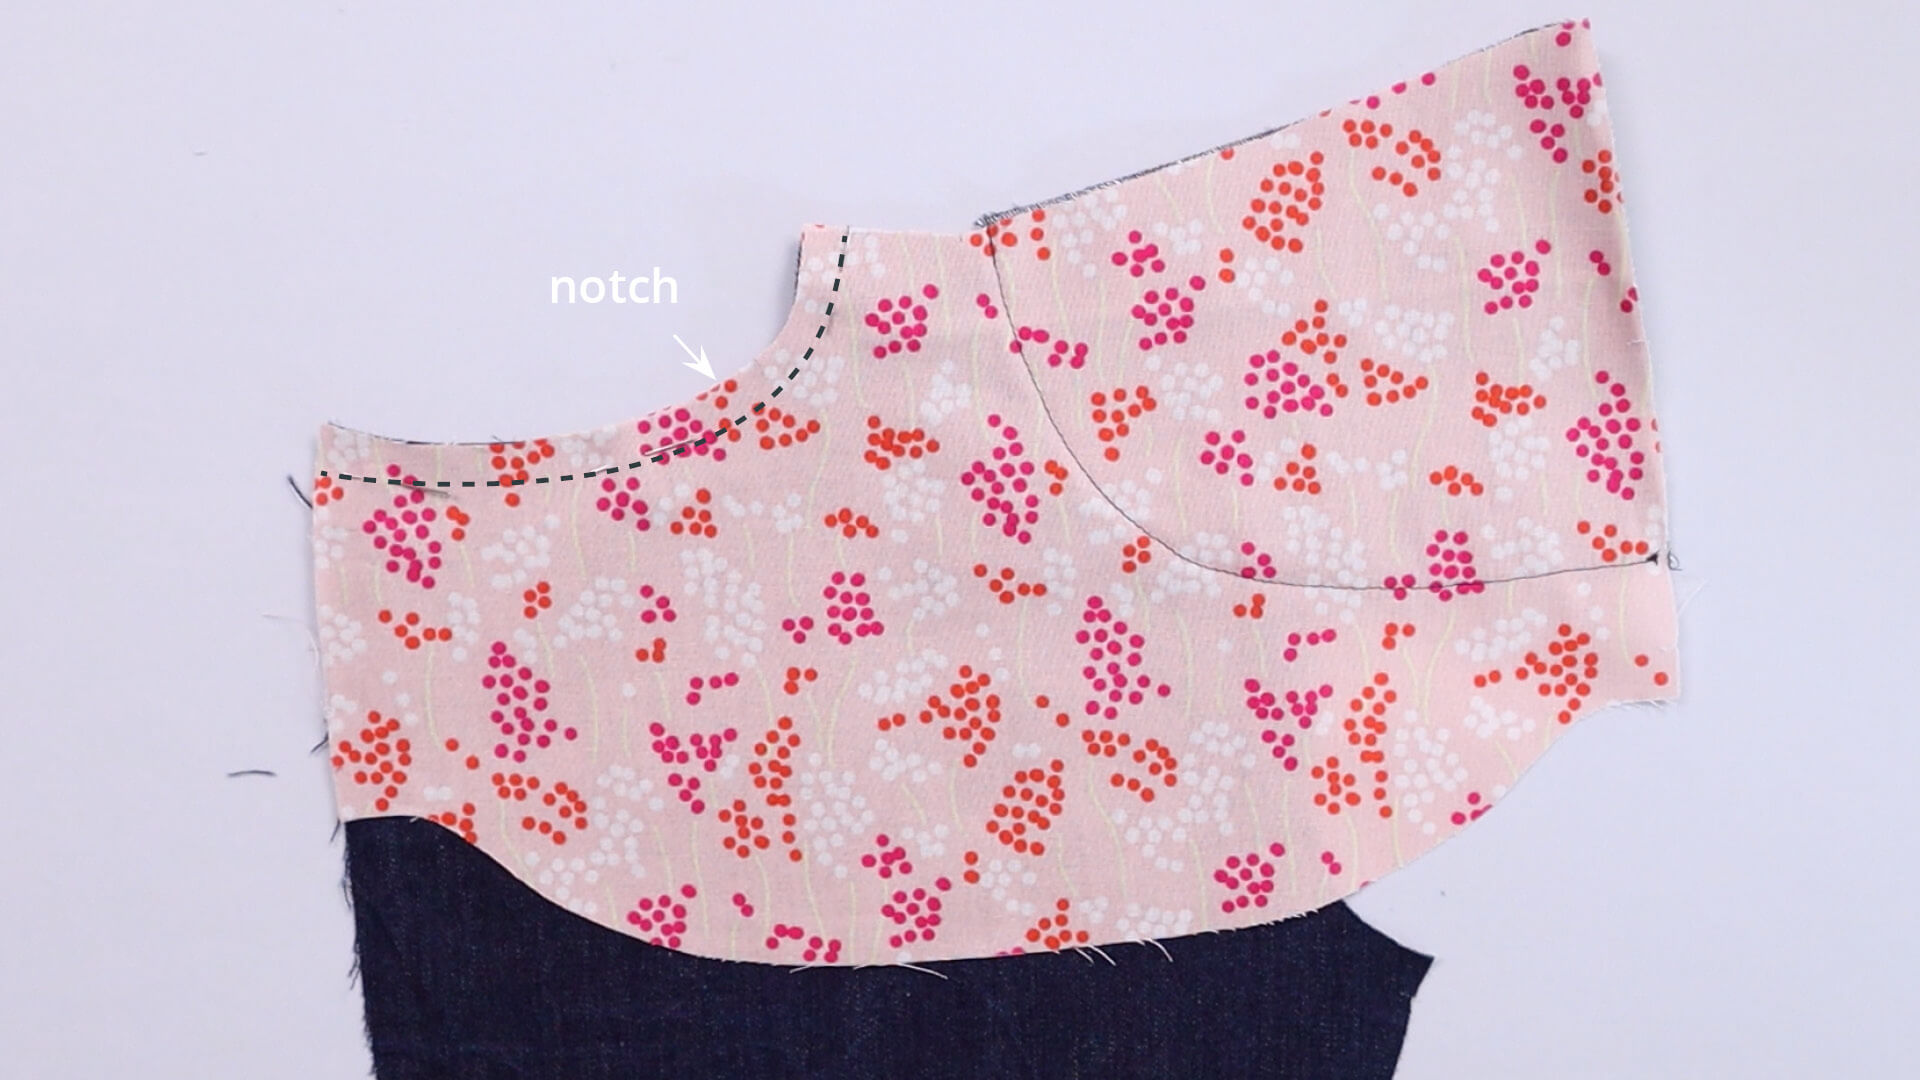
I pin the pocket bag to the opening and sew with a straight stitch at a seam width of 10 mm.
7. Trim seam allowance on the rounded edge
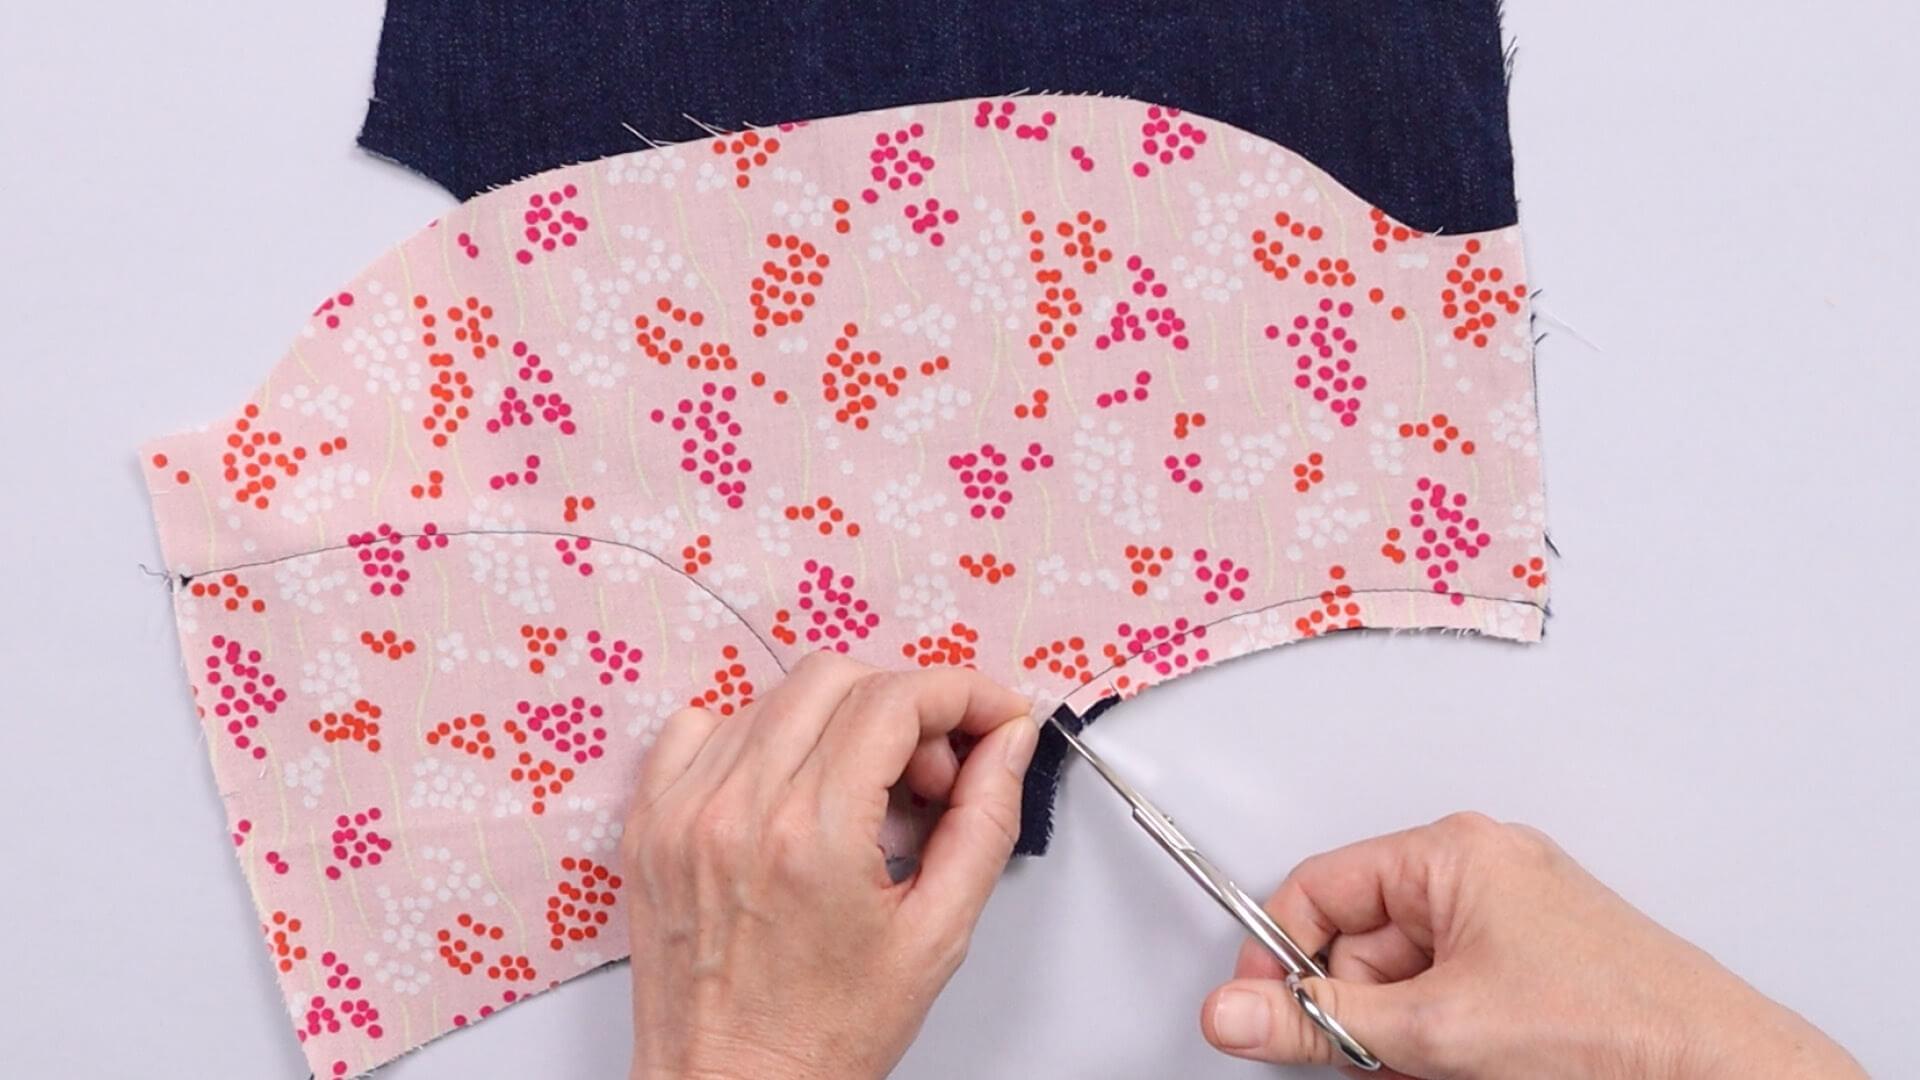
For a rounded pocket opening, I snip into the seam allowance in the curve a few times up to approx. 2 mm before the stitchline. I offset the incisions in the layers of fabric so that they don’t push out as much. BCutting into the seam allowance allows it to sit flat after turning the opening. This step is not necessary with a straight pocket opening.
8. Turning and topstitching of the pocket opening
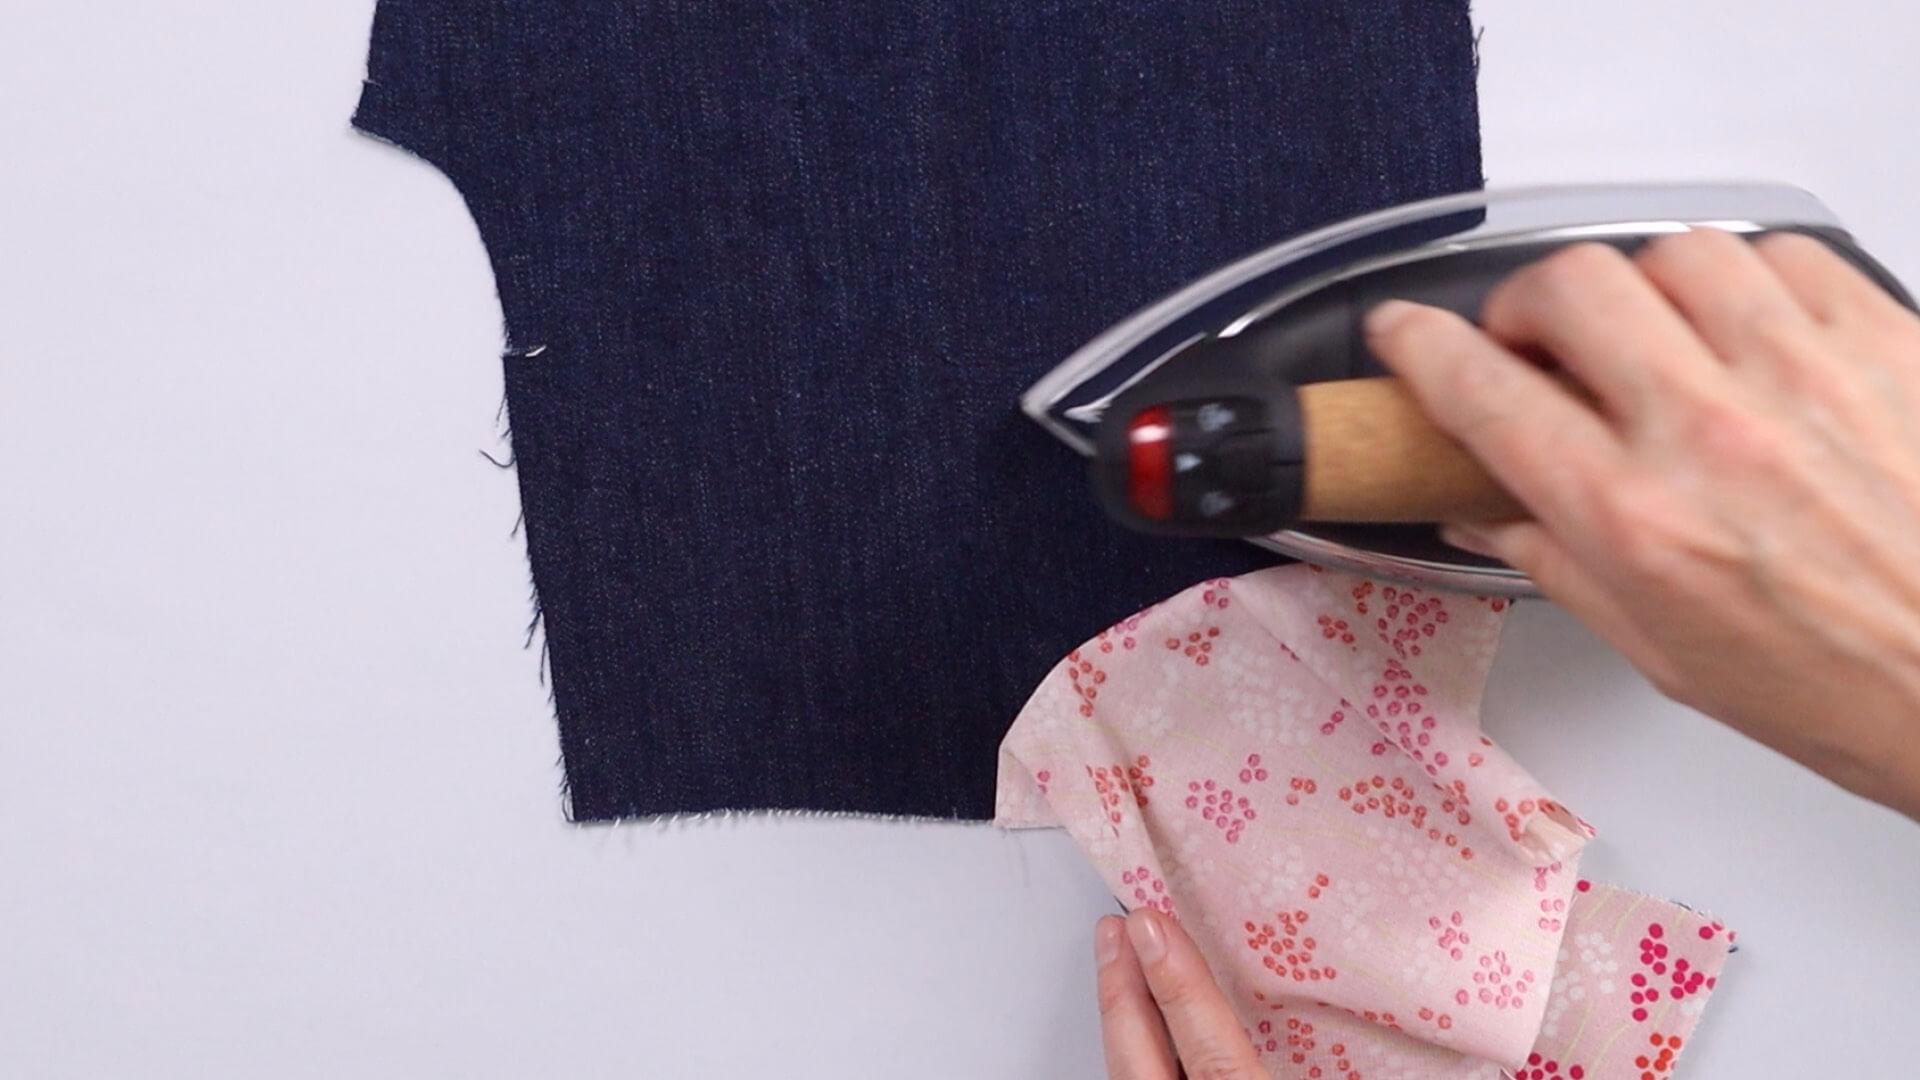
Now I press the seam allowance over to the pocket bag side.
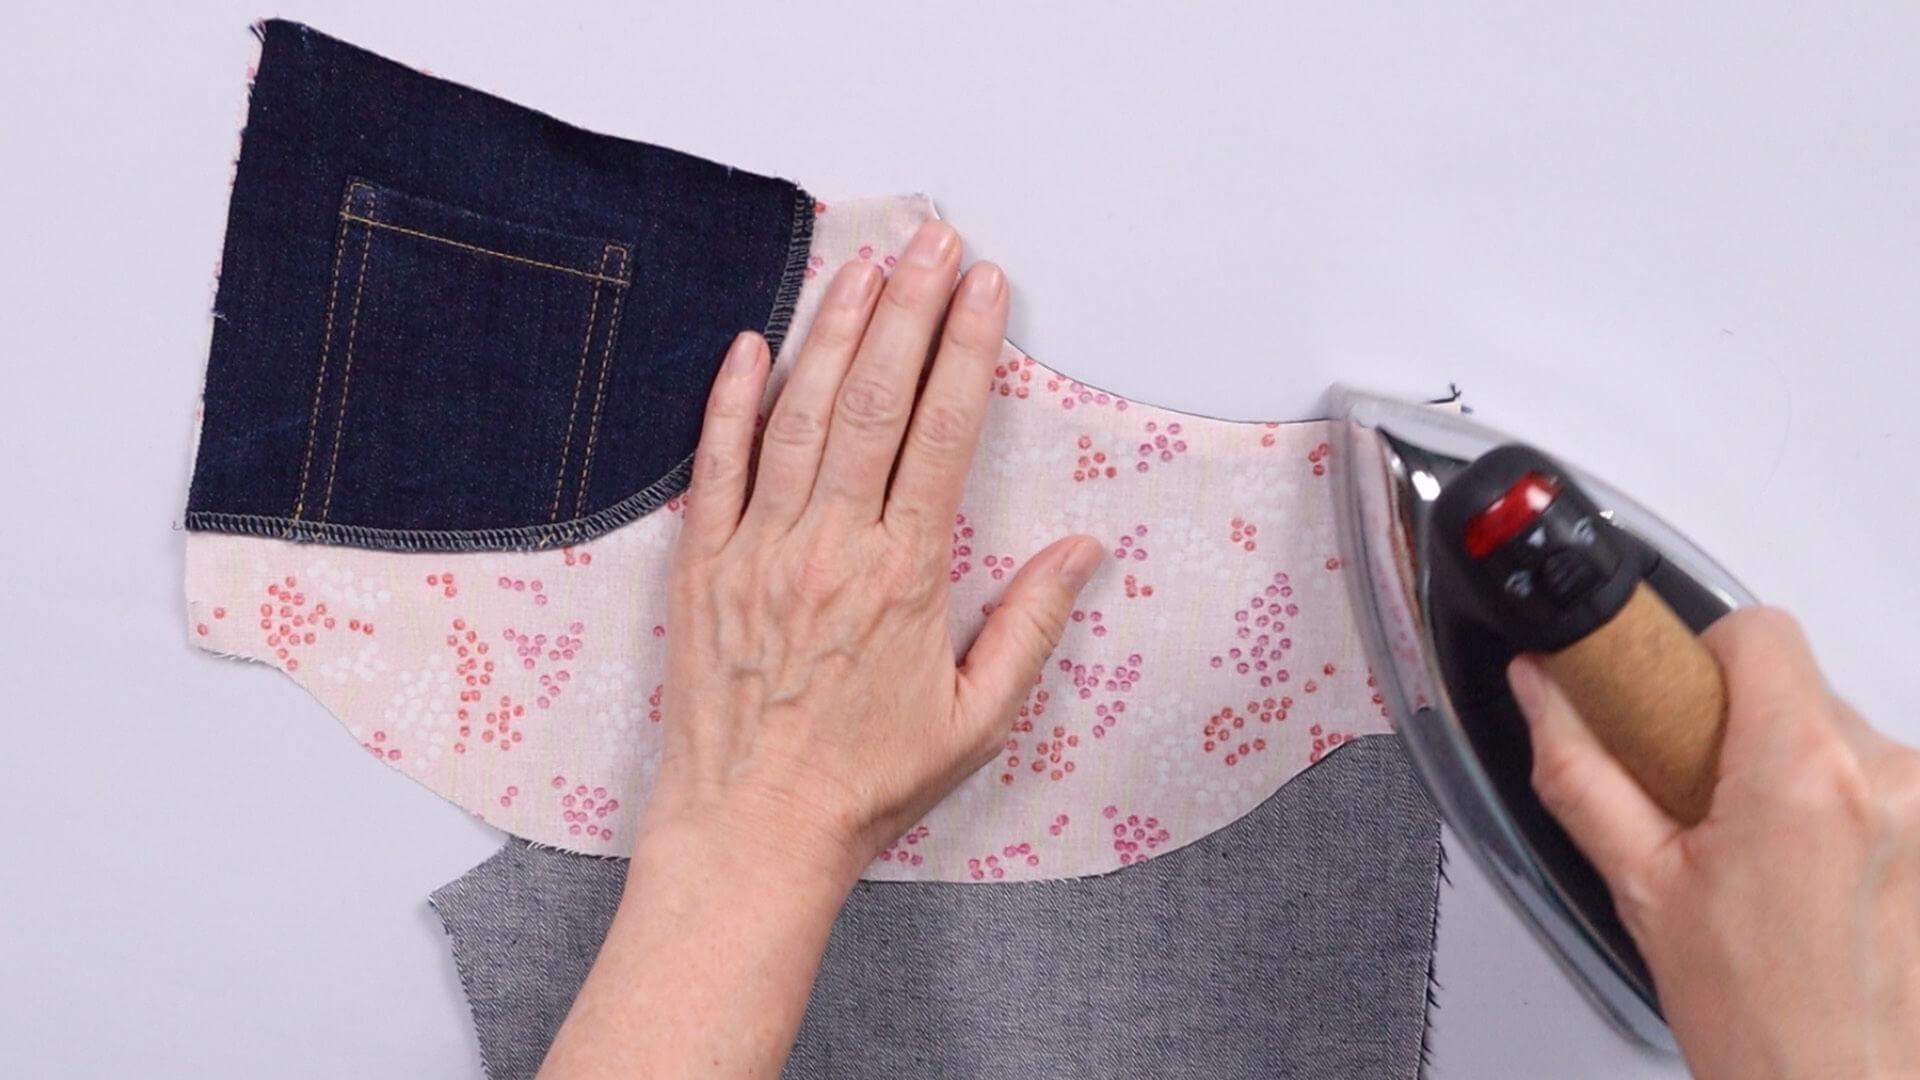
The pocket bag can be folded over. I iron the turned pocket opening flat. I make sure that the pocket bag is not visible from the outside.
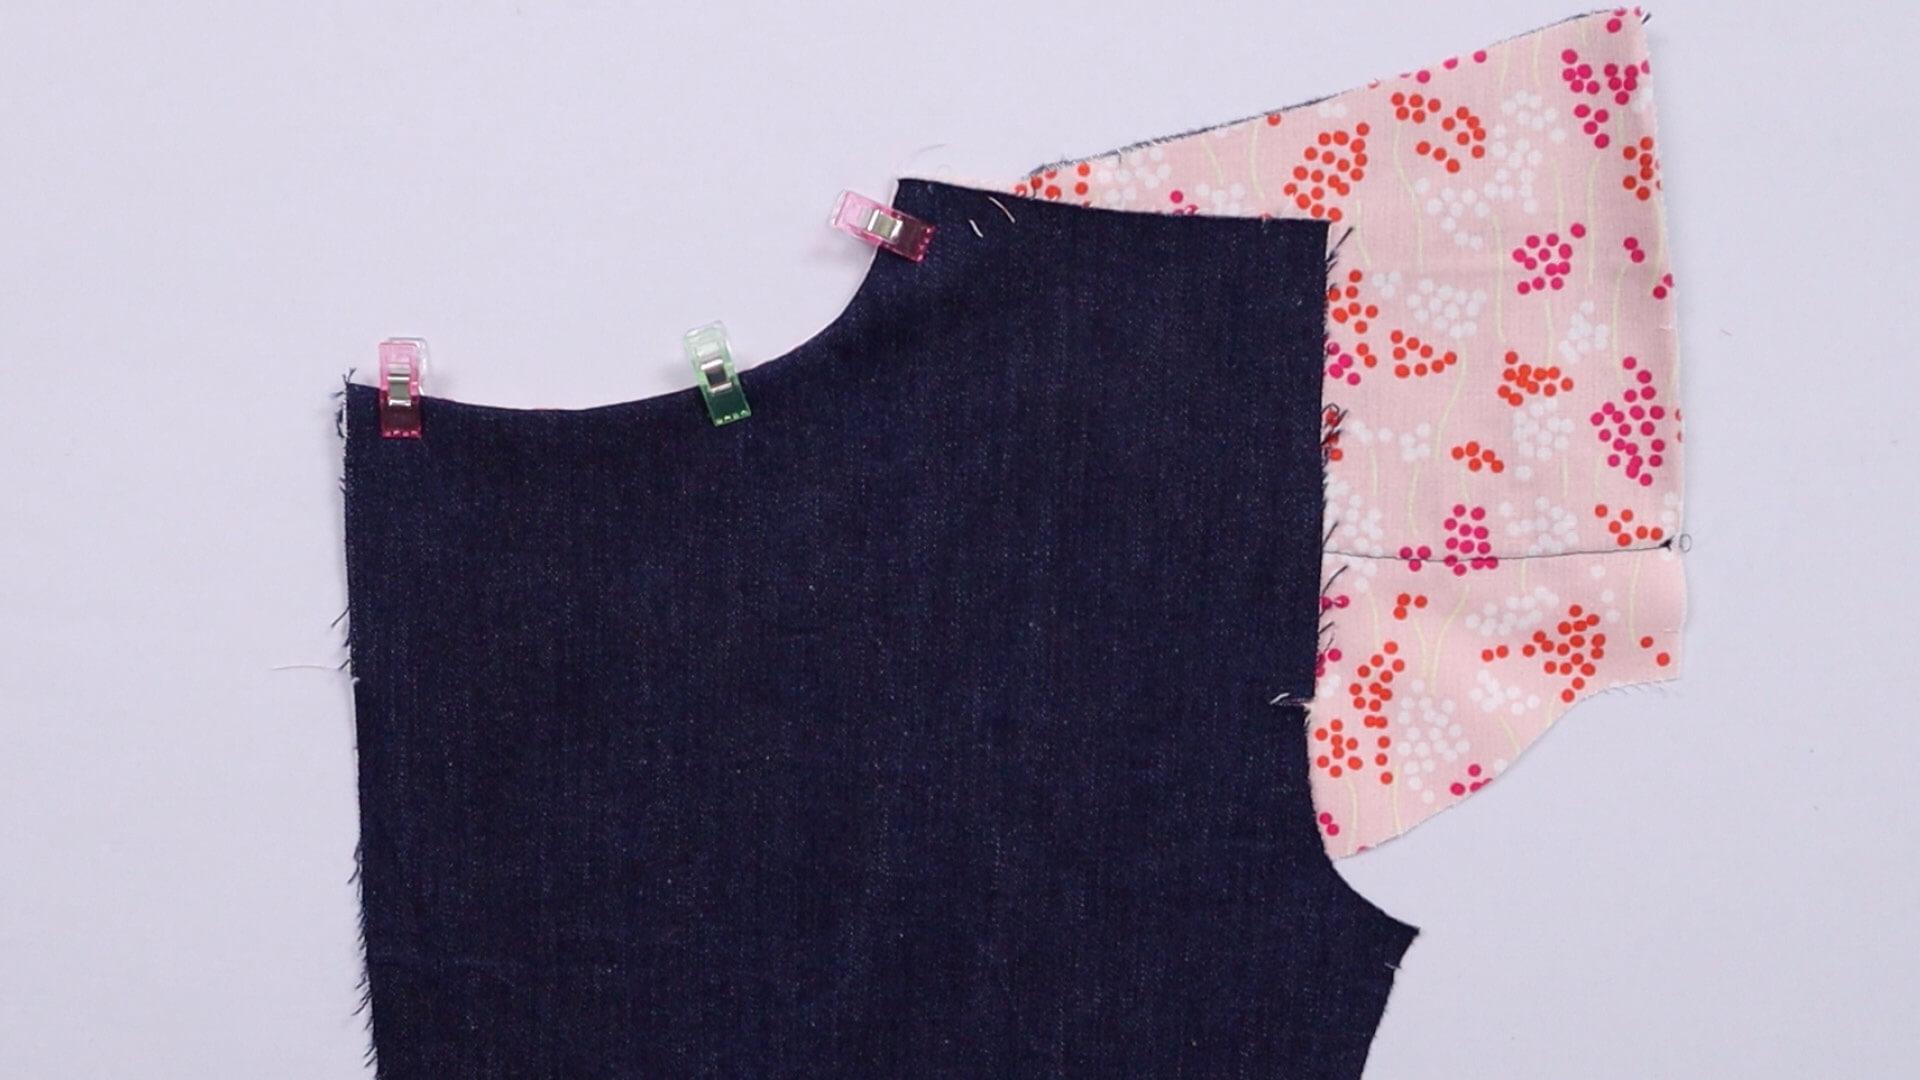
I pin the pocket opening in place.
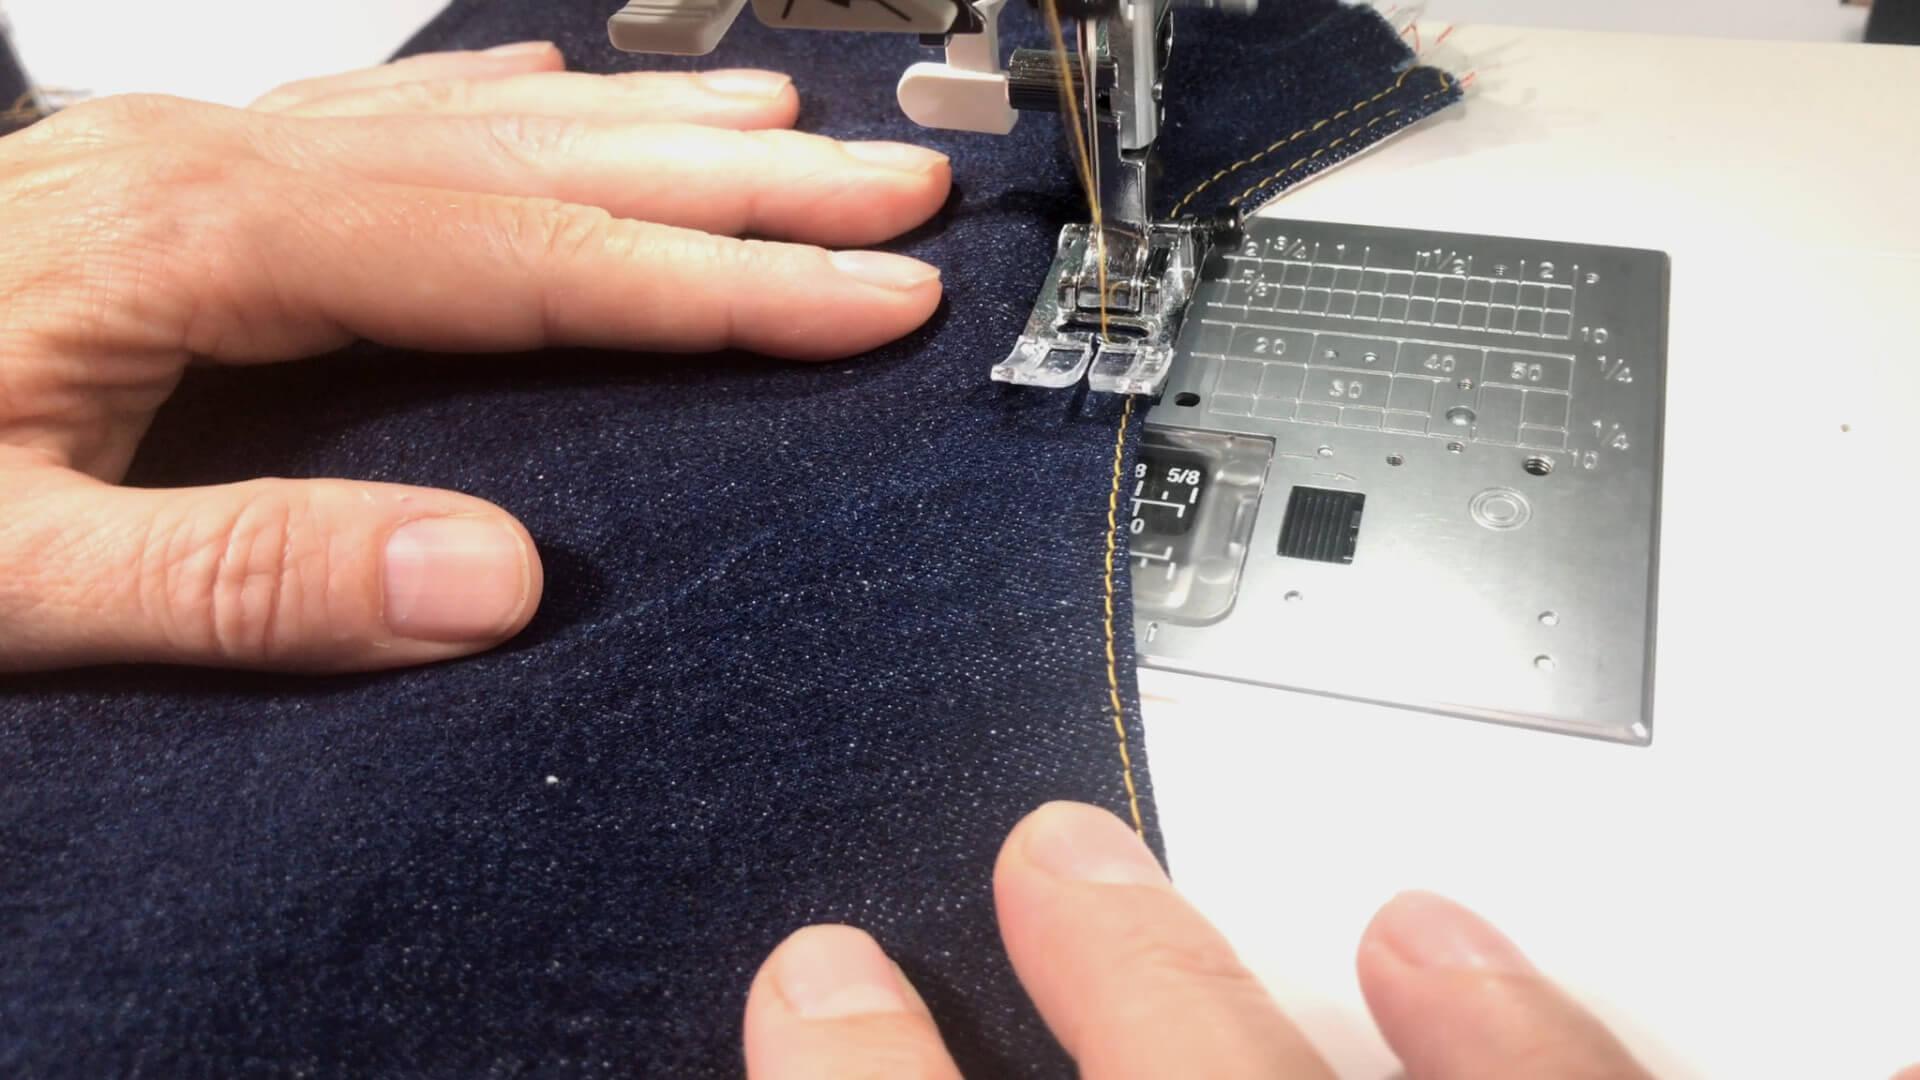
I topstitch the pocket opening with contrasting colored thread with 2+8 mm edge distance. Of course, you can also work with other stitch widths here.
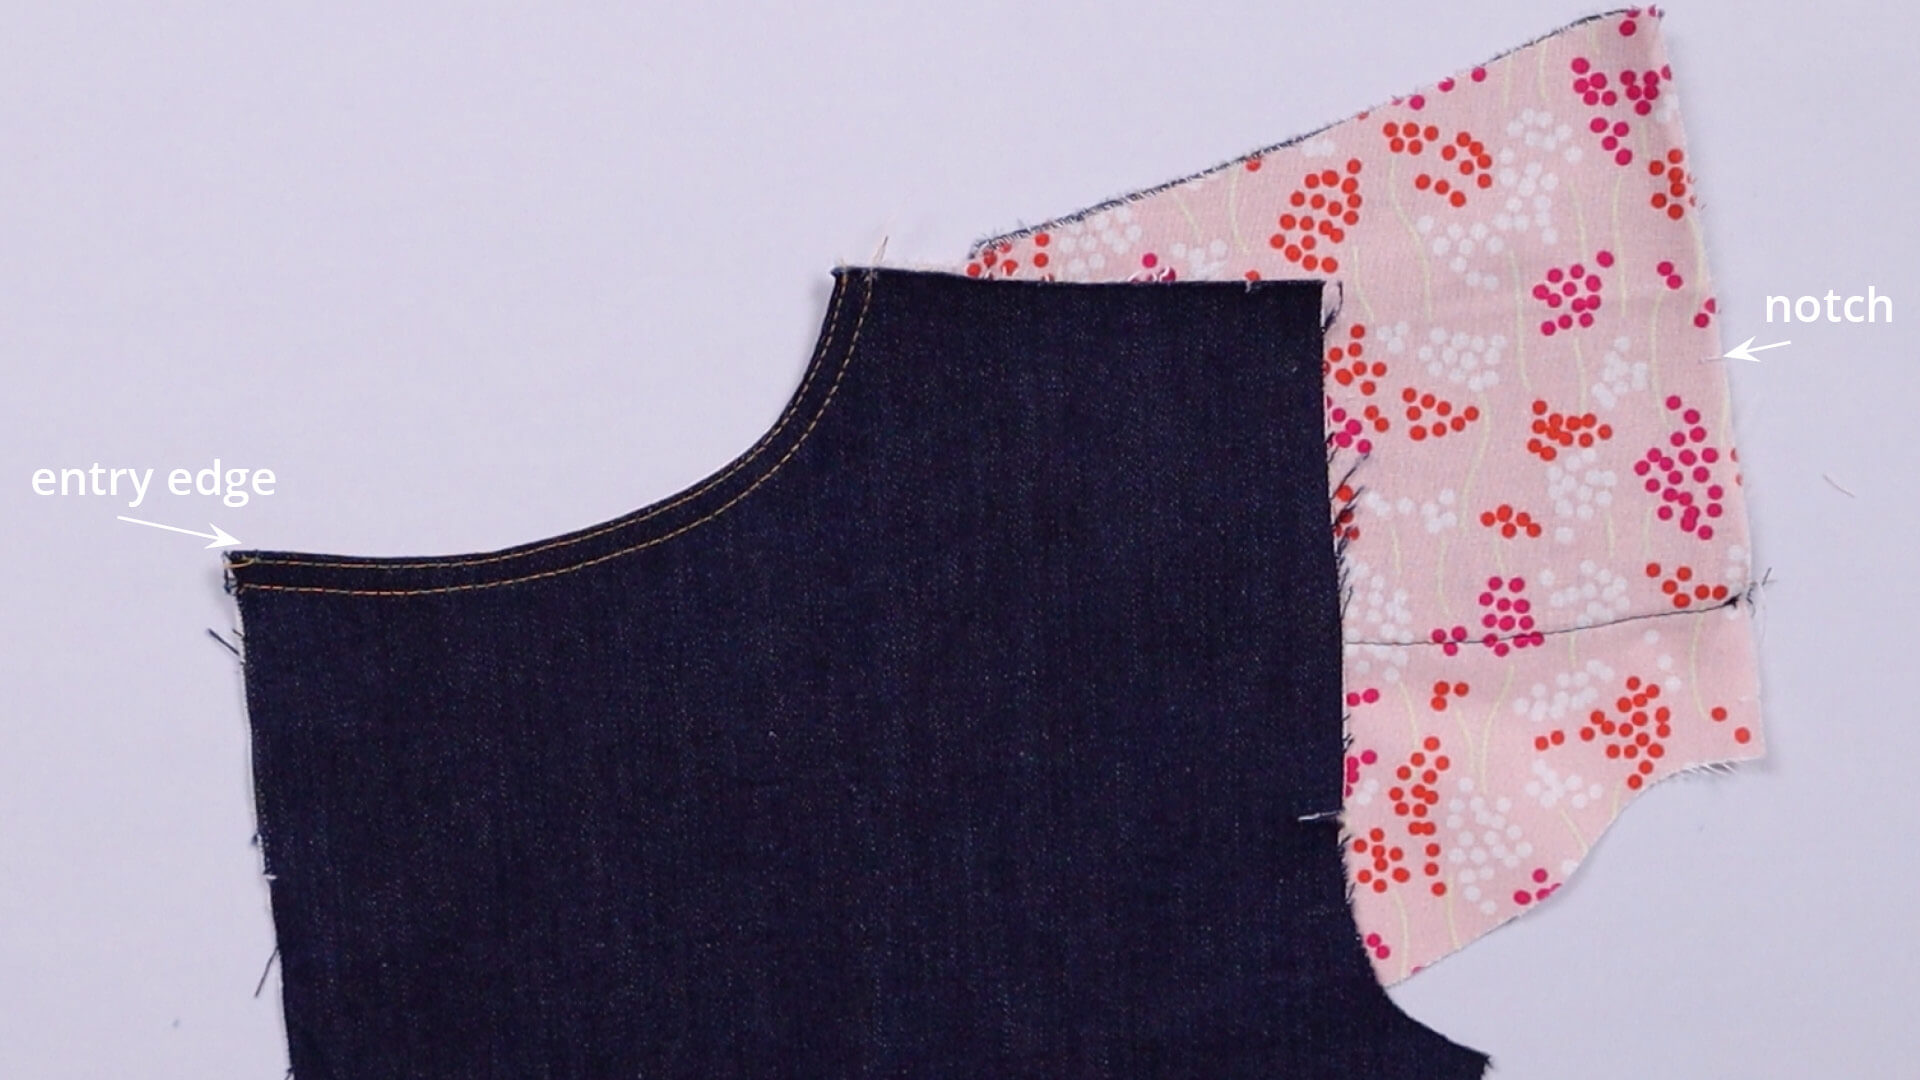
I am text block. Click edit button to change this text. Lorem ipsum dolor sit amet, consectetur adipiscing elit. Ut elit tellus, luctus nec ullamcorper mattis, pulvinar dapibus leo.
9. Finish the jeans pocket with a french seam
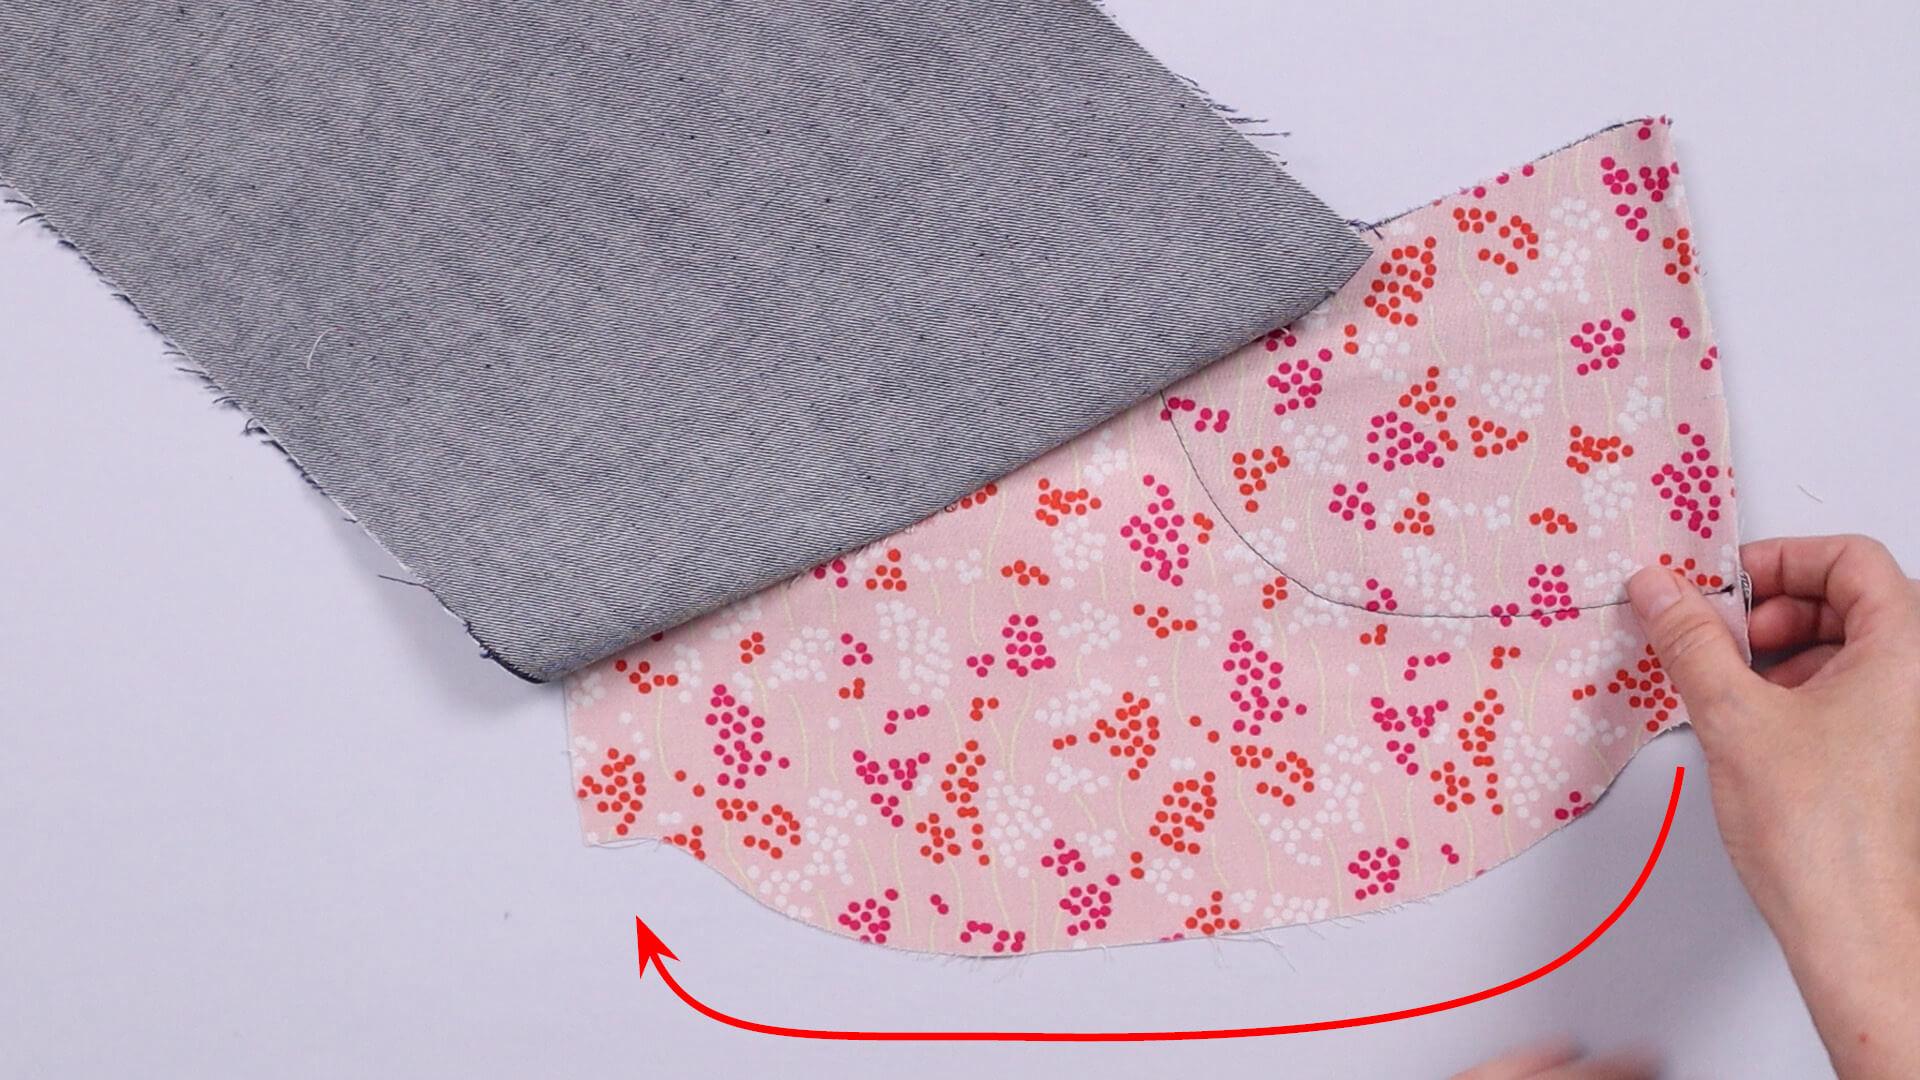
First, I lay the trouser leg in front of me so that the right side of the fabric is facing up. I fold the main fabric back at the folded edge. Fold the pocket bag in half, i. e. fold the side of the pocketto which the facing is stitched to the side seam and pin along to the bottom edge.
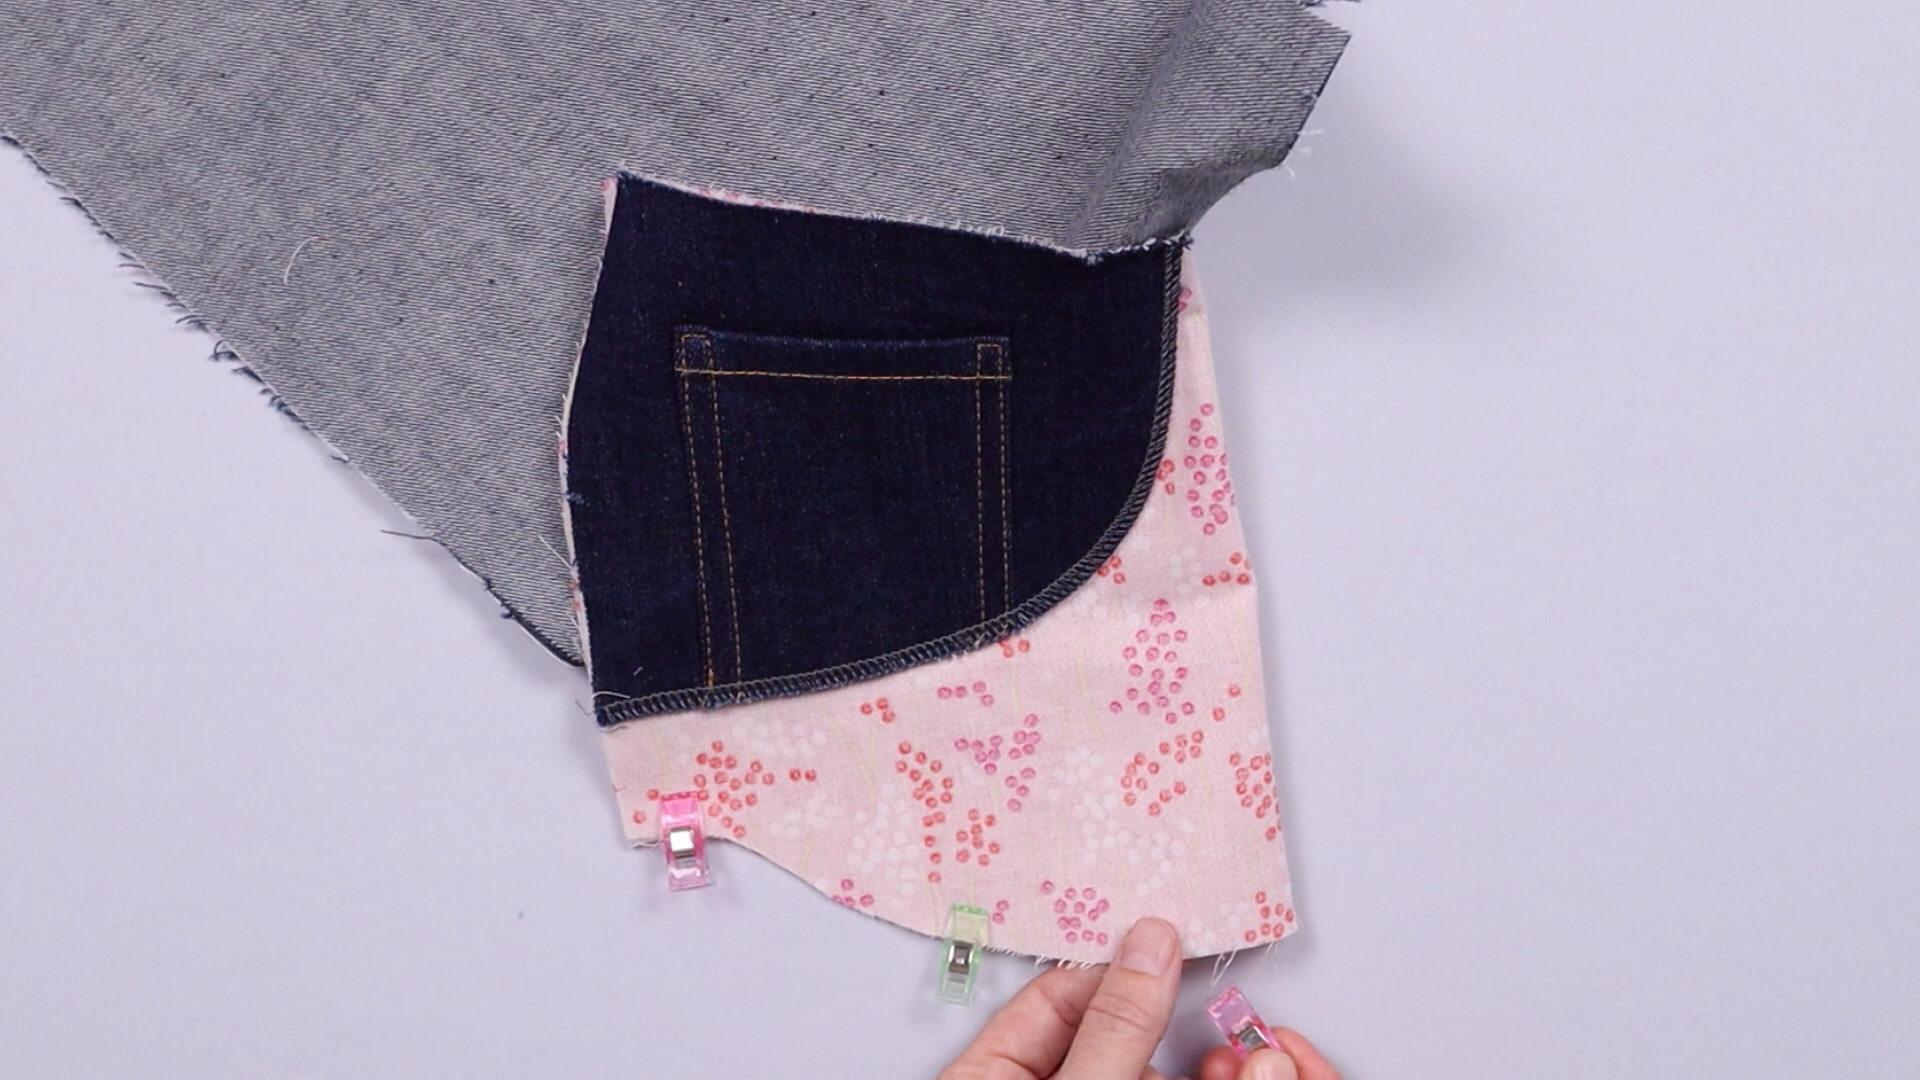
I stitch this edge together with a 6 mm seam allowance.
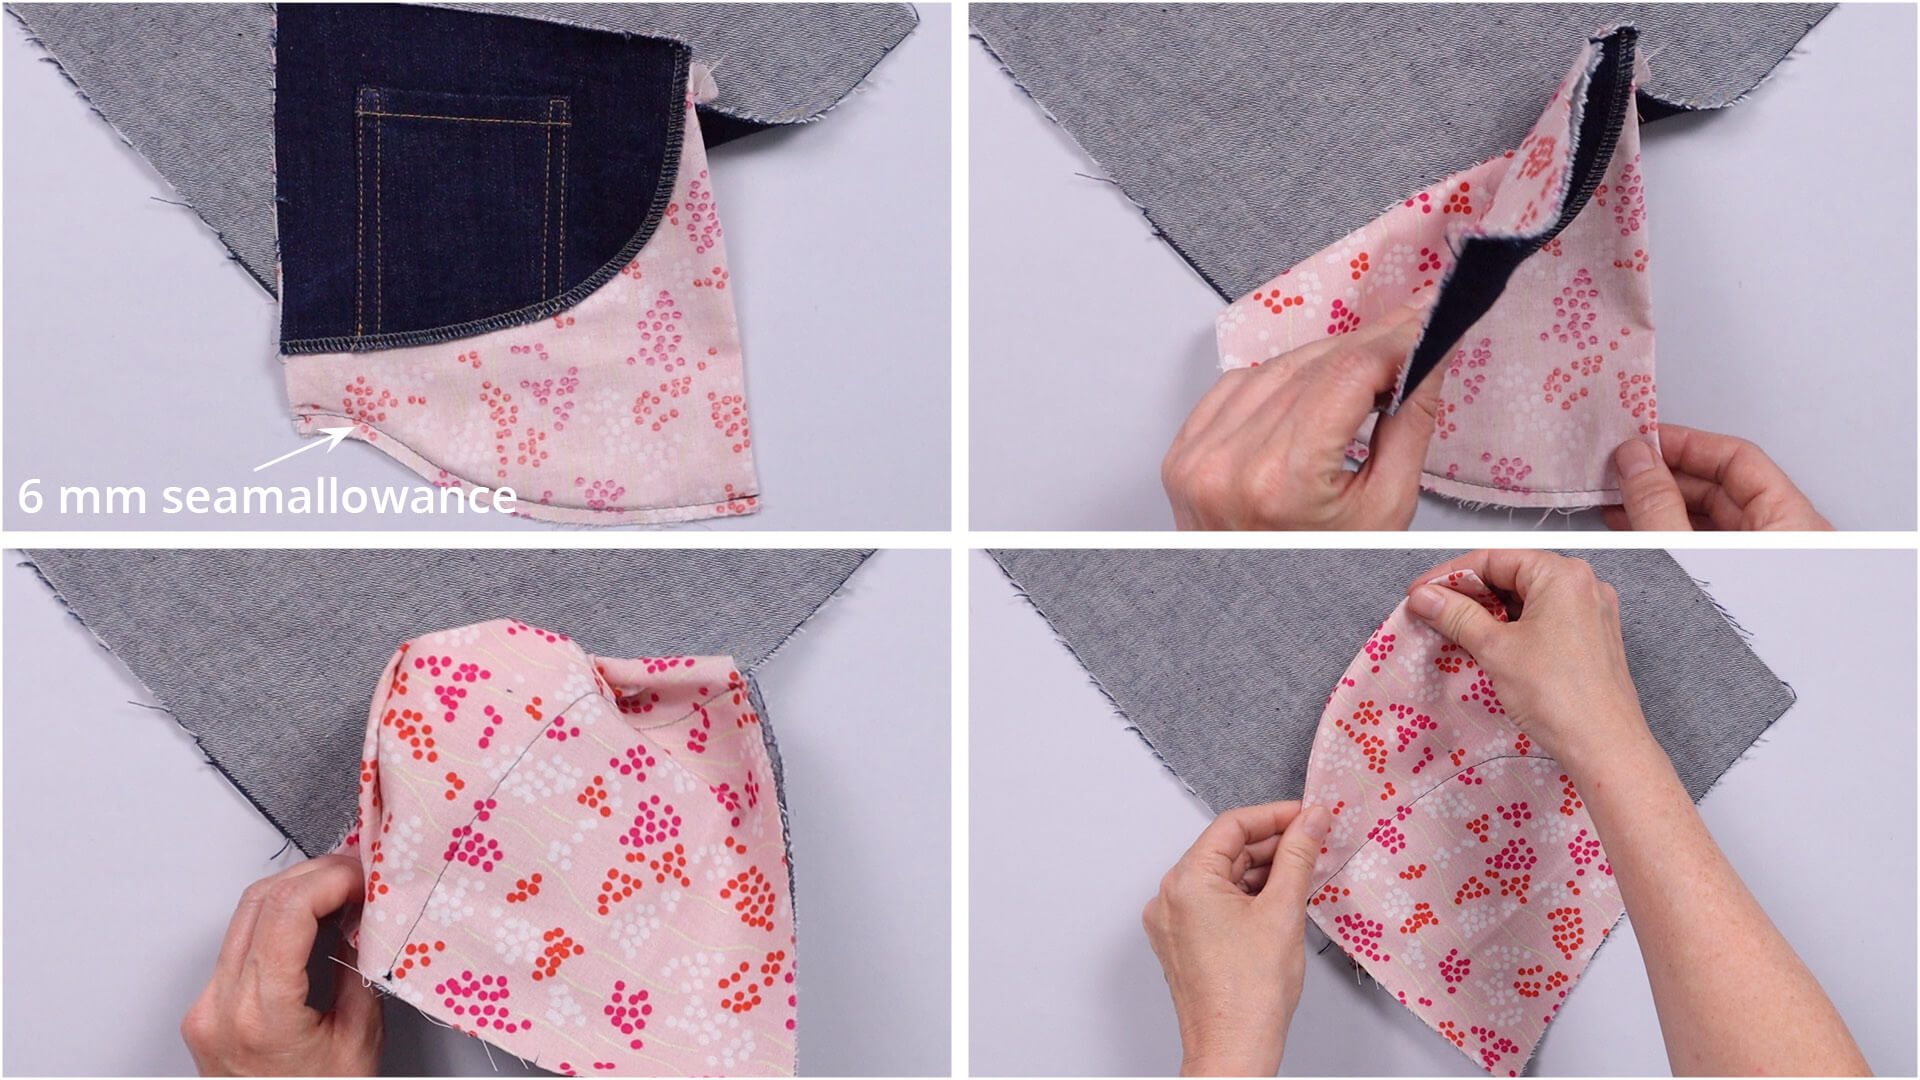
I then turn the pocket bag so that the seam allowance is inside the pocket bag.
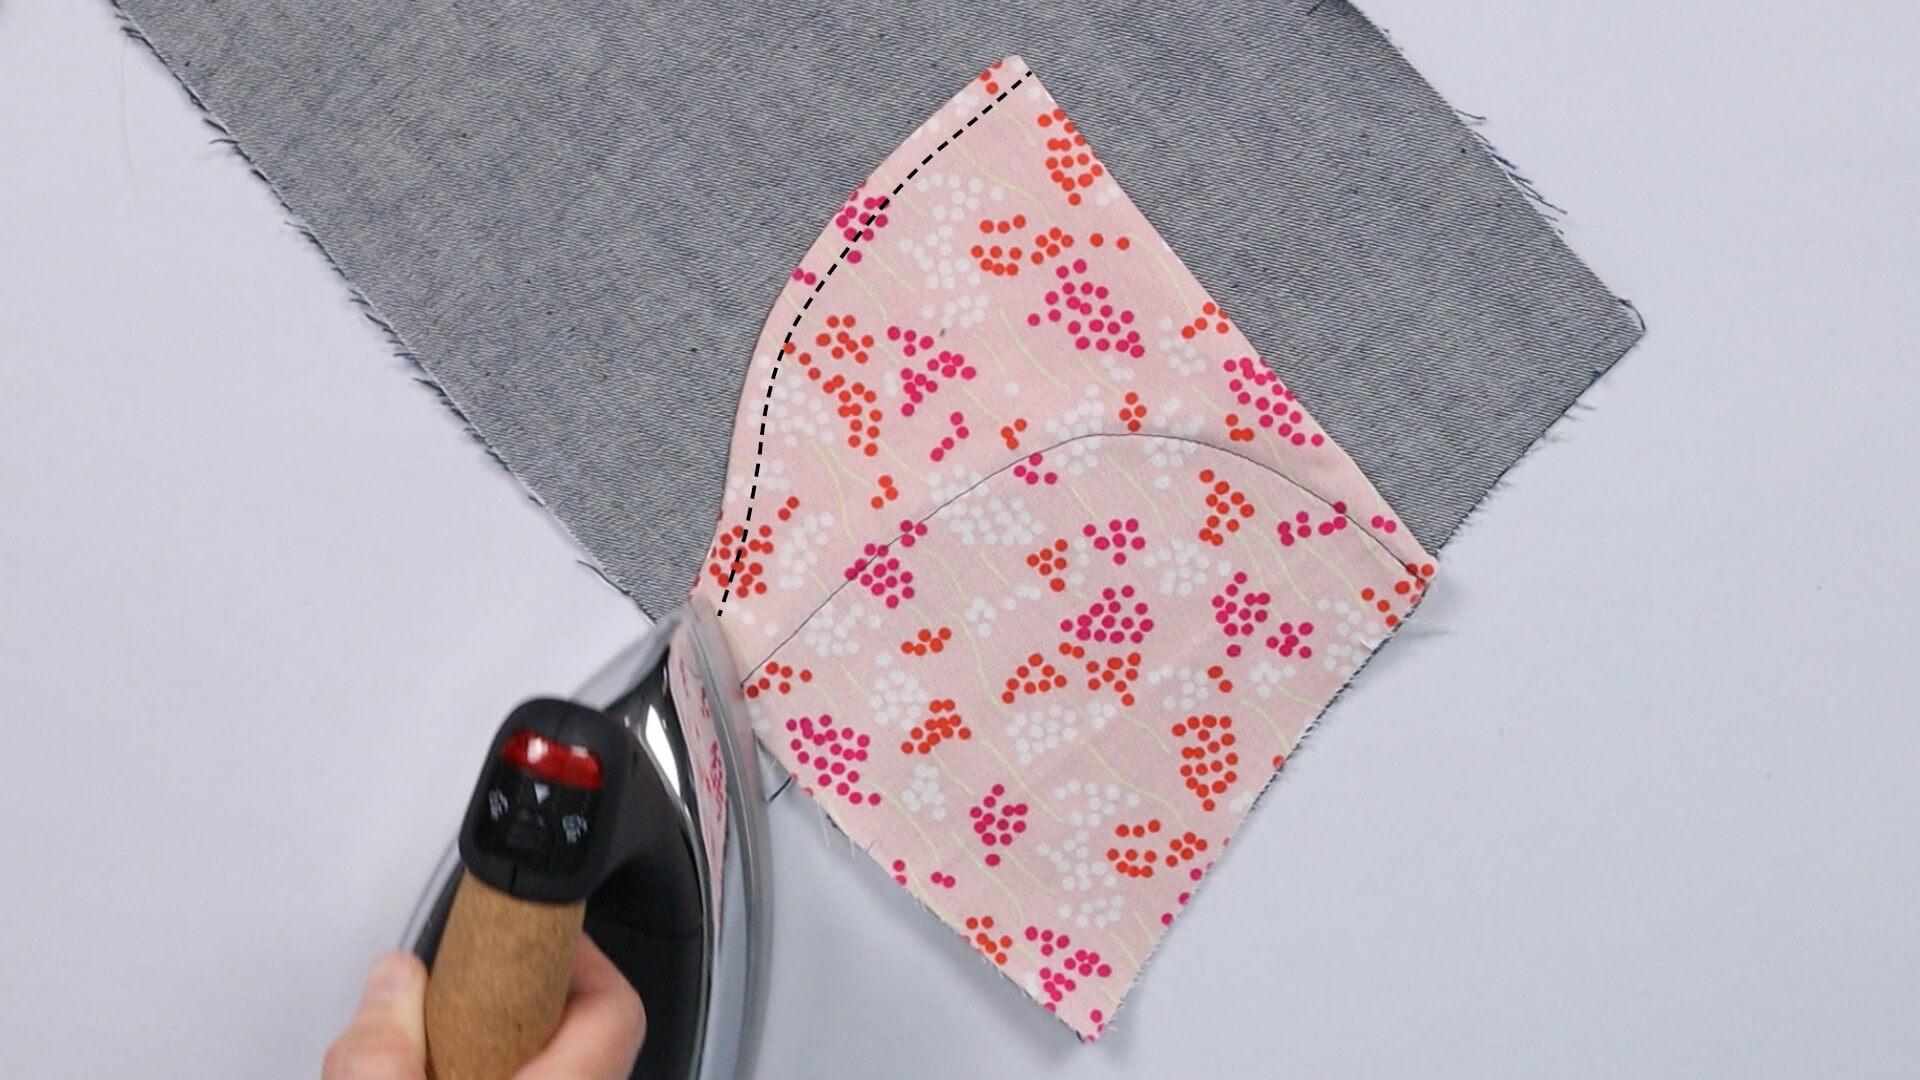
I iron this edge flat and tan stitch it 10 mm from the edge. The seam allowance disappears inside this stitching line and the inside of the pocket bag is nice and clean.
Securing the pocket opening
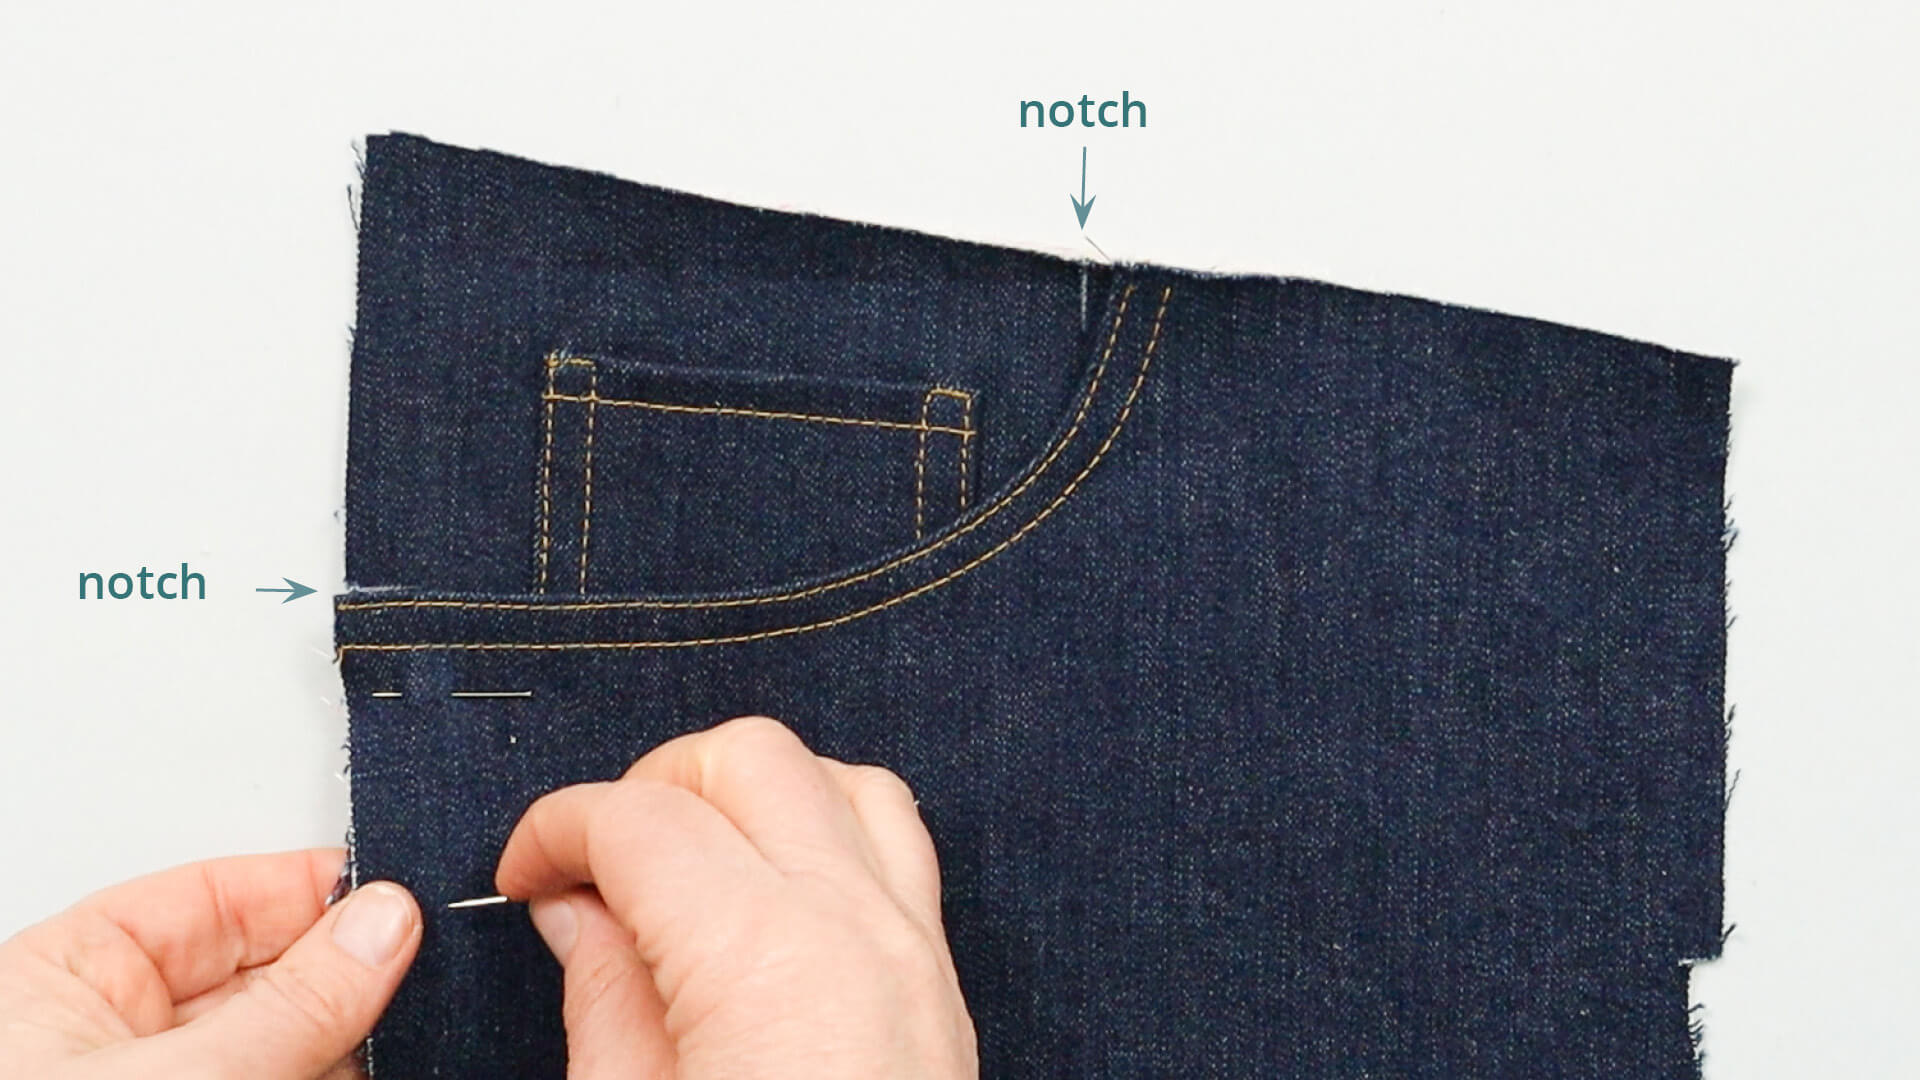
Next, I attach the pocket opening from the outside to the facing. To do this, I first pin it to the side seam flush from the notch downwards.
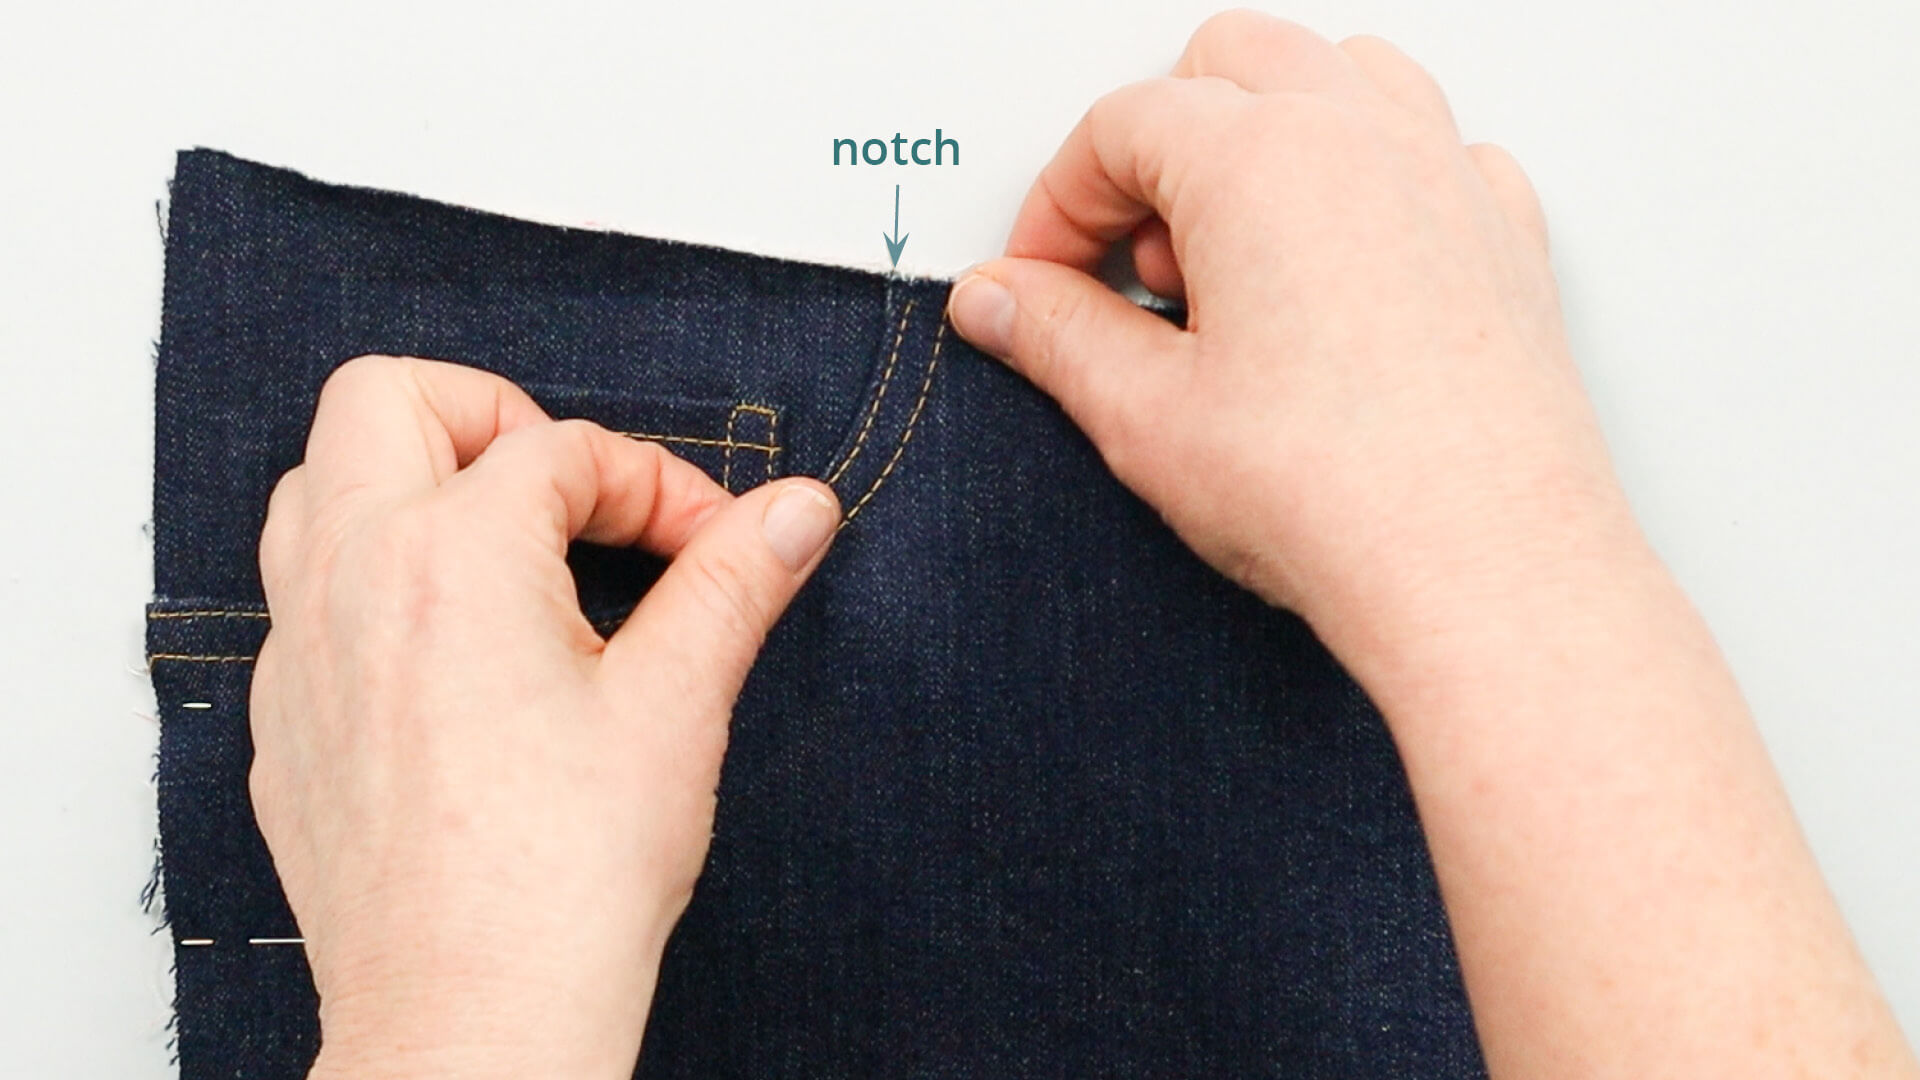
I then push the raw edge of the top edge towards the side seam so that it meets the notch exactly. Depending on the model, this results in a few millimeters extra width at the pocket opening so that you can easily reach in.
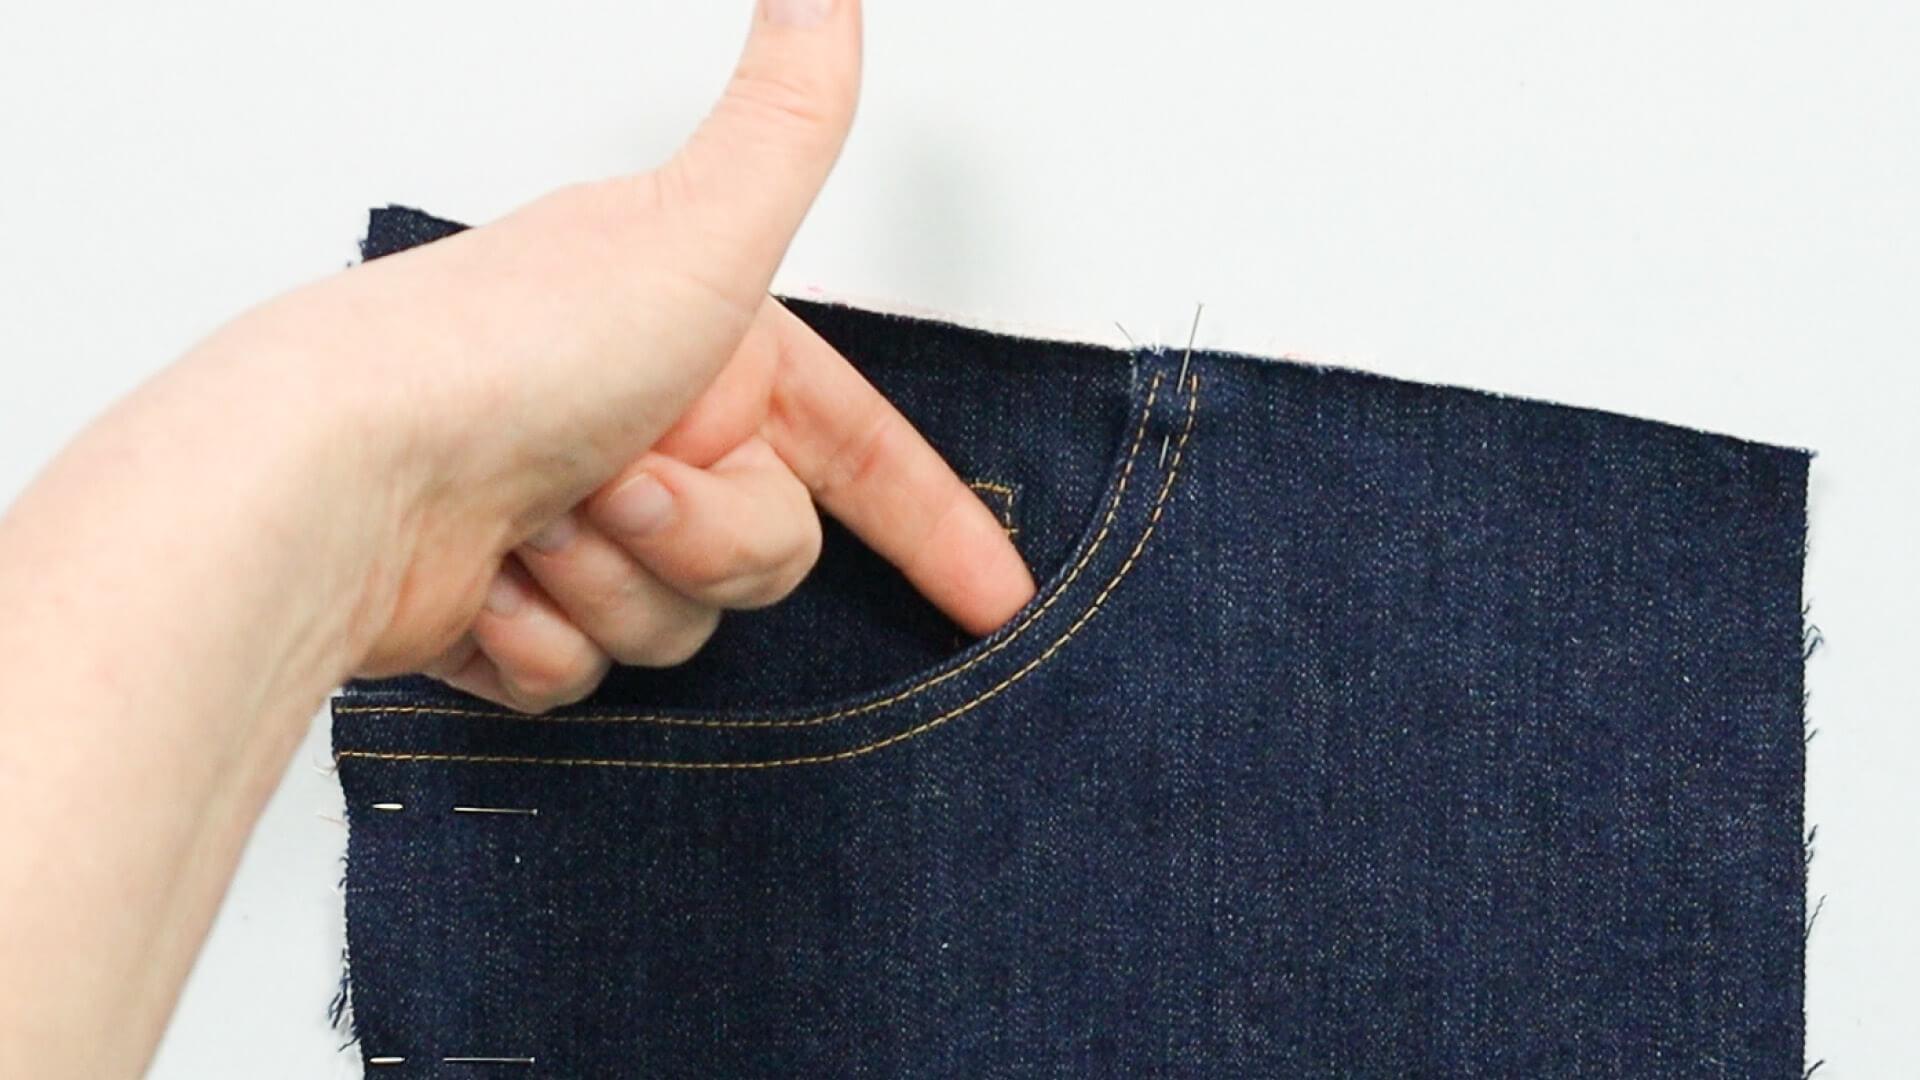
10. Auxiliary seam on the pocket bag
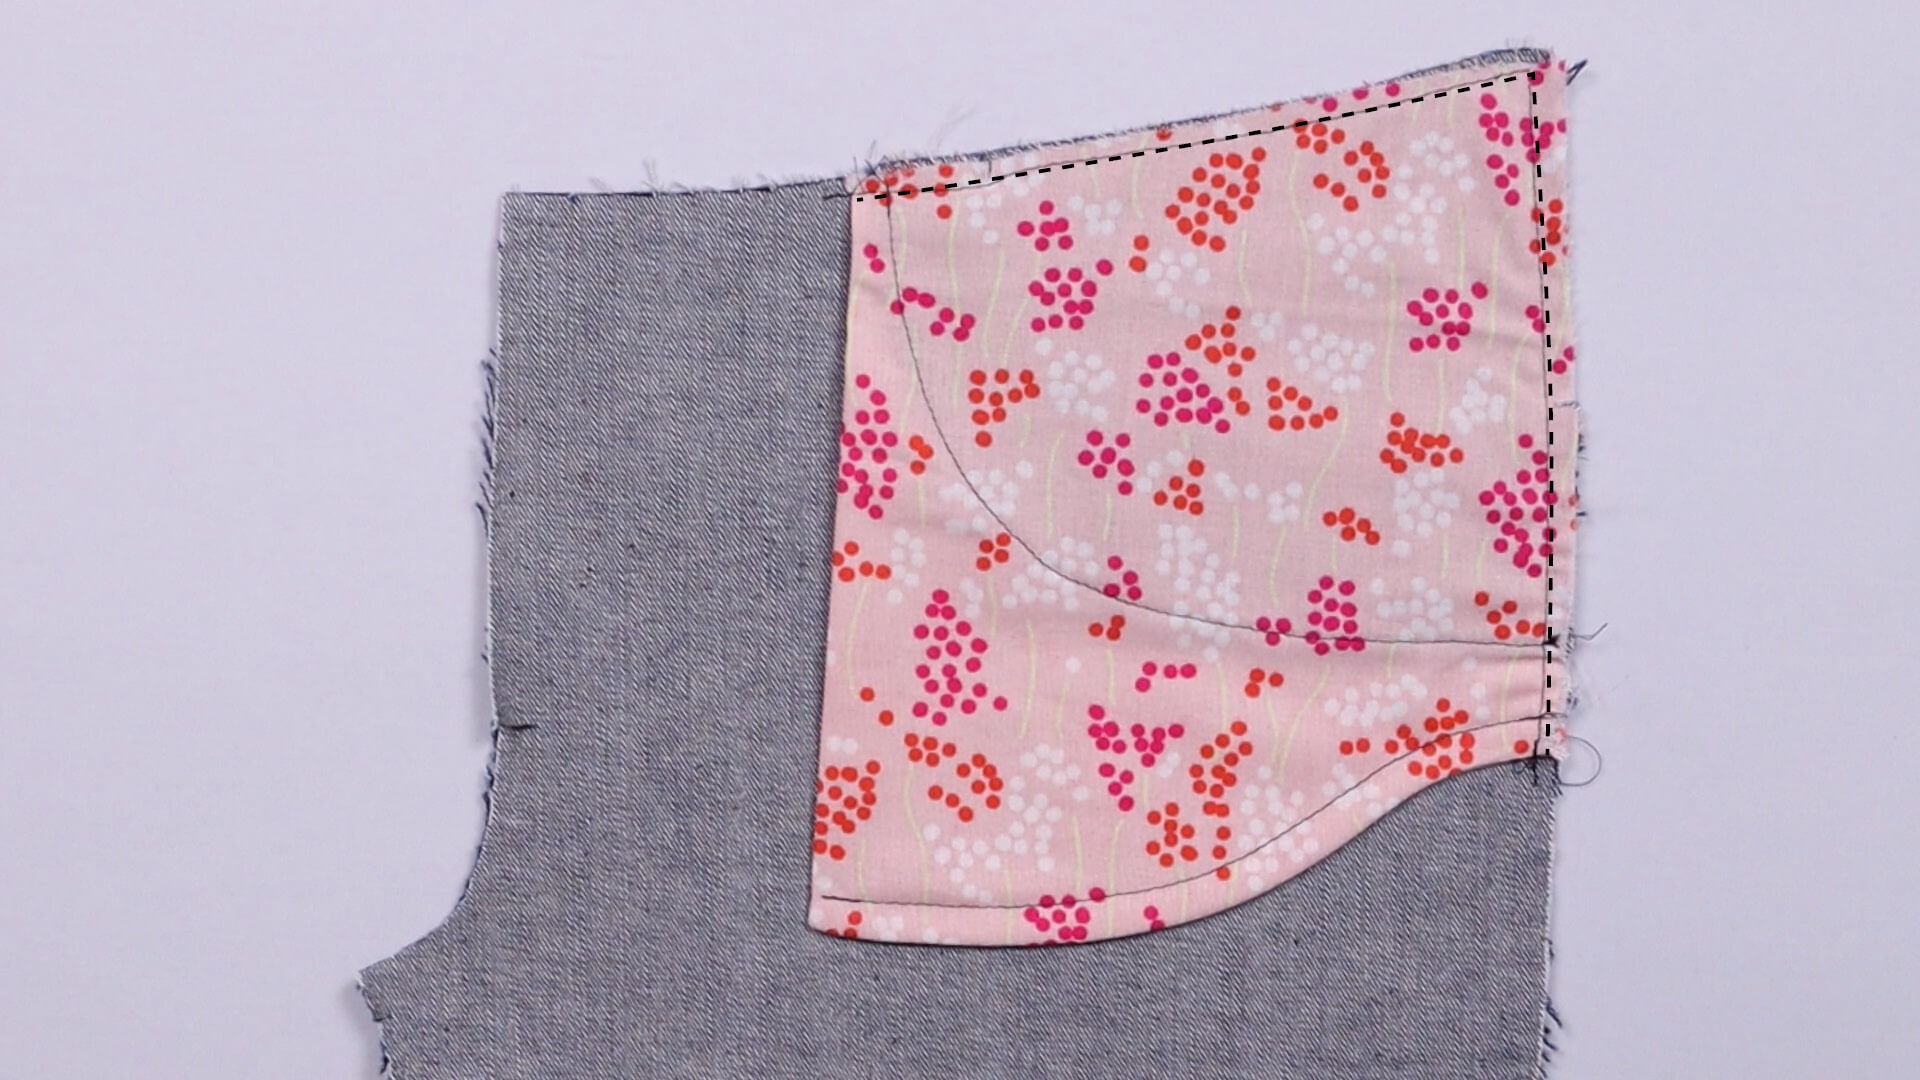
Finally, I attach the pocket bag to the sides and top with a basting seam at a 5 mm edge distance on the front part and iron everything smooth.
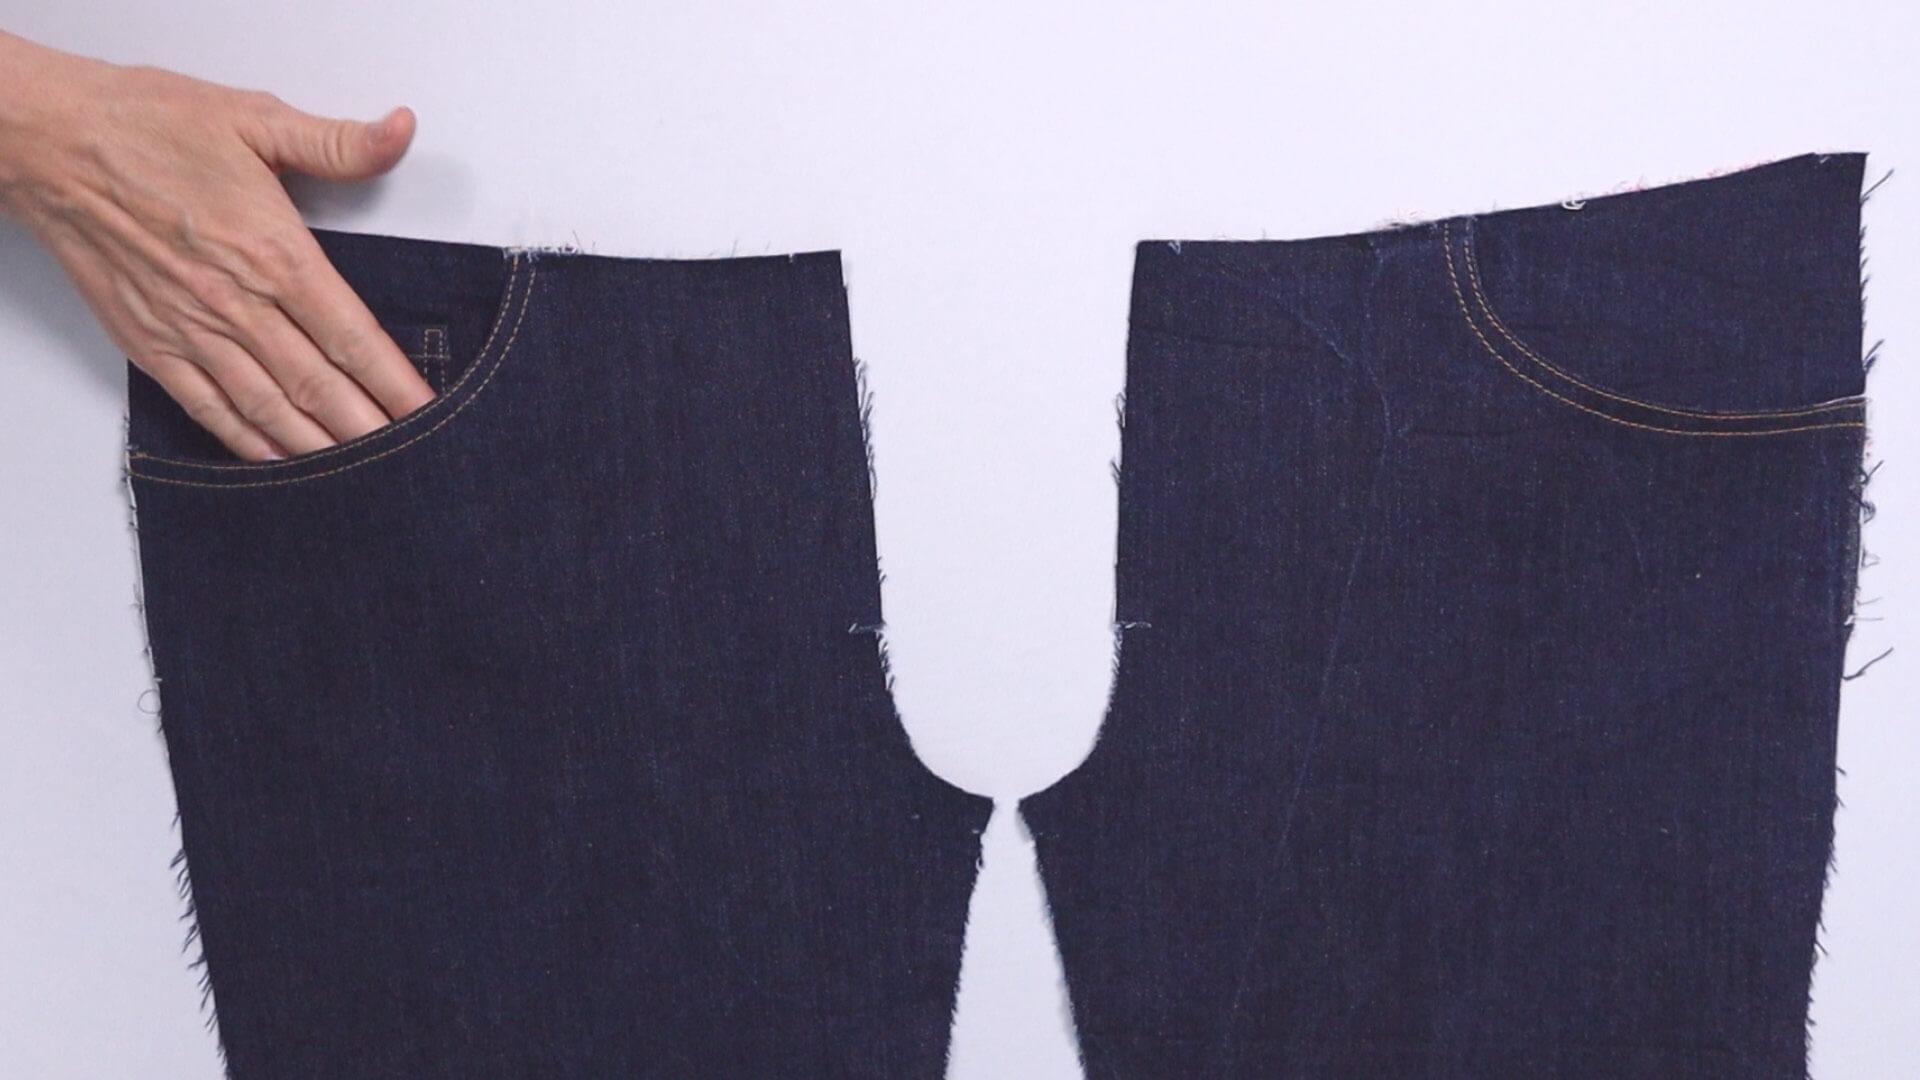
And this is what the finished jeans pocket looks like!
Below you will find links to the next steps:
If you would like to add rivets to your jeans pocket, take a look at the instructions under this link:
If you’re not quite ready yet and perhaps want to start at the beginning, you’ll find some links here:


