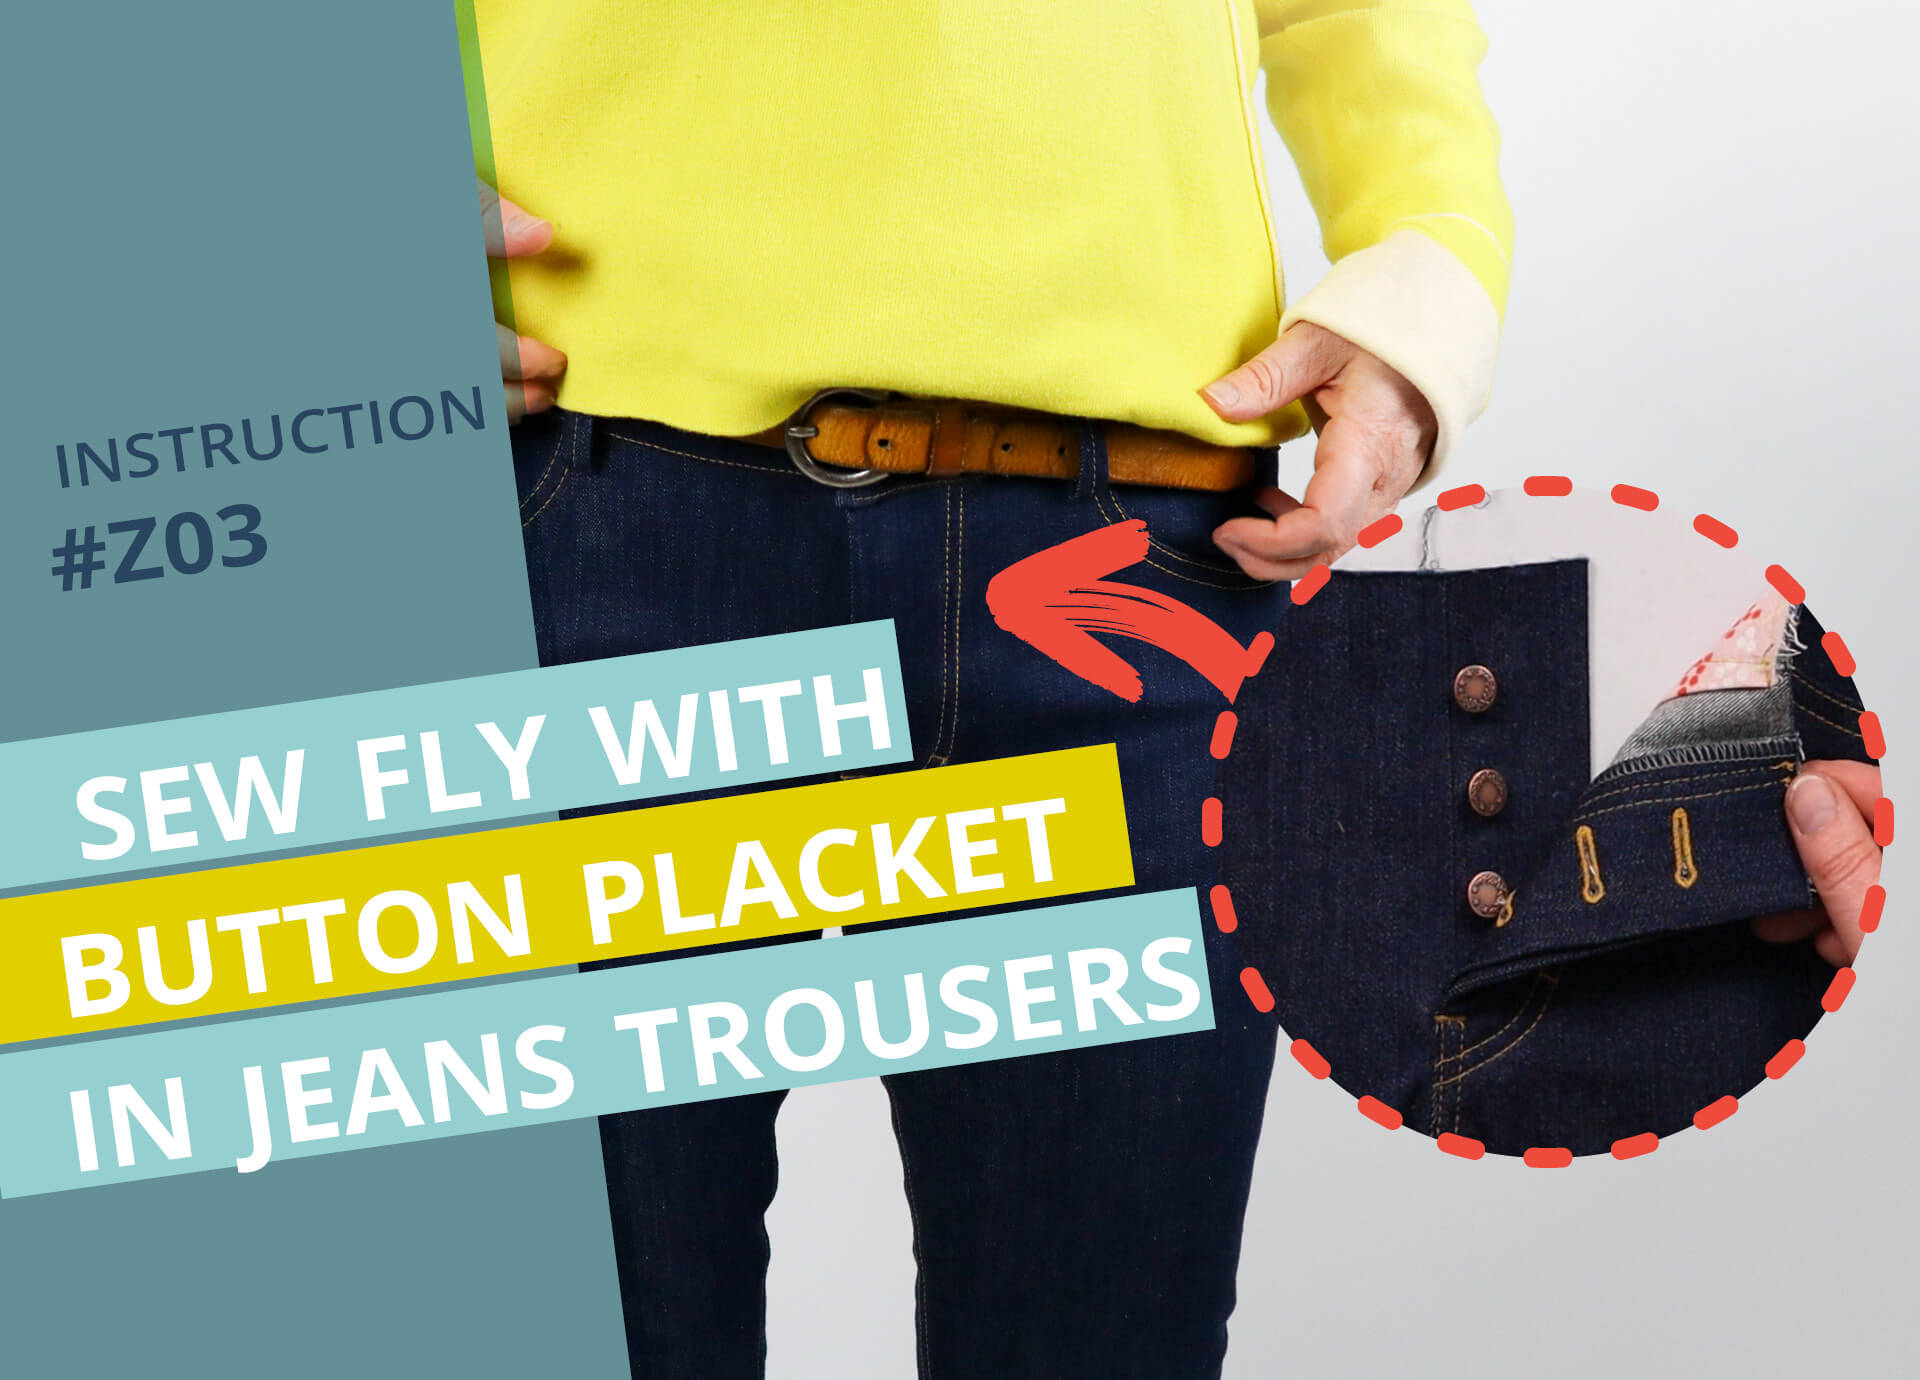
Sew fly with concealed button placket in jeans trousers #Z03
In the following video and illustrated text instructions, I explain step by step how to sew a fly with a concealed button placket into a pair of jeans. The fly is worked into the left center front and has a fly shield on the right side. Have fun with sewing!
Video instructions:
The video instructions are currently only available in German. Via settings you can have YouTube display the subtitles in your language of choice.
Pattern pieces made from main fabric:
- front pieces (VH) – 1 pair – with pockets already incorporated
- fly facing (ZB) – 1 x
- fly placket (ZBK) – 1 x
- fly shield (ZU) – 1 x
Pattern pieces from interfacing:
- fly placket (EZBK) – 1 x
Tools and materials:
- remplate for topstitching the fly (P-SZ)
- button position template (P-KS)
- pins and/or clips
- scissors
- tailor’s chalk or marking pen
- ruler
- buttons for the fly placket
- punch pliers and awl for eyelet buttonholes if necessary
2. Sew fly shield
![Jeans-zipper-seam-diy-2a-cut-underlay smartPATTERN sewing instructions for fly with zipper for jeans](https://smartpattern.de/wp-content/uploads/2024/03/sew-jeans-zip-tutorial-patternpiece-underlap.jpg)
I fold the bottom of the fly shield in half lengthwise, right sides together, and sew the slanted bottom edge, where the side notch are, together with a 10 mm seam allowance.
![Jeans-zipper-seam-diy-2b-underfoot-turn-and-iron smartPATTERN sewing instructions for fly with zipper on jeans - turn and iron slit bottom edge](https://smartpattern.de/wp-content/uploads/2024/03/sew-and-turn-underlap-for-jeans-zip-fly.jpg)
Then I turn the fly shield over and iron it from the outside.
3. Sew and turn fly facing
![Jeans-zipper-sew-diy-3a-front-sewing smartPATTERN sewing instructions for slit with zipper on jeans - trimming the left front edge](https://smartpattern.de/wp-content/uploads/2022/03/Jeans-Reissverschluss-naehen-diy-3a-vorderteil-verschneiden.jpg)
I trim the front edge on the left center front by 10 mm. This cutting line is also marked in the pattern, so you can use it as a guide.
![jeans-zipper-sew-diy-3b-cover-sew-on Place fly facing on front trousers](https://smartpattern.de/wp-content/uploads/2022/03/Jeans-Reissverschluss-naehen-diy-3b-Beleg-annaehen.jpg)
After this I place the fly facing on this edge, flush at the top, right sides facing, pin it in place and mark the end of the fly at the notch mark. I stitch the pieces together with a straight stitch at a seam allowance of 10 mm. The fly end is secured with forward and backward stitches.
![Jeans-zipper-sew-diy-3c-zipper-clip-in Clip into the seam allowance at the zip end on the facing and front piece](https://smartpattern.de/wp-content/uploads/2022/03/Jeans-Reissverschluss-naehen-diy-3c-schltzbeleg-einknipsen.jpg)
The seam allowance is cut in just up to the last stitch.
![Jeans-zipper-sew-diy-3d-cover-stitching Topstitched fly shield](https://smartpattern.de/wp-content/uploads/2022/03/Jeans-Reissverschluss-naehen-diy-3d-Beleg-niedersteppen.png)
Before I turn the facing, I press the seam allowance towards the fly. You can topstitch the seam allowance down on the facing side with a 2 mm gap or topstitch it in the next step using contrasting thread.
![Jeans-zipper-sew-diy-3e-ironing-legs ironing the fly facing to the inside](https://smartpattern.de/wp-content/uploads/2022/03/Jeans-Reissverschluss-naehen-diy-3e-Beleg-buegeln.jpg)
I then fold the fly facing inwards, wrong sides facing, and iron it in place. The lower, loose edge of the facing is placed towards the cut edge of the front piece. Depending on the design, the front edge of the fly can now be stitched with contrasting yarn.
4. Prepare the button placket
![Jeans-pants-concealed-button-front-seam-diy-4a-slash-insert-iron-on smartPATTERN sewing instructions for slit with concealed button placket of jeans - iron on interfacing on fly placket](https://smartpattern.de/wp-content/uploads/2022/09/Jeans-hose-verdeckte-knopfleiste-naehen-diy-4a-Schlitzleiste-einlage-aufbuegeln.jpg)
The interfacing is now pressed onto the wrong side of the button placket.
![Jeans-pants-concealed-button-front-seam-diy-4b-slit-pleats Iron the button placket together in the middle](https://smartpattern.de/wp-content/uploads/2022/09/Jeans-hose-verdeckte-knopfleiste-naehen-diy-4b-schlitzleiste-falten.jpg)
The button placket is then folded in the middle on the long side and ironed in place.
5. Neaten the cut edges
![Jeans-pants-concealed-button-front-seam-diy-5-cut-edges-clean-up overlocked cut edges](https://smartpattern.de/wp-content/uploads/2022/09/Jeans-hose-verdeckte-knopfleiste-naehen-diy-5-schnittkanten-versaubern.jpg)
The round cut edge of the fly facing on the left front piece, the crotch seams of both front pieces, the front edge of the right front piece and the open side edges of the pressed fly shield and the button placket are now finished. I use my overlocker for this.
6. Sew buttonholes into the button placket
![Jeans-pants-concealed-button-placket-seam-diy-6a-buttonhole-position-marking mark buttonhole position on fly placket](https://smartpattern.de/wp-content/uploads/2022/09/Jeans-hose-verdeckte-knopfleiste-naehen-diy-6a-knopflochposition-anzeichnen.jpg)
I now mark the buttonhole position on the fly placket. To do this, I place the template flush and transfer the front point of the buttonhole eye. I then draw the course of the buttonholes parallel to each other.
Tip
If you place the template with the printed side facing up on your pattern piece, the top/beautiful side of the buttonholes will later be on the underside of the fly placket – so you can see them from the inside when you open the fly completely. If you prefer to have the upper side buttonholes on the upper side of the pattern piece, you must mirror the template.
![jeans-pants-concealed-button-front-seam-diy-6b-buttonholes-embroidery smartPATTERN sewing instructions for slit with concealed button placket on jeans - embroider eyelet buttonholes](https://smartpattern.de/wp-content/uploads/2022/09/Jeans-hose-verdeckte-knopfleiste-naehen-diy-6b-knopfloecher-sticken.jpg)
I embroider the buttonholes with the appropriate presser foot and program on my sewing machine. I first make a sample on a test piece. If you do not have such a program on your machine, you can mark the length of the button and embroider the long bartacks with a narrow zigzag stitch. Then use a correspondingly wide zigzag stitch for the bartacks at the beginning and end.
![jeans-pants-covered-button-front-seam-diy-6c-buttonhole-eyes-punching-out smartPATTERN sewing instructions for slit with concealed button placket on jeans - punching out buttonhole eyes with punch pliers](https://smartpattern.de/wp-content/uploads/2022/09/Jeans-hose-verdeckte-knopfleiste-naehen-diy-6c-knopflochaugen-ausstanzen.jpg)
I punch out the eye of my buttonhole with a 2 mm diameter punch. I place a piece of fabric under the strip so that I cut the fabric in the strip completely. I then carefully cut open the buttonholes so as not to cut any stitches.
7. Fly topstiching
![Jeans-pants-concealed-button-front-seam-diy-7a-slit-stitching-draw-on smartPATTERN sewing instructions for slit with concealed button placket on jeans - marking the fly top stitching](https://smartpattern.de/wp-content/uploads/2022/09/Jeans-hose-verdeckte-knopfleiste-naehen-diy-7a-schlitzsteppung-anzeichnen.jpg)
Now I place the fly template on the left front piece and draw the shape for topstitching.
![Jeans-pants-concealed-button-front-seam-diy-7b-slit-front-fastening smartPATTERN sewing instructions for slit with concealed button placket on jeans - attach button placket to inside left front piece](https://smartpattern.de/wp-content/uploads/2022/09/Jeans-hose-verdeckte-knopfleiste-naehen-diy-7b-schlitzleiste-feststecken.jpg)
Then I turn the front piece, place the fly placket 2 mm away from the front edge and pin it in place.
![Jeans-pants-concealed-button-front-seam-diy-7c-slit-front-stitching smartPATTERN sewing instructions for slit with concealed button placket on jeans - stitching the slit from the outside](https://smartpattern.de/wp-content/uploads/2022/09/Jeans-hose-verdeckte-knopfleiste-naehen-diy-7c-schlitzleiste-steppen.jpg)
I then stitch through the fly from the outside. For better durability, I topstitch a second seam at a distance of 5 mm from the front. This secures the concealed button placket under the front.
![Jeans-pants-concealed-button-front-seam-diy-7d-slit-front-second-stitching smartPATTERN sewing instructions for slit with concealed button placket of jeans - second stitching for more durability](https://smartpattern.de/wp-content/uploads/2022/09/Jeans-hose-verdeckte-knopfleiste-naehen-diy-7d-schlitzleiste-zweite-steppung.jpg)
8. Connect the front pieces
![Jeans-pants-concealed-button-front-seam-diy-8a-front-connect smartPATTERN sewing instructions for slit with concealed button placket of a pair of jeans - joining front parts](https://smartpattern.de/wp-content/uploads/2022/09/Jeans-hose-verdeckte-knopfleiste-naehen-diy-8a-vorderteile-verbinden.jpg)
The two front pieces are now sewn together. To do this, I lay them right sides together and pin them at the crotch seam.
![Jeans-pants-concealed-button-front-seam-diy-8b-crotch-seam-pinning-together smartPATTERN sewing instructions for slit with concealed button placket of a jeans crotch seam stitching](https://smartpattern.de/wp-content/uploads/2022/09/Jeans-hose-verdeckte-knopfleiste-naehen-diy-8b-schrittnaht-zusammenstecken.jpg)
The seam is now closed exactly from the fly end to the leg seam with the seam allowance marked in the pattern.
![Jeans-pants-concealed-button-front-seam-diy-8c-crotch-seam-seam-together smartPATTERN sewing instructions for slit with concealed button placket of a pair of jeans- Sew crotch seam together](https://smartpattern.de/wp-content/uploads/2022/09/Jeans-hose-verdeckte-knopfleiste-naehen-diy-8c-schrittnaht-zusammennaehen.jpg)
![Jeans-pants-concealed-button-front-seam-diy-8d-crotch-seam-stretch smartPATTERN sewing instructions for slit with concealed button placket on jeans - stretch crotch seam](https://smartpattern.de/wp-content/uploads/2022/09/Jeans-hose-verdeckte-knopfleiste-naehen-diy-8d-schrittnaht-dehnen.jpg)
I then stretch the seam allowance in the curve when ironing. The seam itself should not be stretched too much.
9. Sew on the fly shield
![Jeans-pants-concealed-button-front-seam-diy-9a-underfoot-connect smartPATTERN sewing instructions for slit with concealed button placket of a pair of jeans - join fly shield](https://smartpattern.de/wp-content/uploads/2024/03/sew-underlap-to-jeans-button-fly-1.jpg)
I place the bottom of the fly with the serged long edge on the edge of the right front piece and pin it in place.
![Jeans-pants-concealed-button-front-seam-diy-9b-bottom-fastening smartPATTERN sewing instructions for slit with concealed button placket on jeans - pin fly shield to seam allowance](https://smartpattern.de/wp-content/uploads/2022/09/Jeans-hose-verdeckte-knopfleiste-naehen-diy-9b-untertritt-feststecken.jpg)
![Jeans-trousers-concealed-button-front-seam-diy-9c-bottom-seam smartPATTERN sewing instructions for slit with concealed button placket on jeans - sew on underlap from front side](https://smartpattern.de/wp-content/uploads/2022/09/Jeans-hose-verdeckte-knopfleiste-naehen-diy-9c-untertritt-annaehen.jpg)
From the front side, I stitch the fly shield with a 10 mm seam allowance.
![Jeans-trousers-concealed-button-front-seam-diy-9c-bottom-joint-stitching-over smartPATTERN sewing instructions for slit with concealed button placket on jeans - topstitch fly shield on front piece](https://smartpattern.de/wp-content/uploads/2022/09/Jeans-hose-verdeckte-knopfleiste-naehen-diy-9c-untertritt-ansatznaht-uebersteppen.jpg)
Then I turn the fly shield to the right side and topstitch the seam with a 2 mm gap on the front piece.
10. Connect center front
![Jeans-pants-concealed-button-front-seam-diy-10a-front-center-labeling smartPATTERN sewing instructions for slit with concealed button placket on jeans - center front on right front piece](https://smartpattern.de/wp-content/uploads/2024/03/mark-center-front-to-sew-button-fly-in-jeans-trousers.jpg)
On the right front piece, the center front is 10 mm parallel to the seam of the fly shield. It is also marked with a notch on the edge of the waistband.
![Jeans-pants-concealed-button-front-seam-diy-10b-connected-underlap smartPATTERN sewing instructions for slit with concealed button placket on jeans - center front at 10 mm from the fly shield seam](https://smartpattern.de/wp-content/uploads/2024/03/connected-underlap-at-jeans-button-fly.jpg)
![Jeans-pants-concealed-button-front-seam-diy-10c-front-center-pin-together smartPATTERN sewing instructions for slit with concealed button placket of a pair of jeans - pin the front pieces together with the center front folded](https://smartpattern.de/wp-content/uploads/2022/09/Jeans-hose-verdeckte-knopfleiste-naehen-diy-10c-vordere-mitte-zusammenstecken.jpg)
Place the left front edge at this position and pin in place.
11. Design of fly and inseam
![Jeans-pants-concealed-button-front-seam-diy-11a-crotch-seam-with-hammer-flat-tapping smartPATTERN sewing instructions for slit with concealed button placket on jeans - hammer the crotch seam flat](https://smartpattern.de/wp-content/uploads/2022/09/Jeans-hose-verdeckte-knopfleiste-naehen-diy-11a-schrittnaht-mit-Hammer-flachklopfen.jpg)
Before I finish the fly and the crotch seam, I flatten the layers a little with a hammer. I use a wooden board as a base.
![Jeans-pants-concealed-button-front-seam-diy-11b-crotch-seam-flat-tap smartPATTERN sewing instructions for slit with concealed button placket on jeans - cover inseam when tapping flat](https://smartpattern.de/wp-content/uploads/2022/09/Jeans-hose-verdeckte-knopfleiste-naehen-diy-11b-schrittnaht-flachklopfen.jpg)
I cover the fly end from the outside with a piece of fabric so that my fabric is not damaged in the process.
Variants for the fly design
![Jeans-pants-concealed-button-front-seam-diy-11c-design-variations smartPATTERN sewing instructions for slit with concealed button placket on jeans - design variations for the slit design](https://smartpattern.de/wp-content/uploads/2024/03/stiching-varaiants-for-button-fly-at-jeans-trousers.jpg)
The crotch seam can then be topstitched. There are many options for designing the fly and the short crotch seam. You can single or double topstitch the fly, as well as the short crotch seam below the fly. You can work with a horizontal or vertical bartack at the end of the fly. I am showing variant 1 here.
![Jeans-pants-concealed-button-front-seam-diy-11d-crotch-seam-topstitching smartPATTERN sewing instructions for slit with concealed button placket of jeans- topstitch crotch seam](https://smartpattern.de/wp-content/uploads/2022/09/Jeans-hose-verdeckte-knopfleiste-naehen-diy-11d-schrittnaht-uebersteppen.jpg)
When topstitching the crotch seam, it helps to stretch it slightly to avoid creases.
![Jeans-pants-concealed-button-front-seam-diy-11e-slash-buckle smartPATTERN sewing instructions for slit with concealed button placket on jeans - slash selvage](https://smartpattern.de/wp-content/uploads/2024/03/sew-bartacks-to-jeans-button-fly-1.jpg)
Secure fly end
I secure the end of the fly with a bartack. I chose a narrow zig-zag stitch with a stitch width of 1.5 mm and a stitch length of 0.4 mm. The bottom of the fly has to be secured, too. Therefor I place a bartack here (above the end of the fly in the curve; not too high, so that I can still fold the strip apart easily).
![Jeans-trousers-concealed-button-front-seam-diy-11f-option-under-leg-inside-buttoning smartPATTERN sewing instructions for slit with concealed button placket of jeans- option concealed bottom button bar](https://smartpattern.de/wp-content/uploads/2022/09/Jeans-hose-verdeckte-knopfleiste-naehen-diy-11f-option-untertritt-innen-anriegeln.jpg)
If you do not want this second bartack for the sly shield to be visible from the outside in the fly stitching, fold back the front piece and attach the seam allowance of the facing to the fly shield from the inside.
![Jeans-pants-concealed-button-placket-seam-diy-12a-button-position-marking smartPATTERN sewing instructions for slit with concealed button placket on jeans - mark button position](https://smartpattern.de/wp-content/uploads/2022/09/Jeans-hose-verdeckte-knopfleiste-naehen-diy-12a-knopfposition-anzeichnen.jpg)
12. Attach buttons on the button placket
Last but not least, I attach the buttons. To do this, I fold the fly facing to the side and mark the button position on the fly shield through the eyes of the buttonholes. I can now sew my buttons on there or fasten the jeans buttons.
![Jeans-pants-concealed-button-placket-seam-diy-12b-jeans-button-in-insert-tool smartPATTERN sewing instructions for slit with concealed button placket on jeans - insert jeans button parts into the tool](https://smartpattern.de/wp-content/uploads/2022/09/Jeans-hose-verdeckte-knopfleiste-naehen-diy-12b-jeanknopf-in-werkzeug-einsetzen.jpg)
I attach jeans buttons and prepare the appropriate tool by inserting the holders. Then I put the button and button base inside.
![Jeans-pants-concealed-button-placket-seam-diy-12c-button-position-with-elephant-widths smartPATTERN sewing instructions for slit with concealed button placket on jeans - widen fabric for button bottom with awl](https://smartpattern.de/wp-content/uploads/2022/09/Jeans-hose-verdeckte-knopfleiste-naehen-diy-12c-knopfposition-mit-ahle-weiten.jpg)
I loosen the fabric at the marked button positions with an awl to make it easier to push the pins of the buttons through the fabric.
![Jeans-pants-concealed-button-front-seam-diy-12d-jeans-button-bottom-push-through smartPATTERN sewing instructions for slit with concealed button placket on a pair of jeans - push the bottom part of the jeans button through the fabric](https://smartpattern.de/wp-content/uploads/2022/09/Jeans-hose-verdeckte-knopfleiste-naehen-diy-12d-jeansknopf-unterteil-durchdruecken.jpg)
I now push the inserted lower part through the opening from below.
![Jeans-pants-concealed-button-front-seam-diy-12e-jeans-button-fastening smartPATTERN sewing instructions for slit with concealed button placket on jeans - fasten jeans button](https://smartpattern.de/wp-content/uploads/2022/09/Jeans-hose-verdeckte-knopfleiste-naehen-diy-12e-jeansknopf-festschlagen.jpg)
Then I fold the side with the top over and hammer the button together.
13. Finished fly with button placket
![Jeans-pants-concealed-button-front-seam-diy-13-finished-slit smartPATTERN sewing instructions for slit with concealed button placket on a pair of jeans - finished concealed button placket](https://smartpattern.de/wp-content/uploads/2022/09/Jeans-hose-verdeckte-knopfleiste-naehen-diy-13-fertiger-schlitz.jpg)
And this is what the finished fly with the concealed button placket looks like.
Below you will find the link to the next step:
If you’re not quite ready yet and perhaps want to start at the beginning, you’ll find some links here: