Sew french pockets into trousers #TV01
In the following tutorial, I will explain step by step how to sew french pockets in various shapes using video and illustrated text instructions. French pockets are also known as wing pockets. They can be shaped in different ways. I chose the squared shape for the instructions because it requires an additional processing step compared to the straight shape. I will explain what else you need to consider with the round bag shape, referred to as banana in the configurator, in the relevant sections.
The instructions for the squared bag shape are not included in the video. If you have decided on this shape, please take a look at the following illustrated text instructions so that you know what you need to pay attention to.
1. This is required
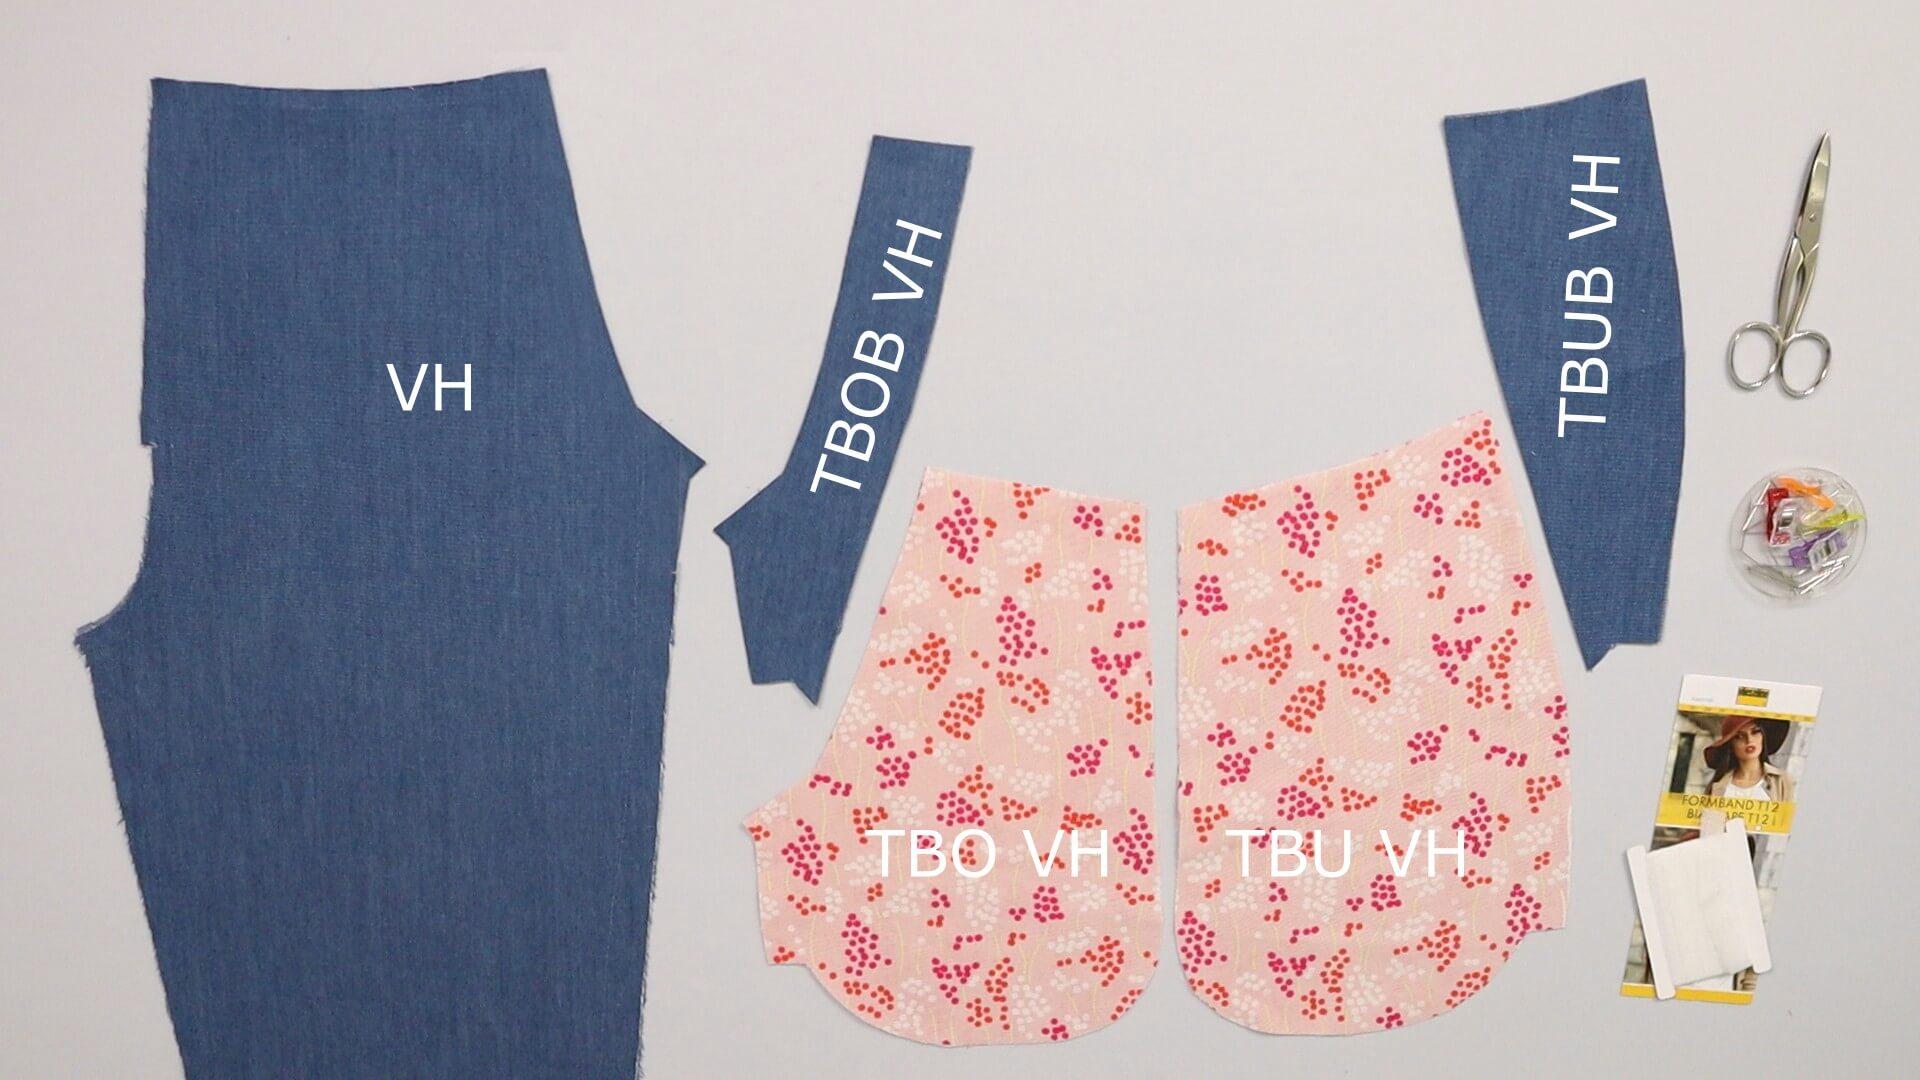
Pattern pieces made from shell fabric:
- front pieces (VH) – 1 pair (the pocket opening is already cut away here – see last point of the fitting instructions)
- upper pocket bag facing (TBOB VH) – 1 pair
- lower pocket bag facing (TBUB VH) – 1 pair
Pattern pieces made from lining fabric:
- upper pocket bag (TBO VH) – 1 pair
- lower pocket bag (TBU VH) – 1 pair
Tools and aids:
- pins or clips
- scissors
- edge tape (for straight pocket opening: e.g. T20 from Vlieseline; for shaped and angular pocket opening: e.g. T12 from Vlieseline)
2. Sew pocket facings onto pocket bags
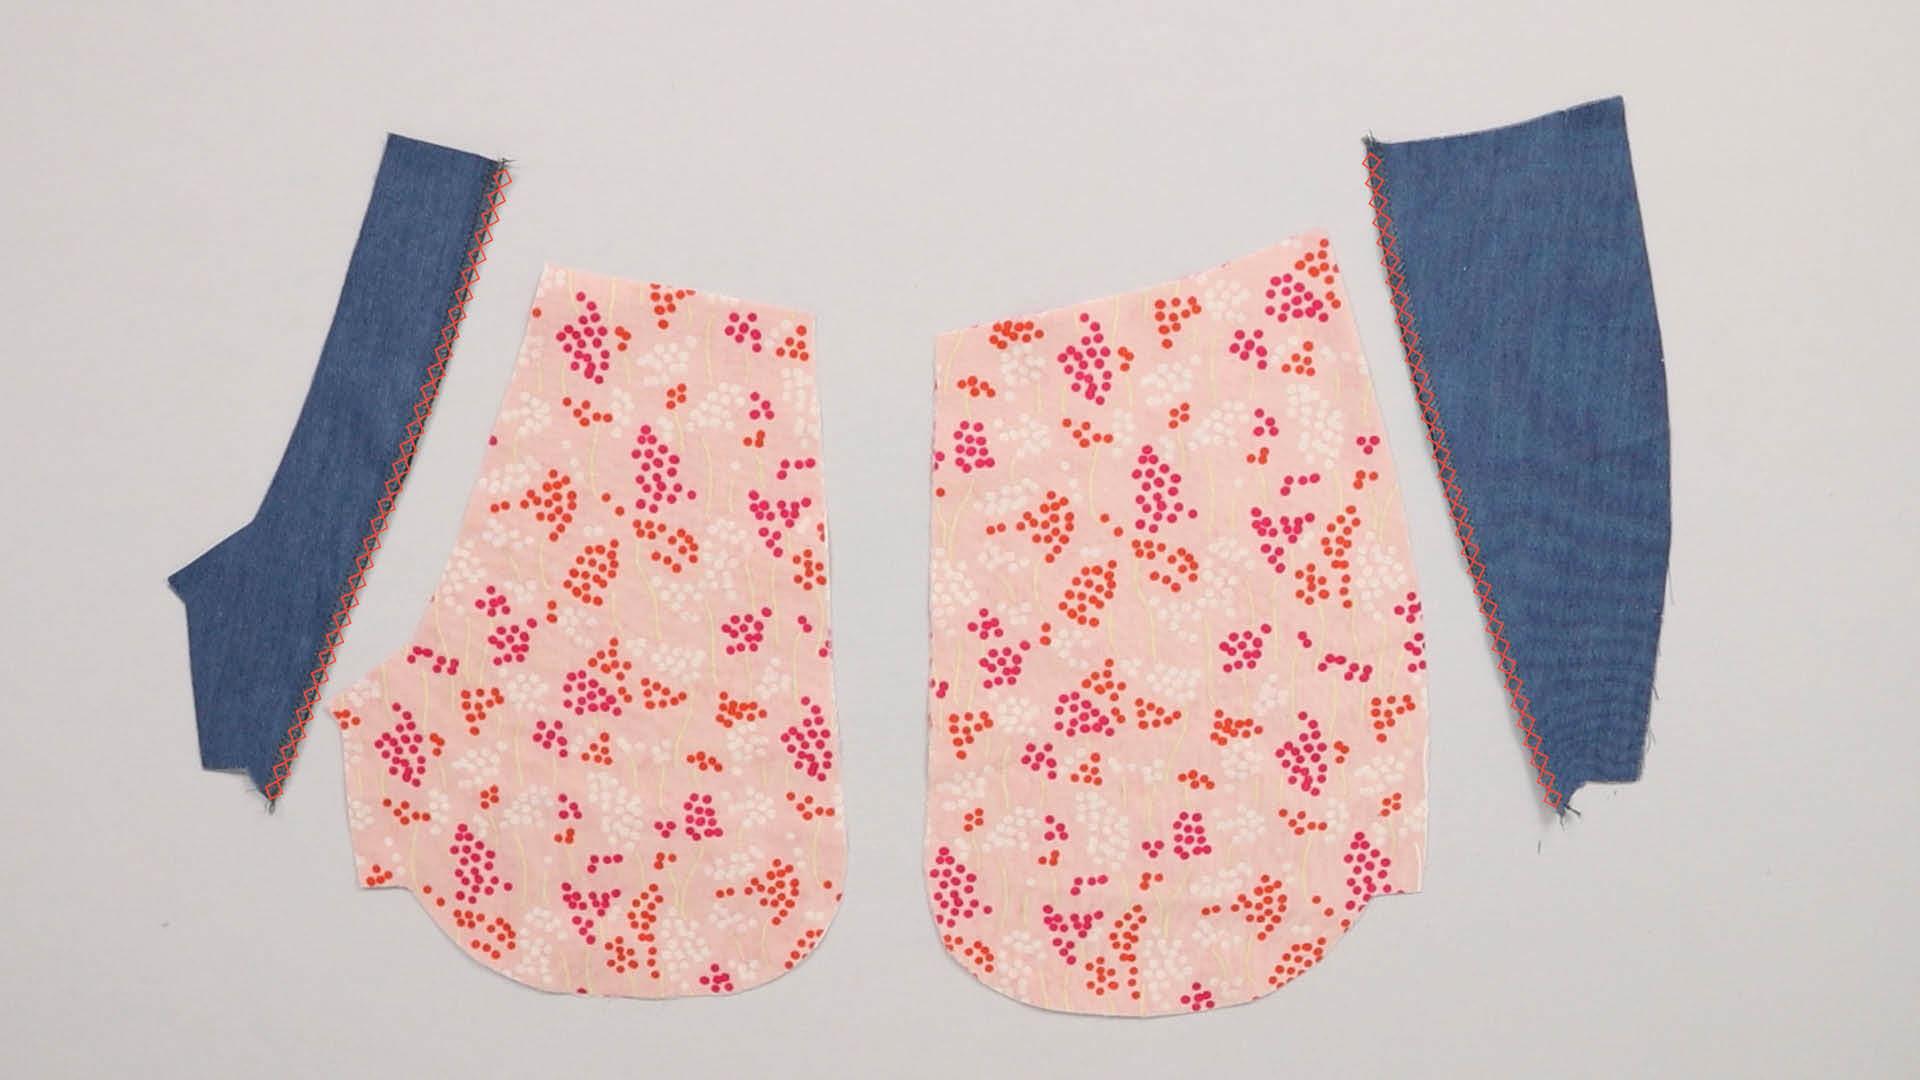
The front edges of the upper and lower pocket bag facing are finished with an overlock or zigzag seam.
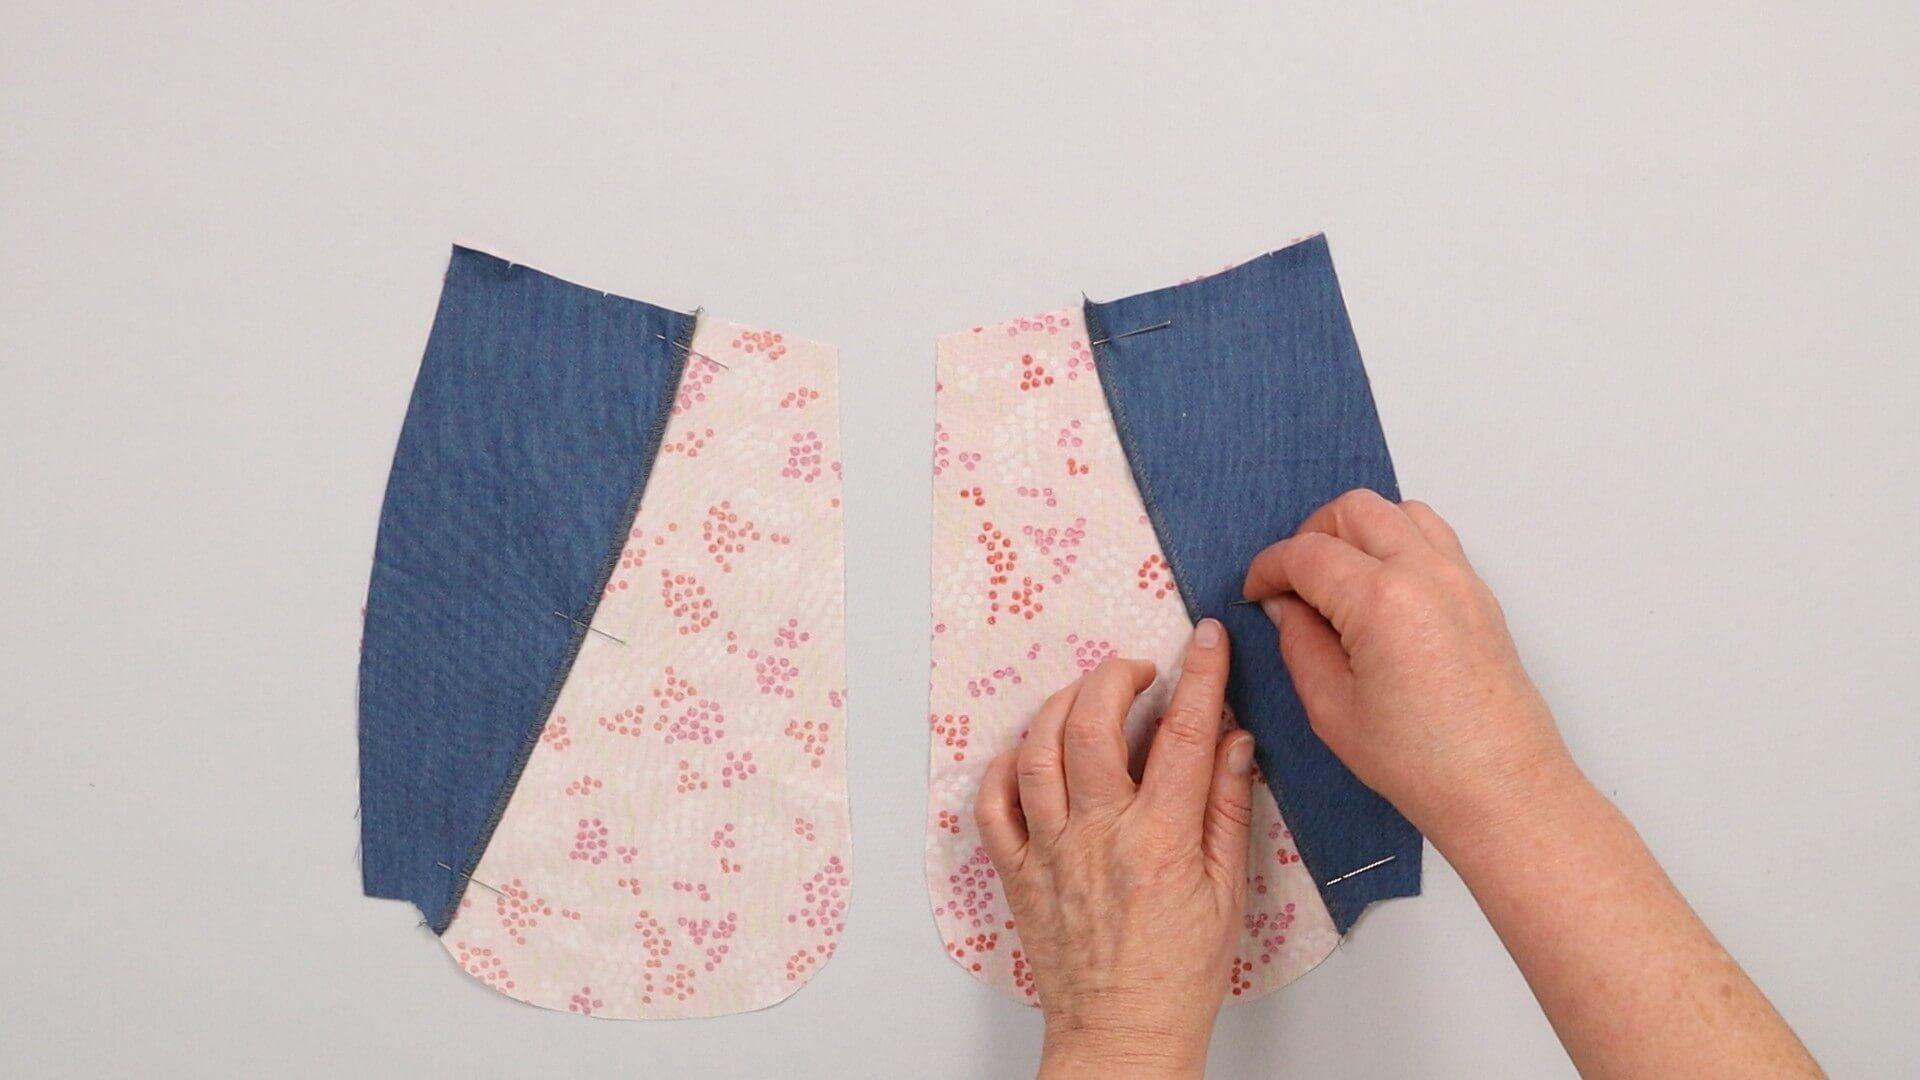
Place the top facing on the top pocket bag and the bottom facing on the bottom pocket bag so that the shape and notches match.
In this example the right side of the pocket bag fabric will be seen inside the trousers. If you choose to have the right side of the pocket bag facing inside your pockets, you have to align the pieces the opposite way.
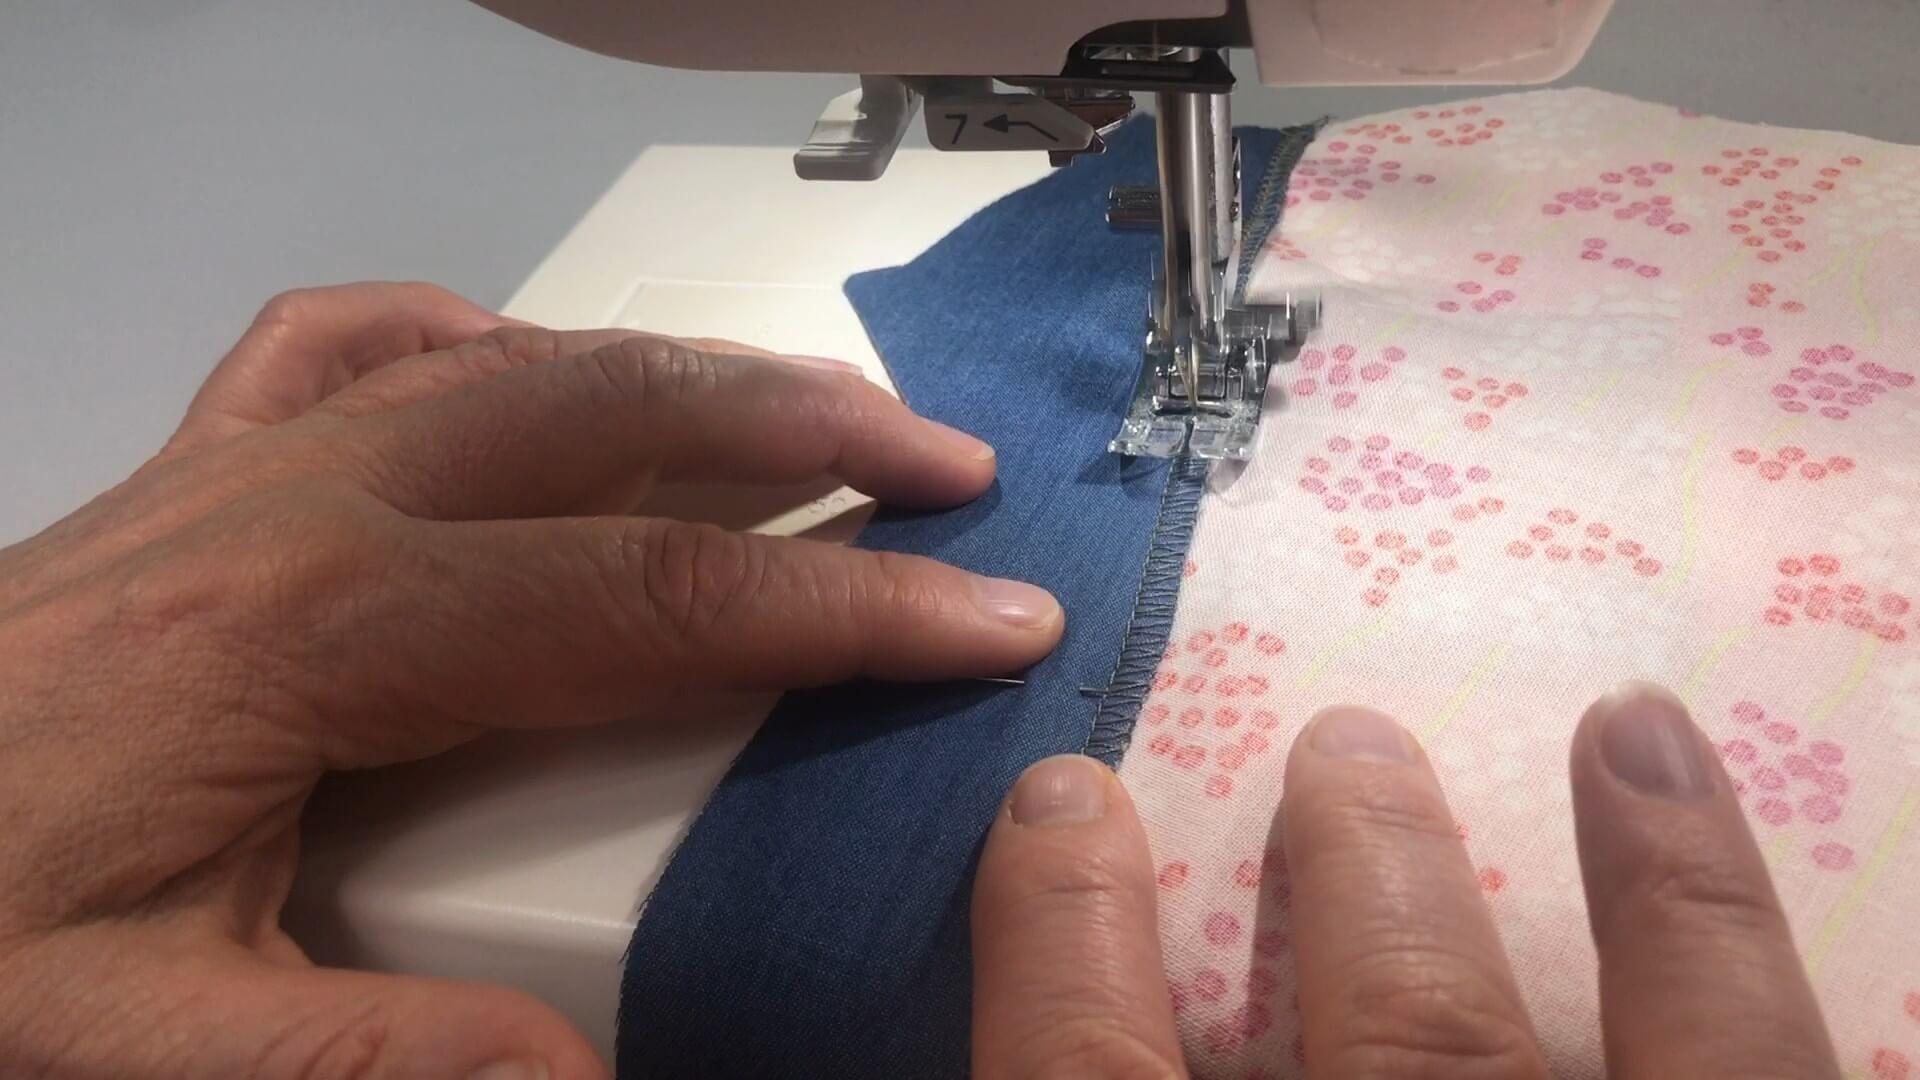
The facing is stitched onto the pocket lining right side facing up by 3 mm distance to the edge and within the overlock seam. If you are using lightweight fabric you can also choose to fold the edge over by 10mm and omit finshing it with the overlock machine.
3. Secure the pocket entry on the front piece
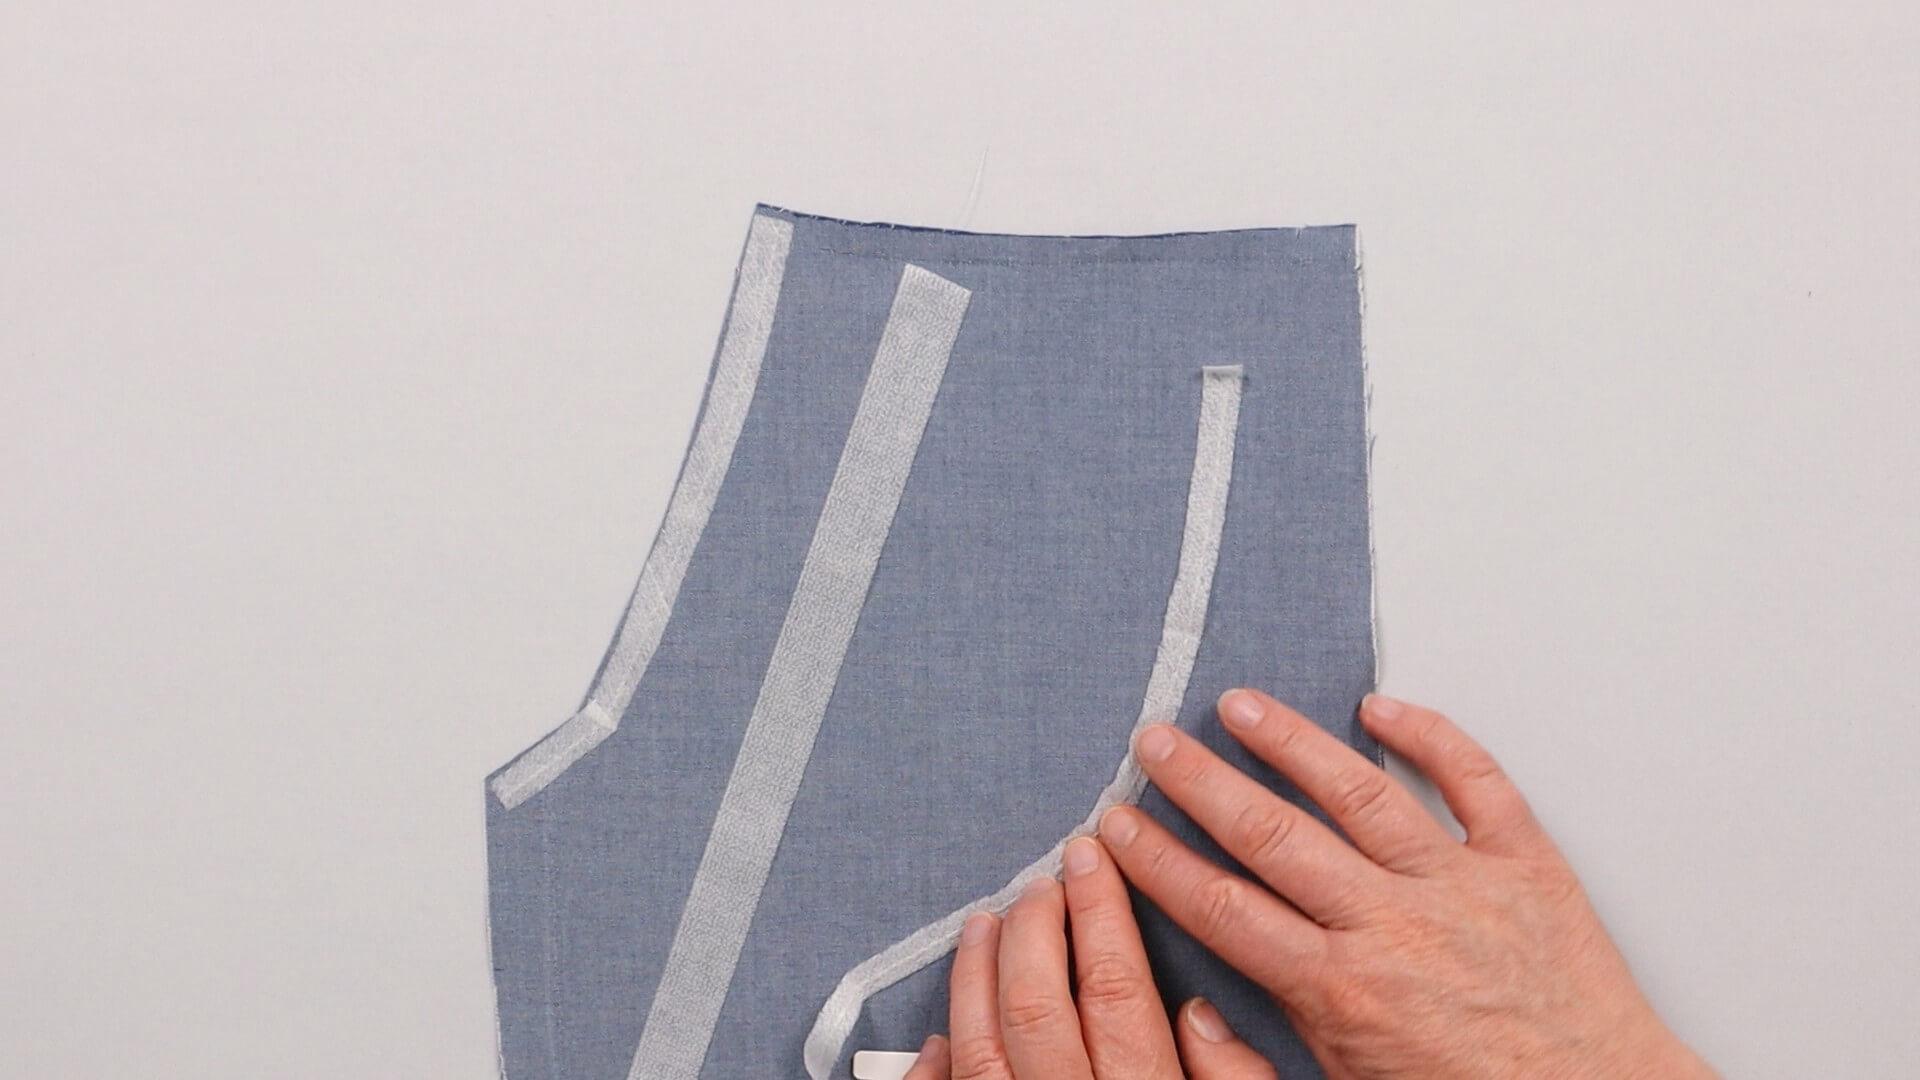
The edge tape is ironed onto the the pocket opening. This will prevent the fabric from stretching. If you don’t have any ribbon available, you can also cut a strip of fusible interfacing.
In the picture you can see how the tape is worked in two pieces on the squared pocket shape and ironed onto the opening. Next to it you can see the straight tape that is suitable for the straight pocket, and last you can see how you can lay the shaped tape to make it fit to the rounded edge.
4. Sew on the upper pocket bag
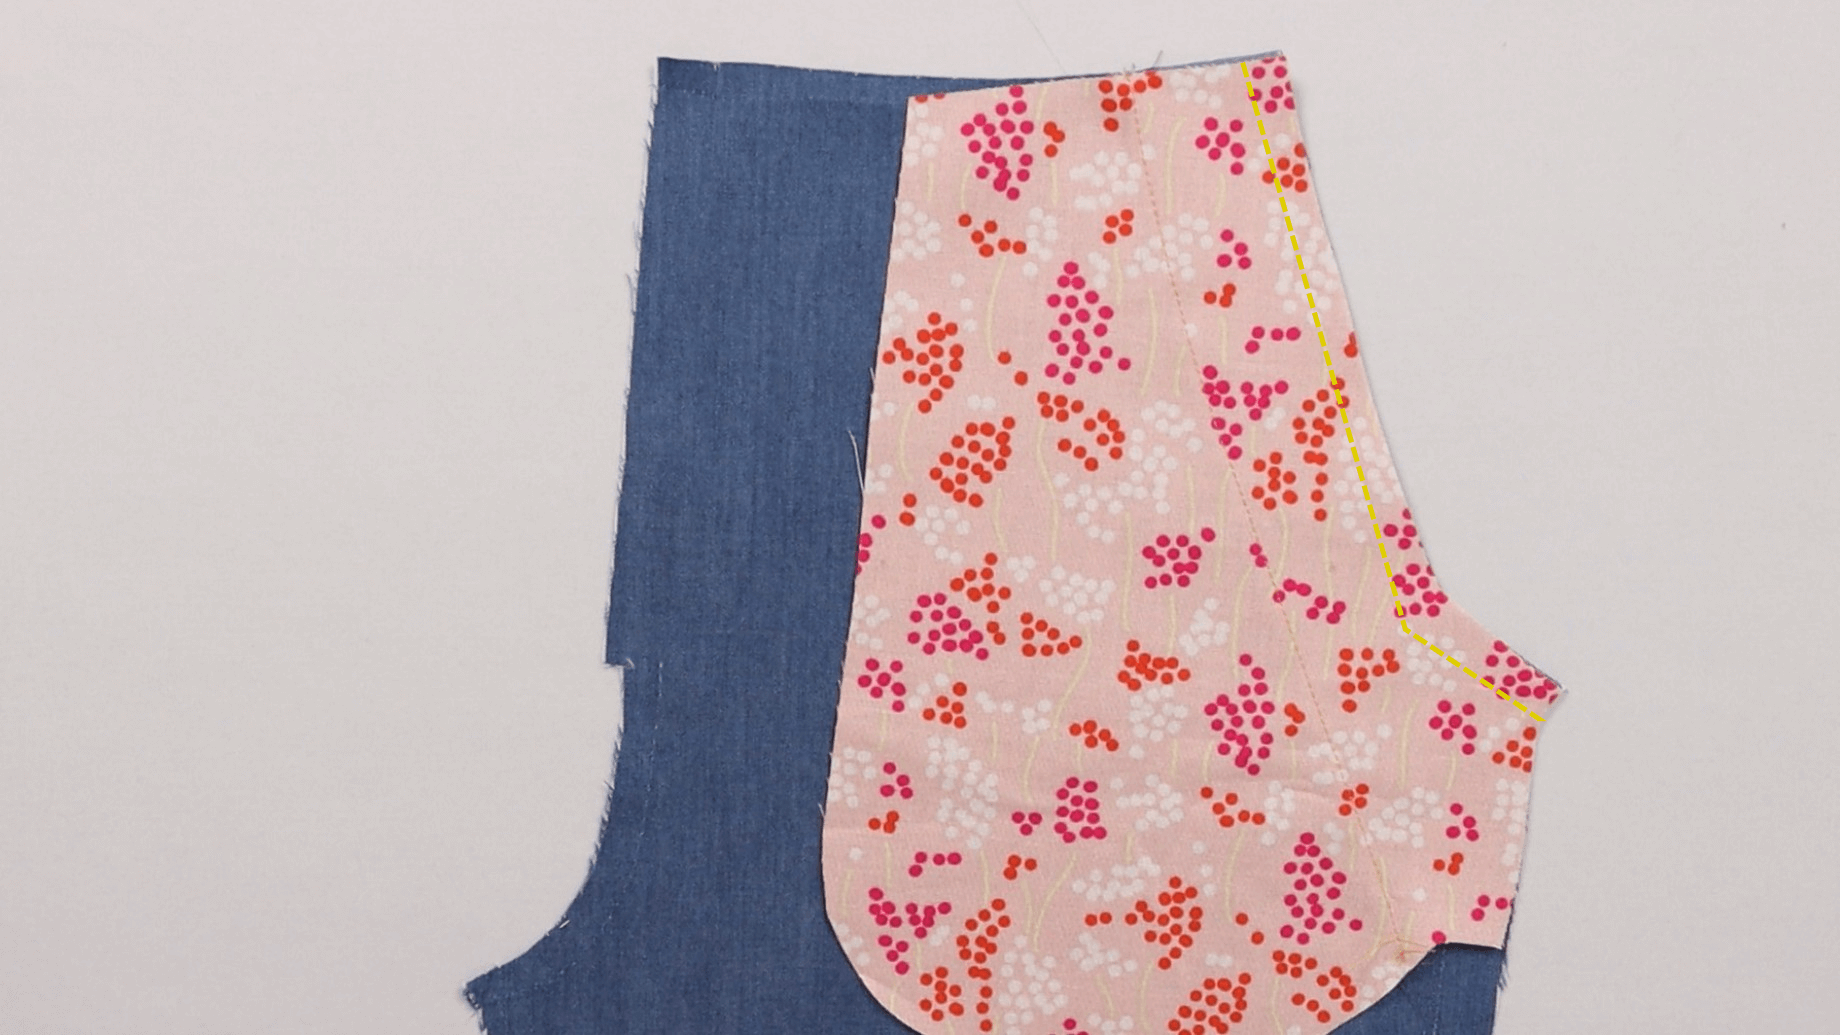
The upper pocket bag is placed with the facing side on the right side of the front trousers. The opening edges are matching, pinned in place and sewn together with a straight stitch at a seam allowane of 1 cm.
5. Seam allowance for a squared or rounded pocket opening
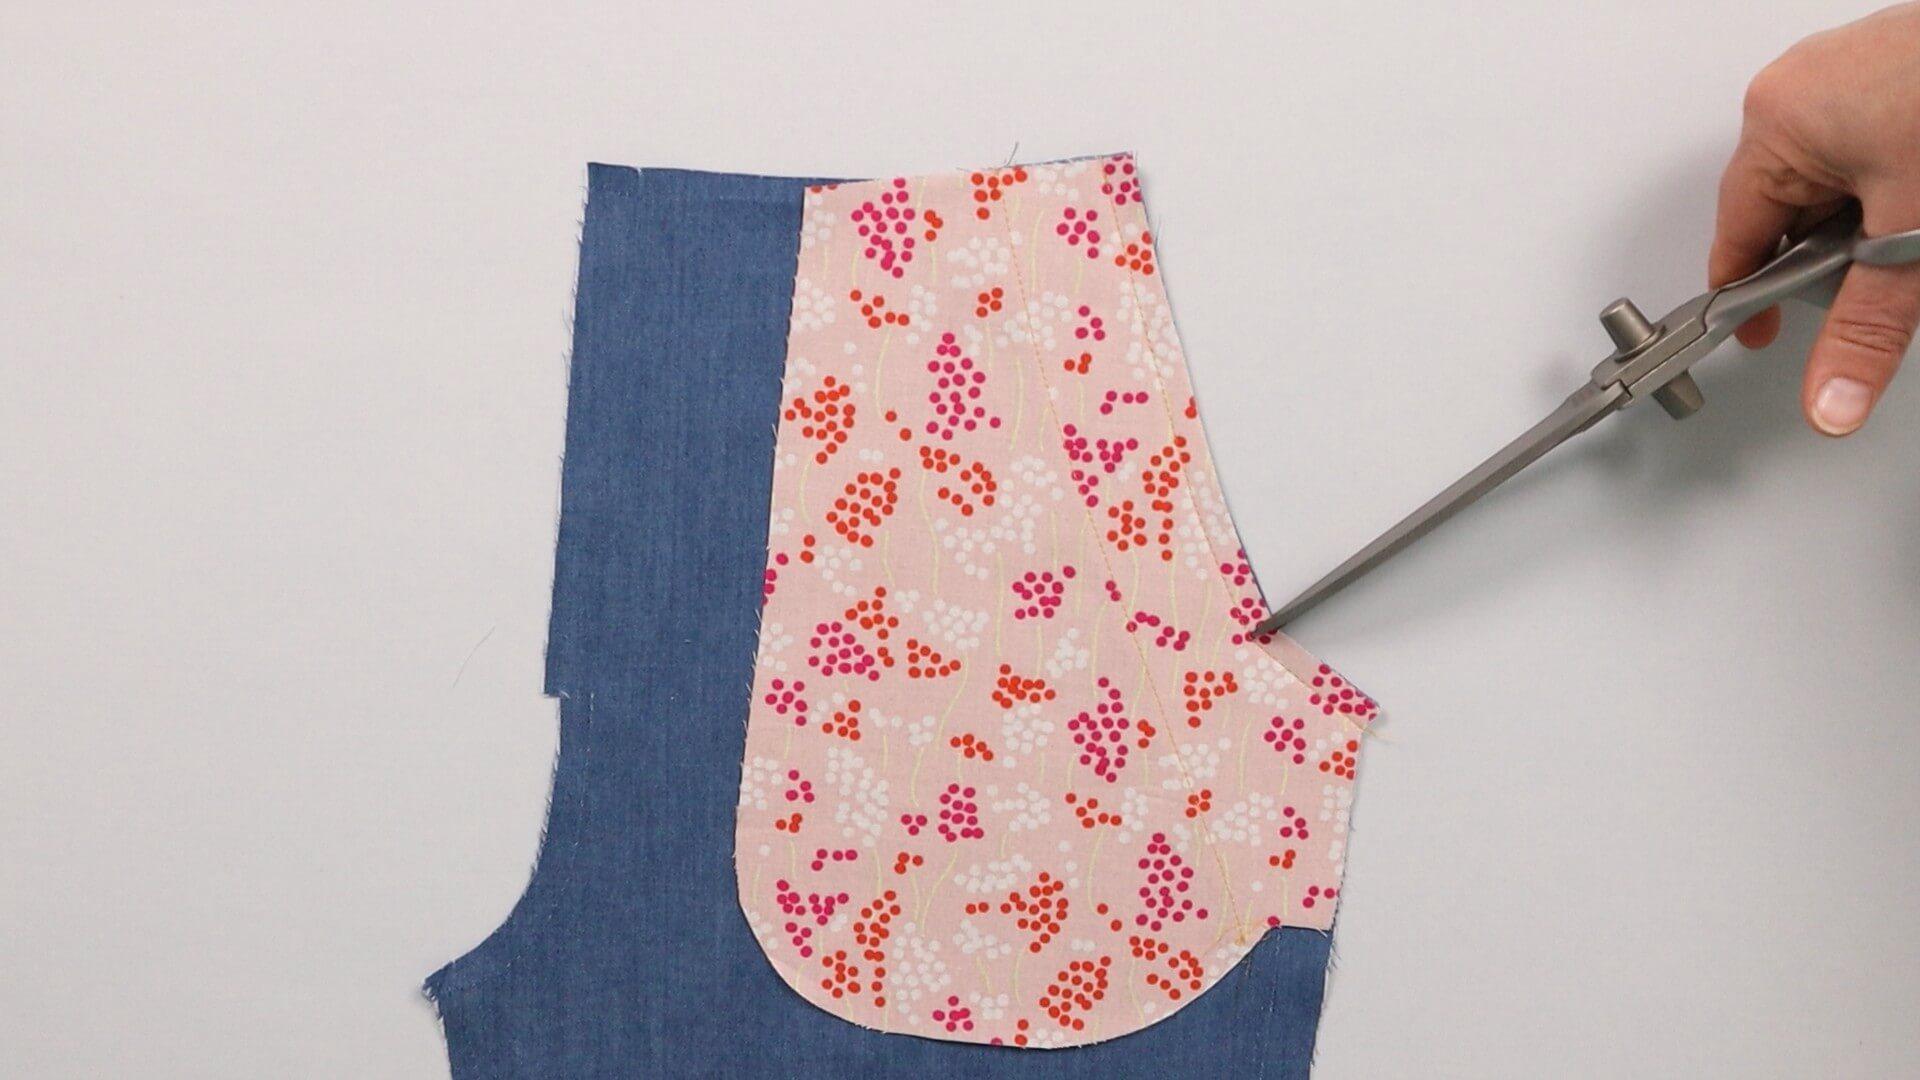
With the square pocket shape, the seam allowance is cut exactly in the corner to just right before the seam. Be careful not to cut into the seam.
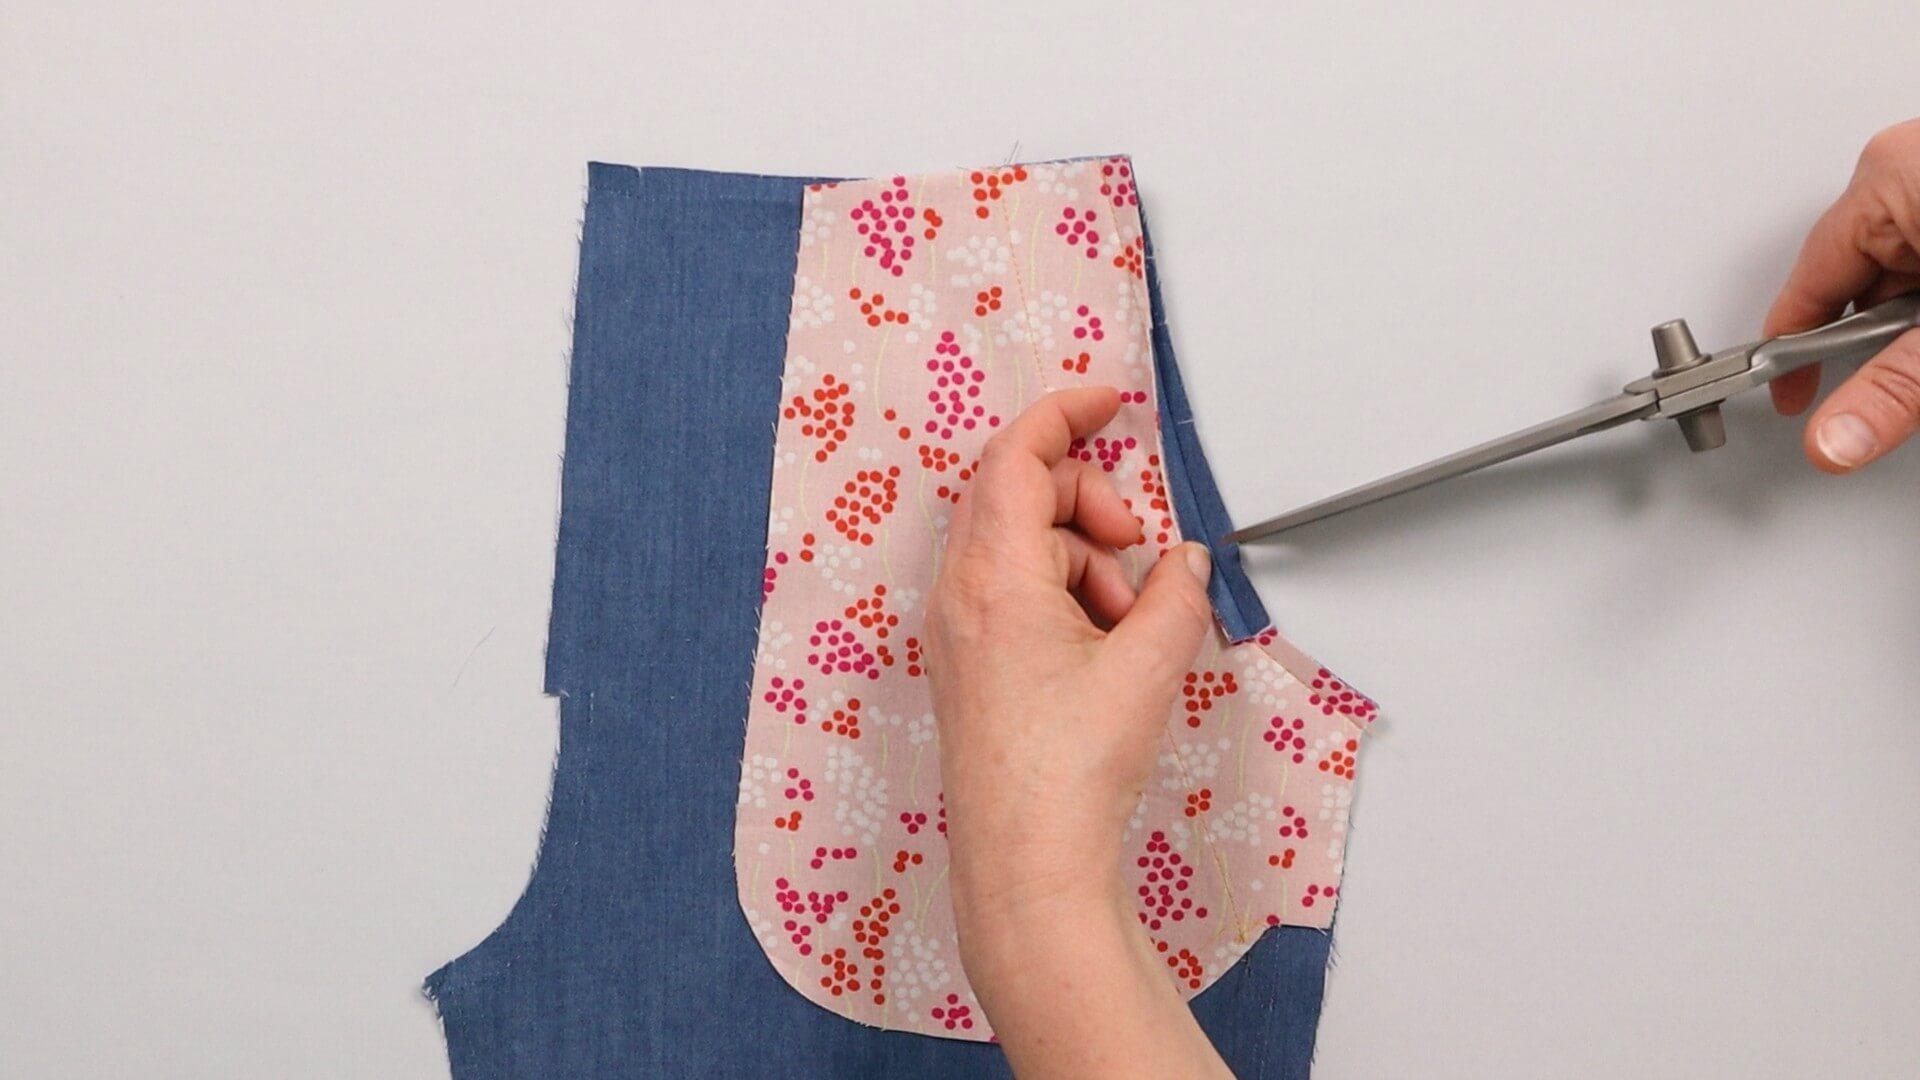
For a round or shaped pocket opening it is important to cut the seam allowance 3 to 5 times up to approx. 2 mm before the seam. It is also advantageous to offset the incisions in the layers so that they are less visible on the outside. As the square pocket opening is slightly rounded at the top, the seam allowance is also cut into this shape. This step is not necessary with the straight pocket opening.
6. Turning and understitching of the french pockets’ opening
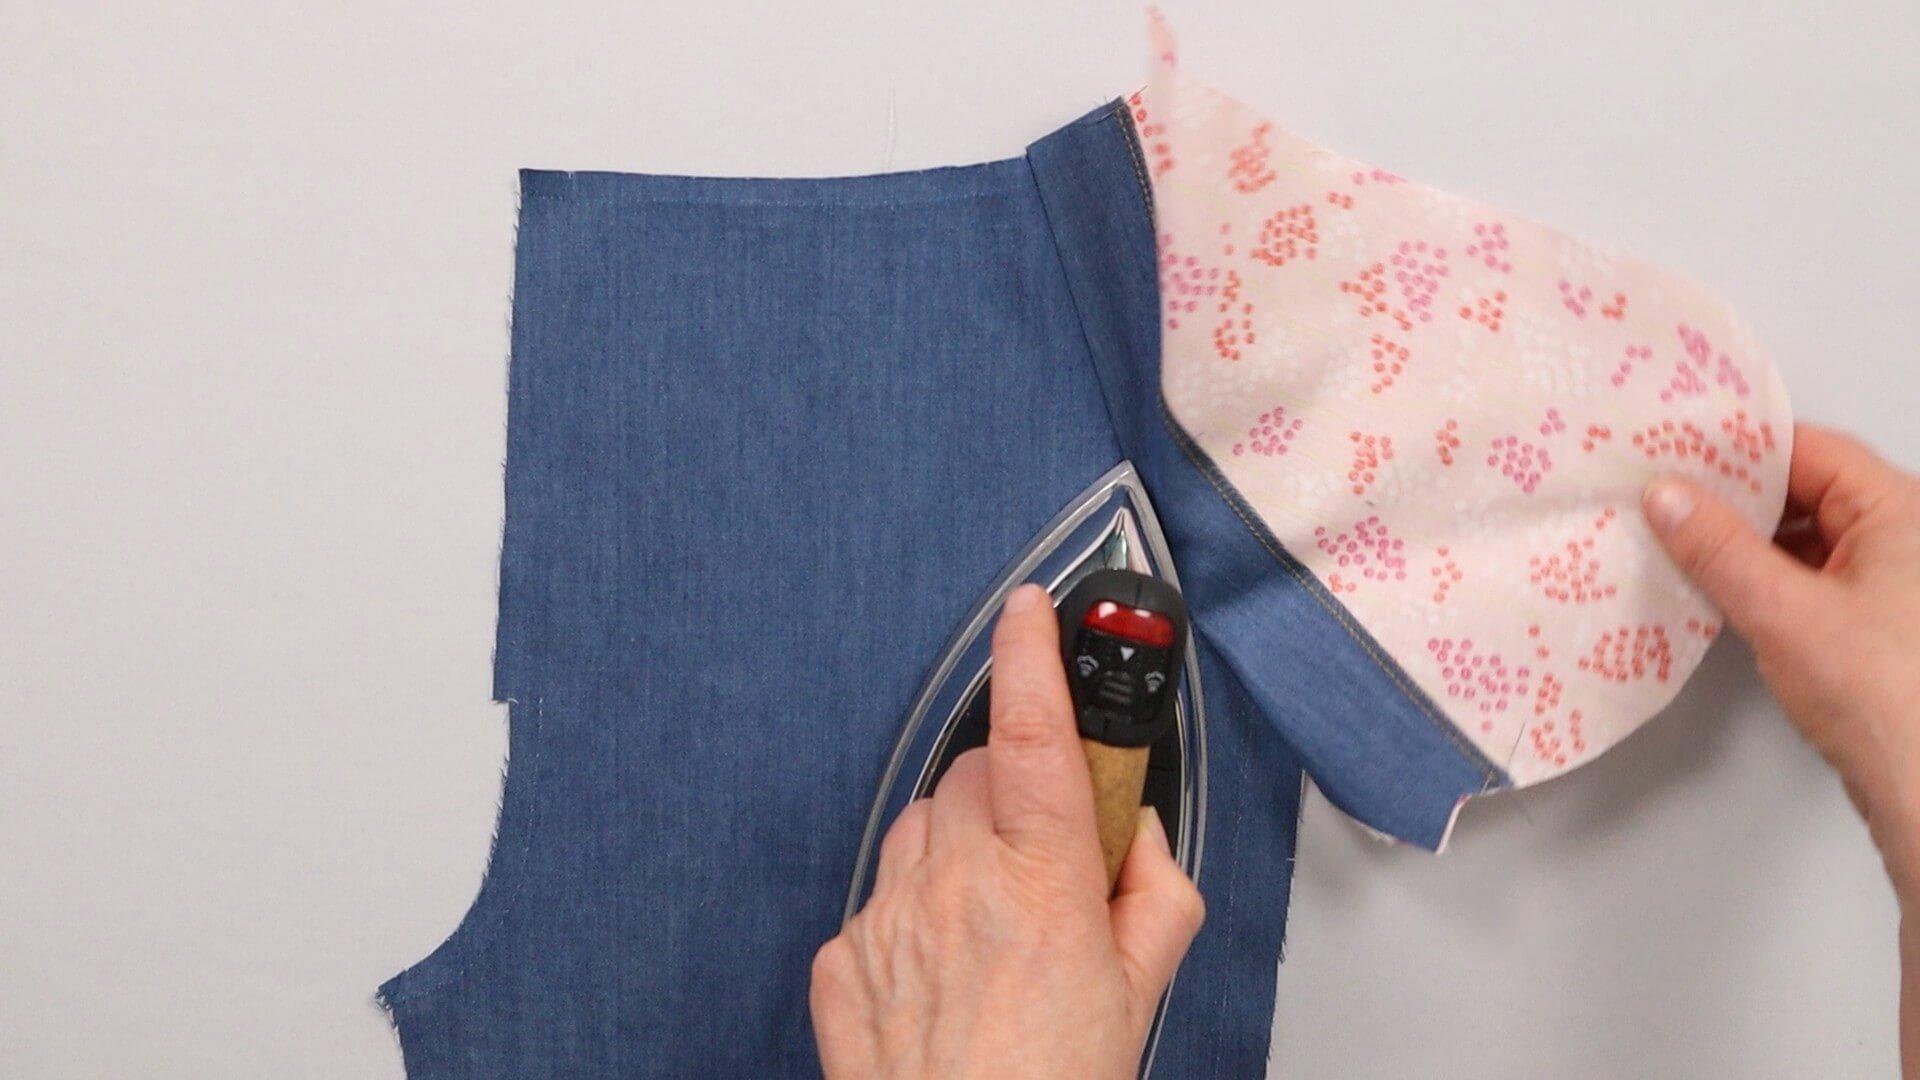
Before you turn the pocket opening, you should iron it over.
Depending on your preferences, the pocket opening can be finished with or without visible ropstitching. If you omit the topstitching, an understitch on the facing side ensures greater durability. When the trousers are positioned as shown in the picture, the facing is stitched to the seam allowance approx. 2 mm from the seam.
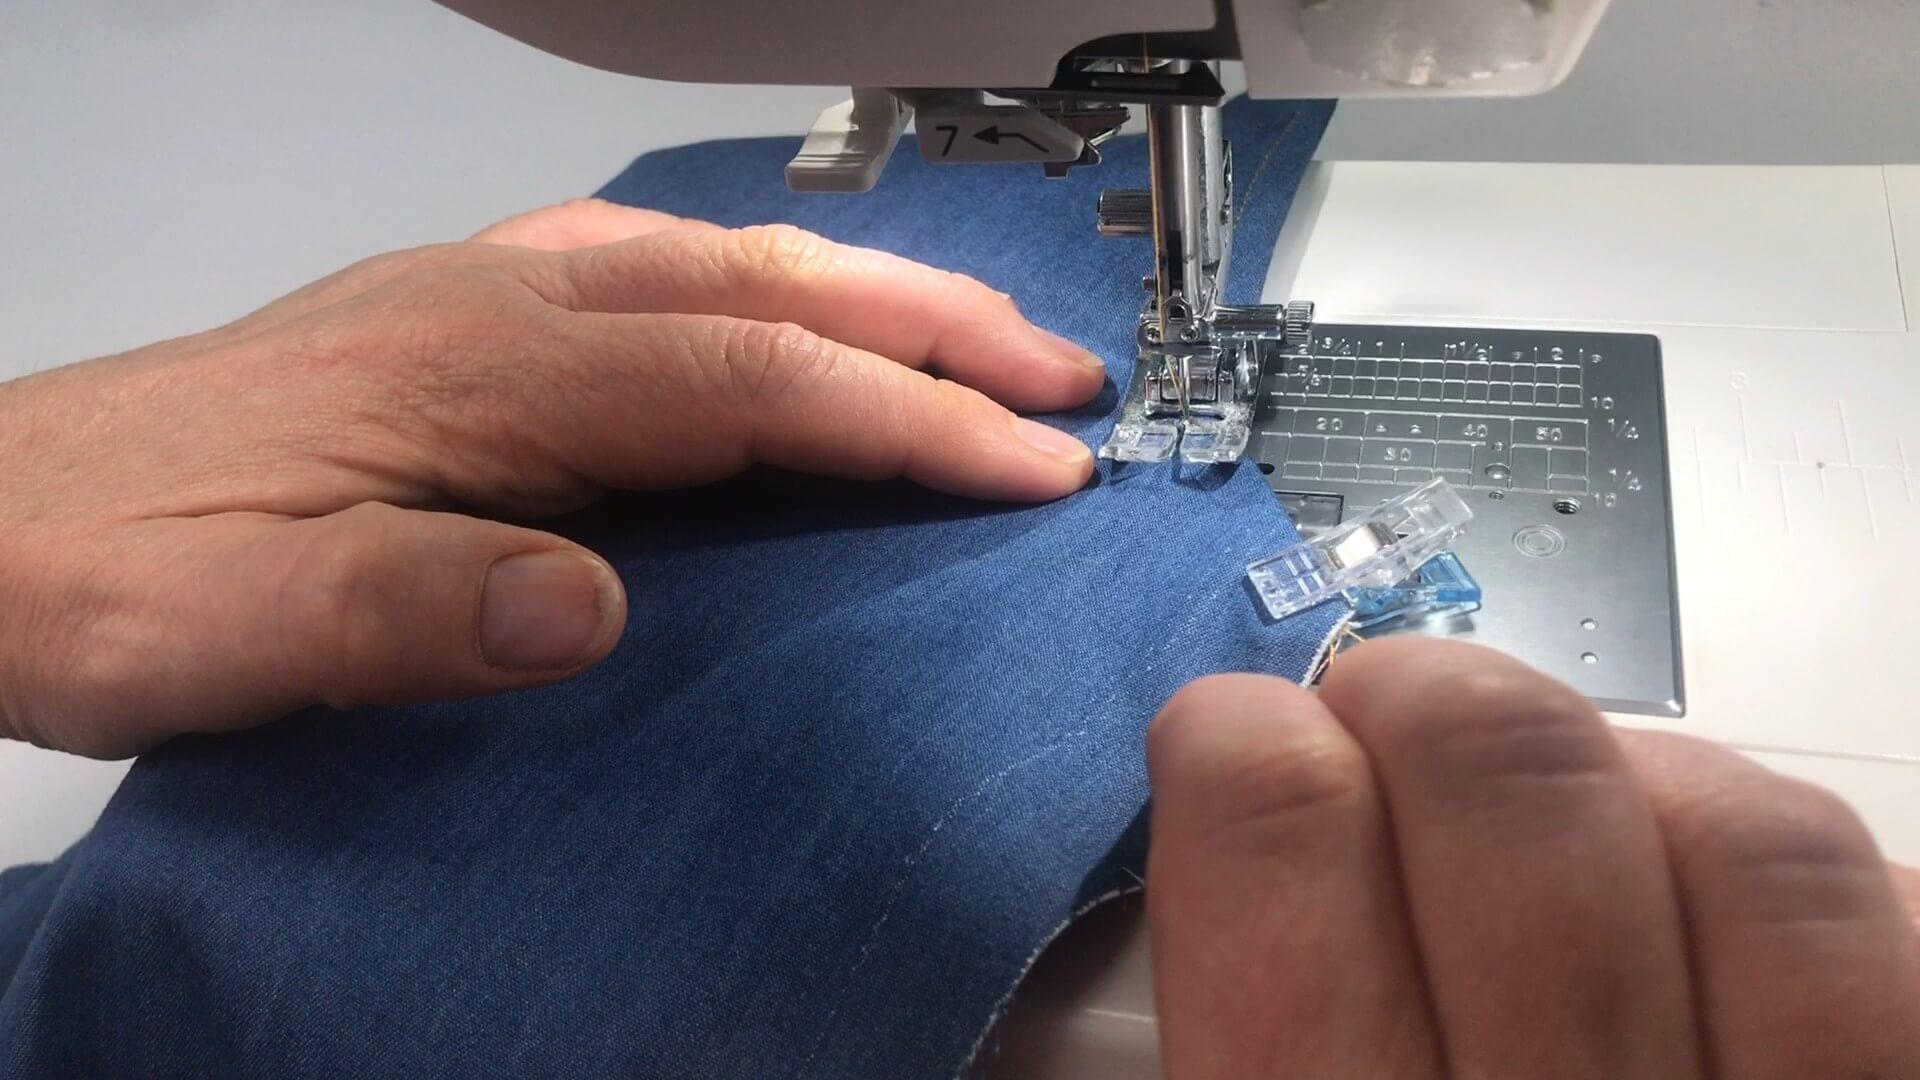
If you want a topstitch on the front of your trouser pocket, topstitch the pocket opening at a distance of 2 to 6 mm from the edge on the right-hand side.
7. Place front piece on lower pocket bag and secure
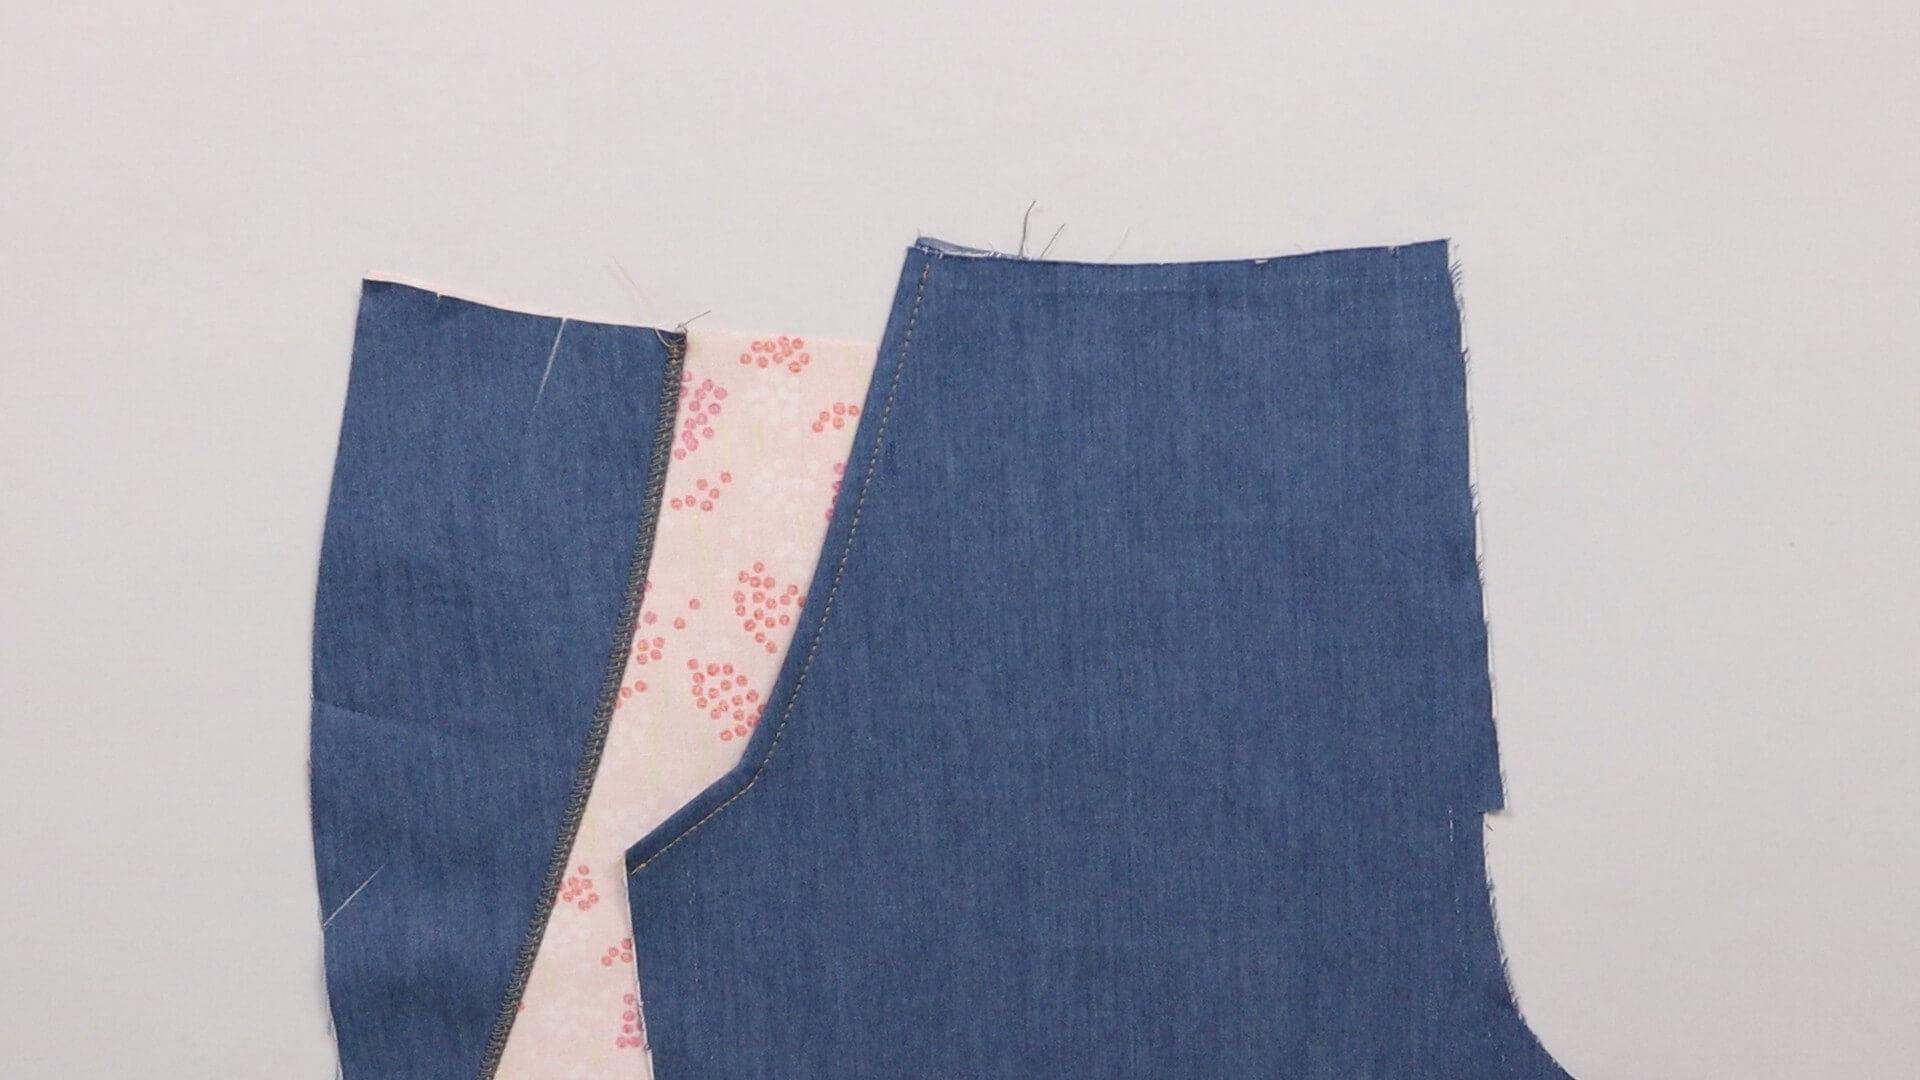
The front trousers are now placed with the opening edge on the lower pocket bag, notches matching. The right side of the fabric of the front trousers and the facing of the lower pocket bag are visible from the top.
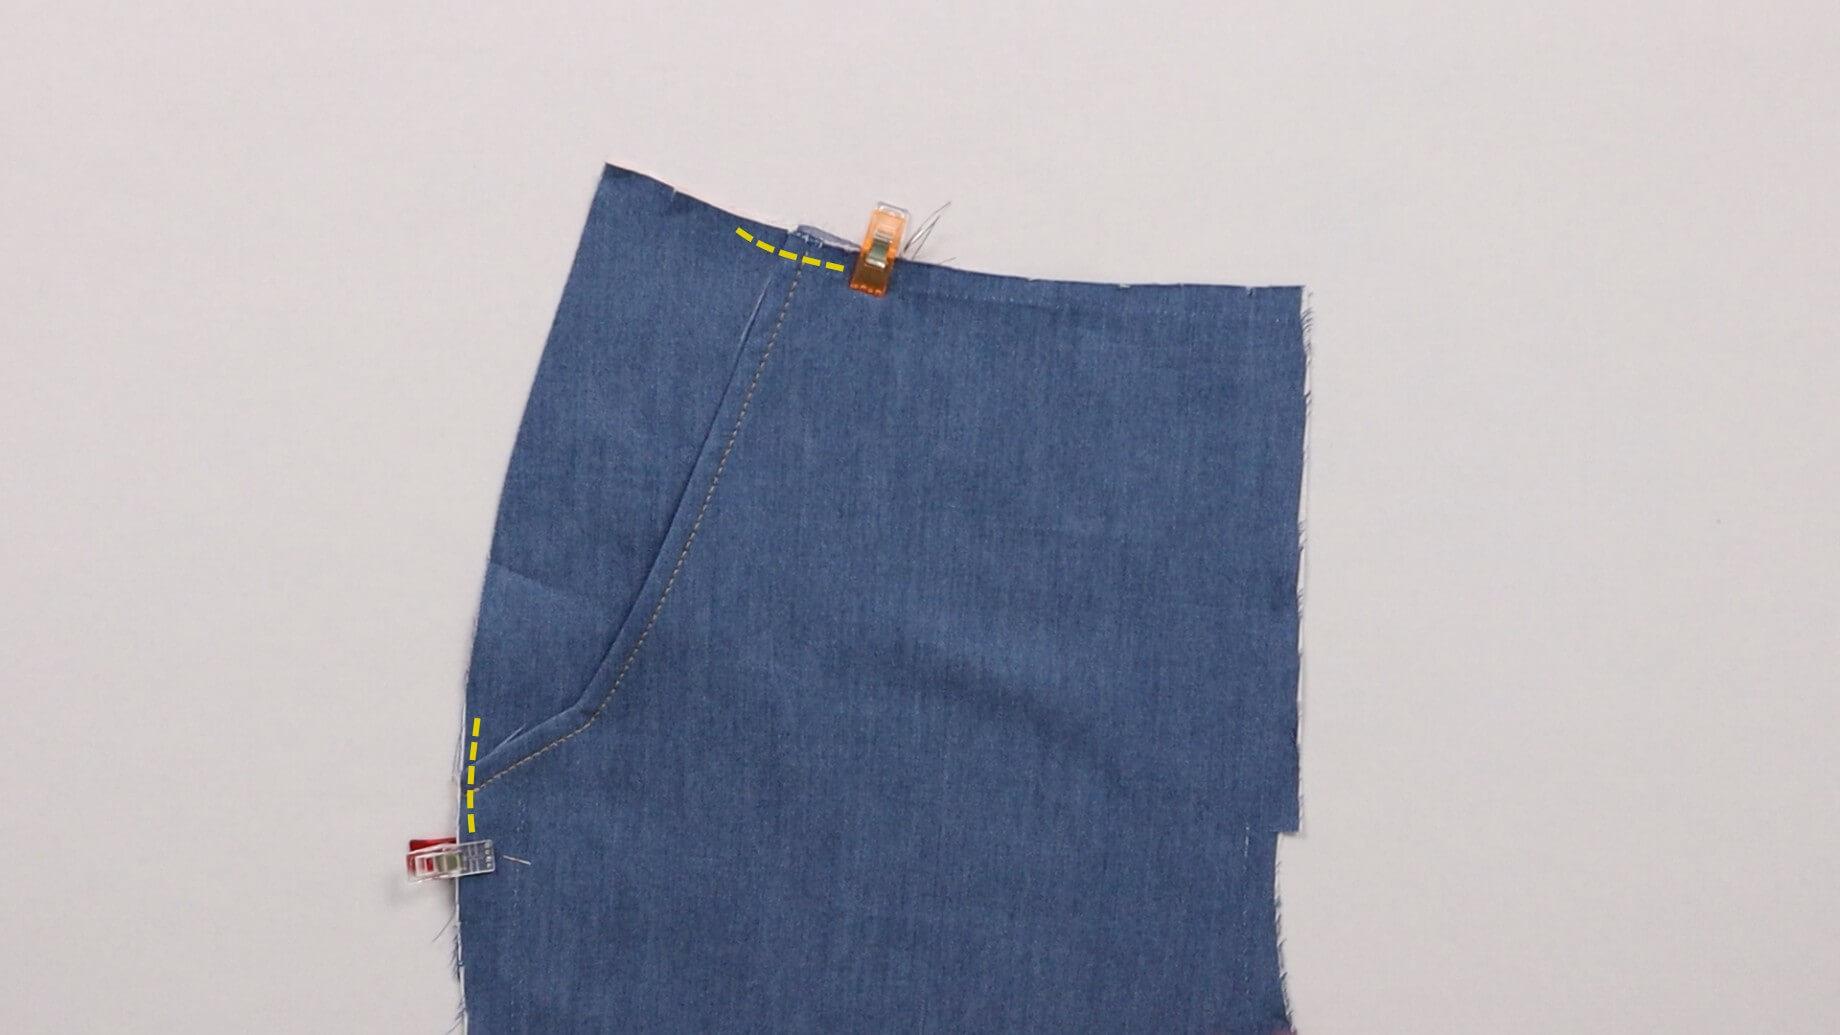
Now fasten the raw edge with pins or clips so that the facing and front trousers form a harmonious line at the waist edge and side seam. Secure at the two marked points with a few stitches so that nothing can slip out of place.
8. Sew the pocket bags together
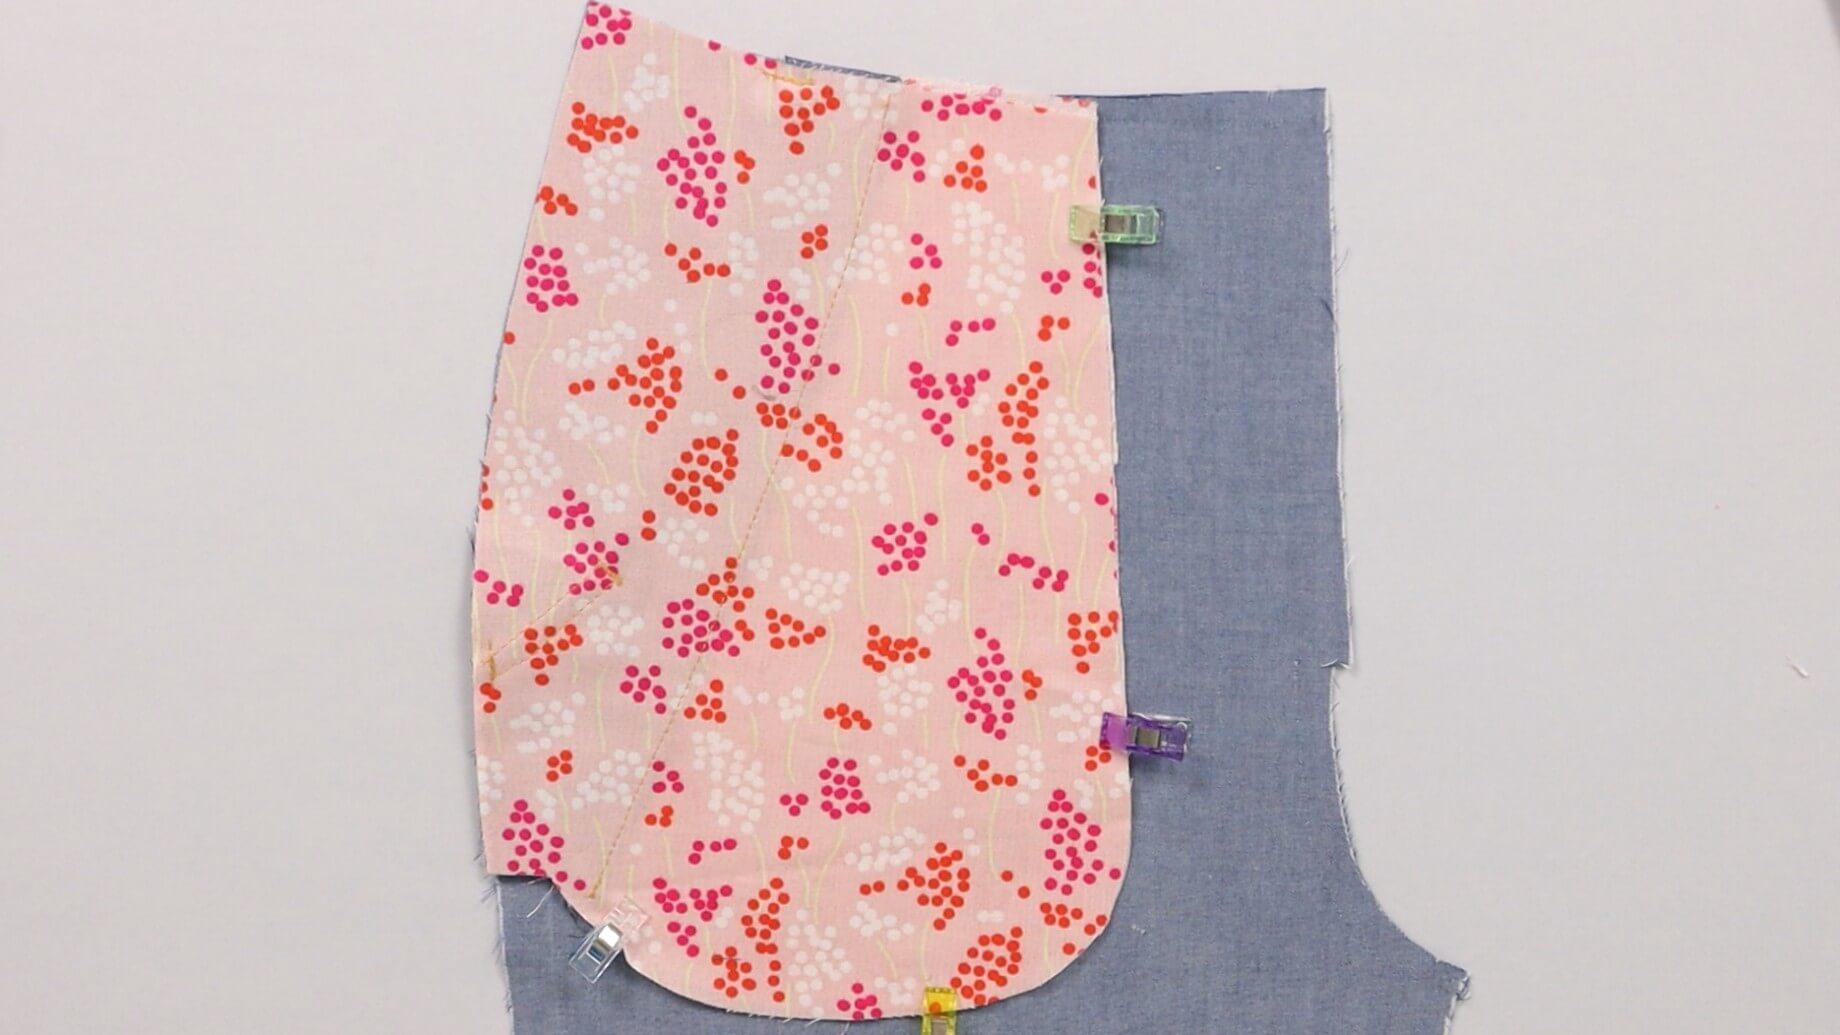
Now the pocket bag still needs to be closed. To do this, the top and bottom pocket bags are pinned together.
The edges of the pocket bags no longer fit together exactly after all the workingsteps. It is important that the edges are not pulled together exactly, but are pinned together smoothly. If necessary, you can trim the edges before sewing them together.
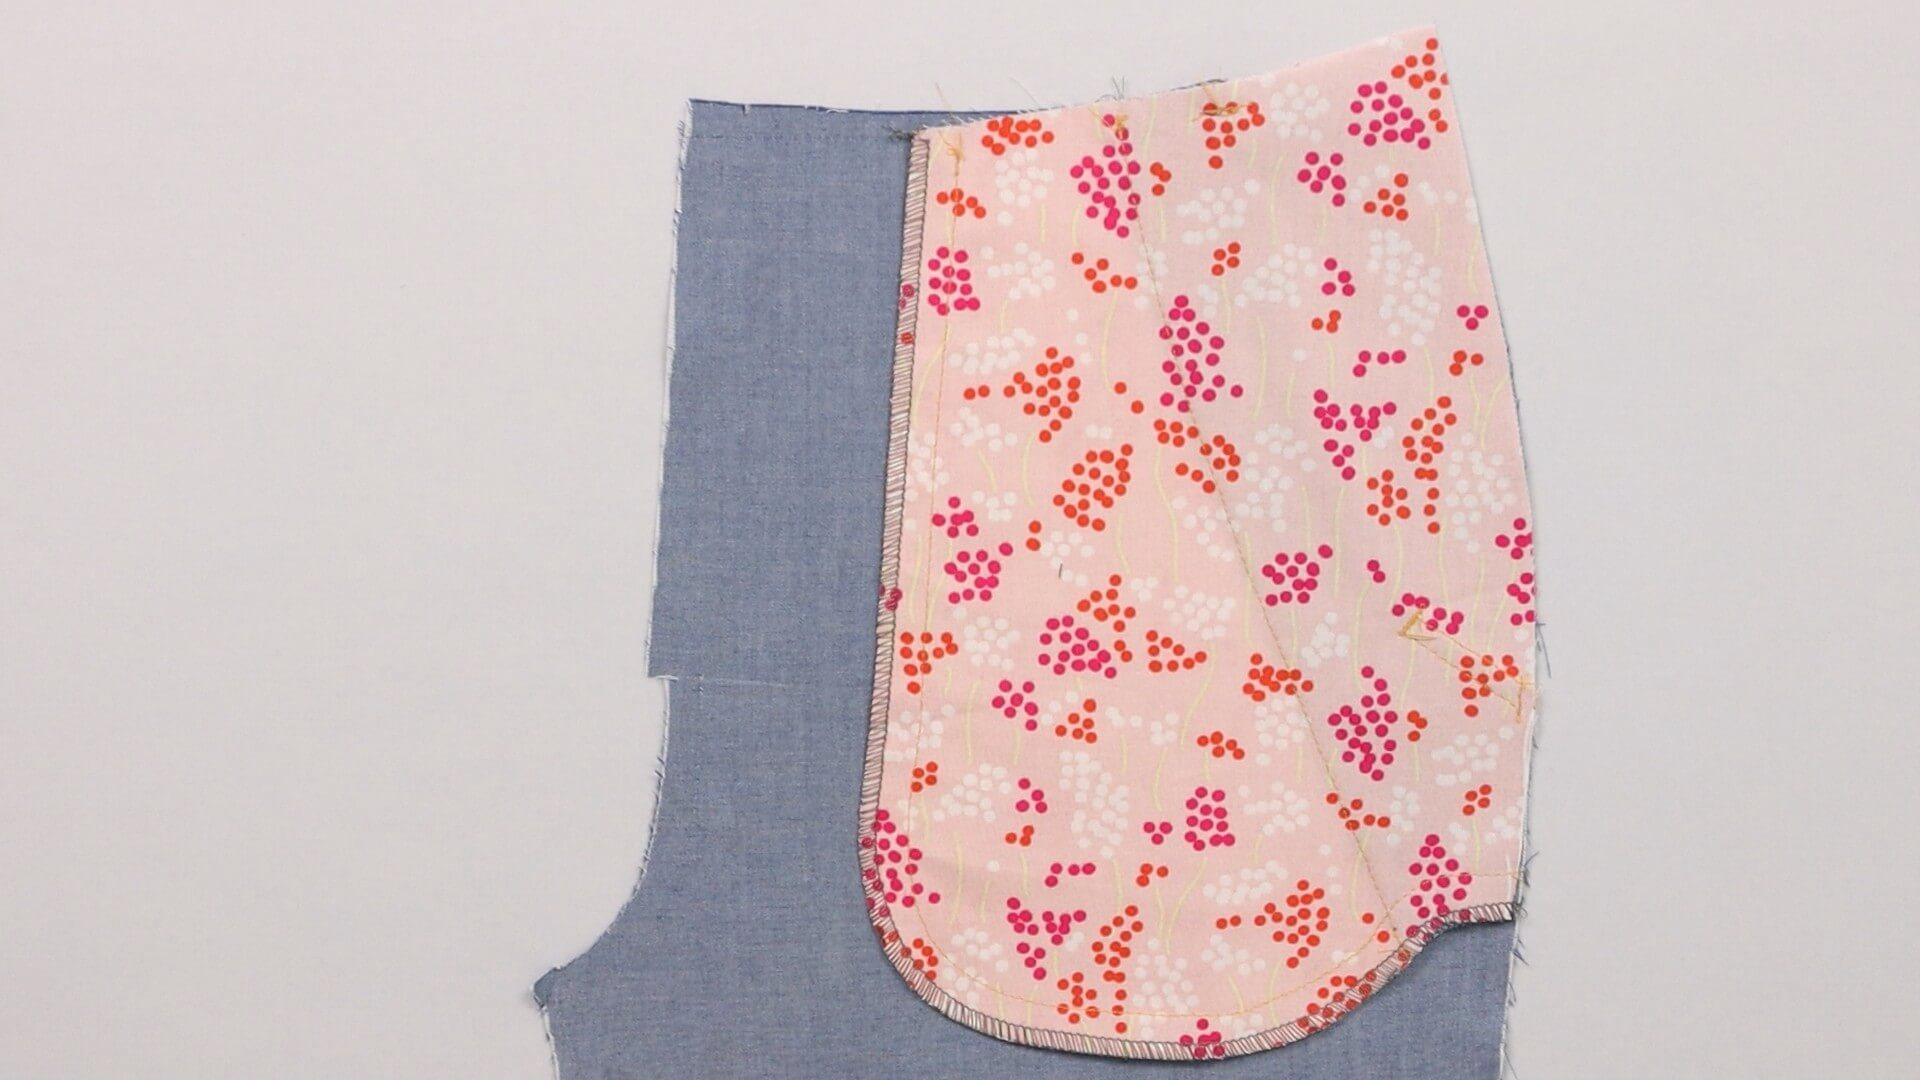
The seam is closed with a straight stitch and the raw edges are finished with an overlock seam or a zigzag stitch.
You can also close the edge with a french seam. If you would like to know how to do this, take a look at the instructions for front jeans pockets.
9. Pleat option
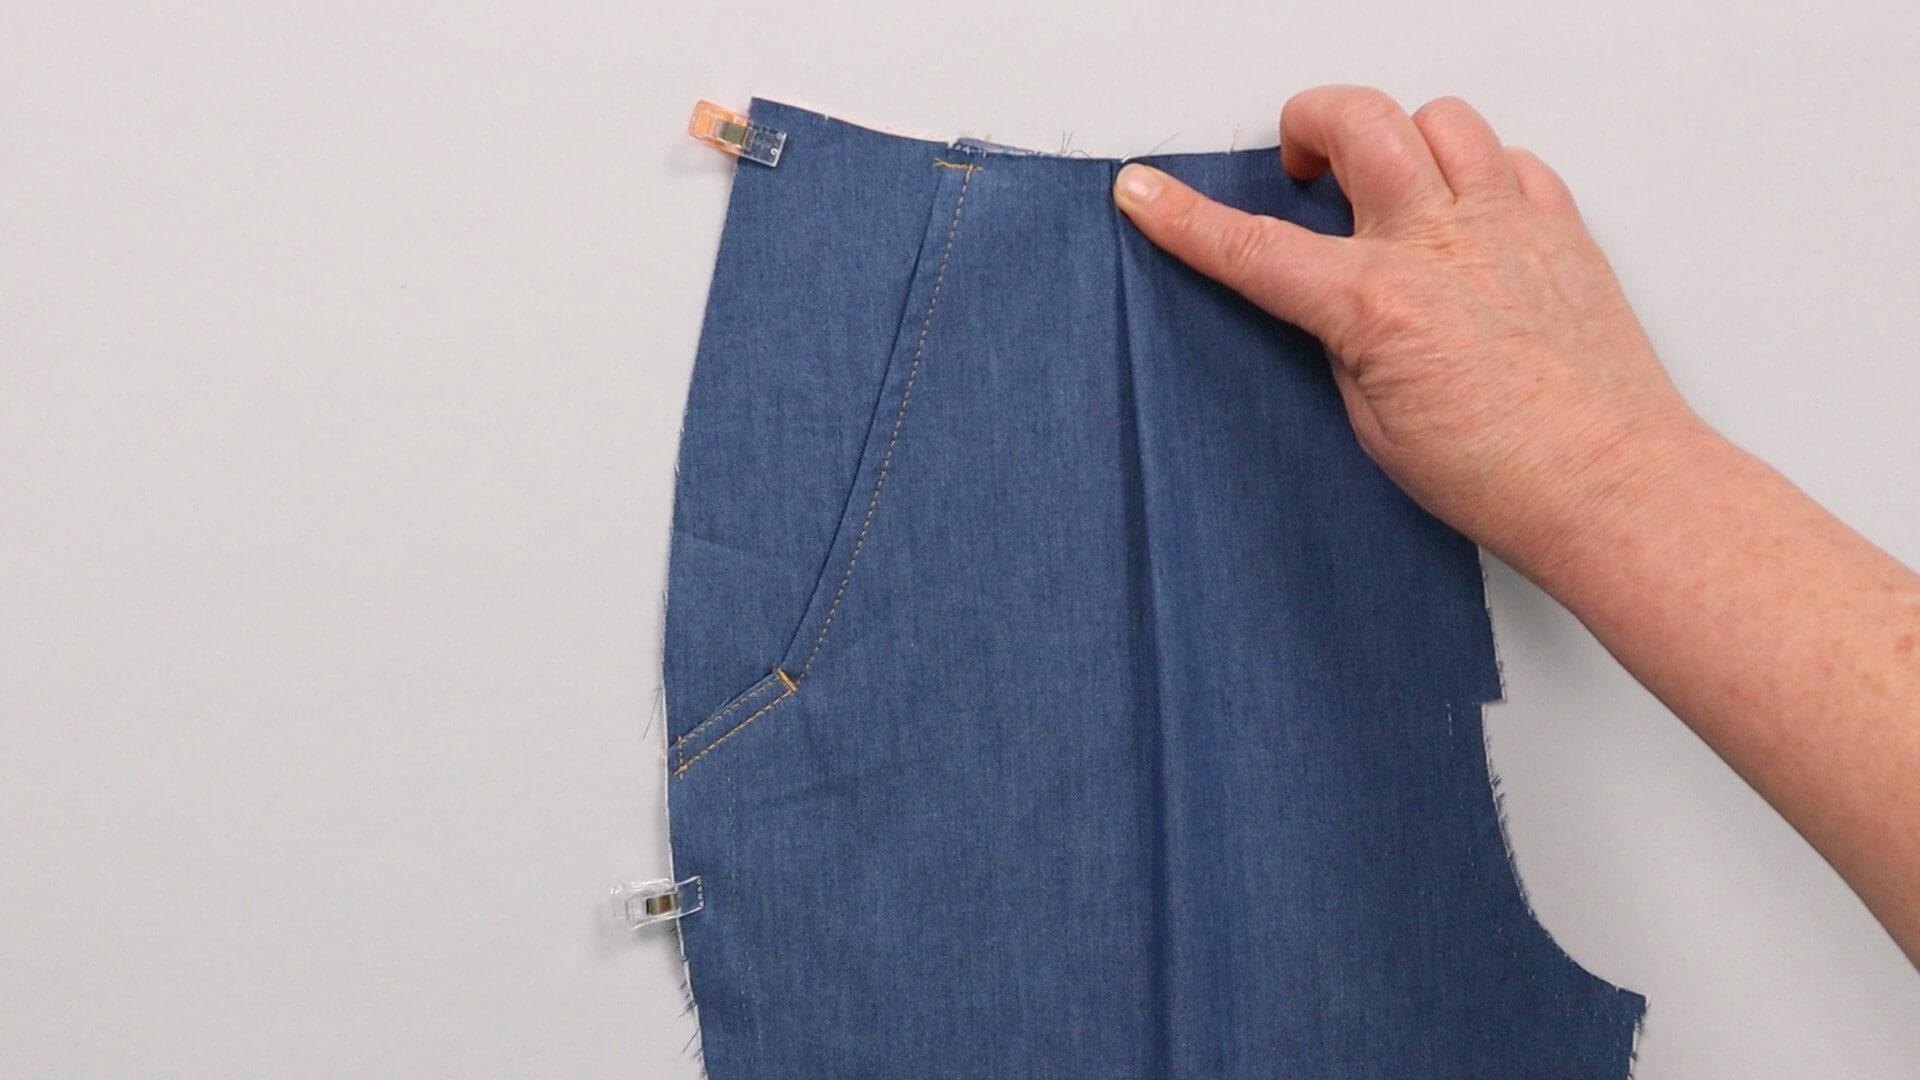
If your trouser shape has a pleat at the waist, this should now be folded and secured in the next step.
10. Auxiliary seam on the french pockets’ bag
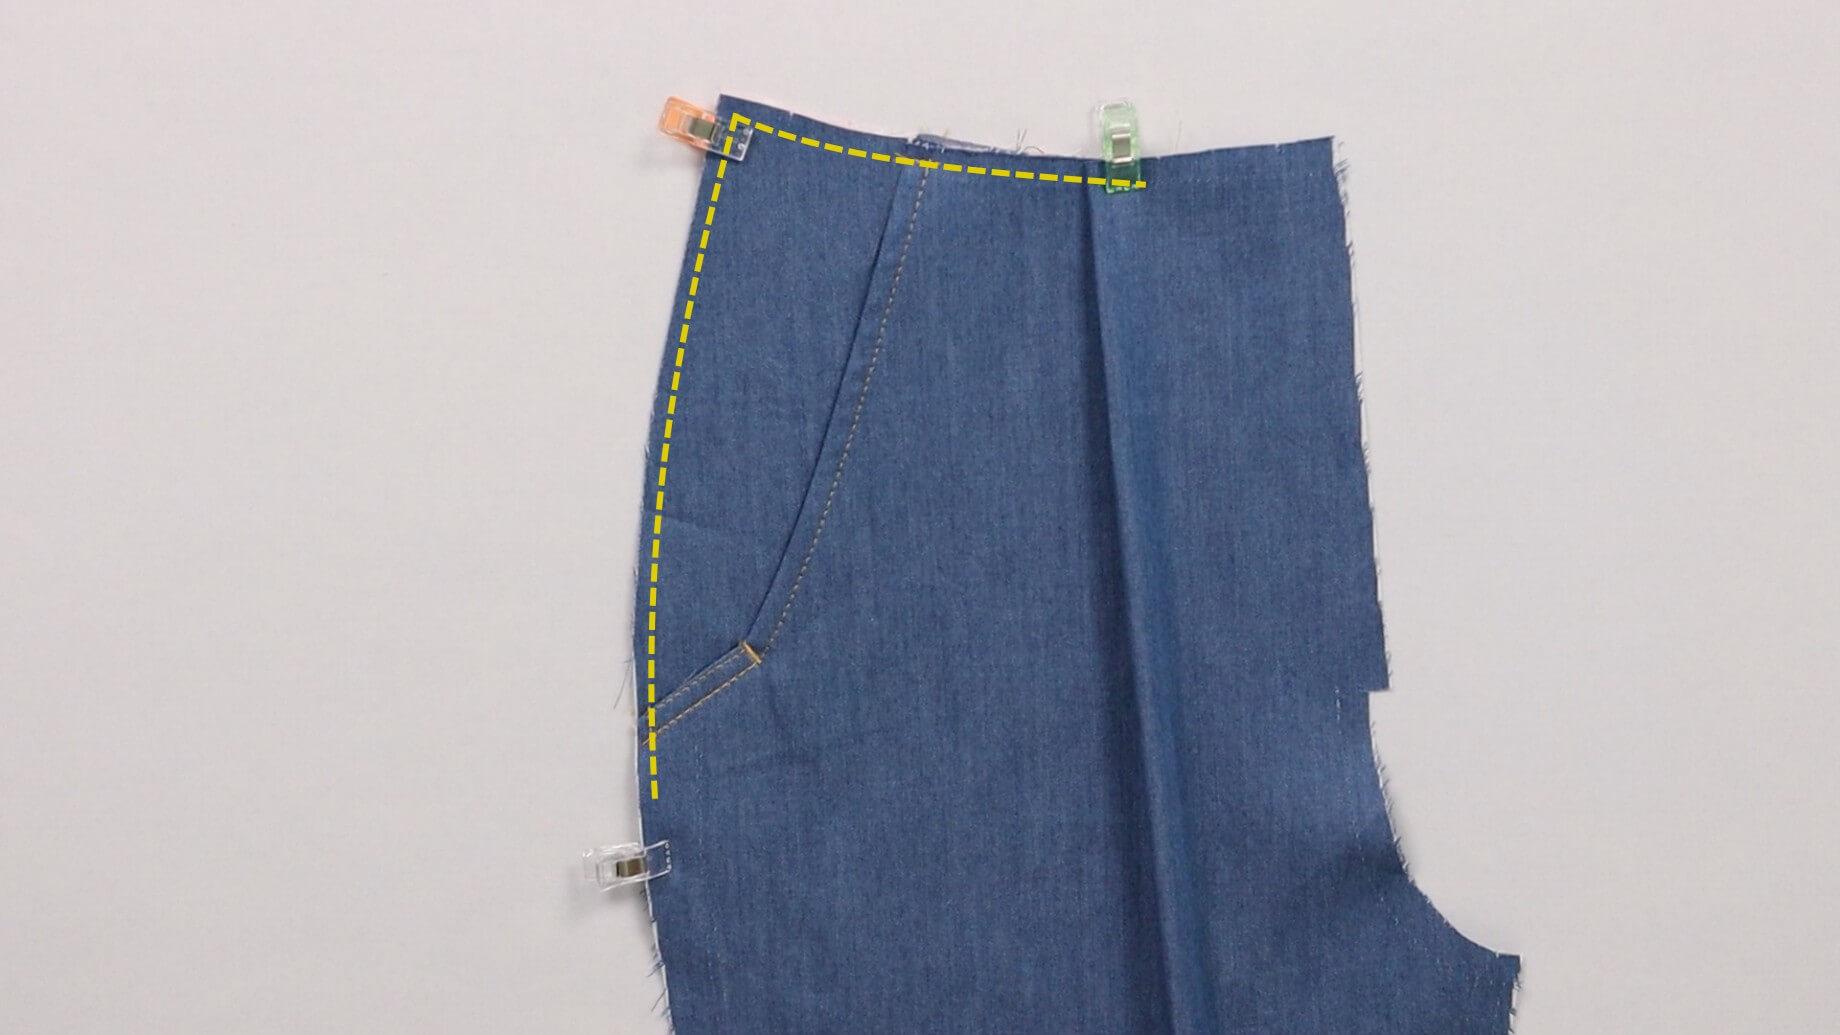
Now everything is being ironed out again. The pocket bag can be pinned at the top edge and side seam and joined to the front trousers by stitching in place within the seam allowance.
11. Topstitching with angular edge
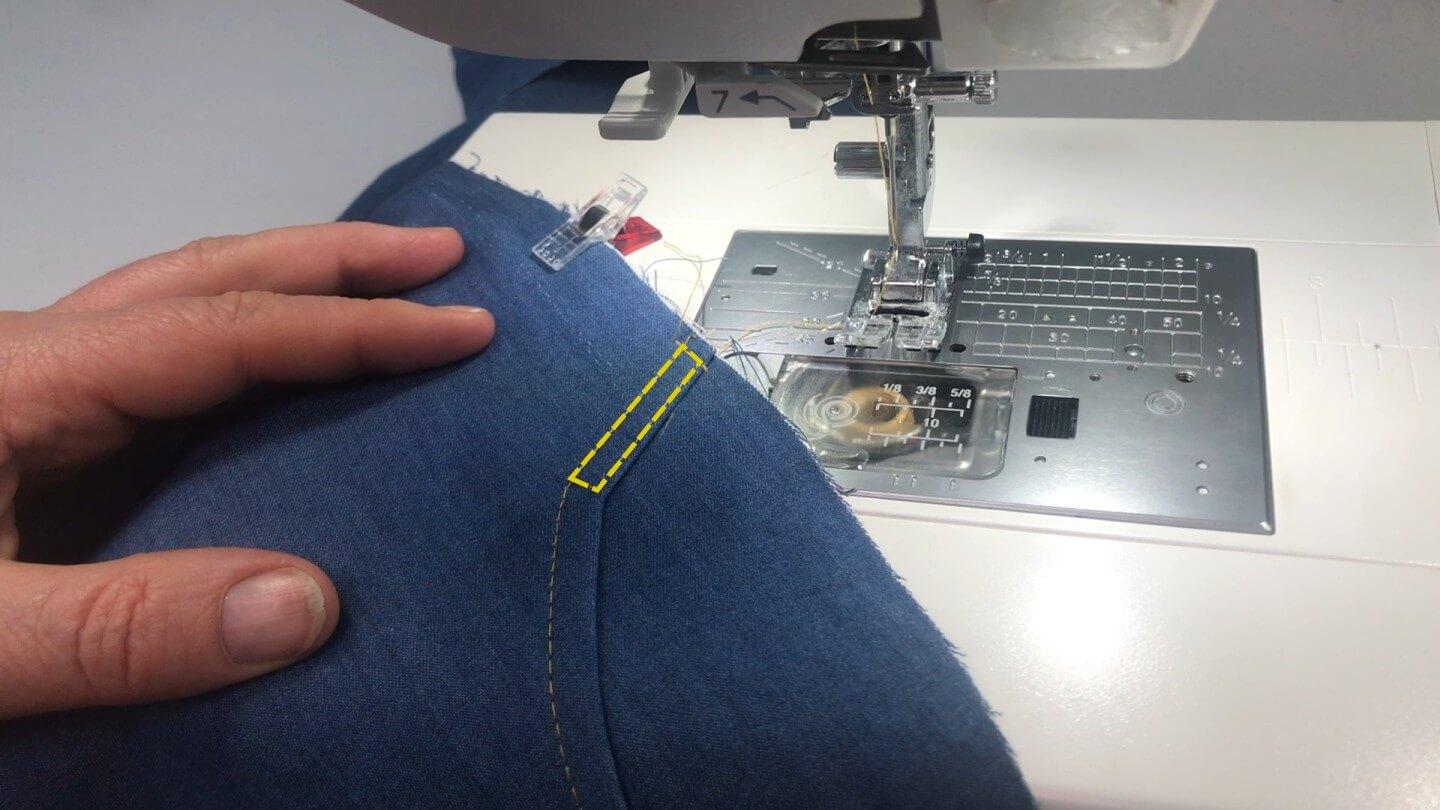
Depending on how you like it, you can topstitch the lower, short section of the square trouser pocket at the front with a decorative seam. It is best to try it out first to see if the pocket opening is still large enough.
12. Finished french pockets
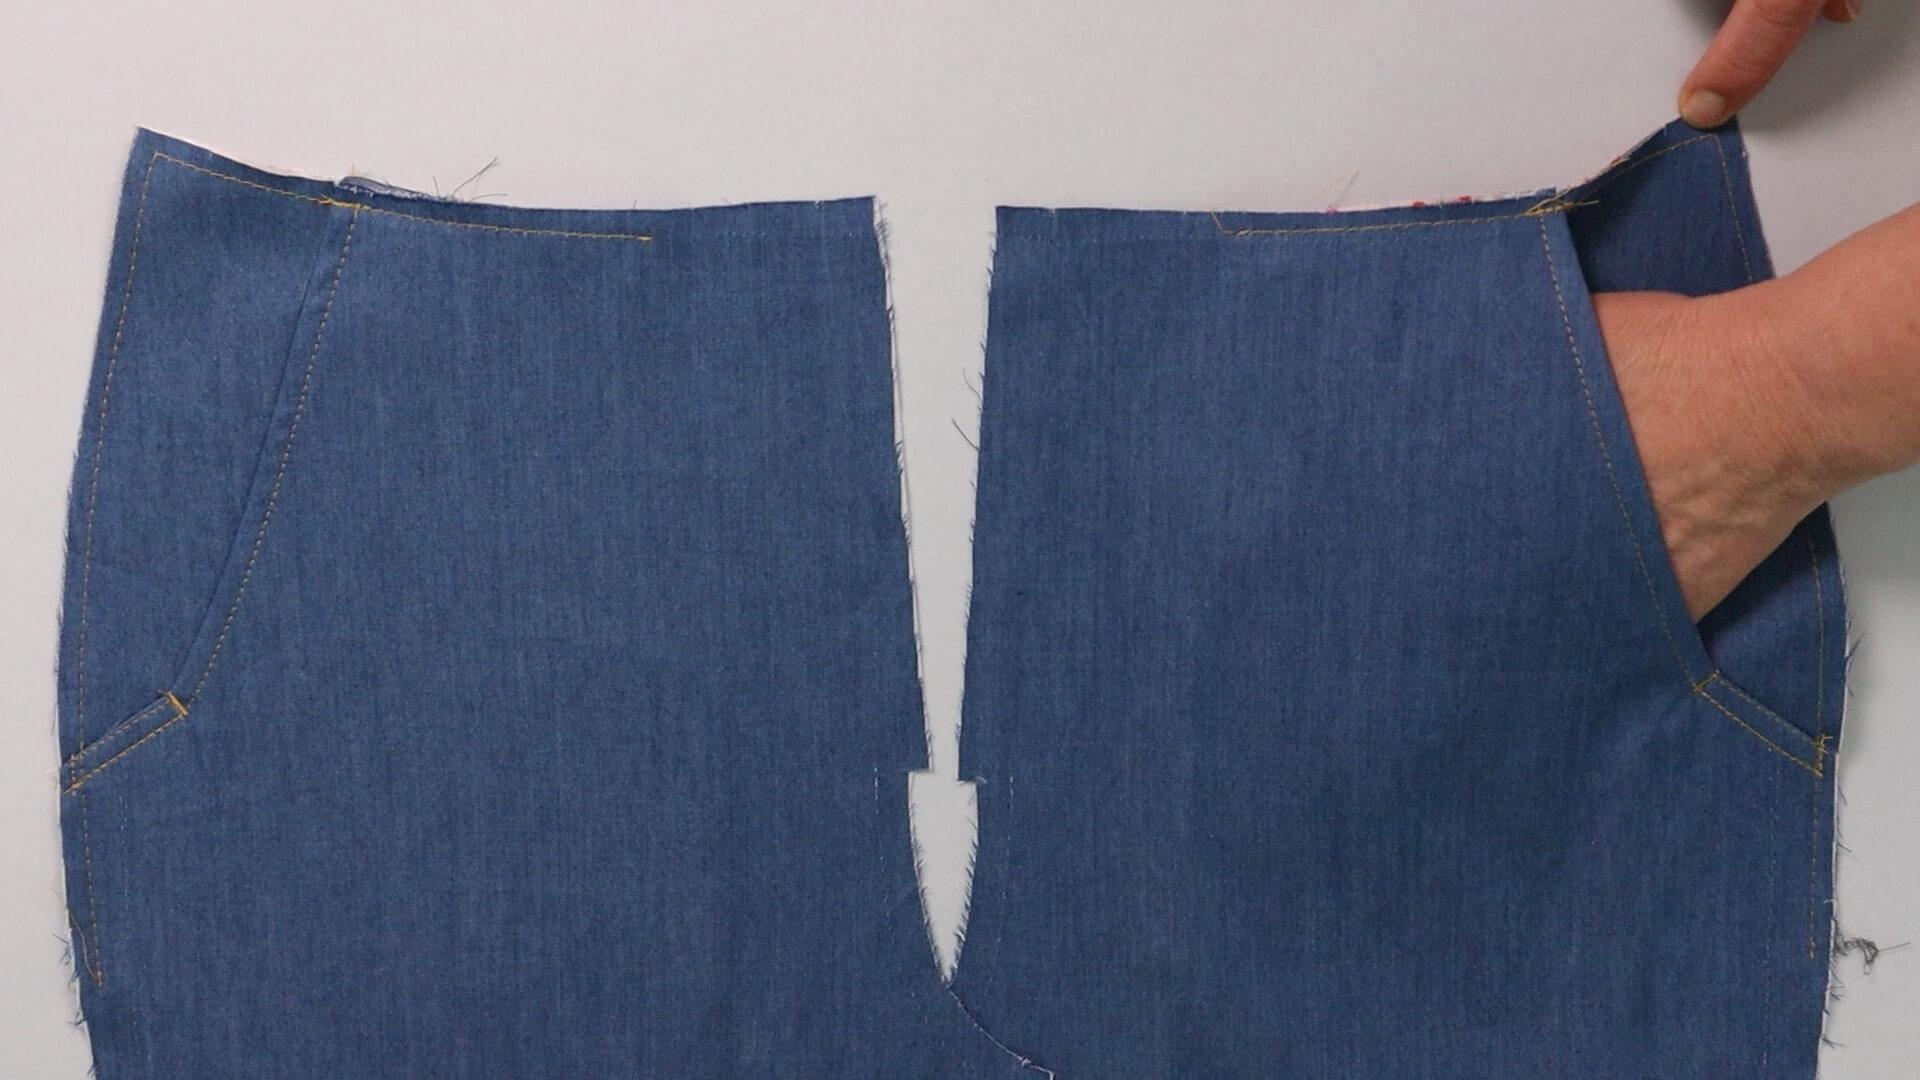
This is what the finished front trouser pockets look like – here in the square shape.
Here you will find the links to the next step
- for the chinos: sewing fly with zipper #Z01
- for the jeans with zipper: Sew fly with zipper in jeans trousers #Z02
- for jeans with button placket: Sewing fly with concealed button placket in jeans trousers #Z03
If you’re not quite ready yet and perhaps want to start at the beginning, you’ll find some links here:


