
Loading cart contents...


Preparing classic trousers with attached waistband and elastic for fitting #F06
In the following step-by-step instructions, I’ll explain how to prepare a classic pair of trousers with attached waistband and elastic for fitting. I’ll also show how to prepare the hem if you’ve chosen a turn-up hem in your pattern.
Even with made-to-measure trousers, I highly recommend a fitting before completing the garment. After all, even at a tailor’s shop, customers are invited to a fitting before taking home their finished garment.
Our patterns intentionally include generous seam allowances, allowing you to make any necessary adjustments. For the fitting, it’s important that the waistband is already attached. This gives the upper edge of the trousers the necessary stability and prevents it from stretching during the fitting.
As the trousers will be taken apart again afterwards, I sew the pieces together using a long machine stitch. Alternatively, you can baste the seams by hand, which I especially recommend for delicate fabrics.
Good luck with your fitting!
The video is currently only available in German. You can display the subtitle in the language of your choice via the YouTube settings.
1. This is required:

Pattern pieces made from main fabric:
- back pieces (HH) – 1 pair; the darts are already sewn
- front pieces (VH)- 1 pair; for the fitting, the front trouser piece is prepared without the pocket opening. The slanted front pocket is cut and sewn after the fitting.
- waistband (B) – 1 x
Paper pattern pieces:
- Back (HH)
- Front (VH)
- Waistband (B)
- if necessary, the template for the back pocket position (P-TZ HH)
- if necessary, the template for the turn-up hem (P-ZH)
Tools and aids:
- Elastic; for length see the instructions included with the pattern or available via the link on the pattern sheets
- Pins or clips
- Scissors
- Chalk or marker pen
- Basting thread and sewing needle if necessary
- safety pin
2. Press the back trousers into shape
First I press the back trousers into shape. I have already finished the outer edges (except for the hem) with the overlock. You can do this at this point or later when the leg seams are closed. This is pointed out again in the corresponding instructions.
The back trouser parts are placed right sides together. I mark the knee height with a chalk line.
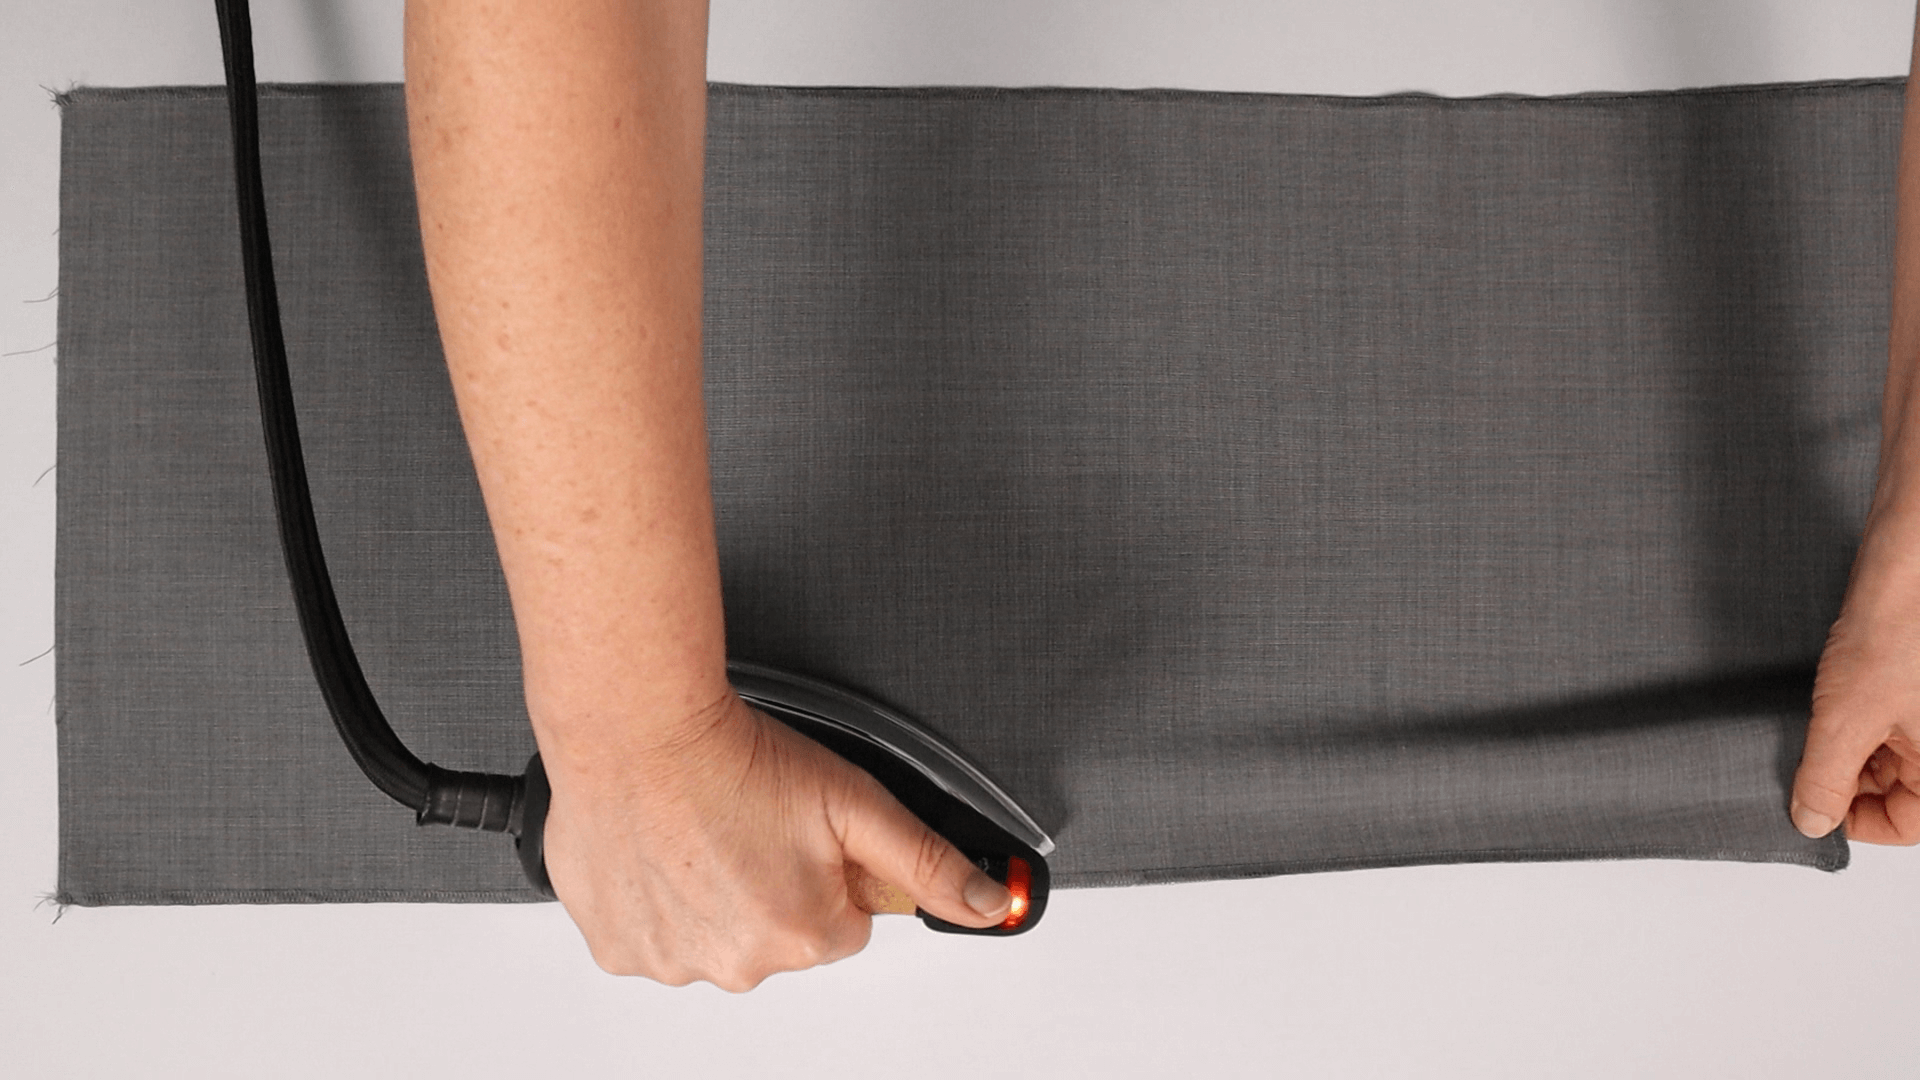
Then I place the iron on the inner leg seam in front of the knee and stretch the upper part.
The inner leg seam may be approx. 10 mm longer.
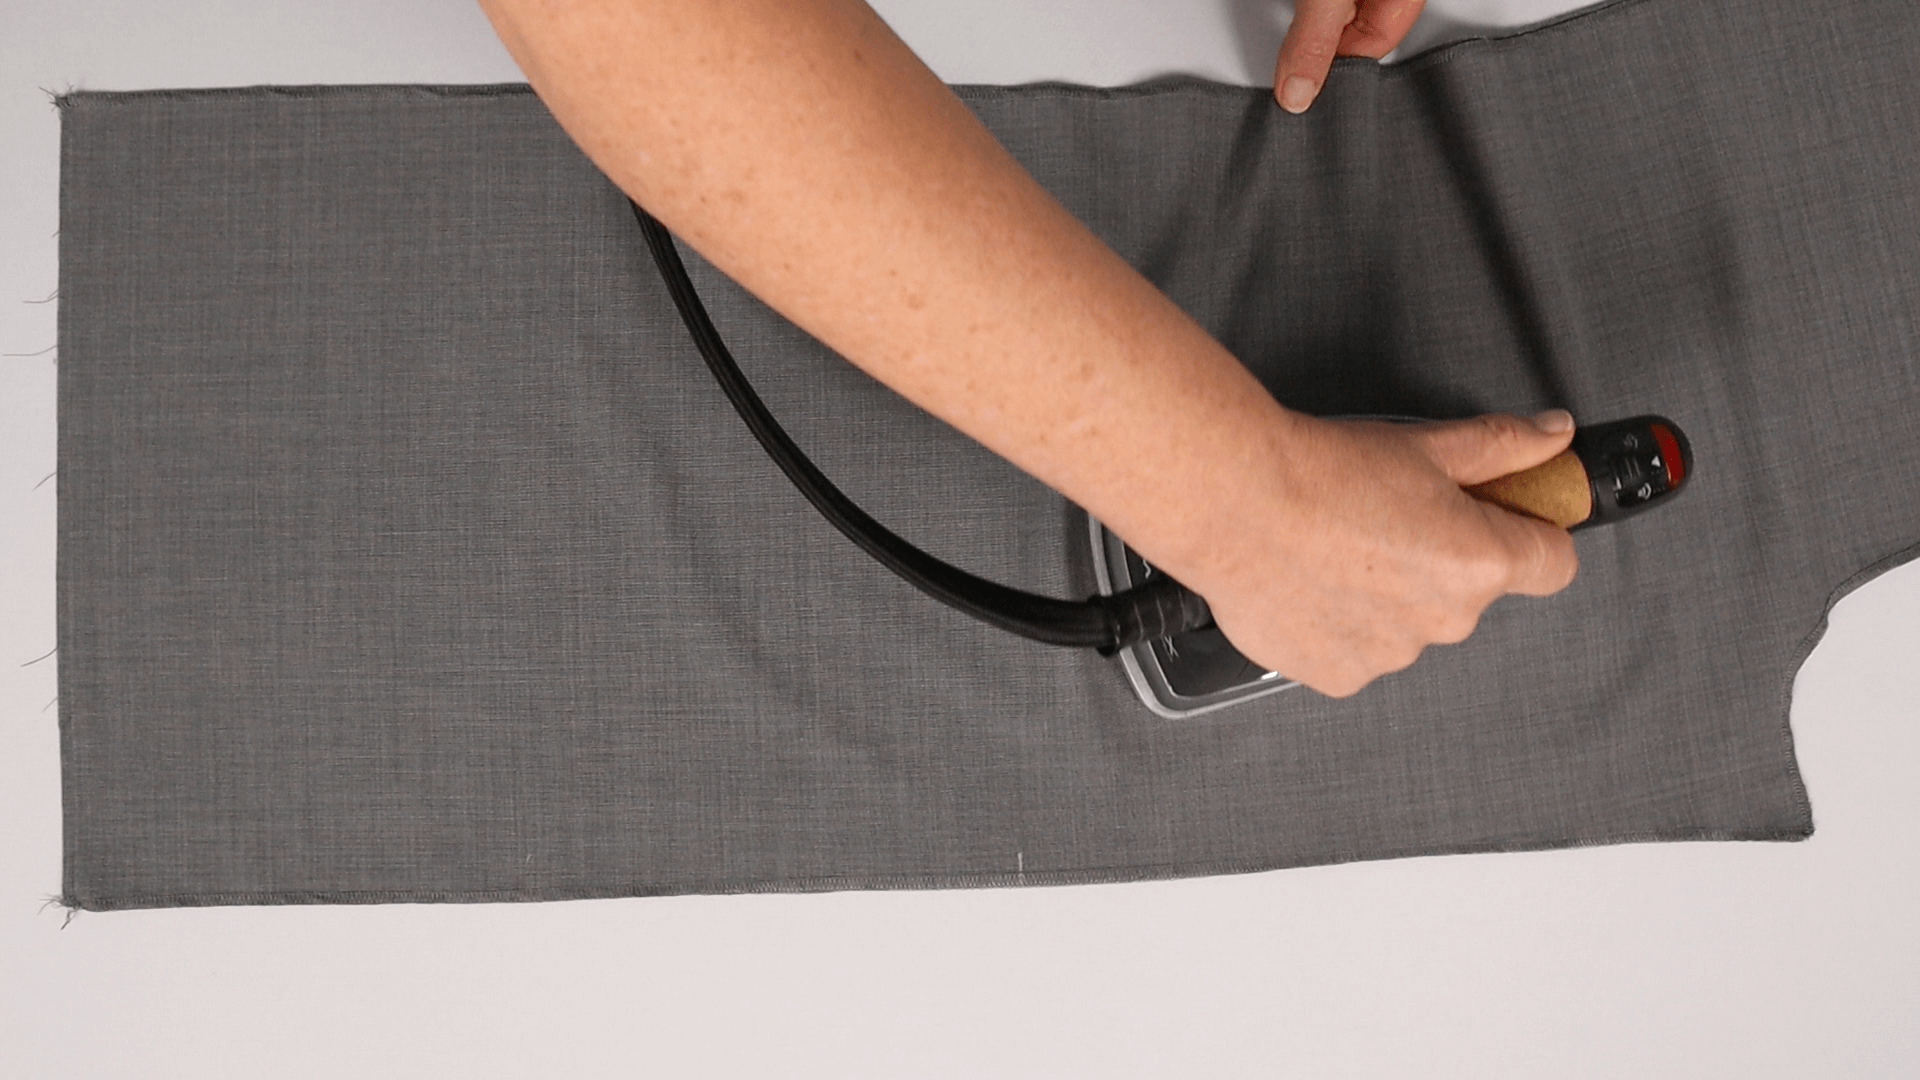
I try to iron the width slightly towards the middle of the leg below the hips. This is the place where the expanse likes to accumulate. This “short ironing” works best with woolen fabrics.
Repeat this a few times.
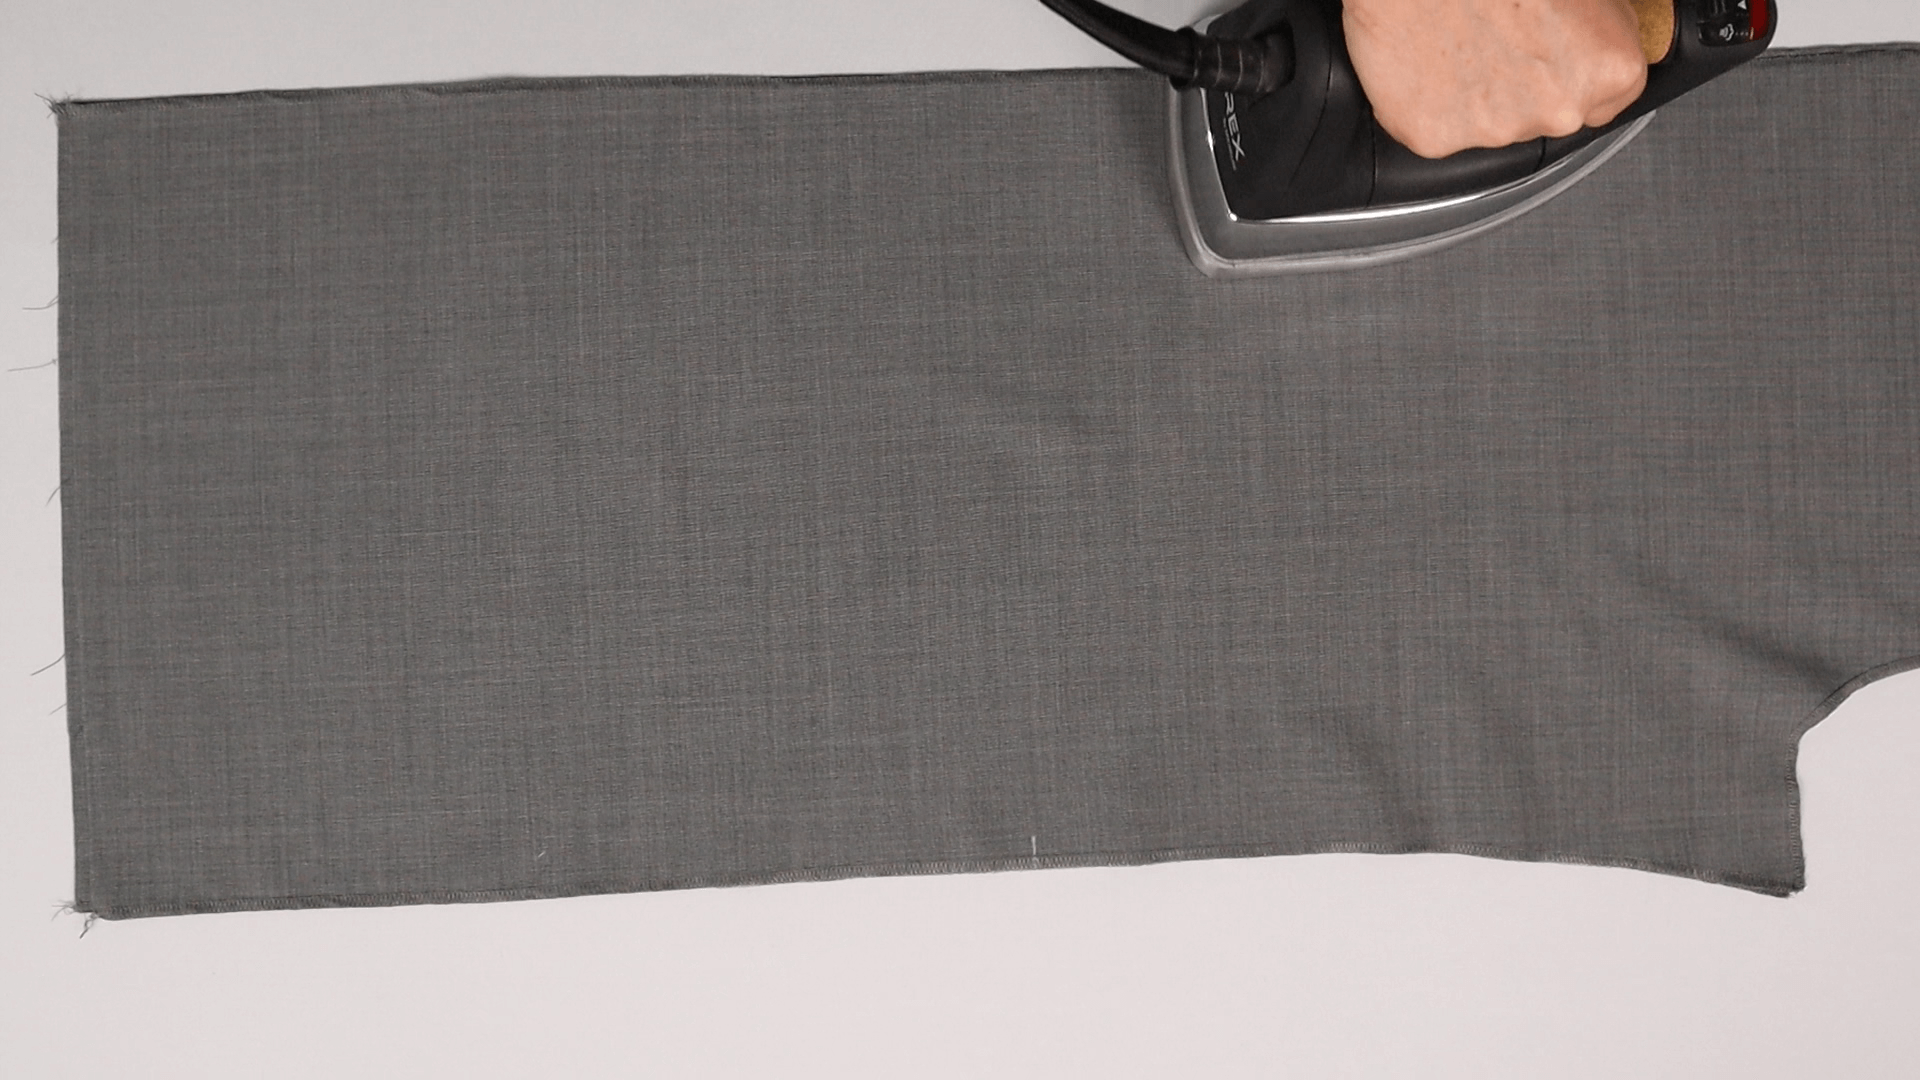
Then I lay the trousers straight in the grain and iron them smooth from the side seam.
I turn the pieces over and iron the same from the other side.
3. Prepare the hem for fitting
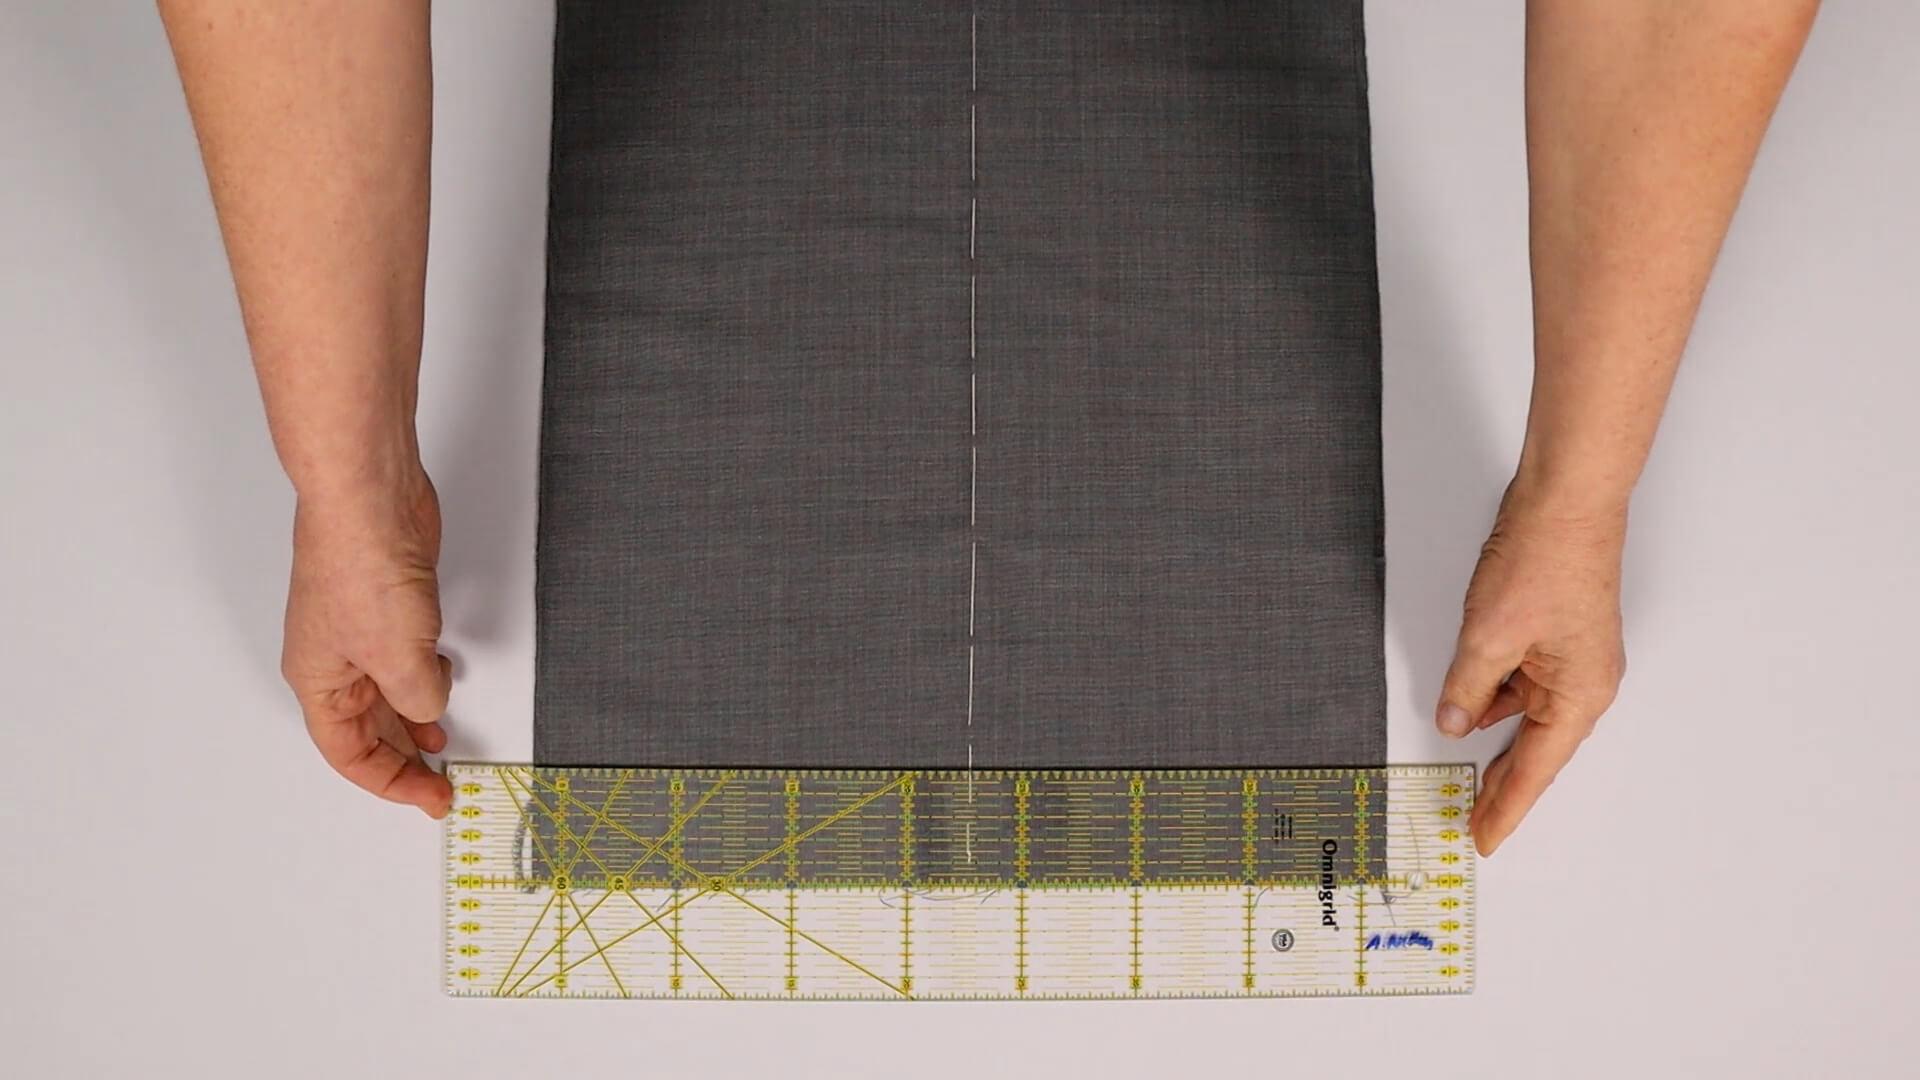
If you have opted for a normal turned-in hem, mark the hem length specified in the pattern on the right side of the fabric parallel to the hem edge. To try on the trousers, the hem is folded inwards at this line and pinned.
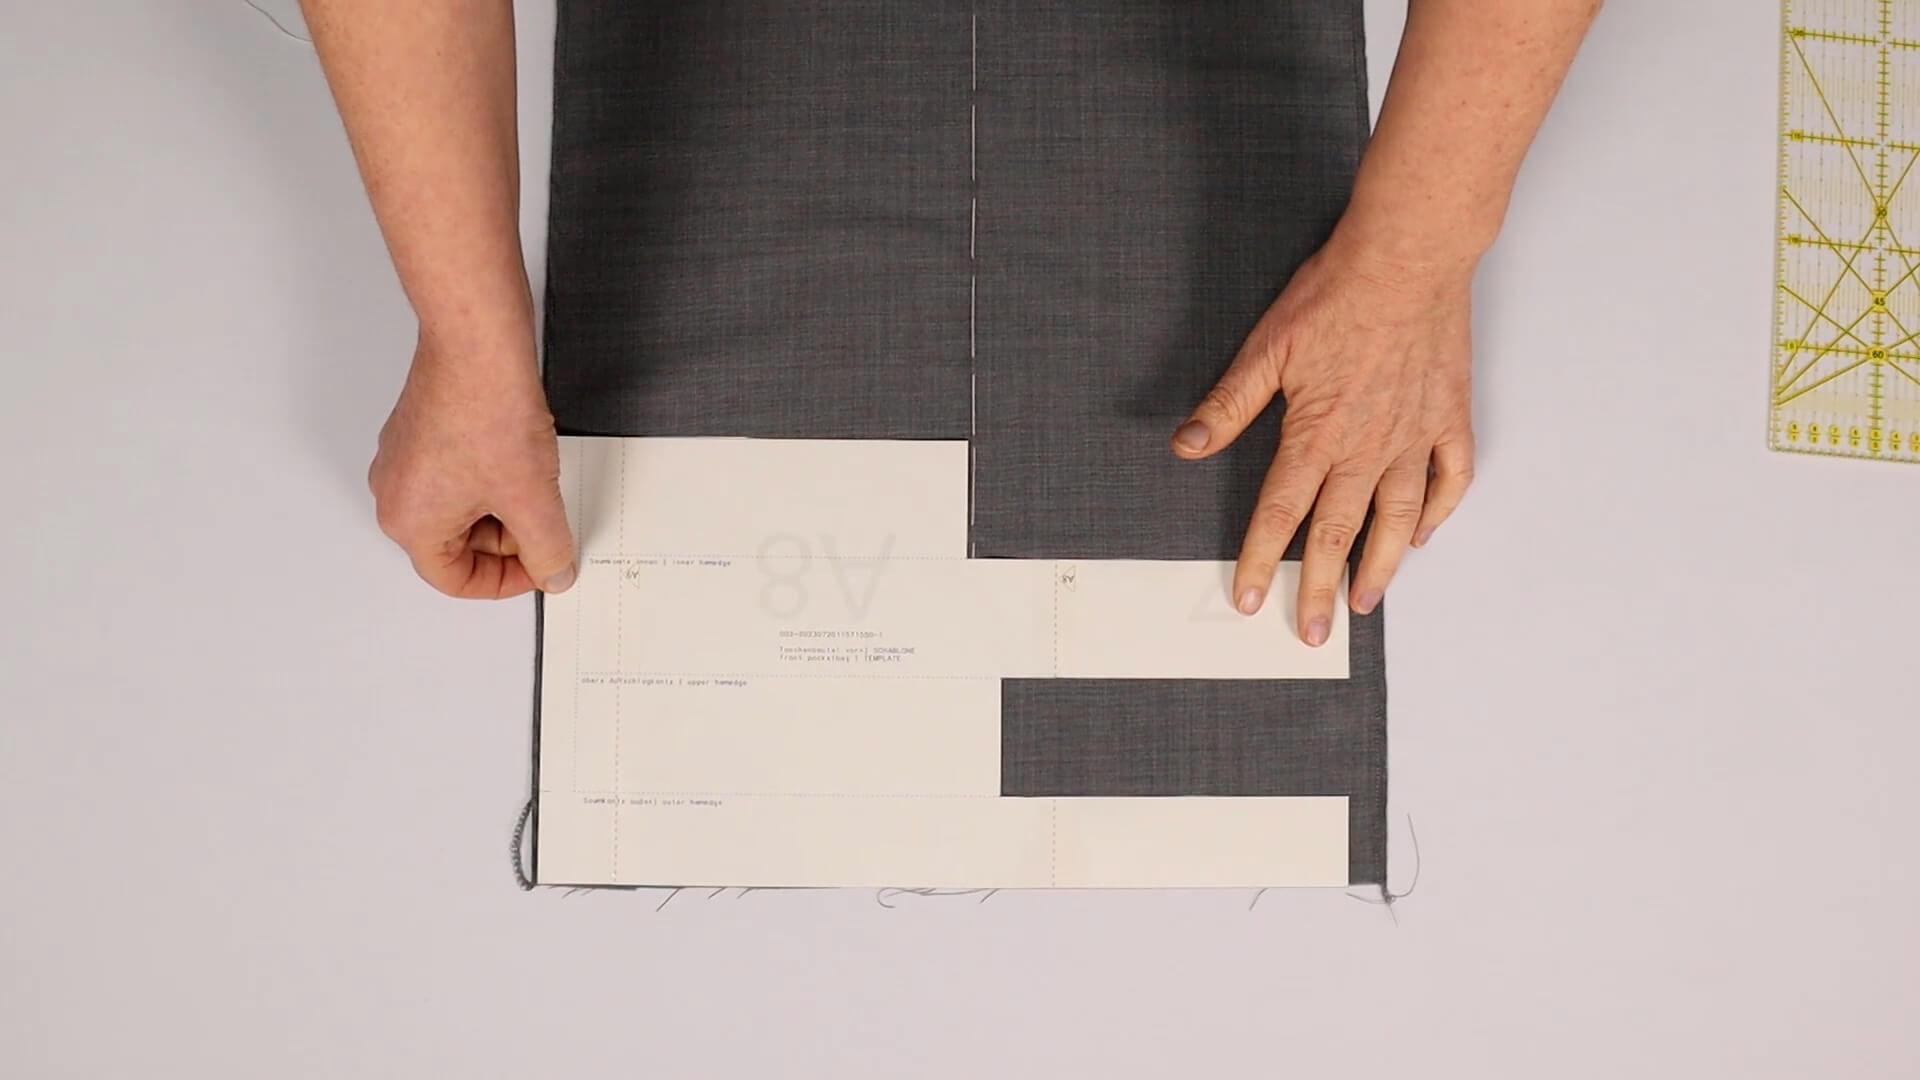
With a turn-up hem, the part that is folded inwards is very wide. The processing therefore differs from that of a normal hem. I place the template for the turn-up hem (P-H) flush with the hem edge.
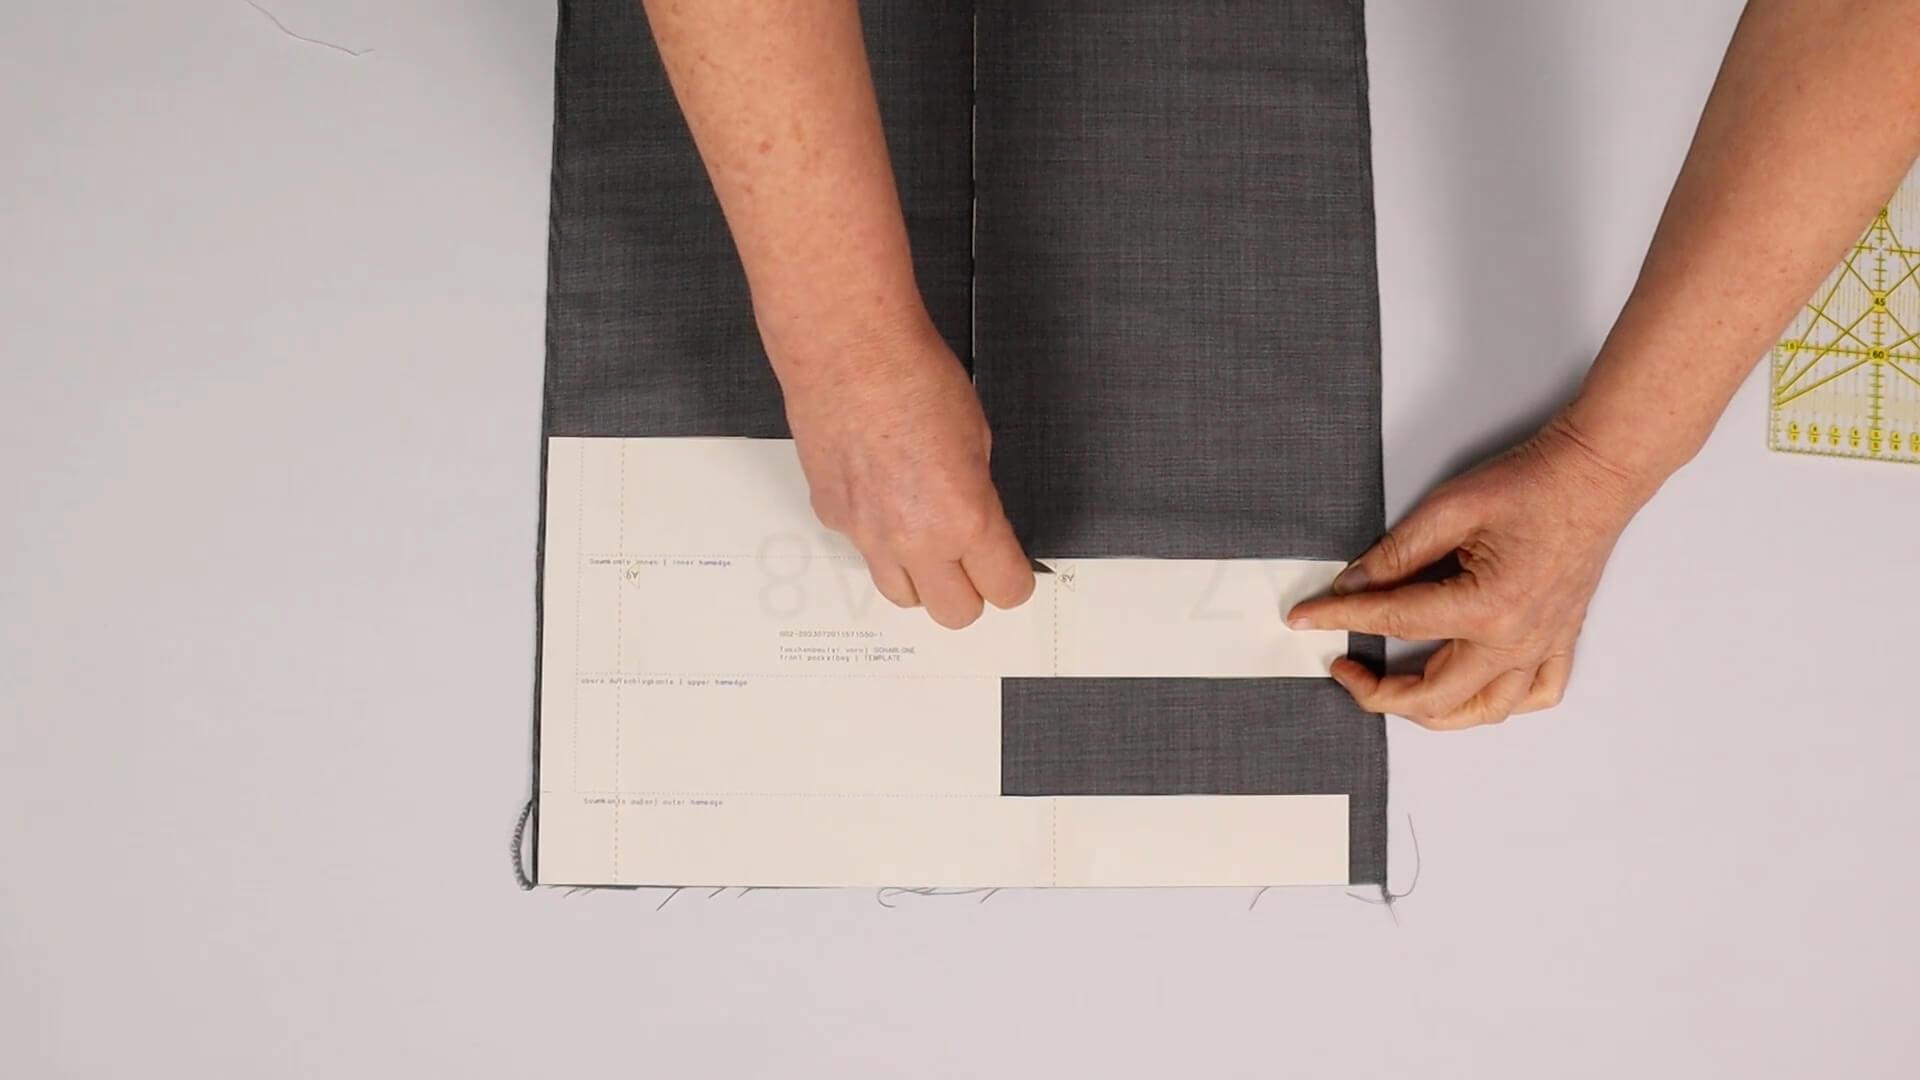
Then I transfer the marking for the inner hem edge to the right side of the fabric.
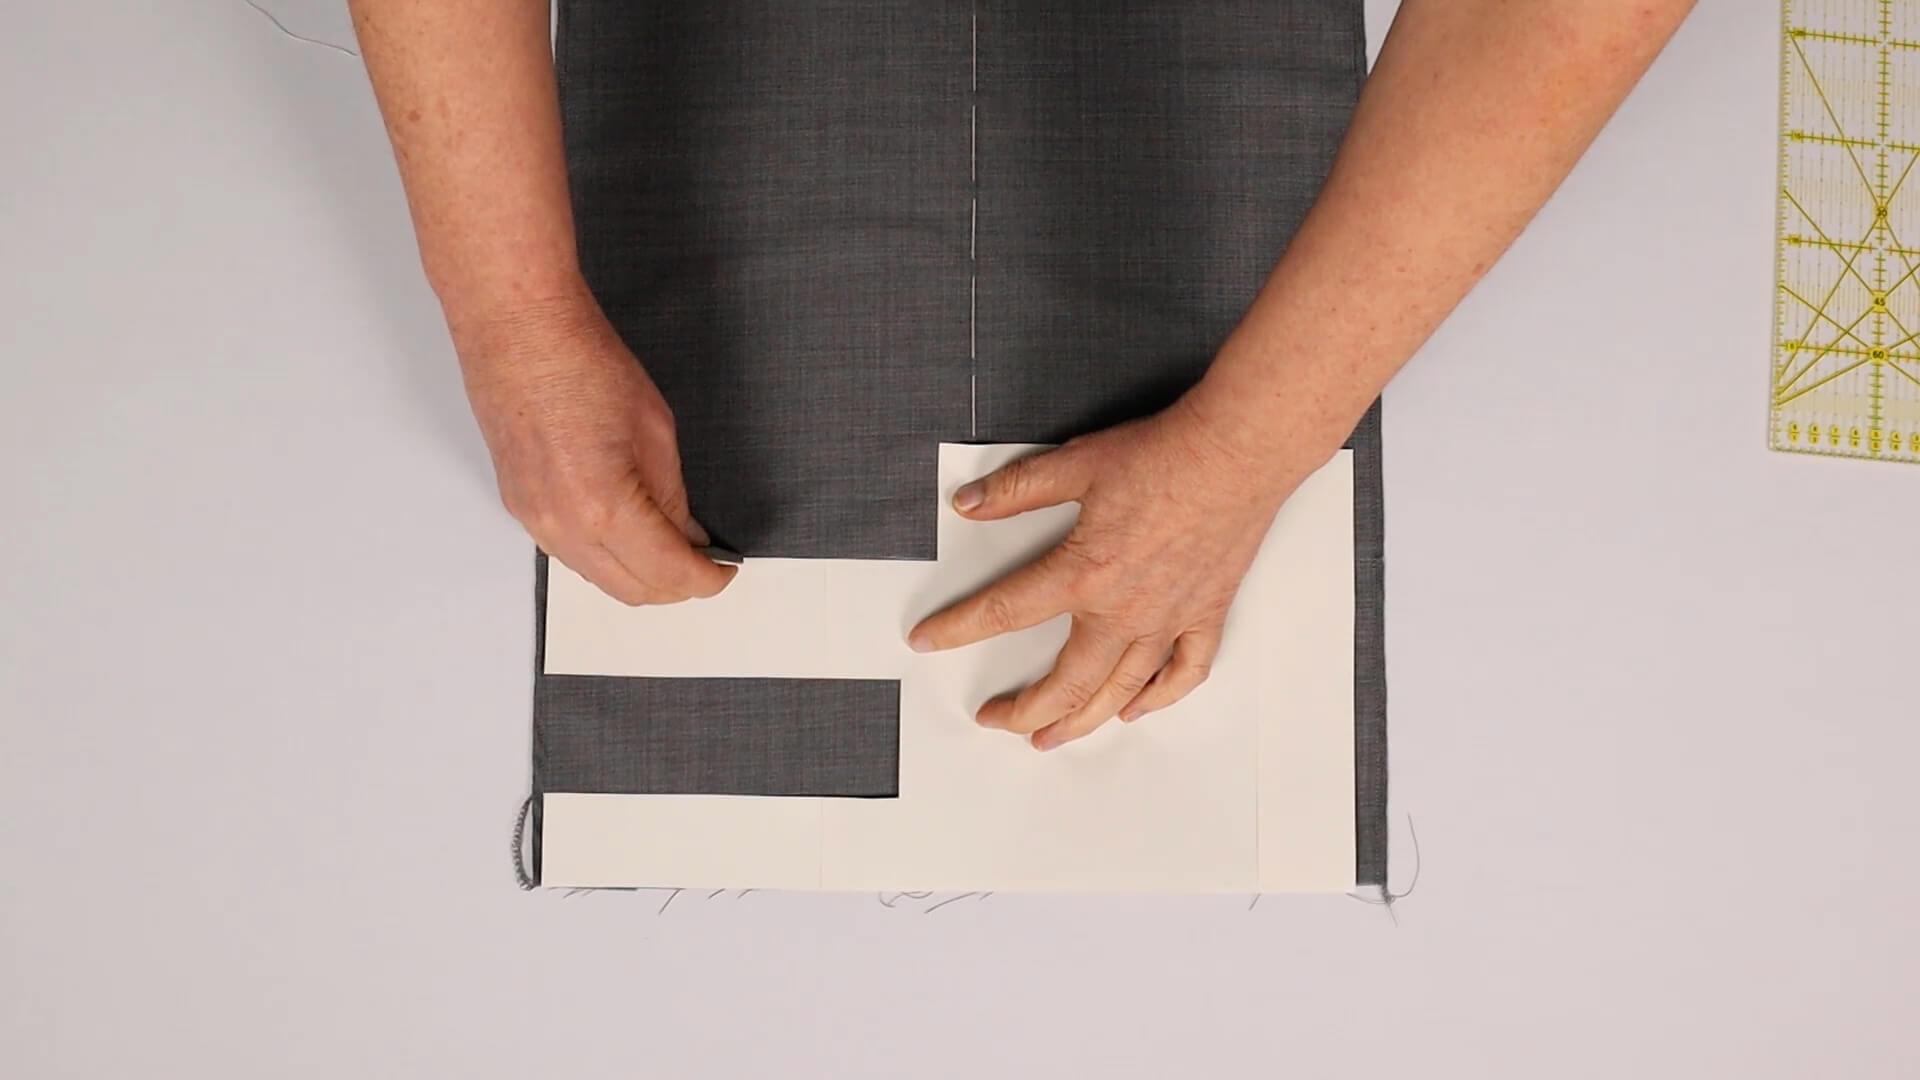
For the other side, I turn the template over and mark the inner hem edge there too.
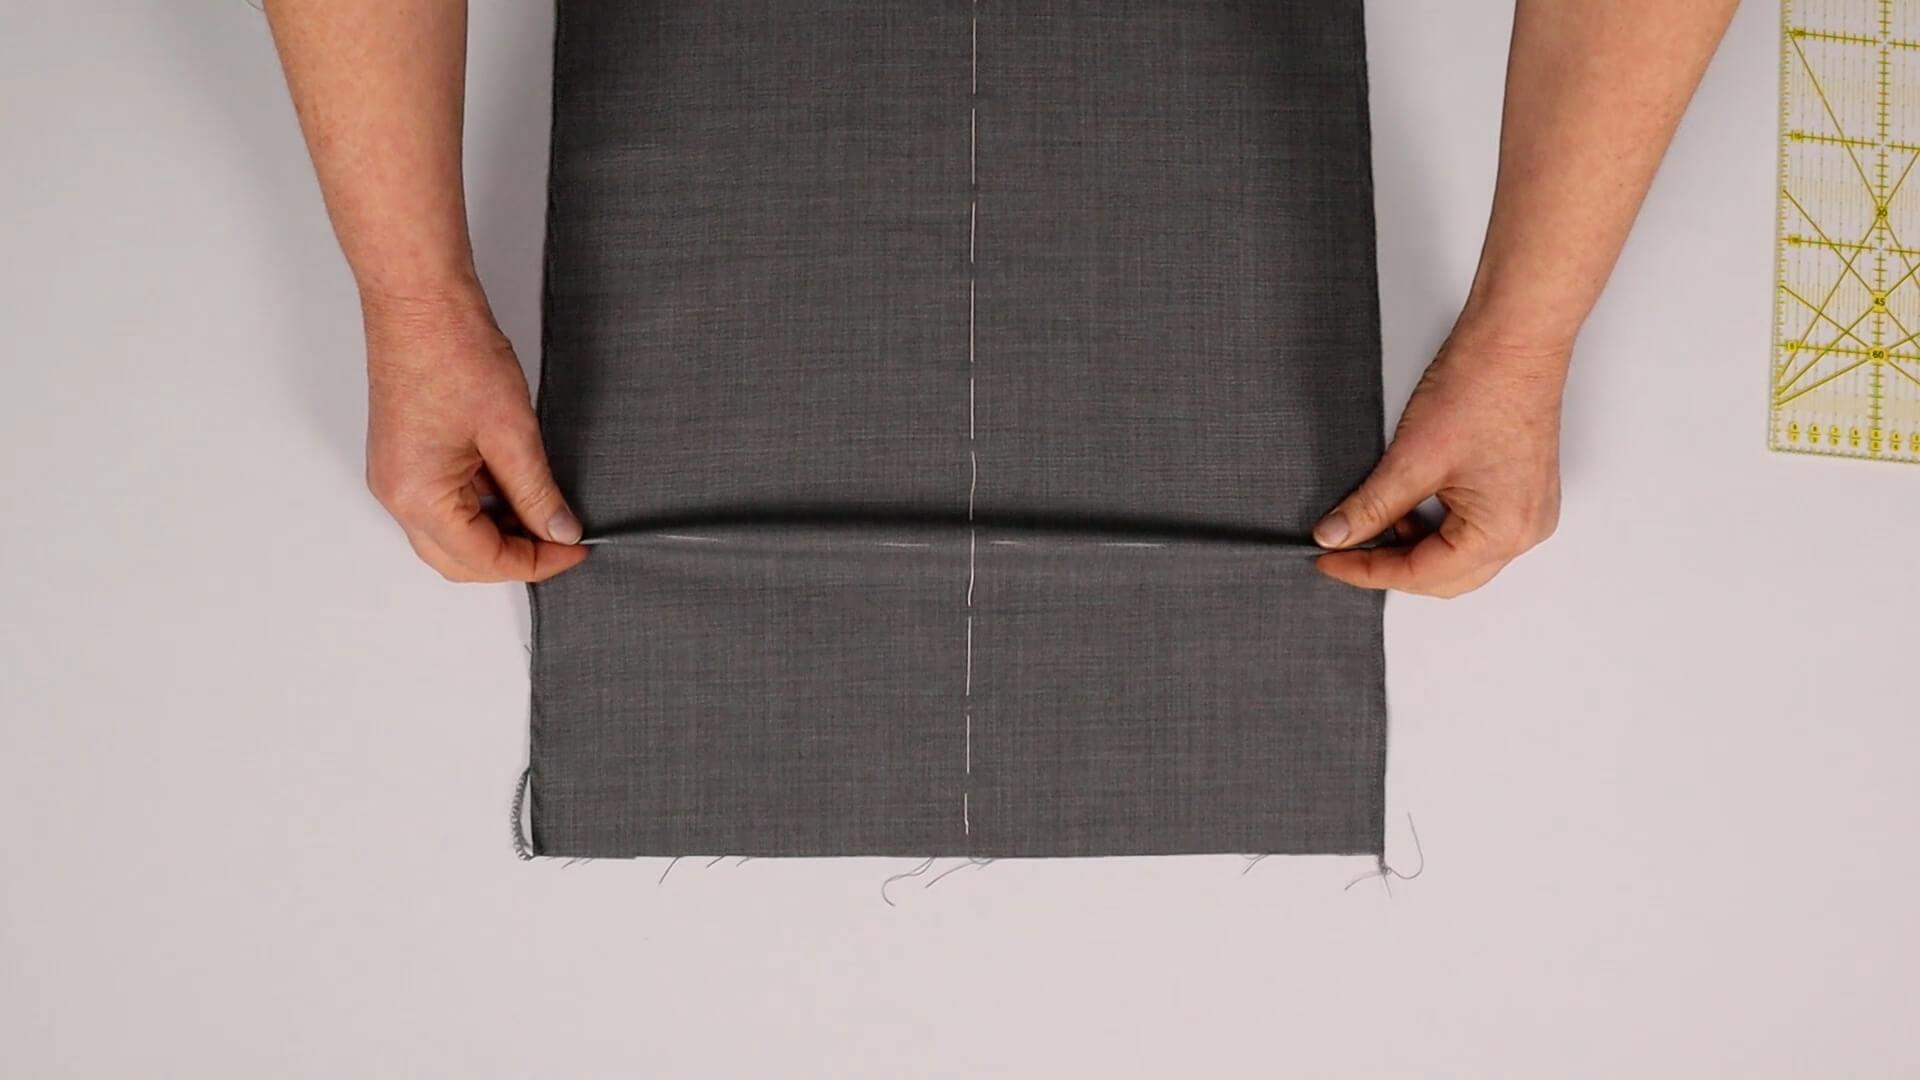
At the marking, I fold the lower part of the trouser leg inwards.
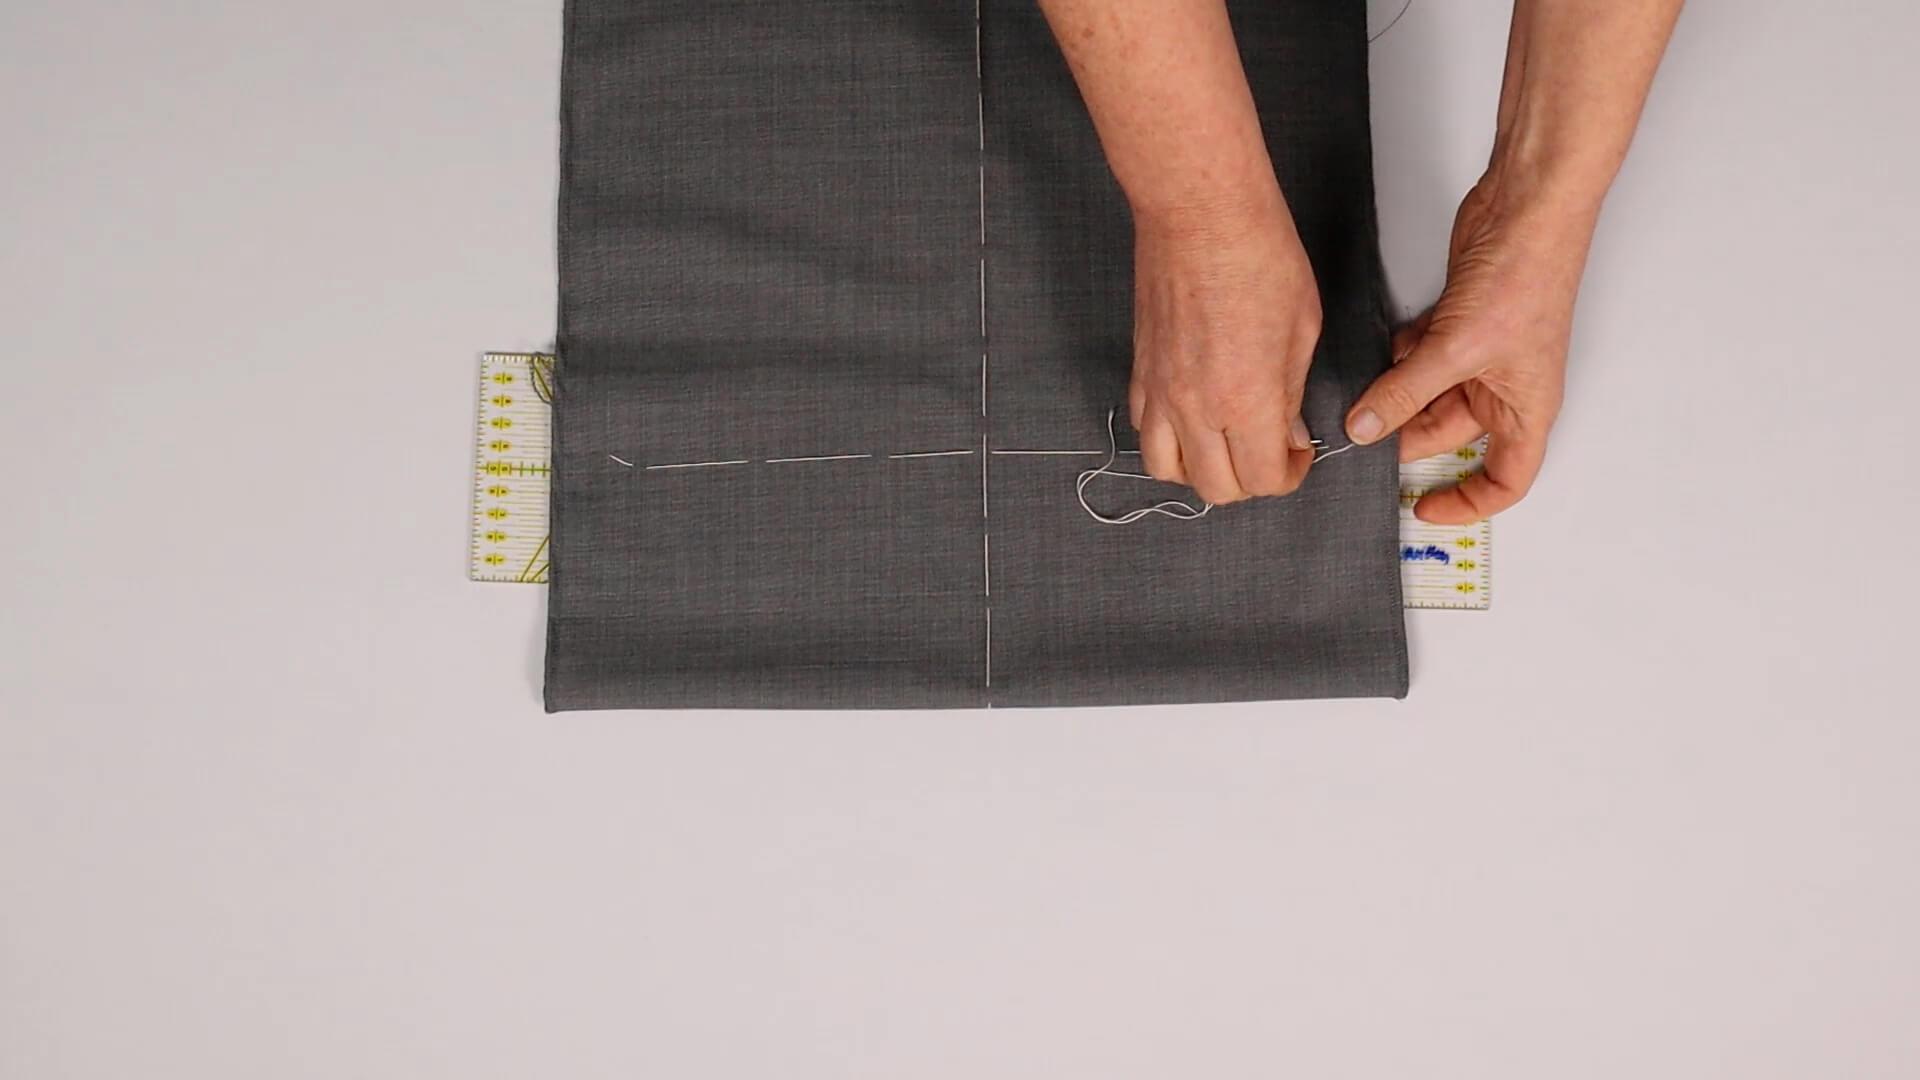
I attach the hem with a few large stitches. I put the ruler under the basting seam so that I don’t poke my ironing board.
I repeat these steps – marking, folding over, basting – with the other three pattern pieces of the front and back trousers.
4. Close the leg seams
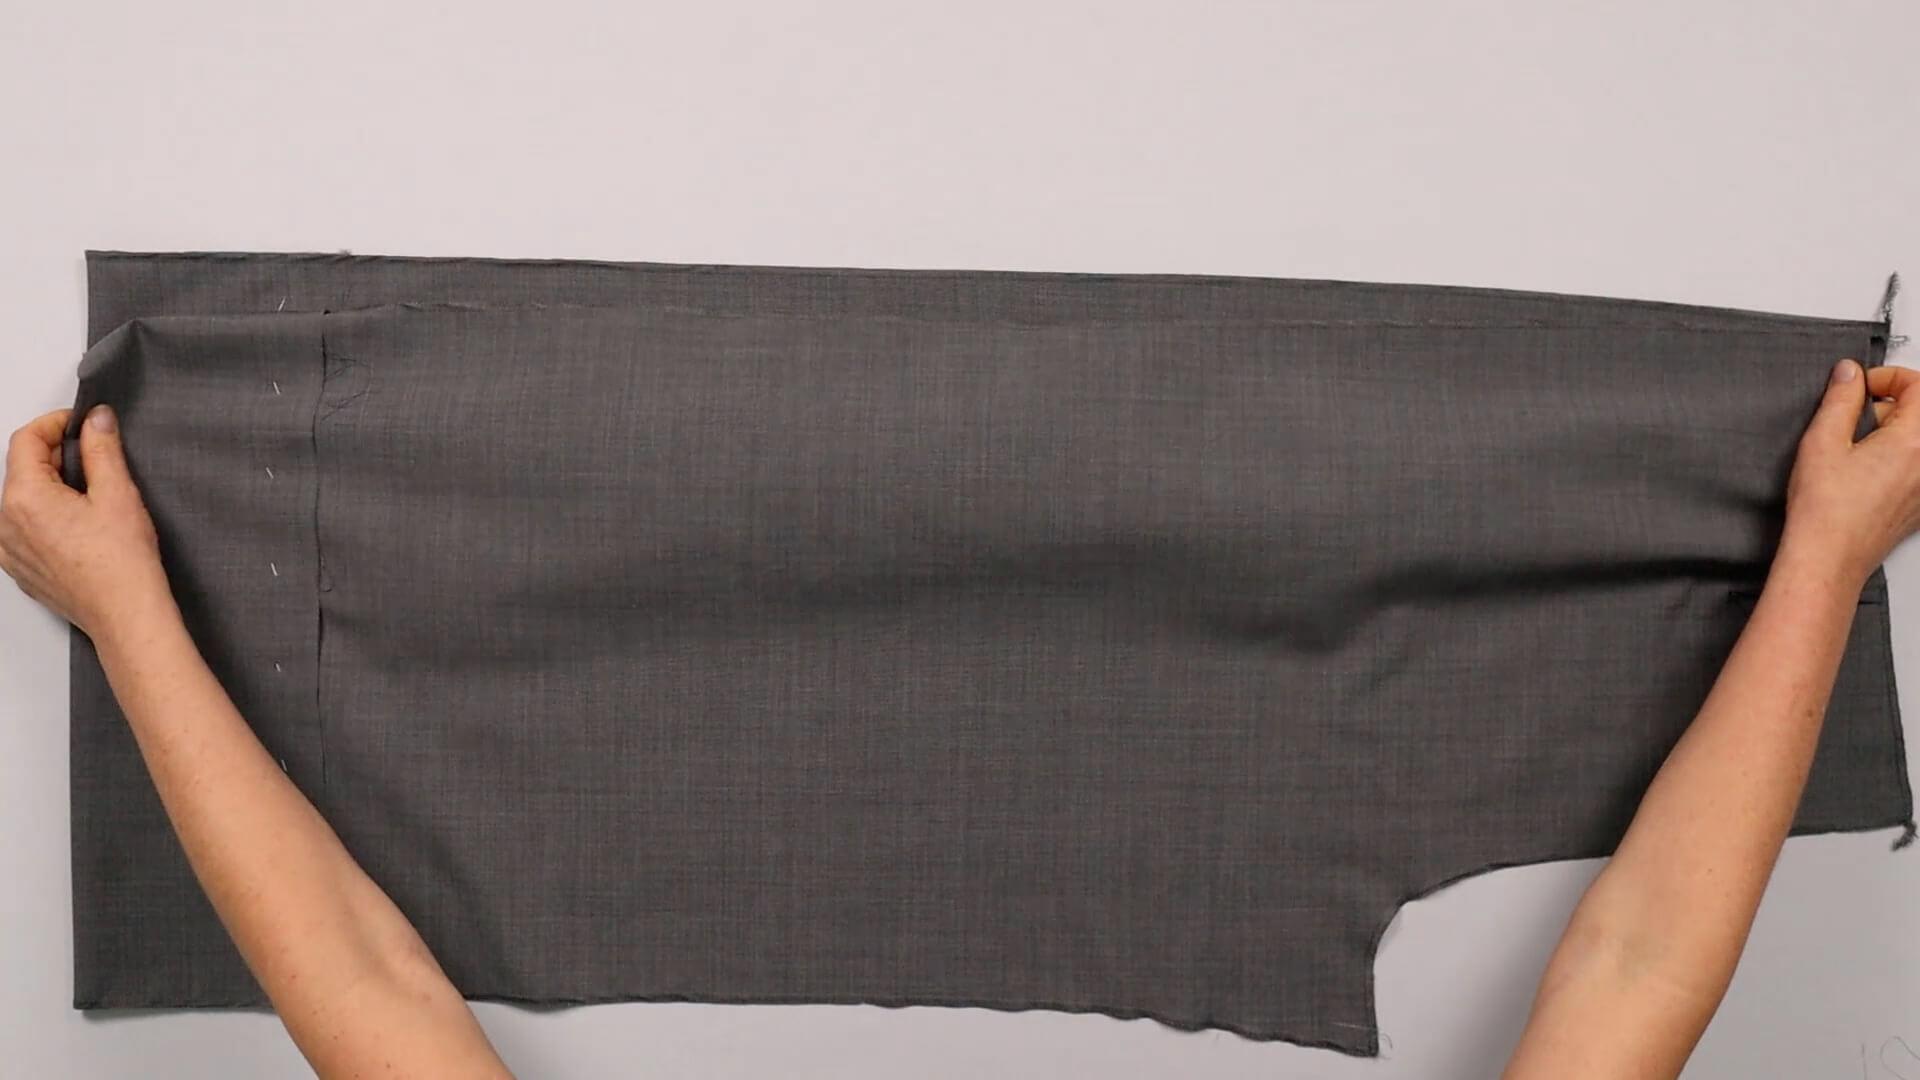
Now I close the inner and outer leg seams. To do this, I lay the front trousers in front of me with the right side facing up. Then I place the back trousers right sides facing on the front trousers.
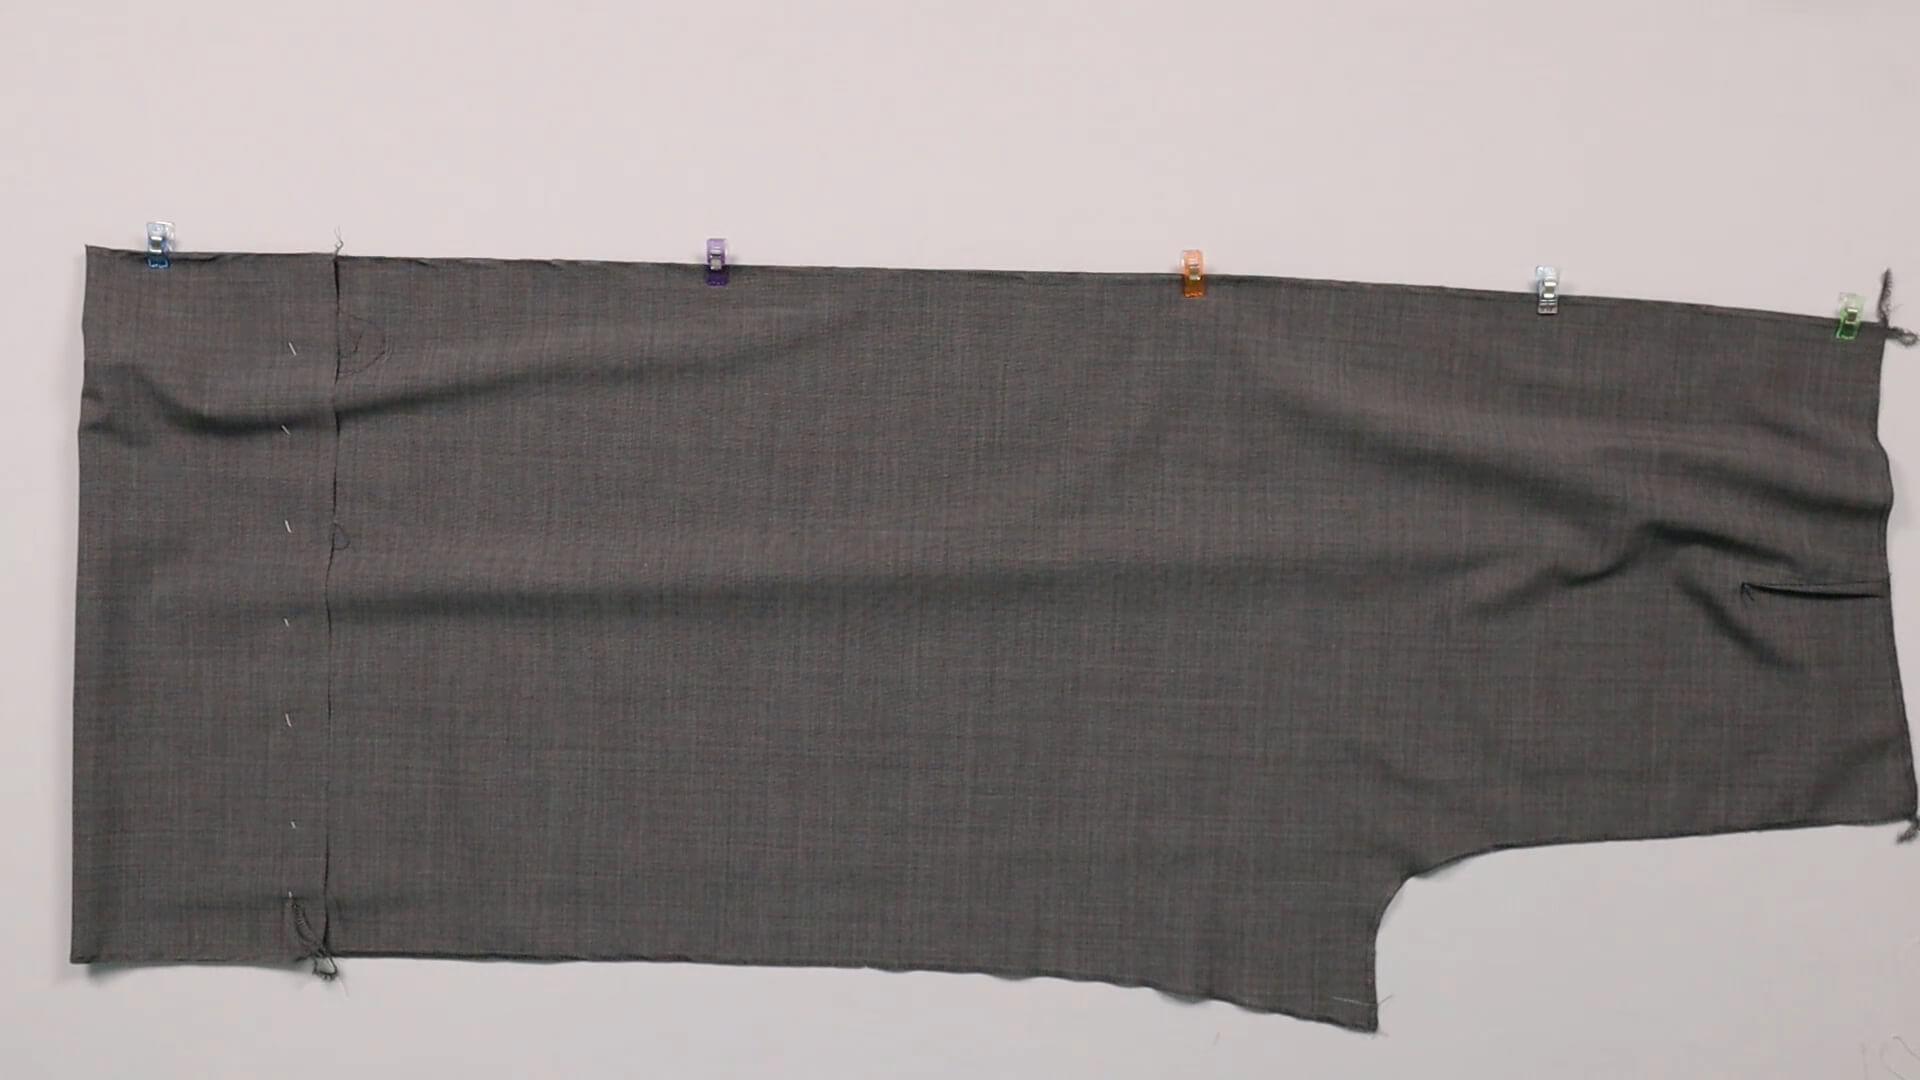
Pin the outer leg edges flush with each other.
Pay attention to the notches at knee height and in the pocket area.
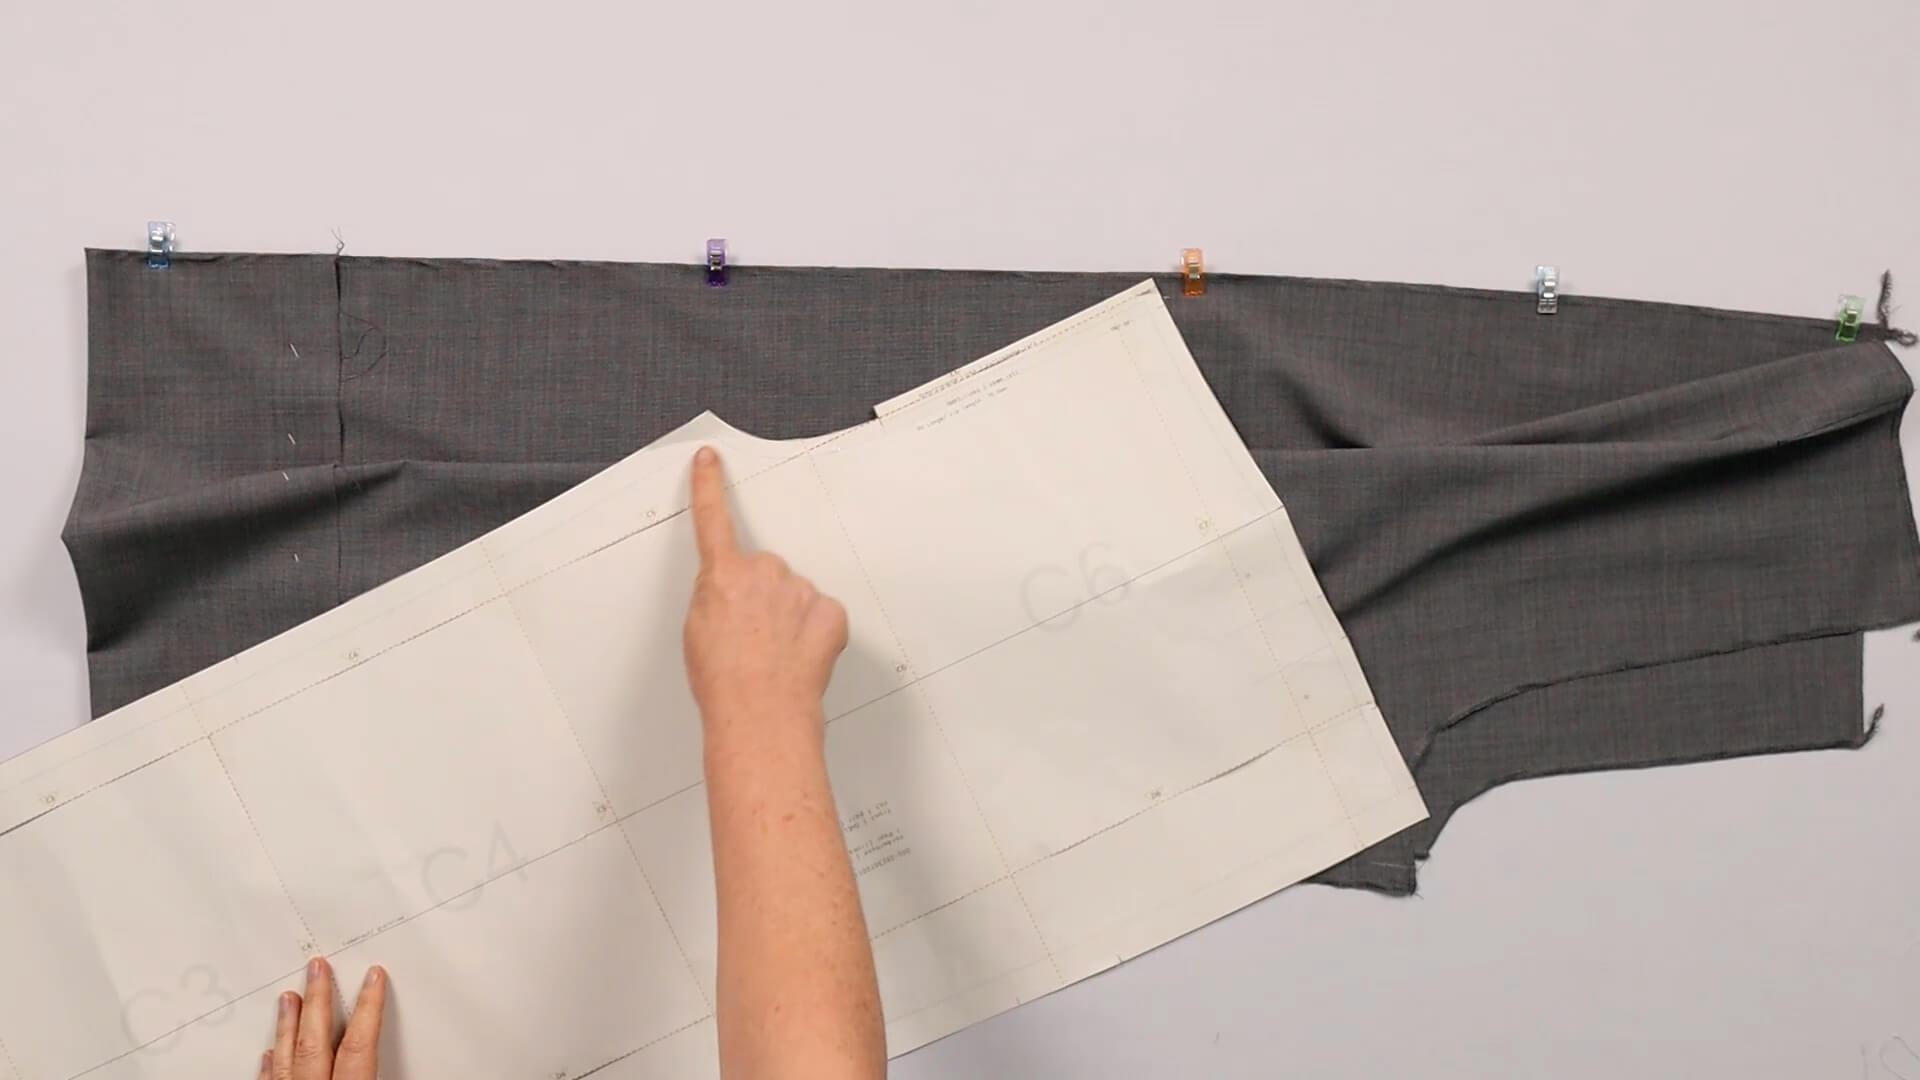
You can see from the pattern piece how wide the respective seam allowances are.
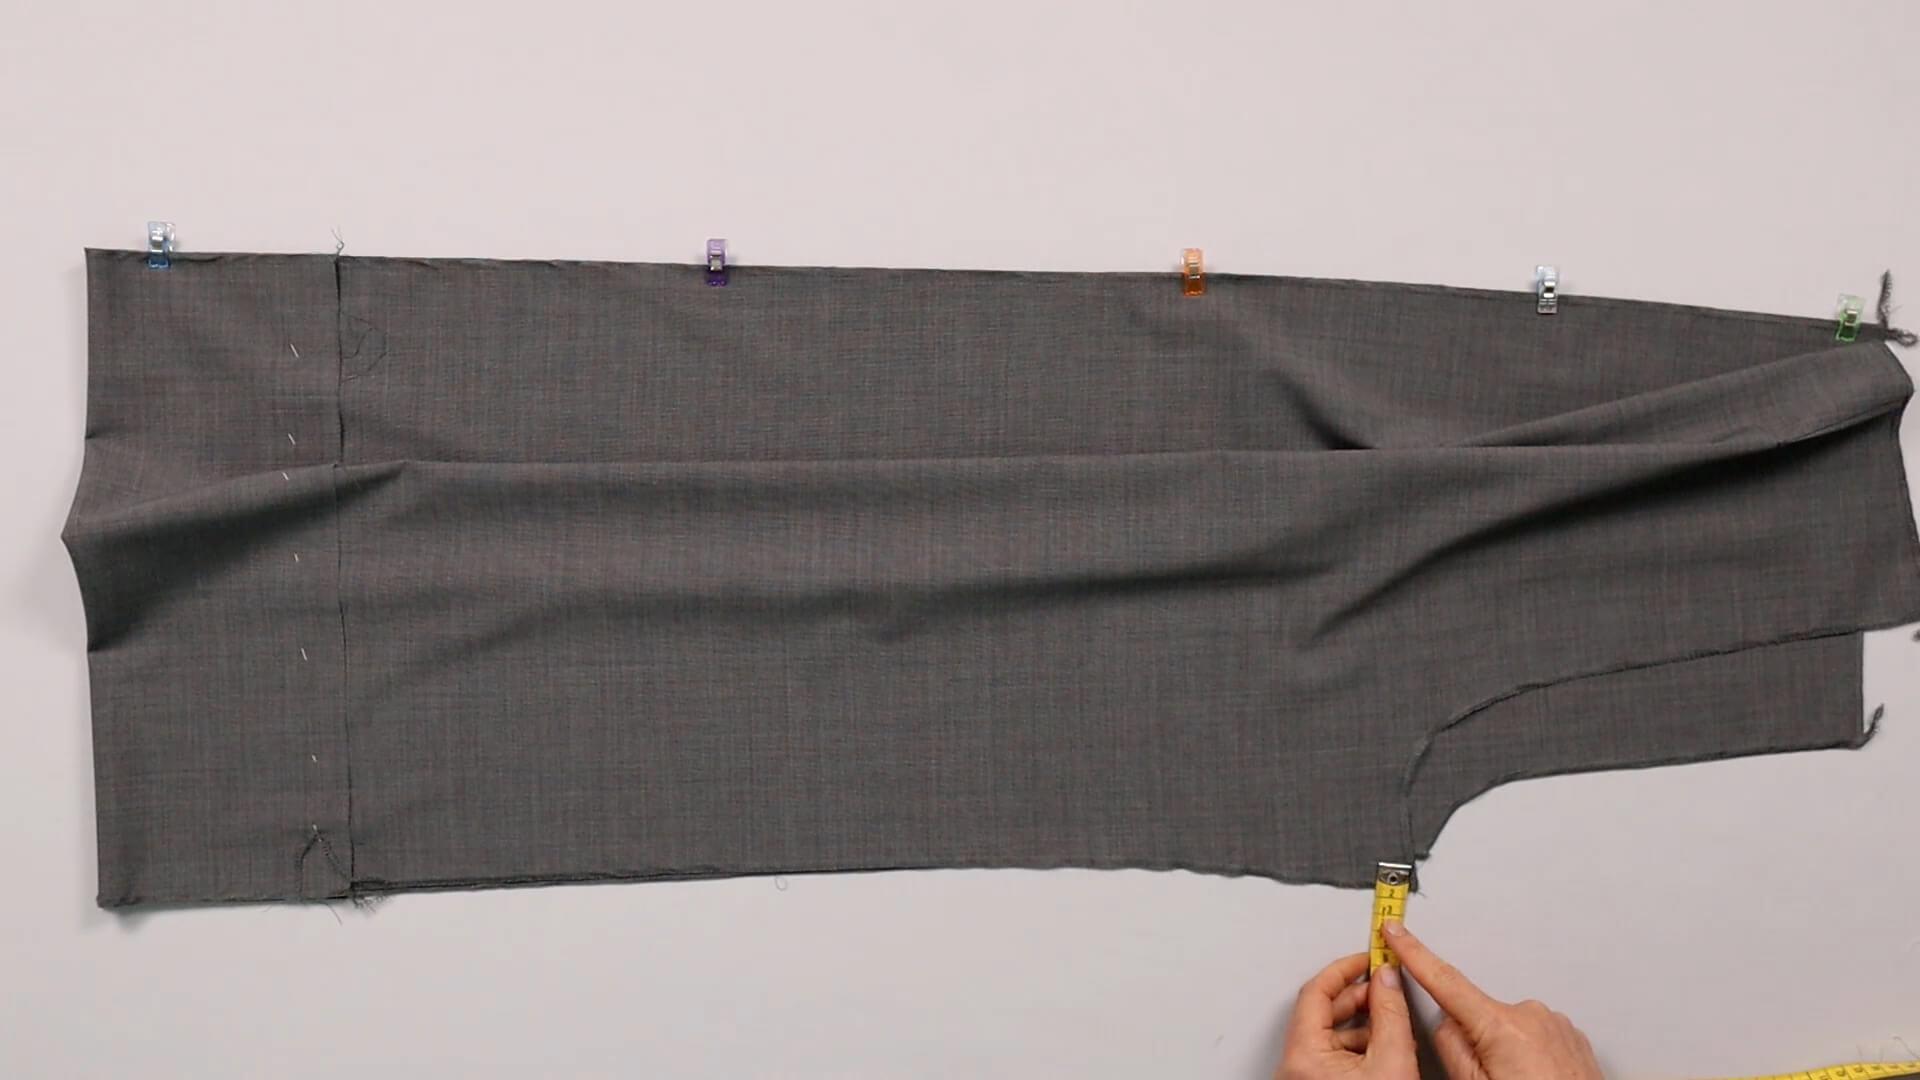
At the upper end of the inside leg seam, I mark the width of the seam allowance on the back trousers.
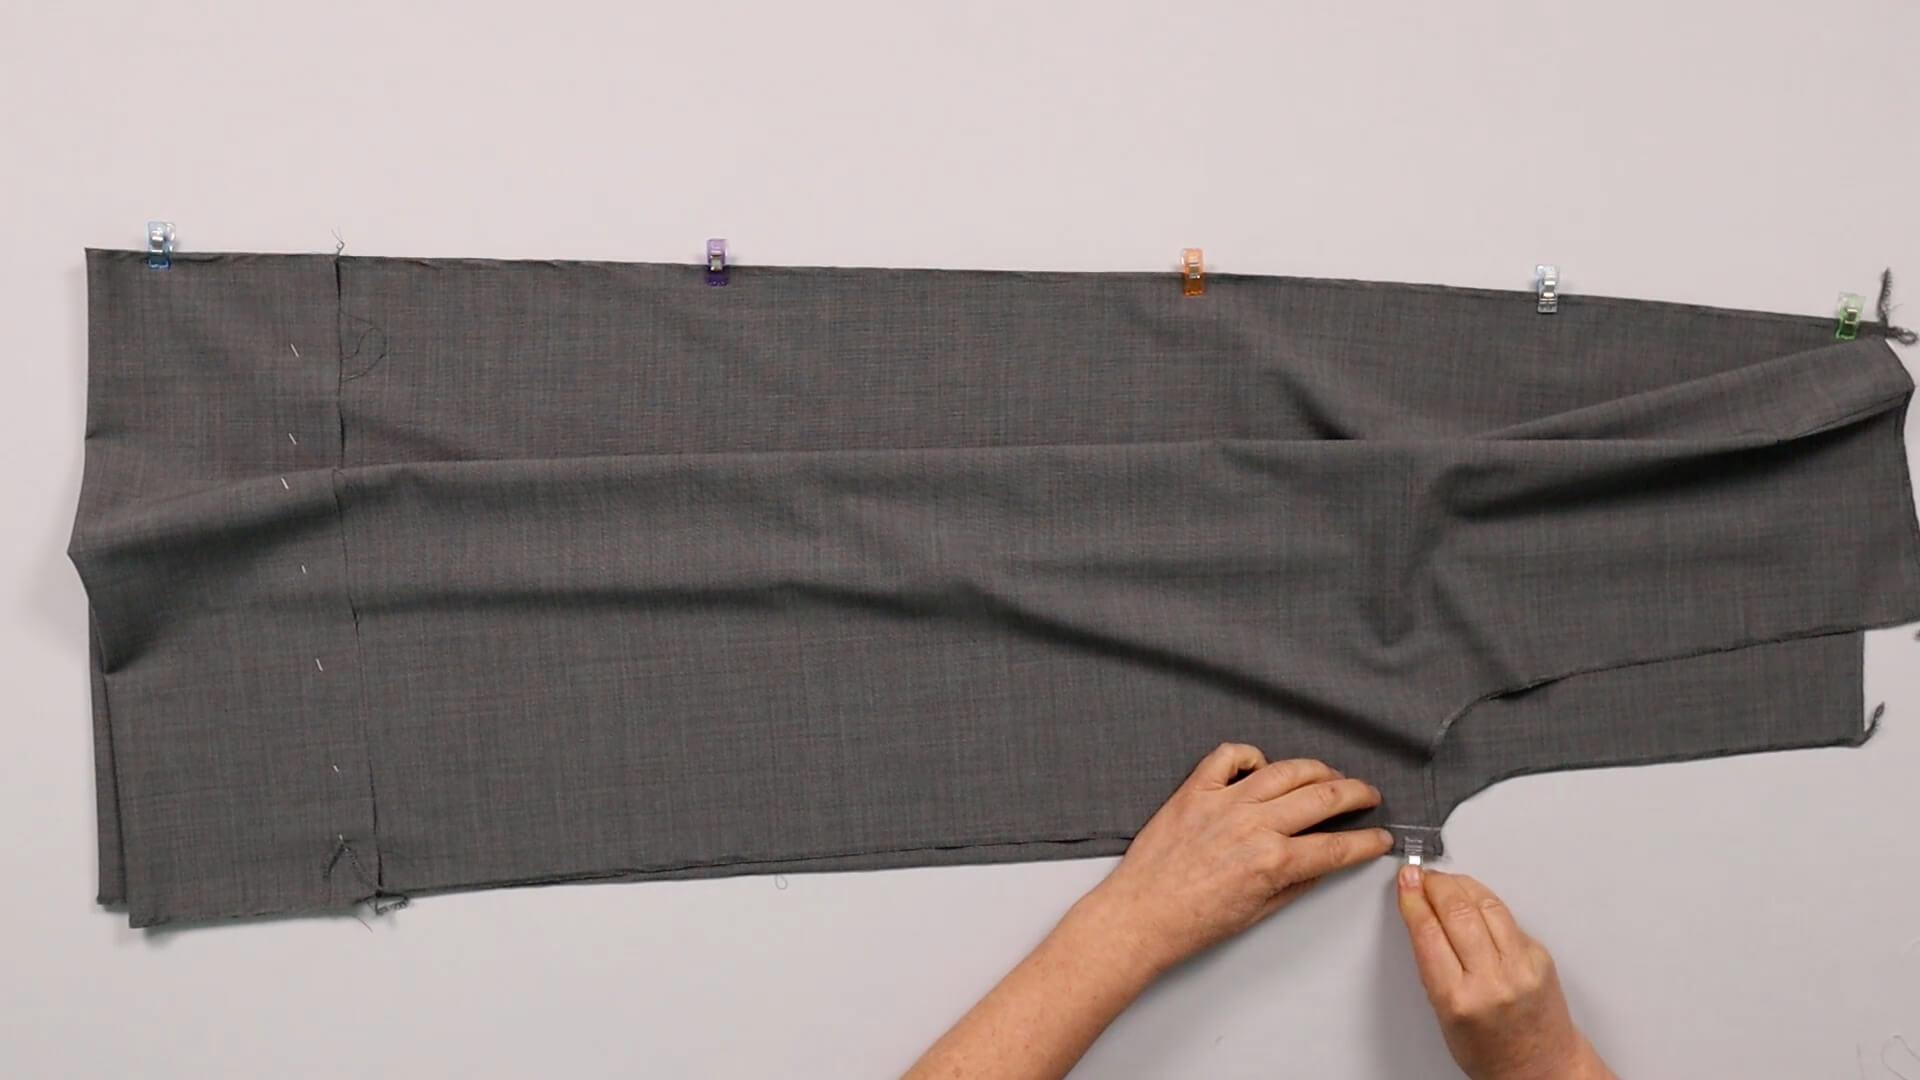
In this position, I secure the upper end of the inner leg seam with a clip or pin. The front and back trousers meet exactly at the marking in the crotch curve.
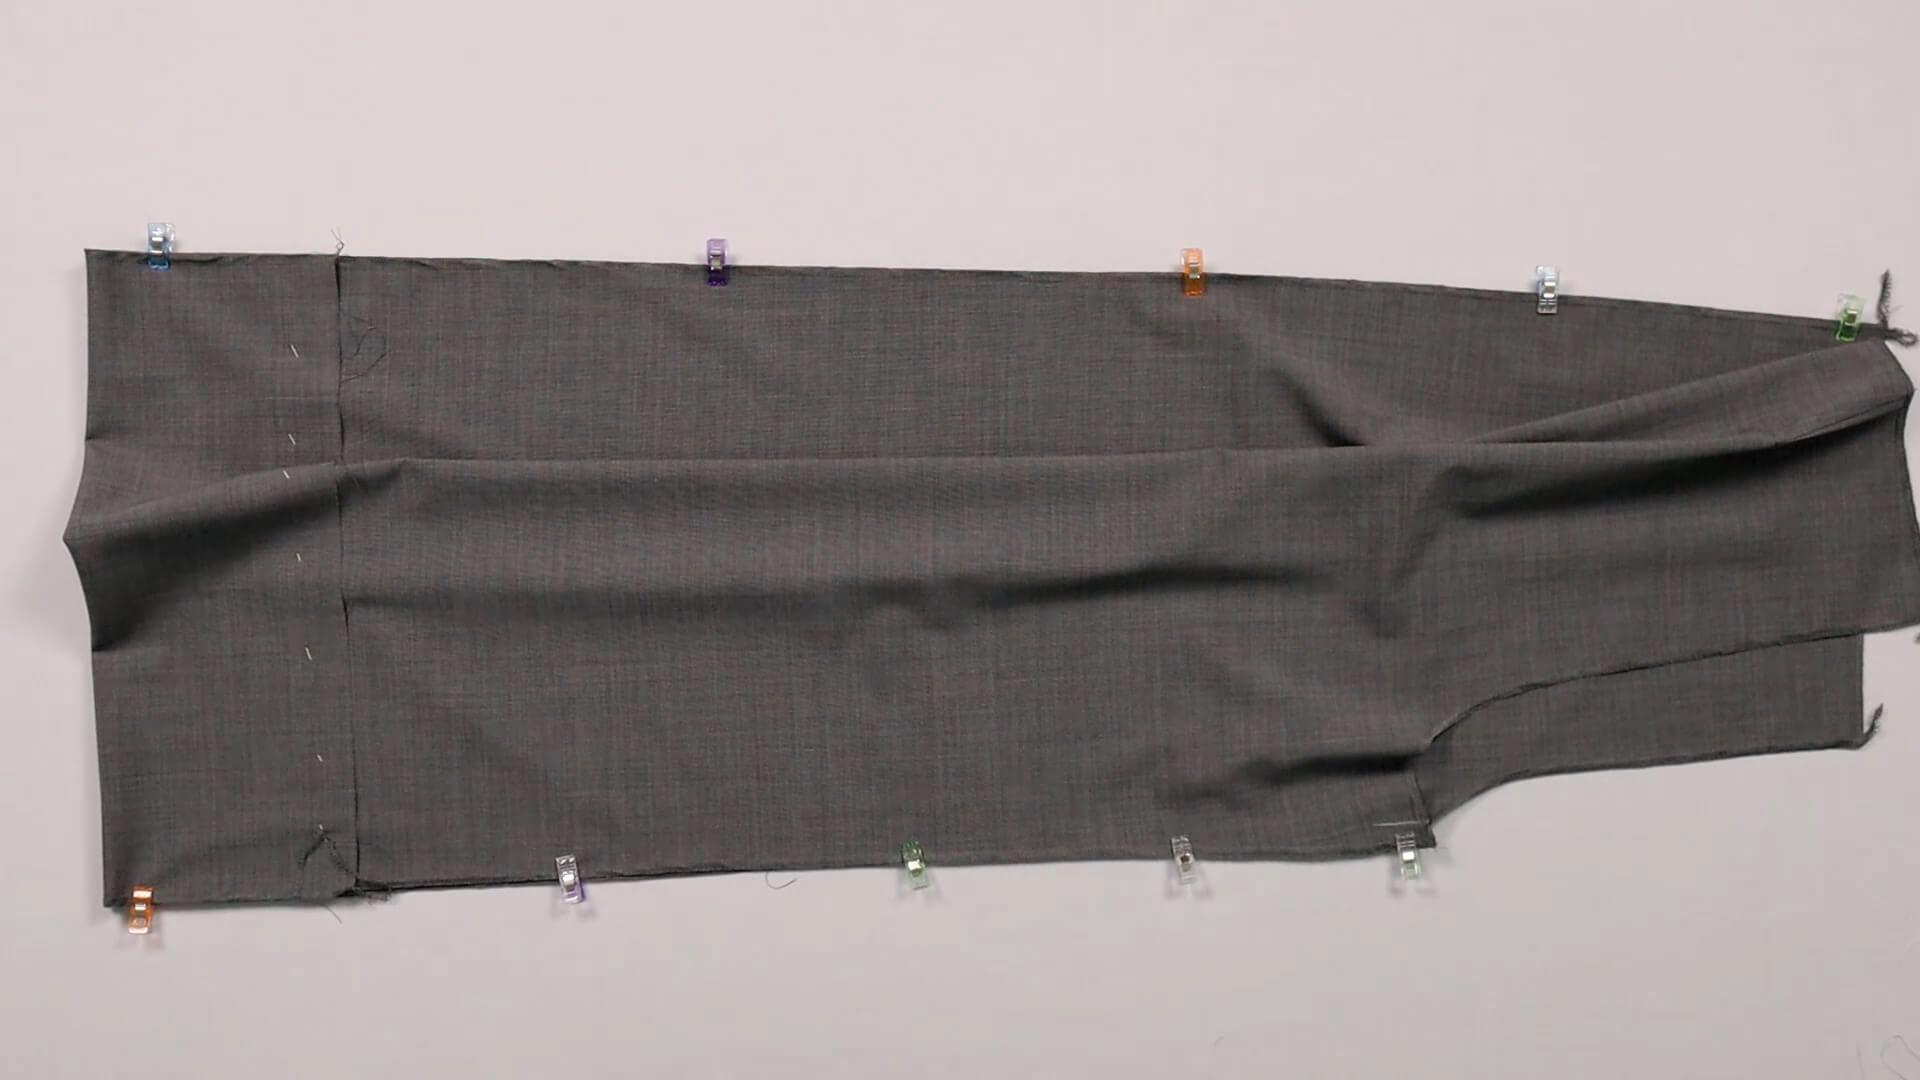
Then I pin the remaining section of the inner leg seam together. Here, too, I make sure that the notches meet at knee height.
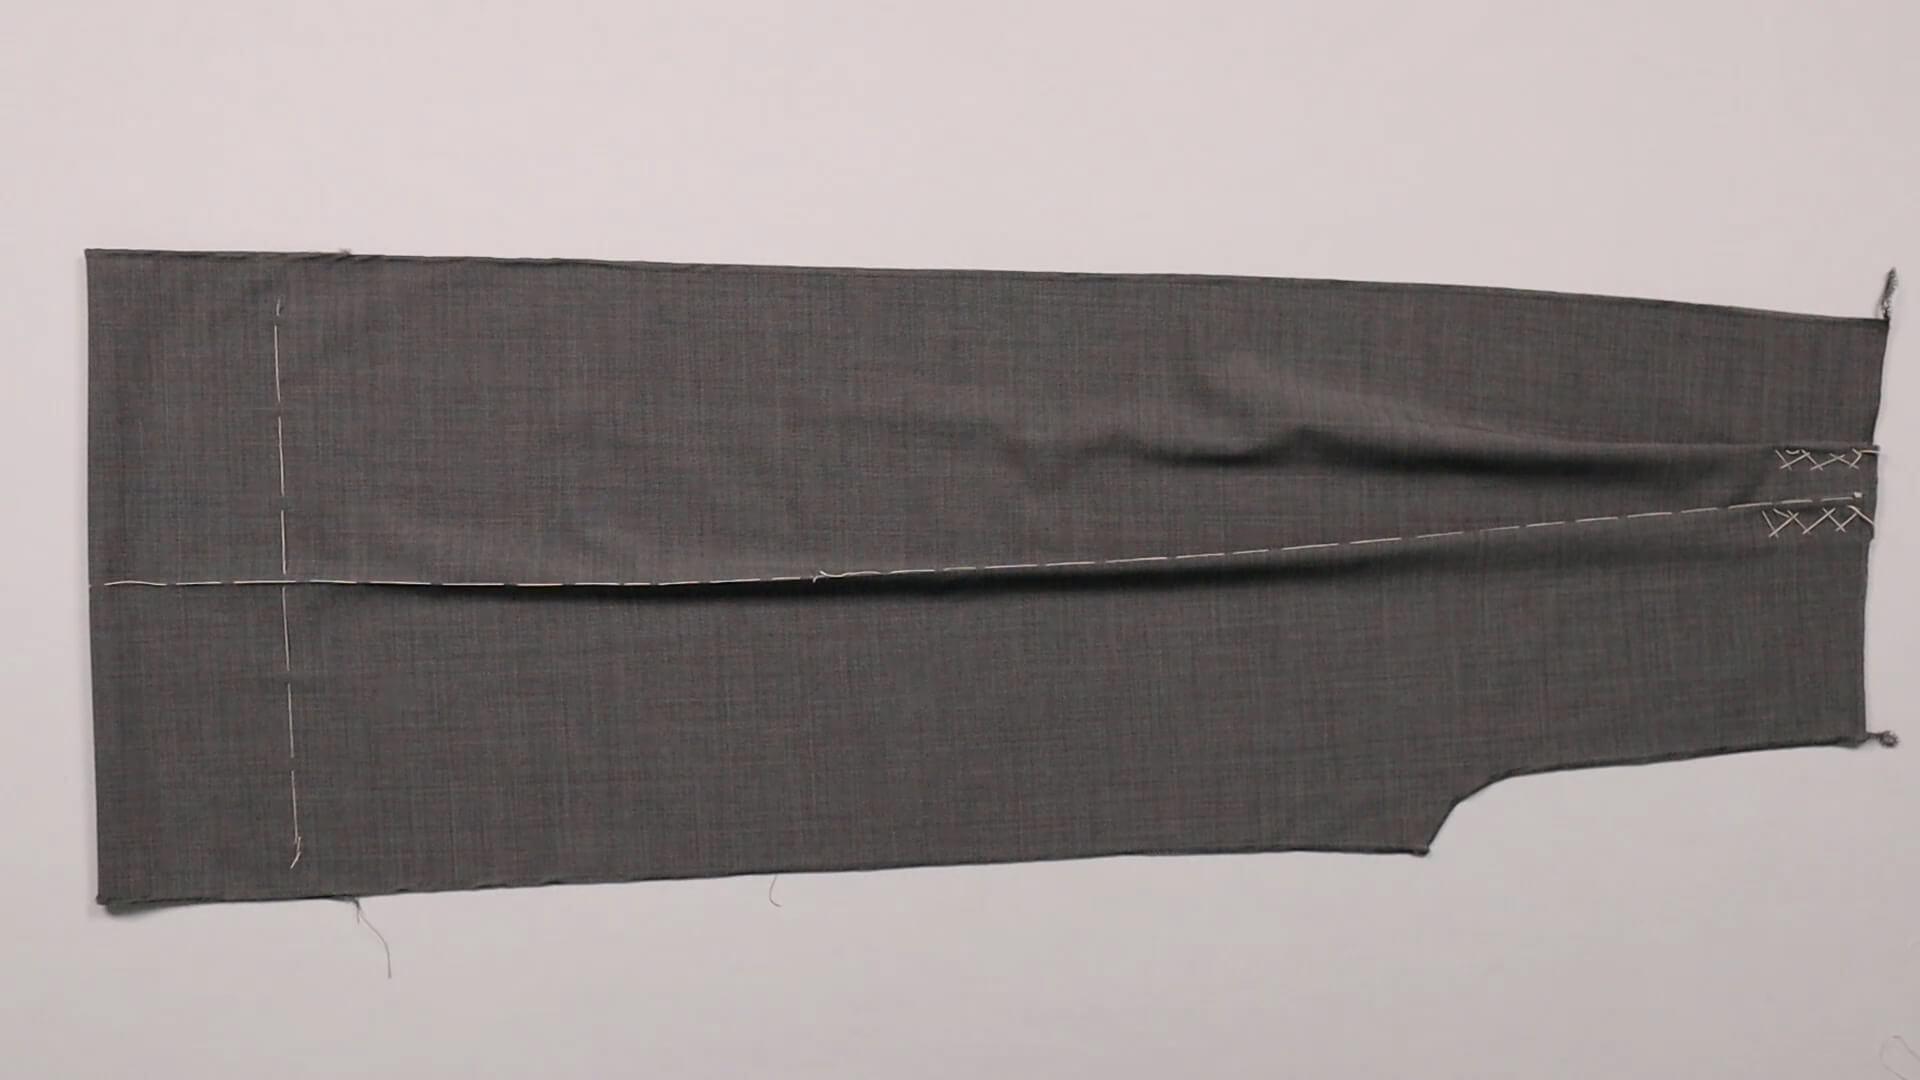
I baste both seams with a straight stitch with a long stitch length or by hand. Make sure to sew with the seam allowances indicated in the pattern.
5. Mark the pocket position on the back trousers

A template is provided for the position of the back trouser pocket. Here you can see the template for welt pockets. The procedure is identical for all pocket variants.
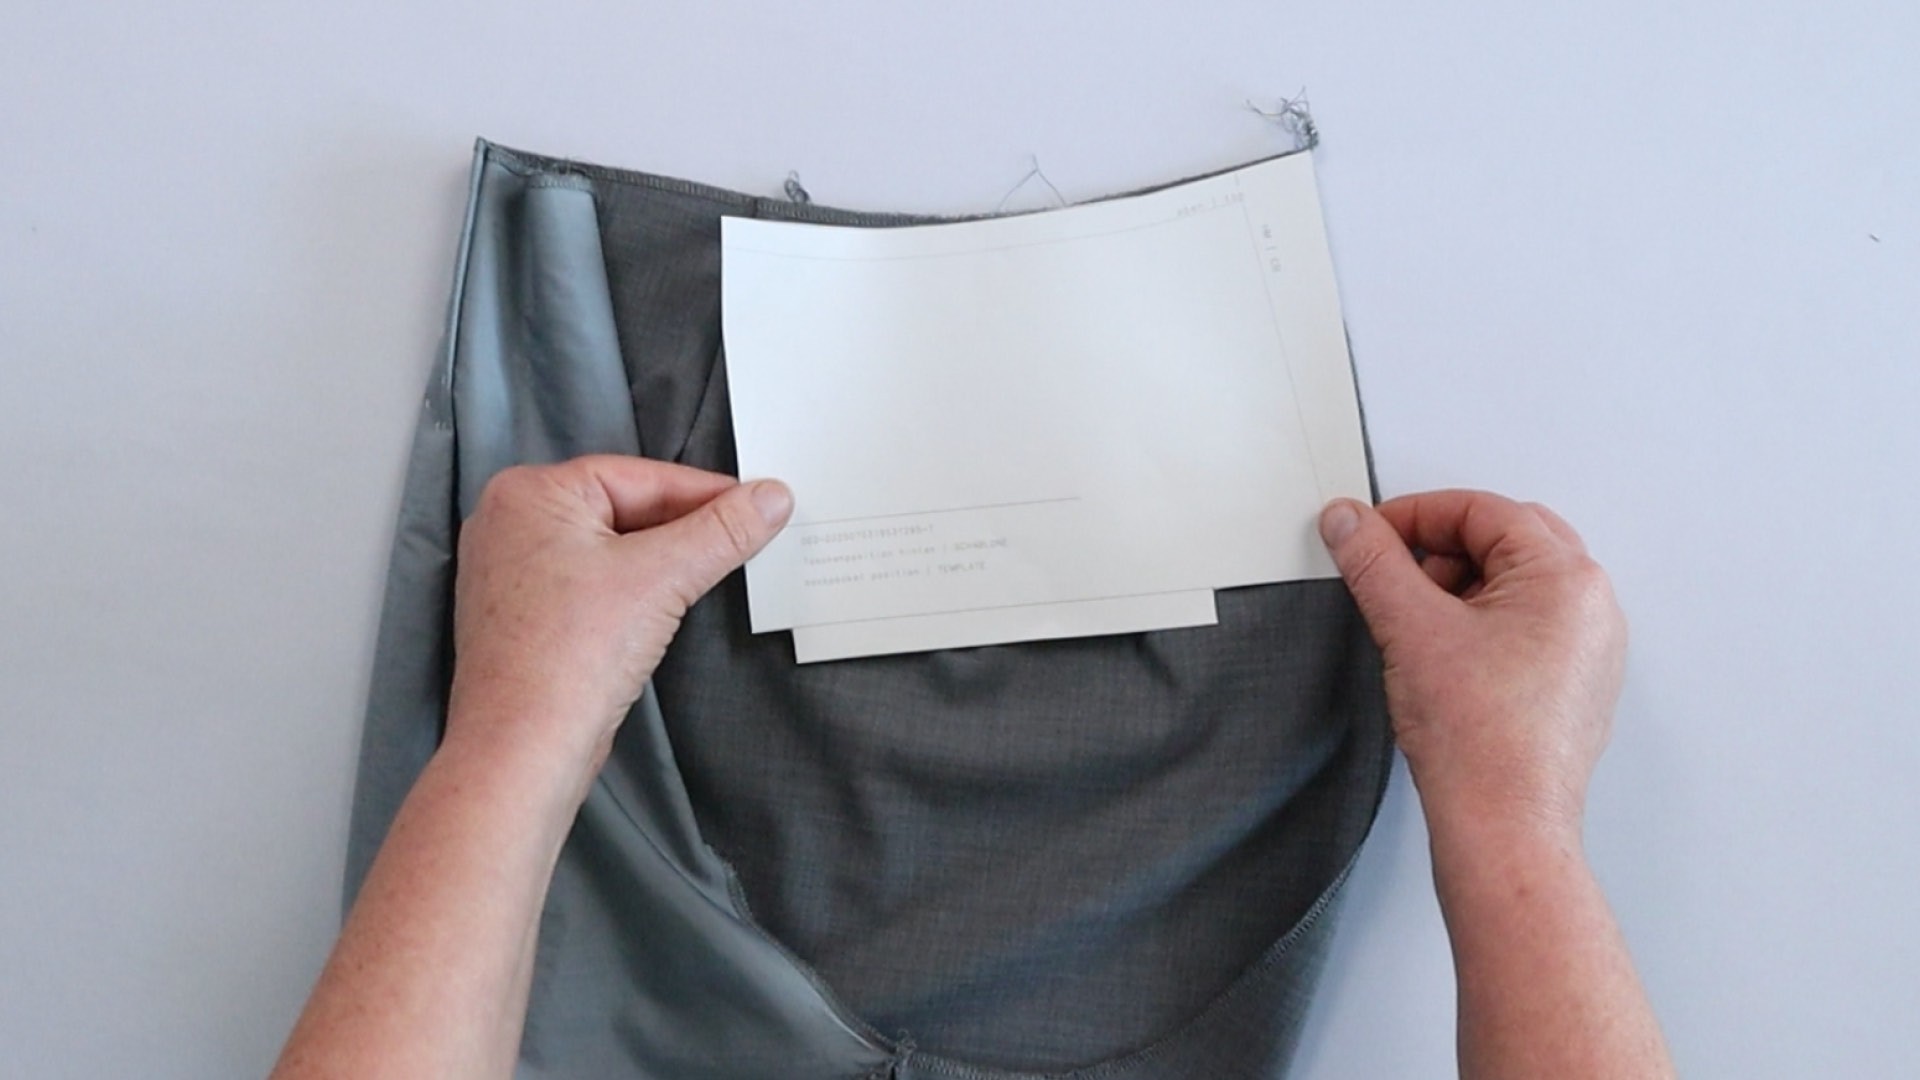
I place them flush against the center back and the top edge of the back trousers.

Then I mark the position of the pocket with tailor’s chalk.

If you make these markings before you try on the trousers, you will get an idea of where the pockets will be later. If you don’t like the position so much, you can still make changes.
6. Close the side and back seams

Since there’s a fly facing sewn onto my front piece, I mark the center front on the right trosuer leg on the left side of the fabric. You can see the distance from the front edge by looking at the top notch or by measuring it on the pattern piece.
I also mark the width of the seam allowance again at the centre back.

Then place the two trouser legs inside each other, right sides facing.
To do this, first turn the left trouser leg over so that the right side is visible on the outside.

Then slide the turned left leg into the right leg (on which I have marked the seam line in the crotch beforehand).

Make sure that the inner leg seams meet exactly in the crotch curve before you pin them.

I lay the back trousers flush on top of each other at the seat seam and pin them together starting from the waistband edge.
At the front, I also make sure that the pieces lie flush against each other along the cut edges.

Now I’ll sew from the waistband edge at the centre back to the waistband edge at the centre front using a long machine stitch. Alternatively, you can baste the seam by hand.
7. Attach the waistband for fitting

Next, I prepare the waistband to sew it onto the pants. I place it right sides together at the centre back. You can determine the seam allowance by the distance between the notch and the cut edge, or by referring to the pattern.

I mark the centre of the waistband and leave about 1.3 cm from the bottom edge for the opening through which I’ll thread the elastic later.

I sew the centre back using a long stitch length, skipping the marked opening.

I’m marking the notches for the centre front and the side seams to make them easier for you to see here.

The seam allowances at the centre back are spread apart.

Then I fold the waistband in half so that the right side of the fabric is on the outside.

I pin the cut edges together all around so they’re flush.

Now I lay the waistband in front of me so that the folded edge is at the bottom and the back center, with the opening, faces me.
I also place the trousers with the right side facing out and the centre back facing towards me.

At the centre back, I begin to pin the waistband to the trousers. The seams line up perfectly.

Then I pin the waistband to the centre front and the side seams, making sure the notches line up exactly with the seams.

Even between the markings, I still pin the waistband in a few places.

With a 1 cm seam allowance, the waistband is now basted to the trousers using a long stitch length.
8. Prepare the elastic

Now I’ll take the elastic band and attach a safety pin to one of the short sides. I’ll discuss the length of the elastic in more detail below.

Now I pull the elastic through the waistband tunnel using the safety pin. As I do this, I make sure that the back end of the elastic doesn’t slip in as well.

On the other hand, I pull the elastic back out of the tunnel and stretch it until it sticks out about 1 cm at the opening.

On this side, I thread the elastic through the waistband and secure it.

Then I sew it securely in place with a long machine stitch through all the layers.

You can now slide the secured end into the tunnel.

On the other side, I also slide the ribbon so that about 1 cm sticks out, meaning the cut edges of the elastic overlap by 2 cm. I secure the end with a safety pin and distribute the fabric evenly.

During the fitting, you can easily adjust how tight the elastic should be, pull it tighter if needed, and redistribute the fabric. To determine the final elastic length, I trim the elastic after the fitting so that 1 cm remains visible. This creates a 2 cm overlap with the other end of the elastic.
NOTE: If you plan to topstitch the waistband later, it may end up becoming wider. This happens because the waistband is stretched during sewing, and the elastic may not spring back as well afterward.
The finished waistband length may vary, especially when using soft elastic, stiff fabrics, or multiple parallel stitching lines. To avoid having to unpick the waistband later, it’s a good idea to make a short test sample first.
We’ve put together a guide for you here.
9. Trying on the trousers
The trousers are ready to try on for the first time!

Here are a few tips on what to consider when trying on:
- To get an impression of how the trousers fit, I recommend taking photos that include at least the three perspectives in the picture above. You should take the photos as straight as possible – i.e. not at an angle from above or below.

For made-to-measure patterns:
- Make sure the top edge of the waistband is at the correct height. To check this, measure the side length from the floor to the top seam and compare it to the side length you specified in the configurator.
- If the top of the waistband is at the correct height but the waistband is still too tight or too loose, compare the measurement you entered during configuration with the circumference measurement at the point where your waistband currently sits, and adjust the width of the elastic again if necessary.
- If the trousers seem a little too wide at the hips, remember that pockets are still being worked in. Depending on the thickness of the fabric, they also need a little space. It is best to try the trousers on again before sewing the waistband on the inside.
- The tighter the fit you have chosen and the less stretchy your fabric is, the more likely it is that the trousers will wrinkle at the back of the legs. This is because they have an “extra length” at the back, which you need so that you can sit down comfortably.
- Wrinkles sometimes look worse in photos than they actually are. Be sure to take another look in the mirror to see what it really looks like.
If you still have problems with the fit, please send me an e-mail with pictures of how the trousers look when worn (see above). I will then try to help you with the adjustments. This works much better at this point than at a later date.
10. Transfer changes and undo seams
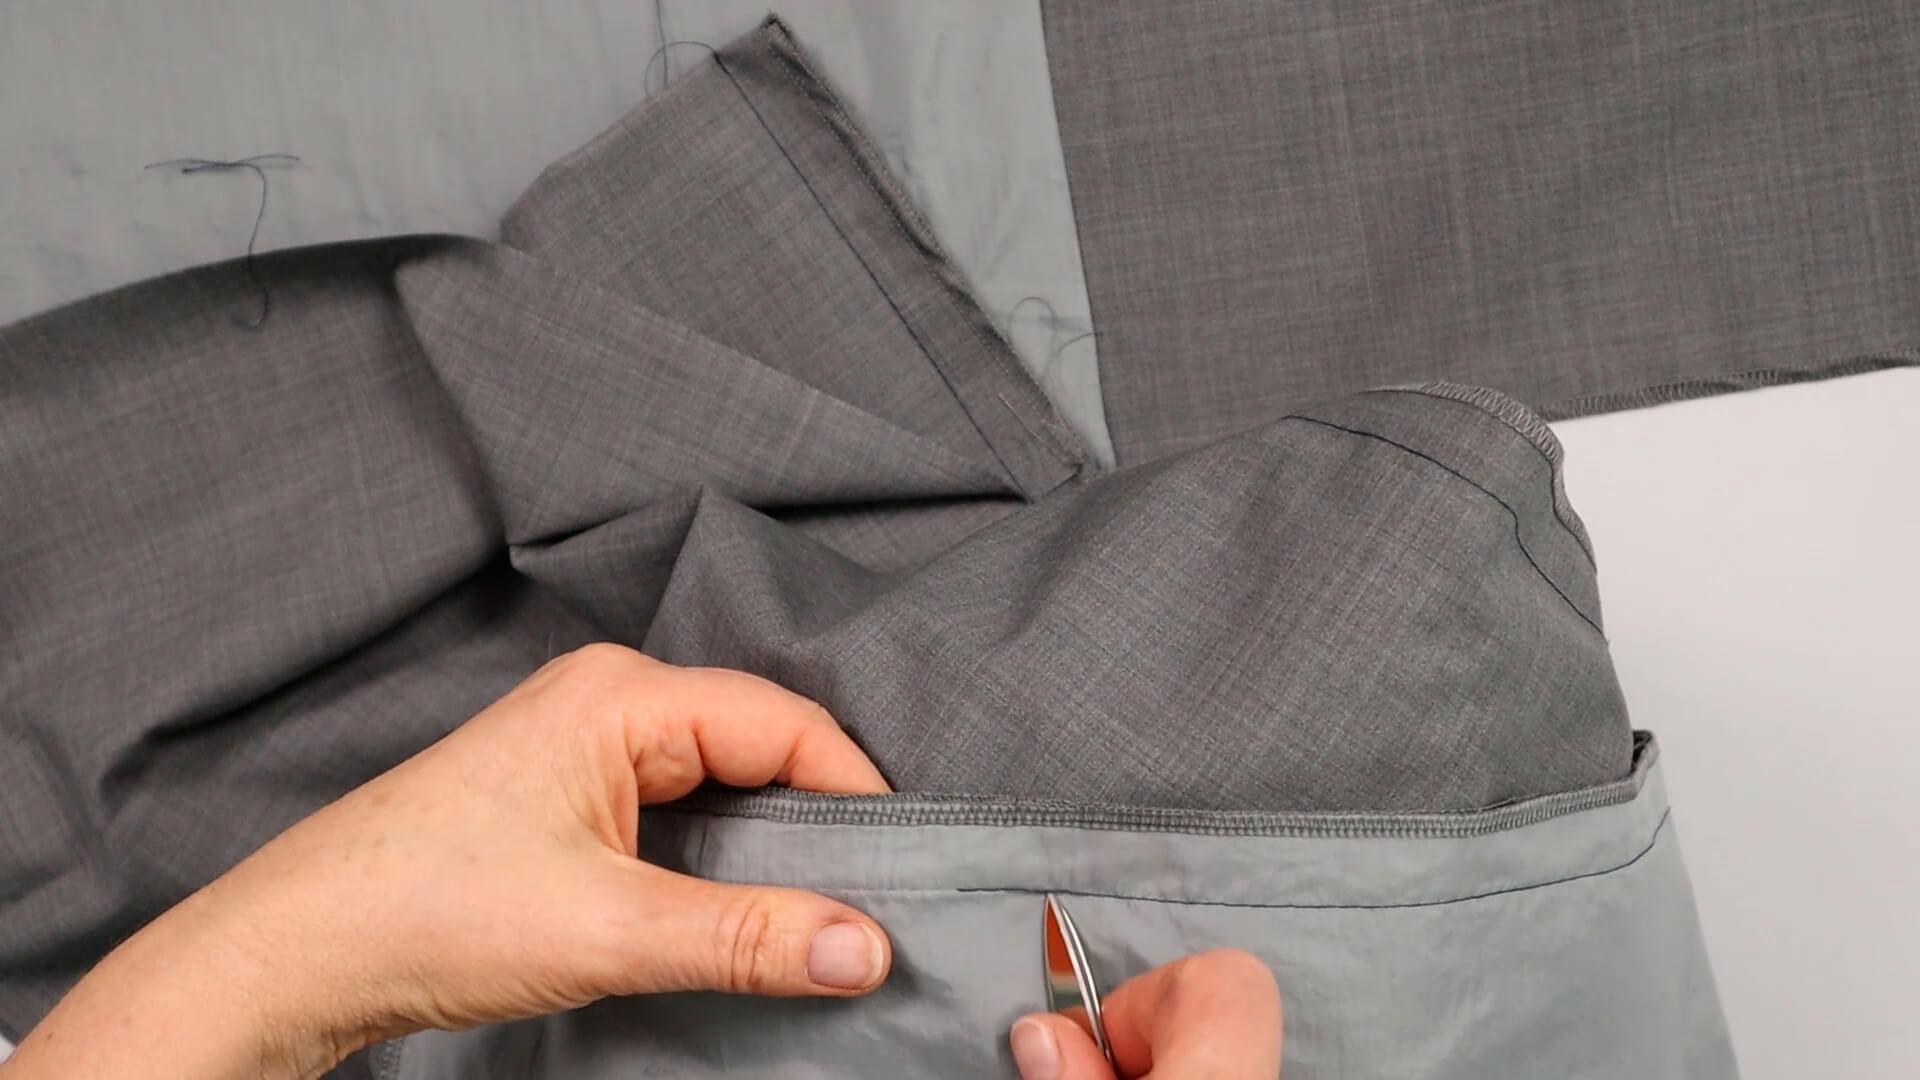
When you have finished trying on the trousers and have made any adjustments to the pattern, all the seams can be undone. Please note: the basting seams of creases are not removed.
If you have opted for closed pleats, you will find the next steps for stitching them closed here.
11. Cut the pocket opening of the front trousers
If the trousers have front slanted pockets/wing pockets (not welt or seam pockets), these must now be cut to size.
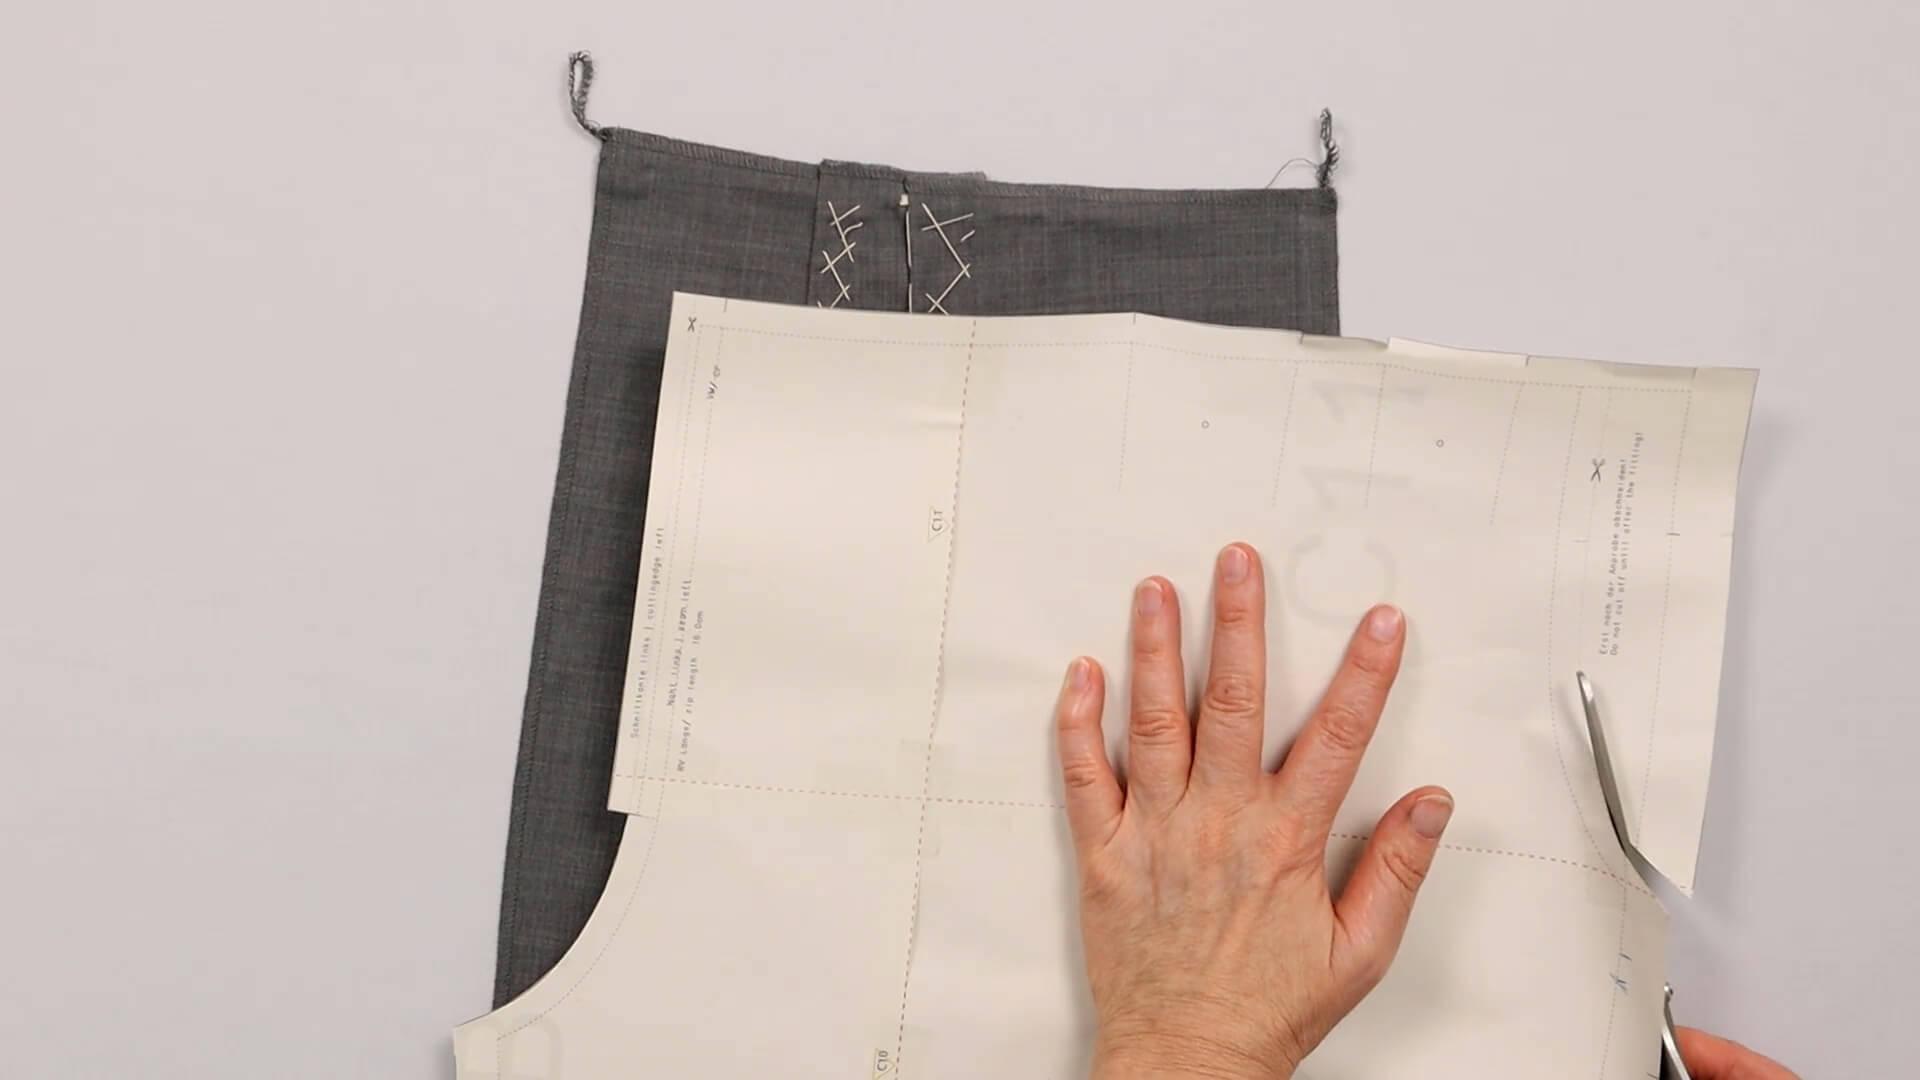
First, I cut away the pocket opening on the paper pattern according to the marking.
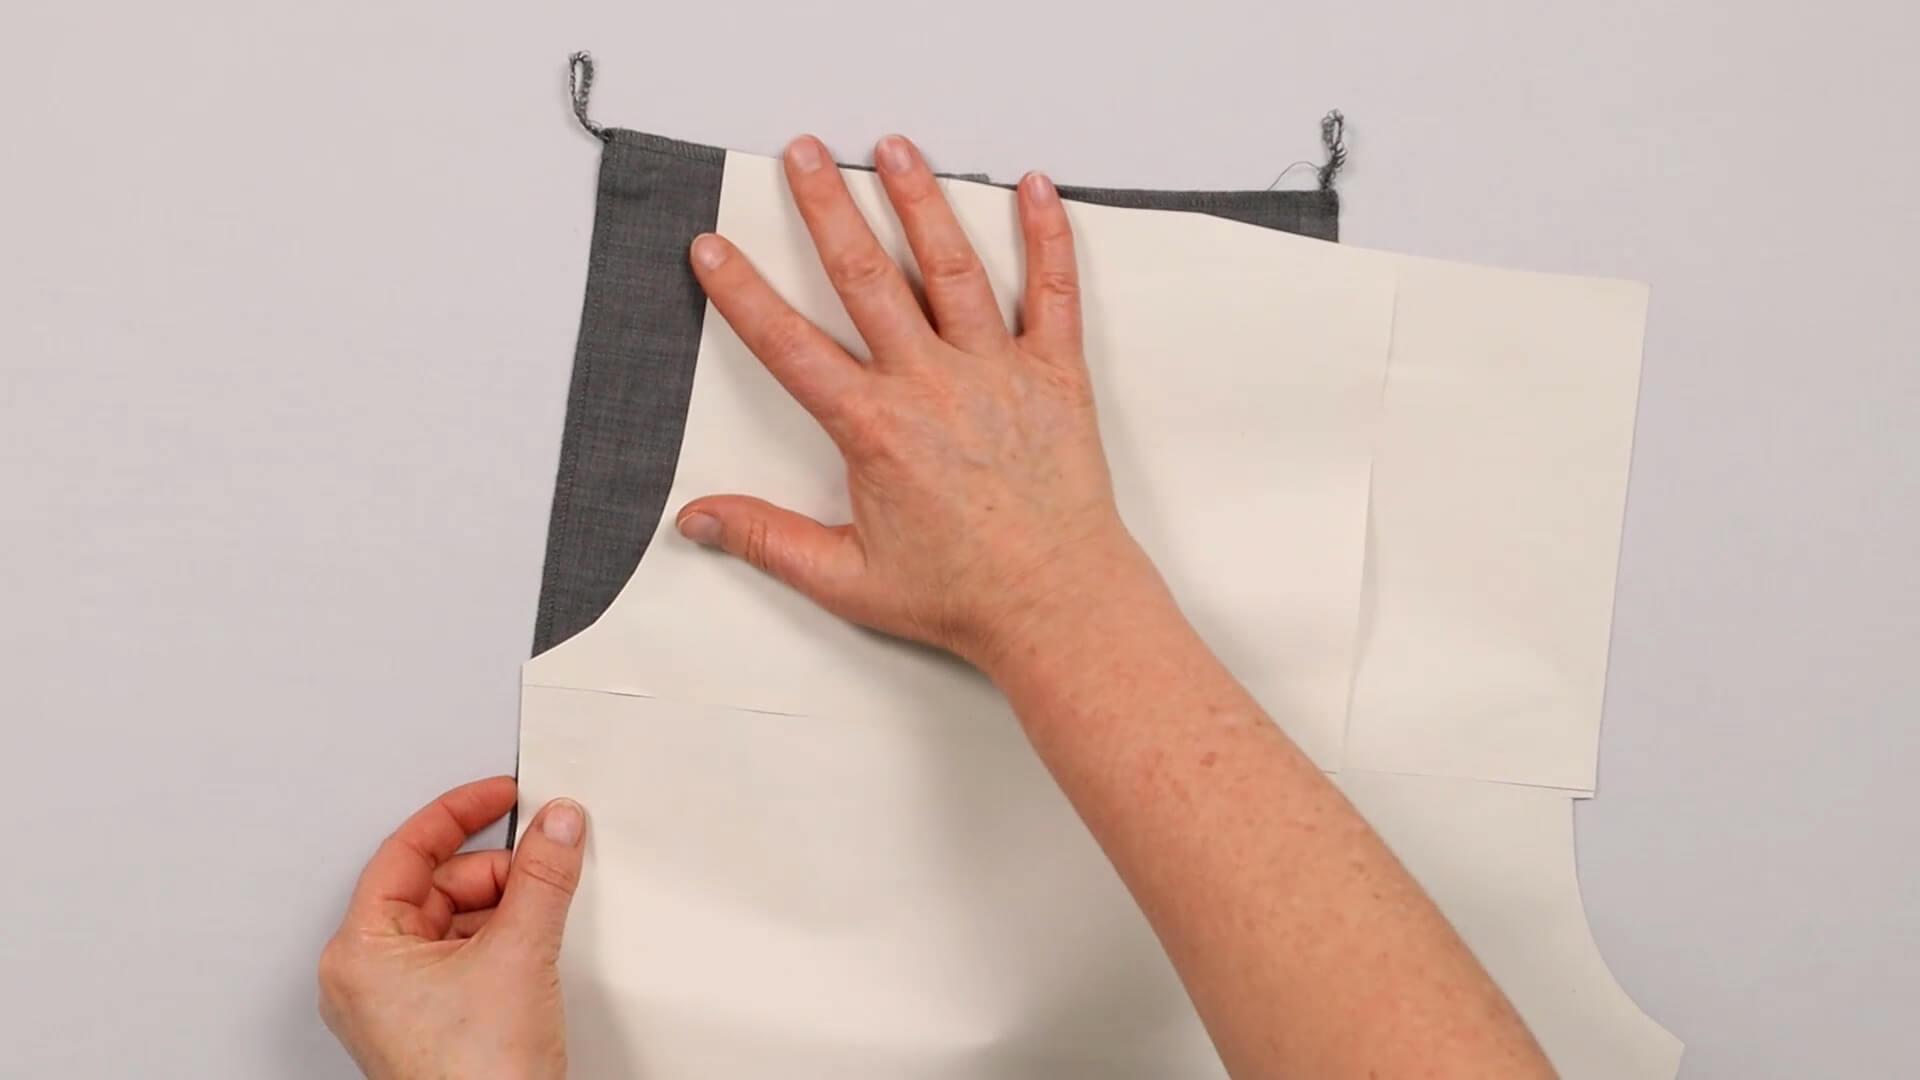
Then I place the pattern piece on the front trousers and mark the pocket opening on the right side of the fabric.
If you have unlined front trousers, you can now cut away the pocket opening. Repeat the steps for the second front trousers before continuing with the next step (see links below).
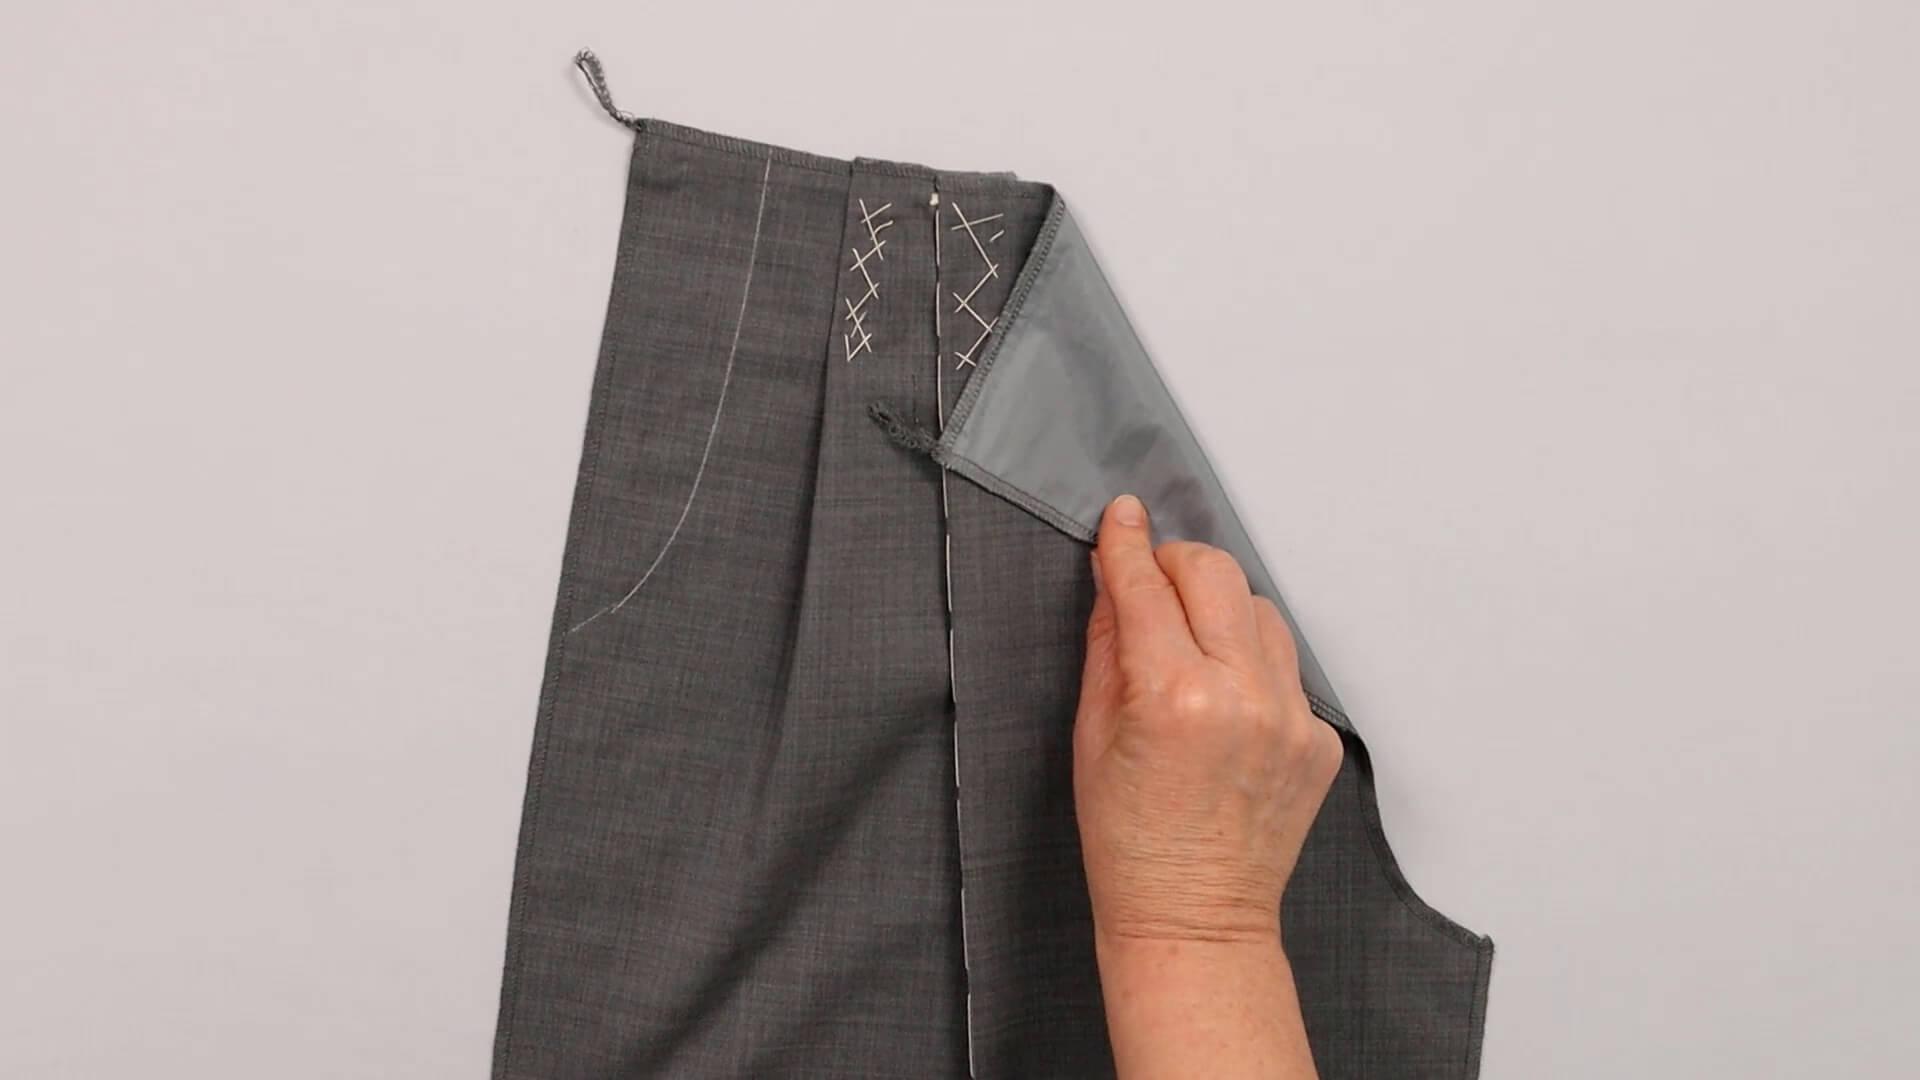
On lined front trousers, I first secure the pocket opening before cutting off the excess fabric.
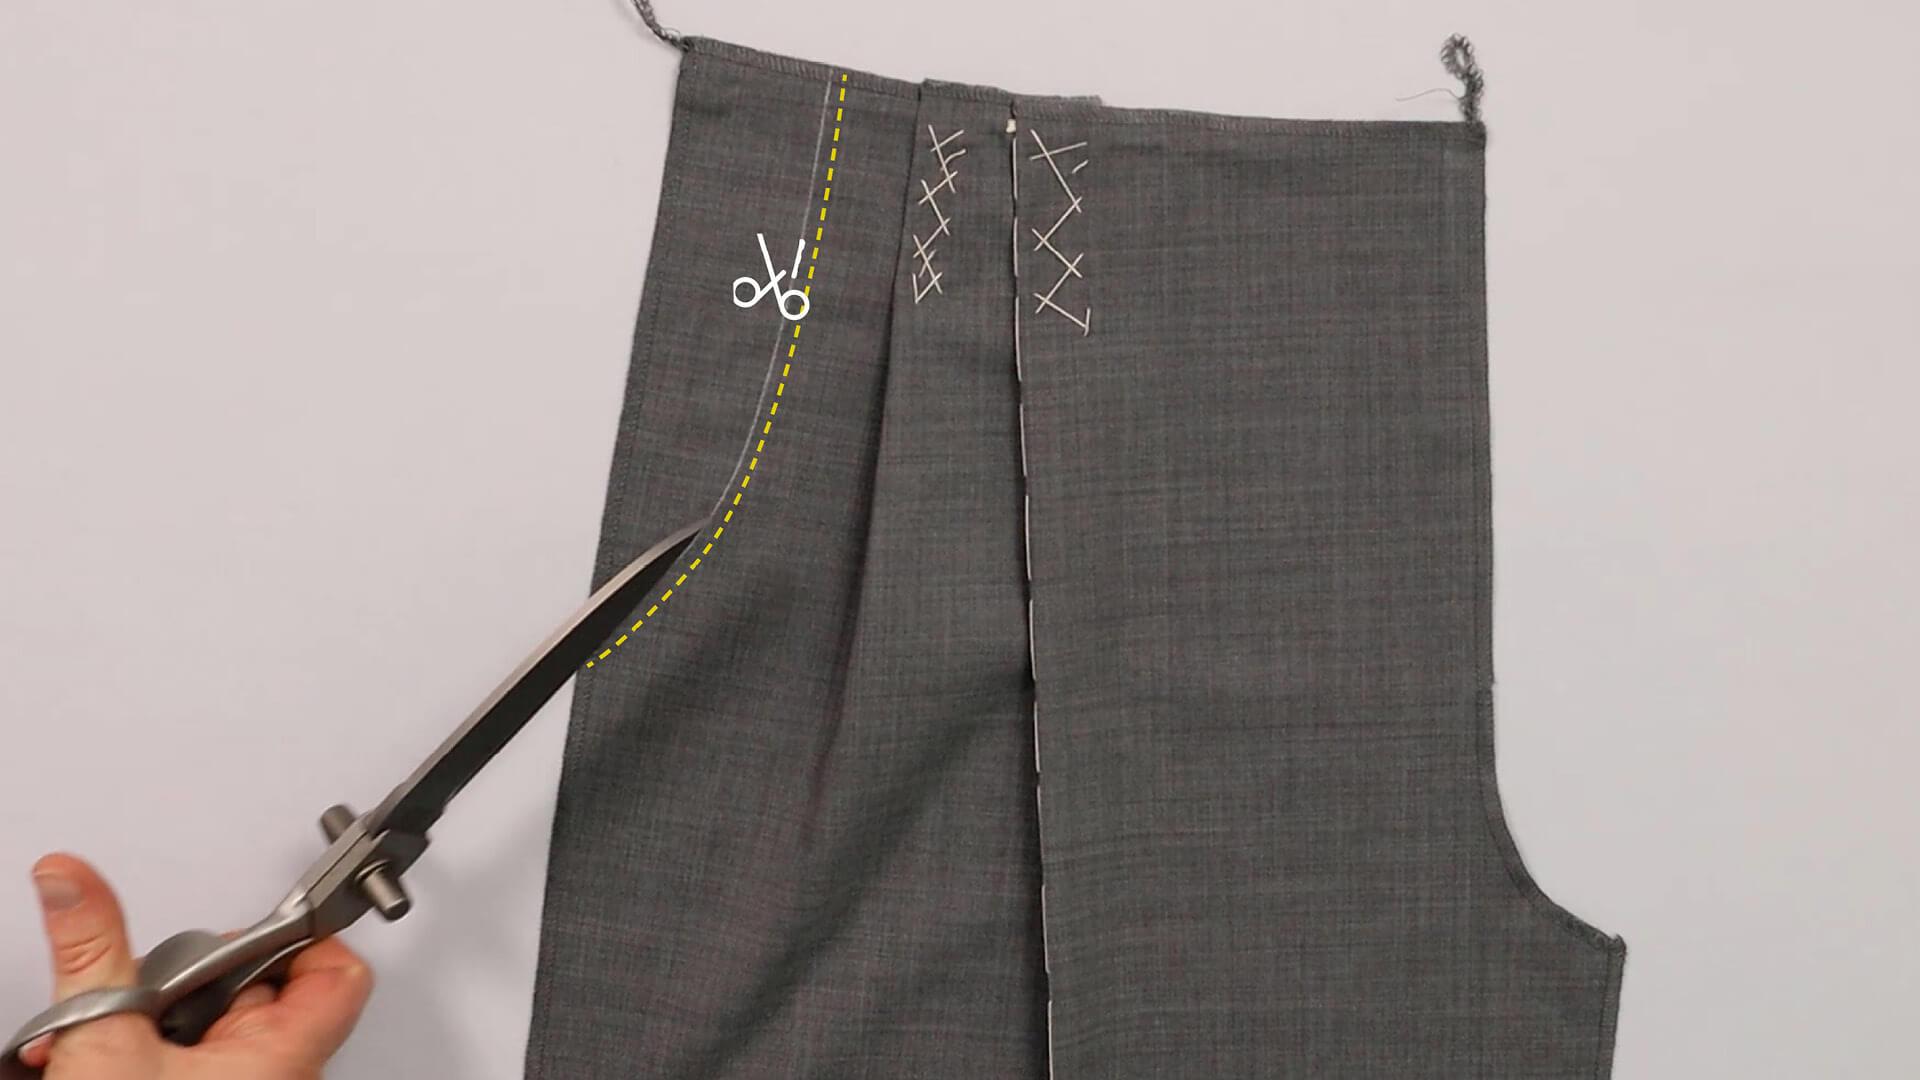
To do this, I sew through both layers of fabric just next to the marking. I can then cut away the pocket opening at the marking. I repeat these steps for the second front trousers.
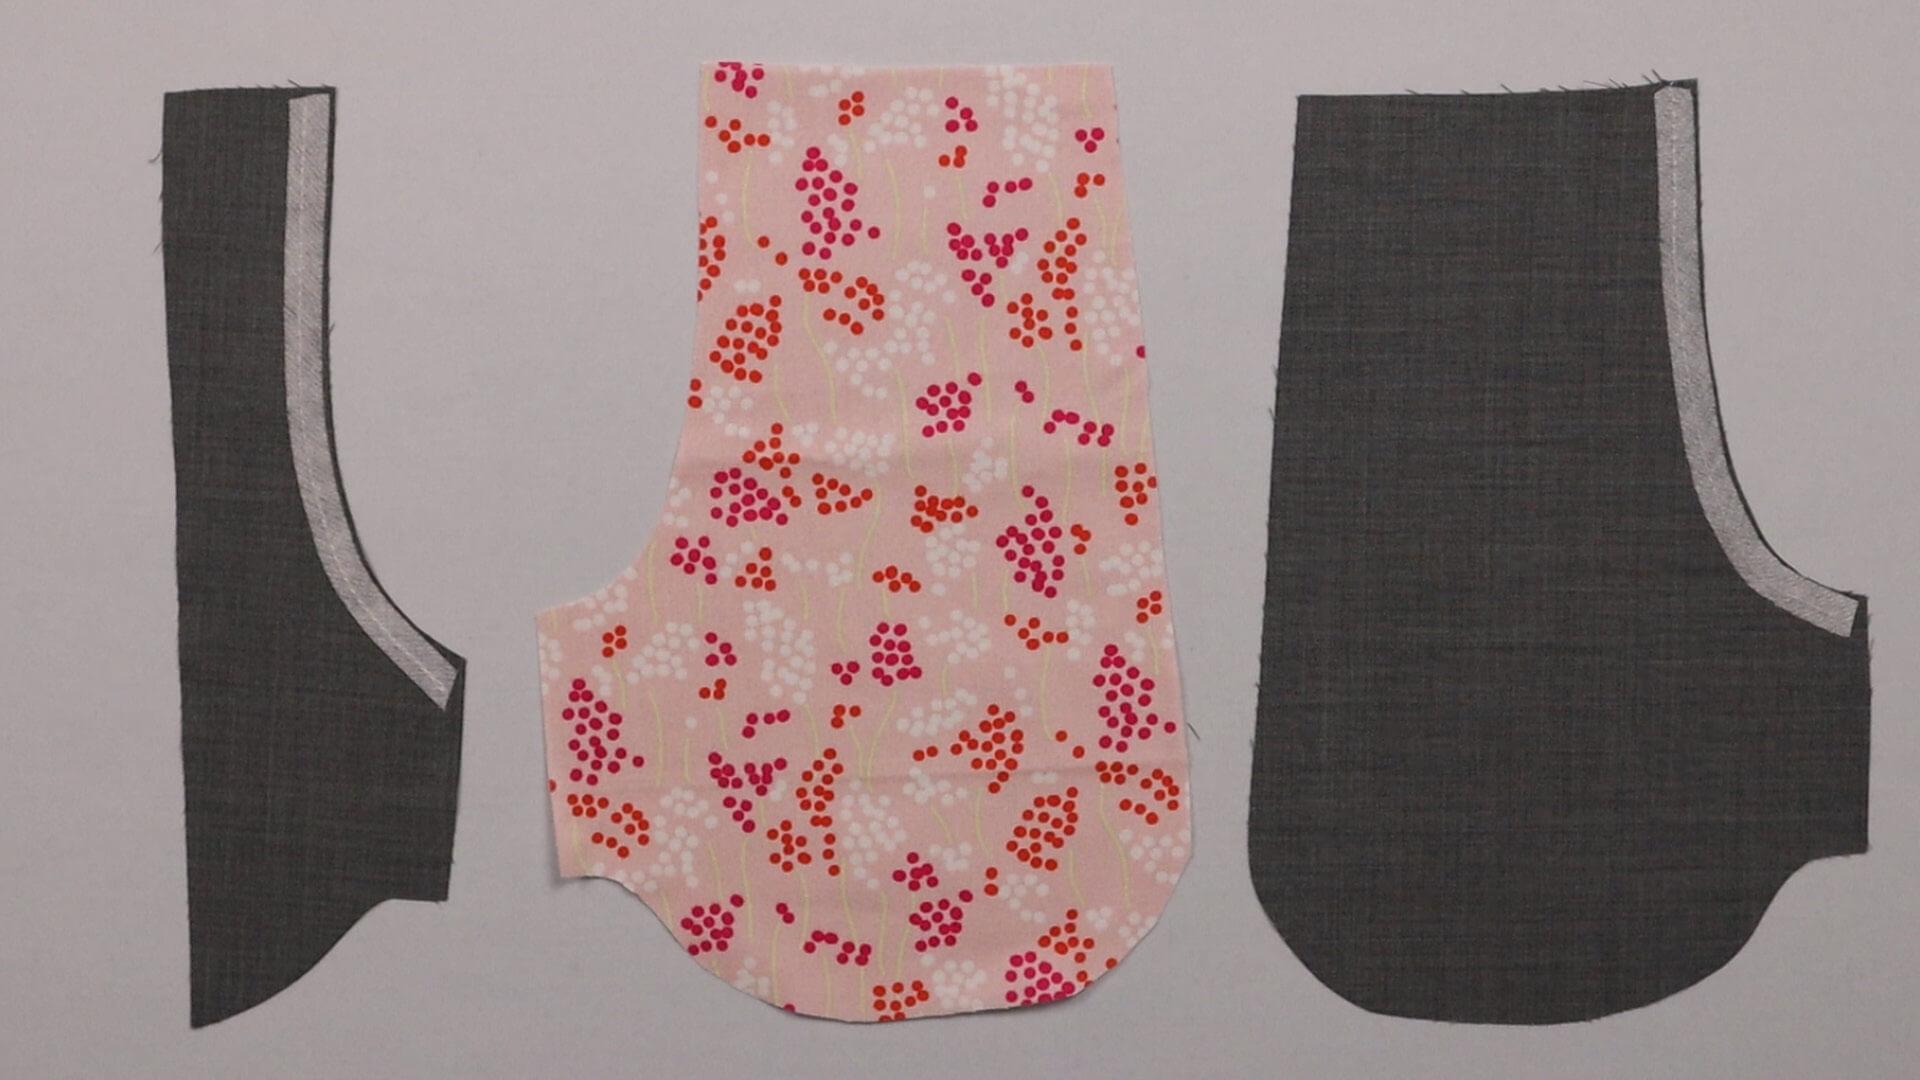
In the case of lined trousers with seam pockets, reinforcing the opening on the lining of the front trousers would not work well. Therefore, the pocket opening is reinforced on the facing of the upper pocket bag on the left side of the fabric, as shown in the picture on the left.
If you sew the upper pocket bag without a facing, the pocket bag itself will be reinforced (right picture).
Here you will find the links to the next step. Select the link that belongs to the bag shape you have chosen.
If you don’t want pockets on the back trousers, continue here:
If you’re not quite ready yet and perhaps want to start at the beginning, you’ll find some links here: