Sewing darts on trousers #AB01
A waist dart brings shape to trousers. You can use darts to narrow the required width at the seat towards the waistband. It’s not rocket science, but you should work carefully to achieve a beautiful result. In the following step-by-step instructions, I explain how to do this using video and illustrated text instructions.
Video instructions:
The video instructions are currently only available in German. Via settings you can have YouTube display the subtitles in your language of choice.
2. Transfer darts to the fabric
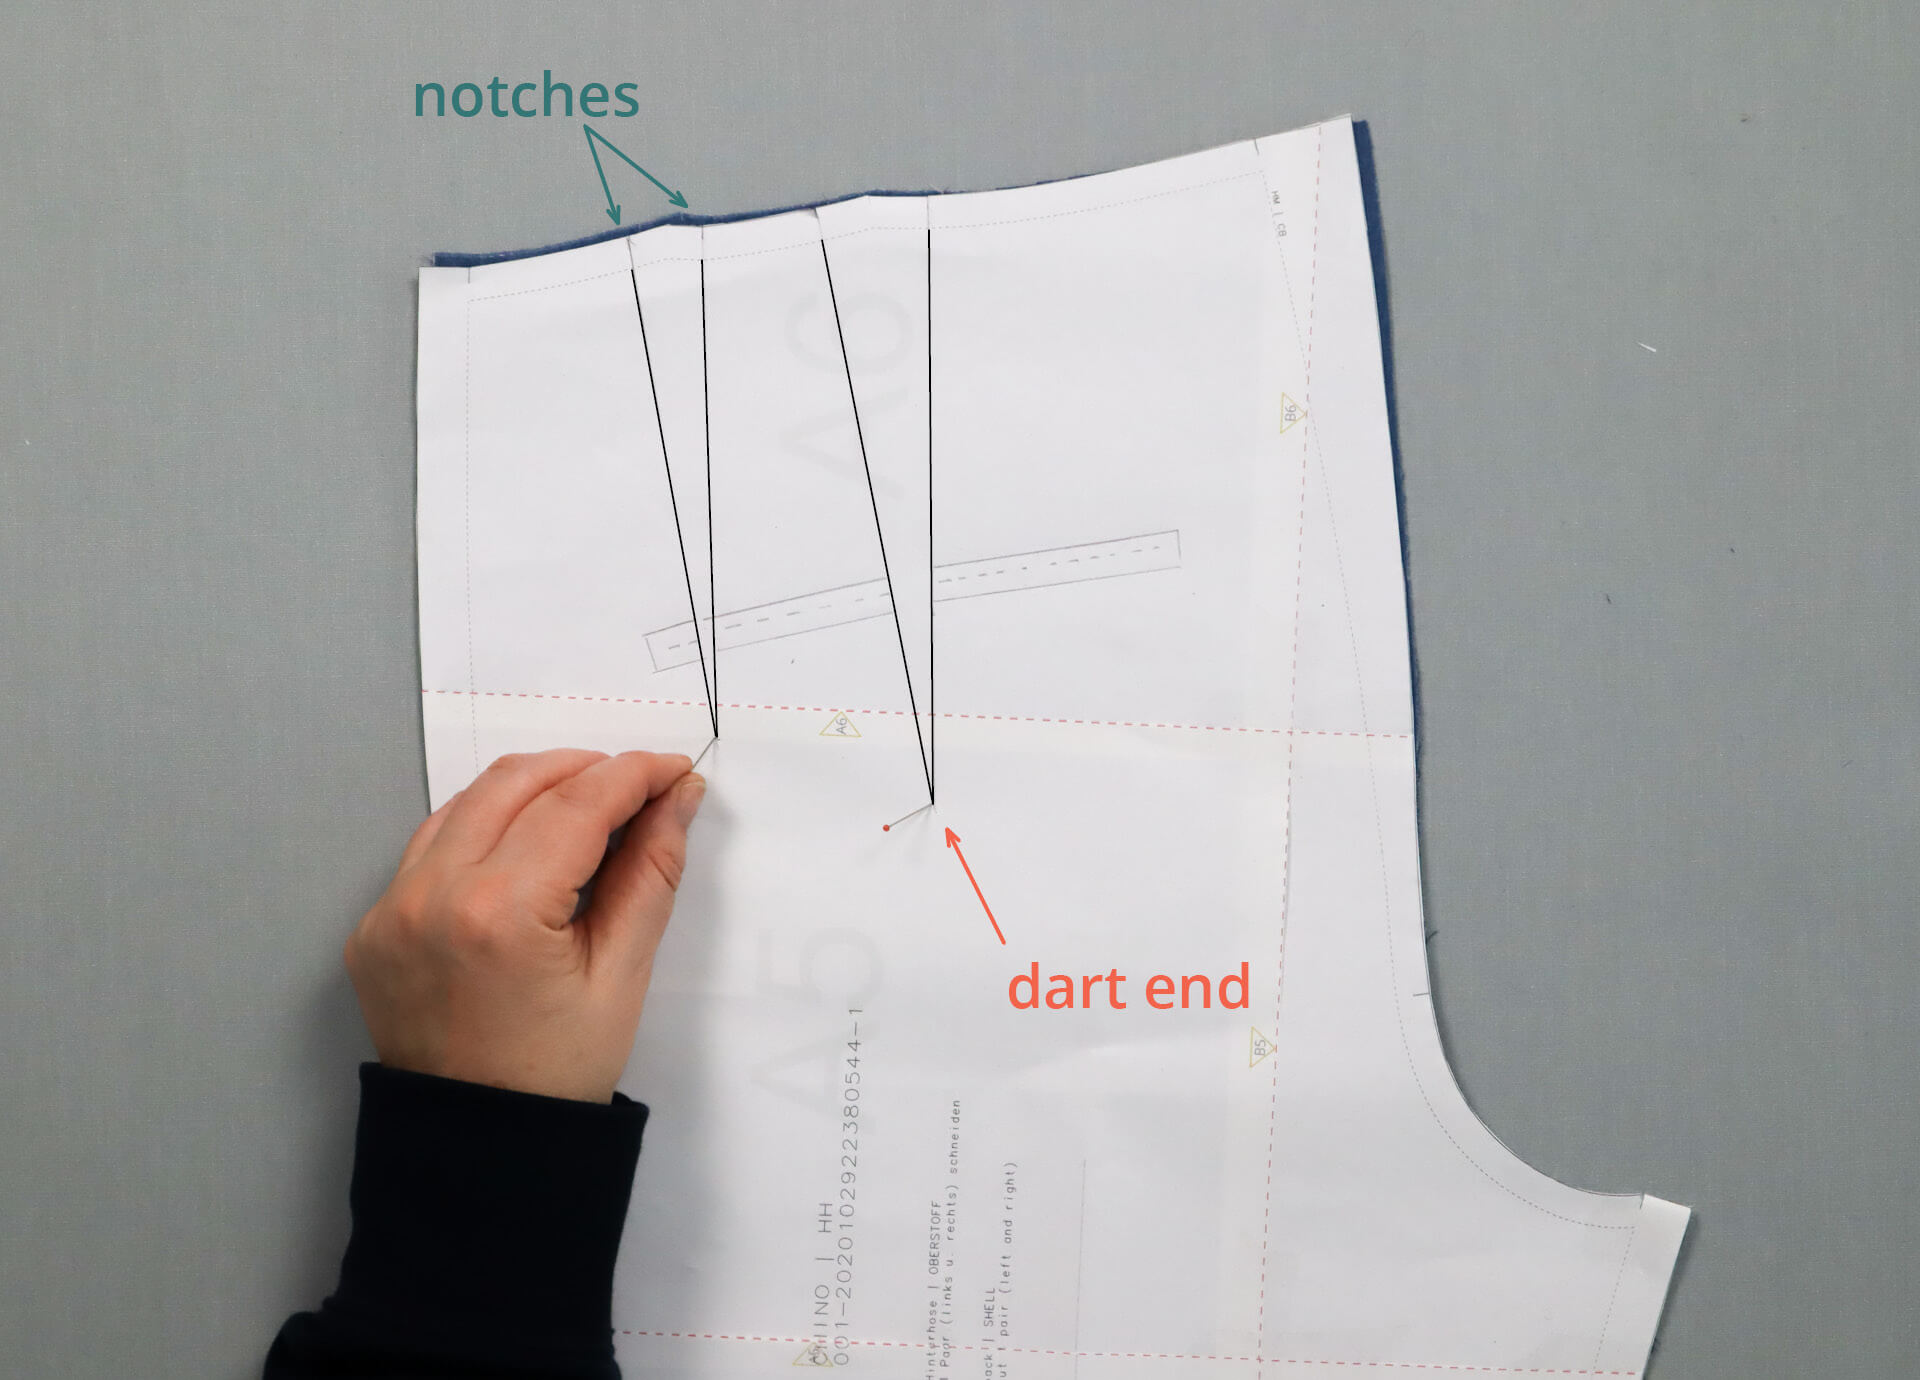
Waist darts are shapes that point downwards from the waist edge in a wedge shape. Depending on the model and figure, this may be one or two darts. When cutting out the back trouser pieces according to the pattern, you should transfer the notches to the fabric as short incisions. There are 2 notches for each dart at the waist edge. These are precisely aligned with the dart legs.
To transfer the dart point to the fabric, I place the pattern with the same edges on the pair of back pants fabric and pierce the point with a pin through the paper and the two layers of fabric.
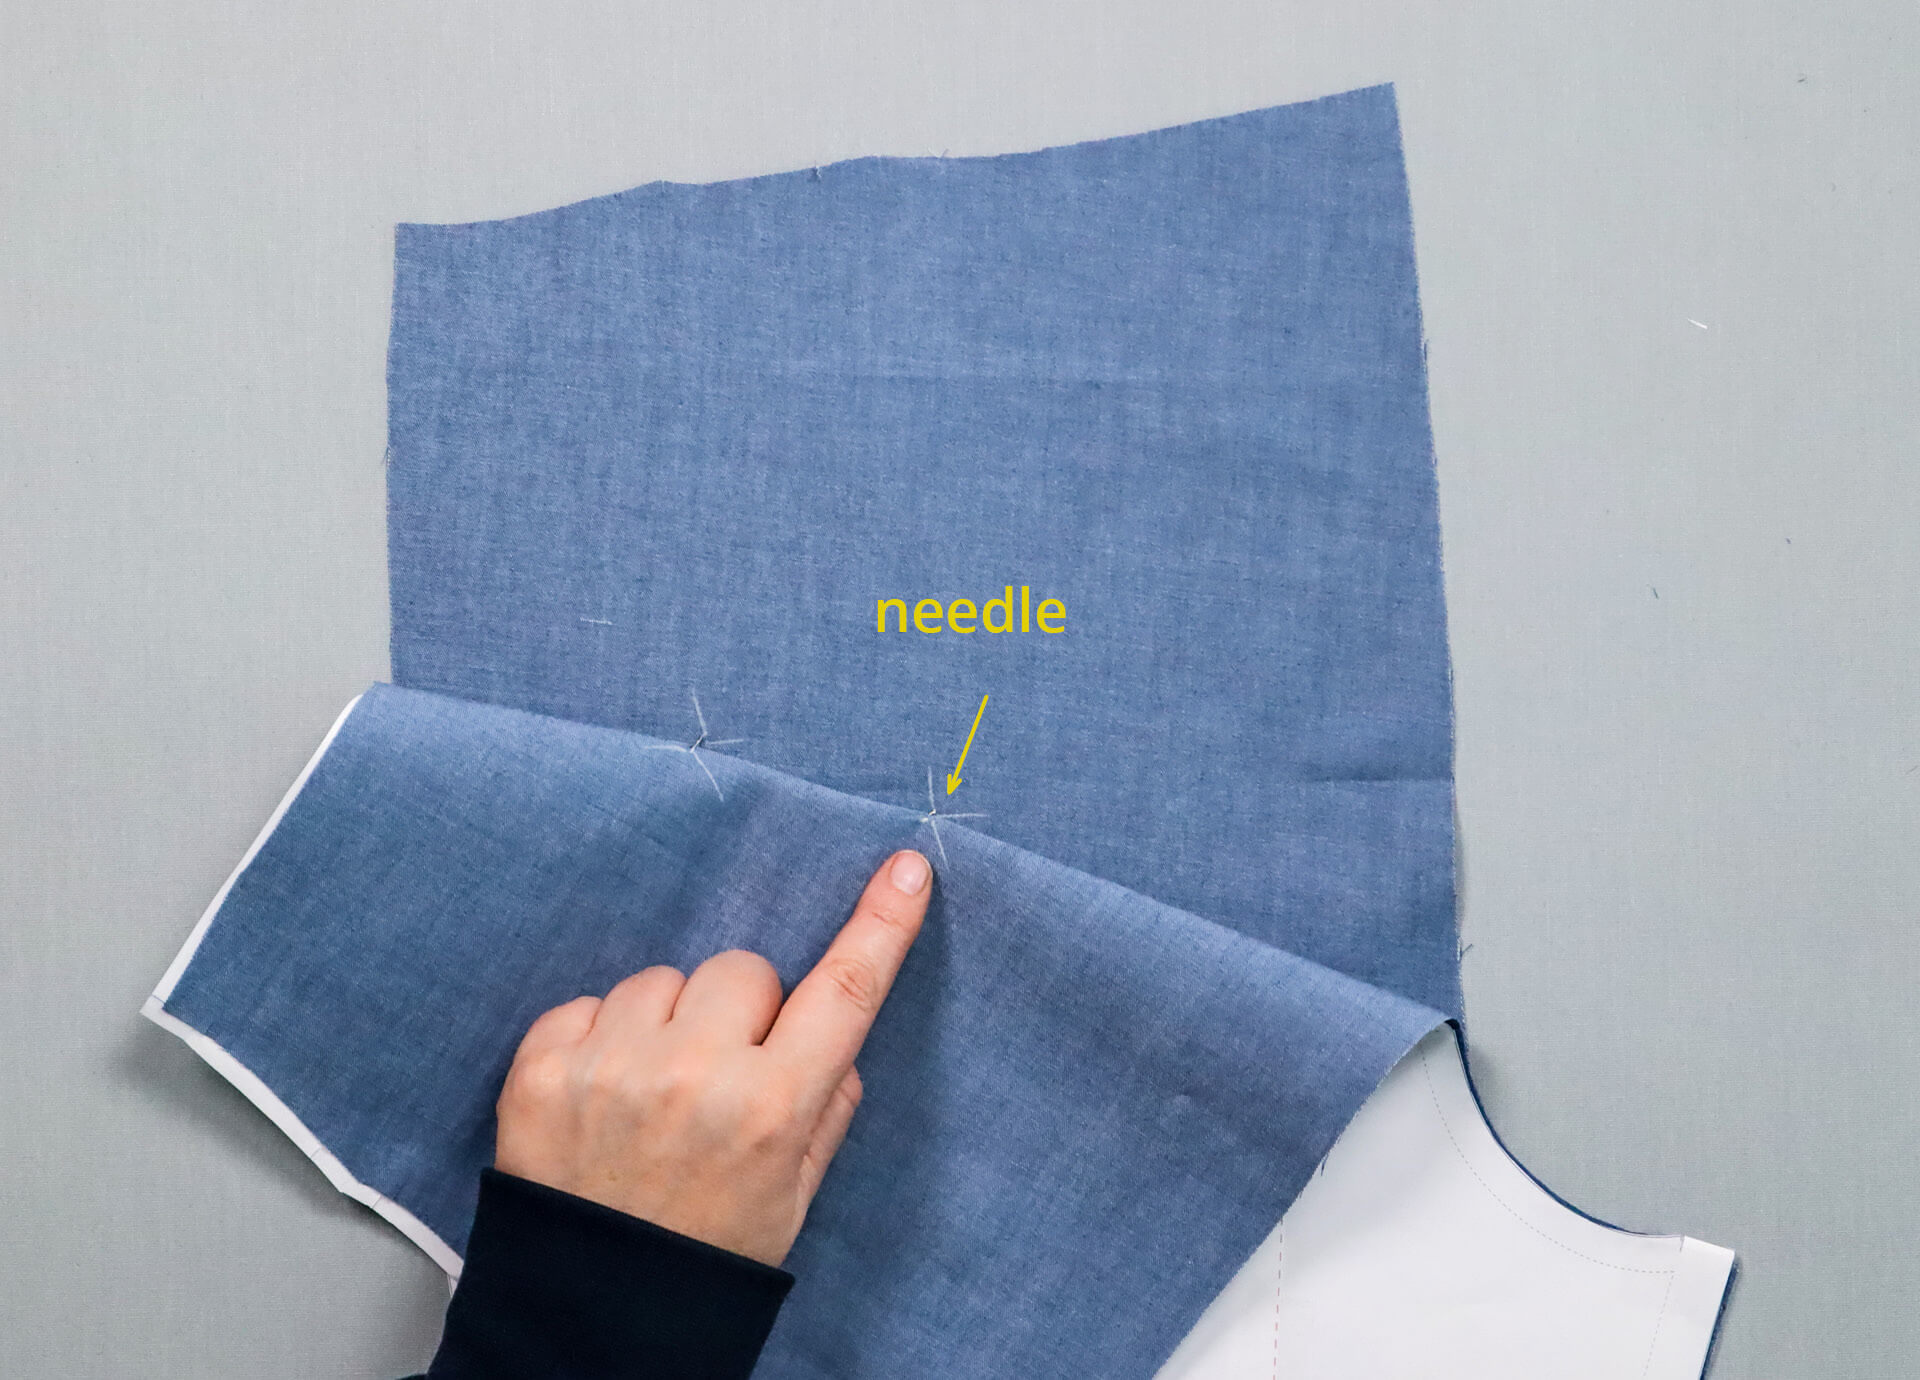
Then I carefully pull the fabric layers apart and mark the dart point on the wrong side of the fabric at the point where the needle goes through. I make sure that the needle does not slip out of the fabric.
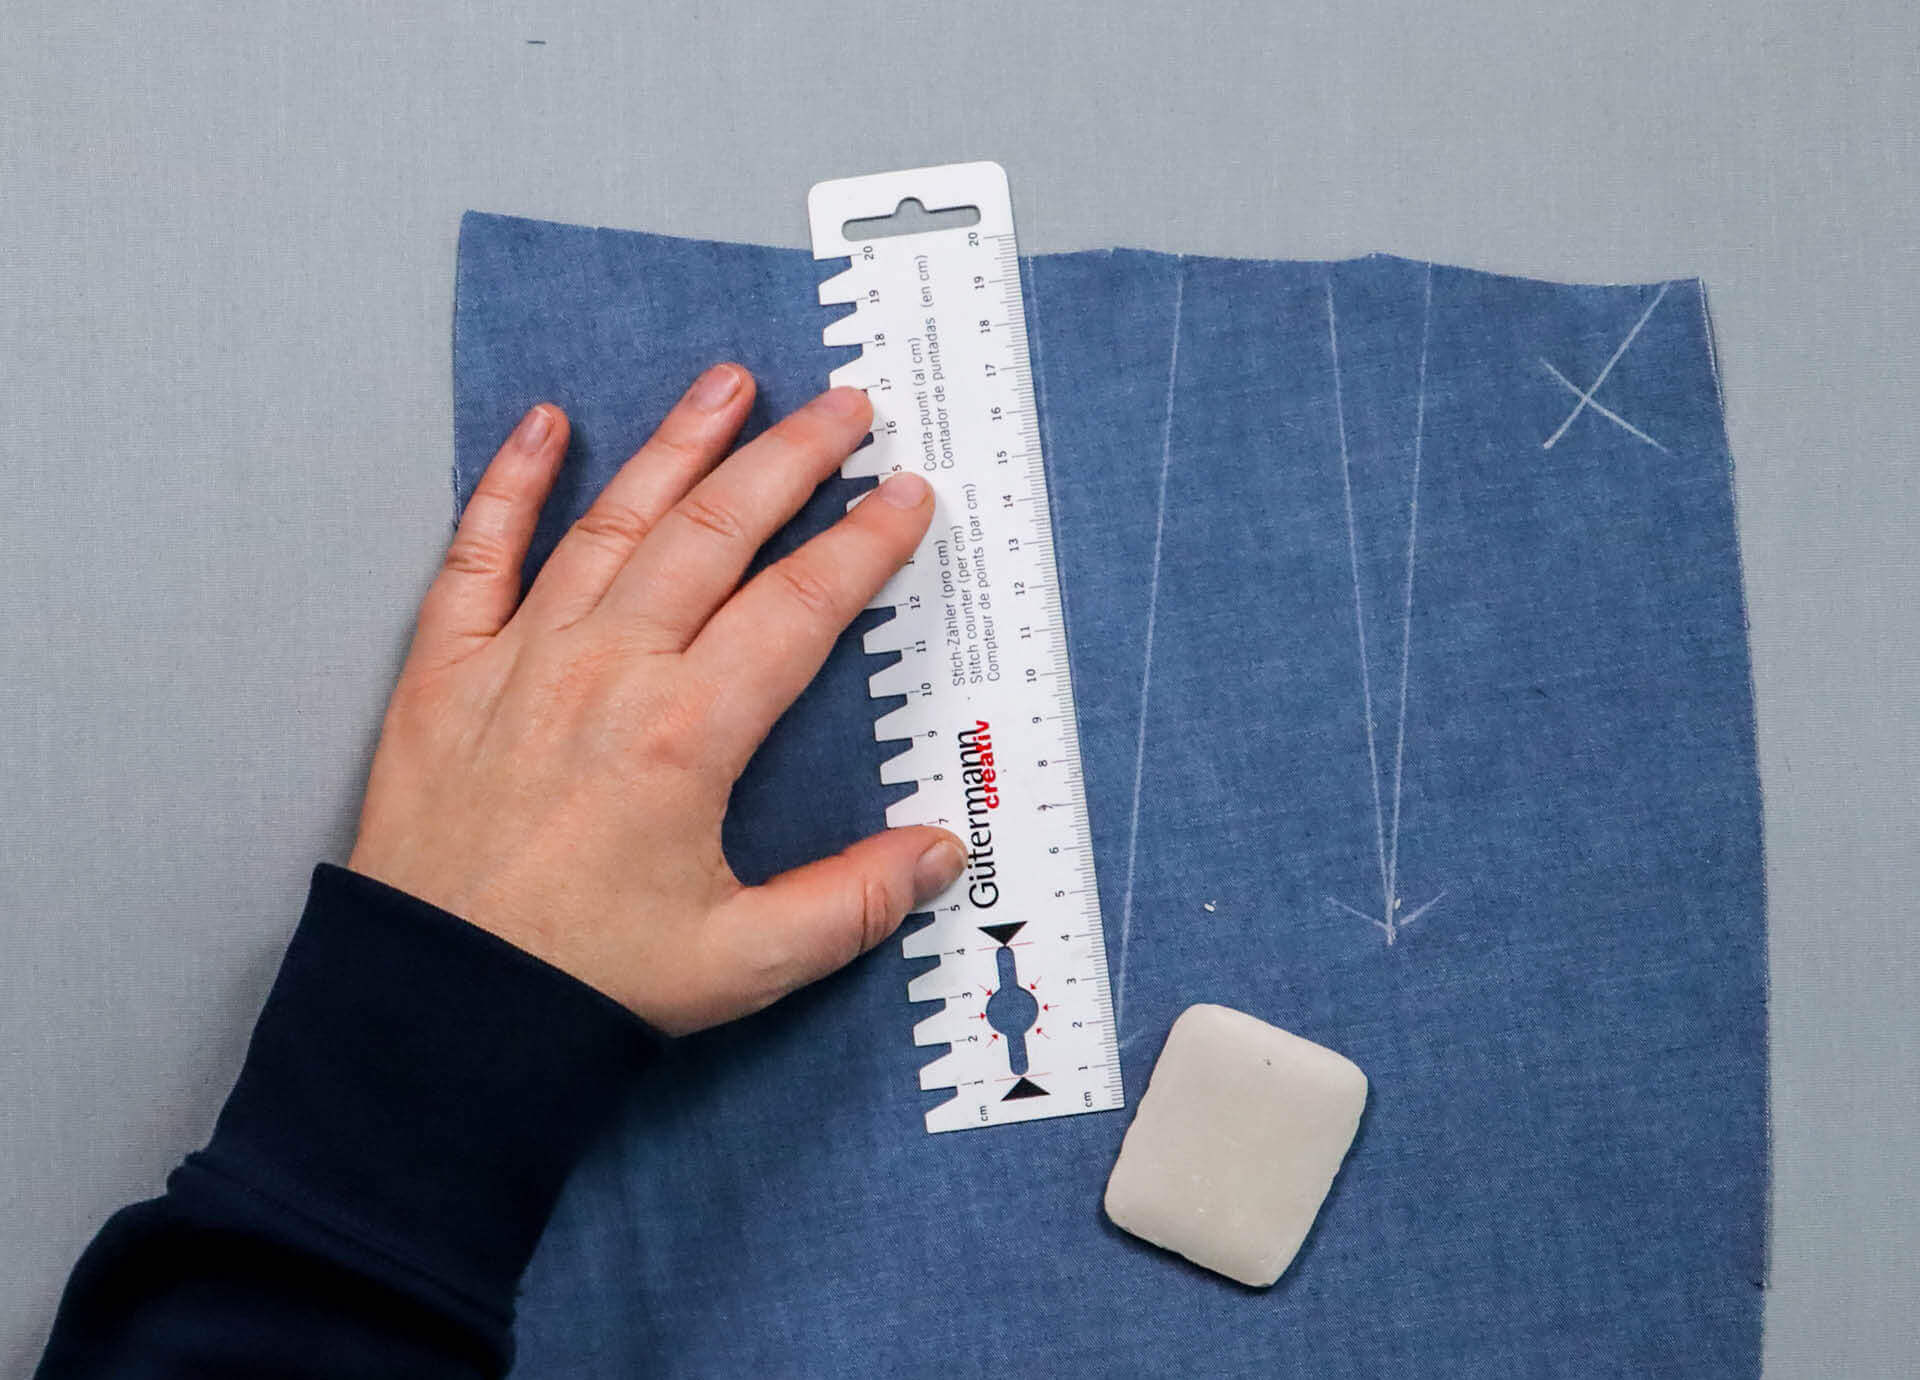
You can now draw the legs of the waist darts on the wrong side of the fabric. To do this, use a ruler to connect the dart point with the notches on the waist edge.
3. Fold and sew the darts
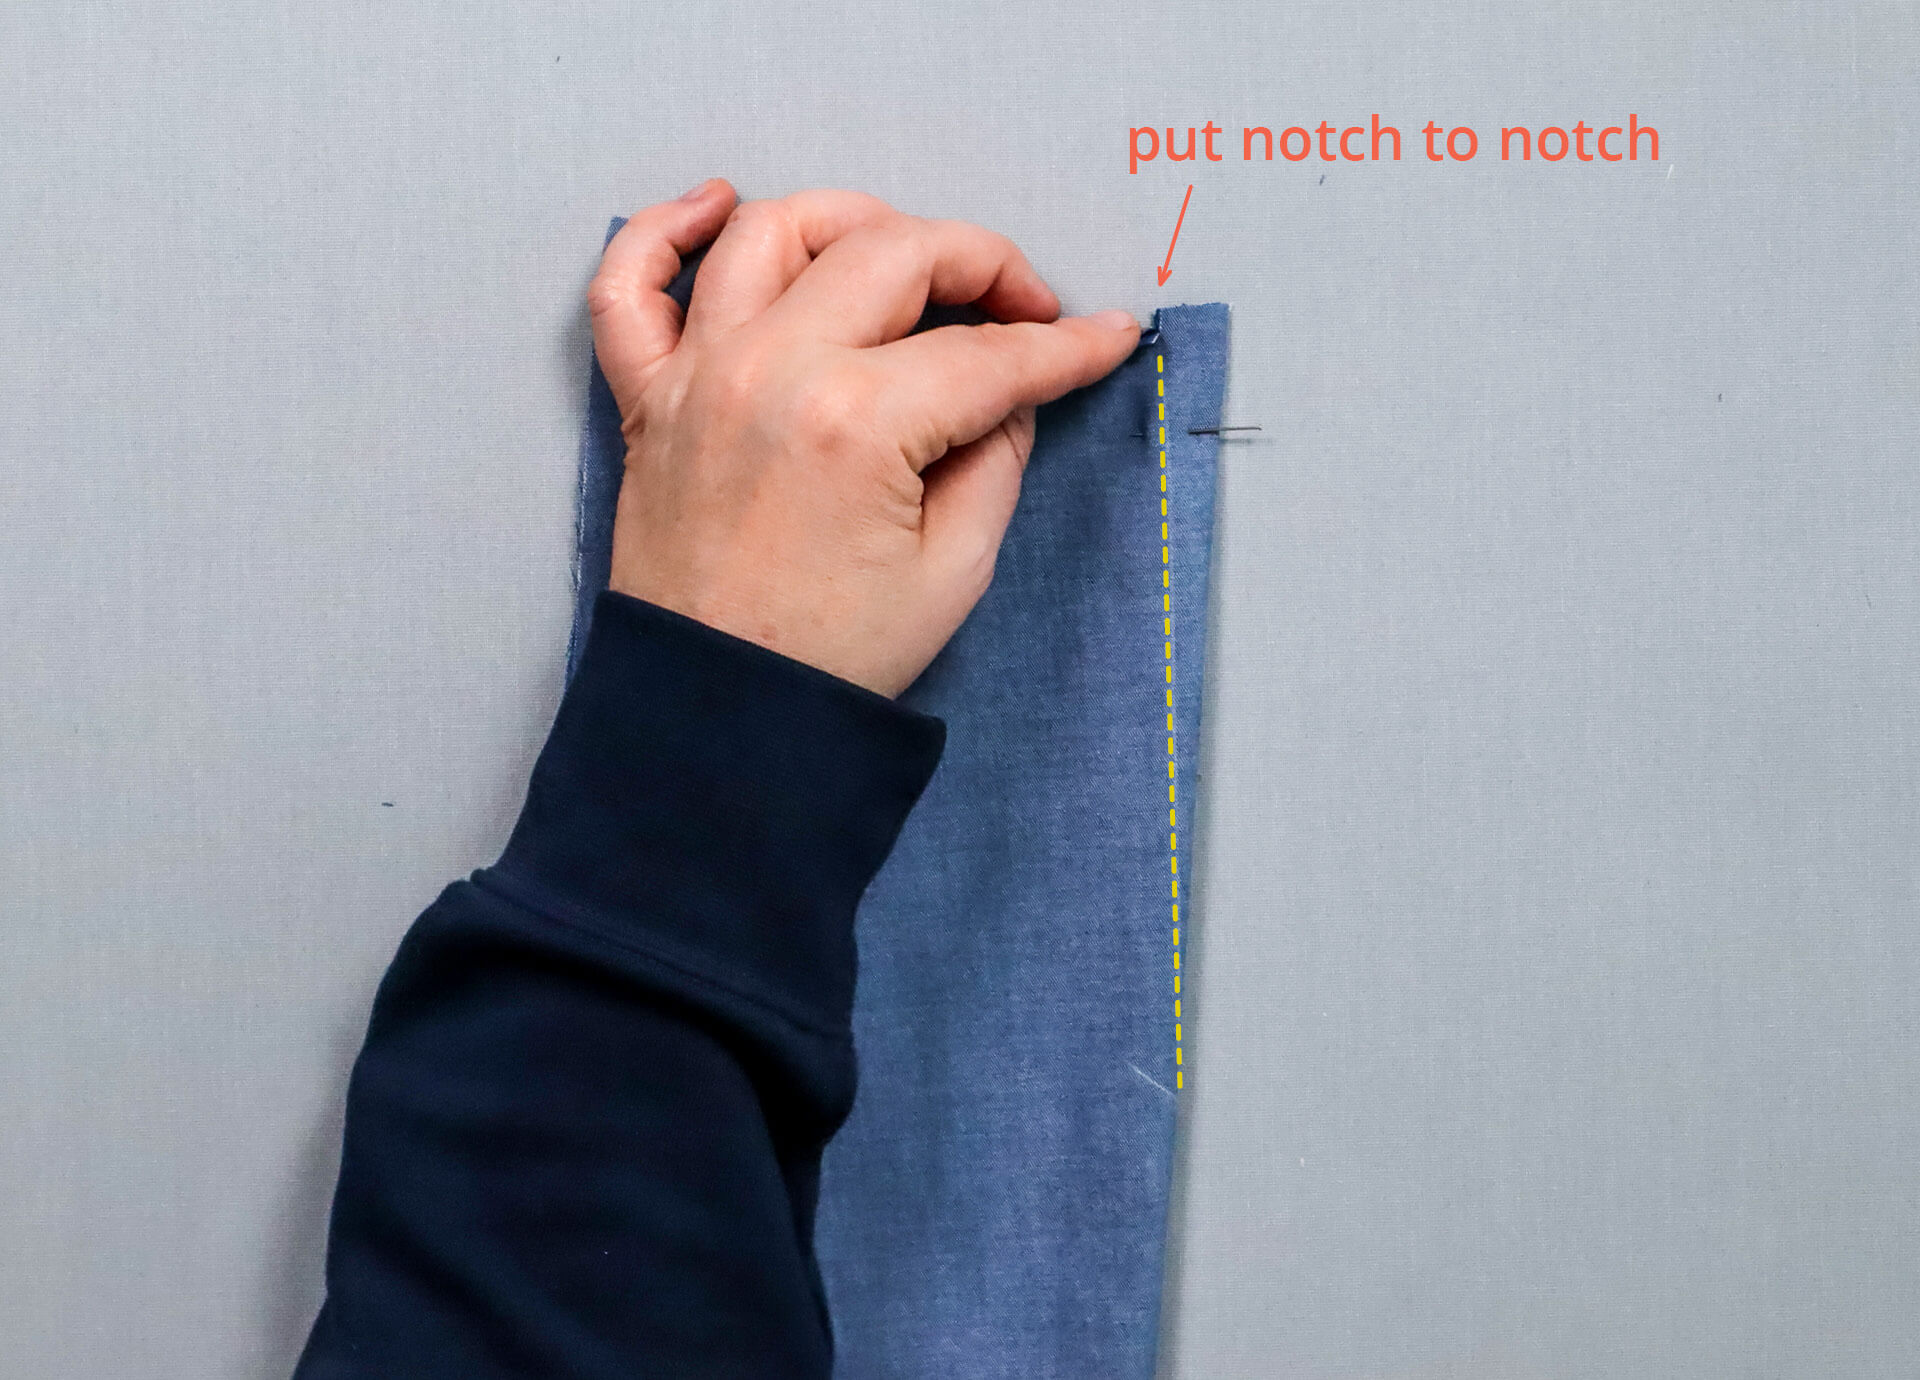
To be able to sew the dart, the fabric is folded right sides together, notches matching, nd the markings of half the dart showing on the wrong side of the fabric. The waist dart is now sewn starting from the notches to the end of the dart.
4. Knot the thread ends and iron the darts
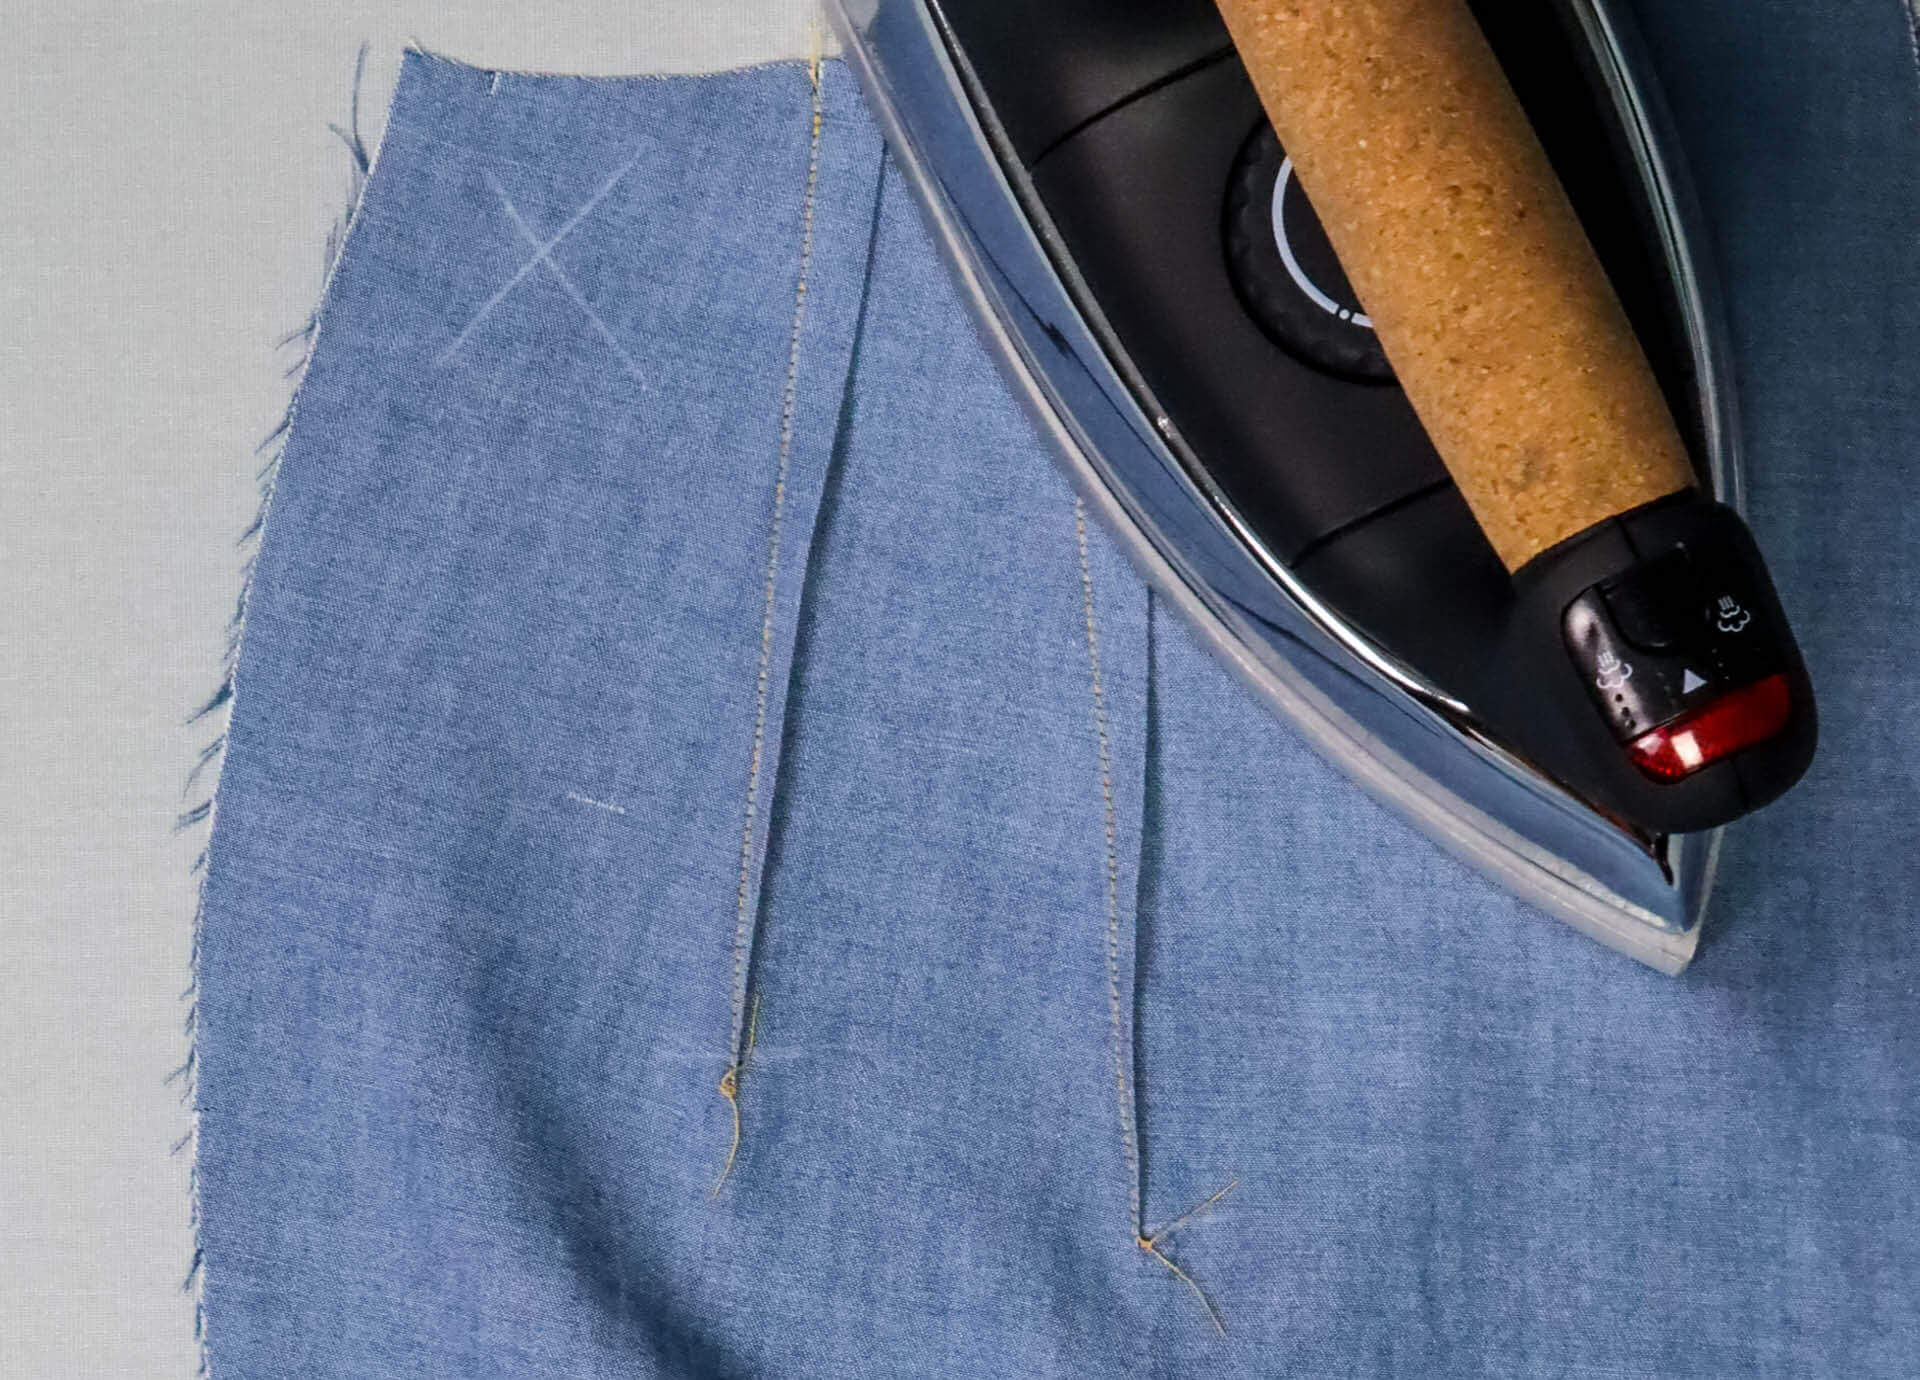
Let the ends of the thread protrude by approx. 8 cm. These are knotted two to three times and can then be cut back to a length of 1-2 cm. This prevents an unsightly bulge from forming at the tip of the waist dart due to forward and backward stitches.
The finished darts are then ironed over from the wrong side of the fabric towards the center back.
Below you will find a selection of links to further steps:
- Preparing to try on the trousers #F02
- Sew french front trouser pockets #TV01
- Sew patch pocket on trousers #TH01
- Sew double welt pockets into trousers #TH02
- Sew welt pockets into trousers #TH03
If you are not quite ready yet and want to start at the beginning, you can find some links here:


