Sew divided waistband to trousers and close seat seam #B04
In the following article and video tutorial, I explain step by step how I sew a divided waistband to a pair of trousers and then close the seat seam. The division in the center back makes it easier to adjust the width later.
I chose a very classic finish without visible stitching for the waistband and belt loops. I attach the belt loops so that there is no need for a bartack at the top of the waistband. Further, the bottom edge of the waistband will be finished with bias binding.
If you want to work the waistband and belt loops differently, take a look at the instructions for jeans and chinos. Different versions of topstiching are shown, the belt loops are attahed to the upper edge of the waistband and a jeans button is added. Also how to lengthen the waistband is explained.
Please note, different to this process, the seat seams have been closed before attaching the waistband.
Enjoy sewing!
1. This is required
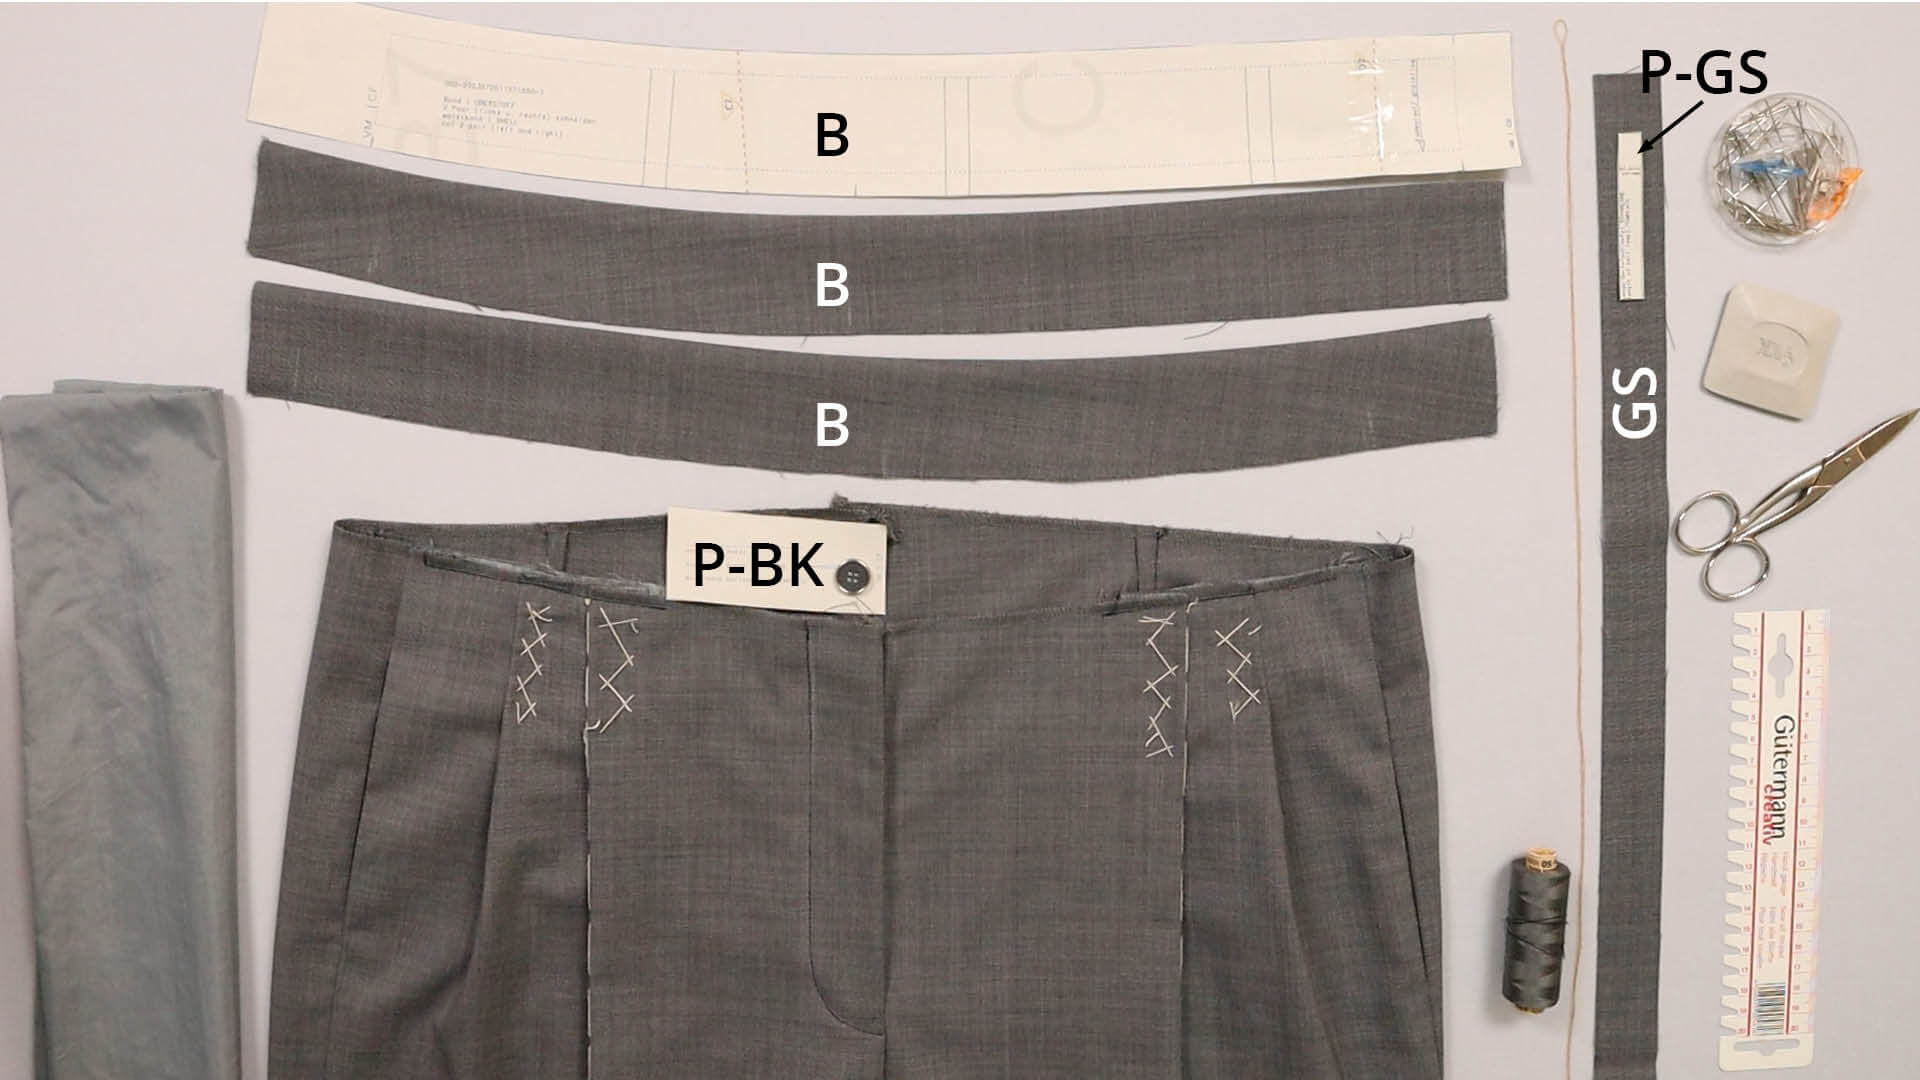
The basis is the prepared trousers including the fly with zipper, pockets closed leg seams. The bach seat seam is still open. I have explained how to prepare the right and left waistband stripes in the fitting instructions, which you can find here. It is already reinforced and shortened at the top edge.
I’m working on a pair of trousers with pleats and knee lining. Your trousers may look different depending on the configuration, but this is not relevant for the waistband finish.
Pattern pieces made from main fabric:
- the belt loops (GS)
- the prepared trousers
- the prepared waistband stripes (B)
Paper pattern pieces:
- the template for the belt loops (P-GS)
- the template for the waistband buttonhole (P-BK)
- waistband (B) for the position of the belt loops
Tools and aids:
- 1 or 2 buttons or trouser hooks for the waistband, depending on the model
- pins or clips
- scissors
- chalk or fabric marker
- long ruler
- cutting mat and rolling knife
- edge shaper
- suitable sewing thread and hand sewing needle if necessary
- a thick thread for turning the belt loops
- for finishing the bottom edge of the waistband, a piece of lining fabric from which I cut the bias binding; of course you can also use ready-made bias tape or another thin fabric
2. Prepare the belt loops
Before sewing on the waistband, I prepare the belt loops.
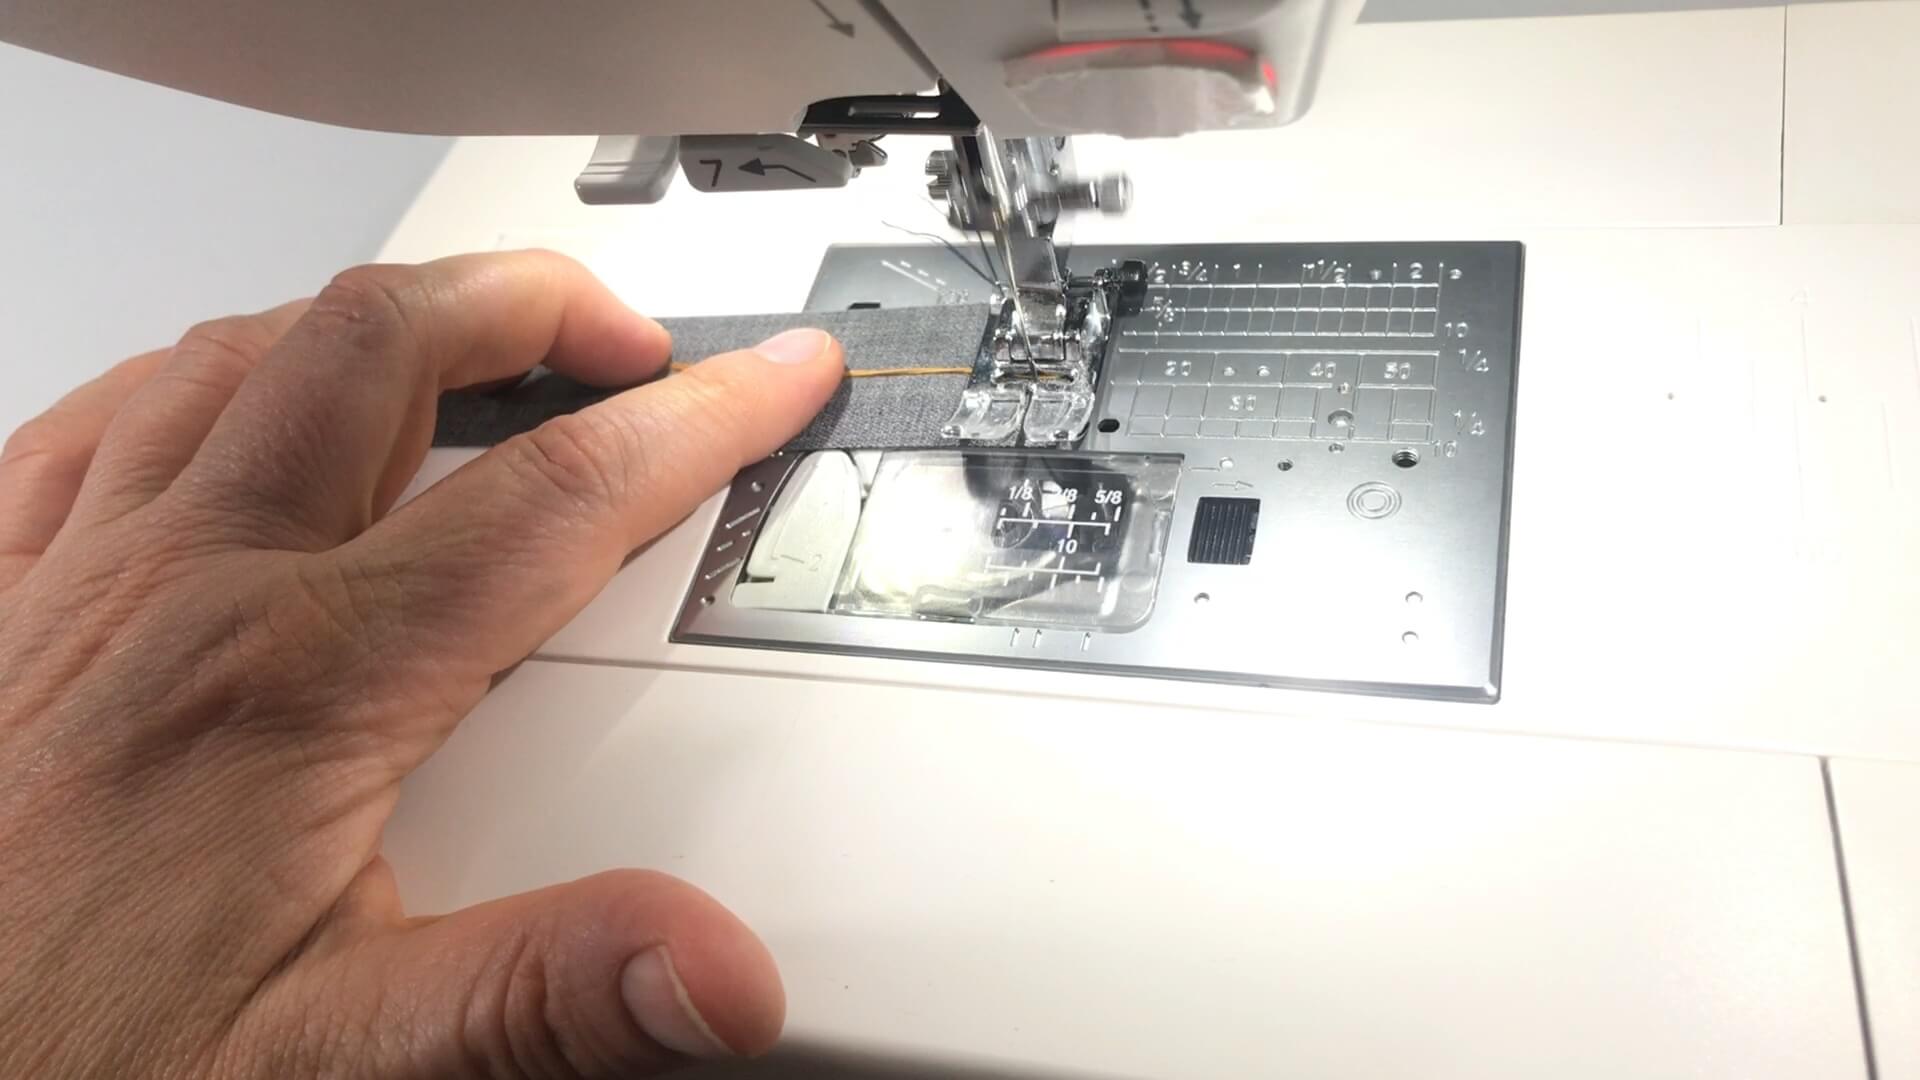
In order to make turning easier later, I add a thread to the short side of the belt loop on the right side of the fabric. The thread shall be a bit longer than the fabric strip.
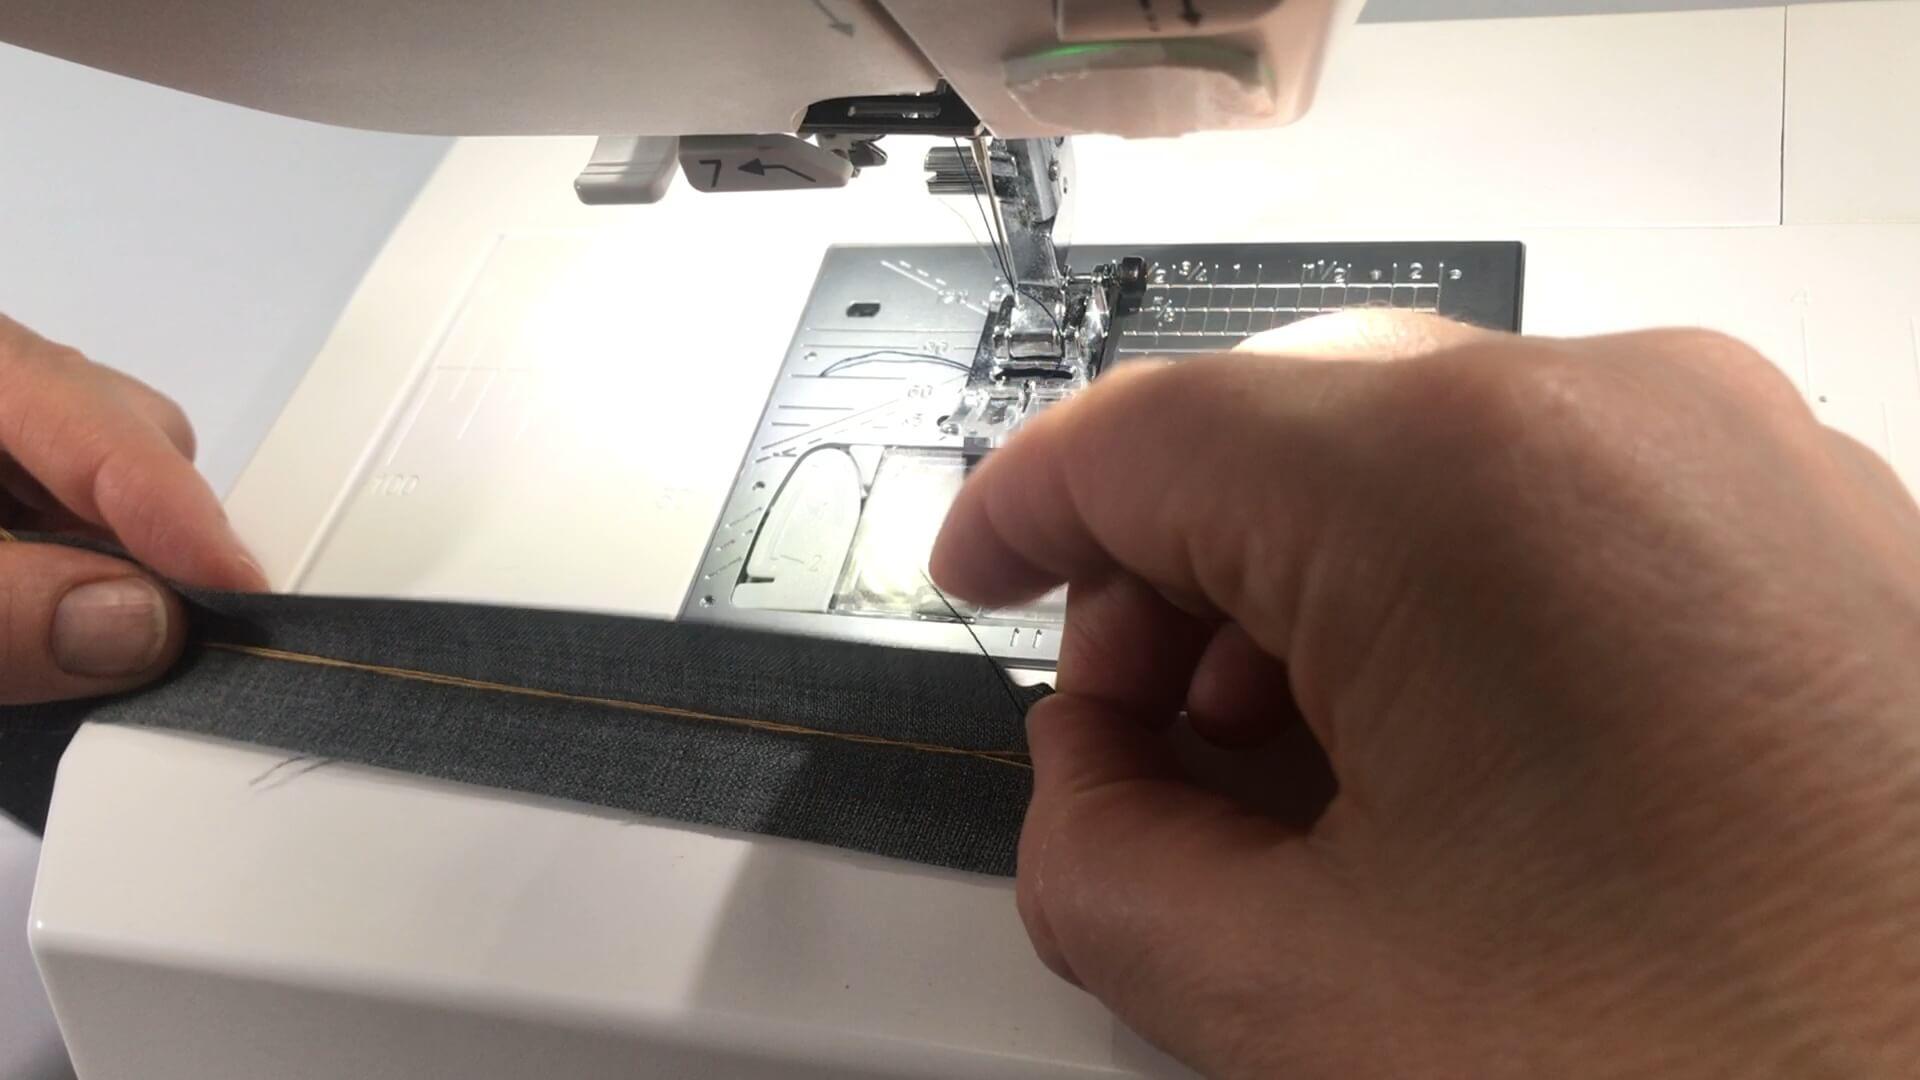
I fold the strip right sides facing along the long edge. The thread stays in the fold.
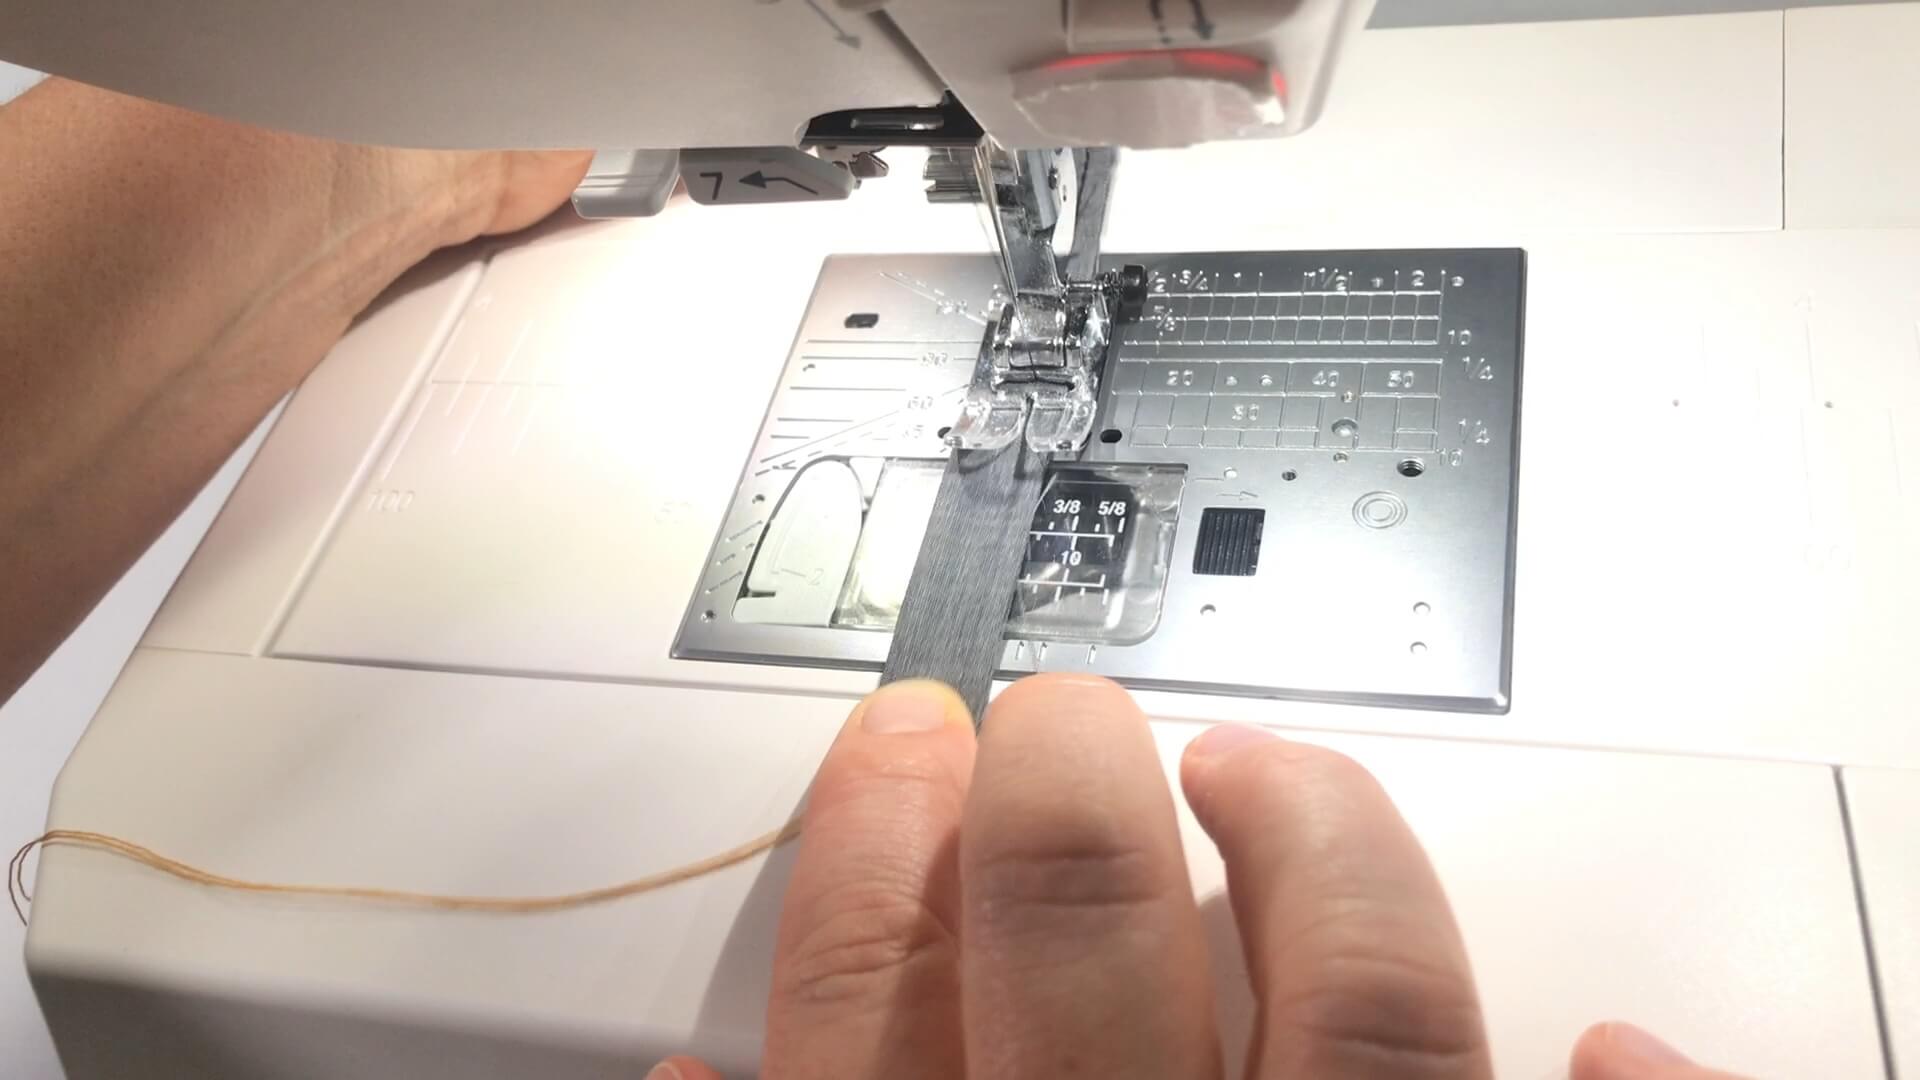
I sew the strip lengthwise with a 4mm seam allwoance.
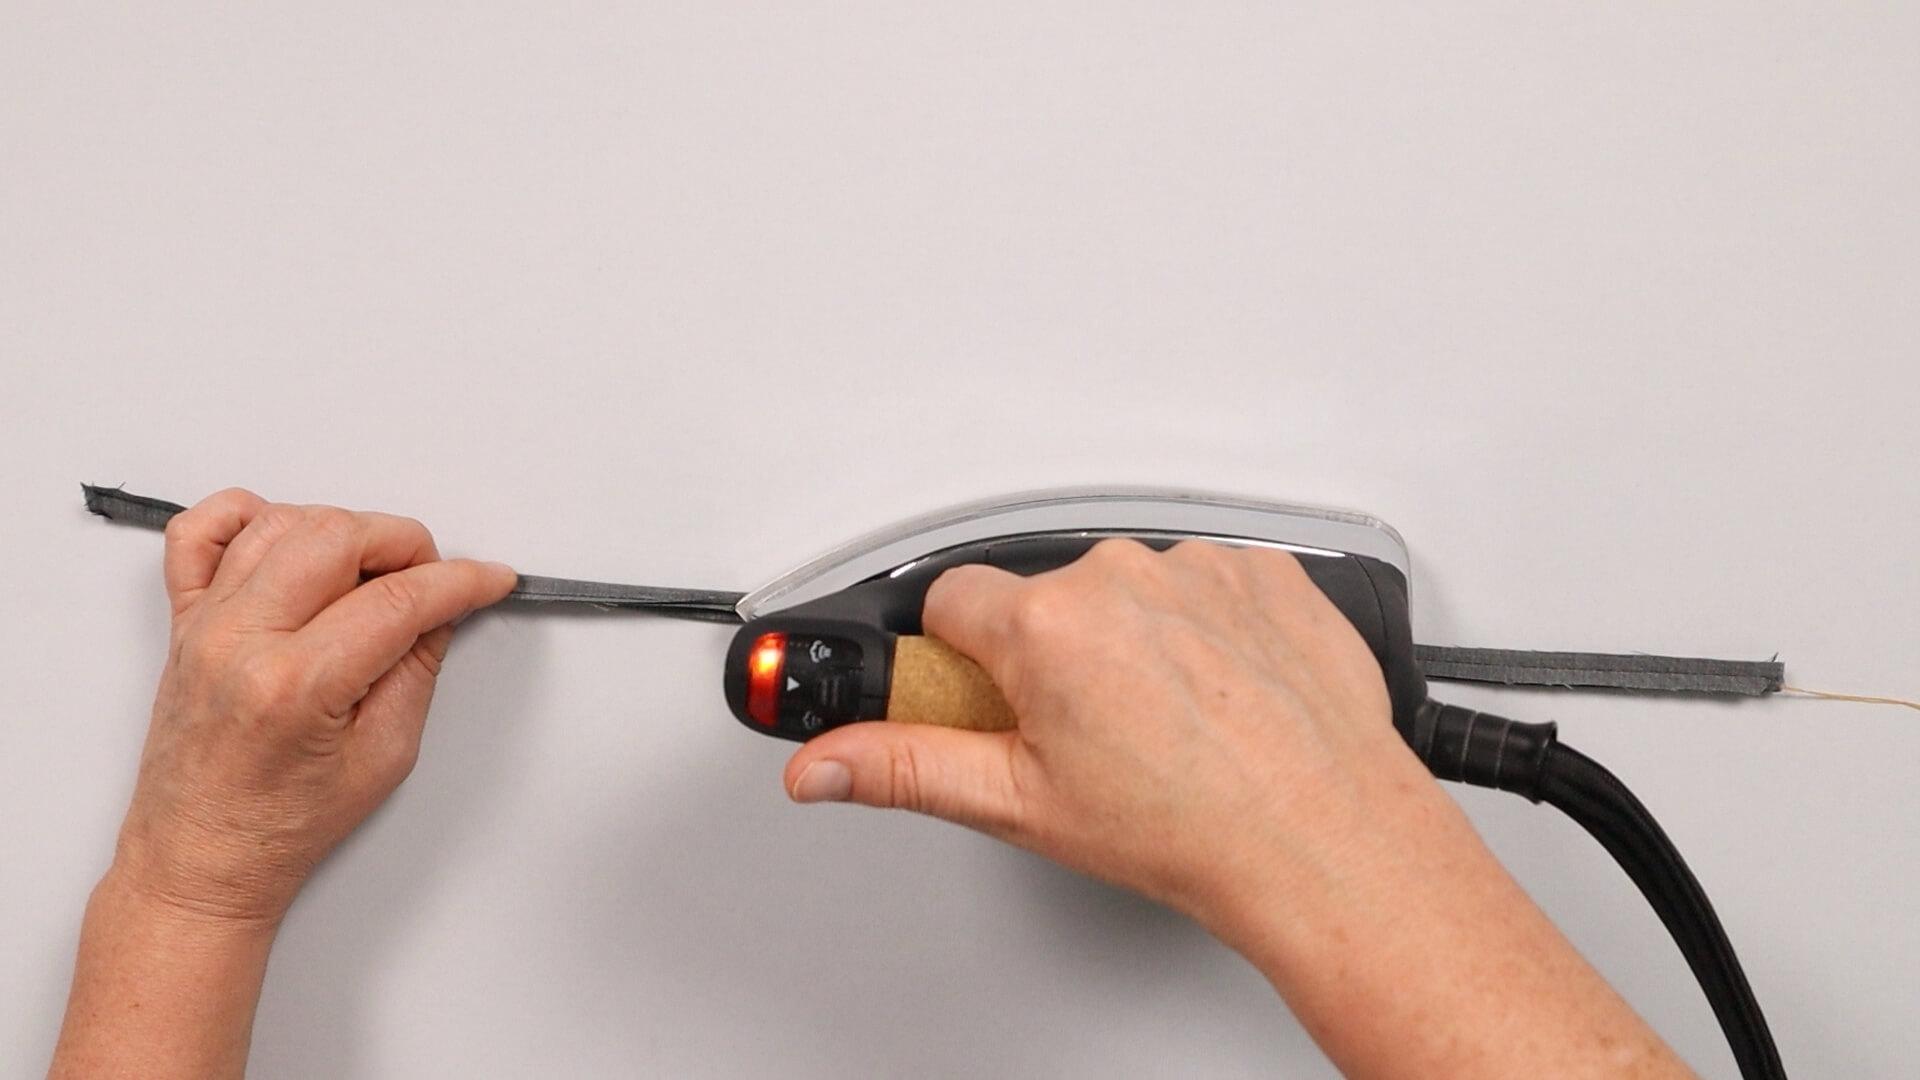
Then I press the seam allowances open.
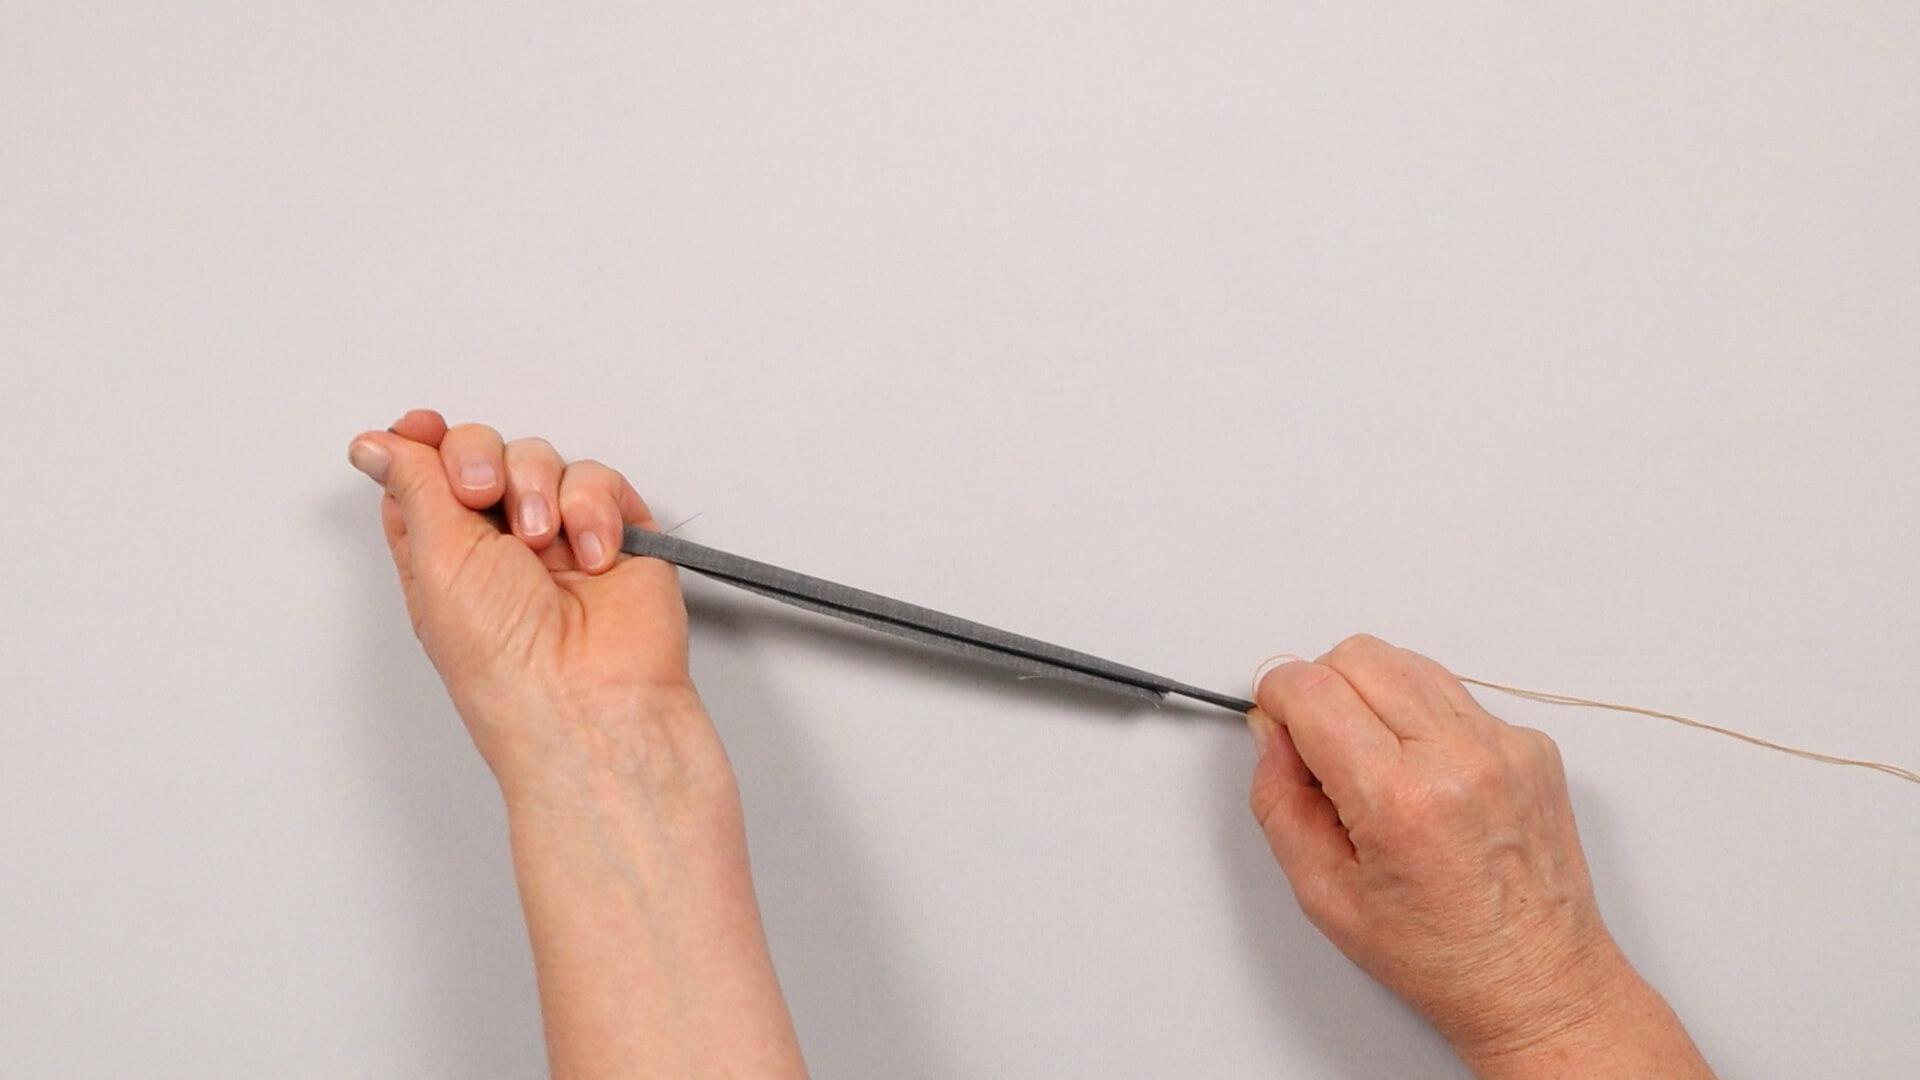
I turn the fabric over by pulling carefully the long thread.
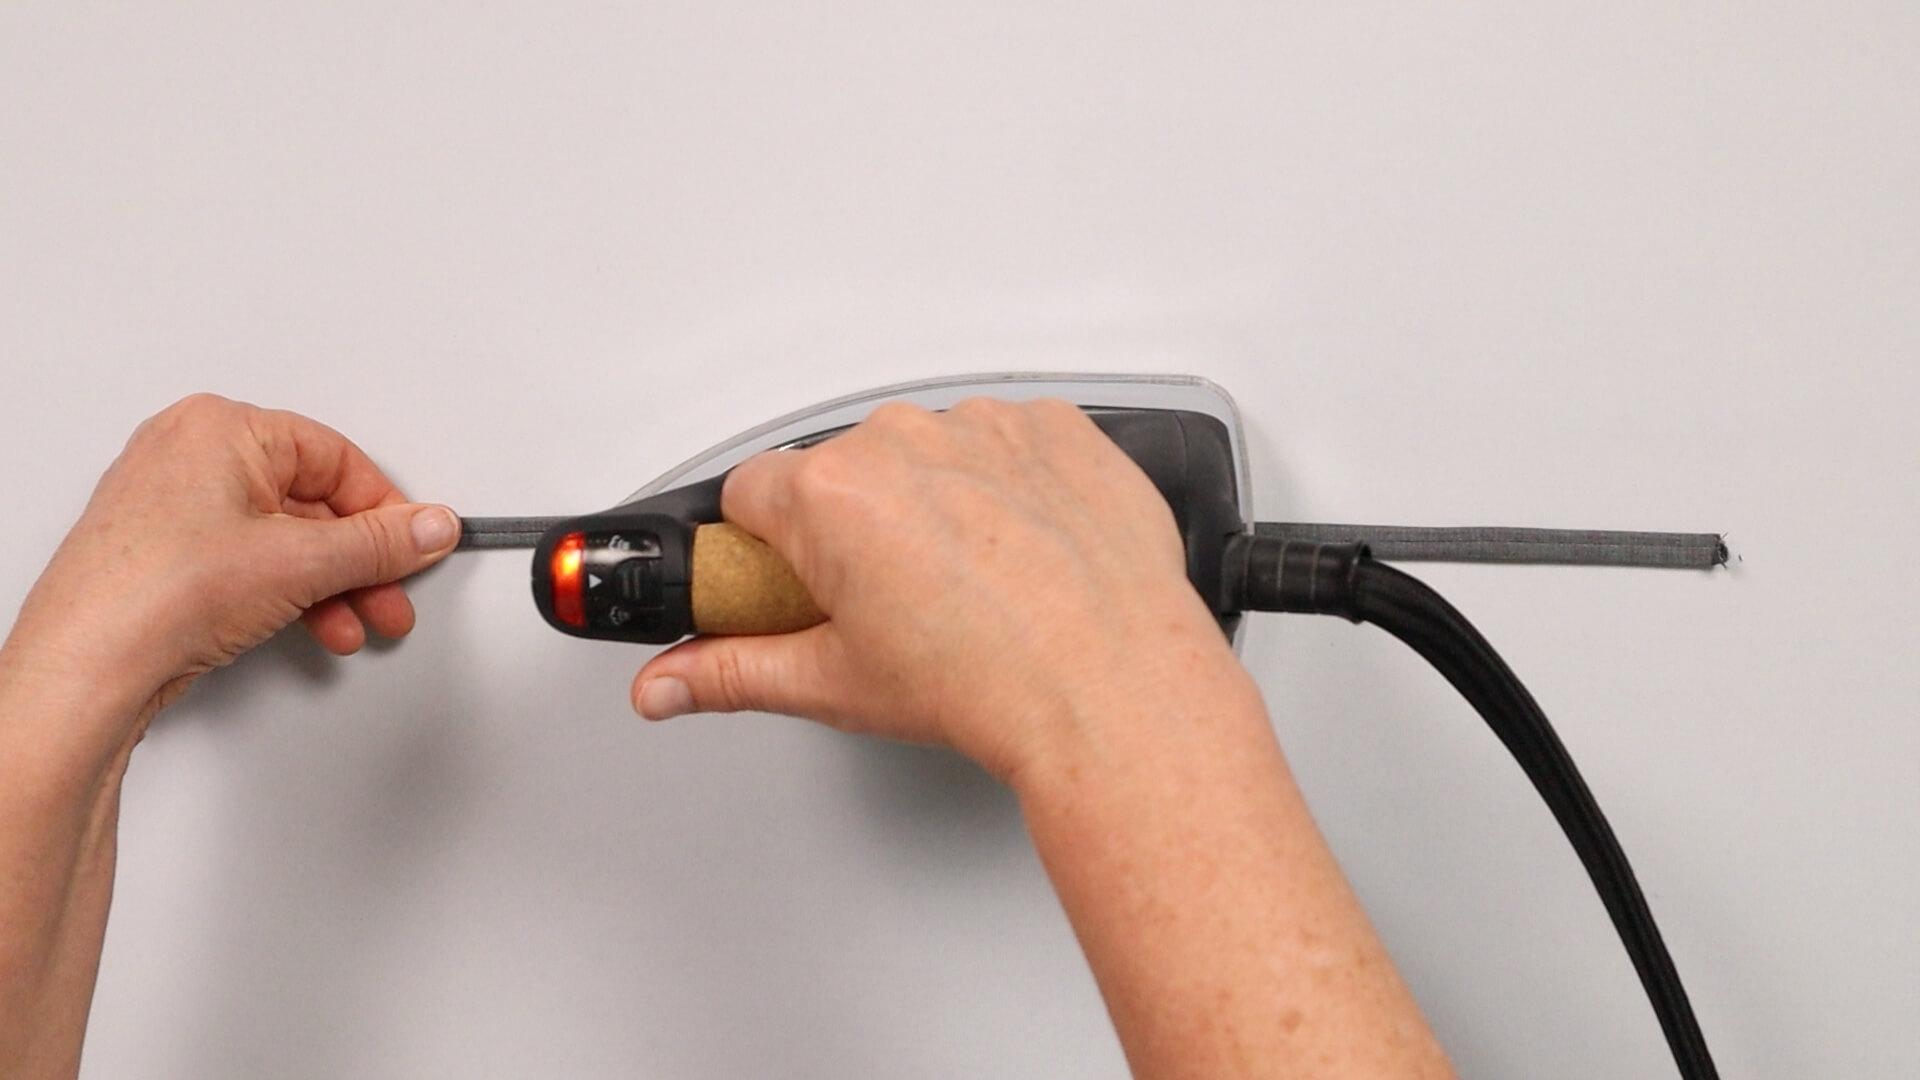
The strip is now ironed smooth. I make sure the seam is approximately in the middle of the strip.
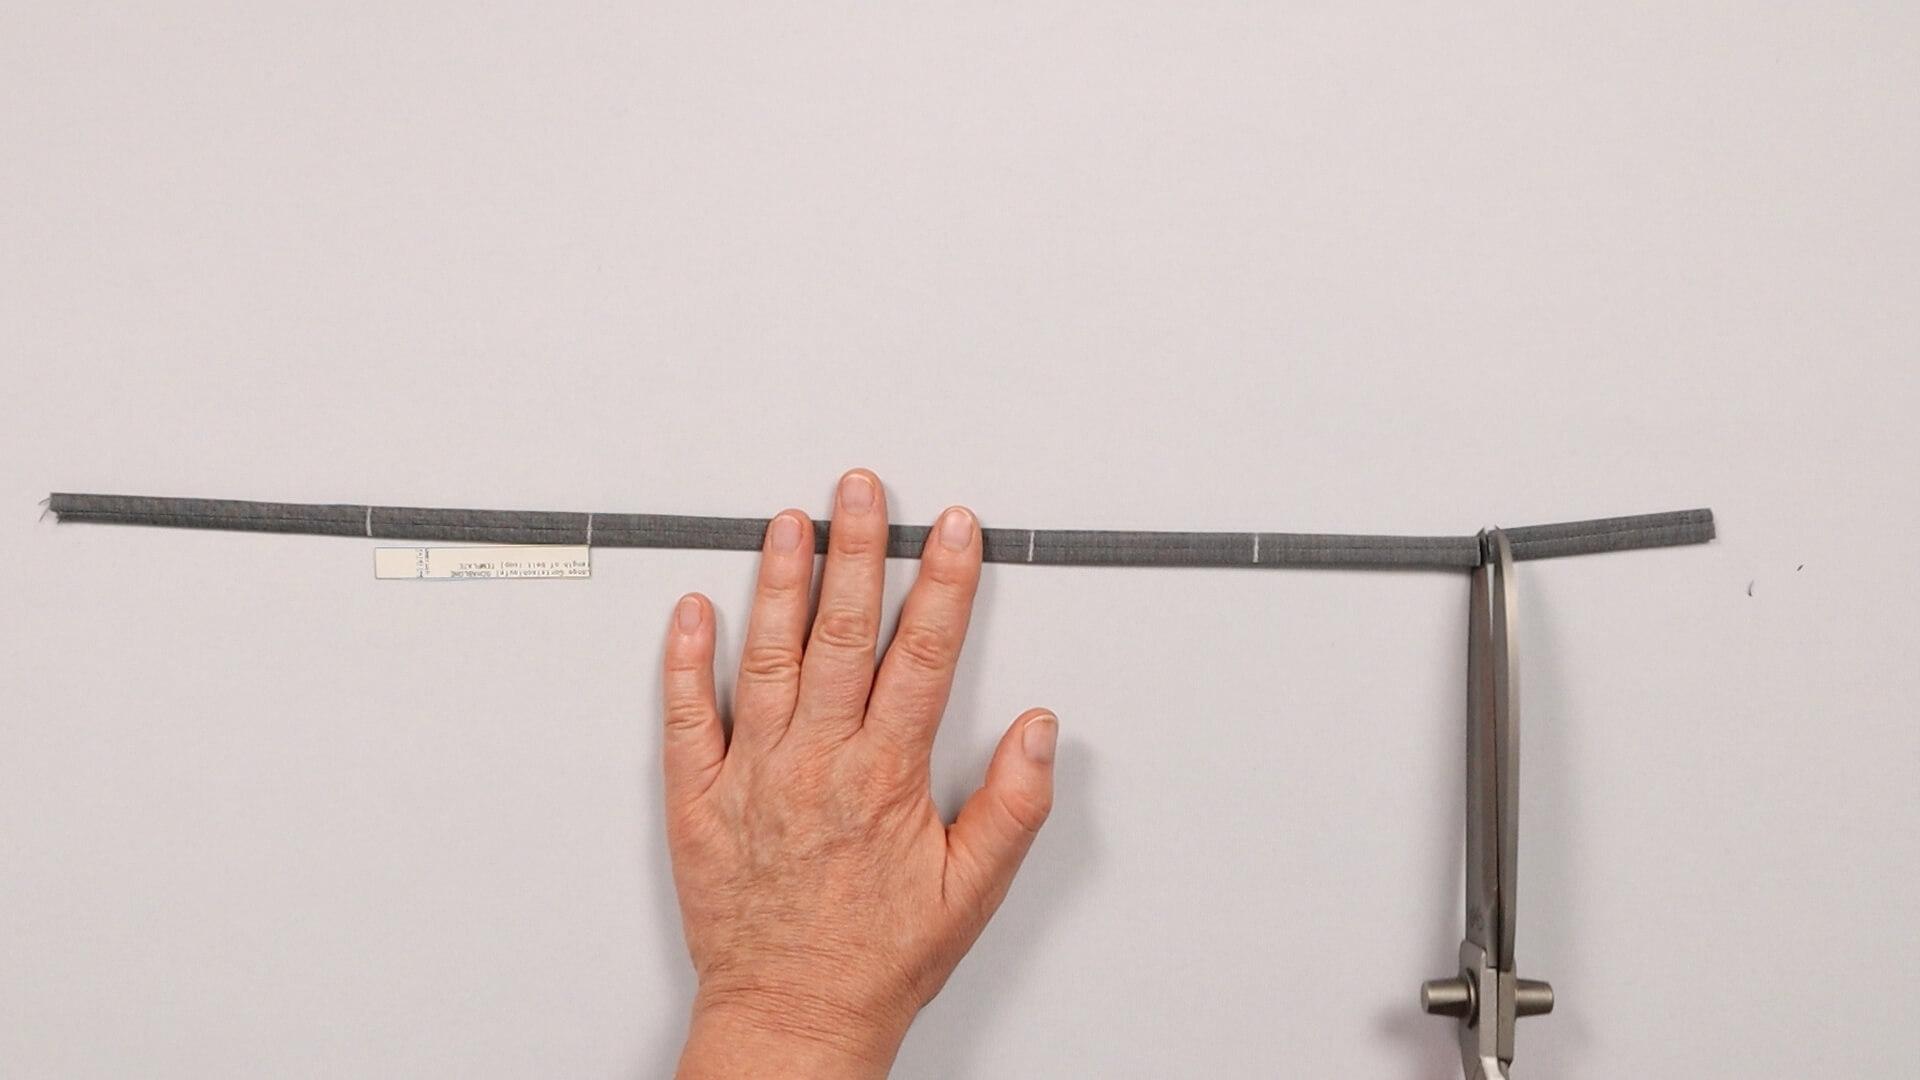
I cut the belt loops from the long strip, using the template for the belt loop to mark the cutting length.
3. Finish the divided waistband with bias binding
Cutting diagonal strips
If you want to finish the edge of the waistband, it is important to use a bias strip. Cutting the strip diagonally to the grain makes it stretchable, which facilitates processing.
Of course, you can also use a ready-made bias tape with a width of approx. 4 cm.
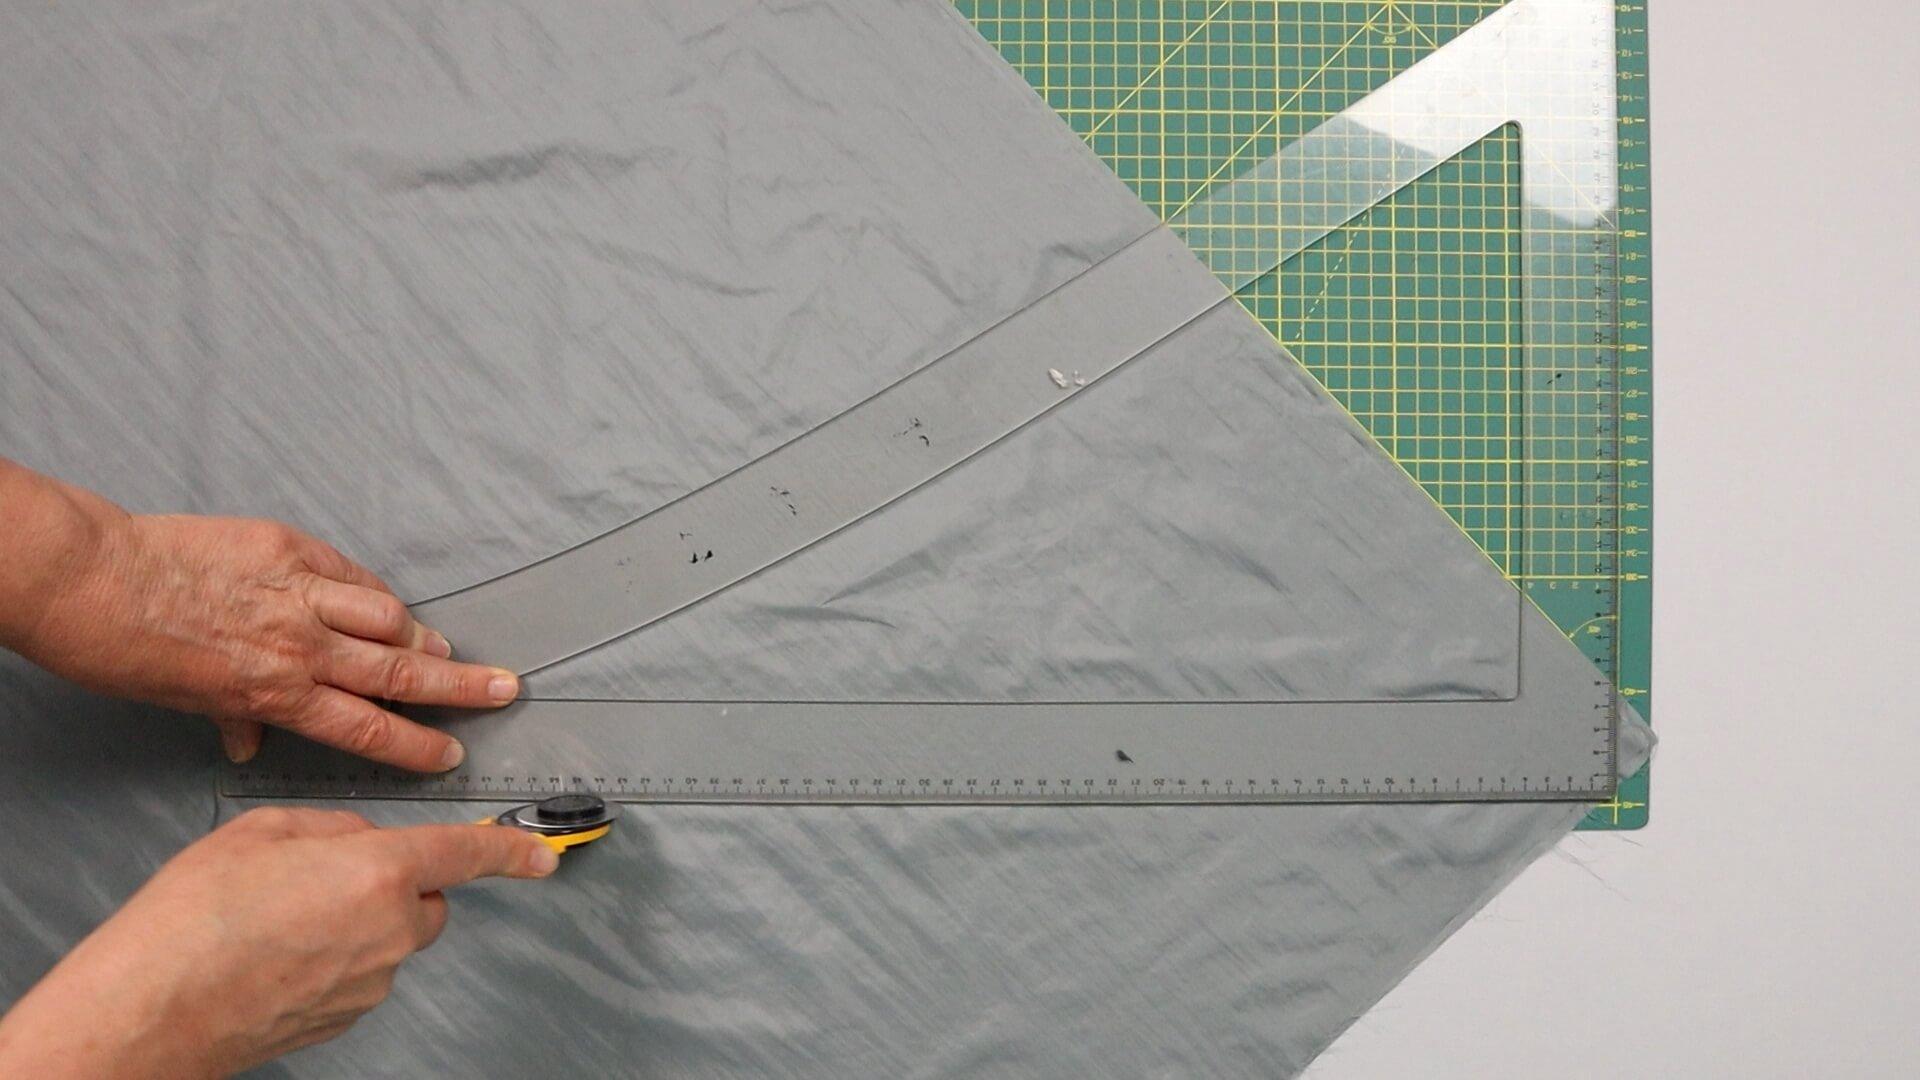
I use my cutting mat to cut the bias strip from a piece of lining fabric and place the selvedge of the lining on the 45° auxiliary line.
I place my ruler on the straight line that runs parallel to the edge of the cutting mat. The strips should be at least as long as the waistband strips. In my case, this matches the length of the ruler exactly.
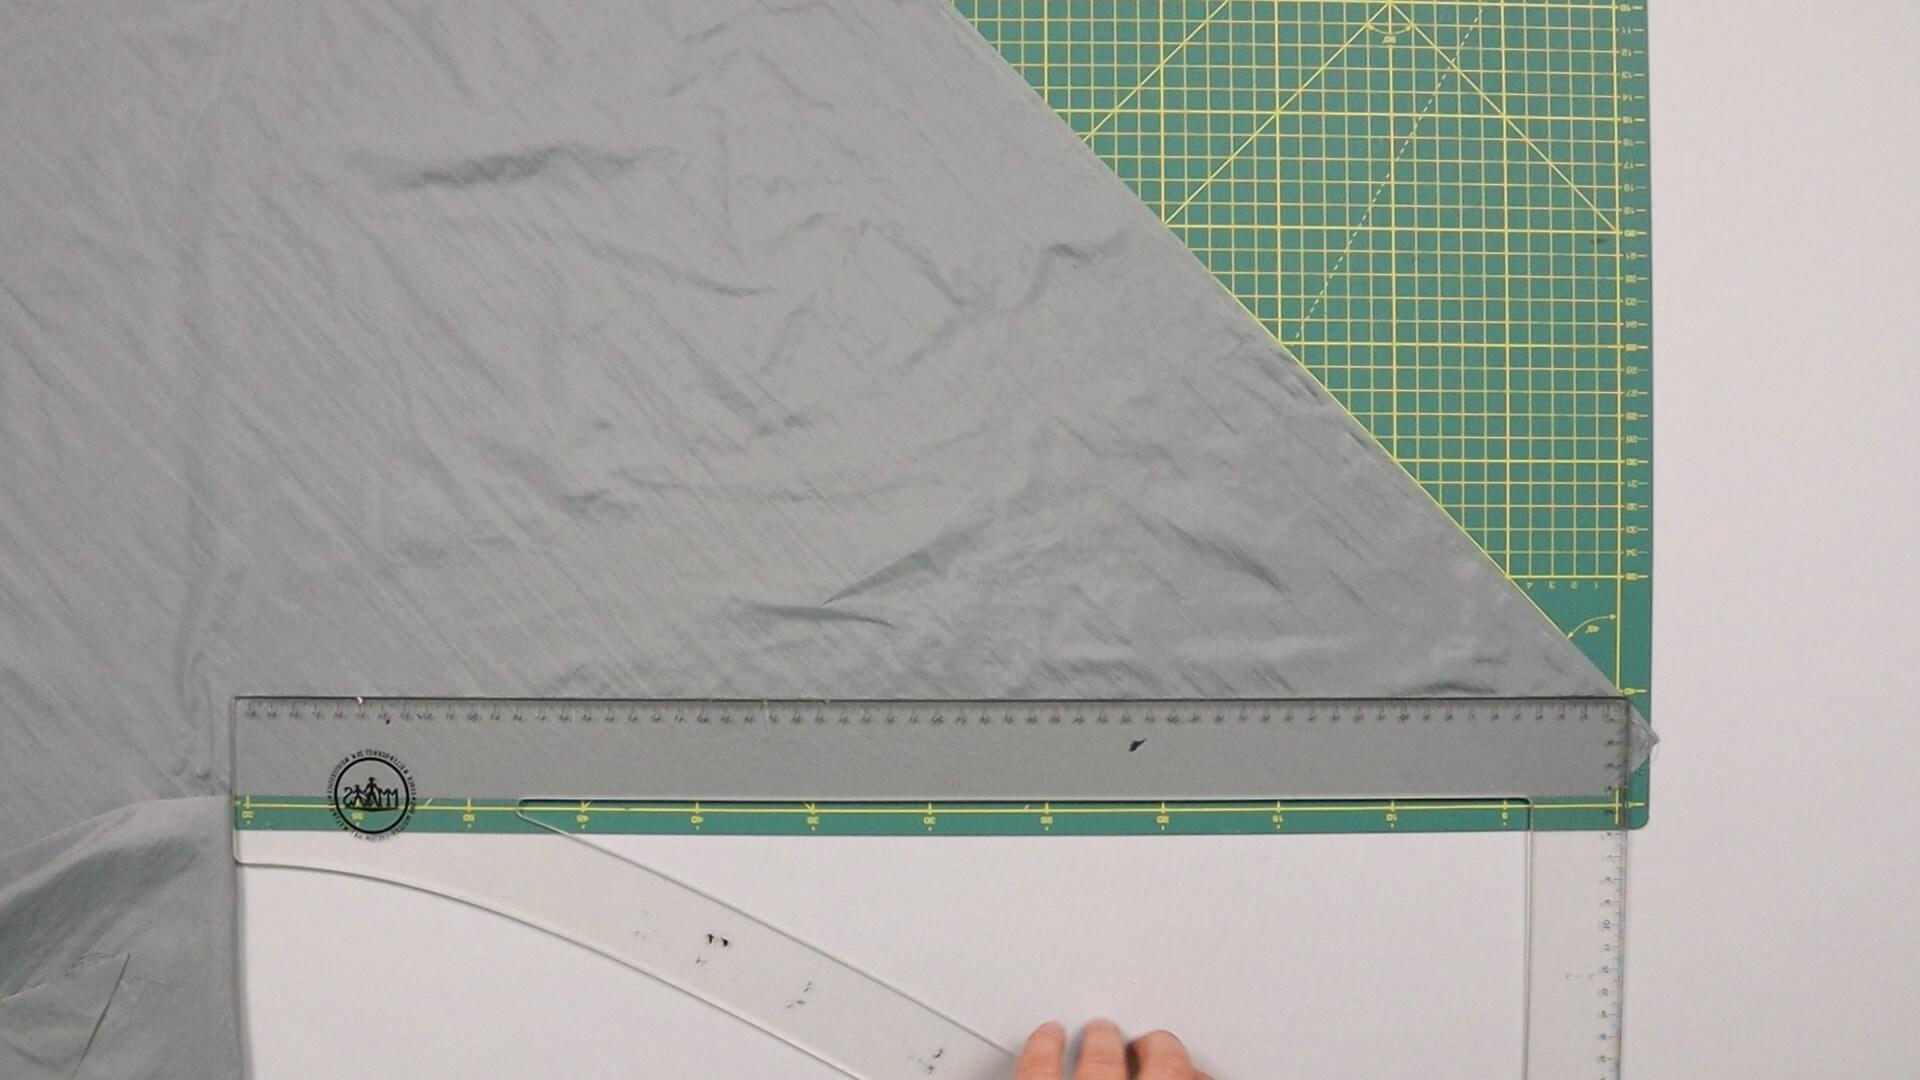
I cut the strips approx. 4 cm wide, which corresponds to the width of my ruler.
Finish inner waistband edge
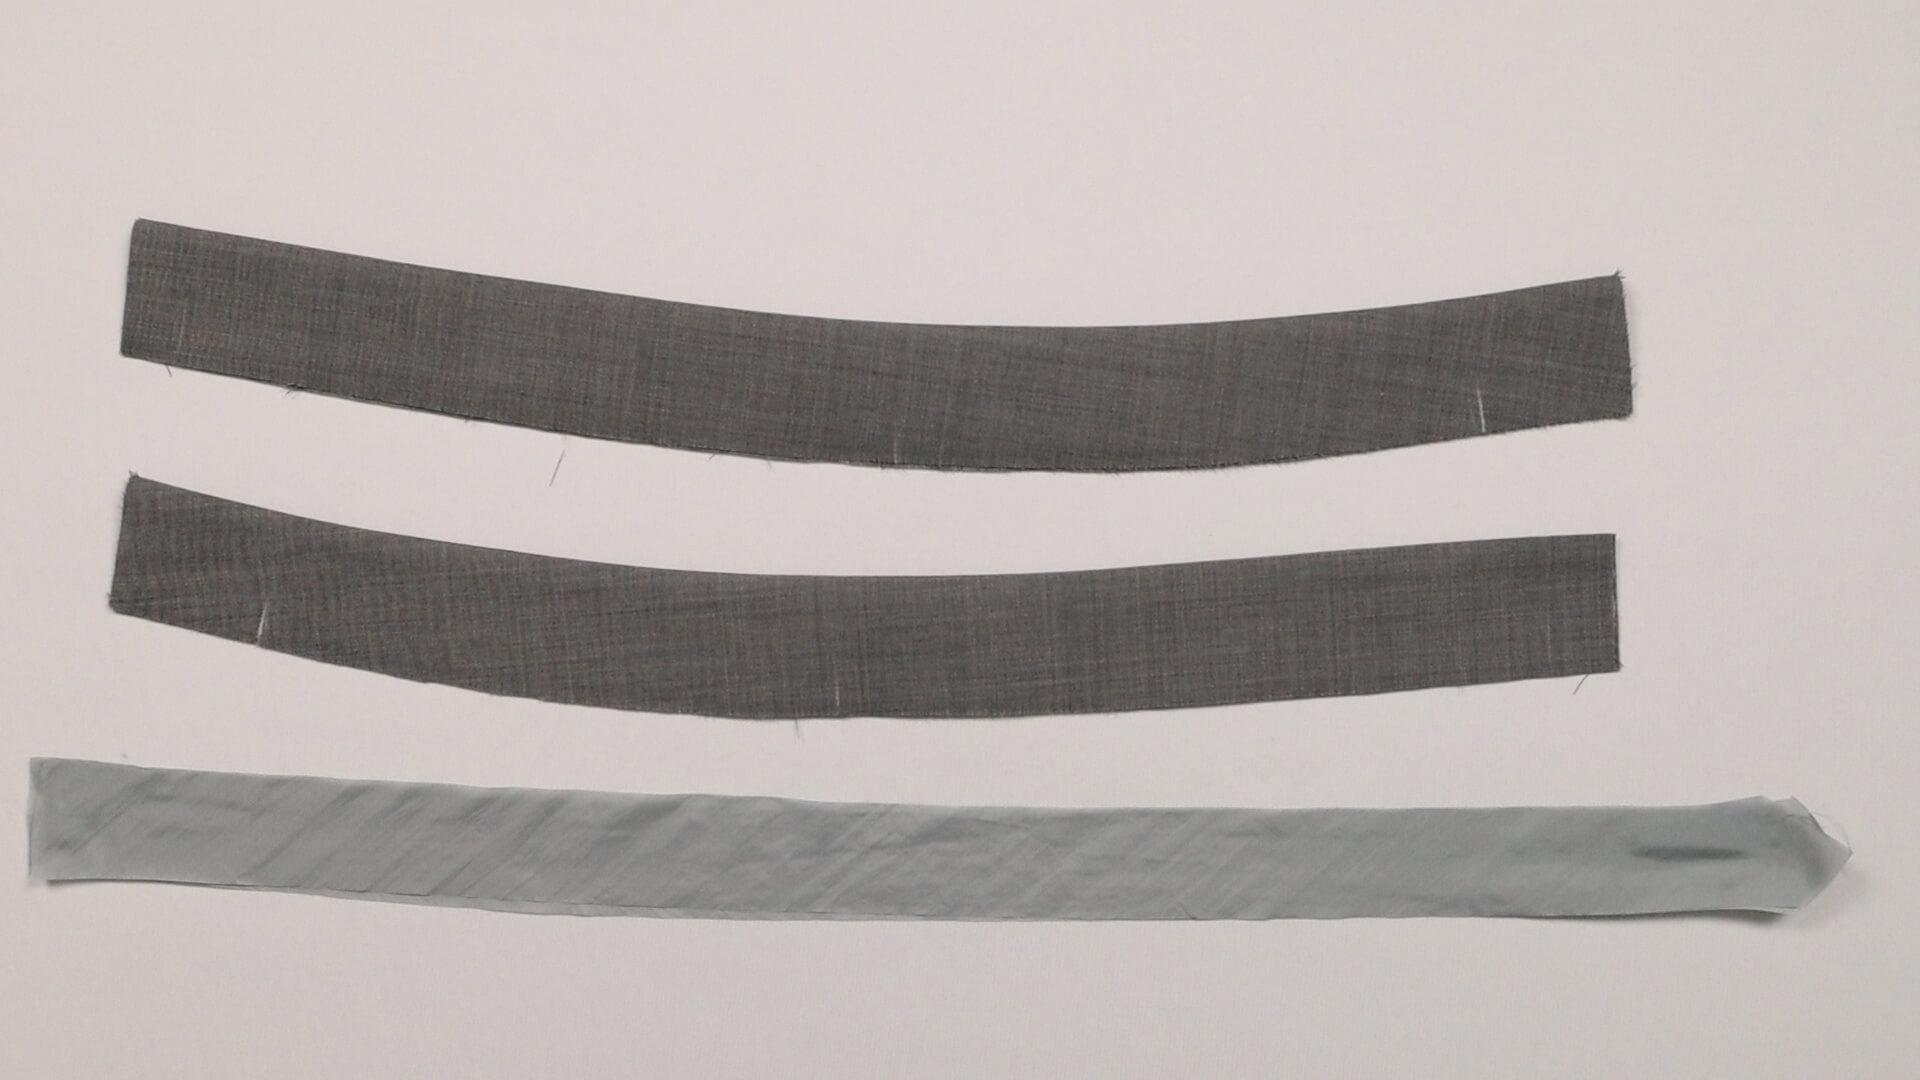
The two waistband strips are positioned right sides up. The front center is marked.
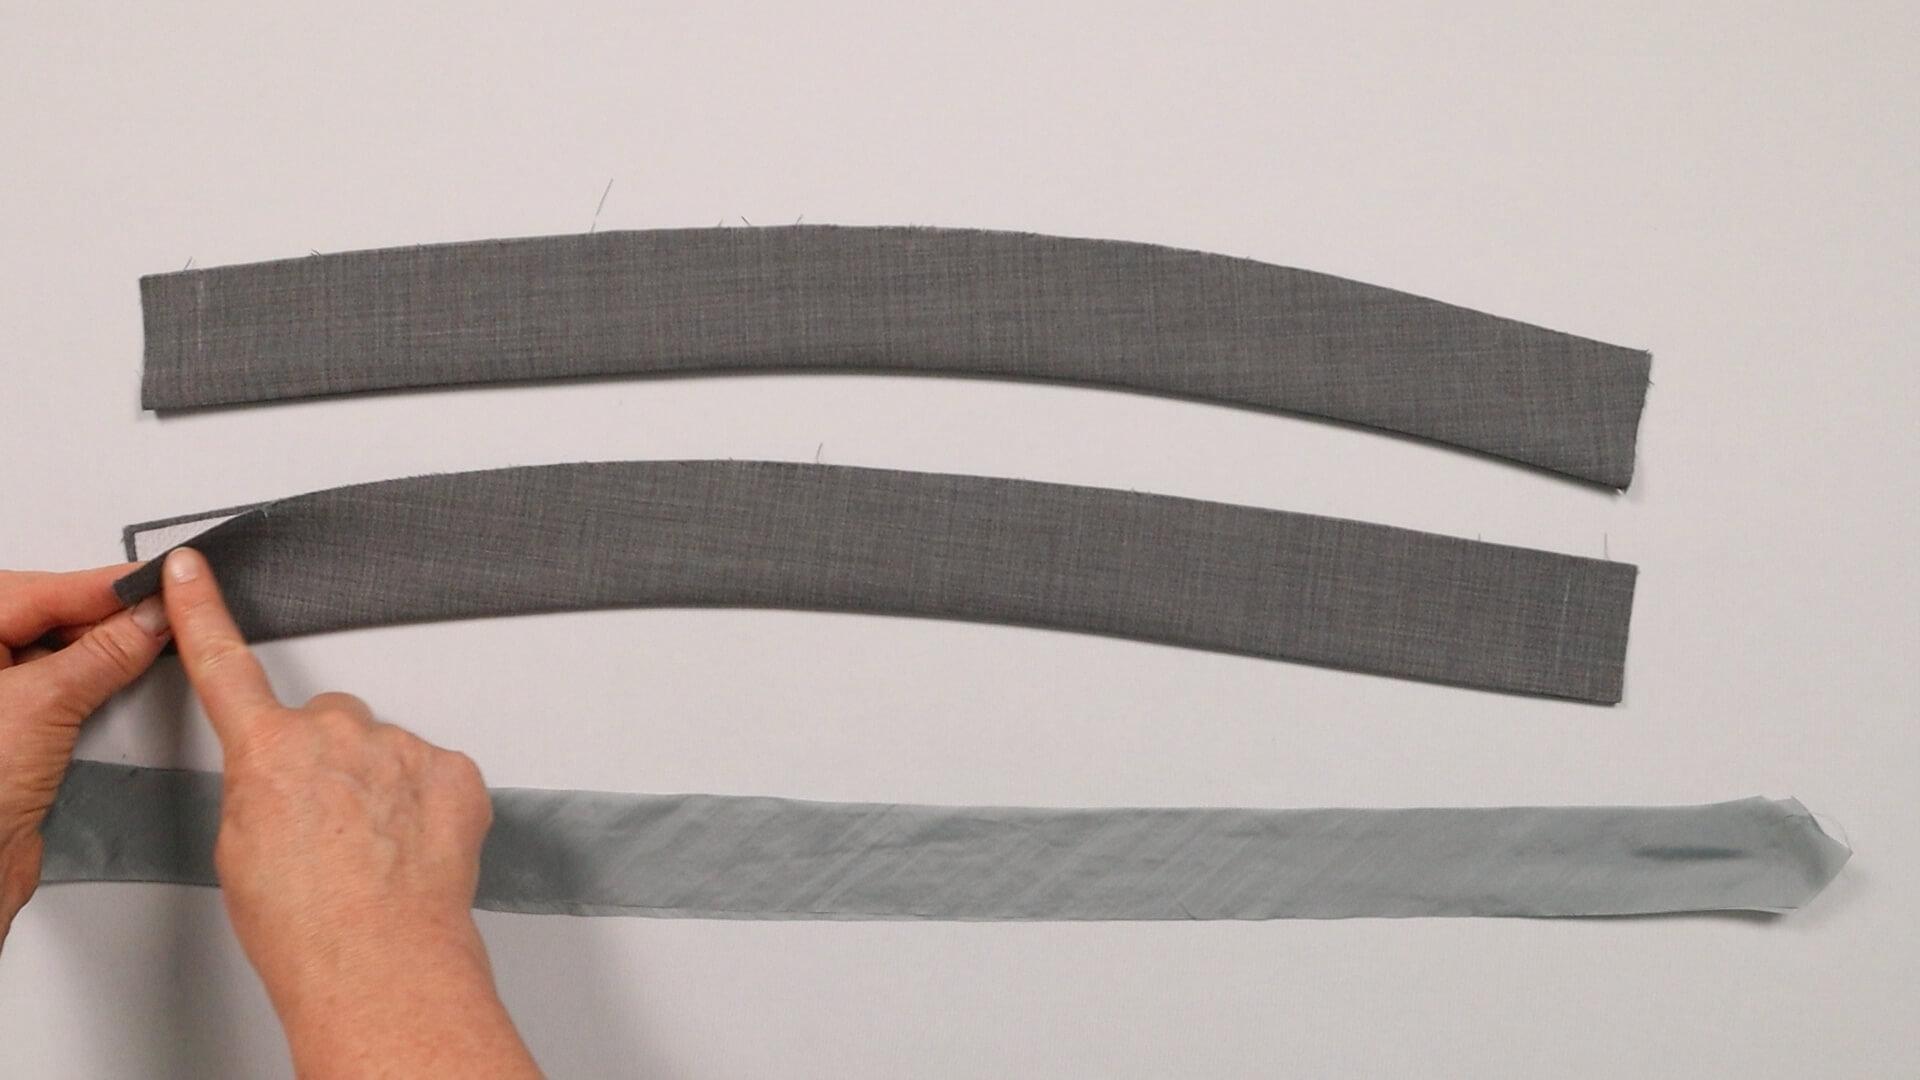
I turn the strips so the inside is visible and attach the bias binding to the raw edge.
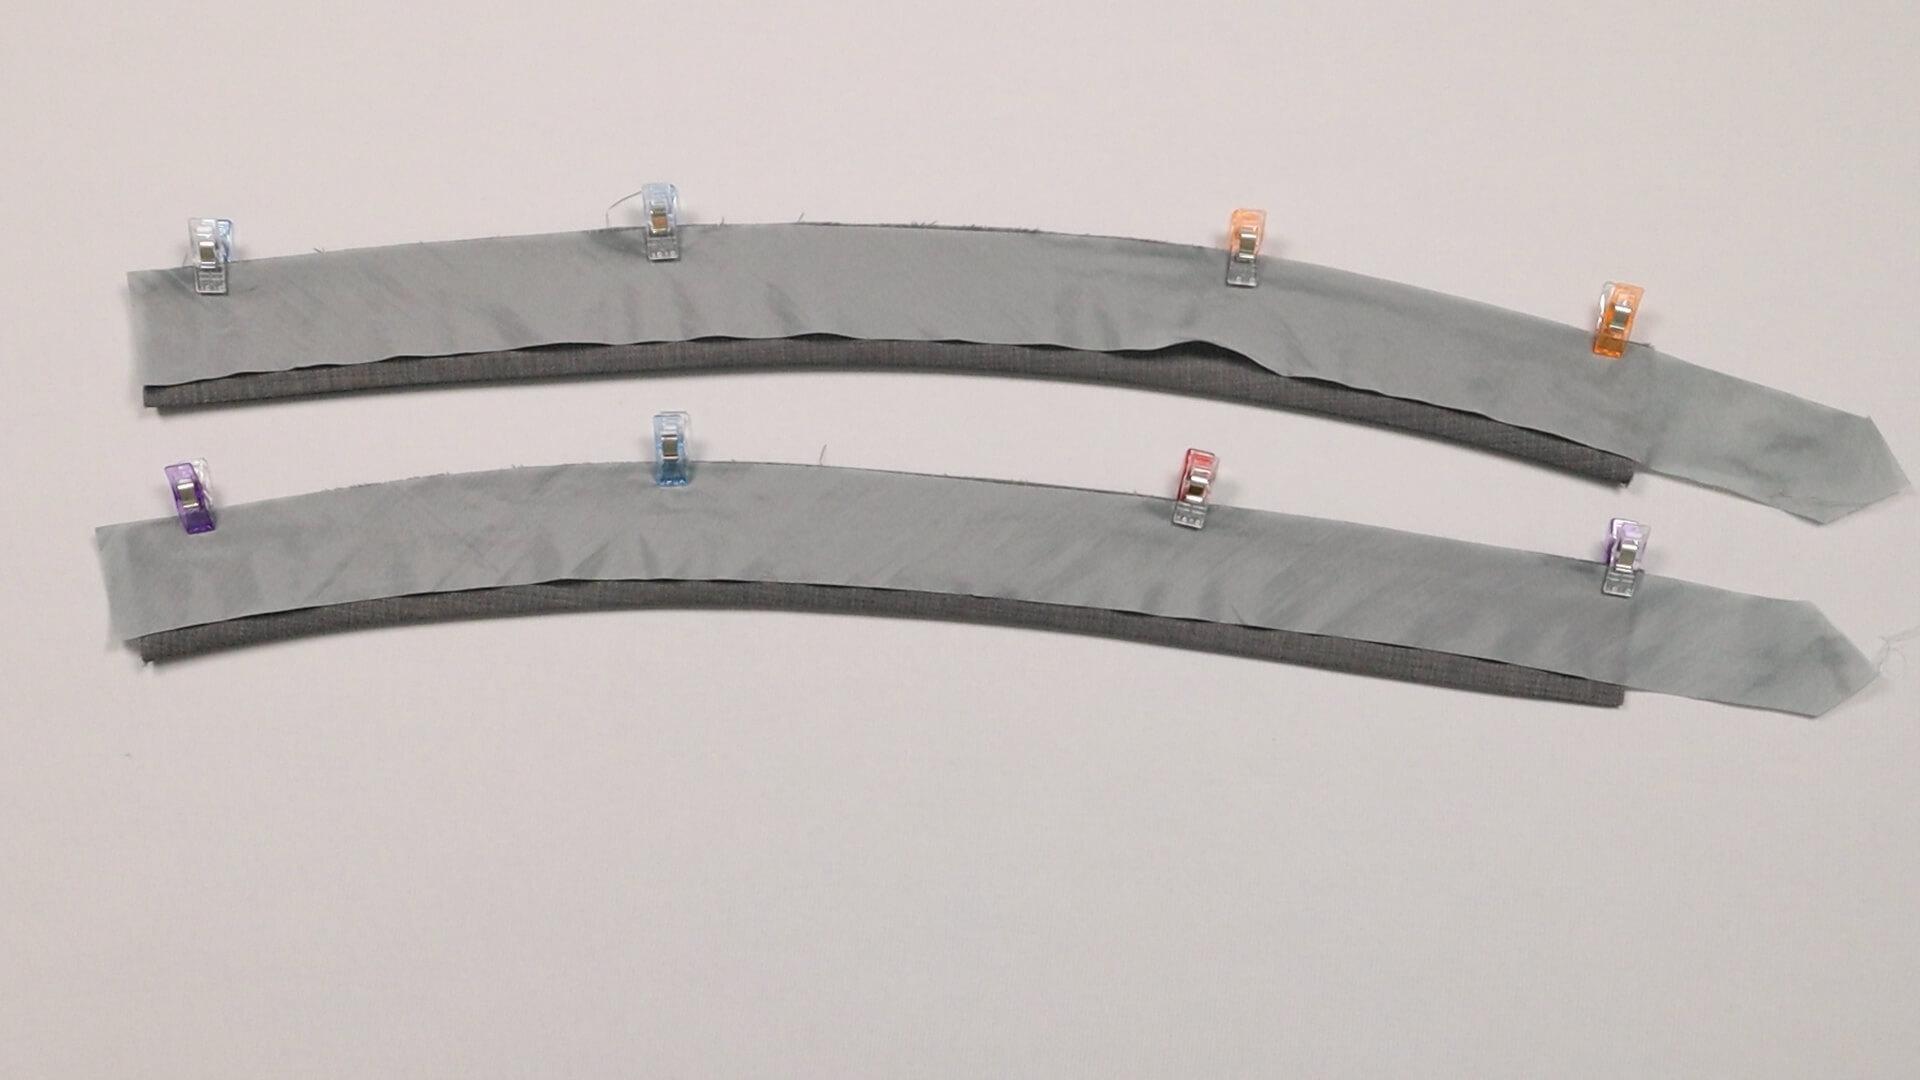
I pin the bias strips to the bottom edge of the waistband, right sides together, and sew them on with a seam width of 4-5 mm. Unfold the ready-made bias tape before sewing it on, place it right sides together on the lower edge of the waistband and sew it in place exactly on the fold line.
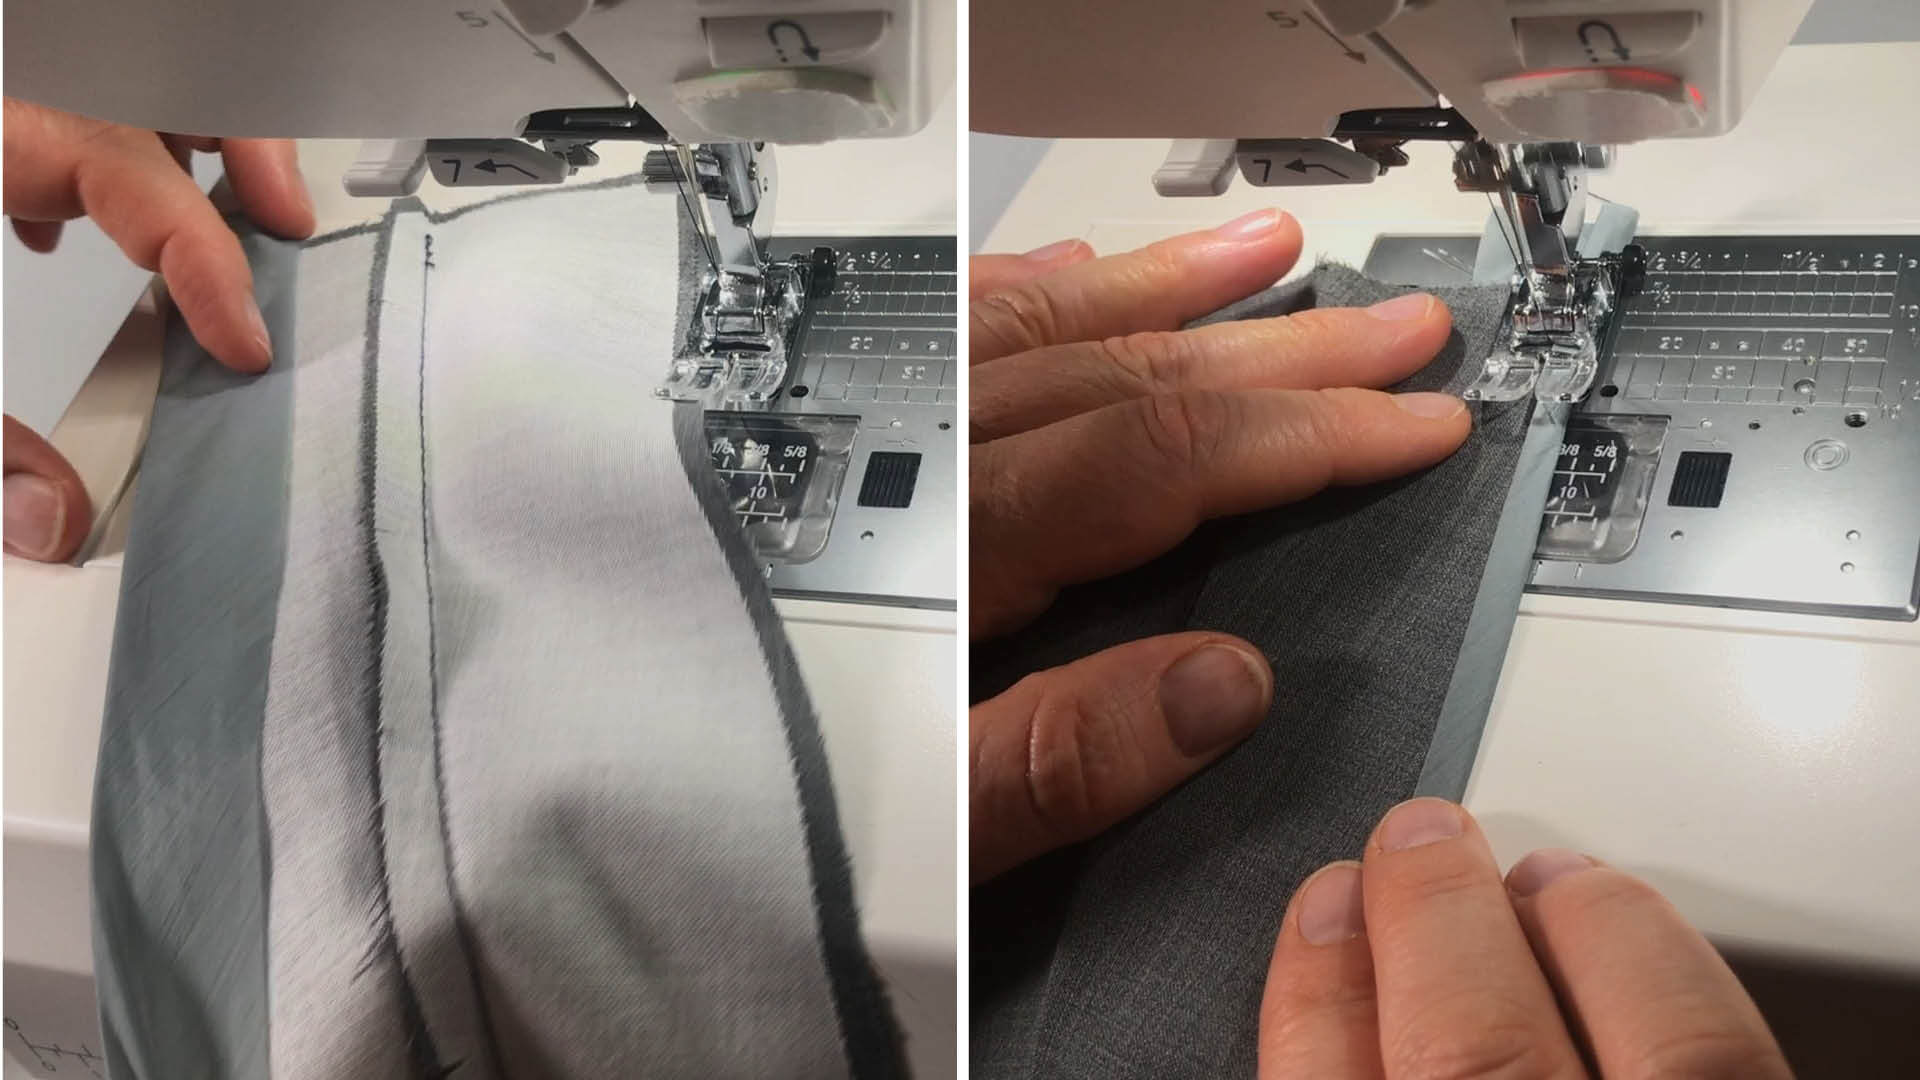
I fold the lining around the edge and stitch it in place right next to the seam. If you are using ready-made bias tape, I recommend to unfold the bias binding on the inside to prevent the waistband from being too thick and sewing through too many layers.
4. Sew on the belt loops
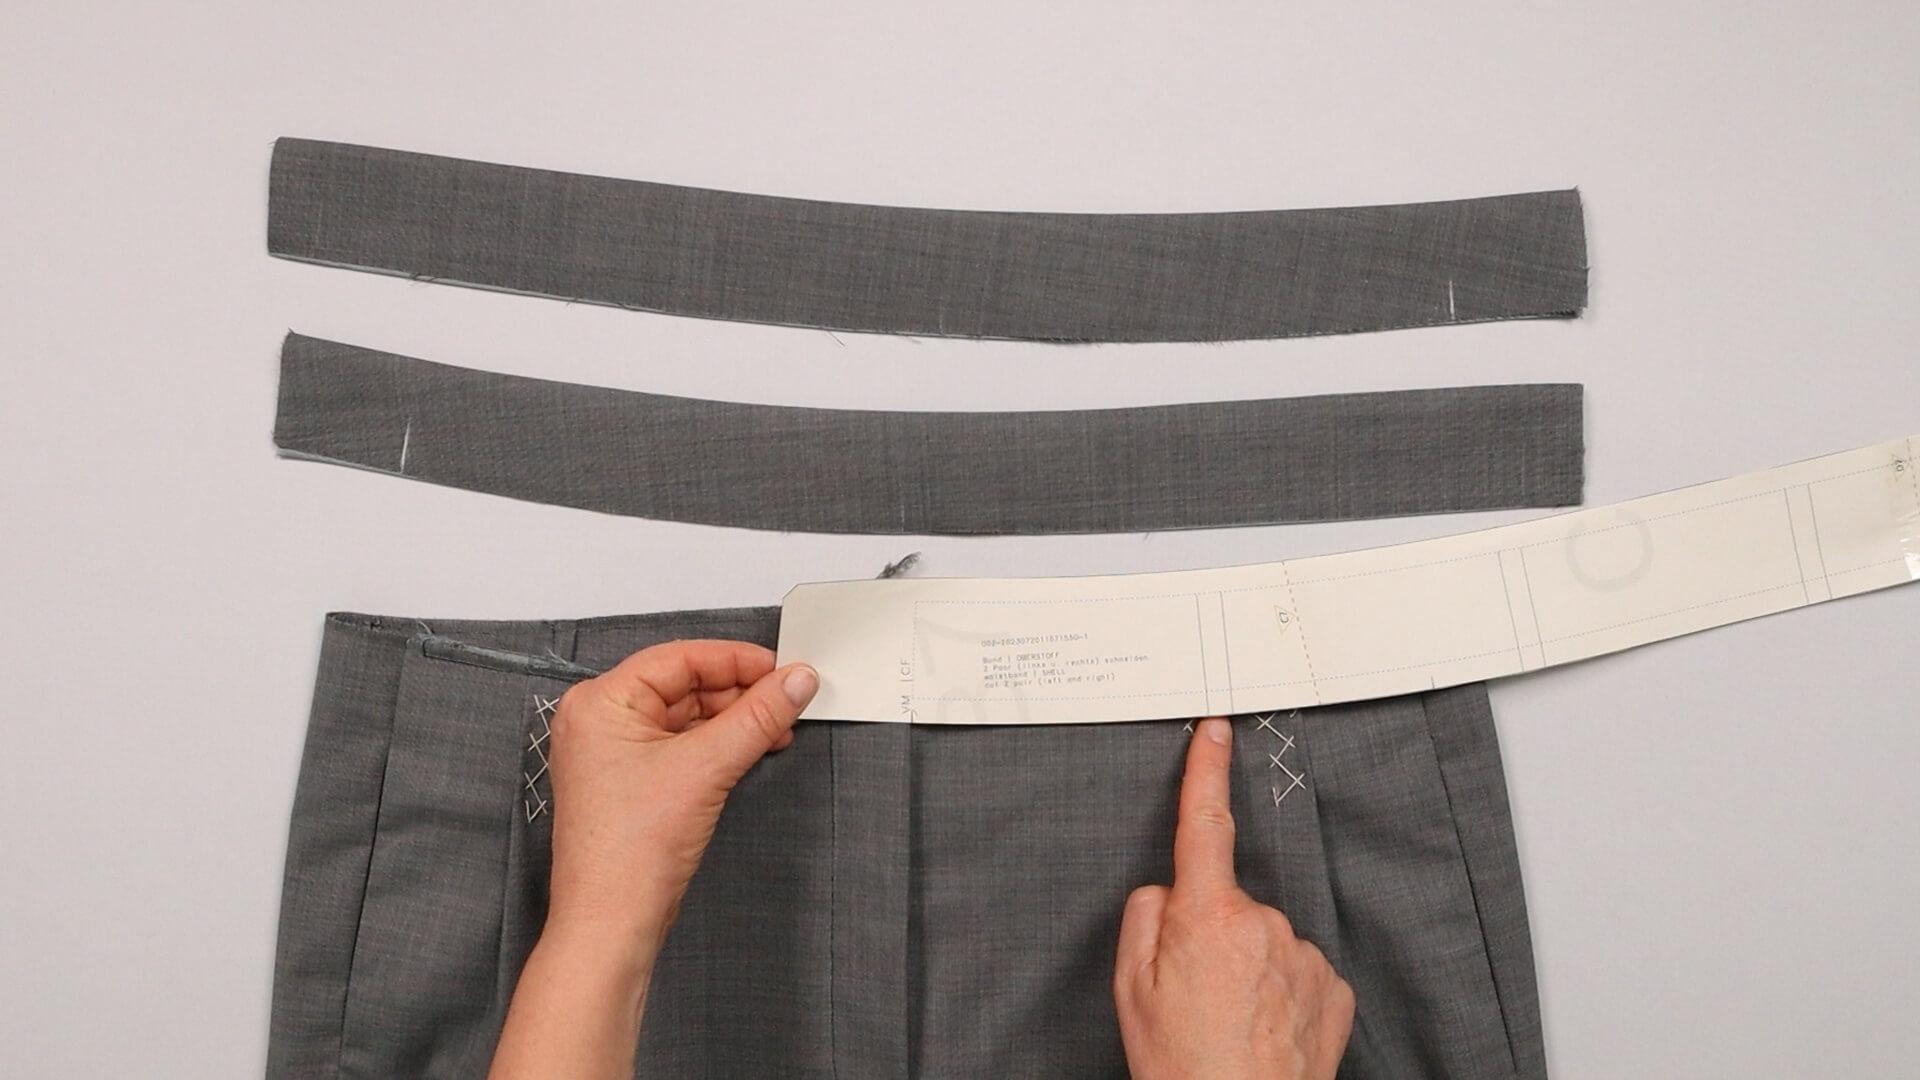
Before I sew the belt loops onto the waistband strips, I check whether I like the positions marked on the pattern. I adopt the indicated positions without modifications.
I want to insert the belt loops in the upper edge of the waistband, so I have to undo the seam in the upper waistband where the belt loops will be sitting.
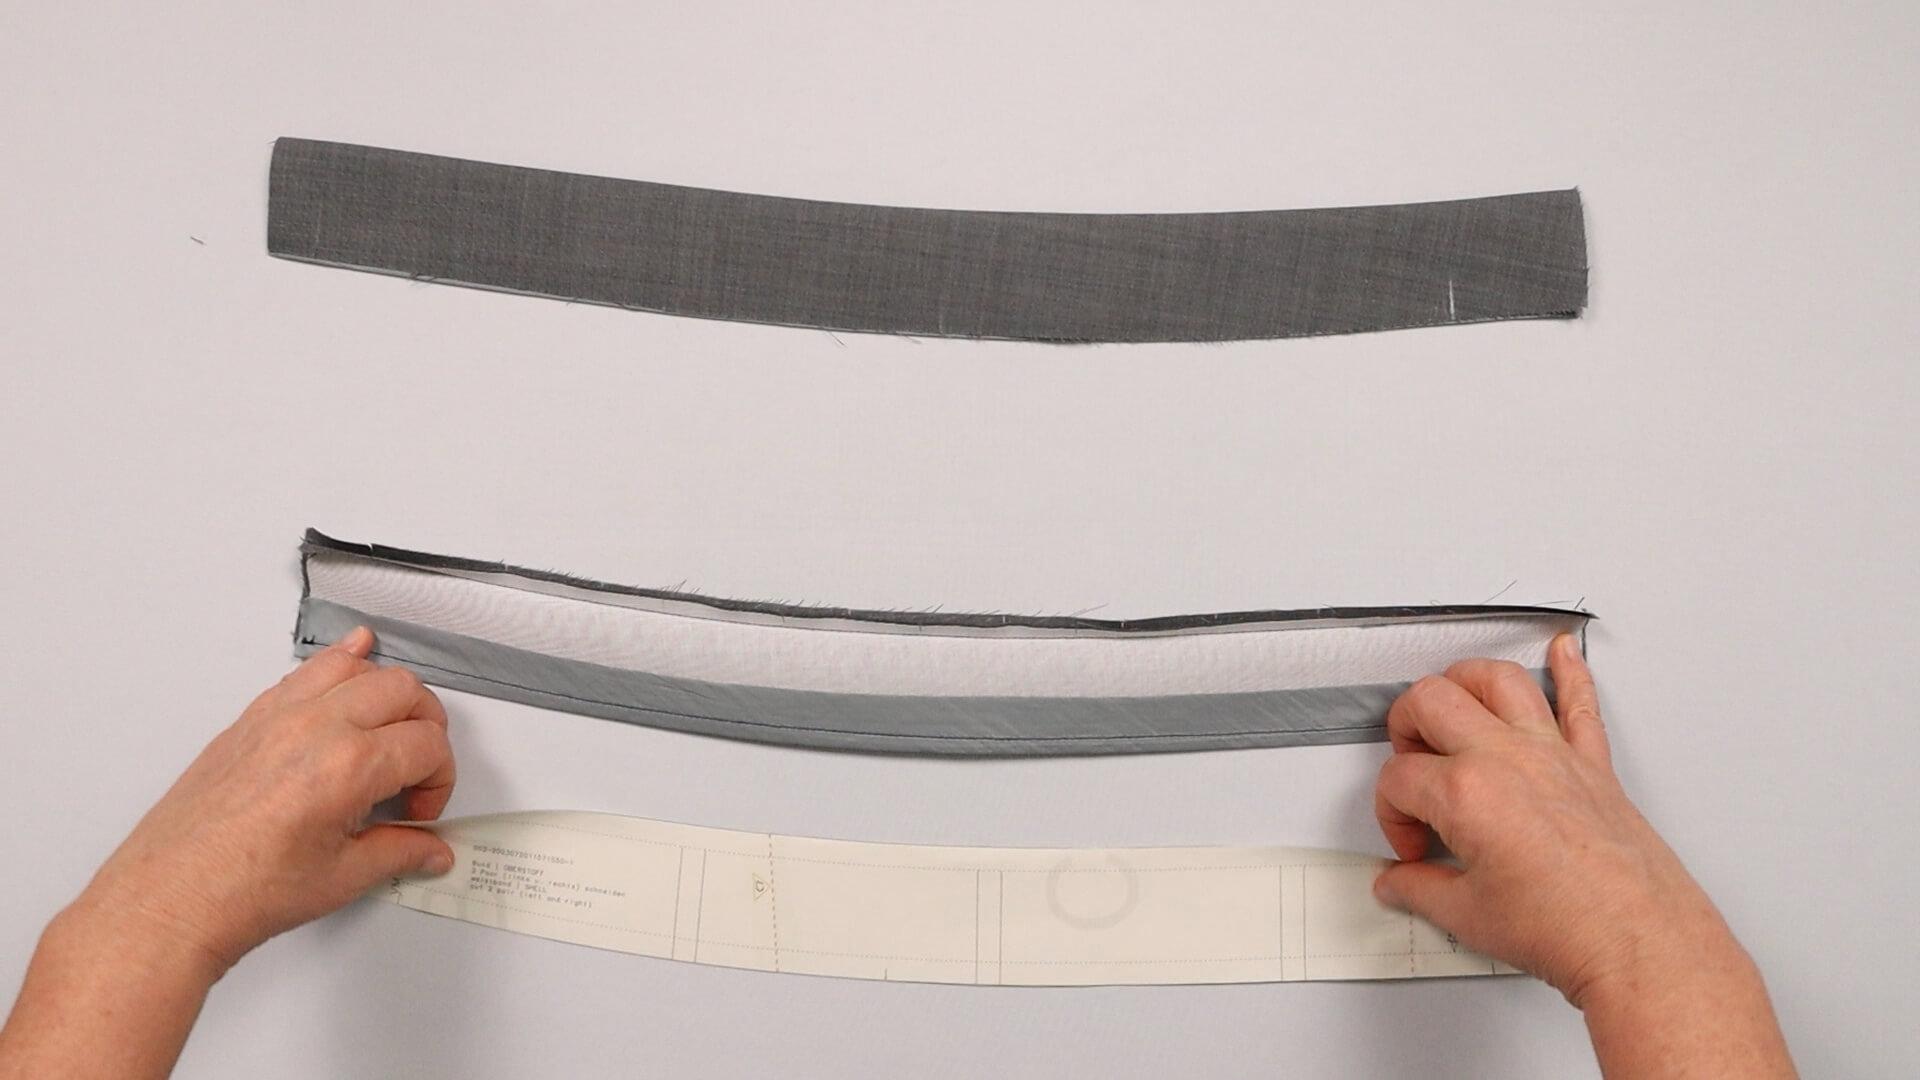
To prepare this, I turn the left waistband strip right sides facing and position the paper pattern piece on top.
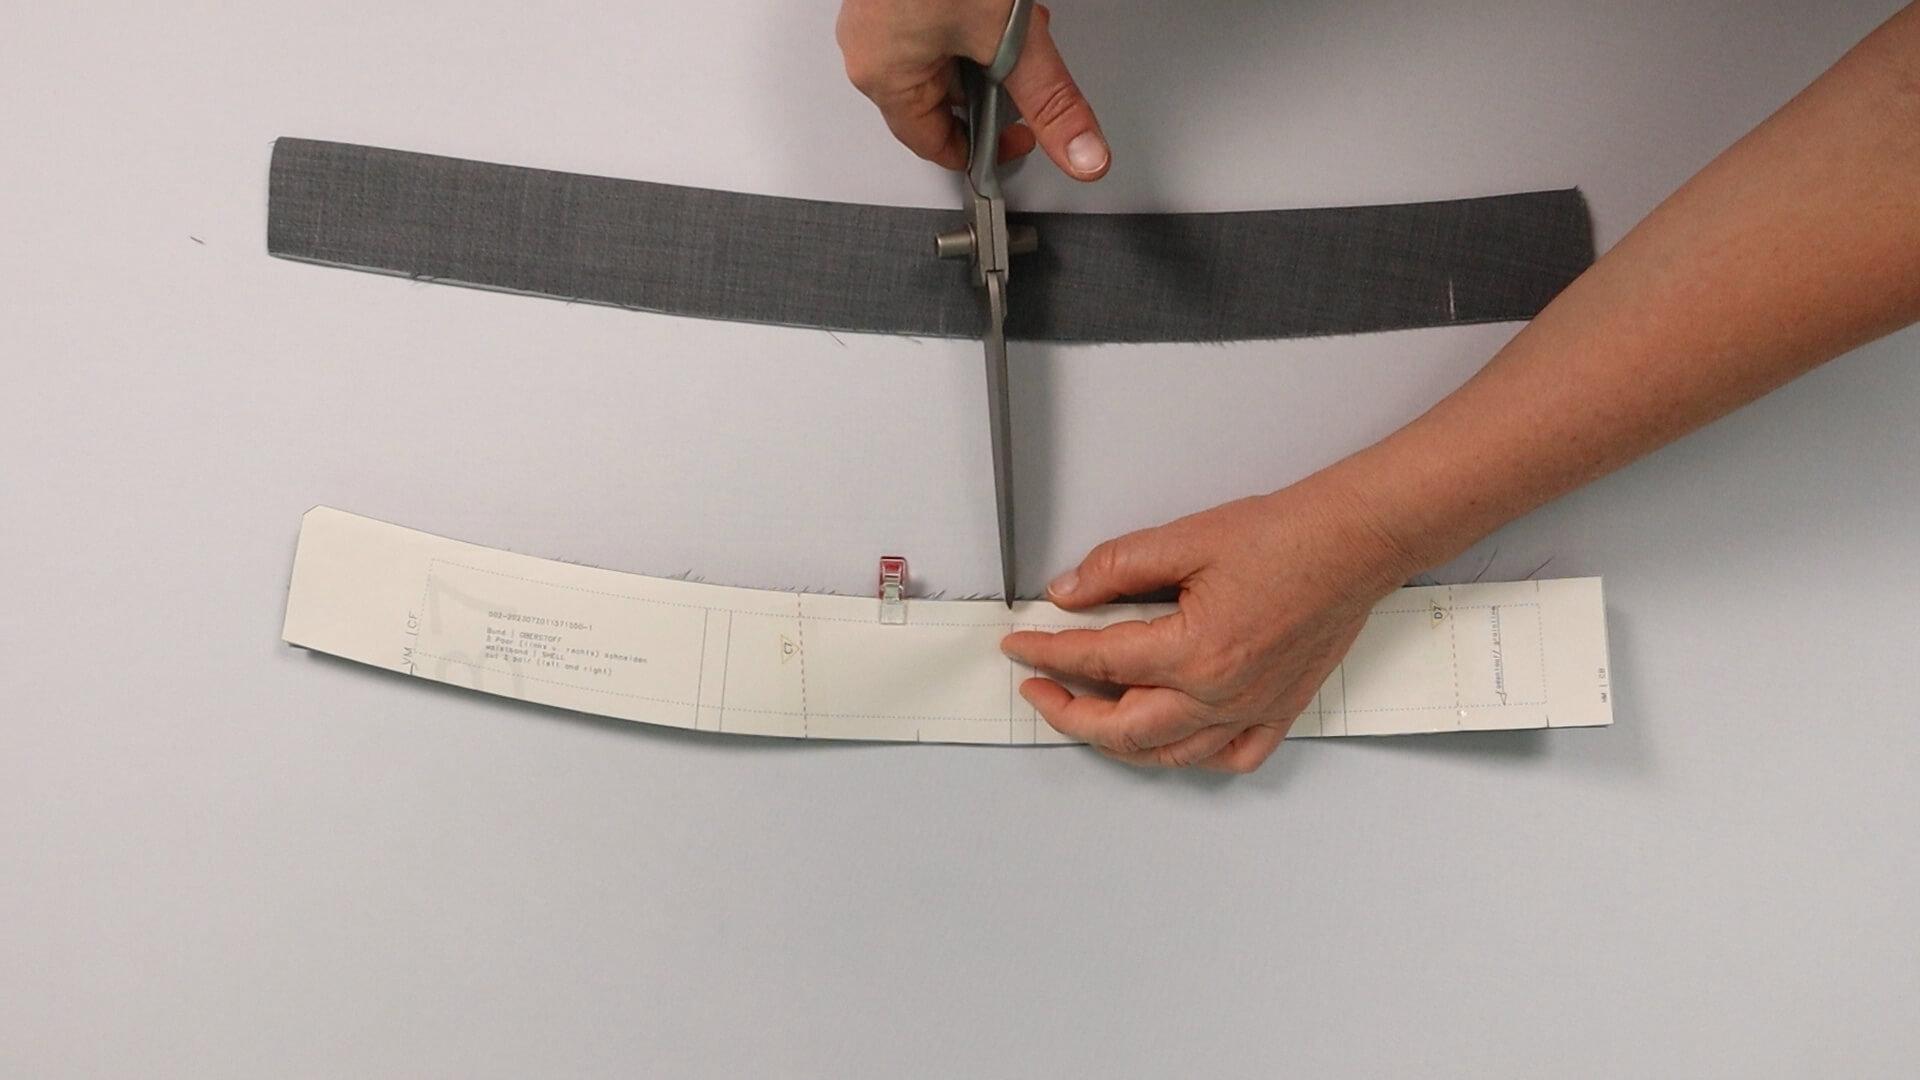
To mark the belt loop positions, I snip into the seam allowance approx. 5 mm.
I proceed in the same way on the right waistband strip, placing the pattern piece mirrored.
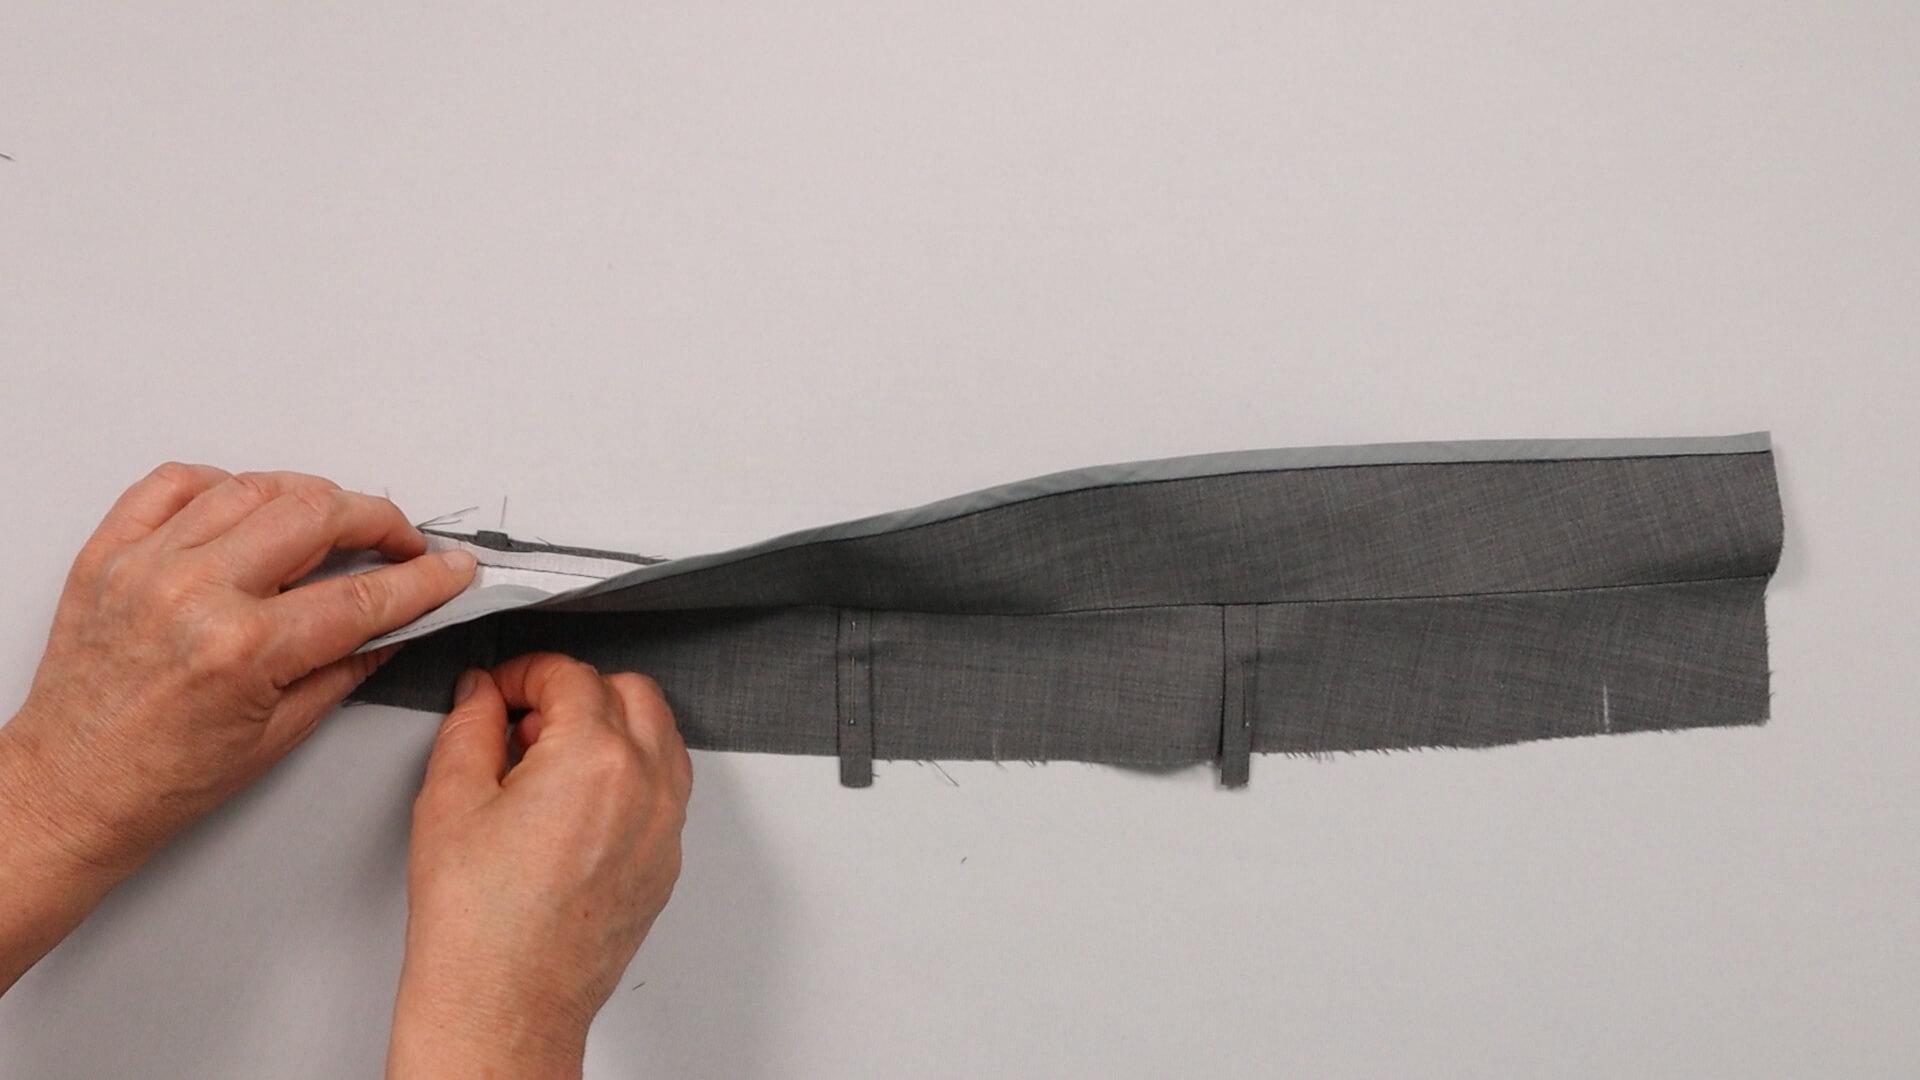
I undo the upper edge of the waistband between the two markings for each belt loop.
Then I push the belt loops through the openings from the outside and make sure they are on the outside of the waistband with the correct side facing up.
I place the cut edge of the loops concise with the top edge of the waistband and pin them in place.
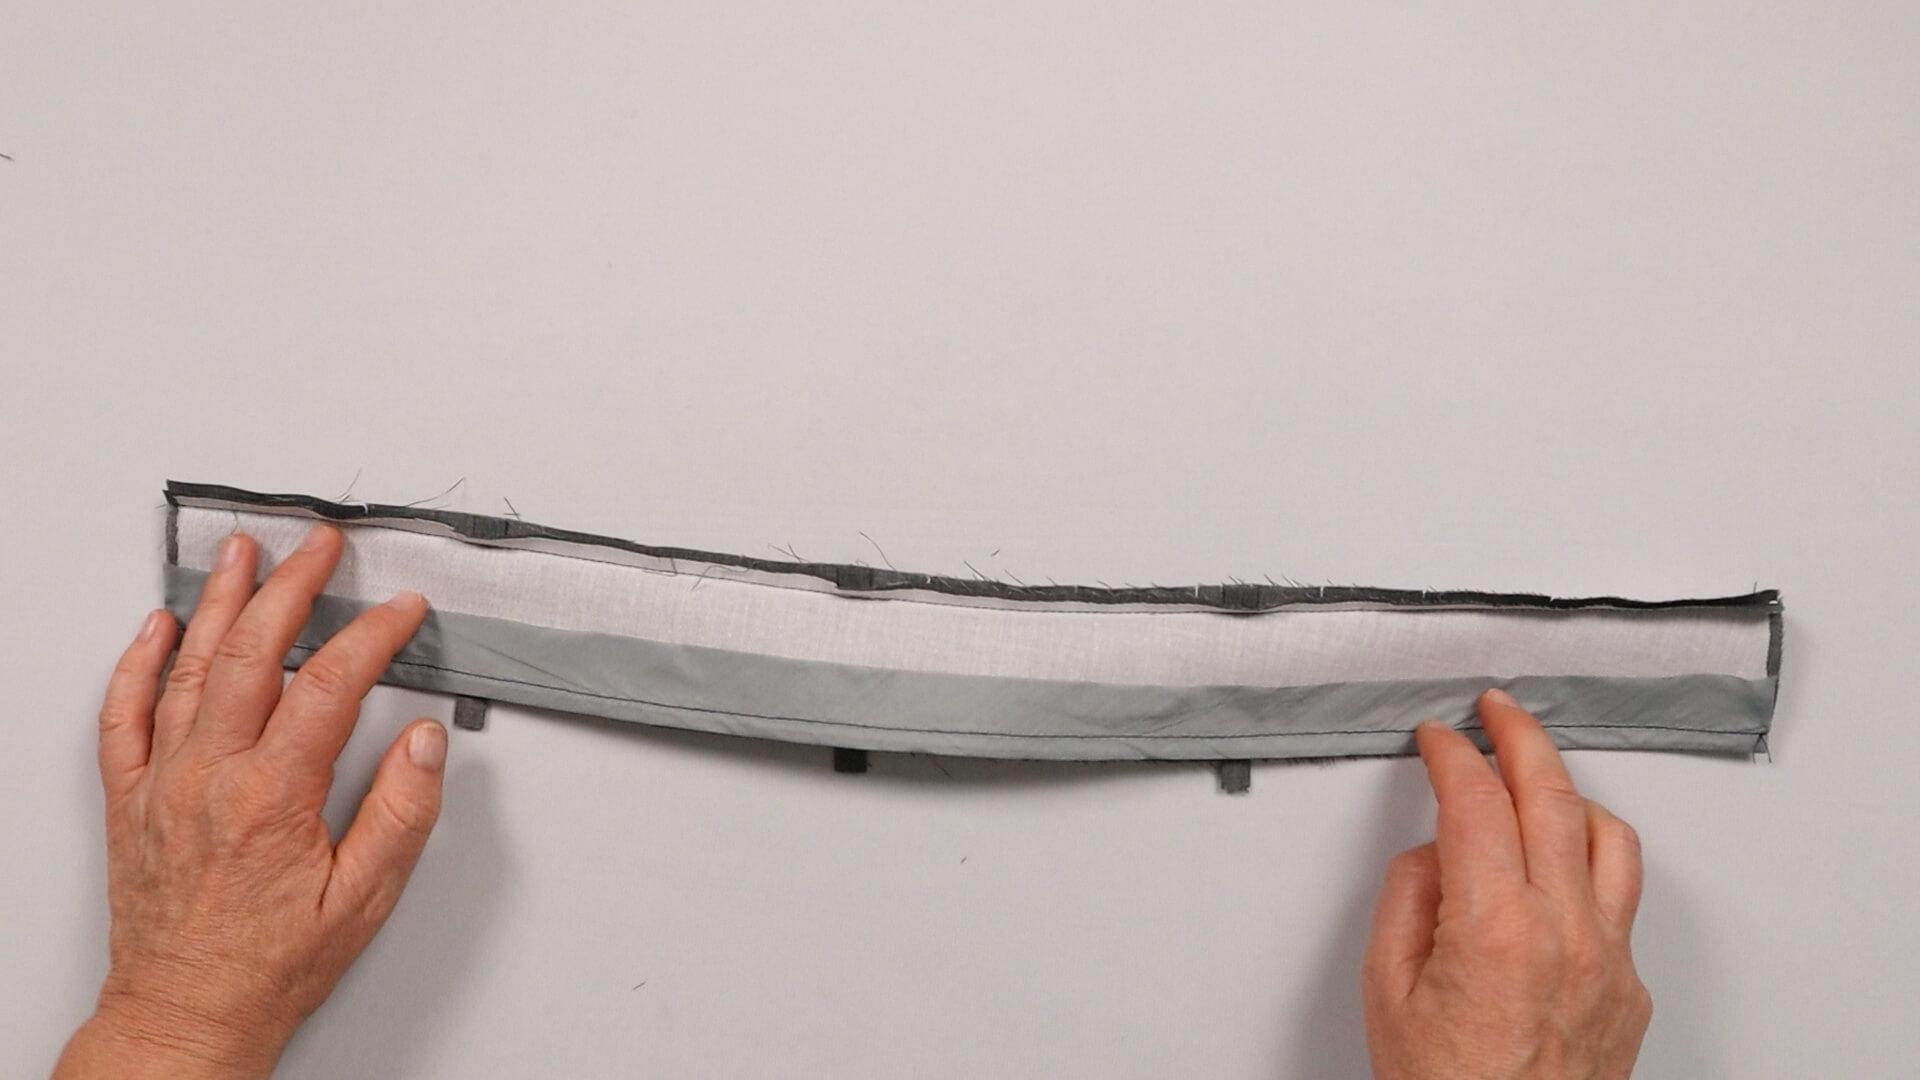
I close the openings.
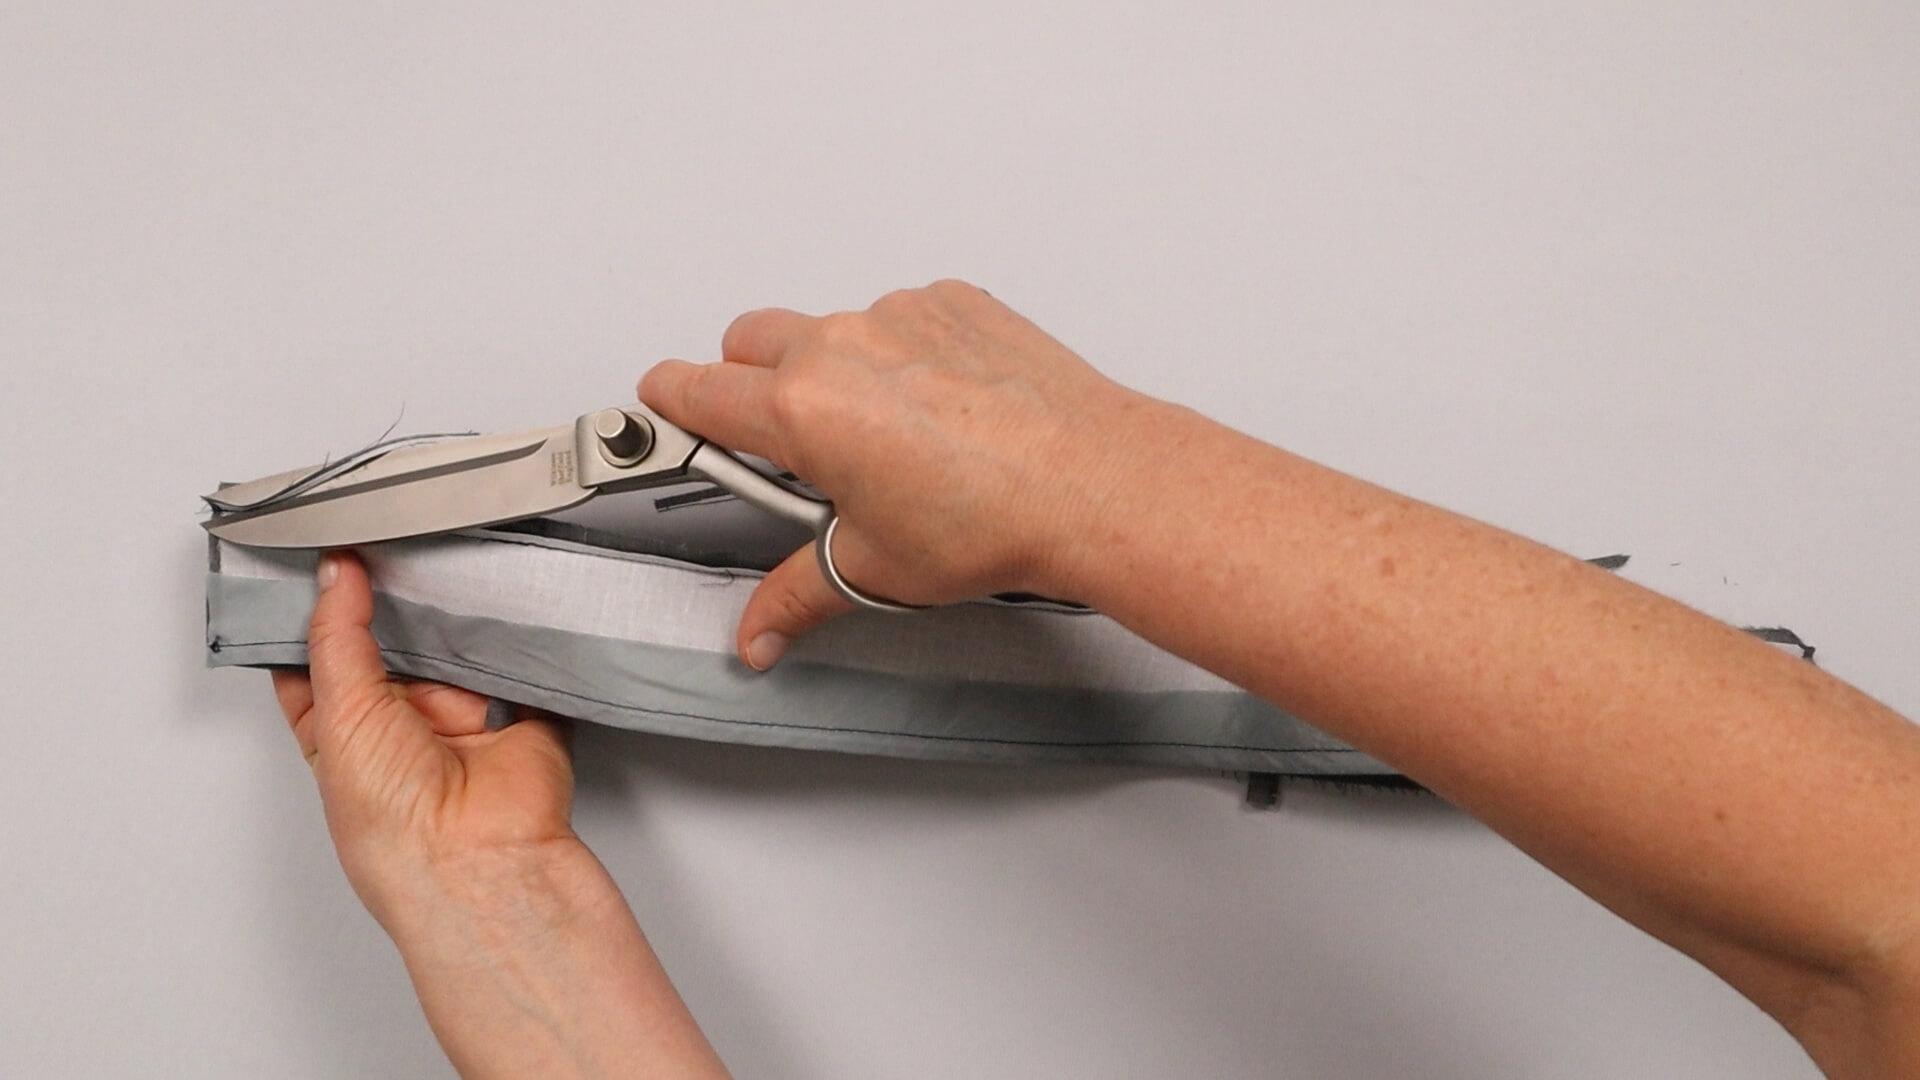
I cut the seam allowance in half on the inside of the waistband.
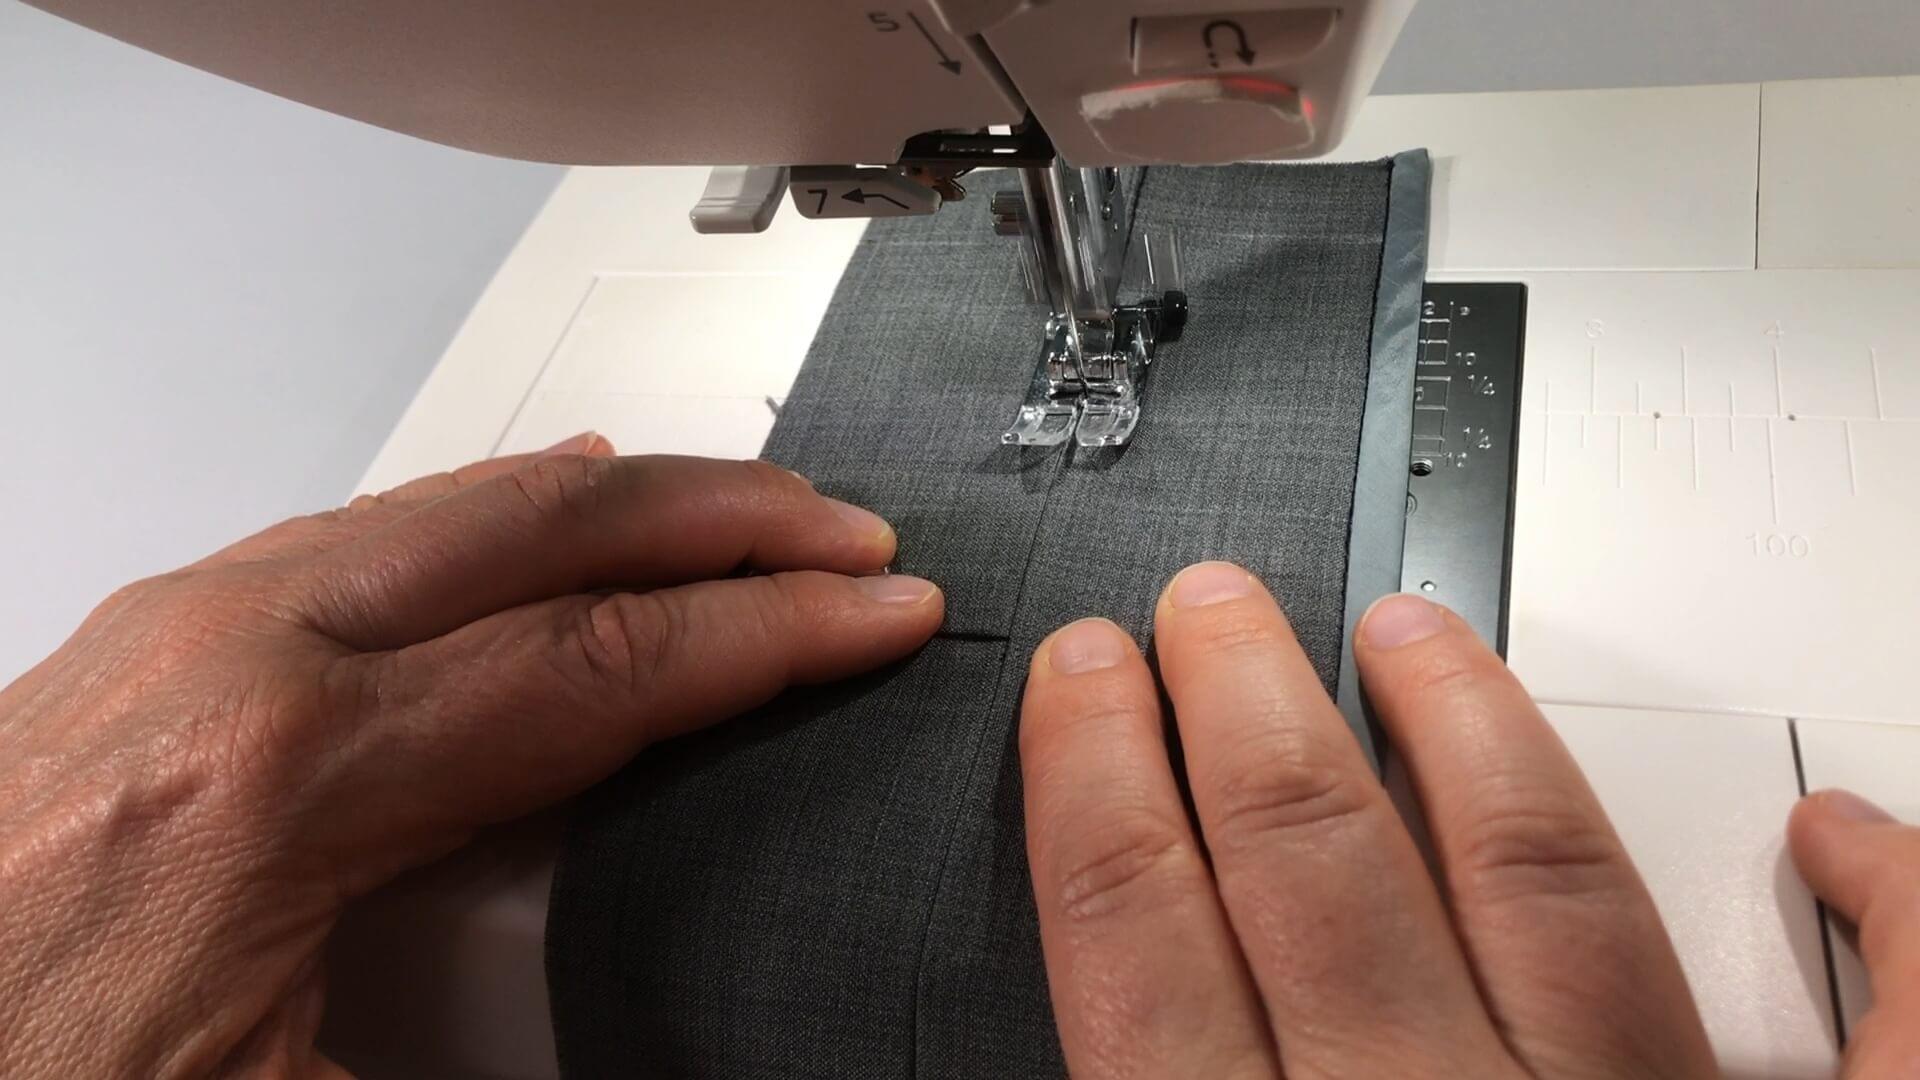
I understitch the seam allowance to the inside of the waistband, leaving a gap of approx. 2 mm to the seam. This prevents the upper edge of the inside of the waistband from pushing towards the outside.
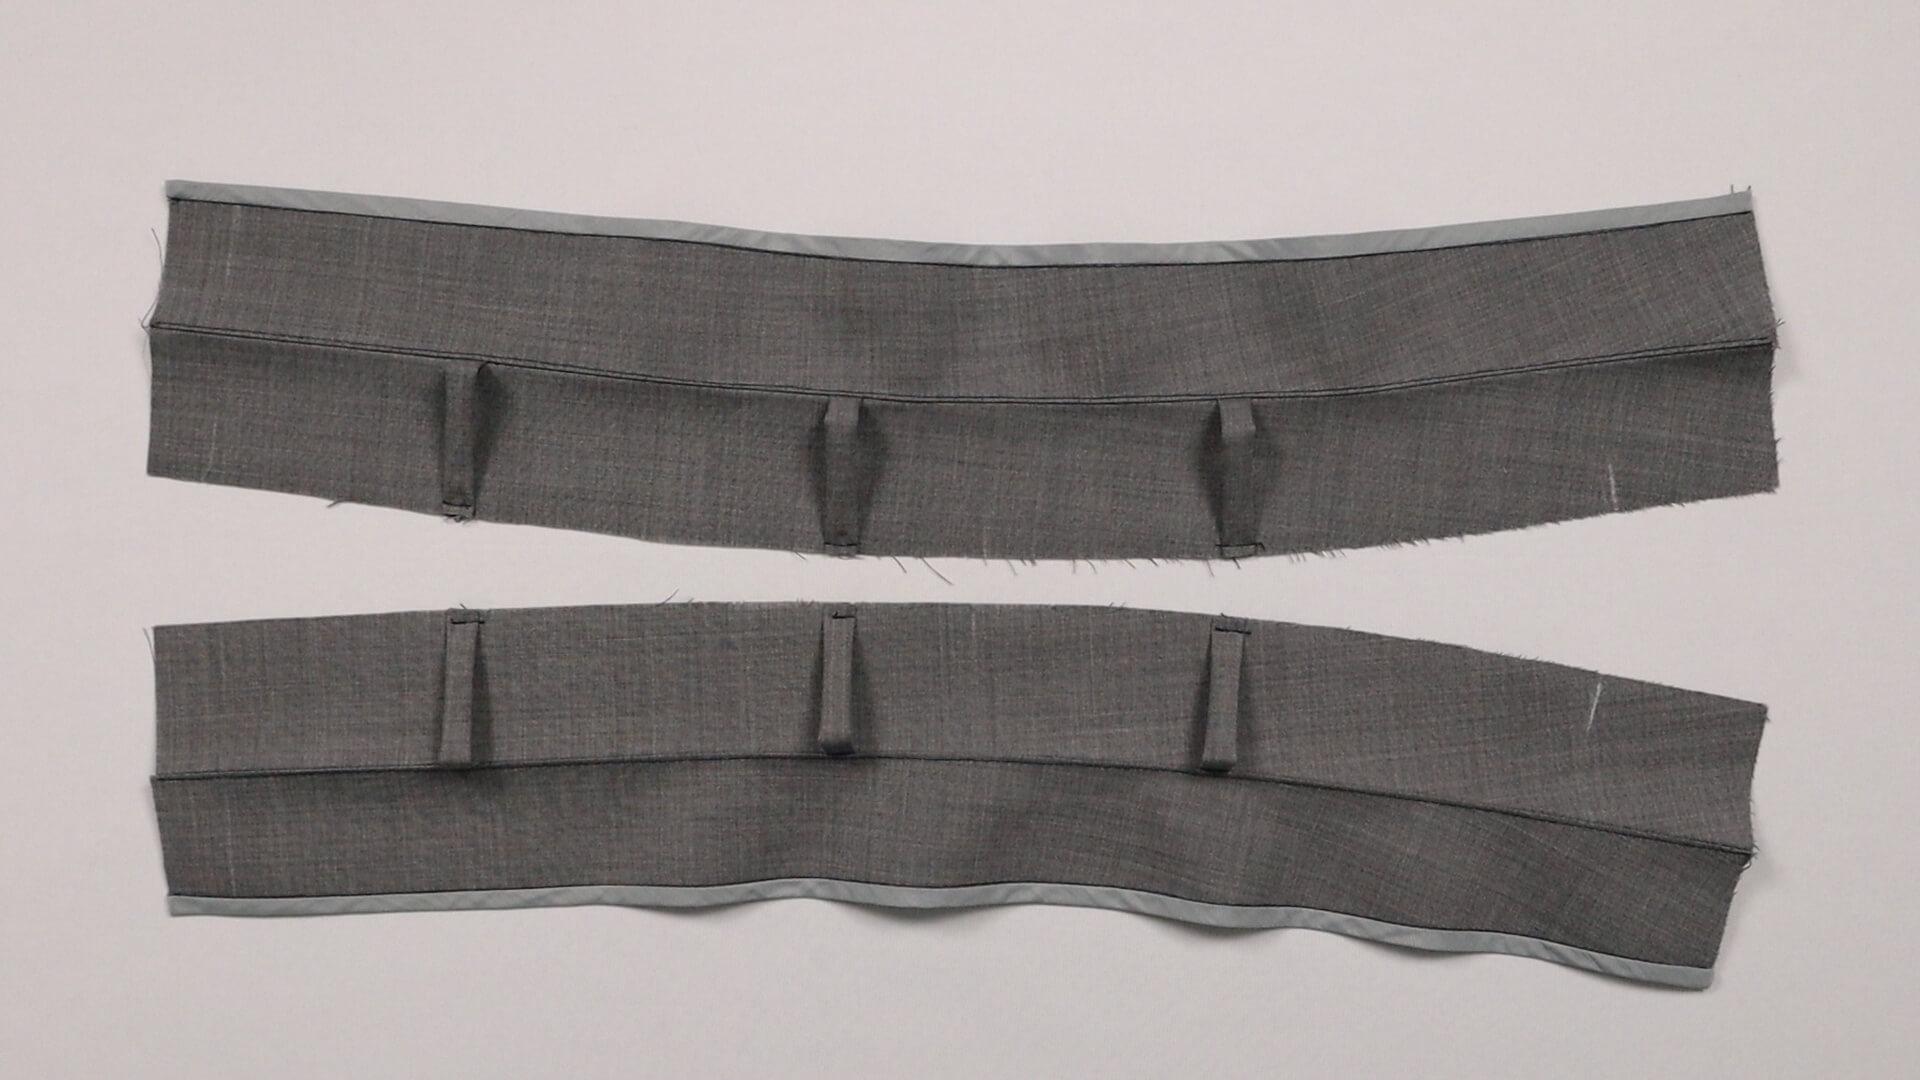
Finally, I stitch the belt loops to the bottom edge with within the seam allwoance. They lie concisely against the bottom waistband edge.
I also check again whether the belt loops on both sides of the divided waistband are positioned in the same way.
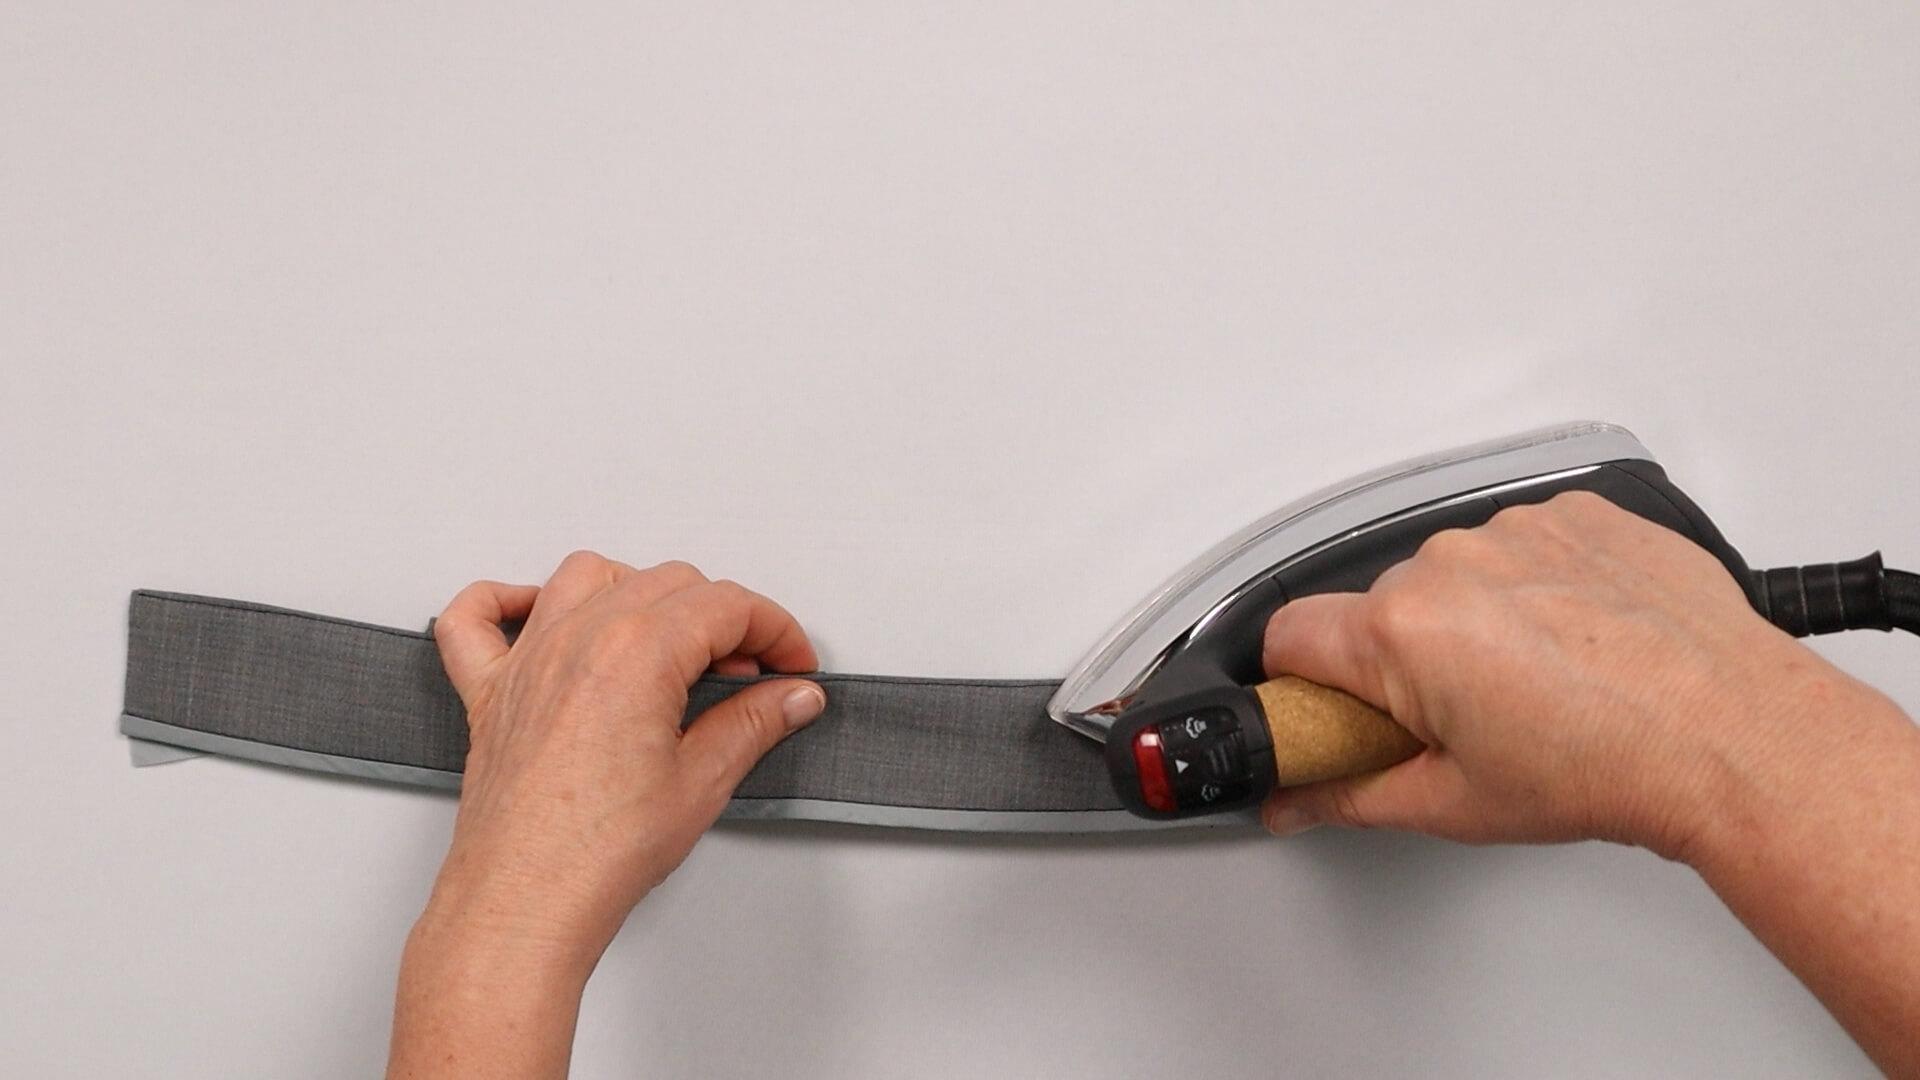
I iron the top edge of the waistband from the inner side.
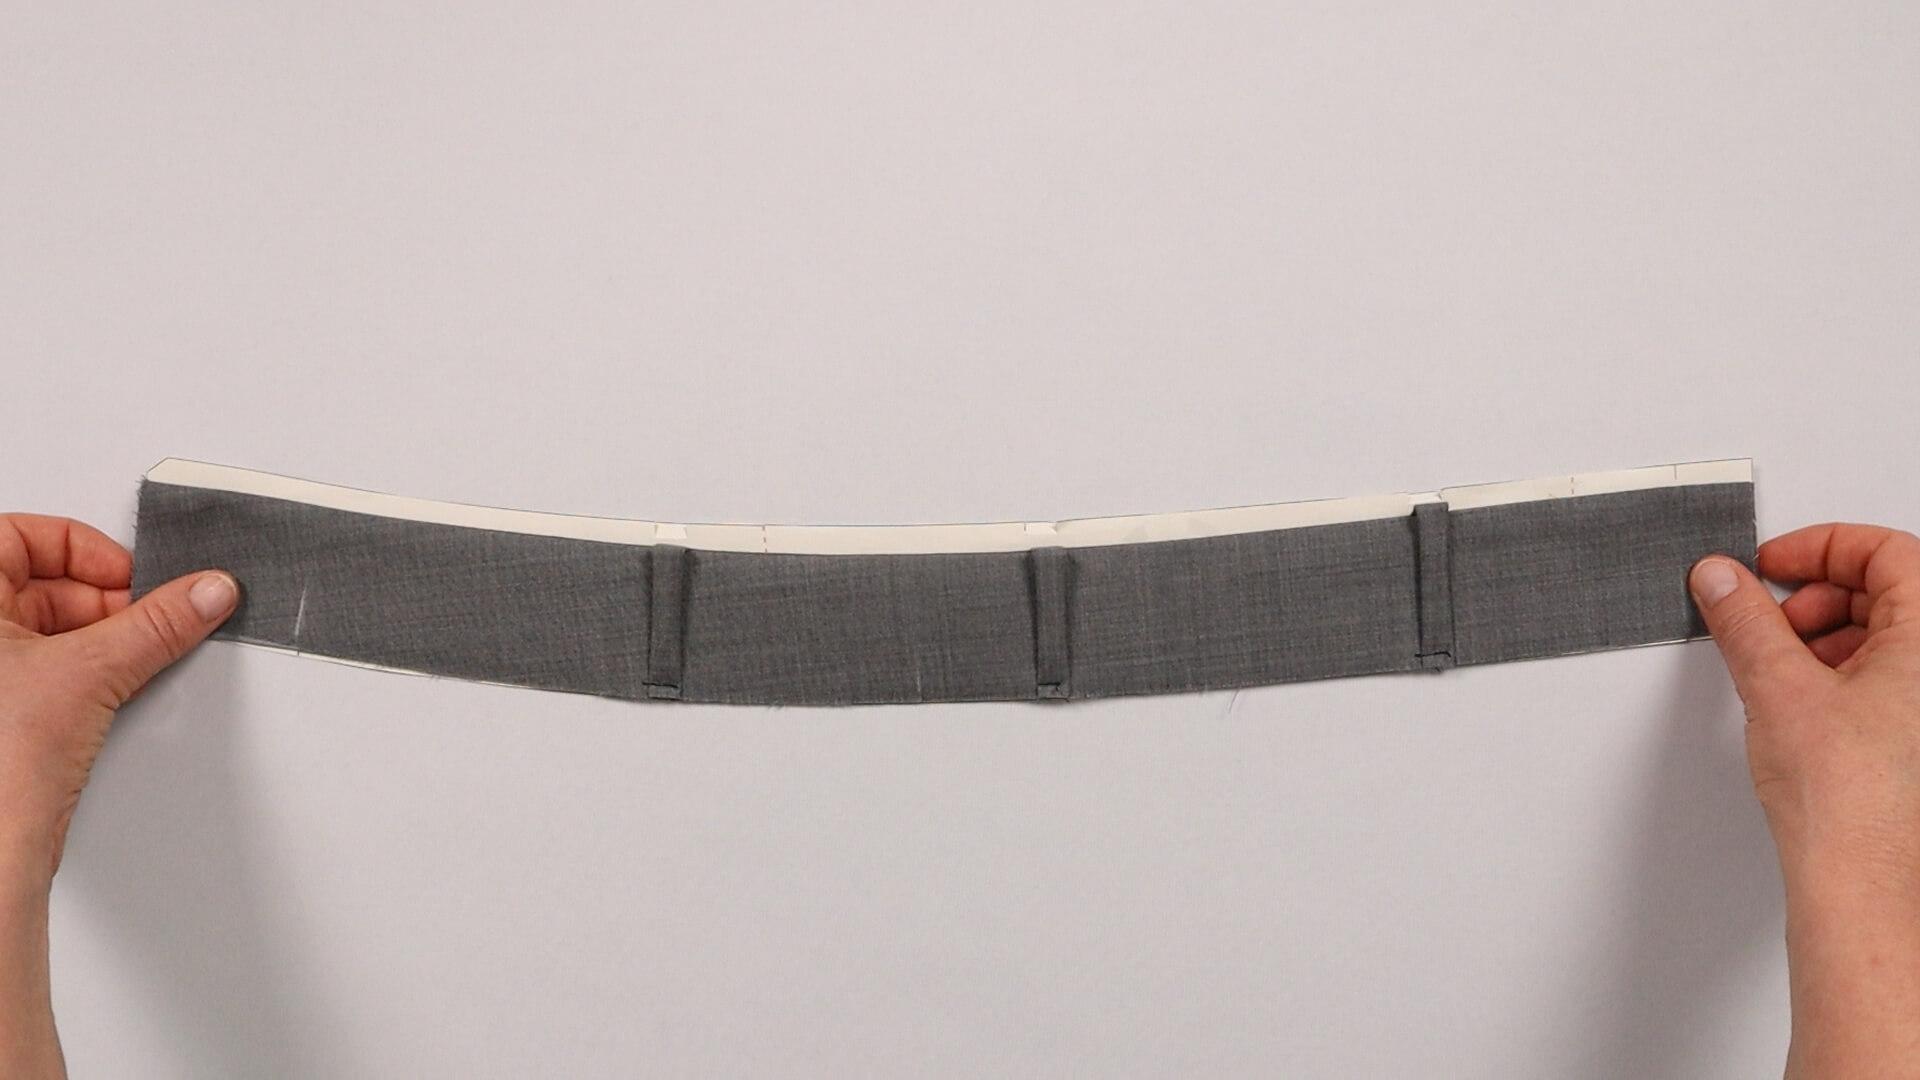
Now I place the waistband on the pattern piece and check that the length ist still corresponding.
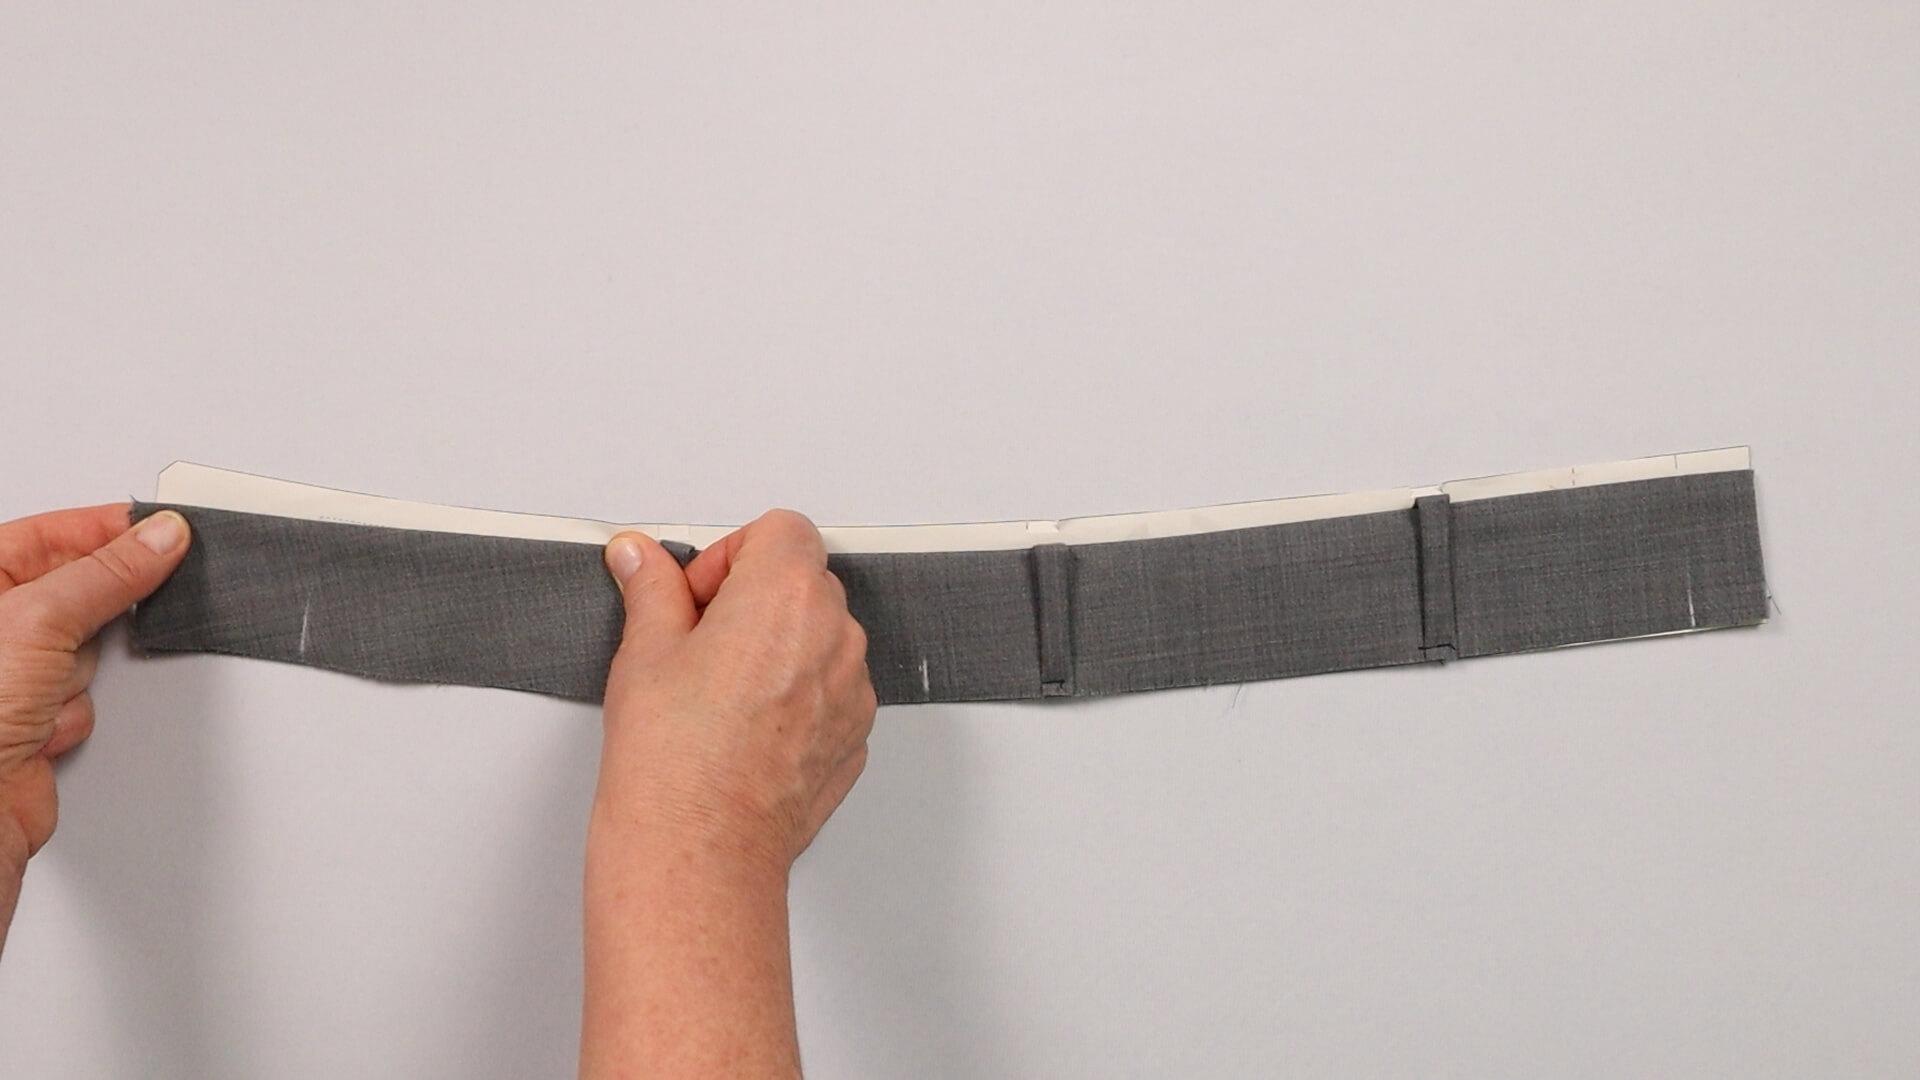
With a shaped waistband, I also check whether the upper edge in the front area, where it is shaped at an angle to the grain, can still be stretched a little.
5. Put on the divided waistband
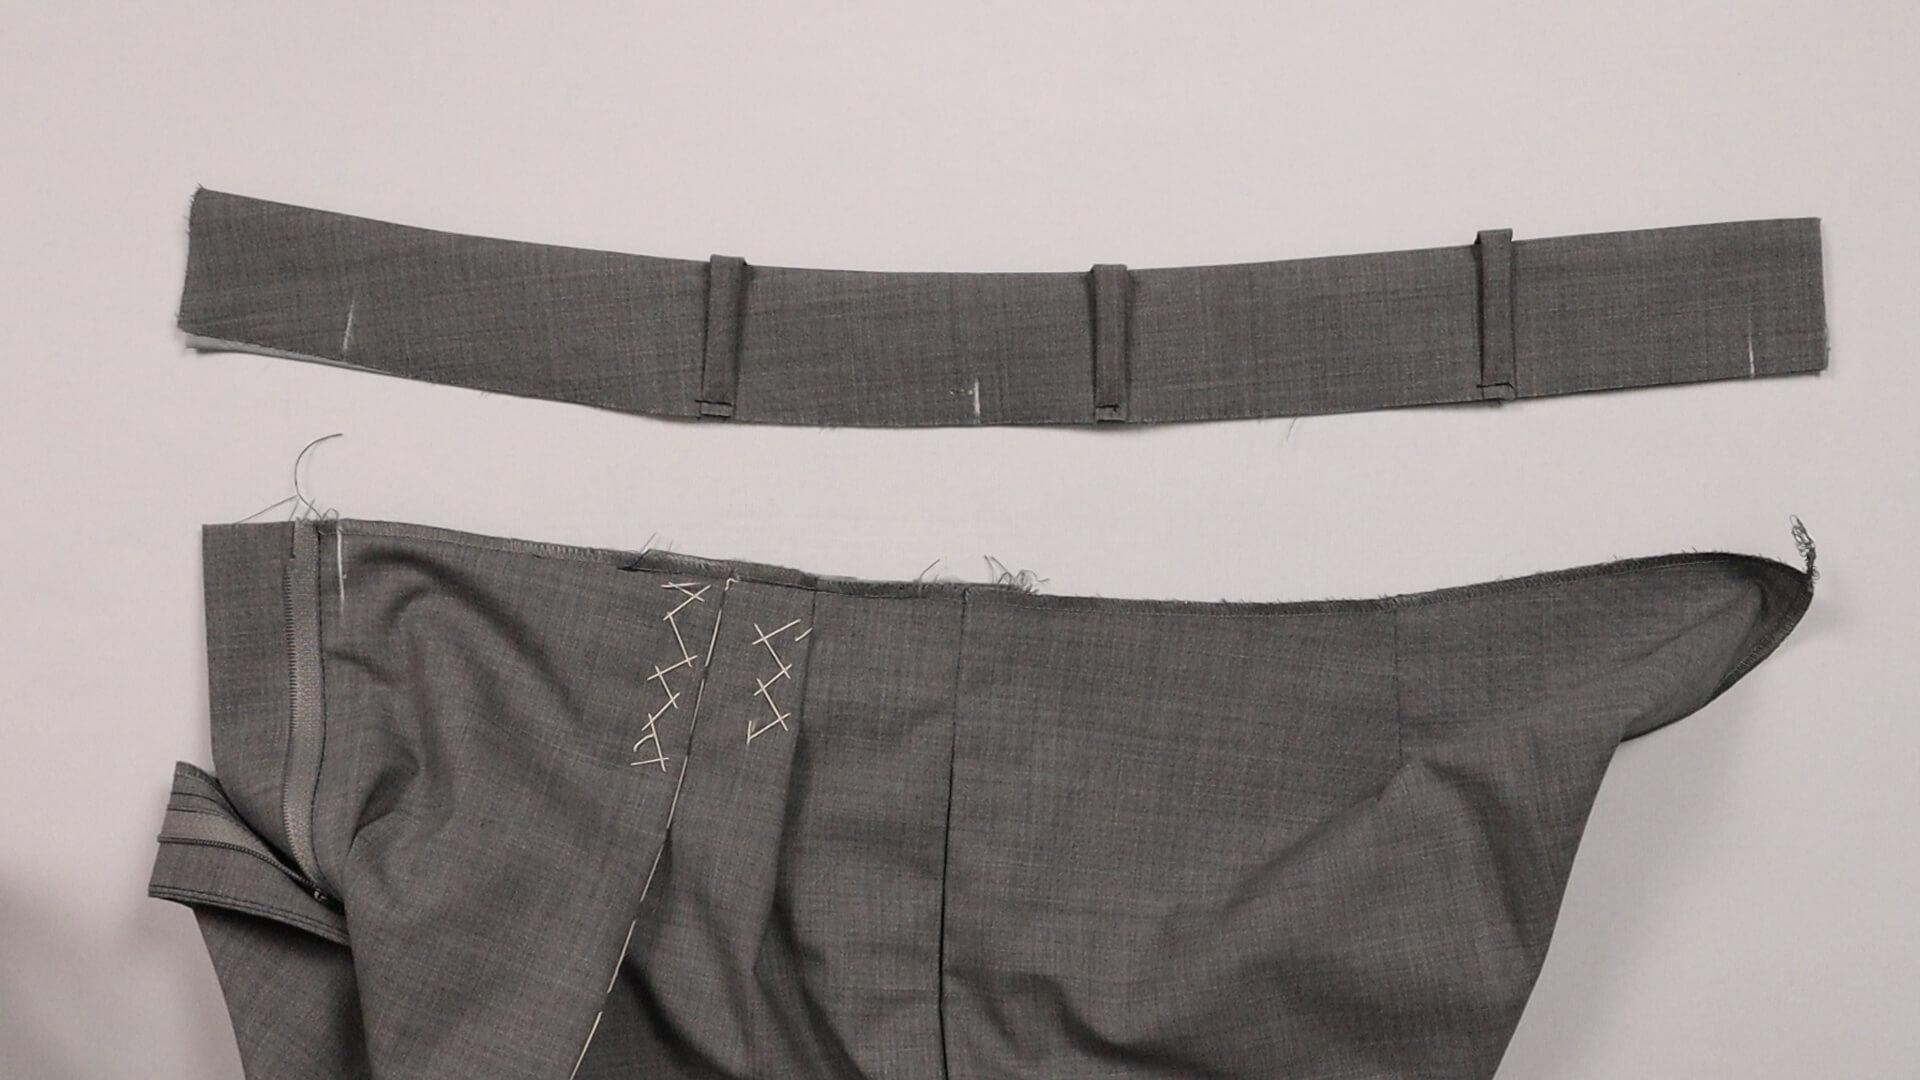
The divided waistband can now be attached.
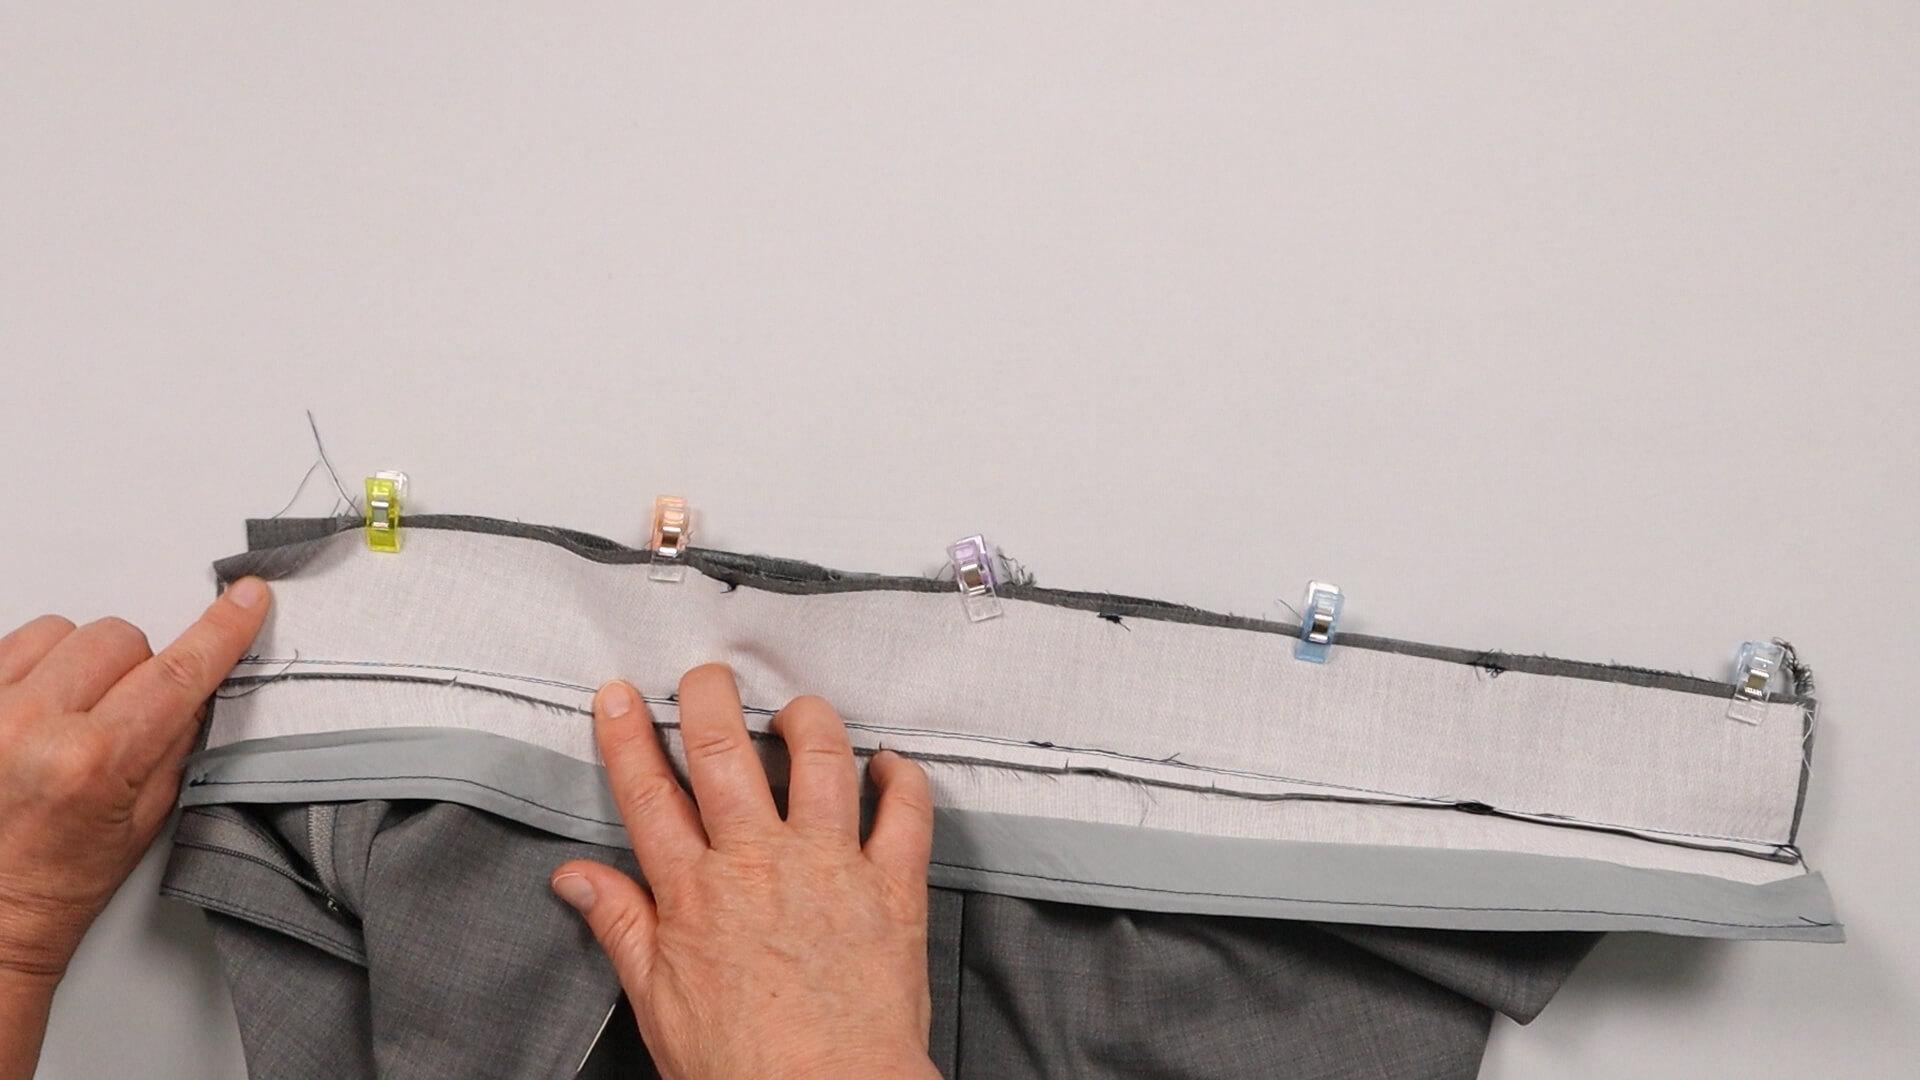
I place the waistbands onto the truosers, right sides facing, and pin it in place. The notches meet at the center front, side seam and center back.
There is a 1 cm seam allowance on the side with the fly shield.
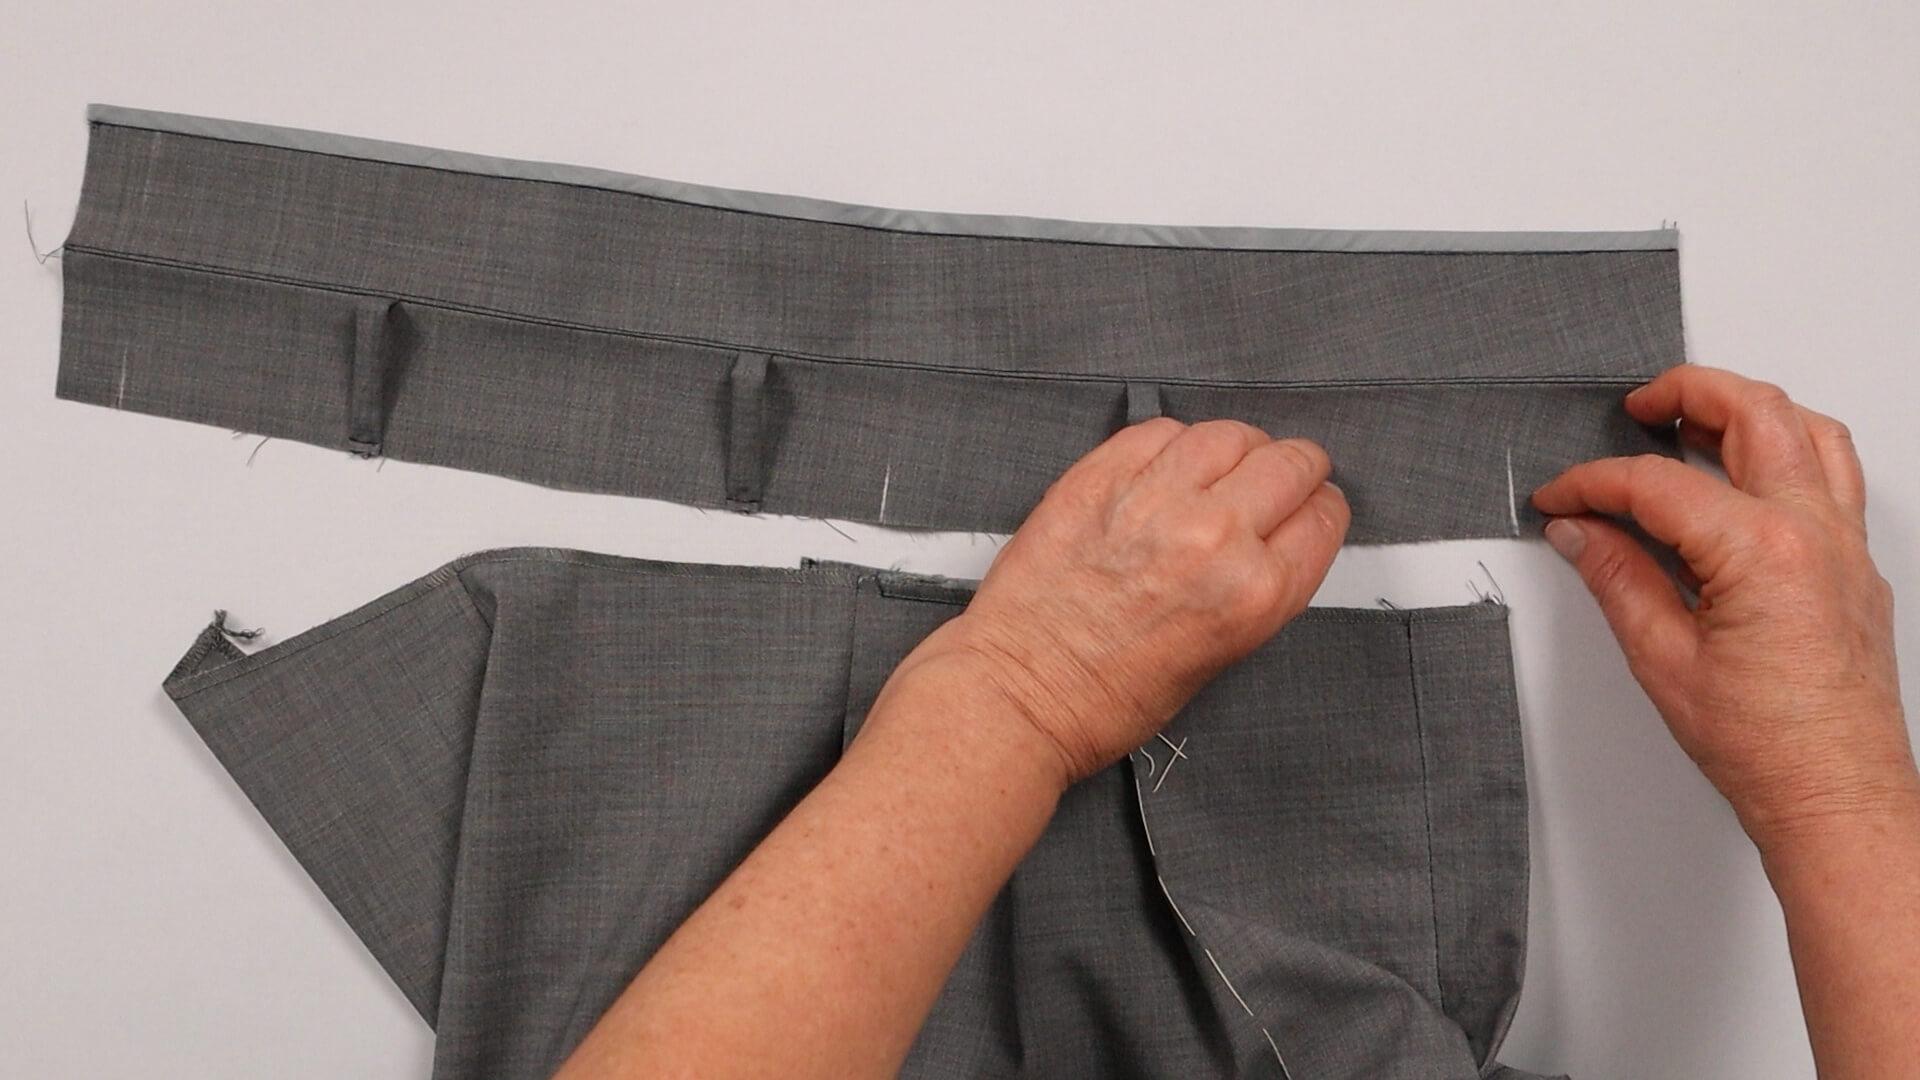
The waistband overlaps the trousers a couple of cm on the side whith the fly facing. I’ll come back to that later.
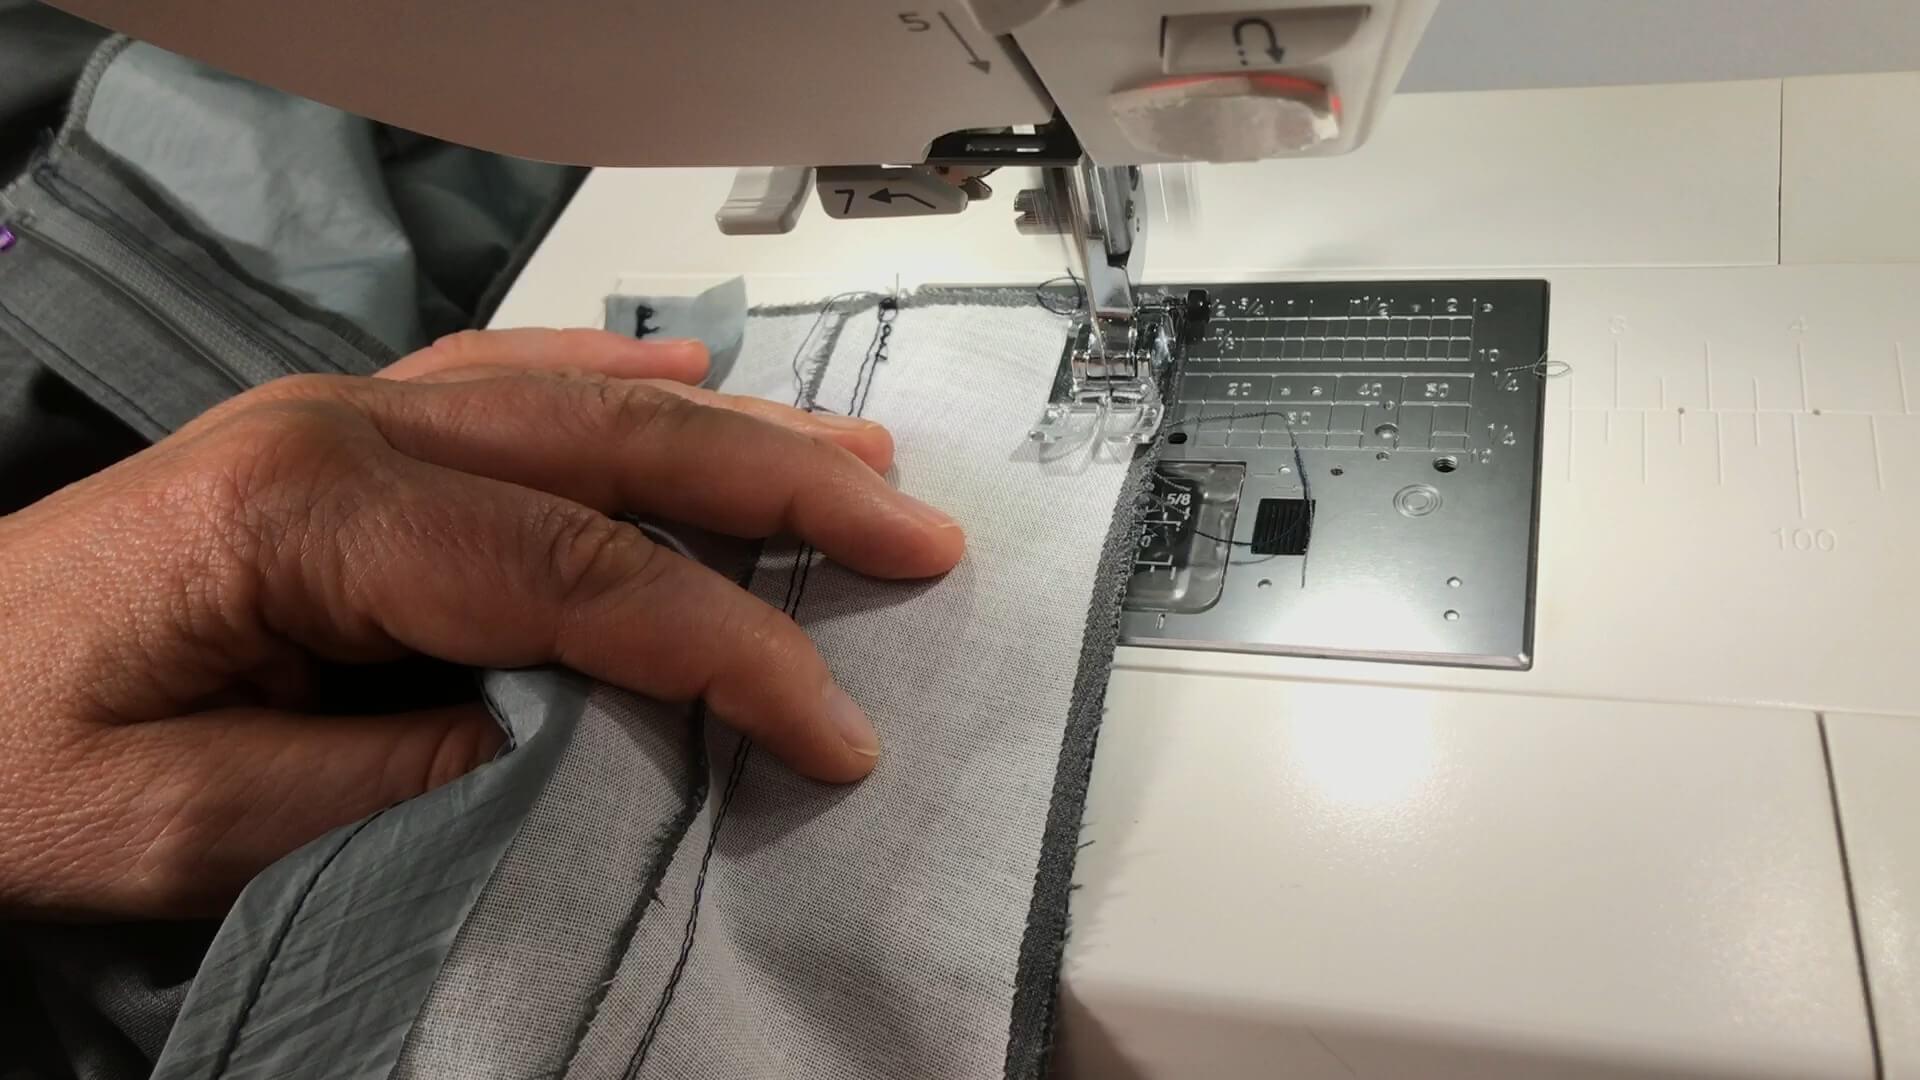
Now I sew the divided waistband onto the trousers with a seam allowance of 1 cm.
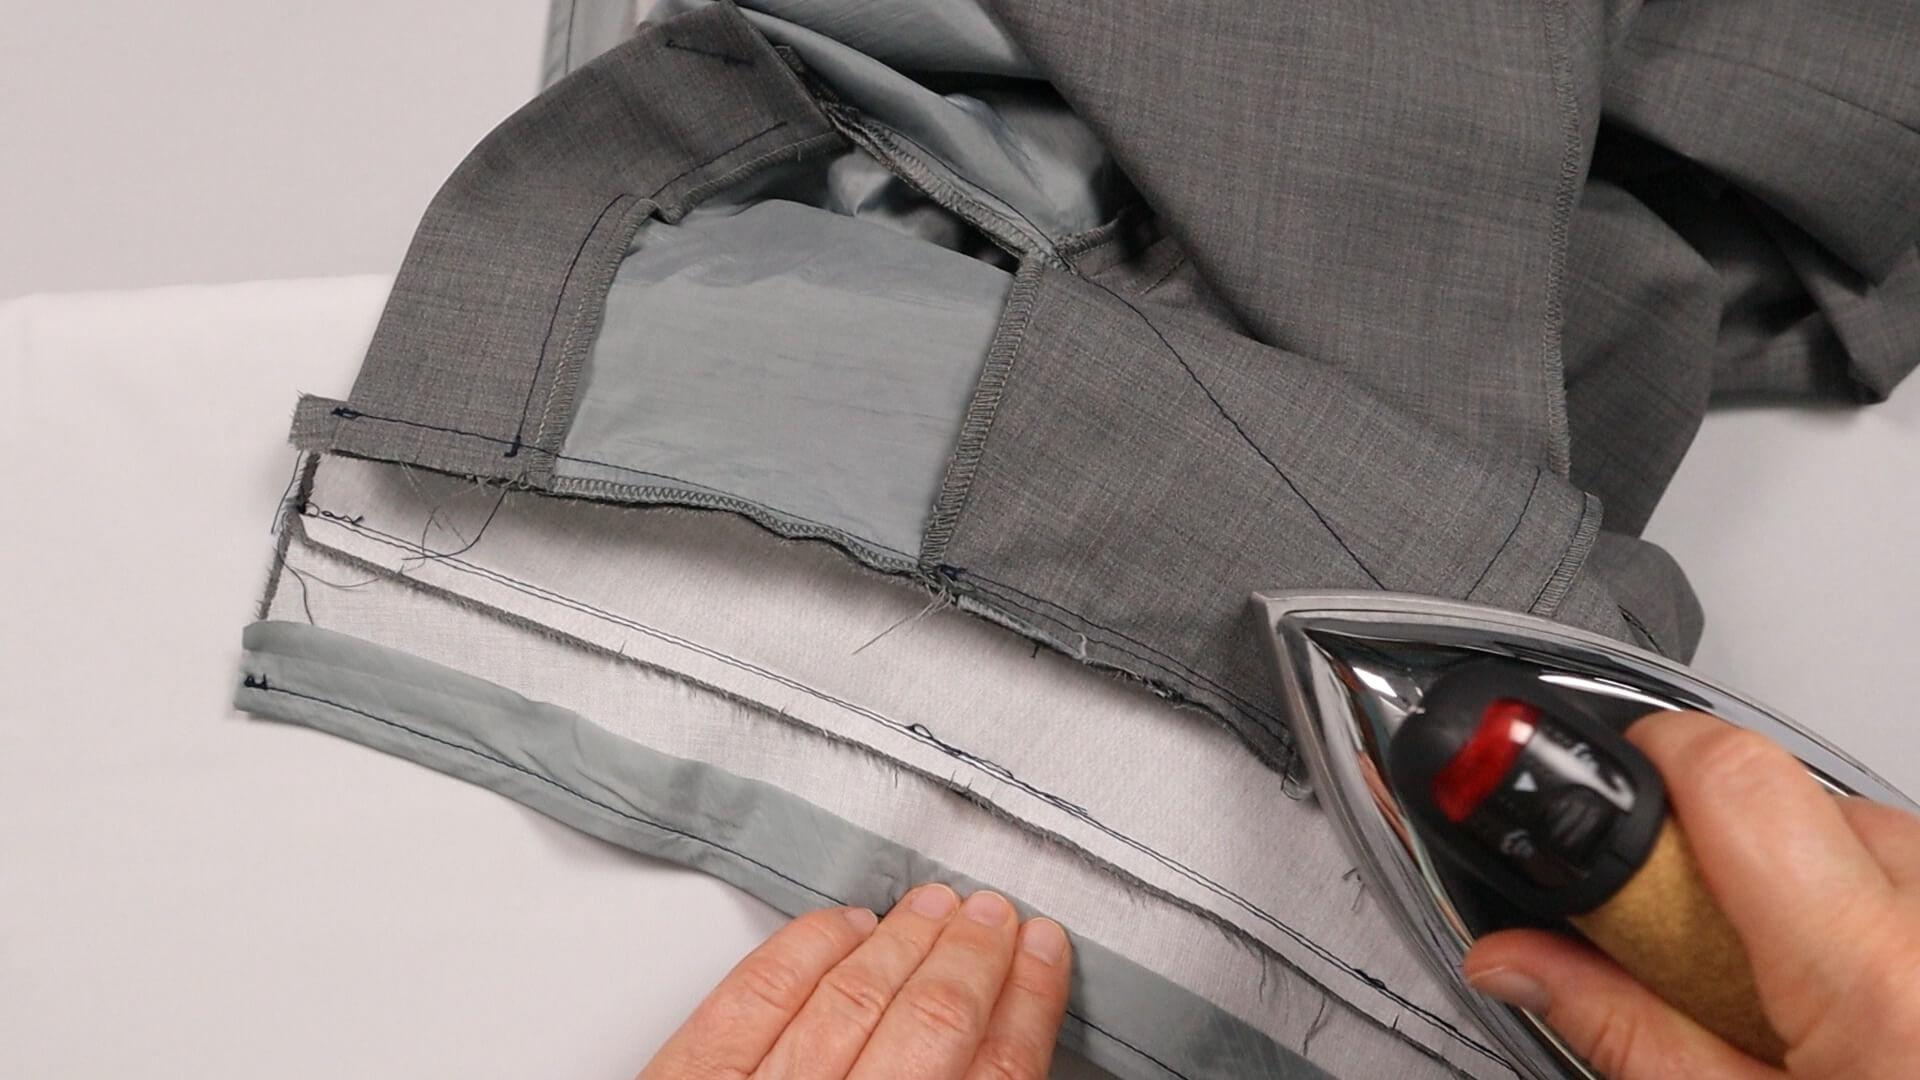
I press the seam allowances into the waistband, placing the trousers over the curve of my ironing board.
6. Close the seat seam
The seat seam can now be closed.
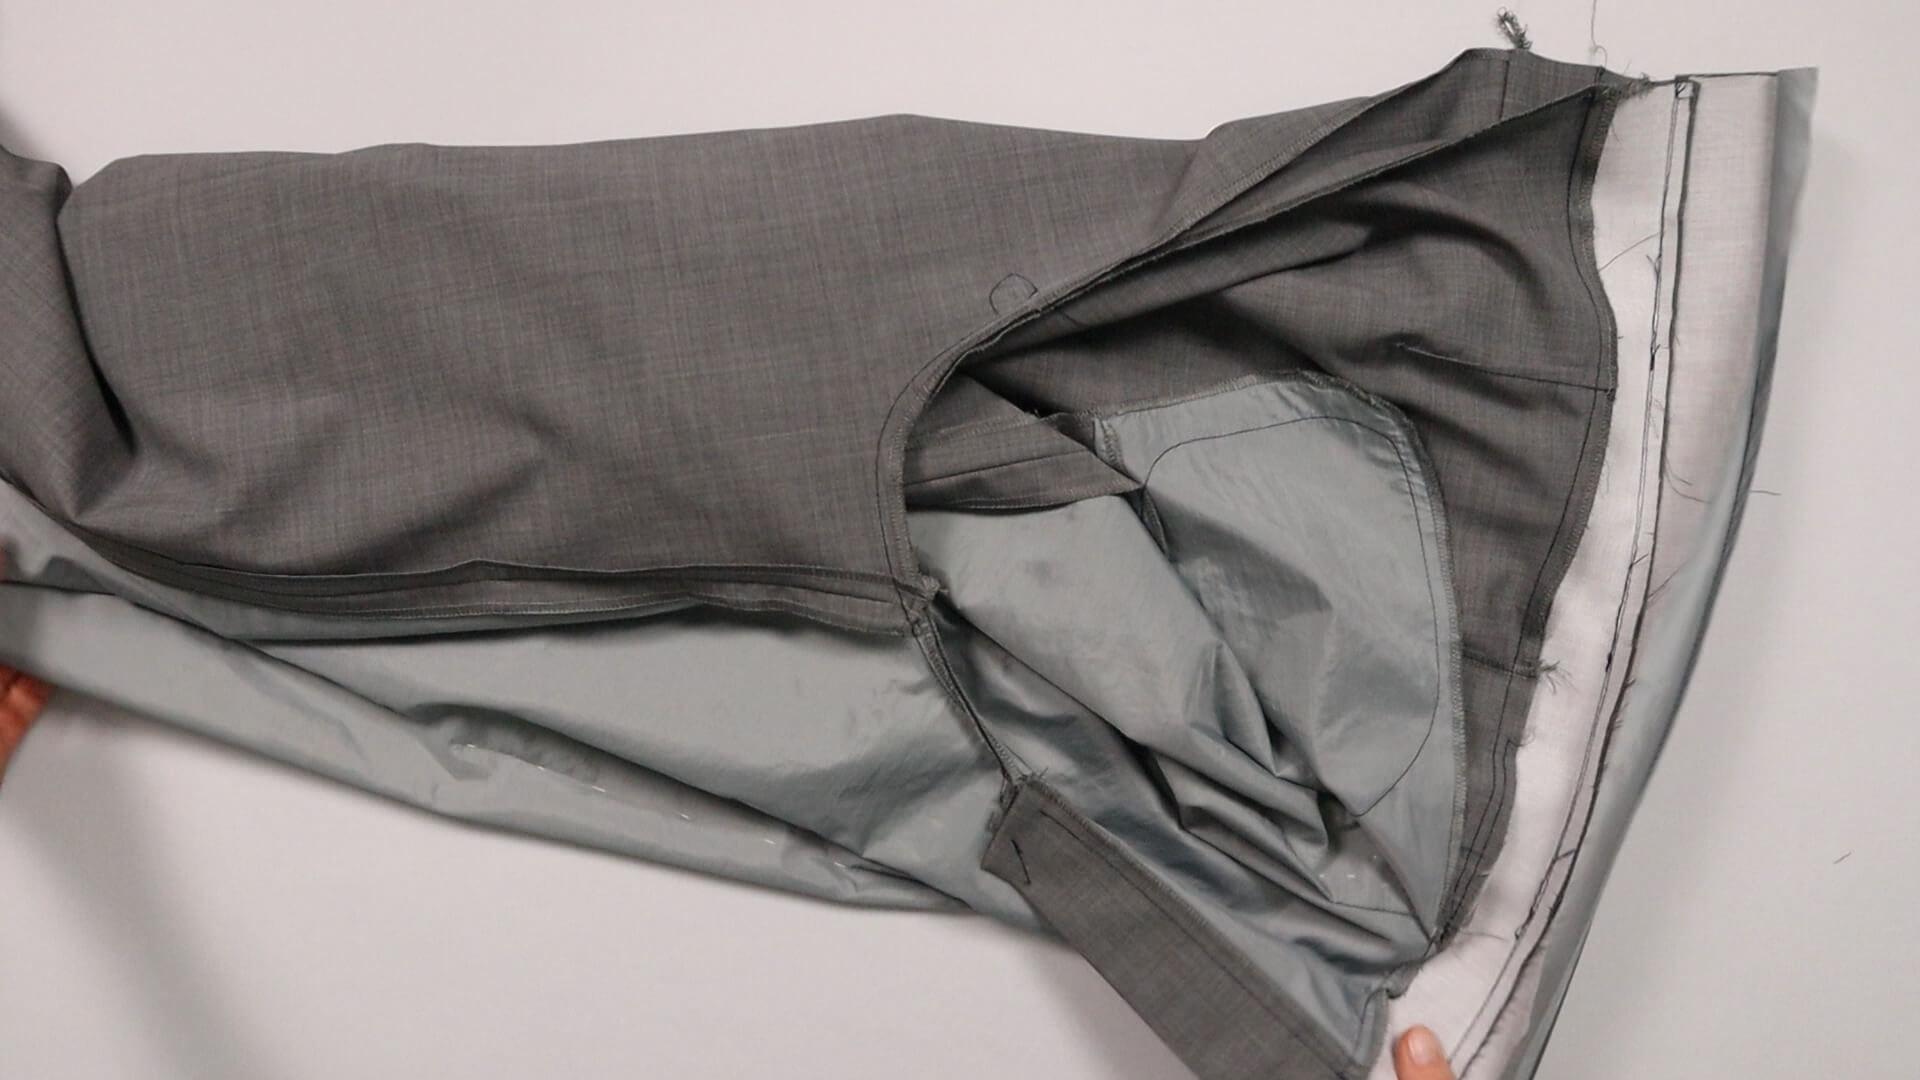
First, I turn the right trouser leg inside out. Then I tuck the left trouser leg into the right one, right sides facing. The two pieces are aligned on the centre back and the raw edge..
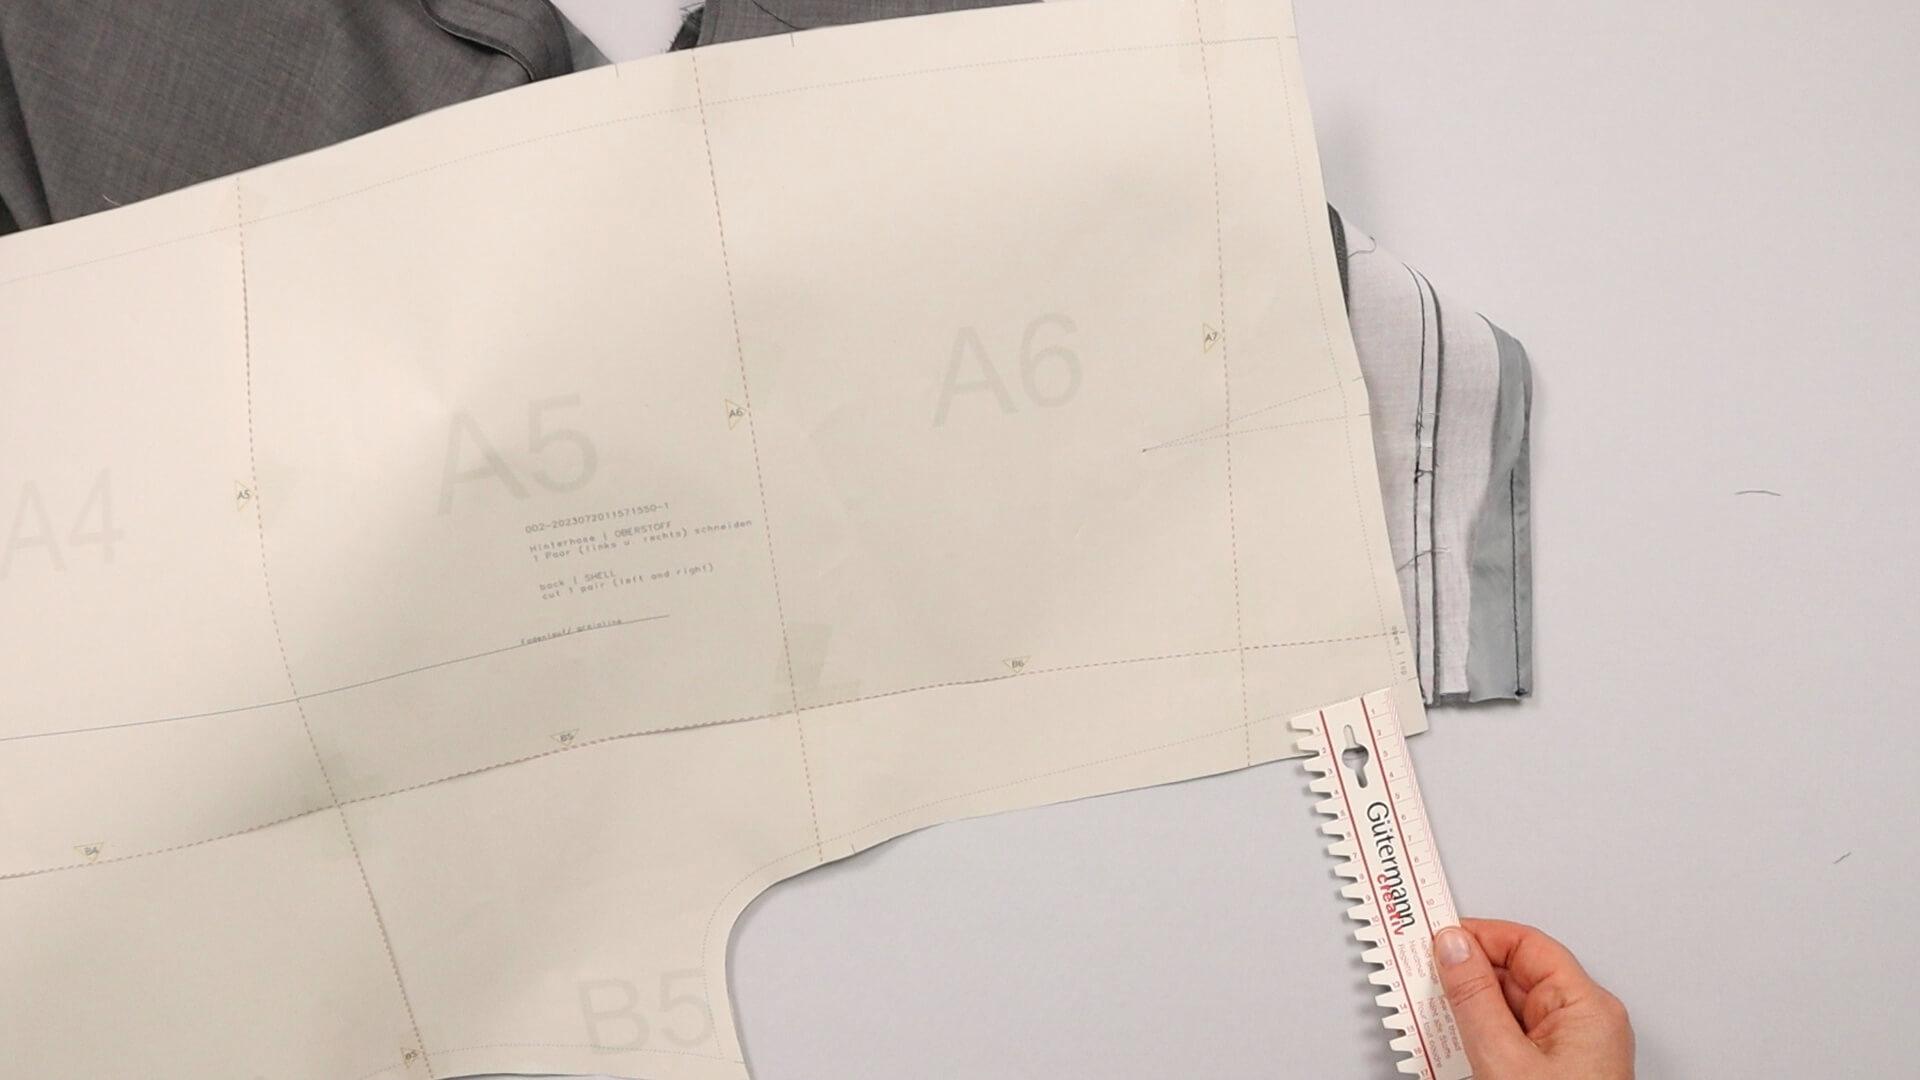
A wide seam allowance is provided at the center back. I will check the exact width again on the pattern.
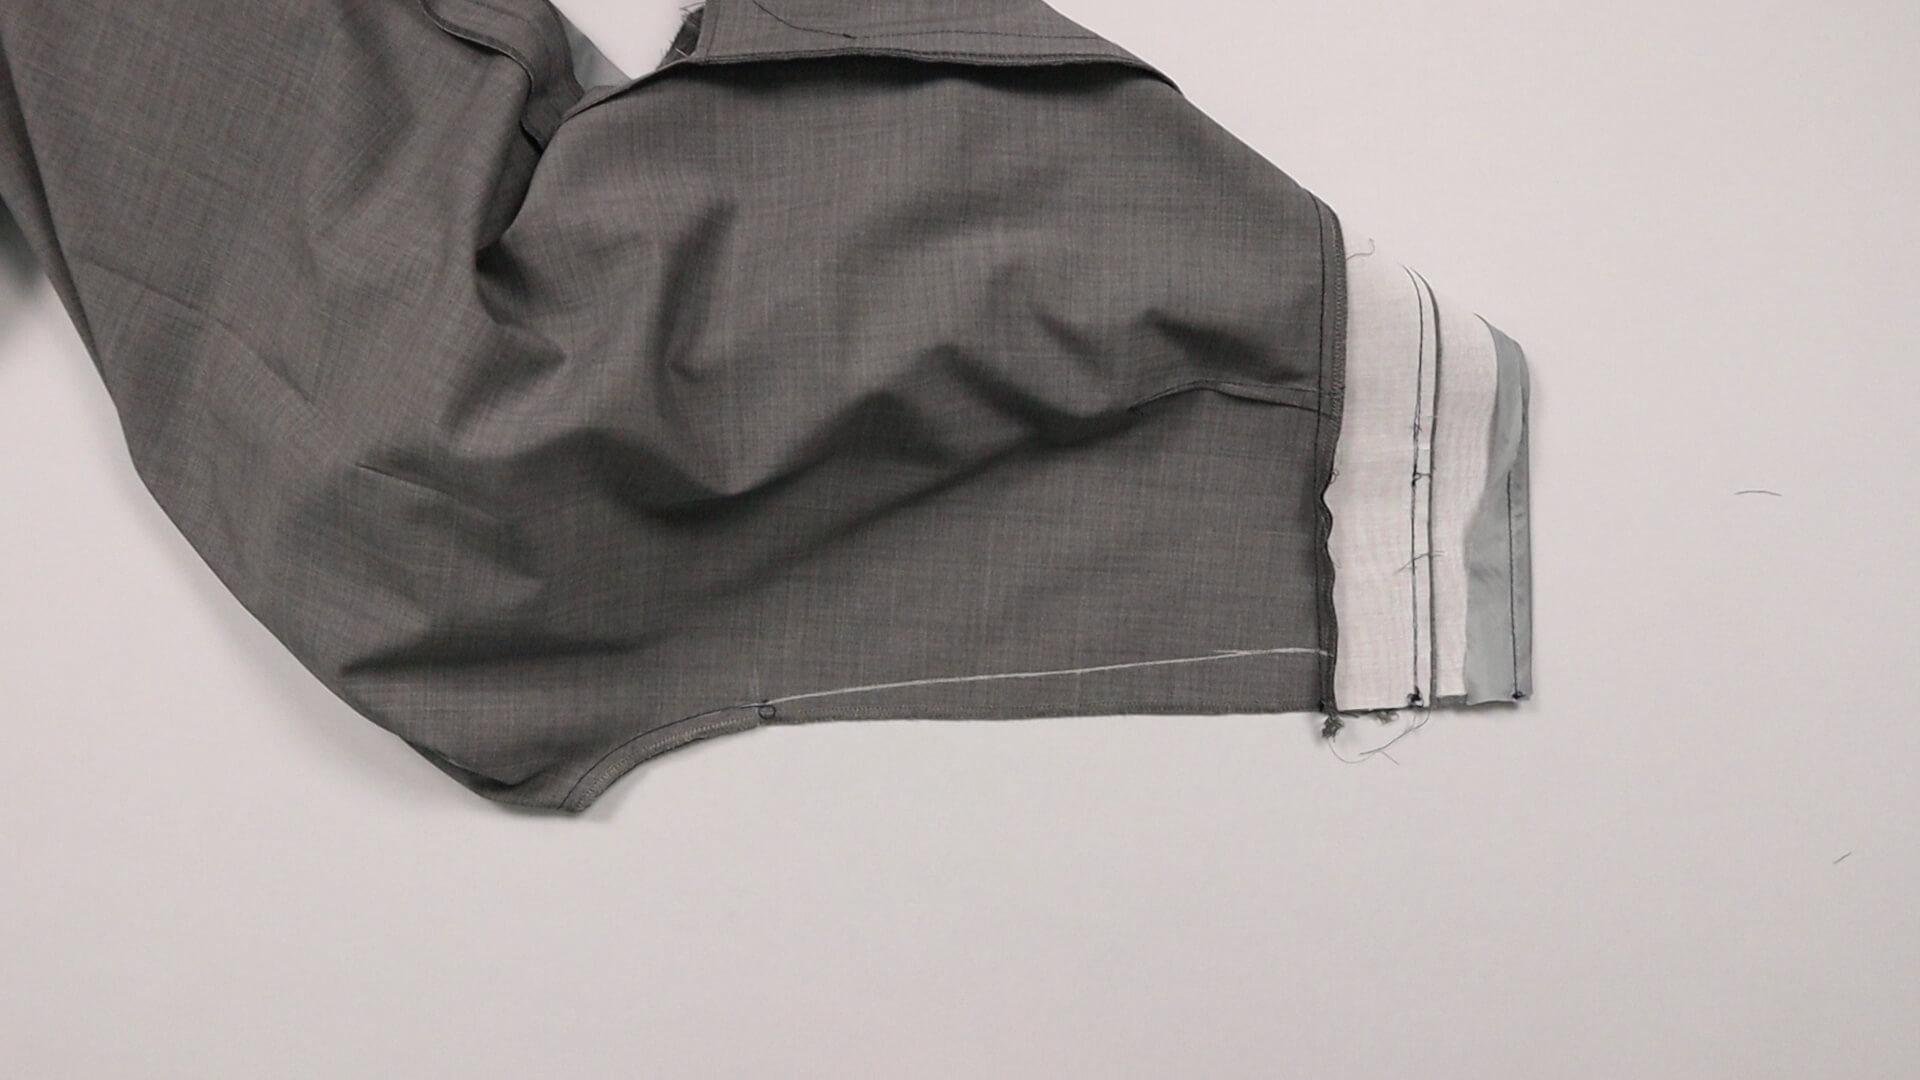
I transfer the seam line to the fabric all the way of the seat seam.
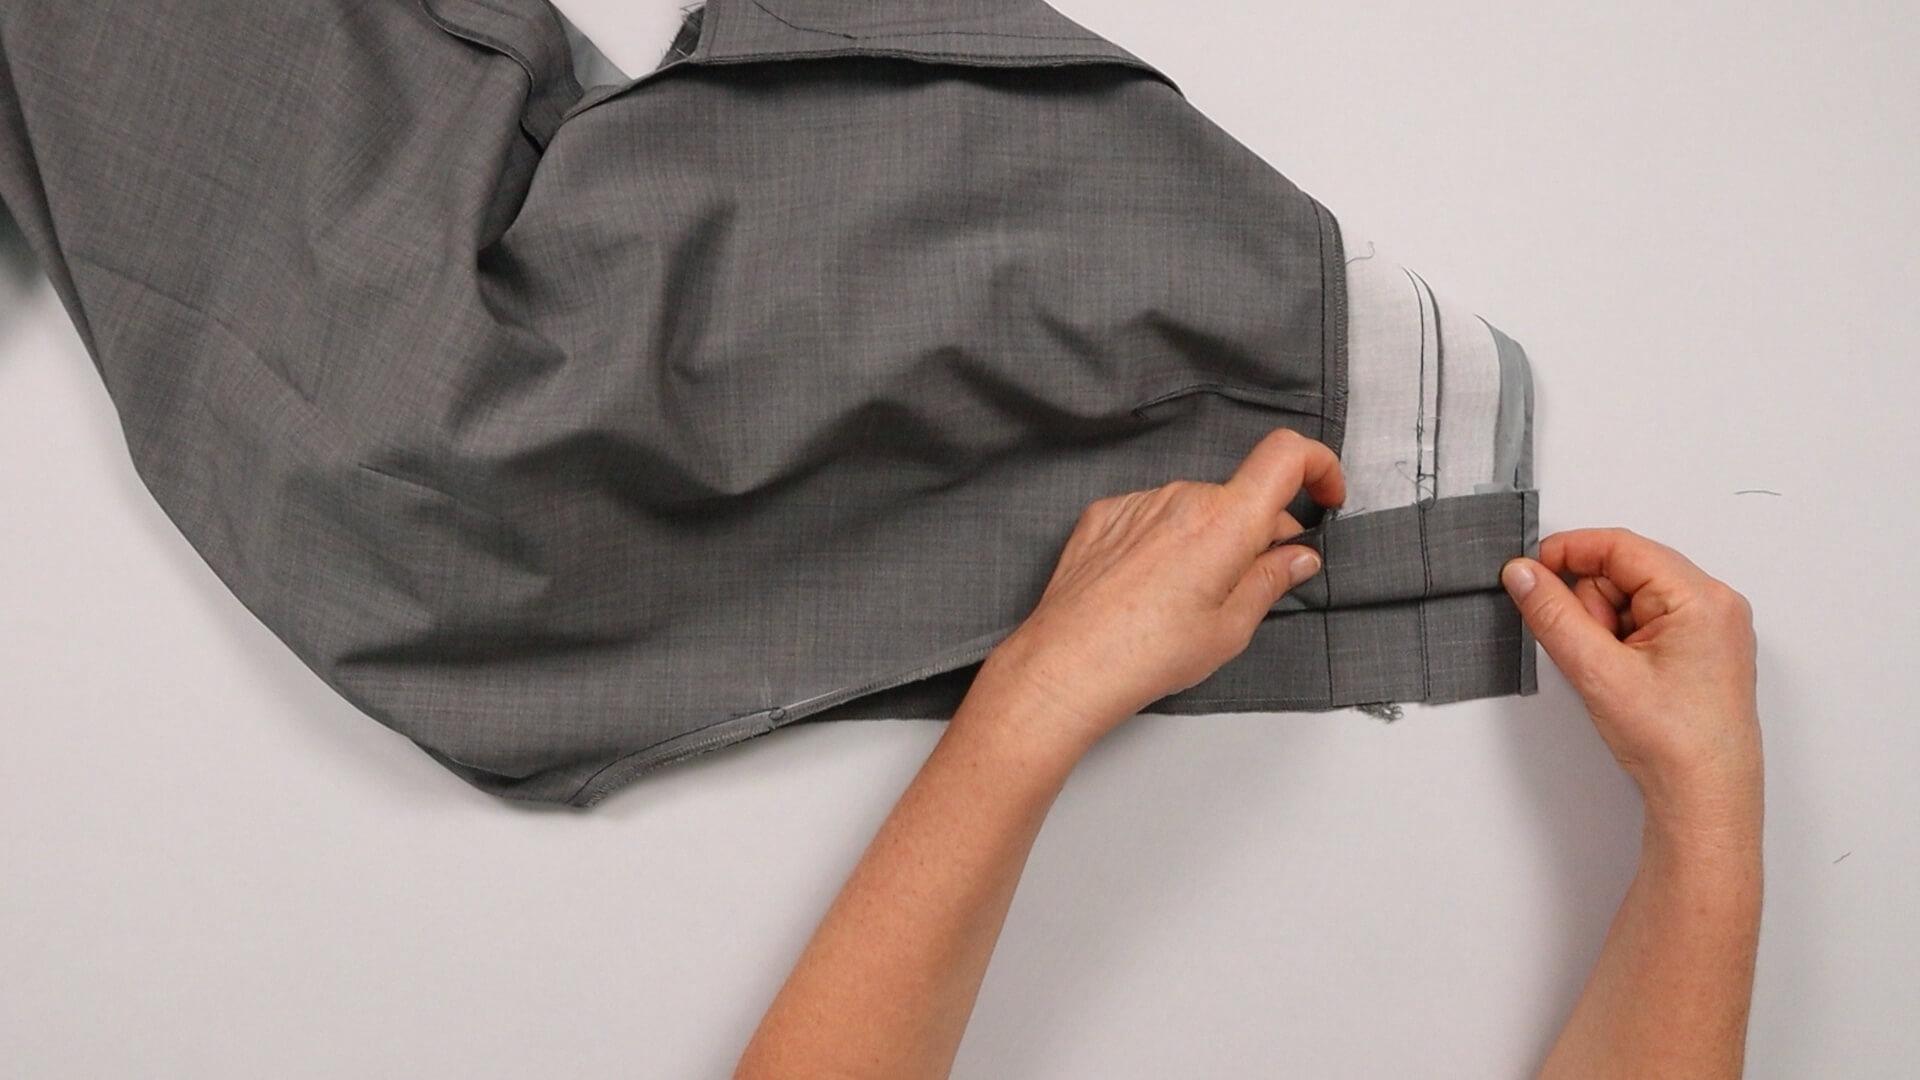
Before sewing the seam,I pin both pieces at the waistband seam and make sure the seams match.
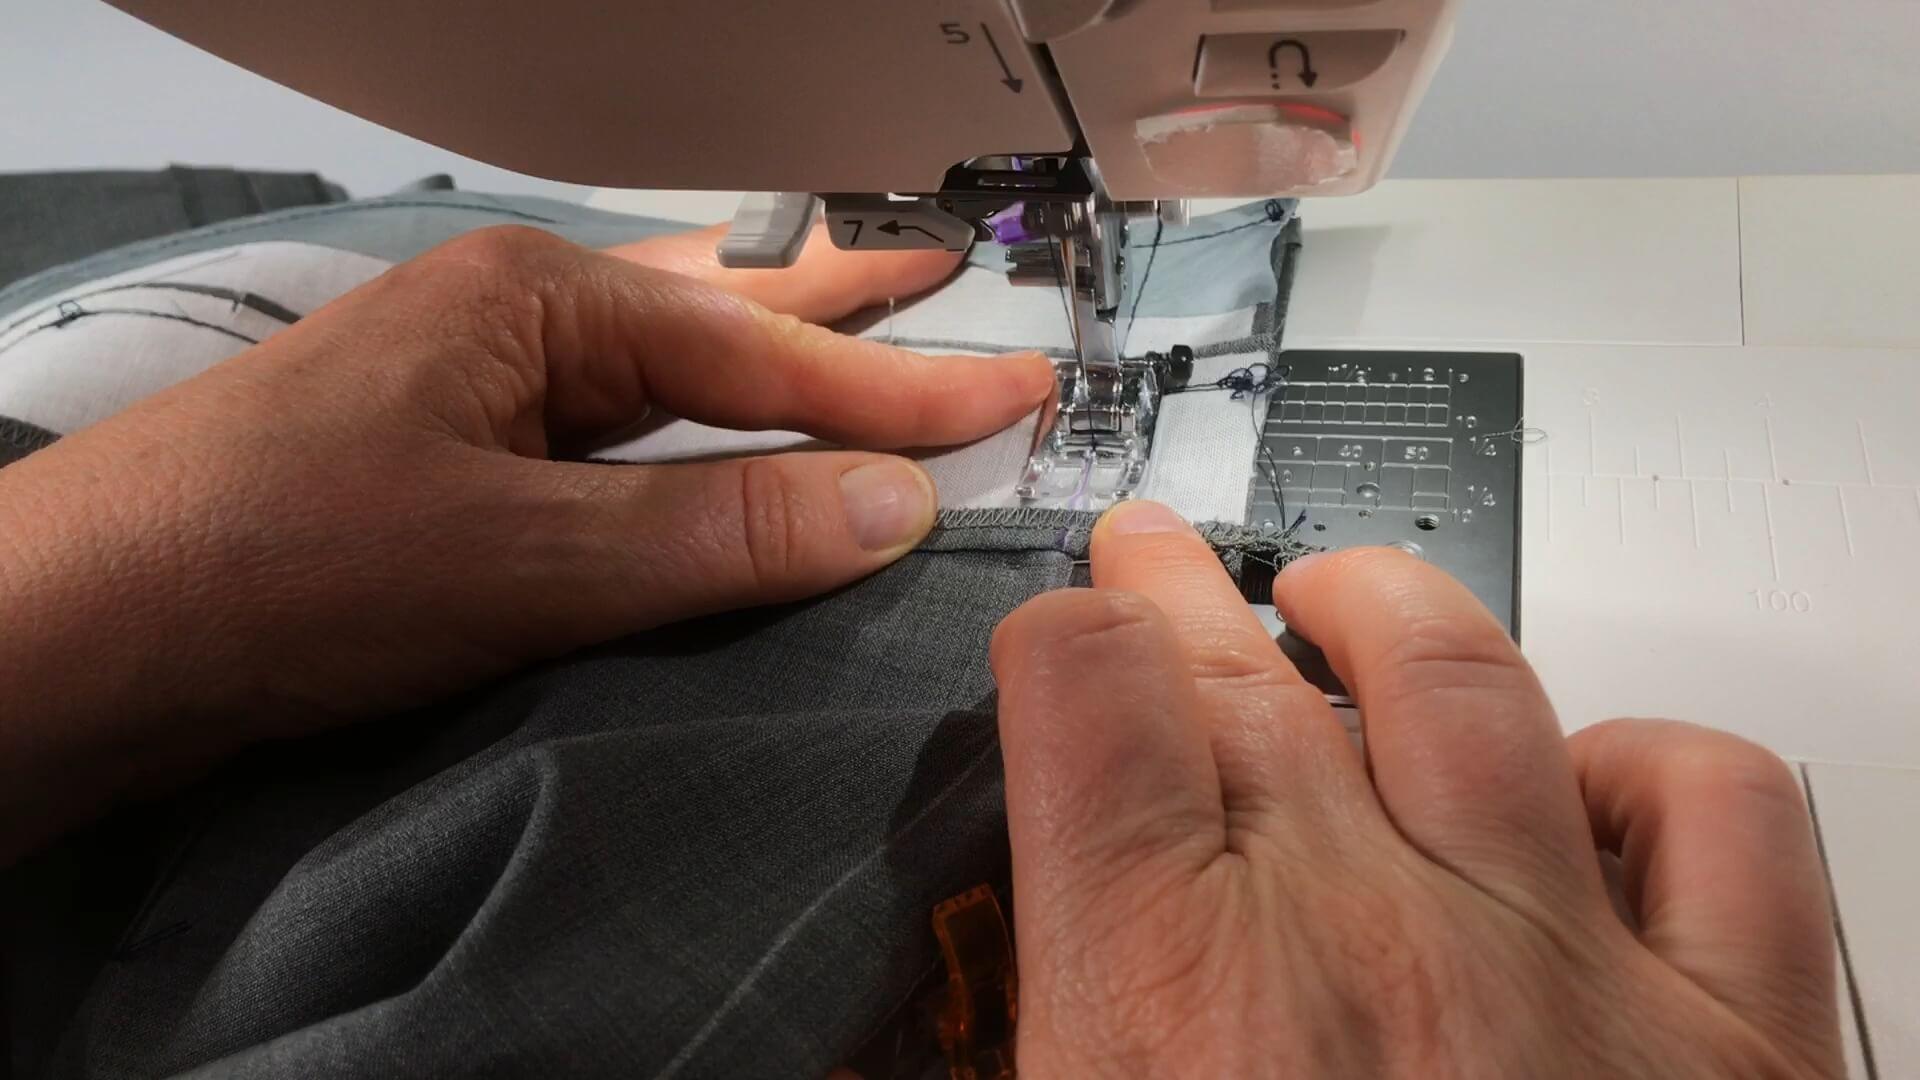
Using a relatively short stitch length of approx. 2.4 cm I continue closing the seat seam up to the lower crotch seam. The short stitch will give more stability to a realatively stressed area.
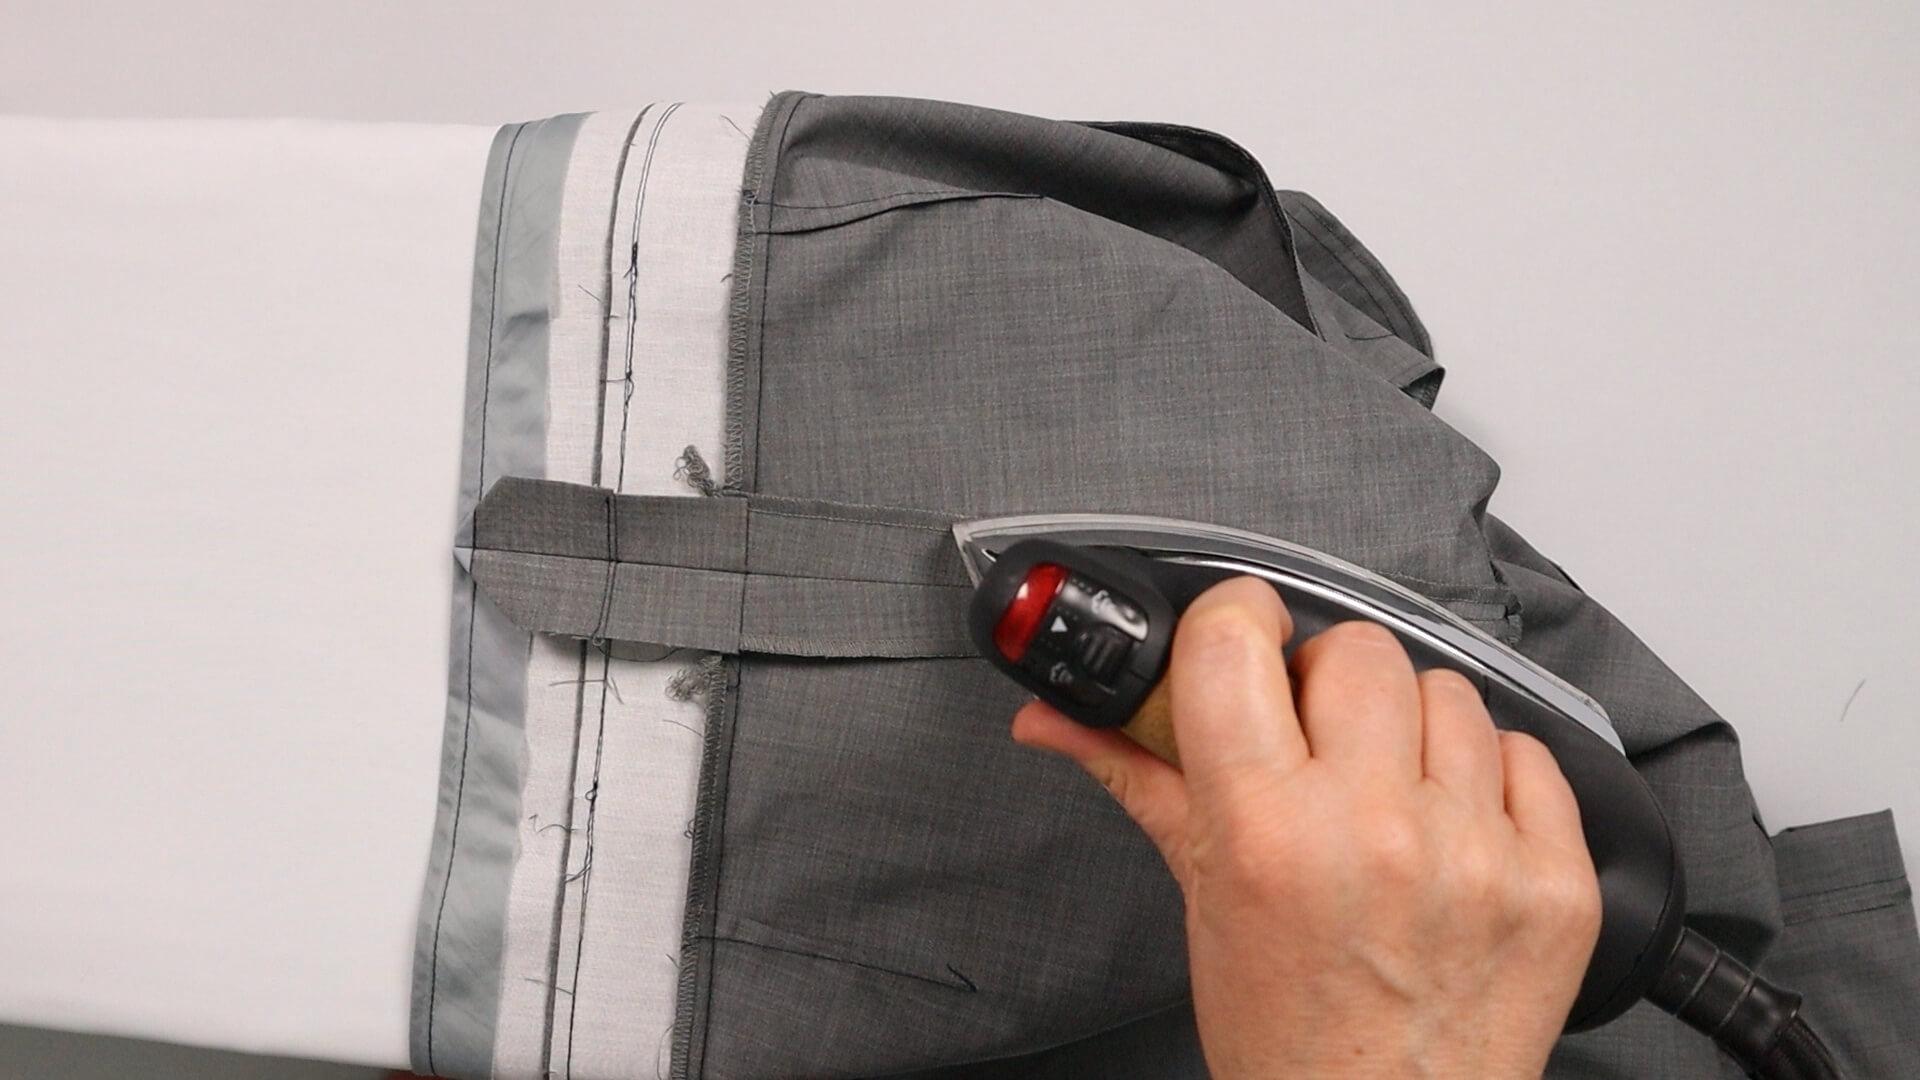
Press the seam allowance of the back trousers open up to the lower notch on the seat seam.
Then I also iron the ends of the finished bottom edge of the waistband diagonally inwards on the front.
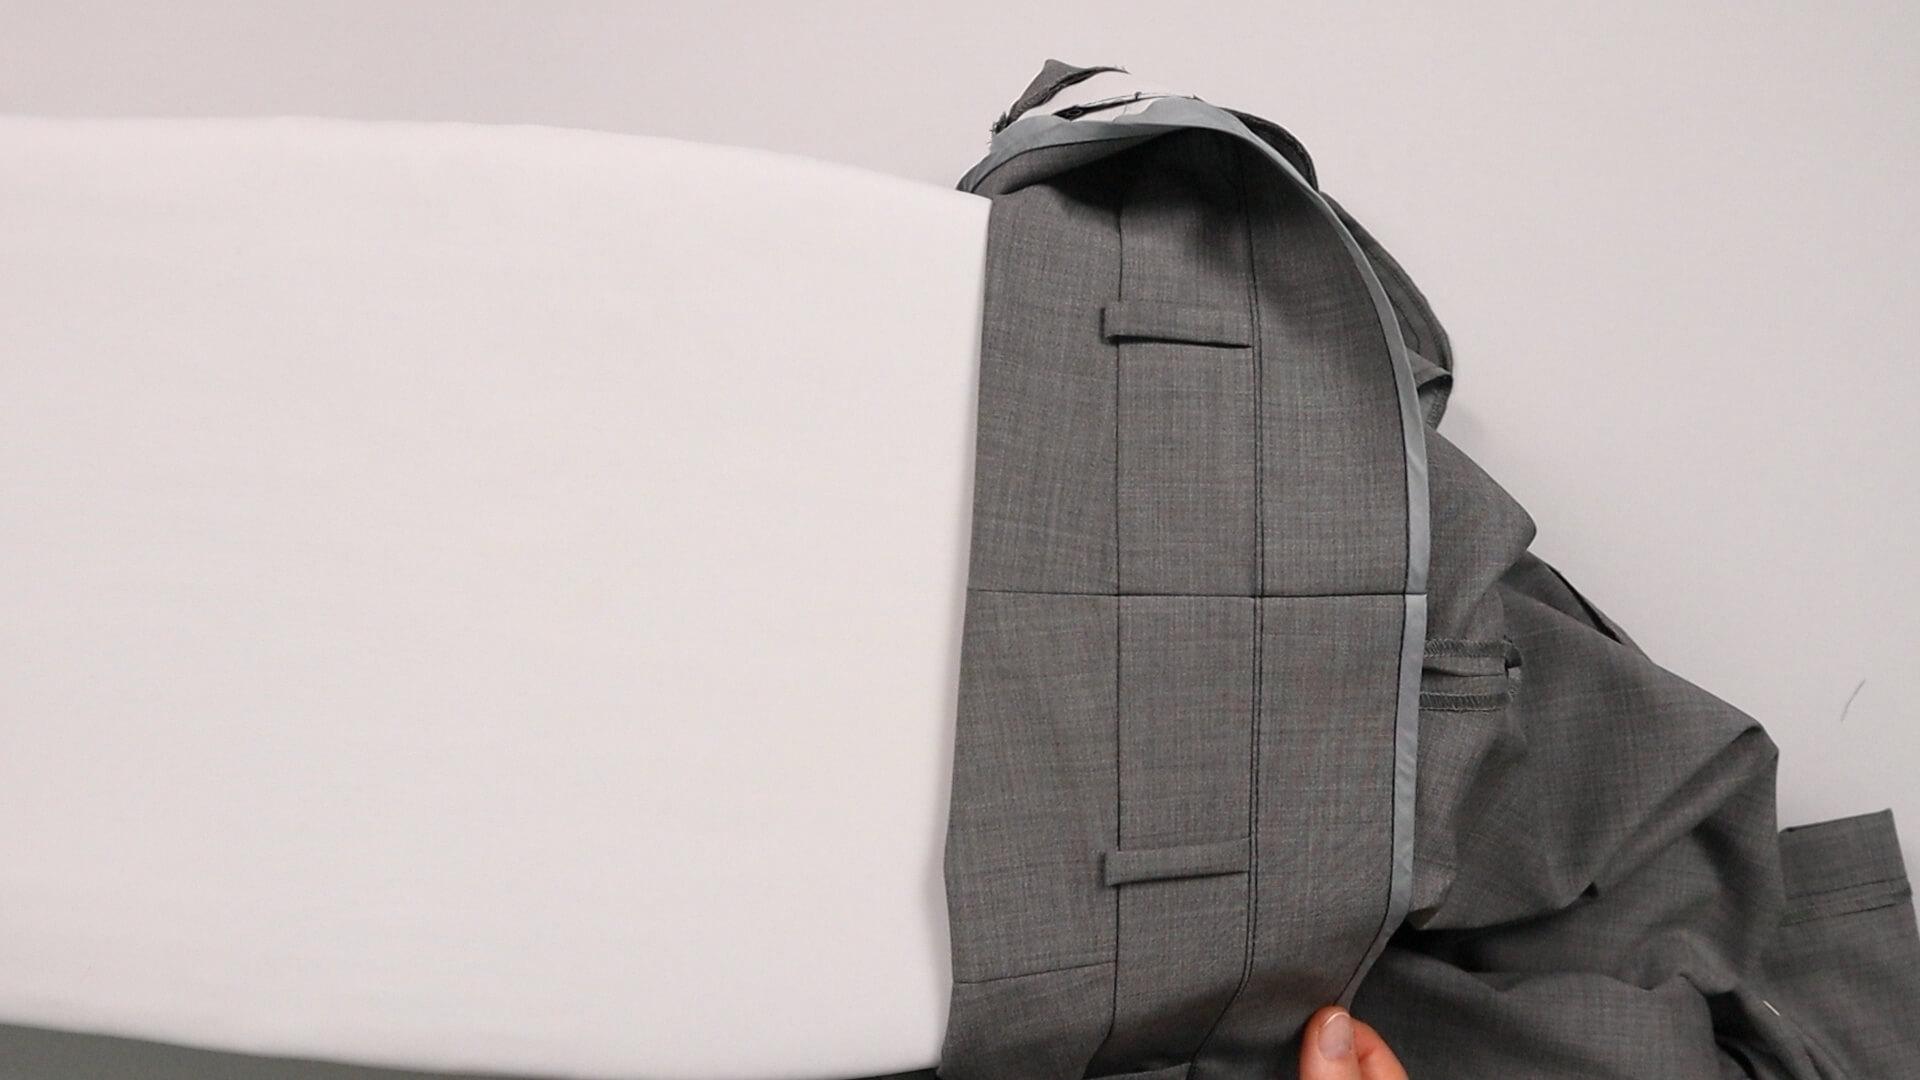
Here you can see how the seams on the divided waistband meet exactly.
7. Shorten front waistband edges/corners
The next step is to adjust the front waistband edges.
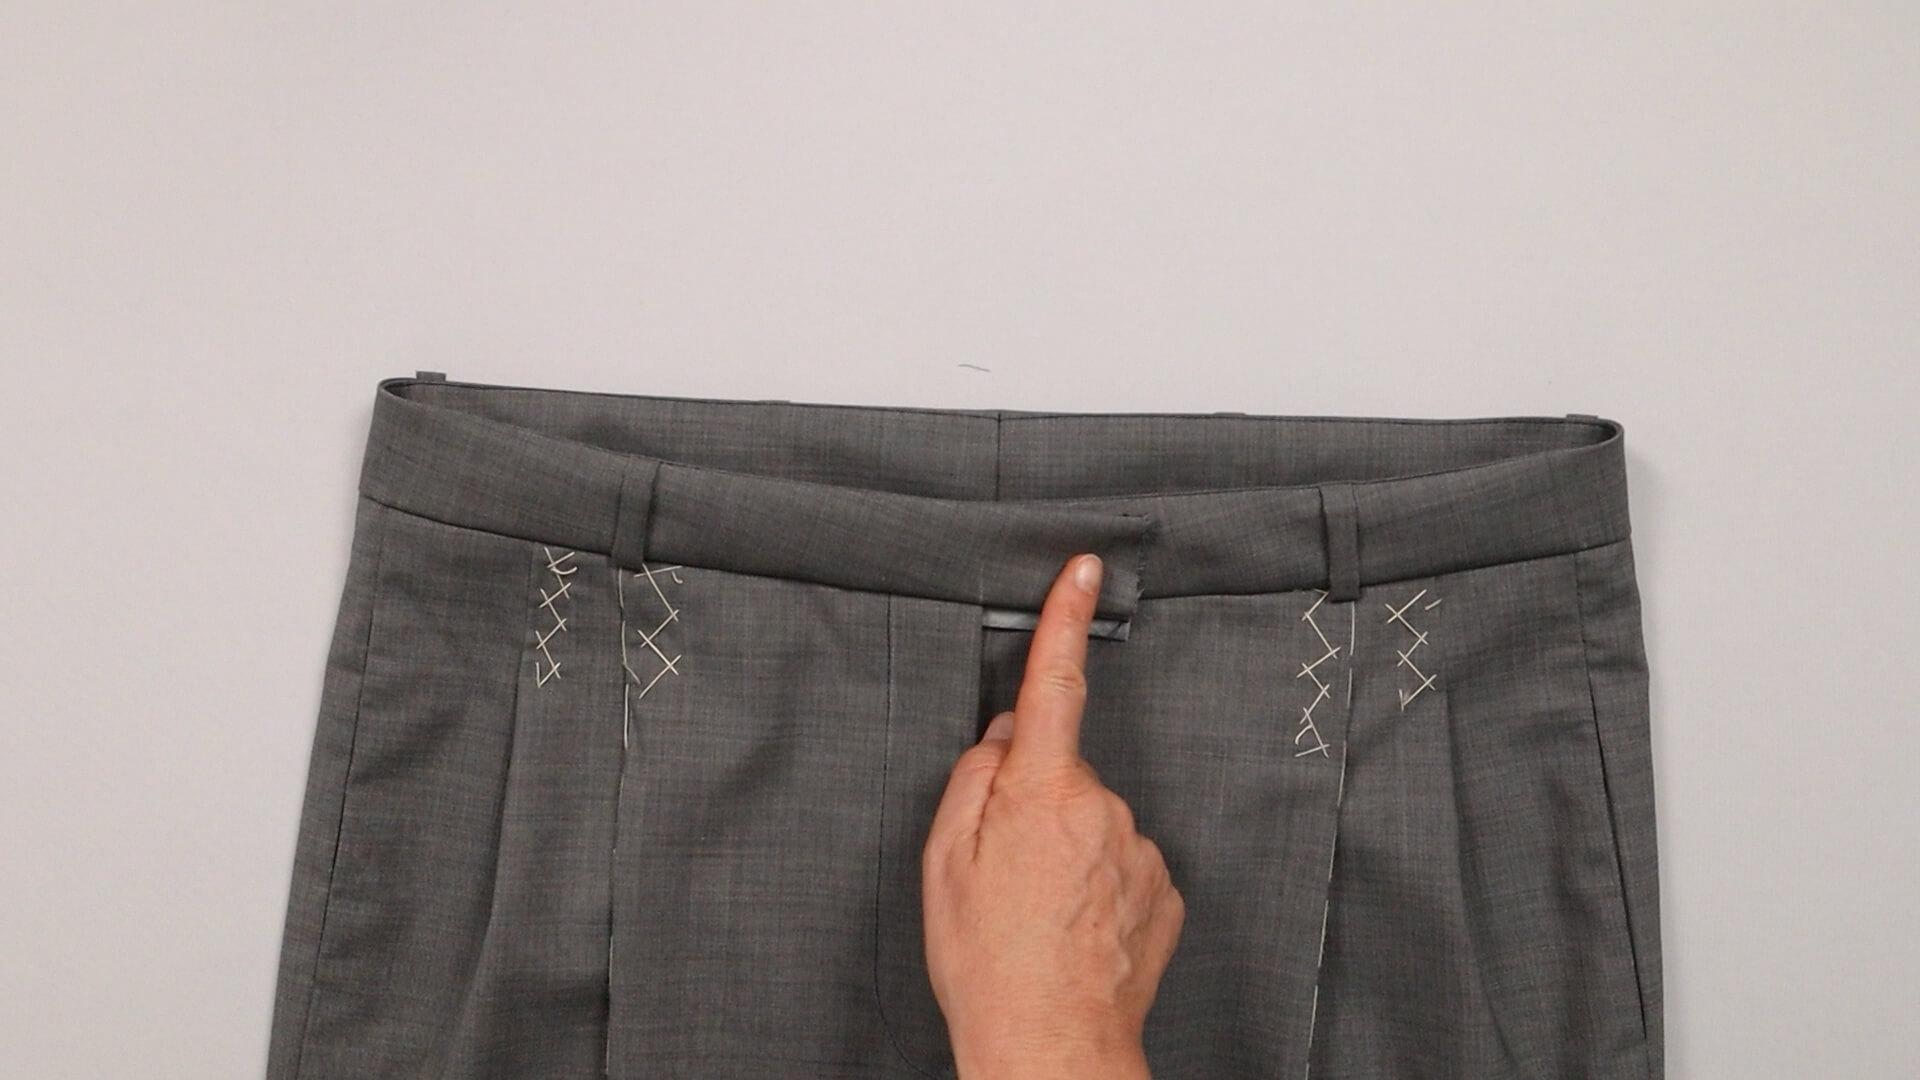
You can use the excess material on the fly shield side for a waistband extension. You can find instructions here.
However, in this case the waistband edge will end exactly with the the center front.
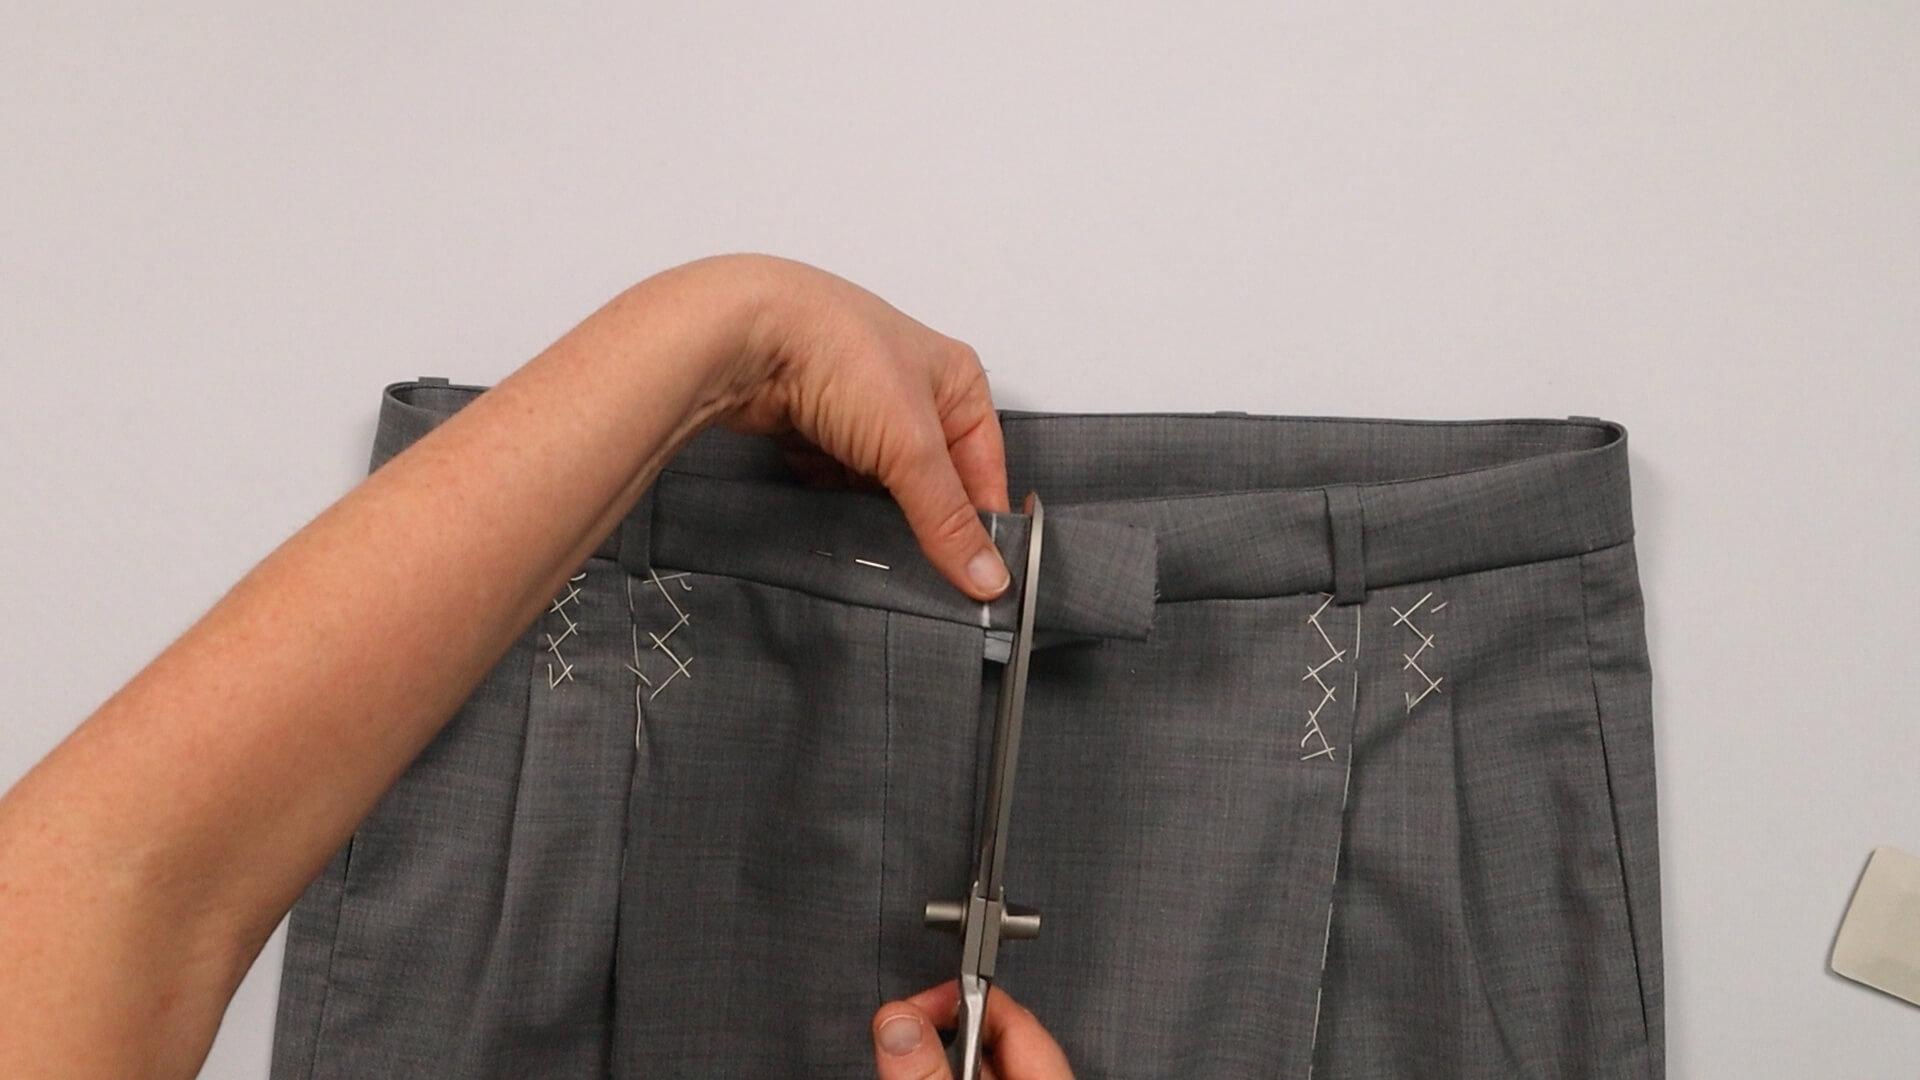
I pin the divided waistband and mark the course of the center front.
From there I mark 1 cm wide seam allowance and cut away the excess material.
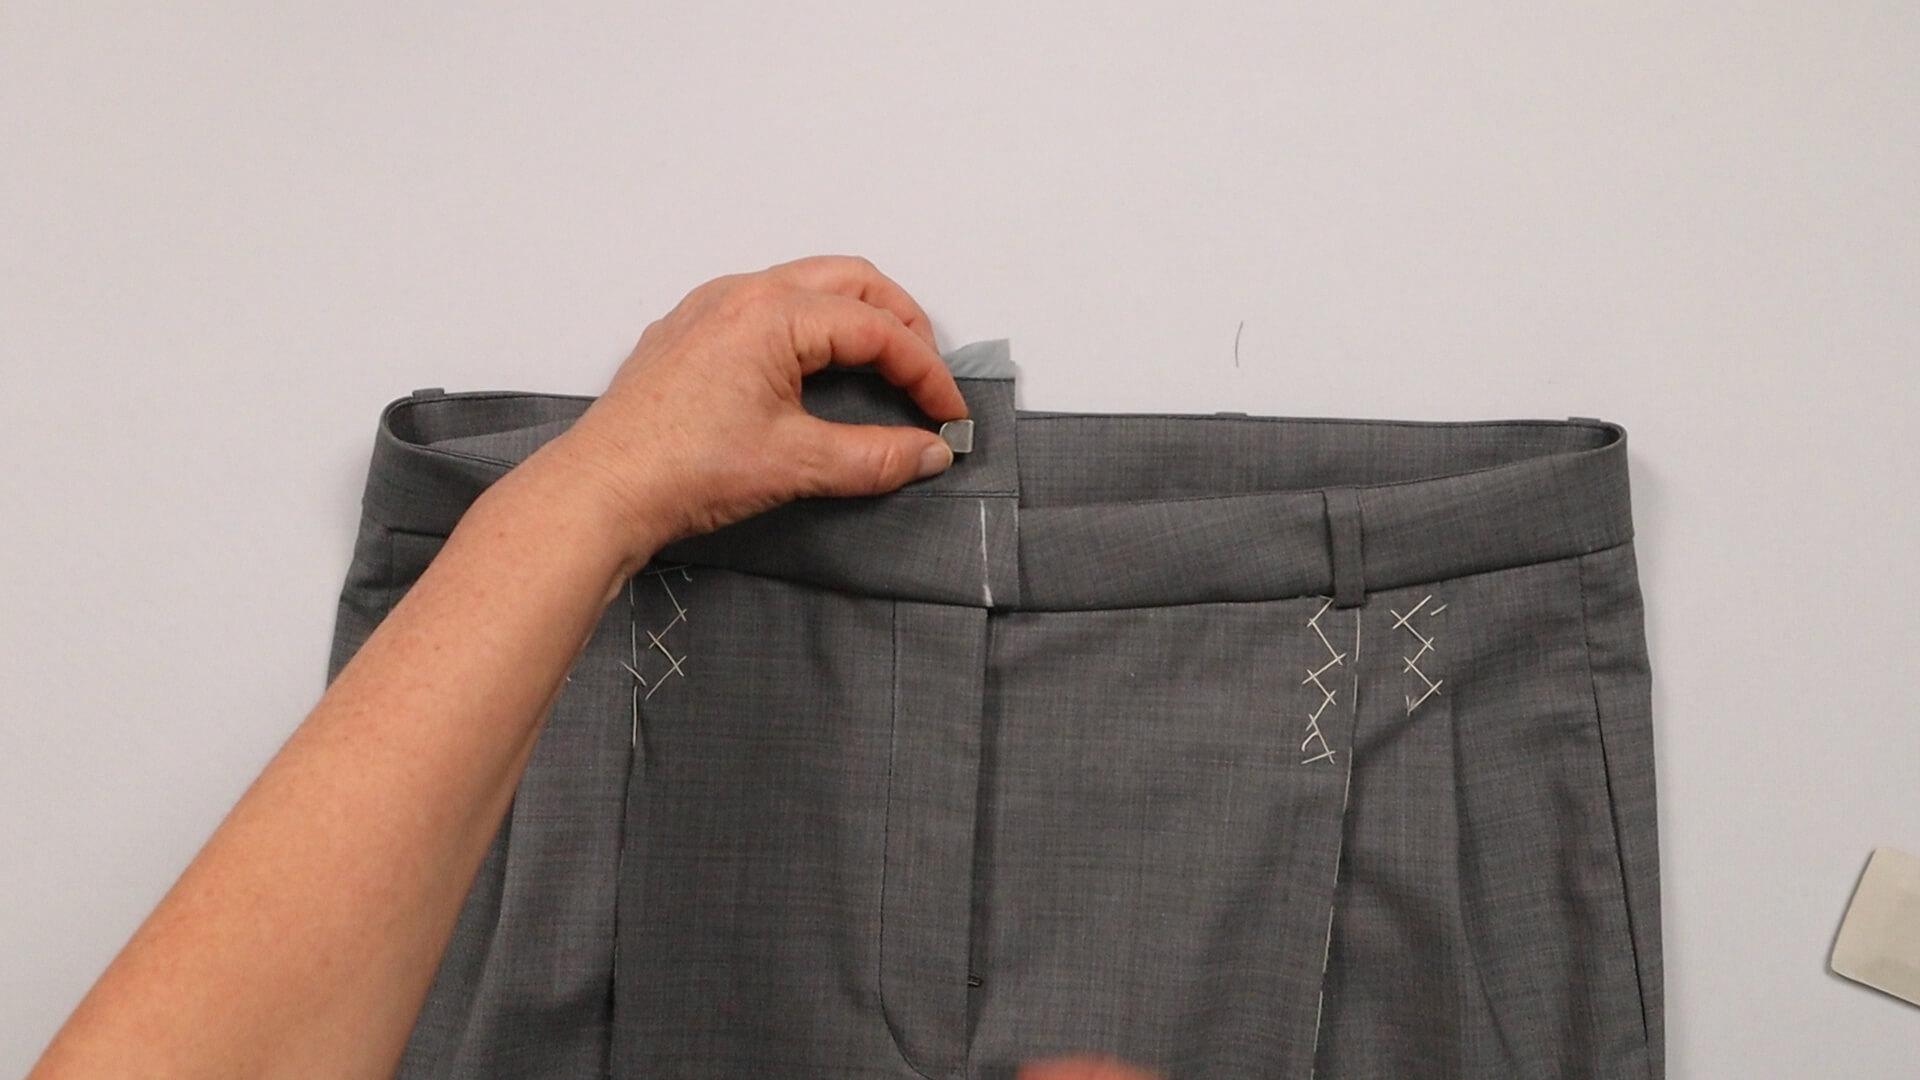
If you want to add a concealed hook instead of a buttonhole, you should now attach it to the inside of the waistband.
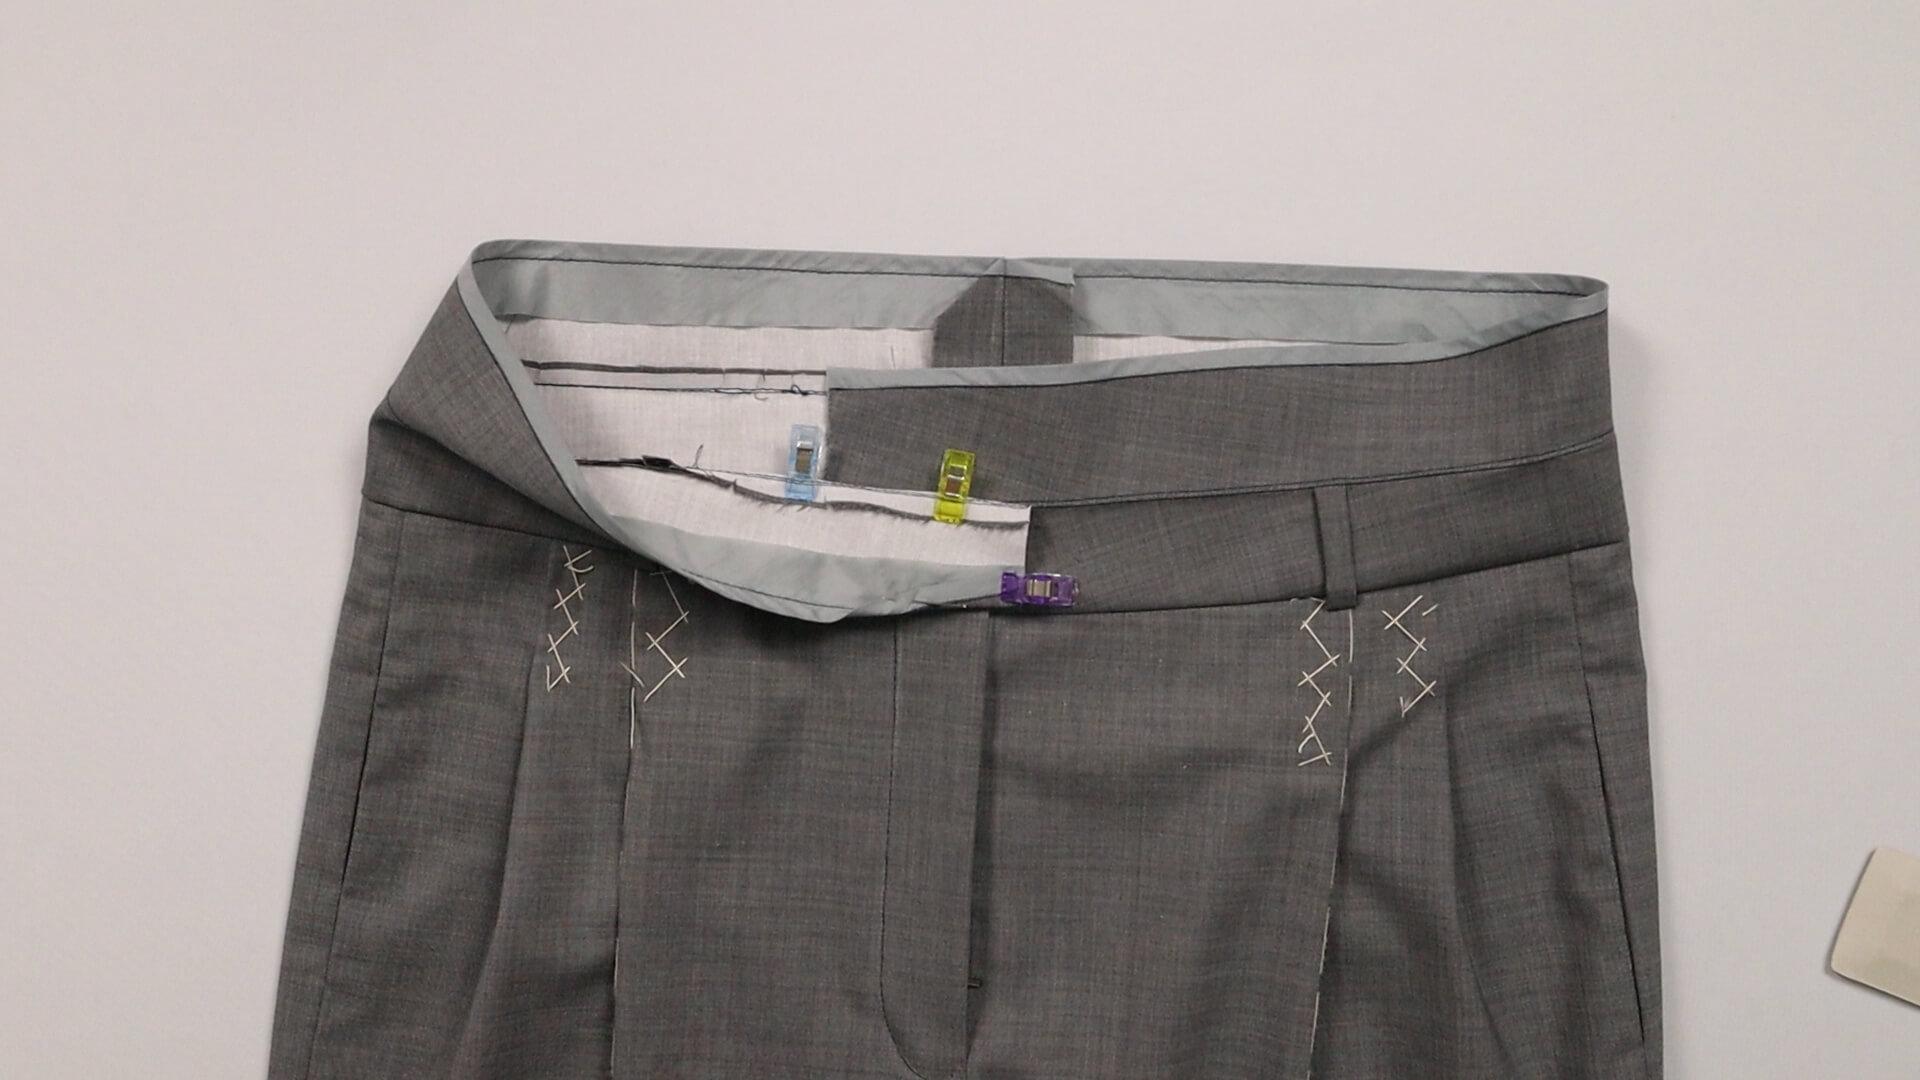
On the fly shield side, I fold the waistband right sides together and secure the top edge with a few clips.
I fold the bottom edge of the waistband at the front making the seam meet at the center front. At the hight of the fly topstitching, it extends approx. 5 mm beyond the seam.
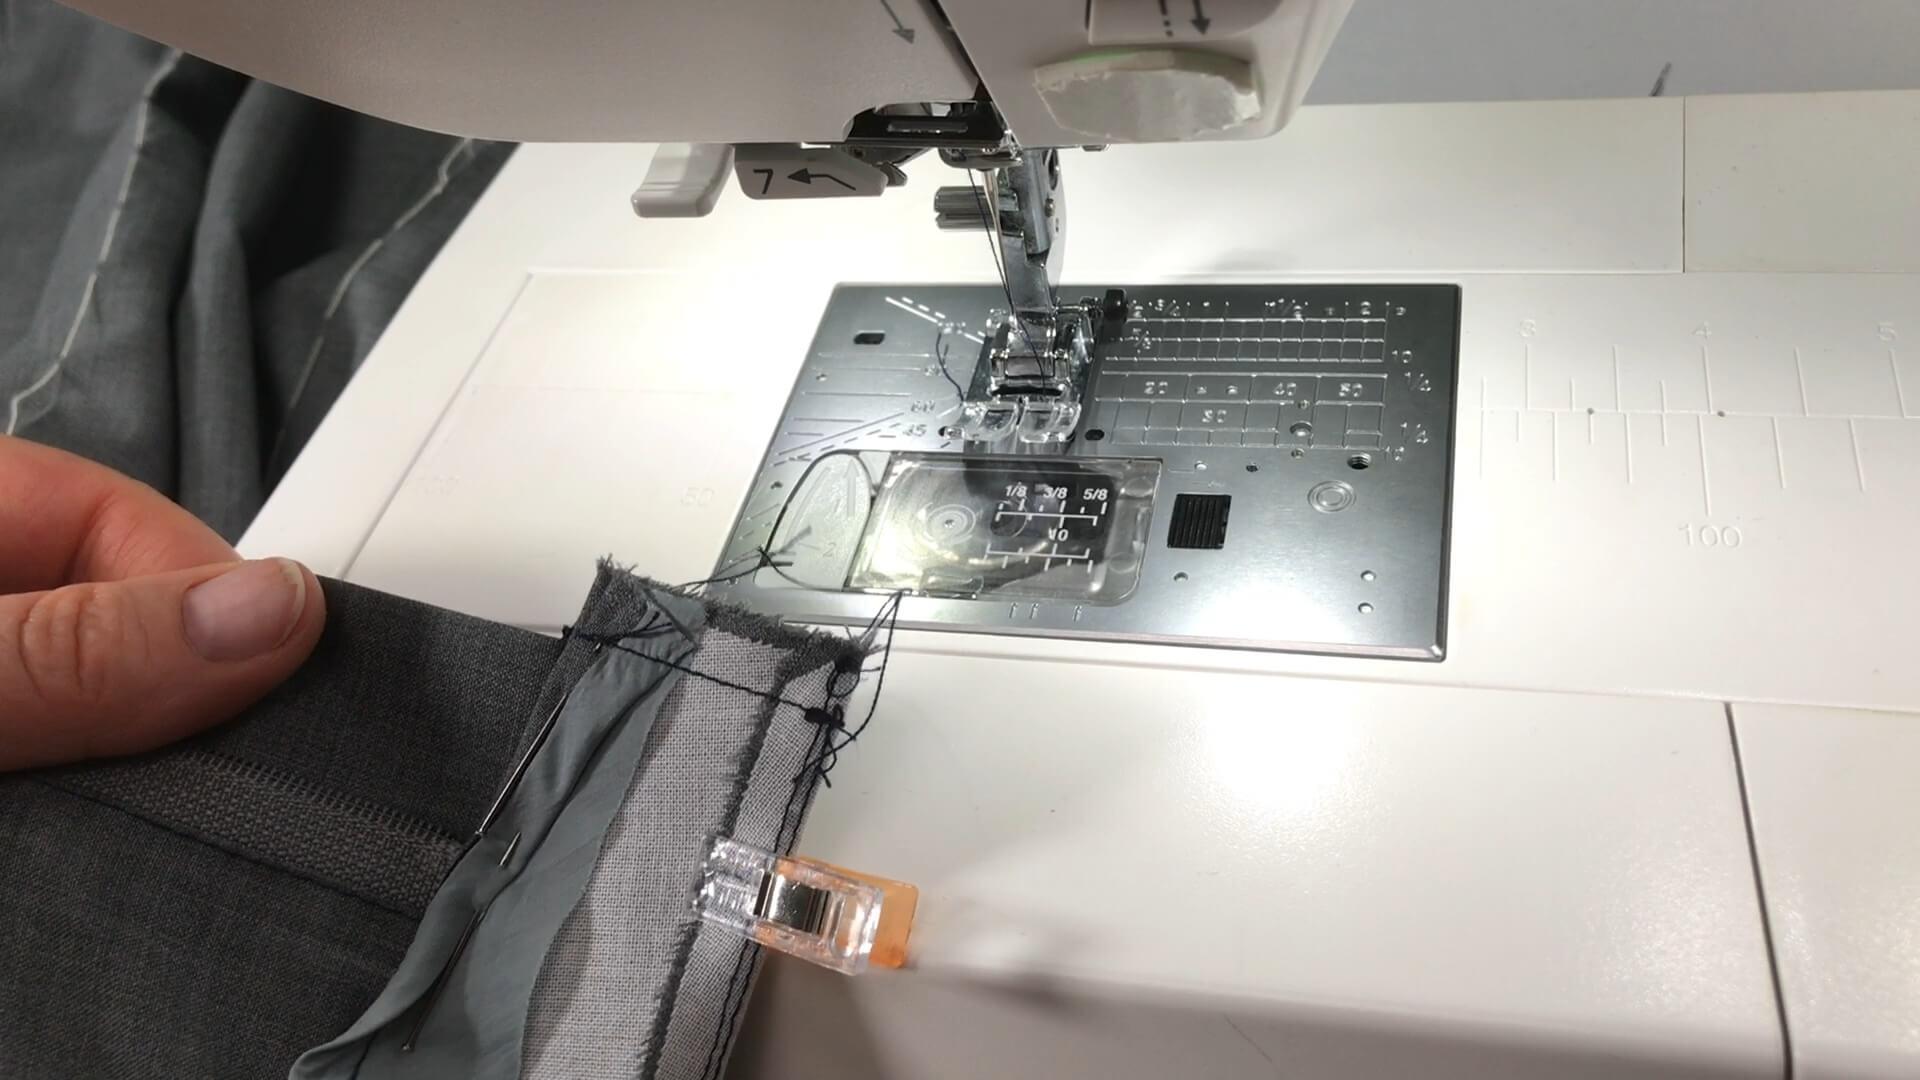
I sew the front edge with a 10 mm seam allwoance. If using thick materials, you should sew with a seam allowance of 9 mm so the waistband lies neatly around the fly shield when turning.
I proceed in exactly the same way with the fly shield.
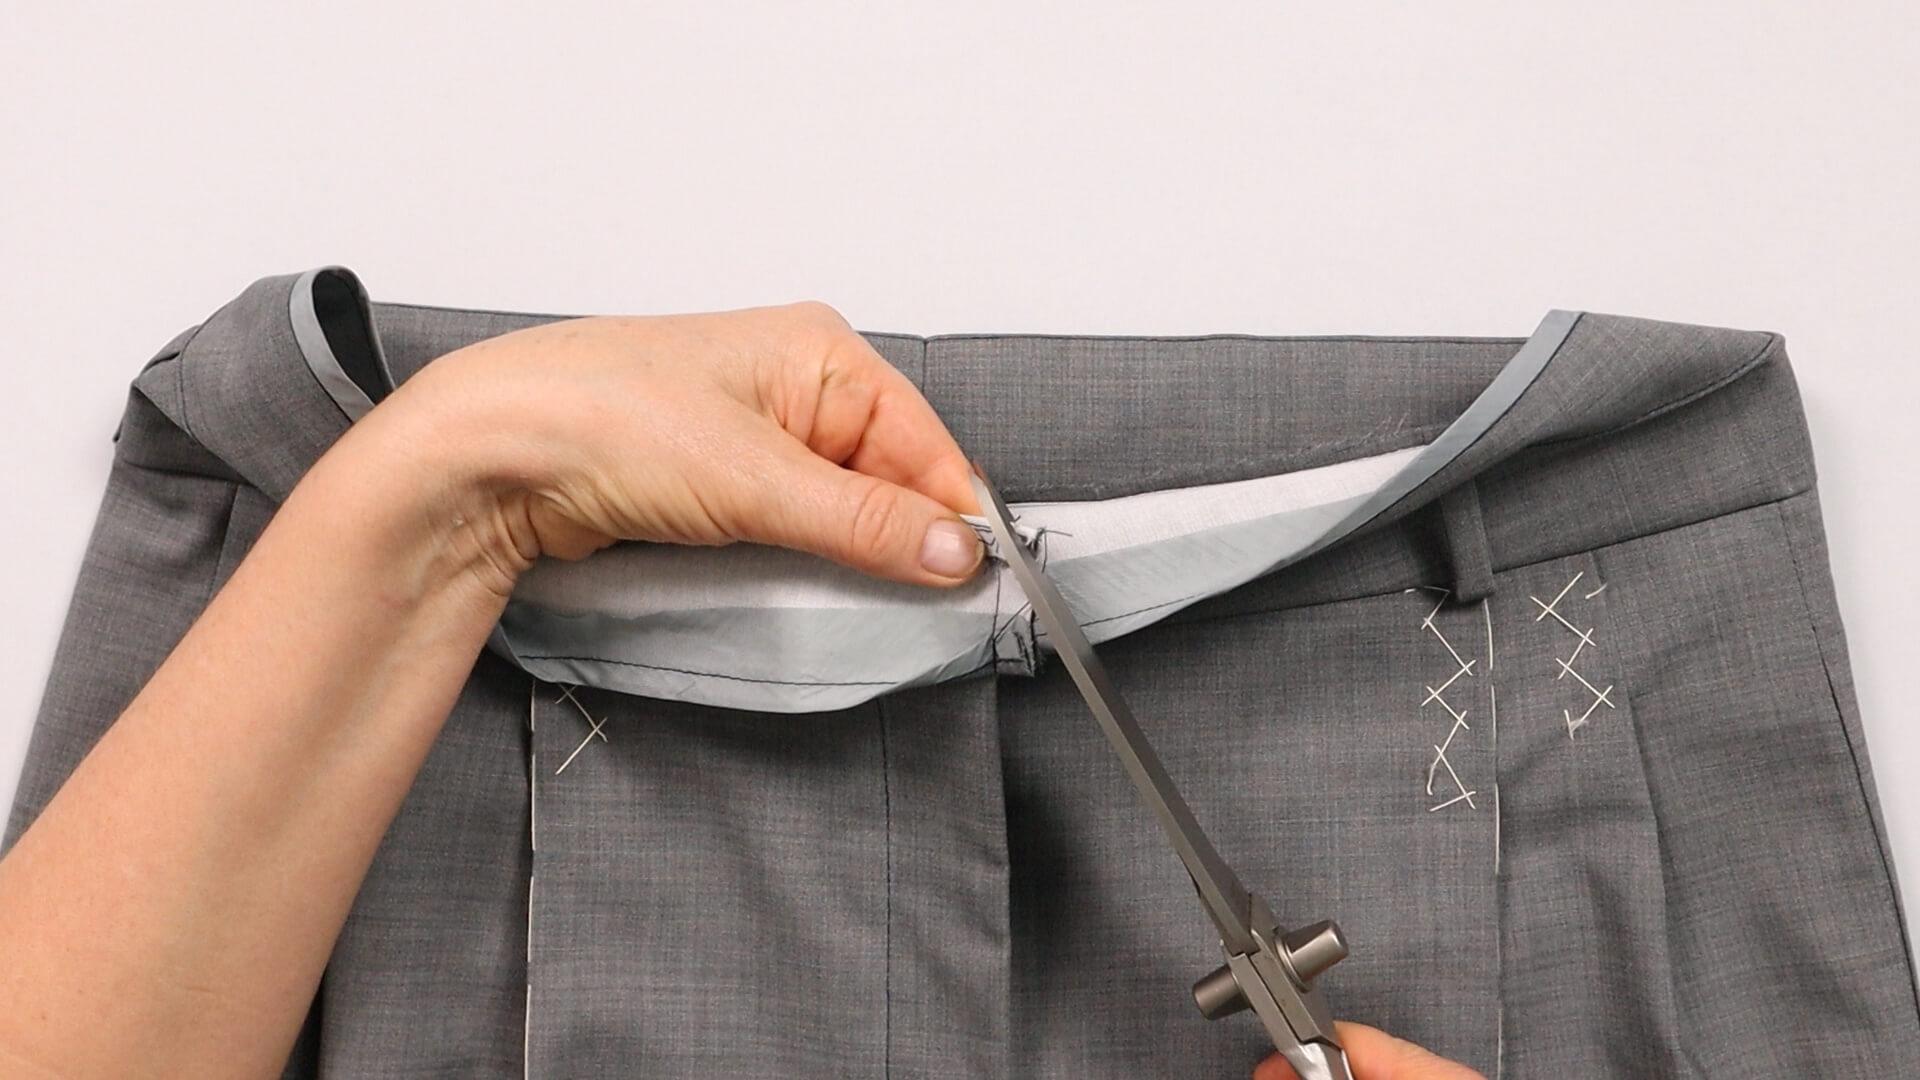
I cut the seam allowances back diagonally to the top corner.
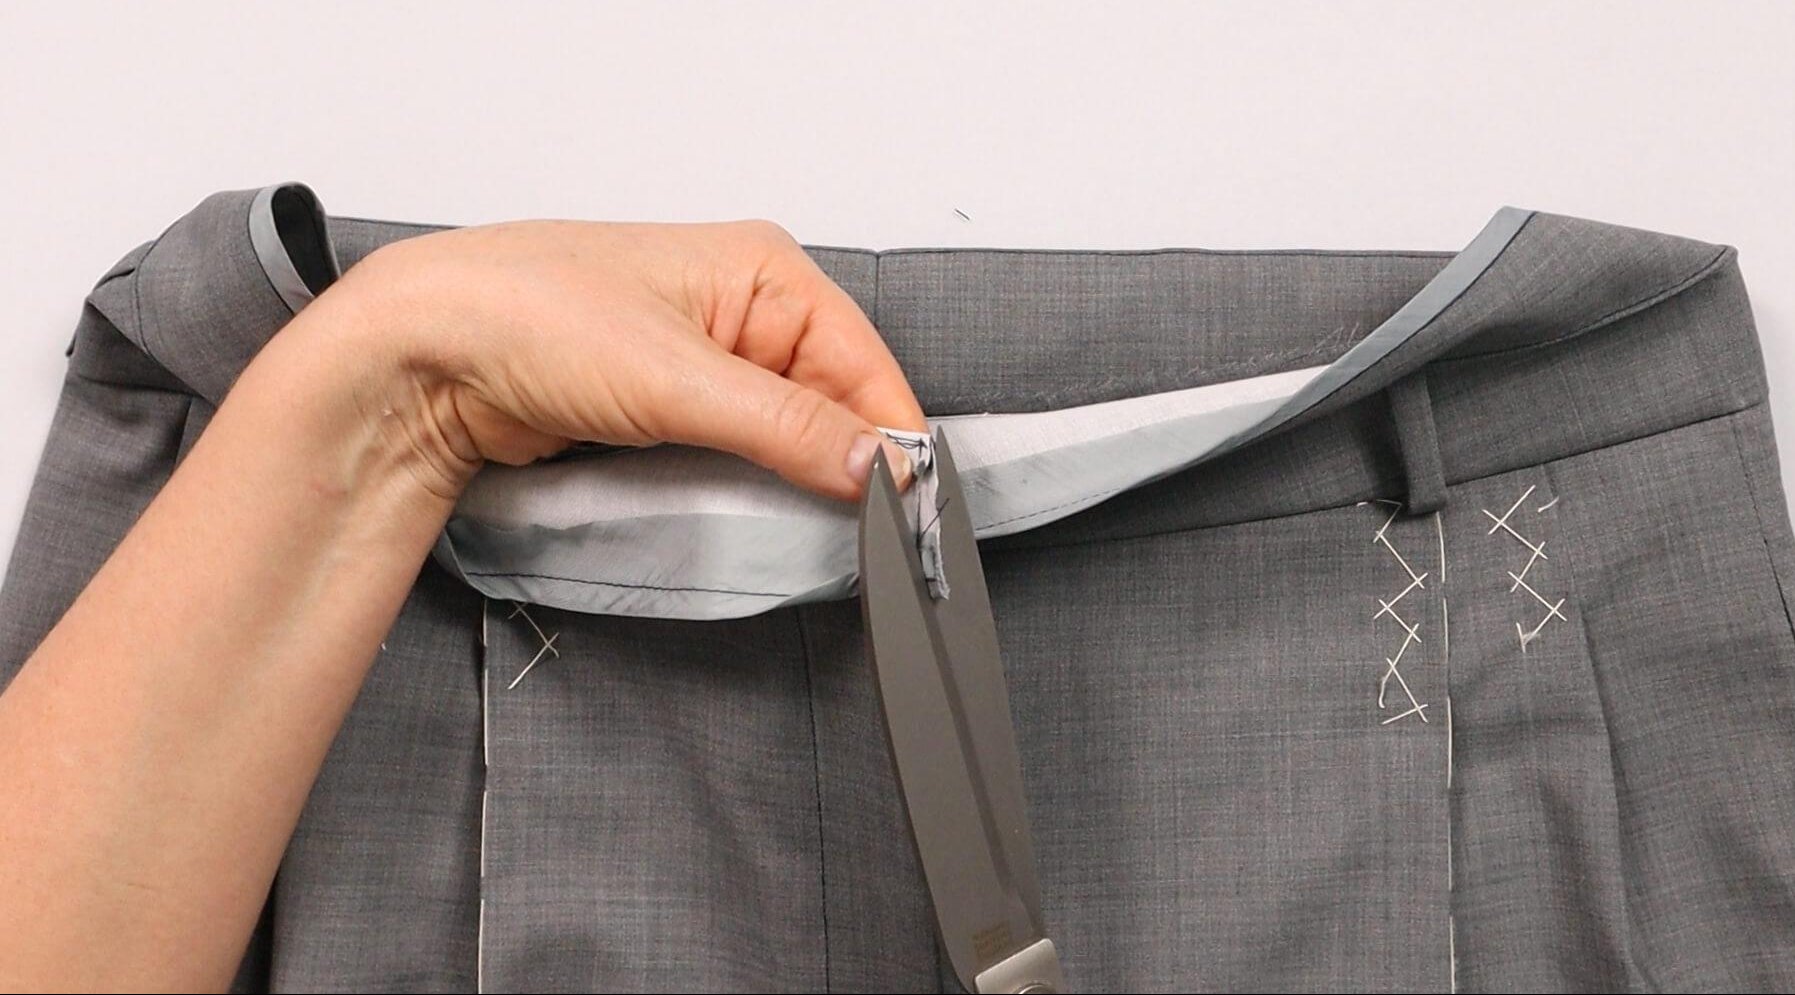
I trim the seam allowances on the front edge.
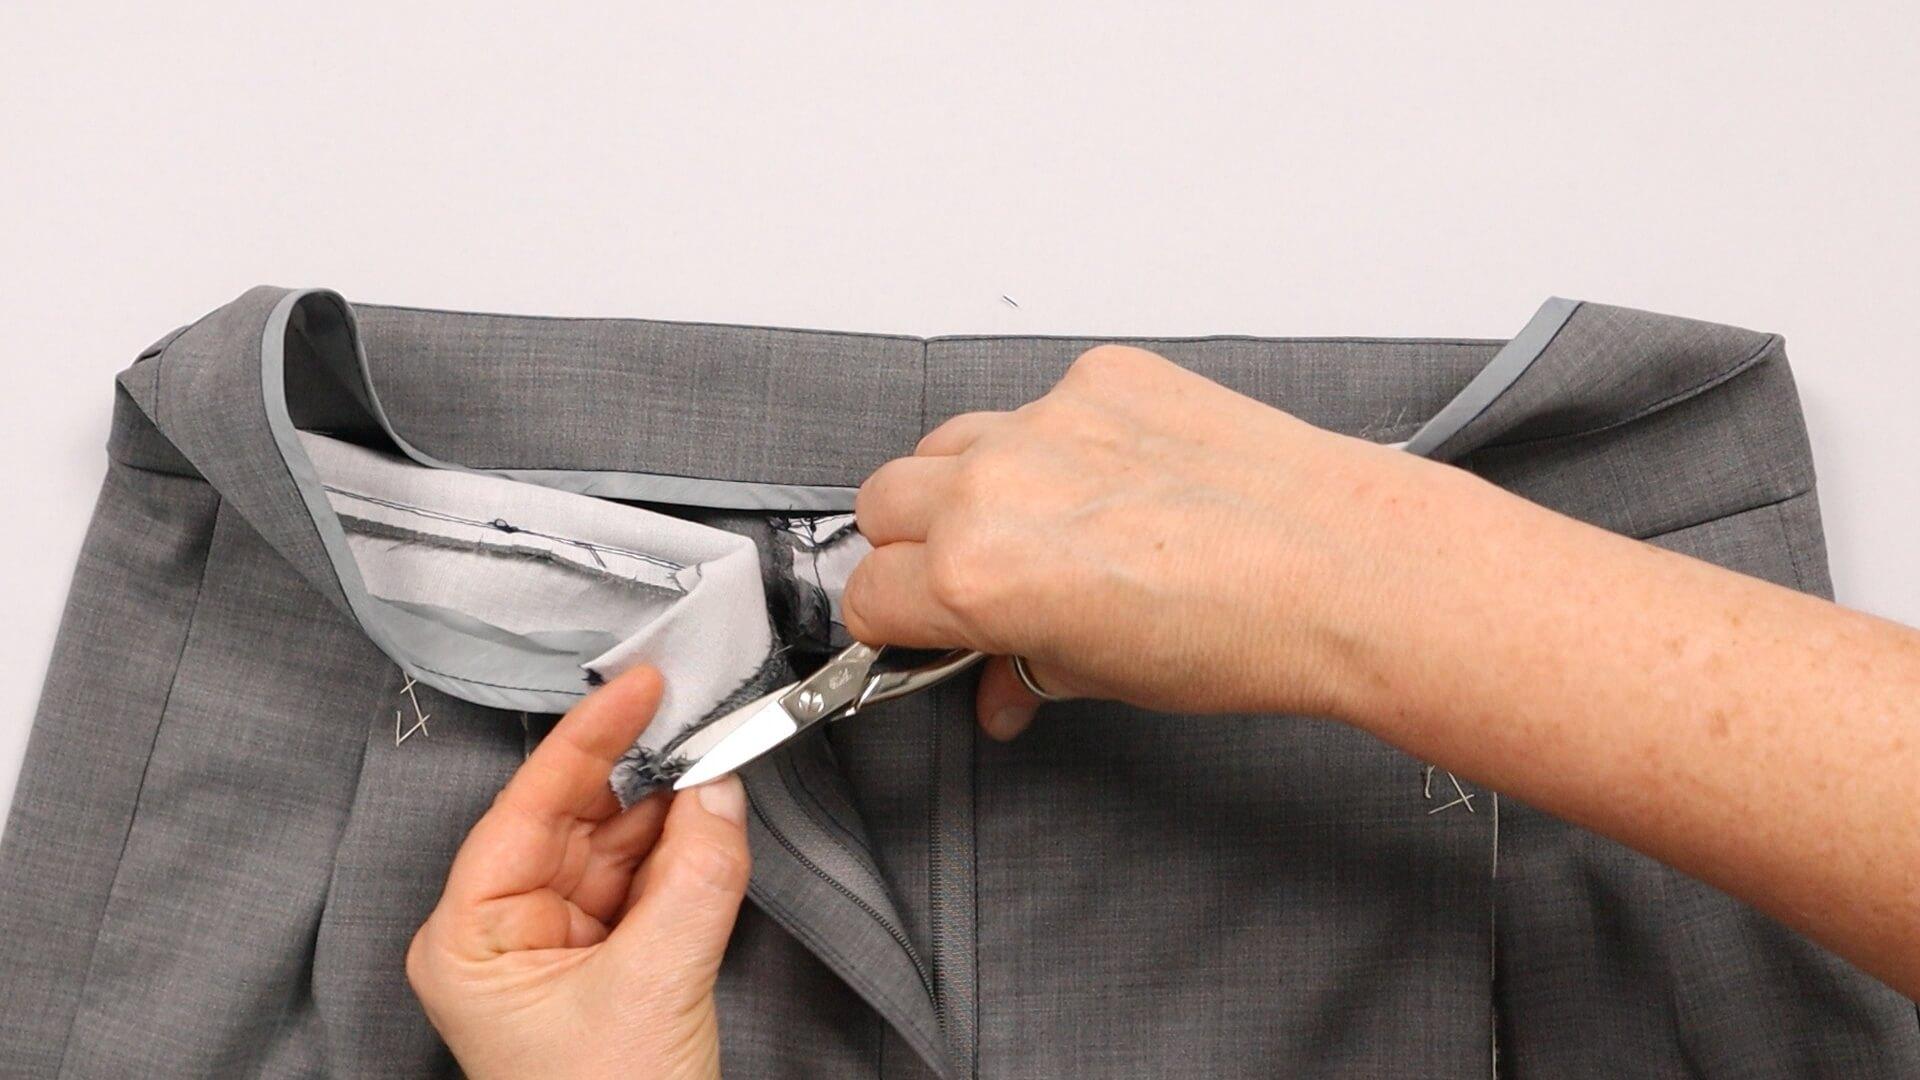
Further I cut back the seam allowances on the inside and thin them out as much as possible.
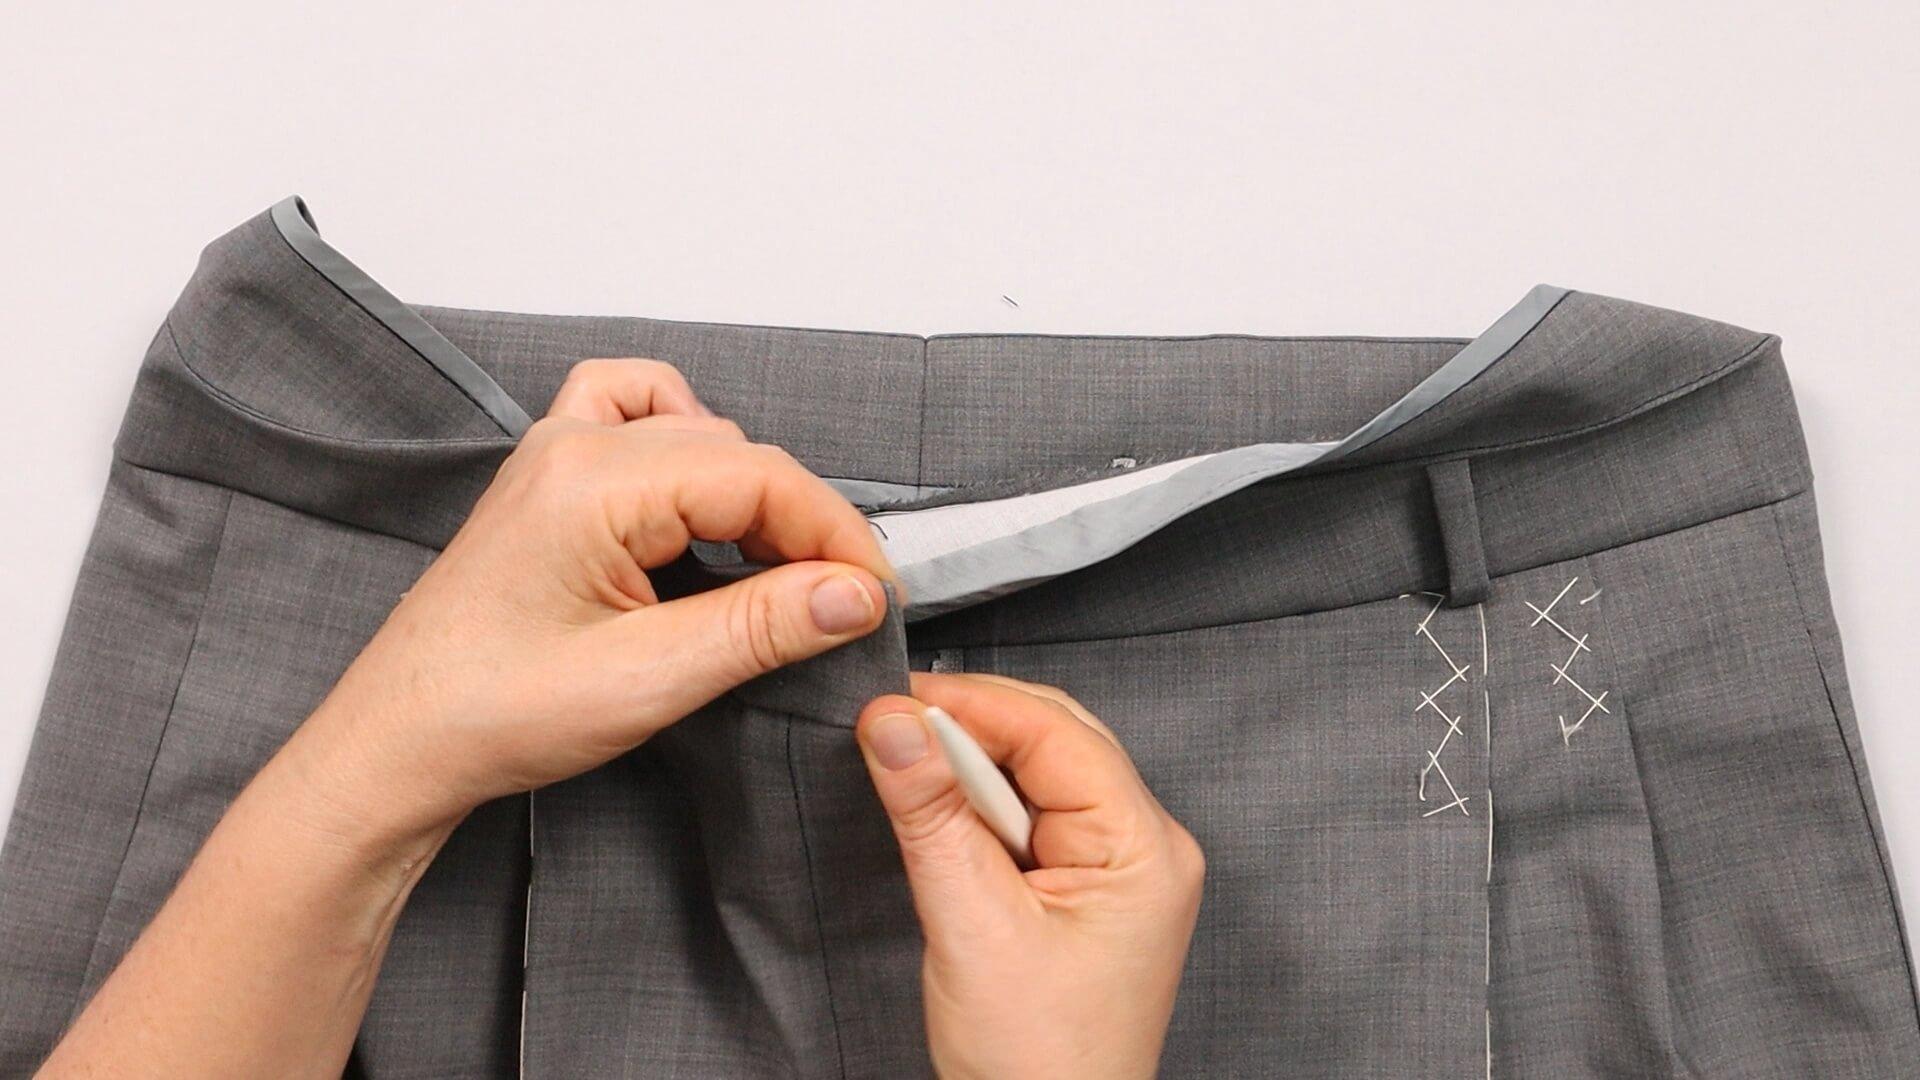
I turn the edge of the waistband again and shape it with an edge shaper and repeat these steps on the other side of the waistband.
8. Topstitch the divided waistband
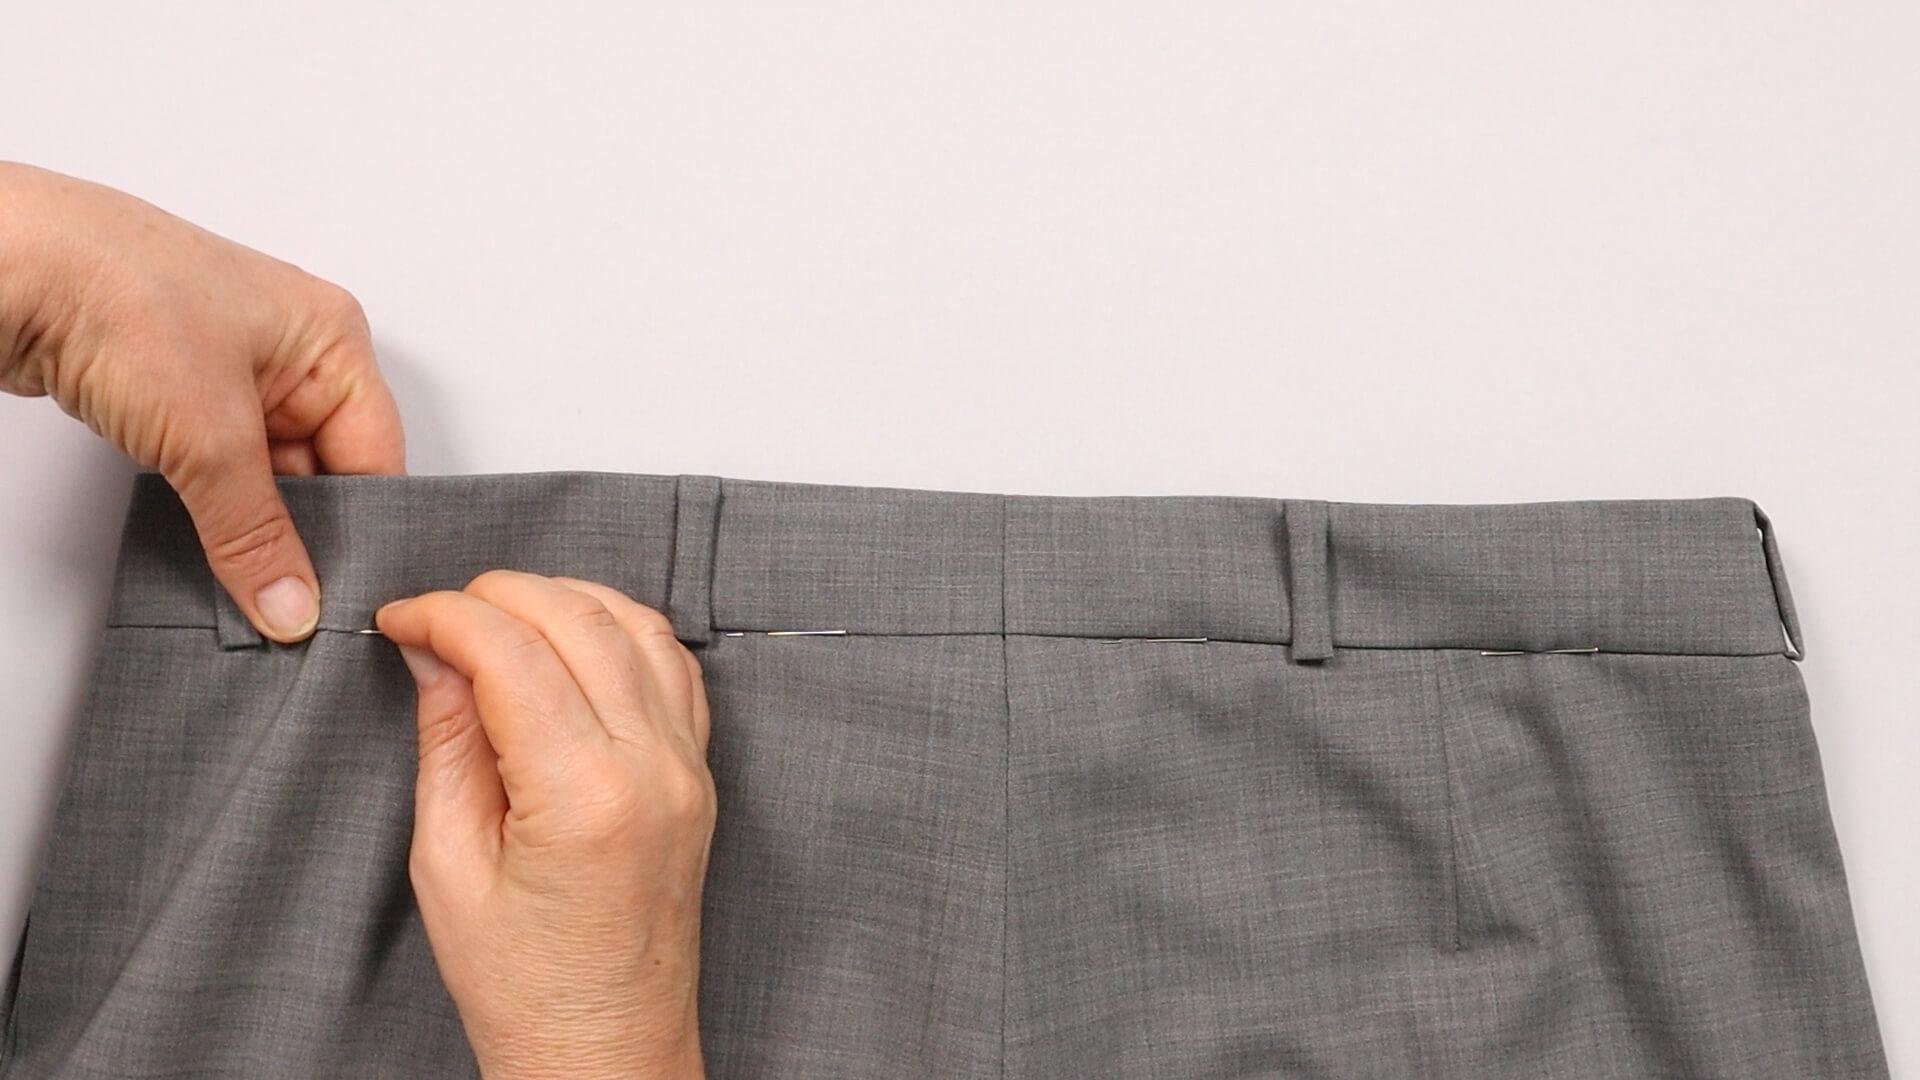
I pin the waistband from the outside all the way around at the seam and sitch it in place with the sewing machine.
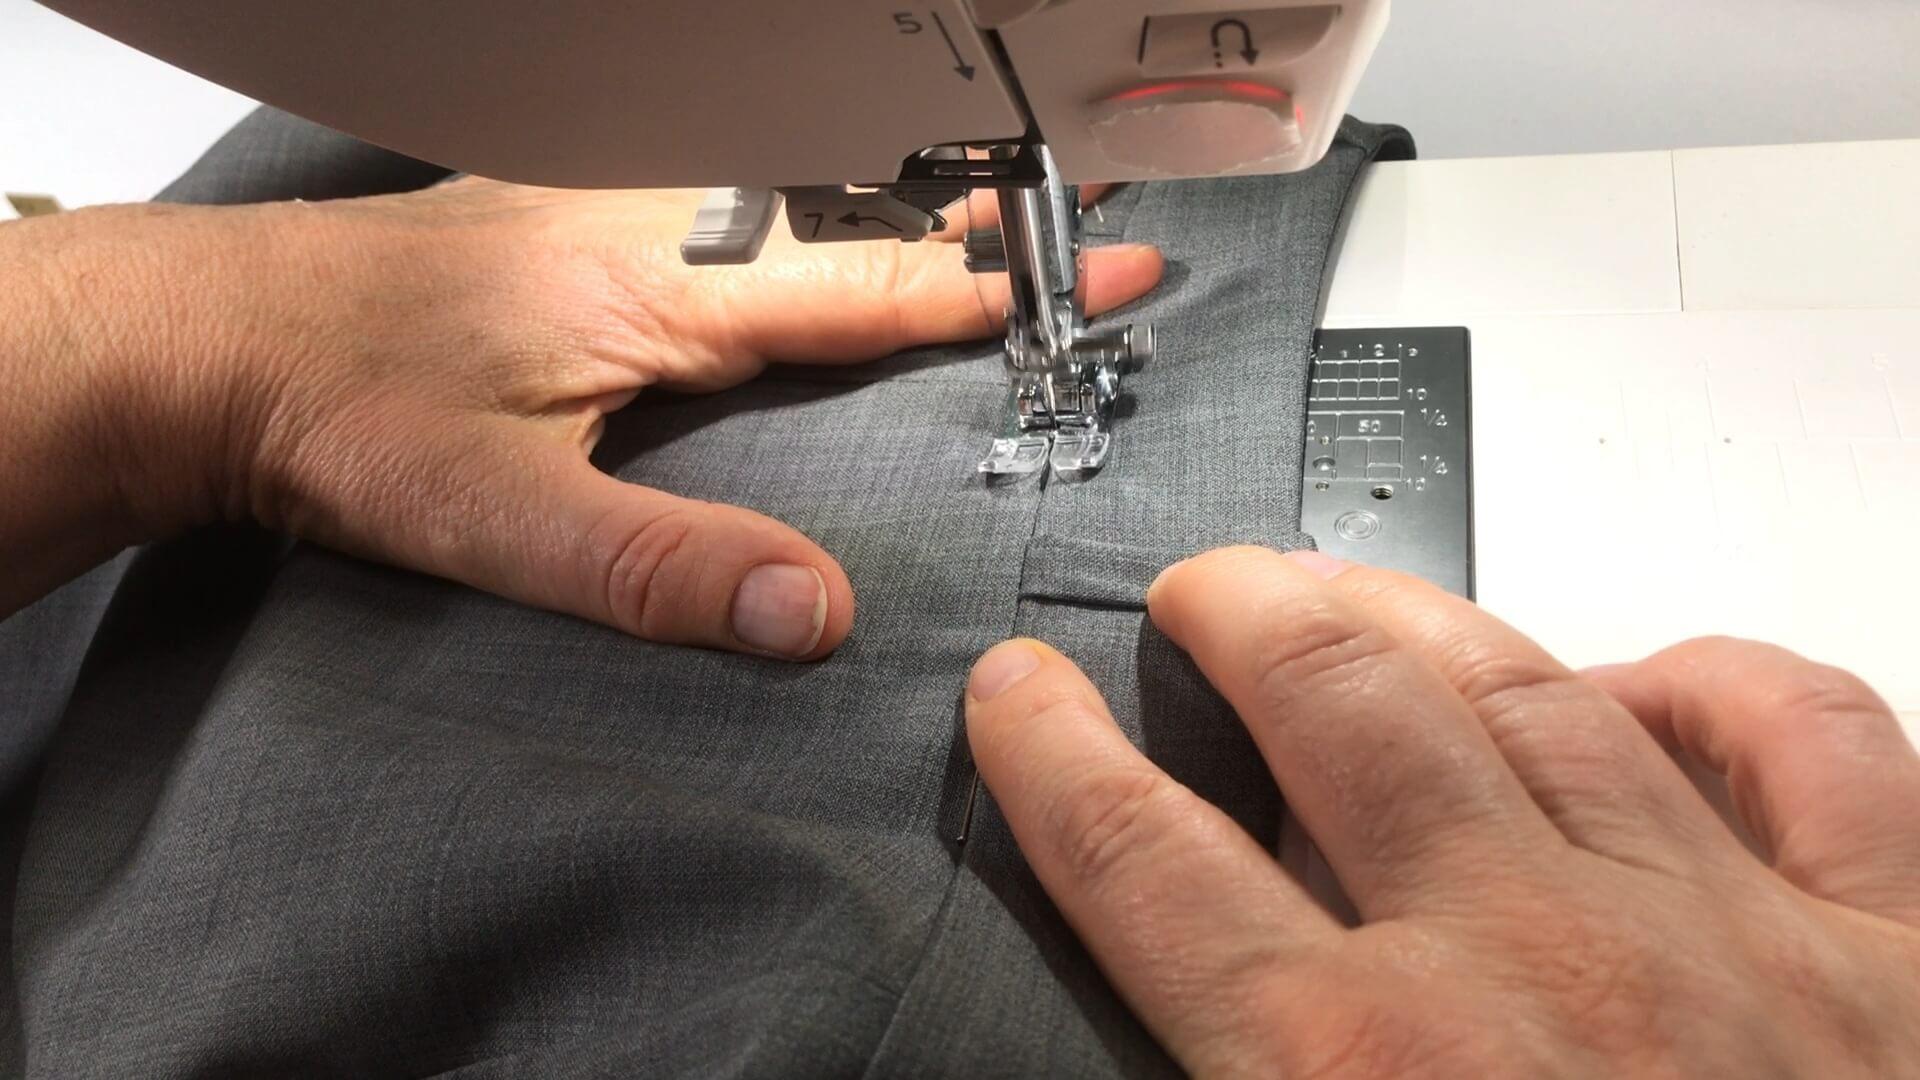
I stitch almost directly in or just below the first seam. This is called stitch in the ditch. You can hardly see the stitching later, especially if the yarn matches the color of the outer fabric.
Fasten inner waistband with hand stitch
I’ll show you how I attach the inner waistband with a hand stitch as an alternative:
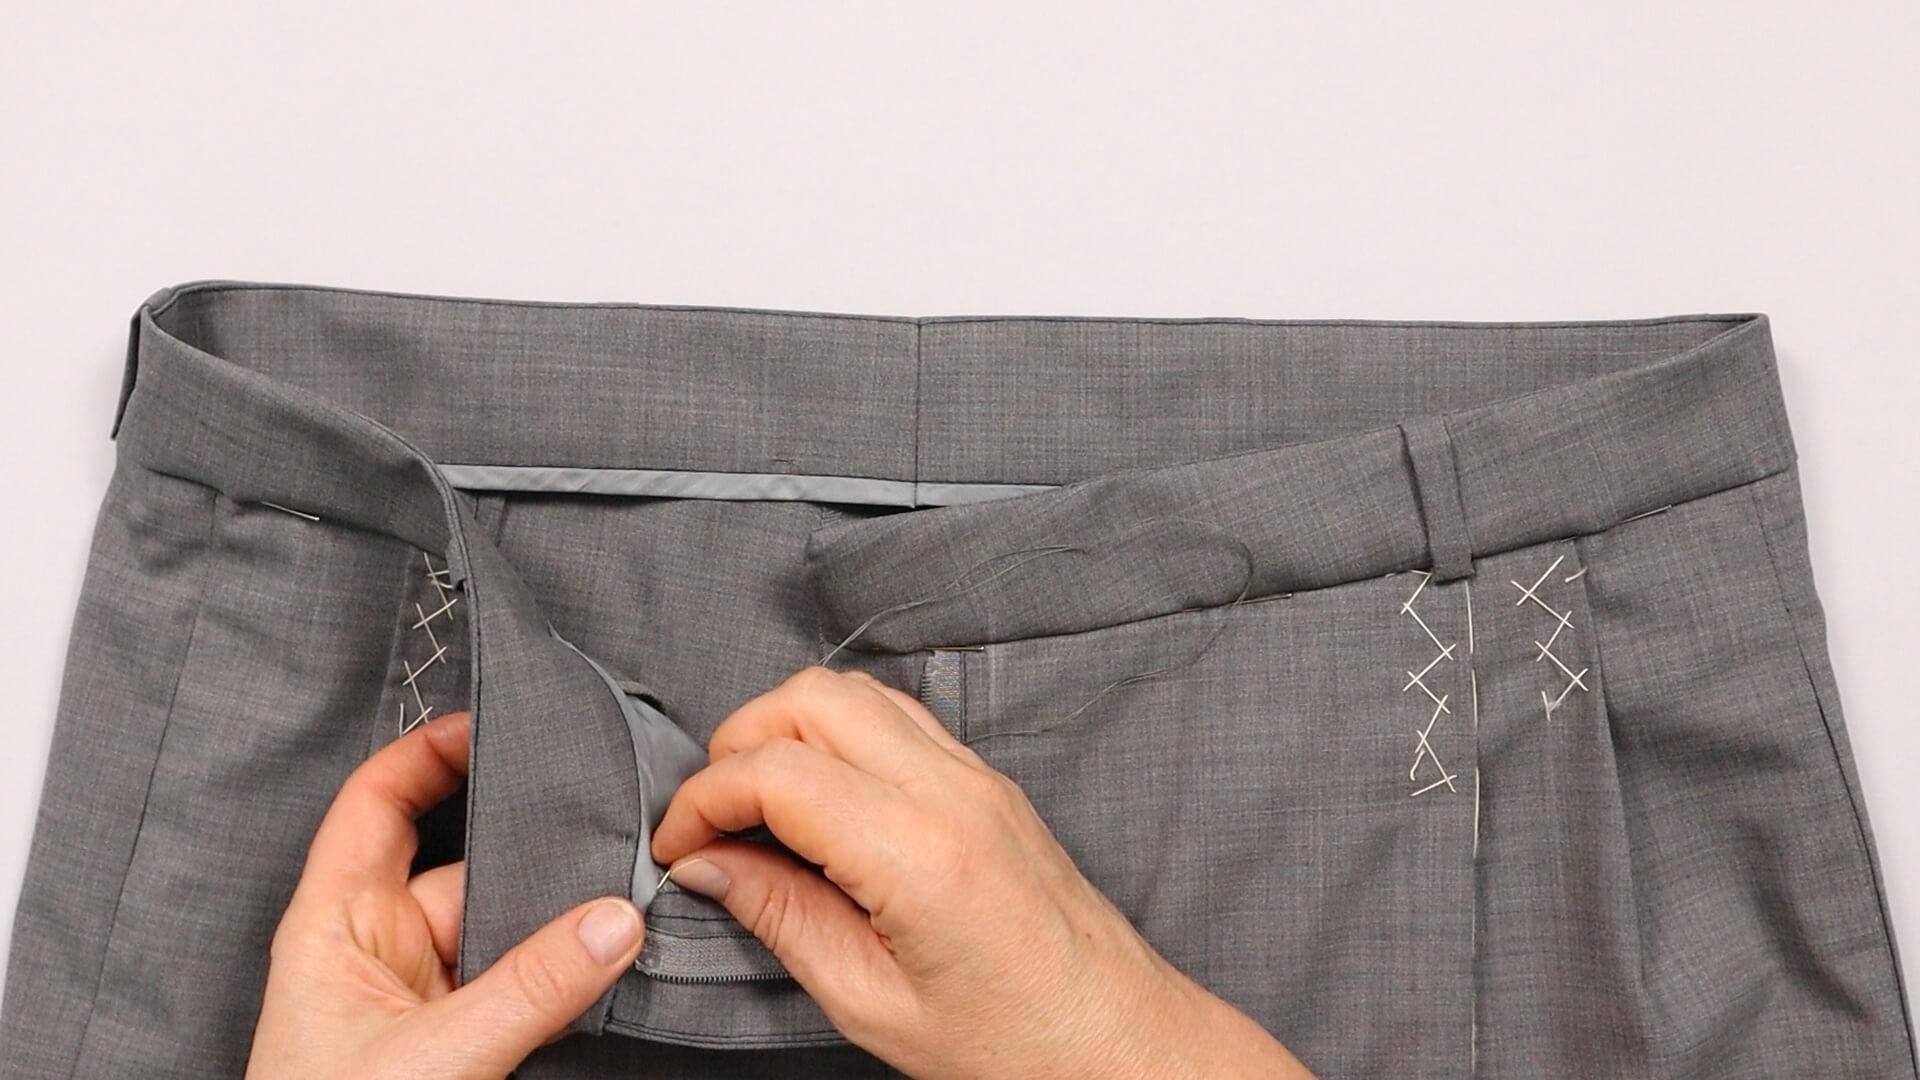
First I attach the turned-in corners to the facing or bottom edge from the inside.
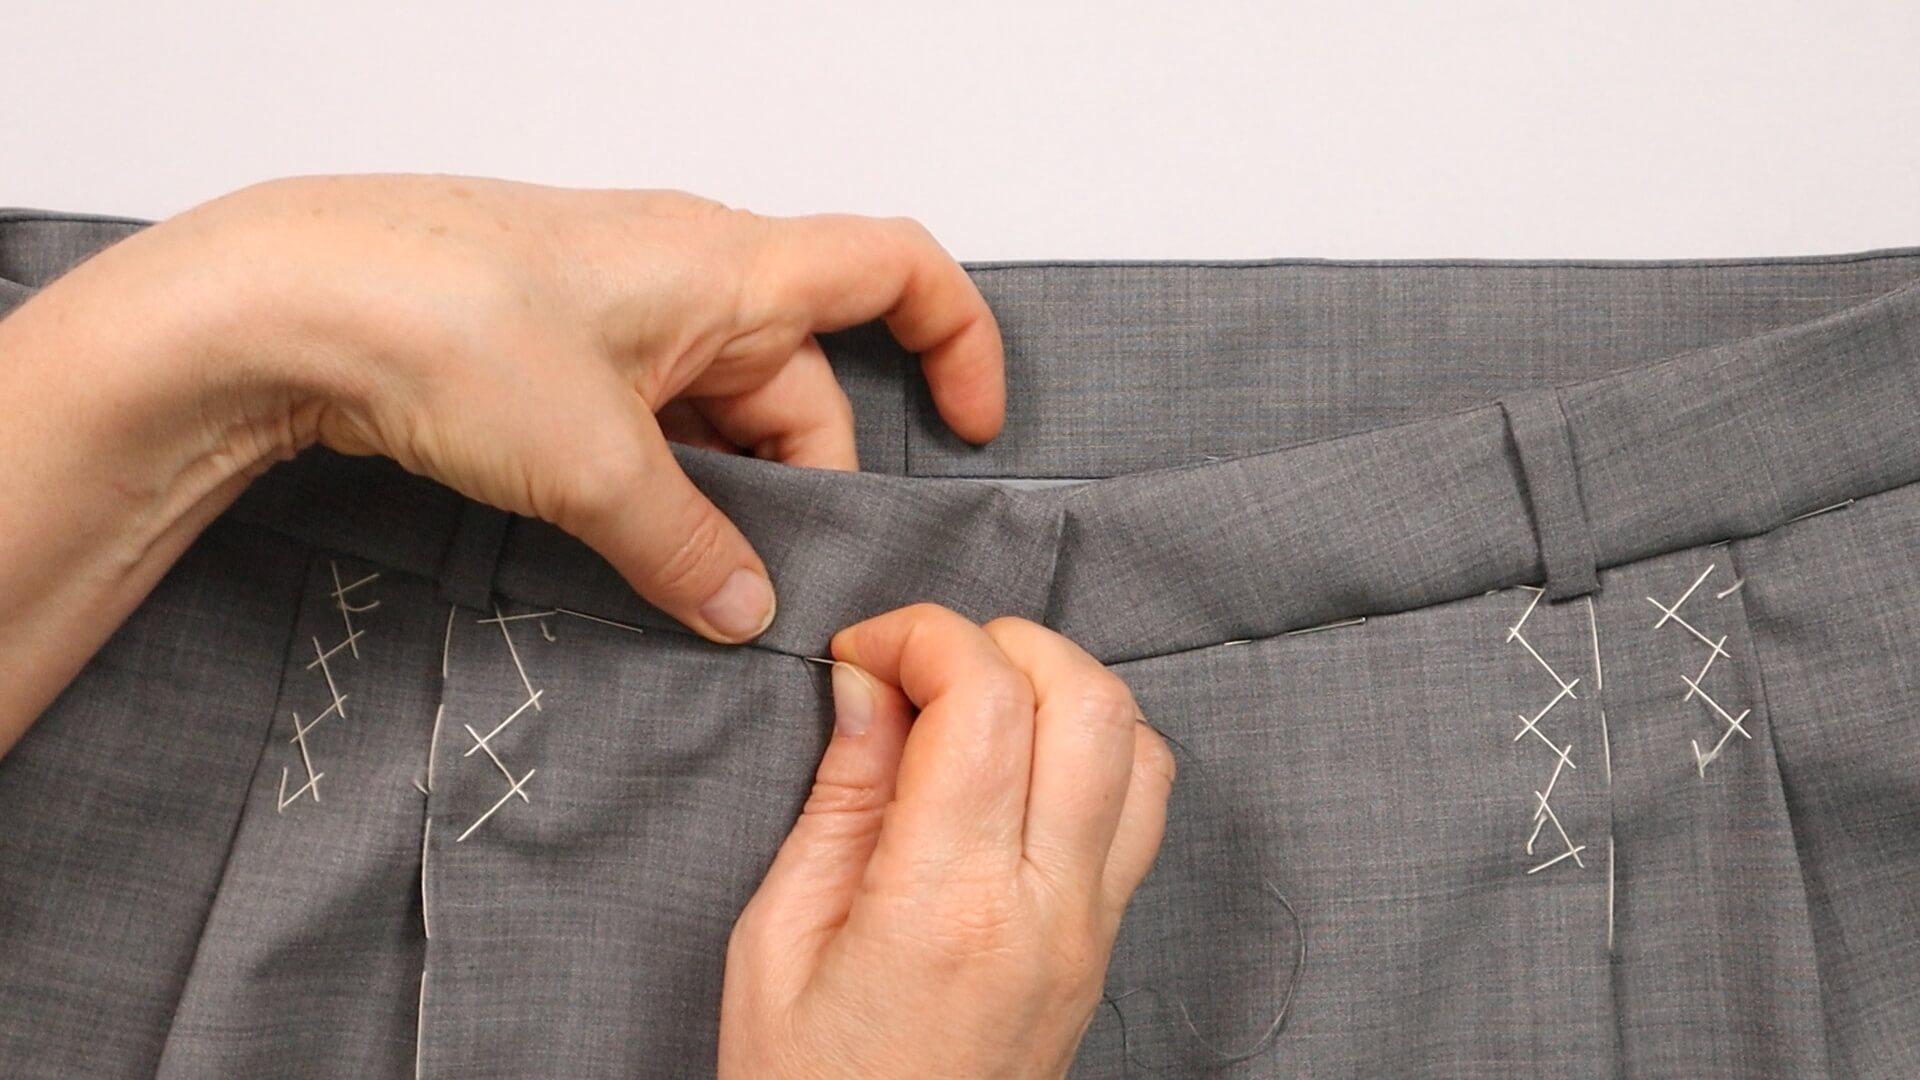
Using the point stitch which I have already used in step 7 of this instructions for sewing the zipper, I sew through the seam from the outside .
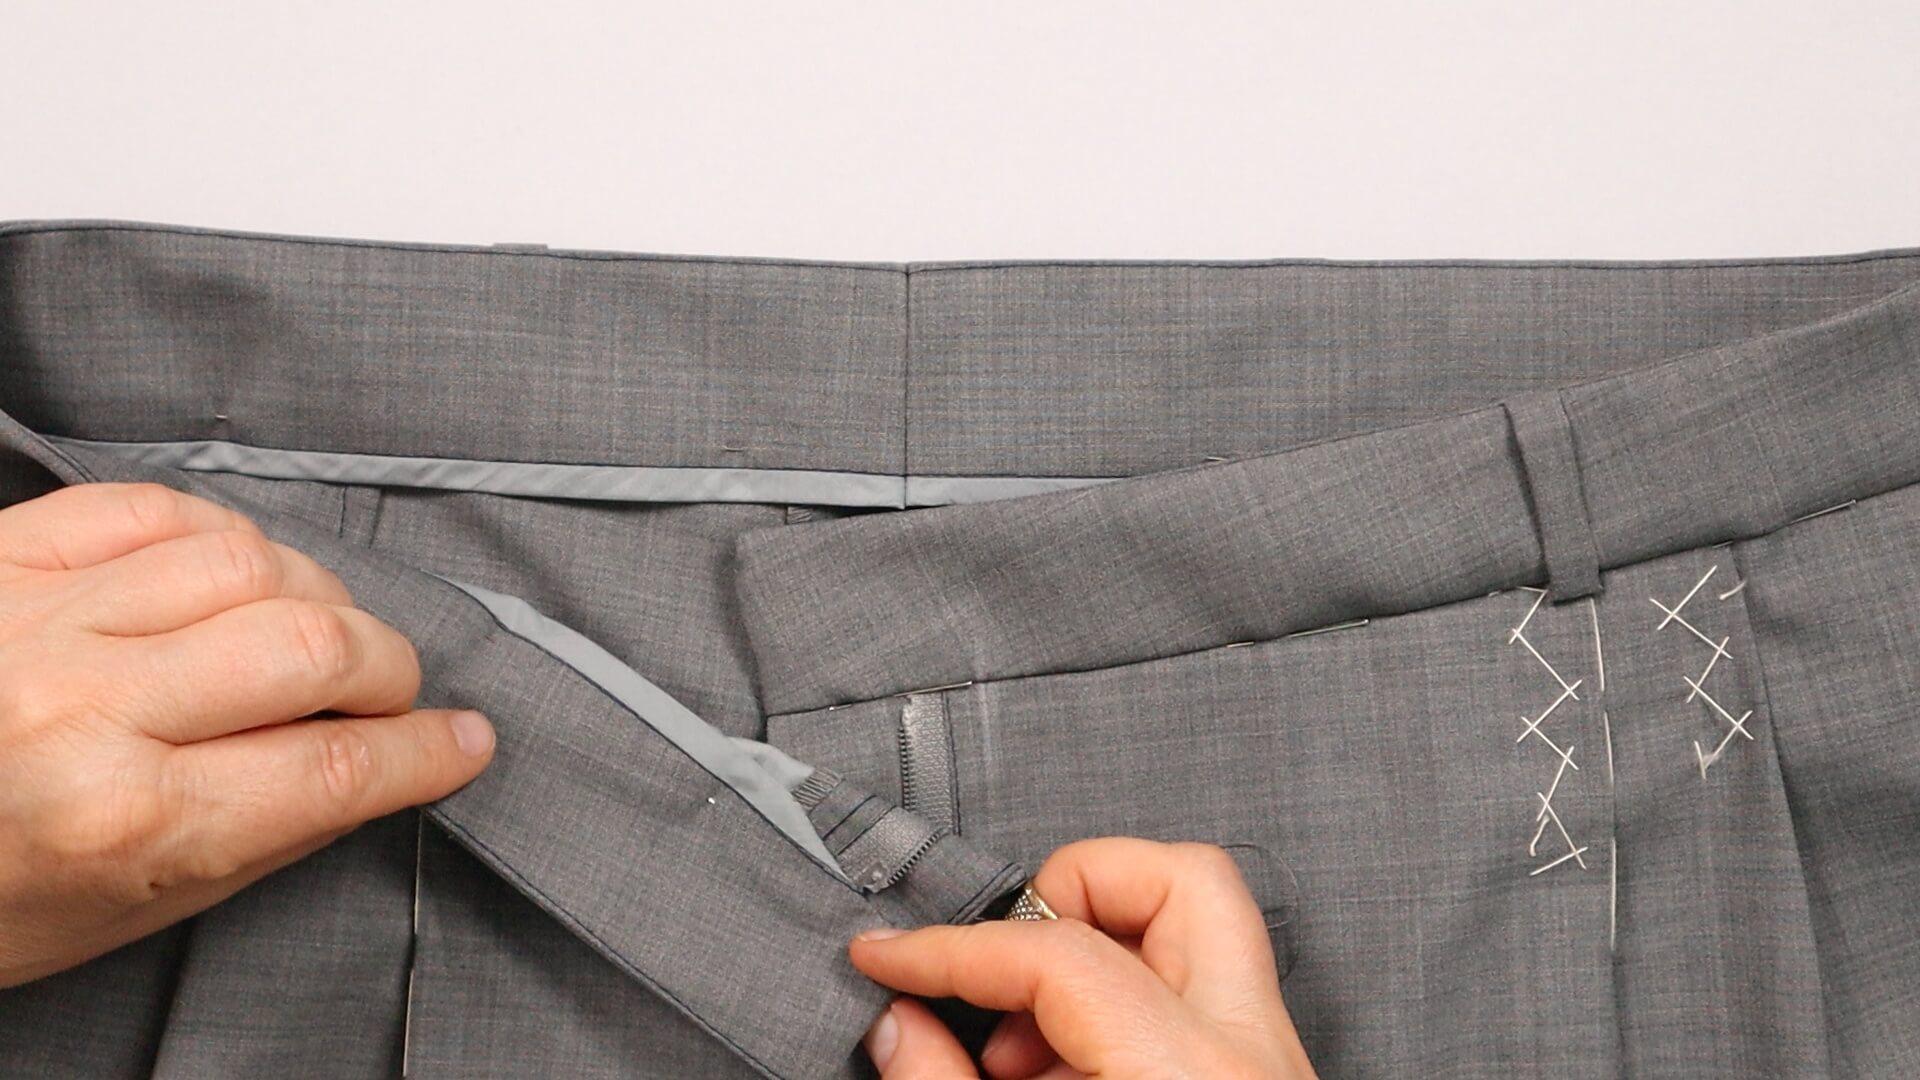
I always stitch through the waistband again just after the thread comes out and come out with the needle about 5 mm further forward. From the inside you can see the thread in this area, from the outside the seam is almost invisible.
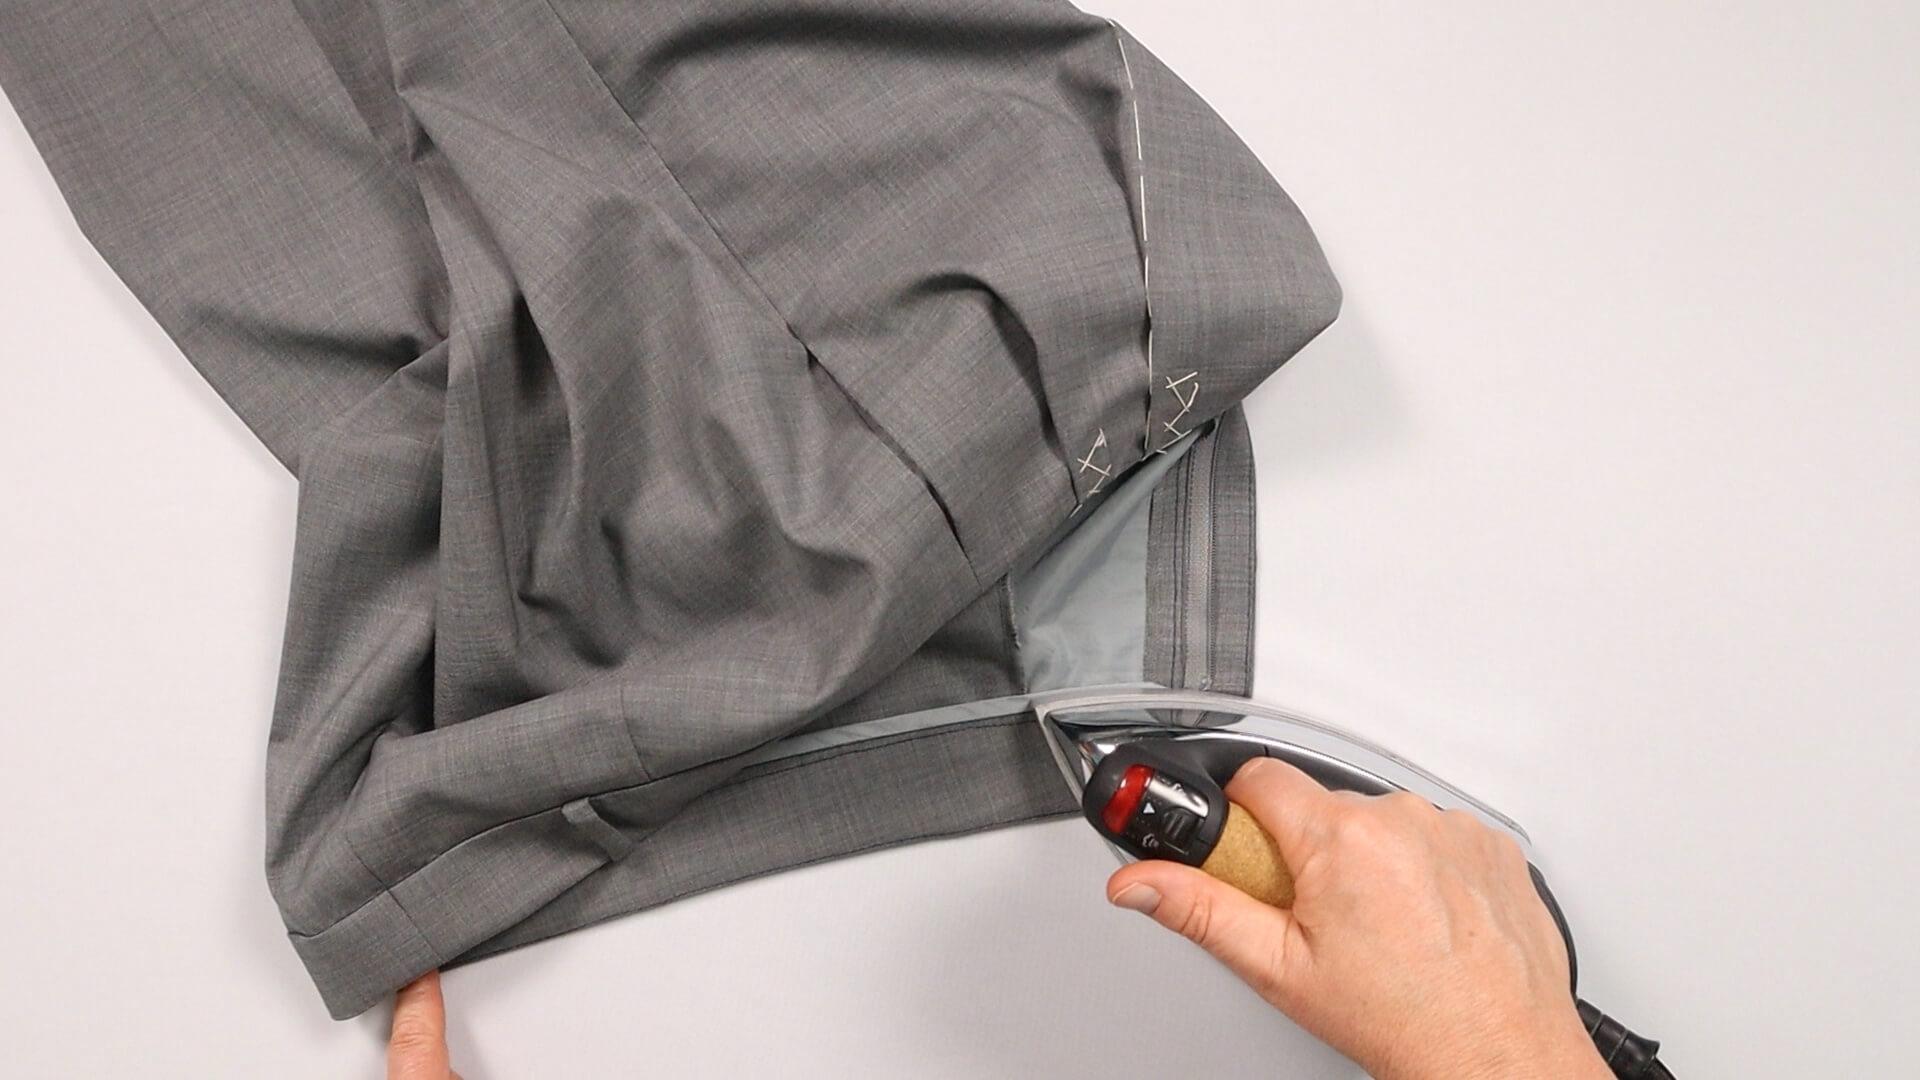
Finally, I press the corners flat from the inside.
9. Finish the trousers
If you have decided on a trouser hook, all you have to do now is attach the eyelet to the divided waistband and – if applicable – remove basting stitches from creases and pleats.
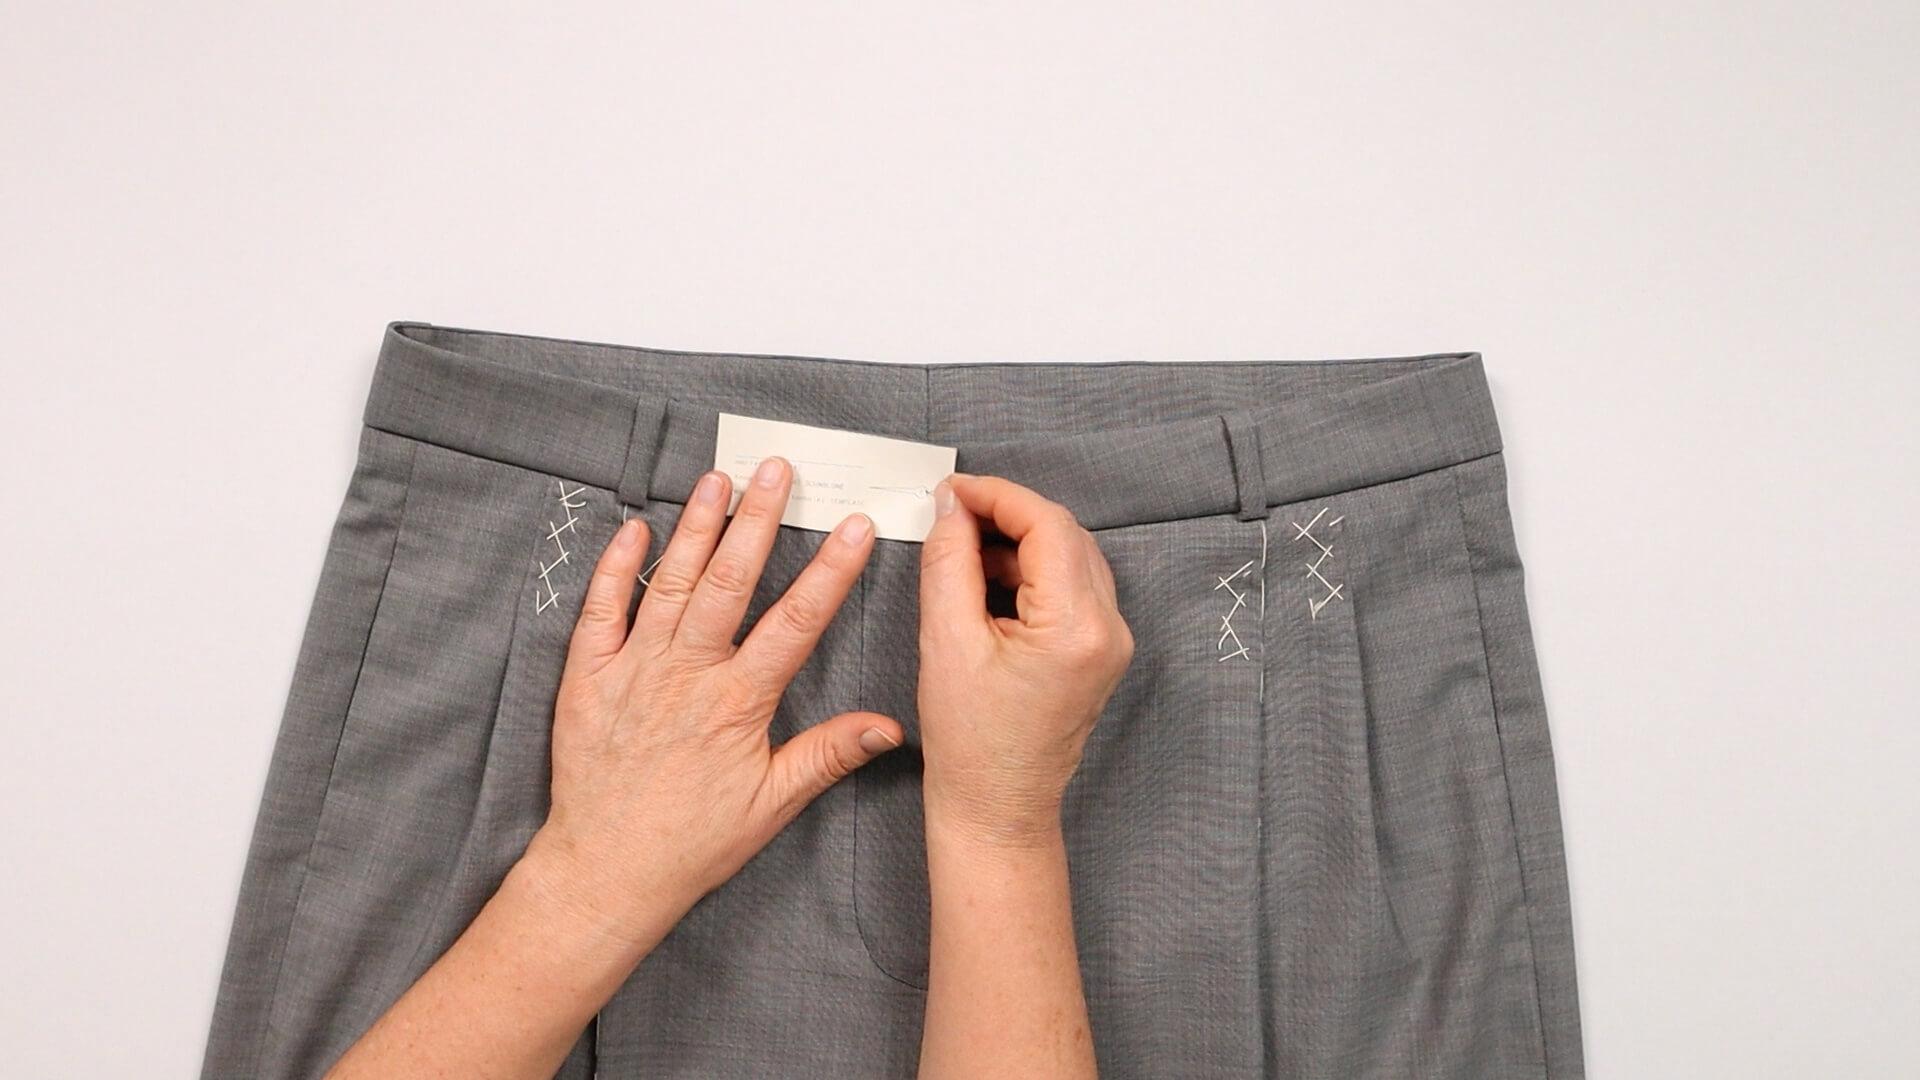
The buttonhole (2 buttonholes for the wide waistband version) is now added to the right side of the waistband. I transfer the position by placing the template onto the waistband.
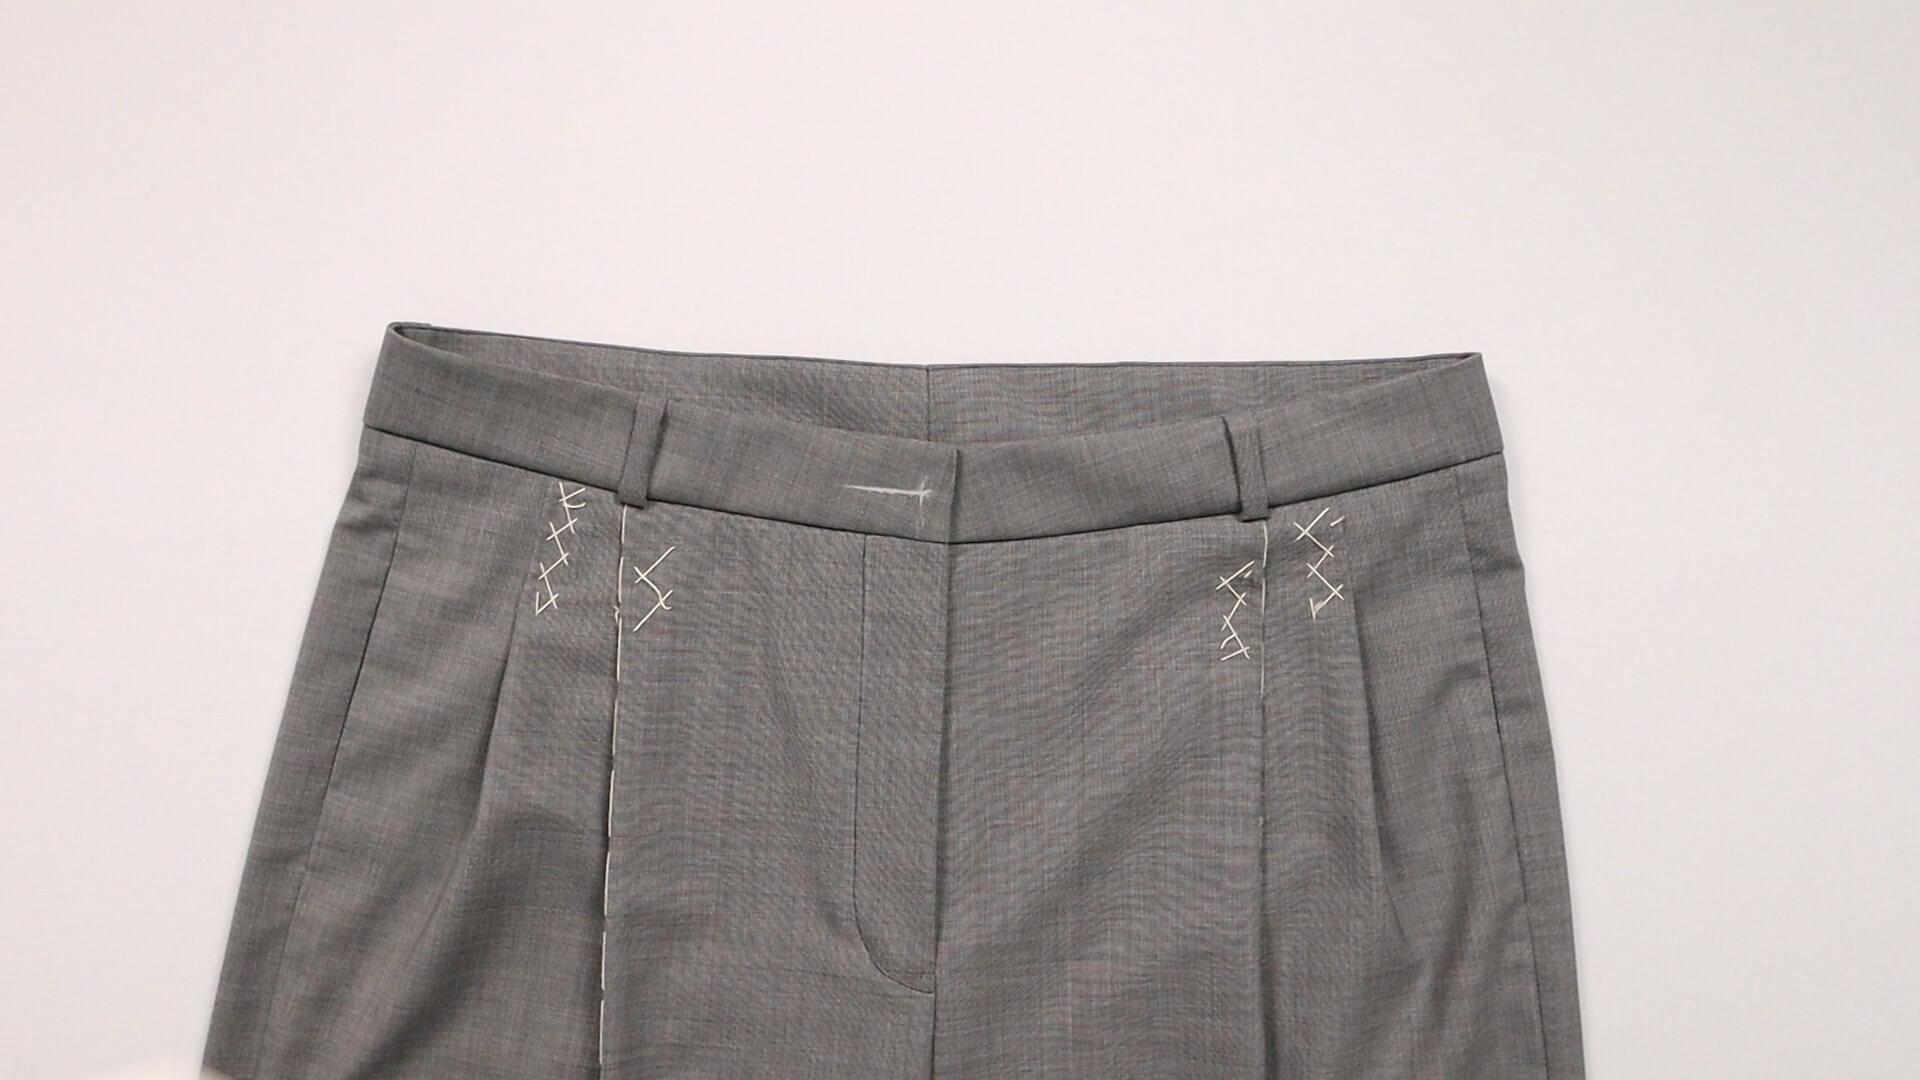
The length of the buttonhole depends on the button size. I use the buttonhole function on my sewing machine for sewing. It is best to test the buttonhole on a scrap piece first.
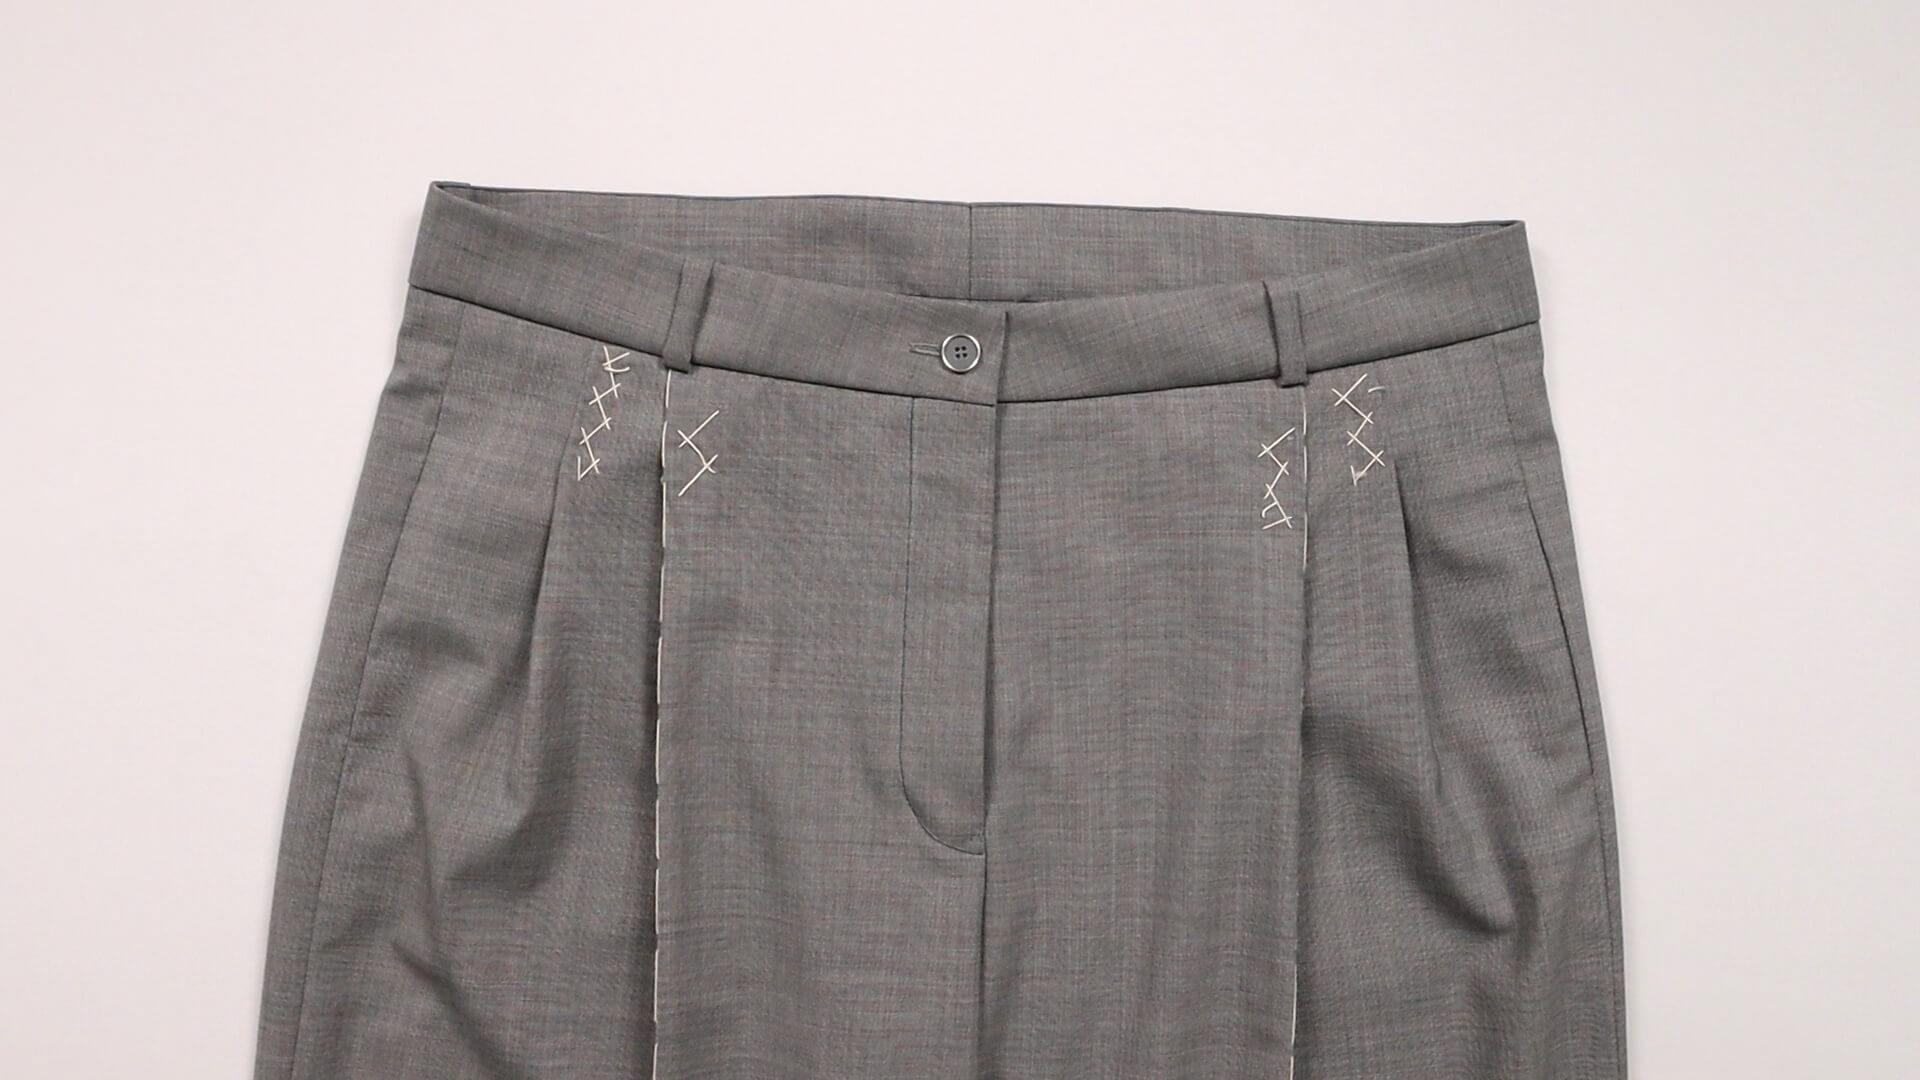
Then I sew on the button.
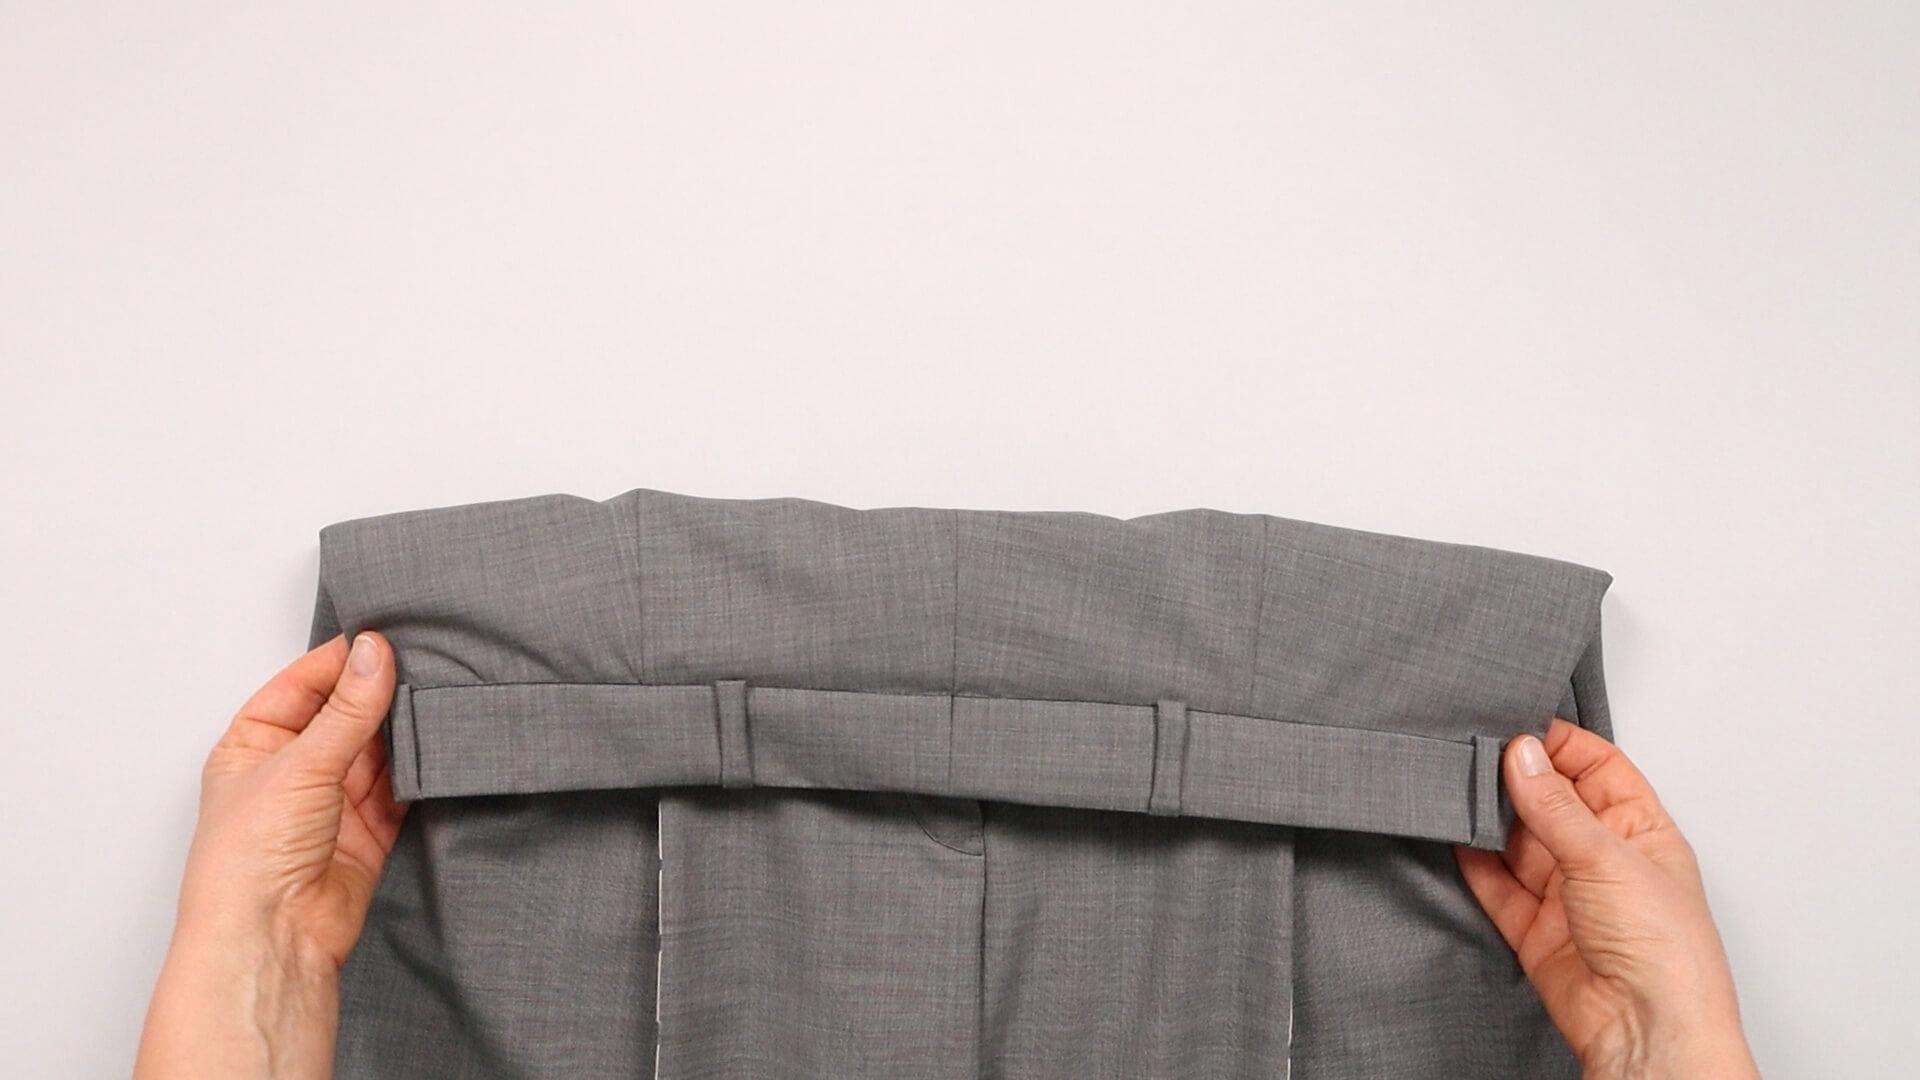
This is what the finished back trousers with divided waistband look like.
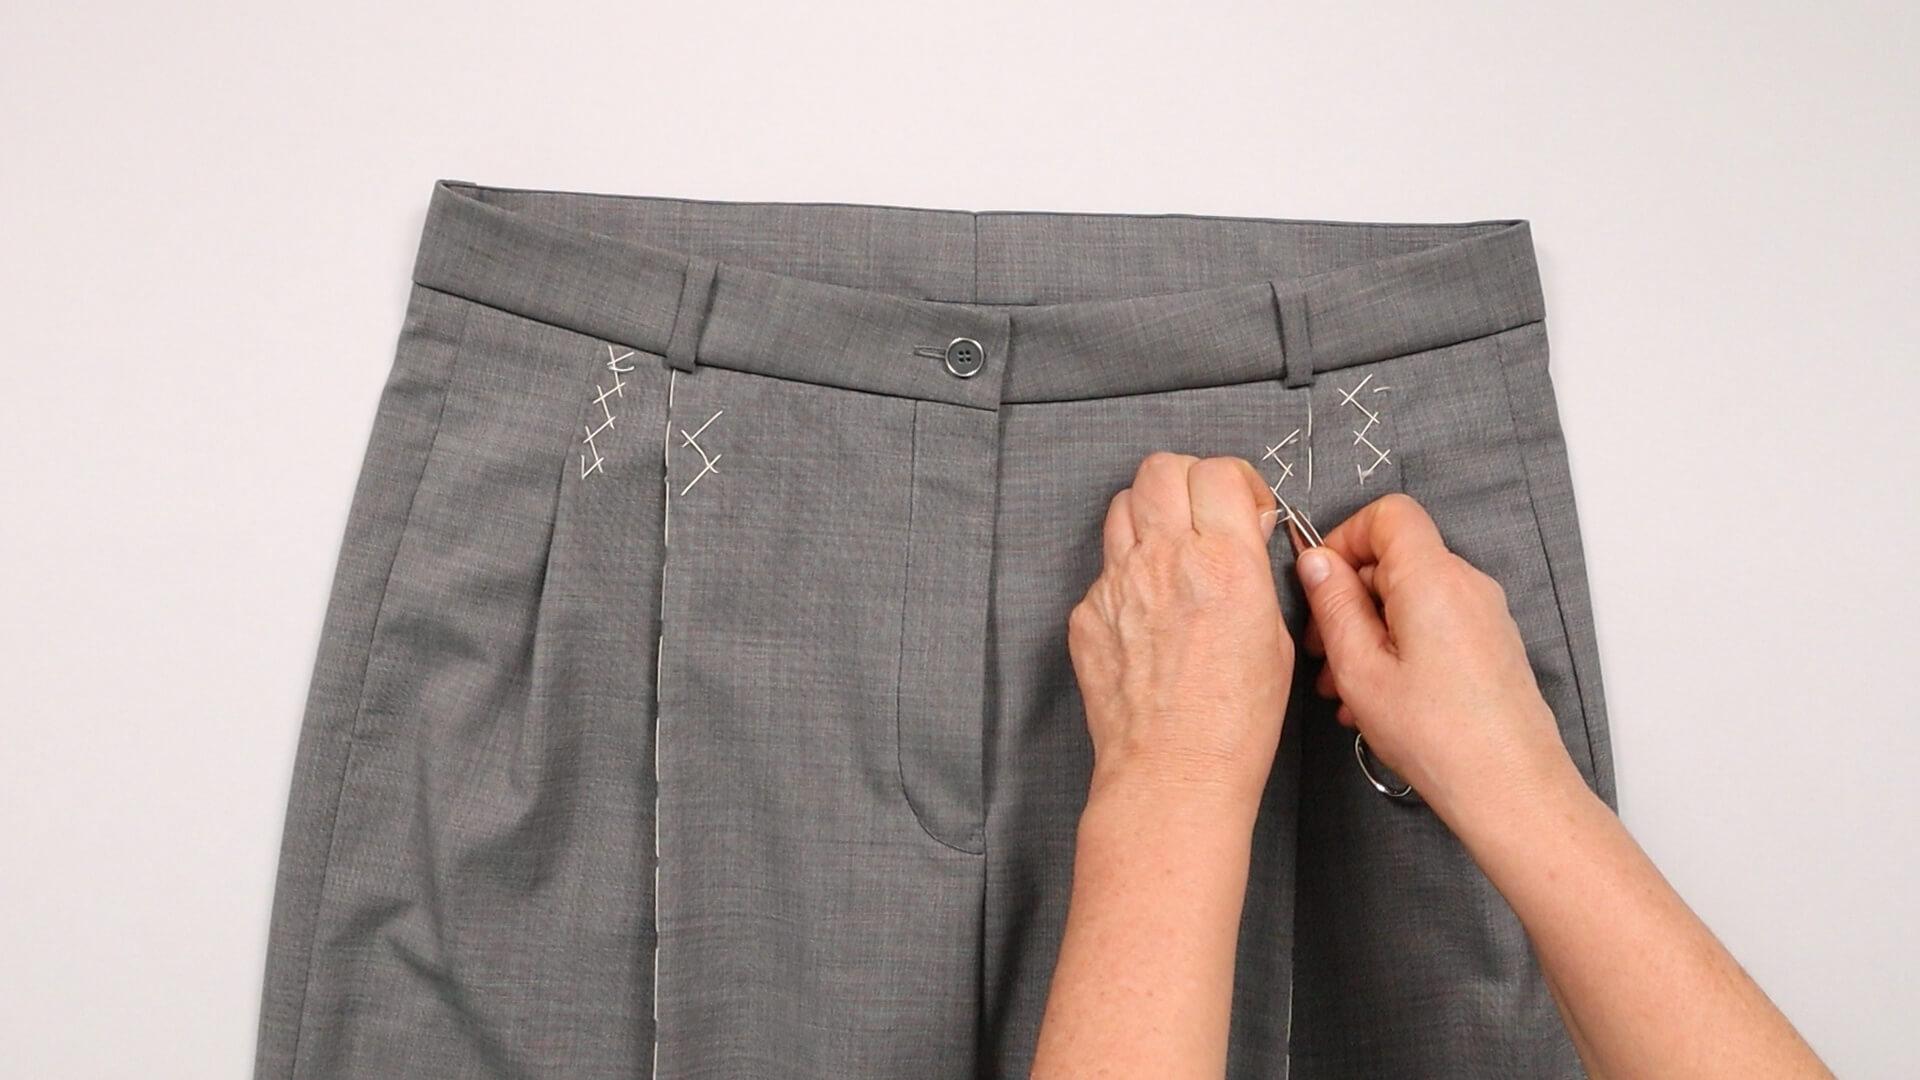
If you still have basting threads in the front trousers, you can now remove them before the trousers are ironed.
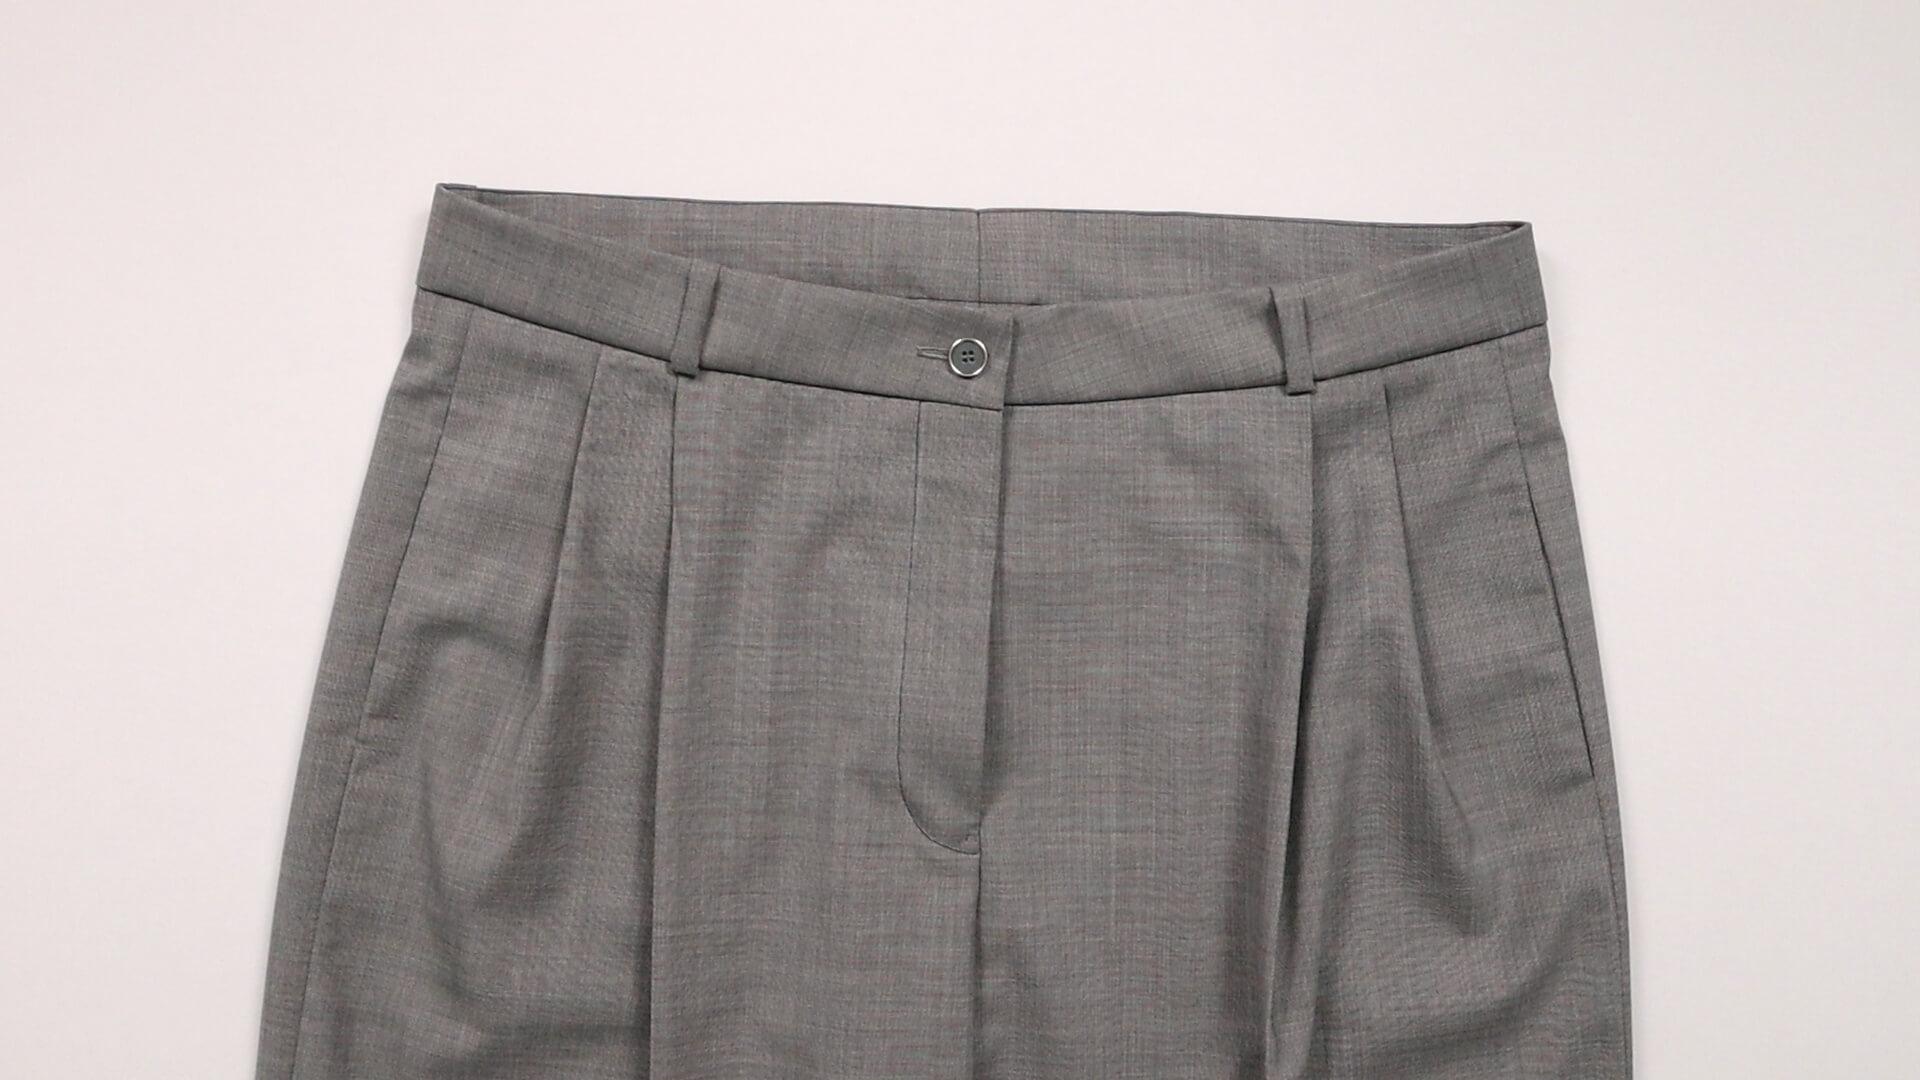
Congratulations! Your pants are now finished and will hopefully give you a lot of pleasure!
We would be delighted if you share your finished work on Instagram and tag us, using:
#smartpatternmarlene @smartpattern
If you’re not quite ready yet and perhaps want to start at the beginning, you’ll find some links here:


