Sew waistband on trousers #B03
In the following article, I explain how to sew a waistband with belt loops step by step using illustrated text instructions. I used a shaped waistband in the instructions. If you have chosen a version with a straight cut waistband, this will make no difference to the finish. Enjoy sewing!
1. This is required
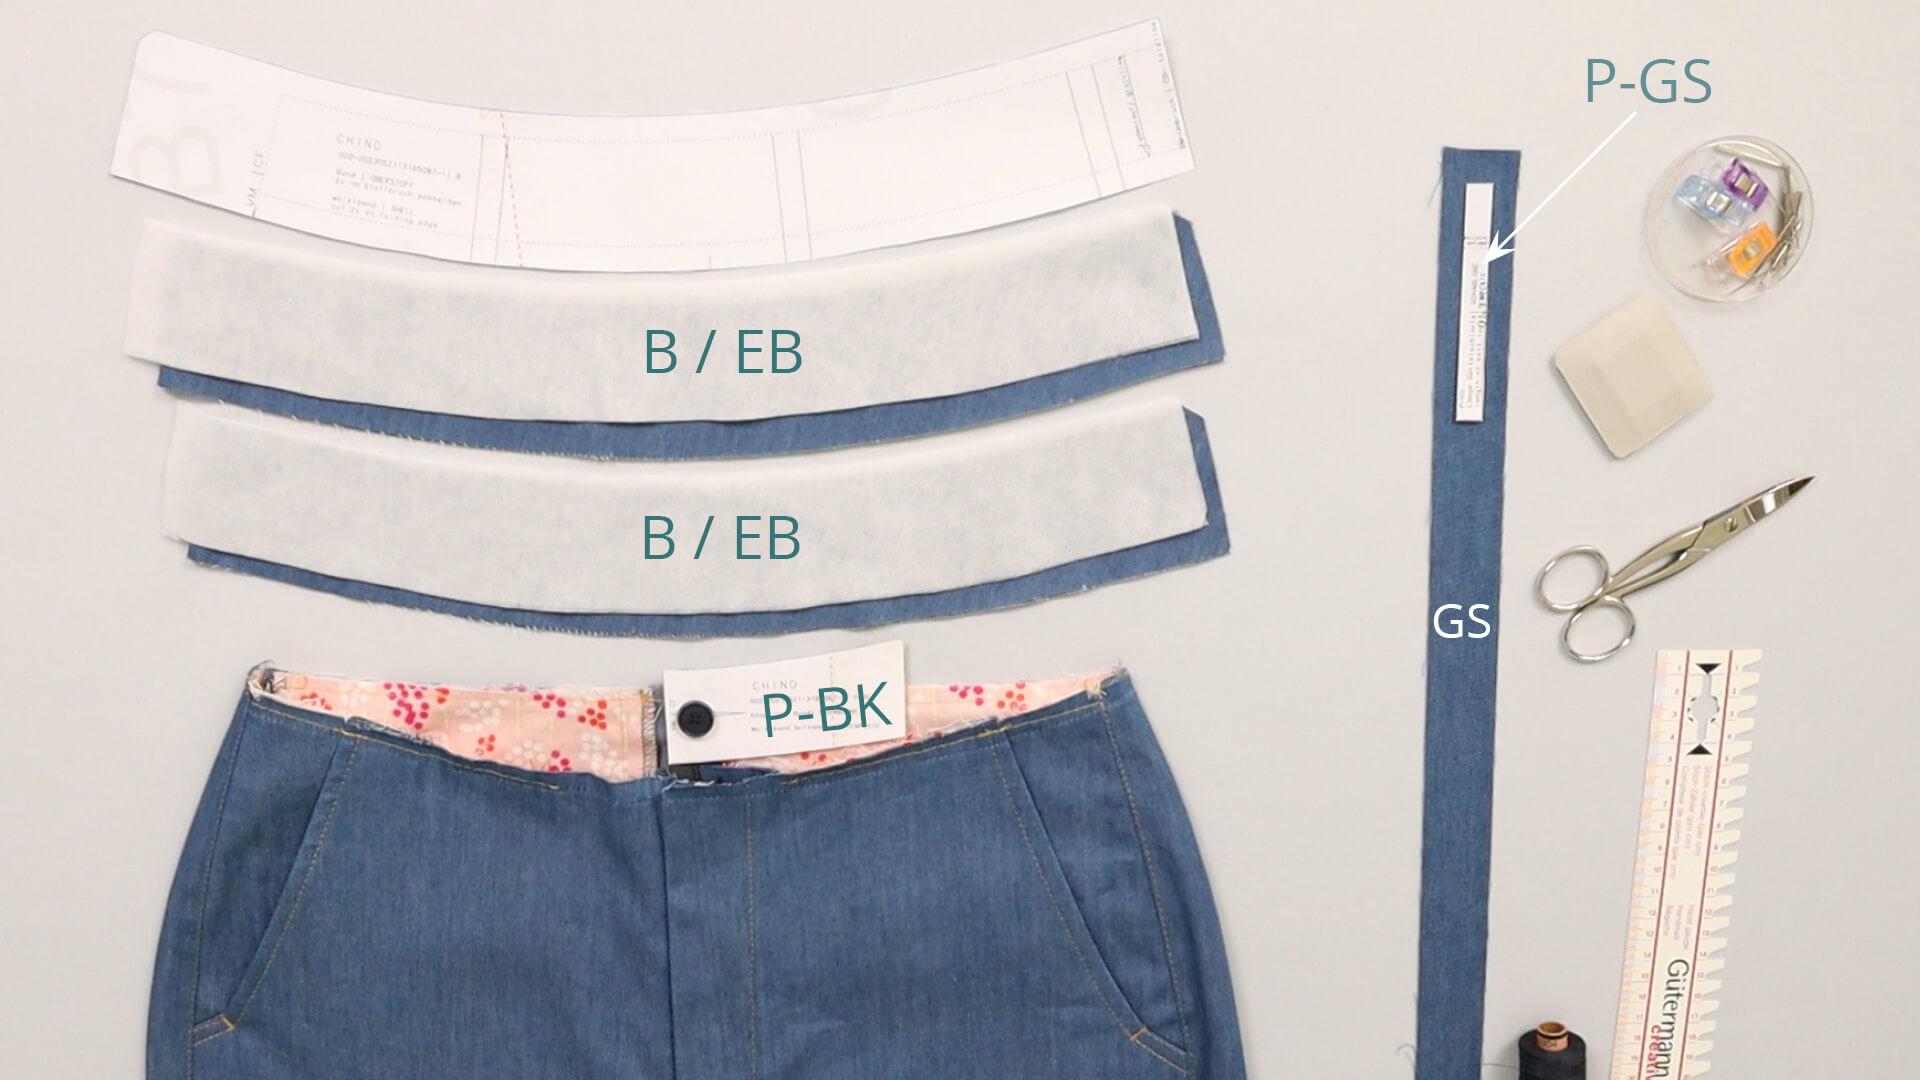
The basis is the prepared trousers including the fly and pockets and the seat seam and leg seams have been closed.
Pattern pieces made from main fabric:
- waistband (B)- 2x
- belt loop (GS) – 1x
Pattern pieces from interfacing:
- waistband (EB) – 2x 2 pairs
Paper pattern pieces:
- waistband (B) for the position of the belt loops
- buttonhole template (P-BK)
- belt loop template (P-GS)
Tools and aids:
- pins and/or clips
- scissors
- Chalk or fabric marker
- ruler
- hand needle for sewing on the button, if necessary
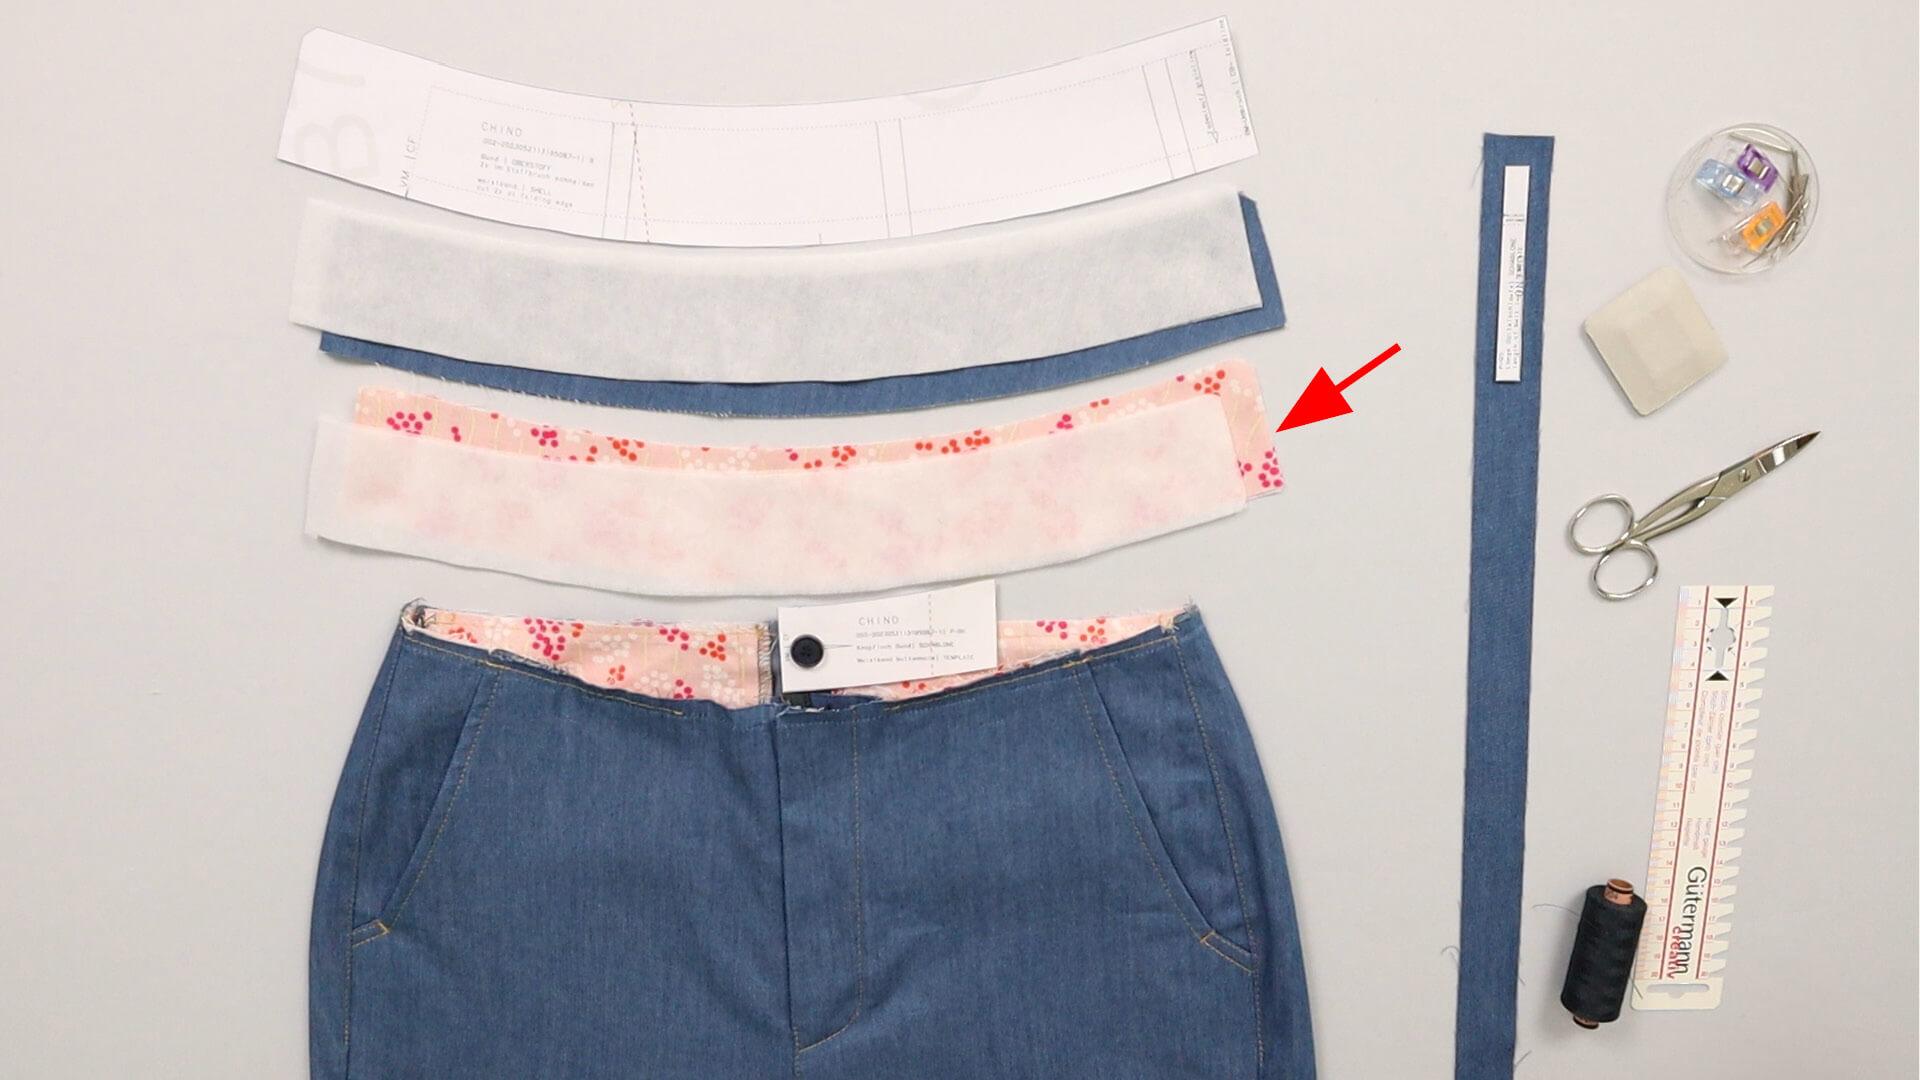
I will replace the inner waistband strip in this instructions and make it from the same material as my pocket bags rather than the outer fabric. This is a nice detail and you can better distinguish between the inside and outside of the waistband. If you are working with a pattern that is intended for elastic material, the fabric for the inner waistband strip must have the corresponding stretch properties.
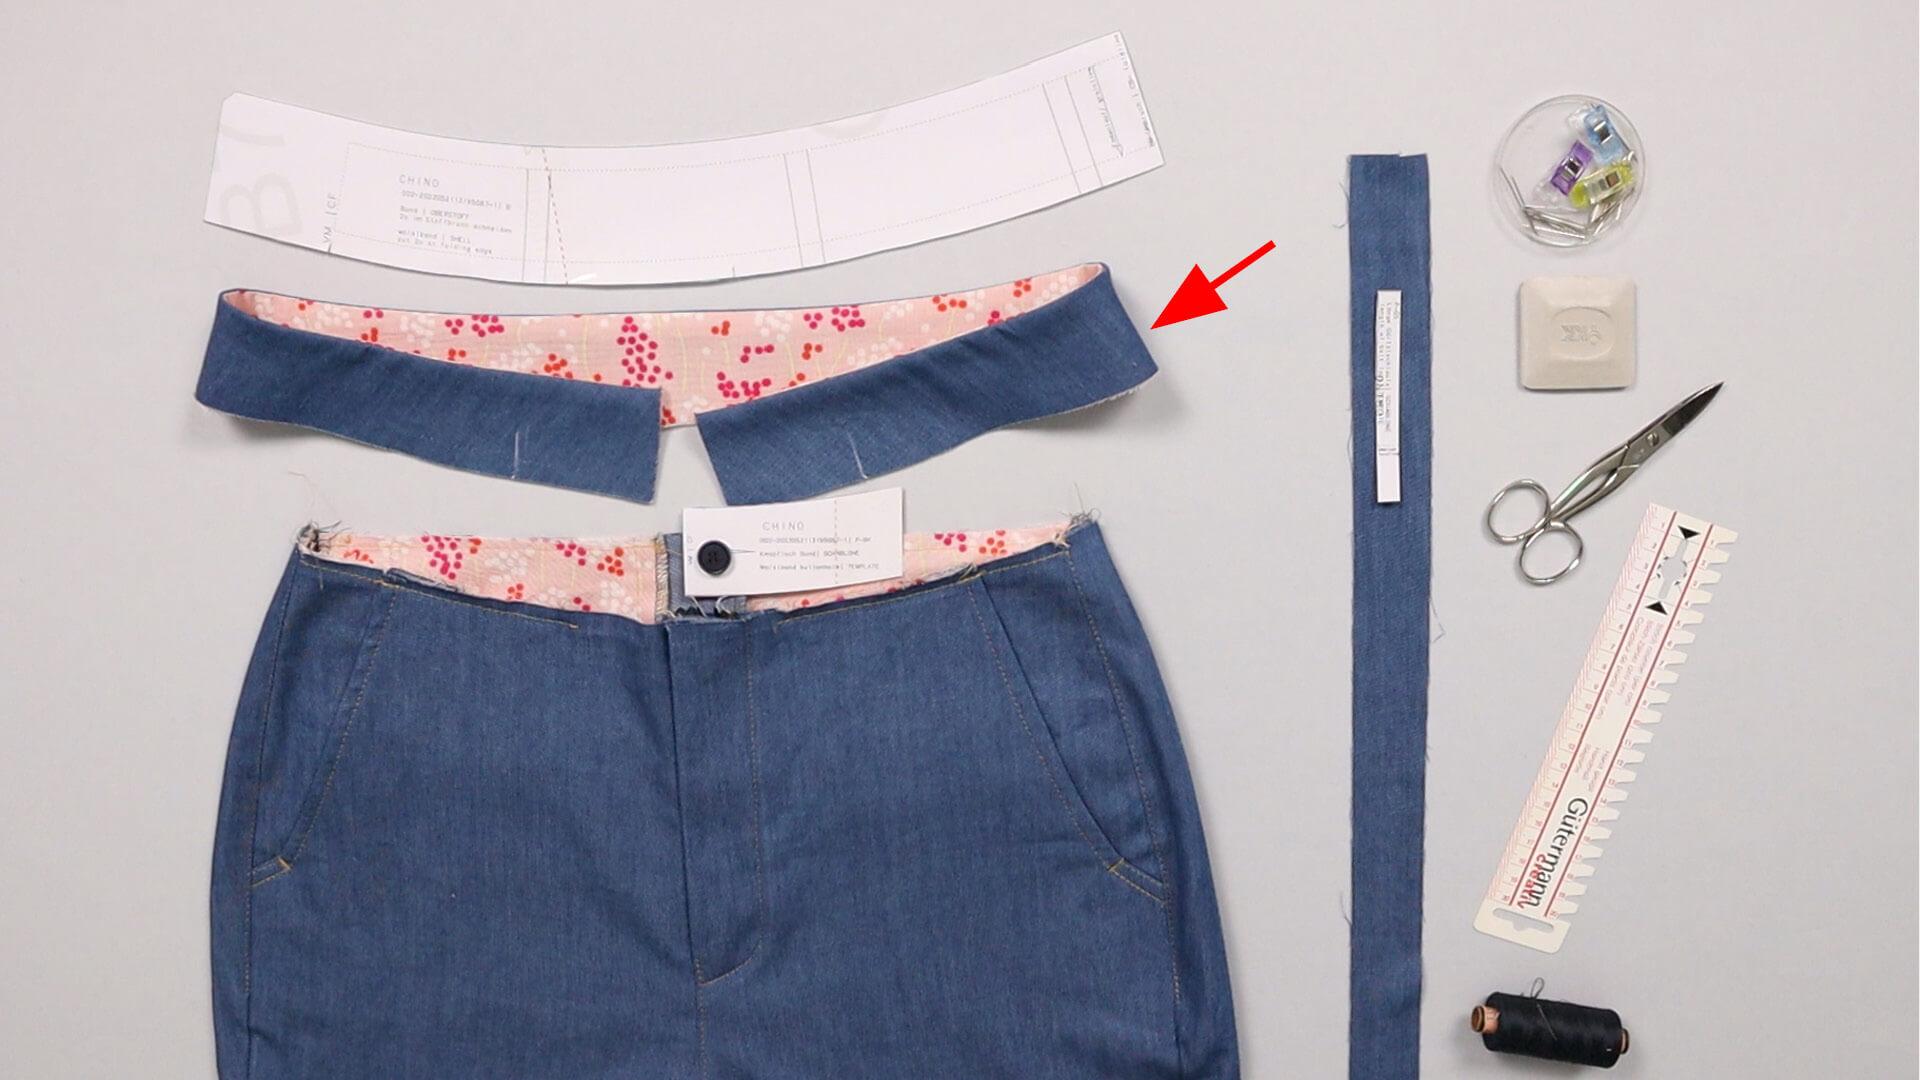
If you have followed the fitting instructions, your waistband is already prepared, as you can see here.
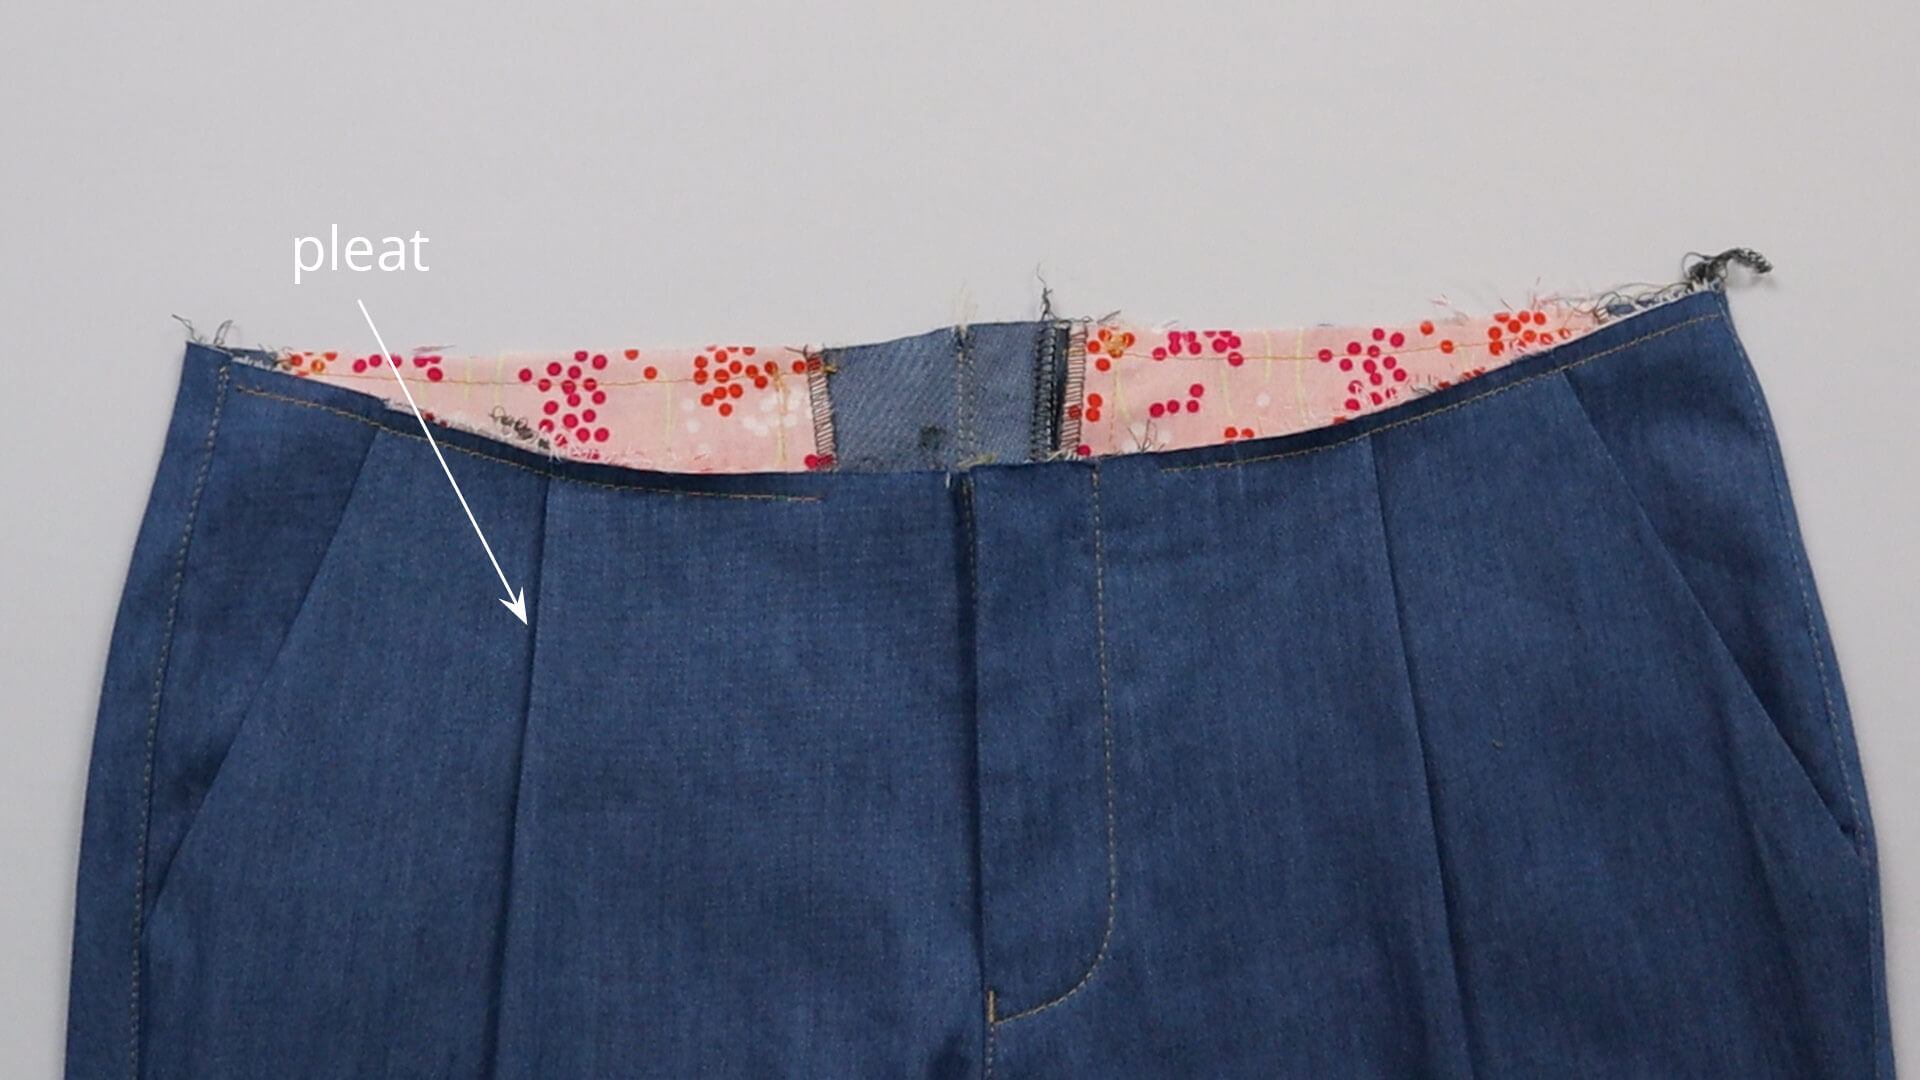
If you have chosen a trouser style that has pleats or darts at the waistband edge, these must be placed or sewn down before the waistband is attached.
2. Prepare the belt loops
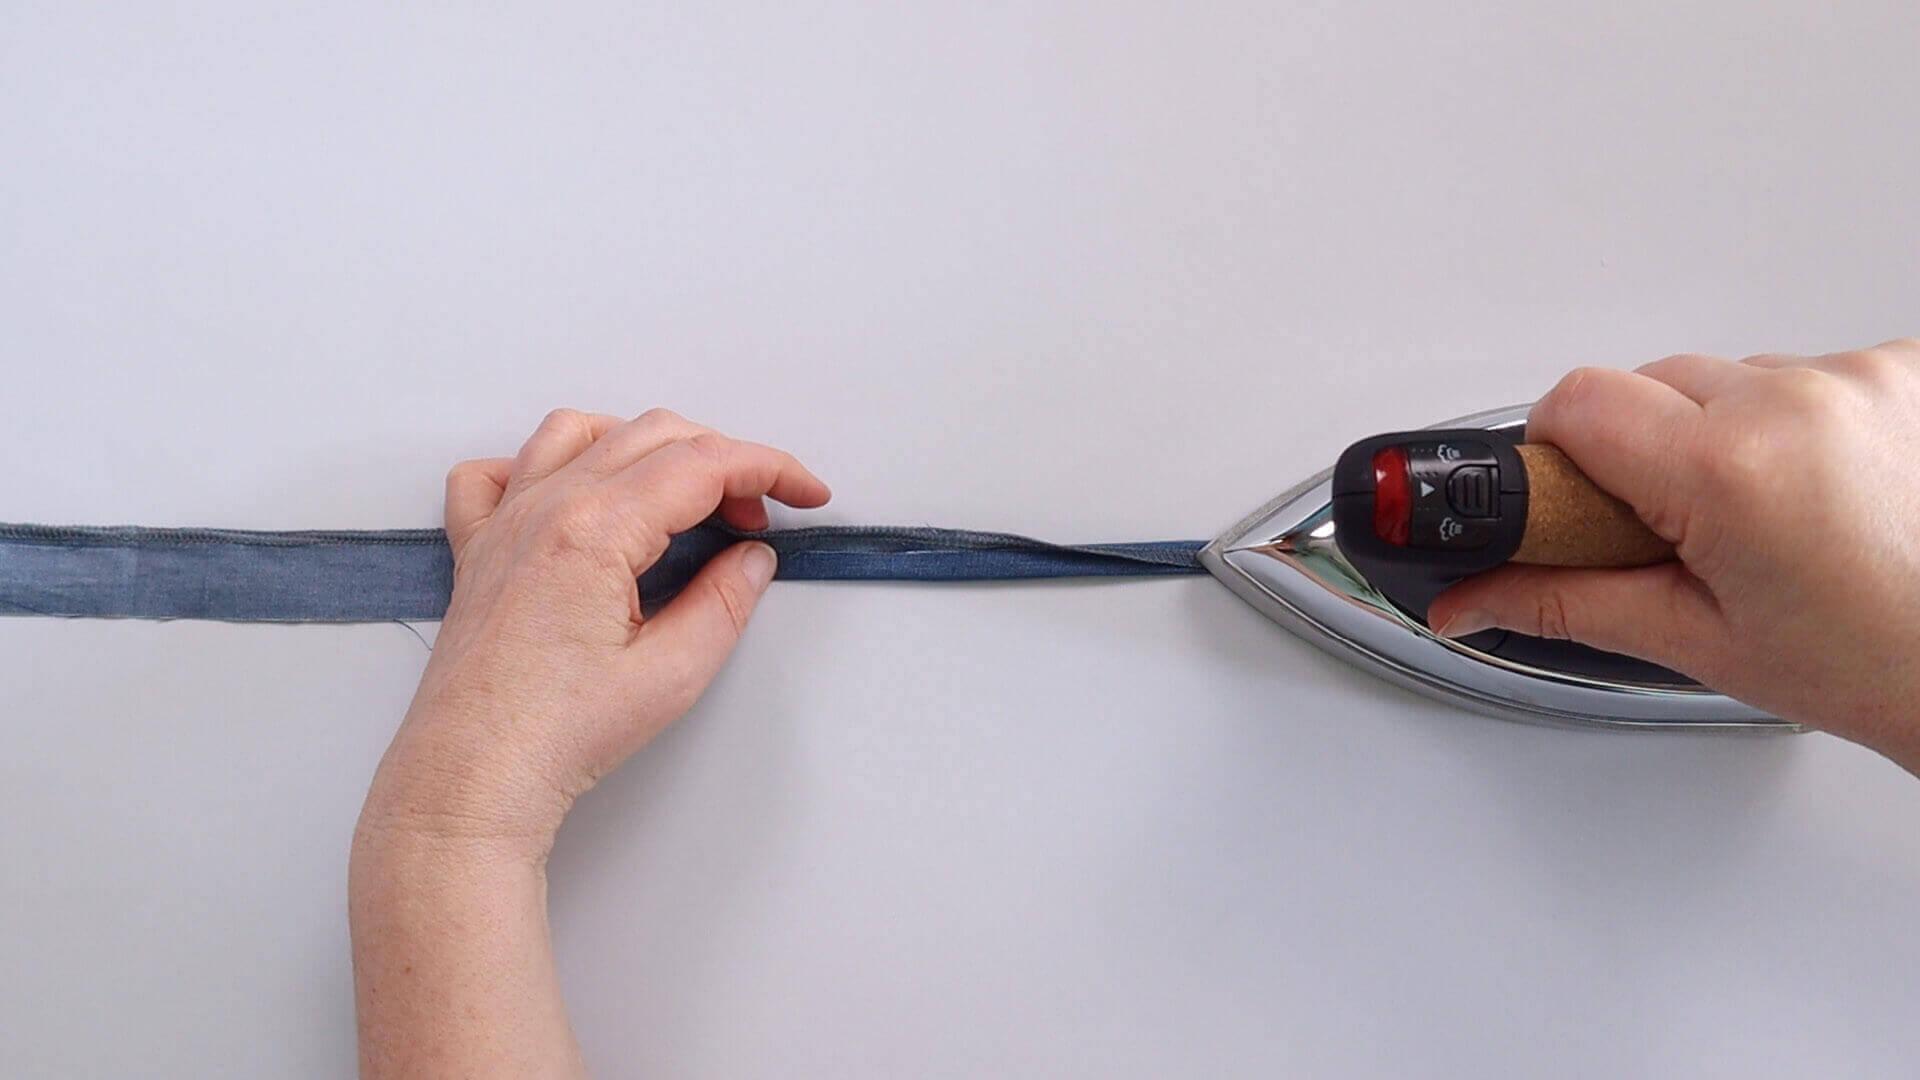
Before sewing on the waistband, I prepare the belt loops. I have already serged one long side of the strip with the overlocker. I place the strip wrong side facing up and fold over the long edges by 1 cm, making sure the open cut edge is on the inside. I topstitch the strip from the outside lengthwise right in the middle.
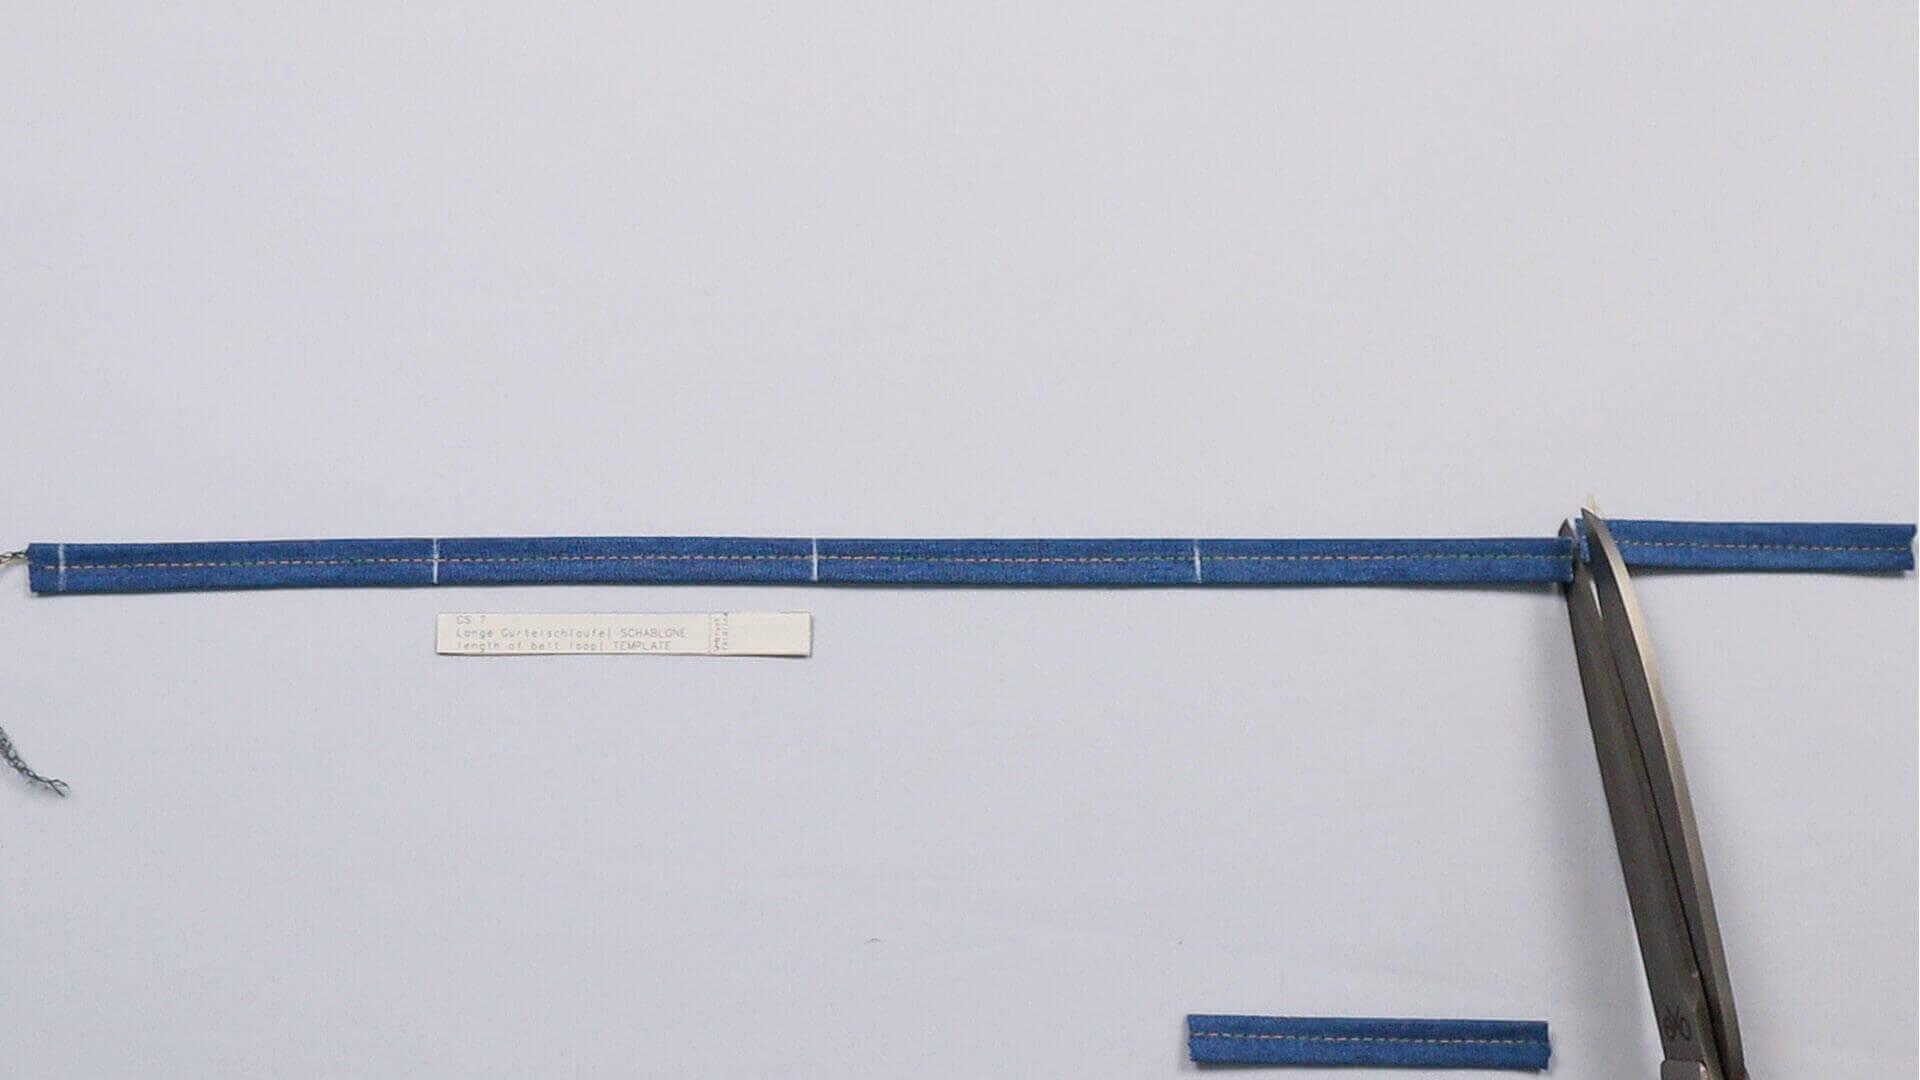
Now I cut six belt loops from the long strip, using the template for the belt loop to mark the appropriate cutting length.
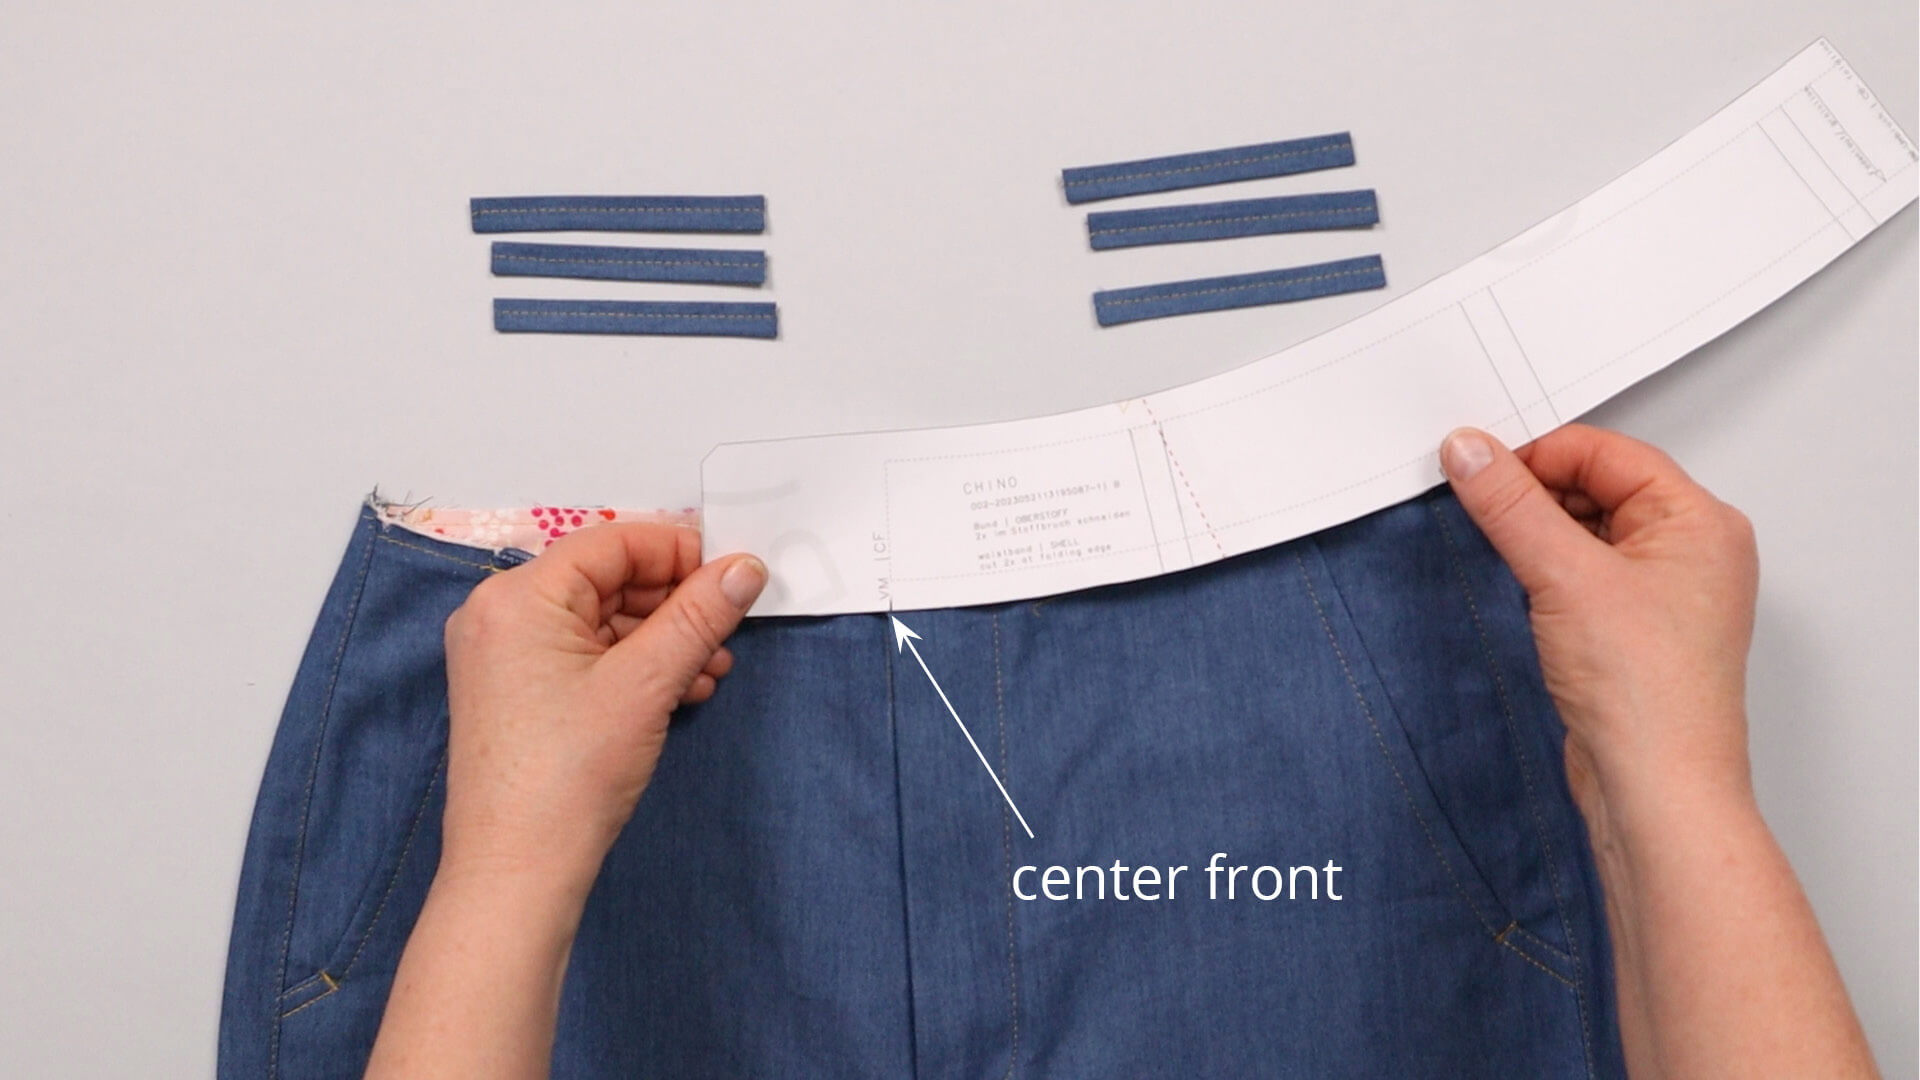
I pin the strips to the pants, right sides facing. For the positioning, I place the pattern of the waistband above the center front and transfer the positions of the belt loops to the trousers.
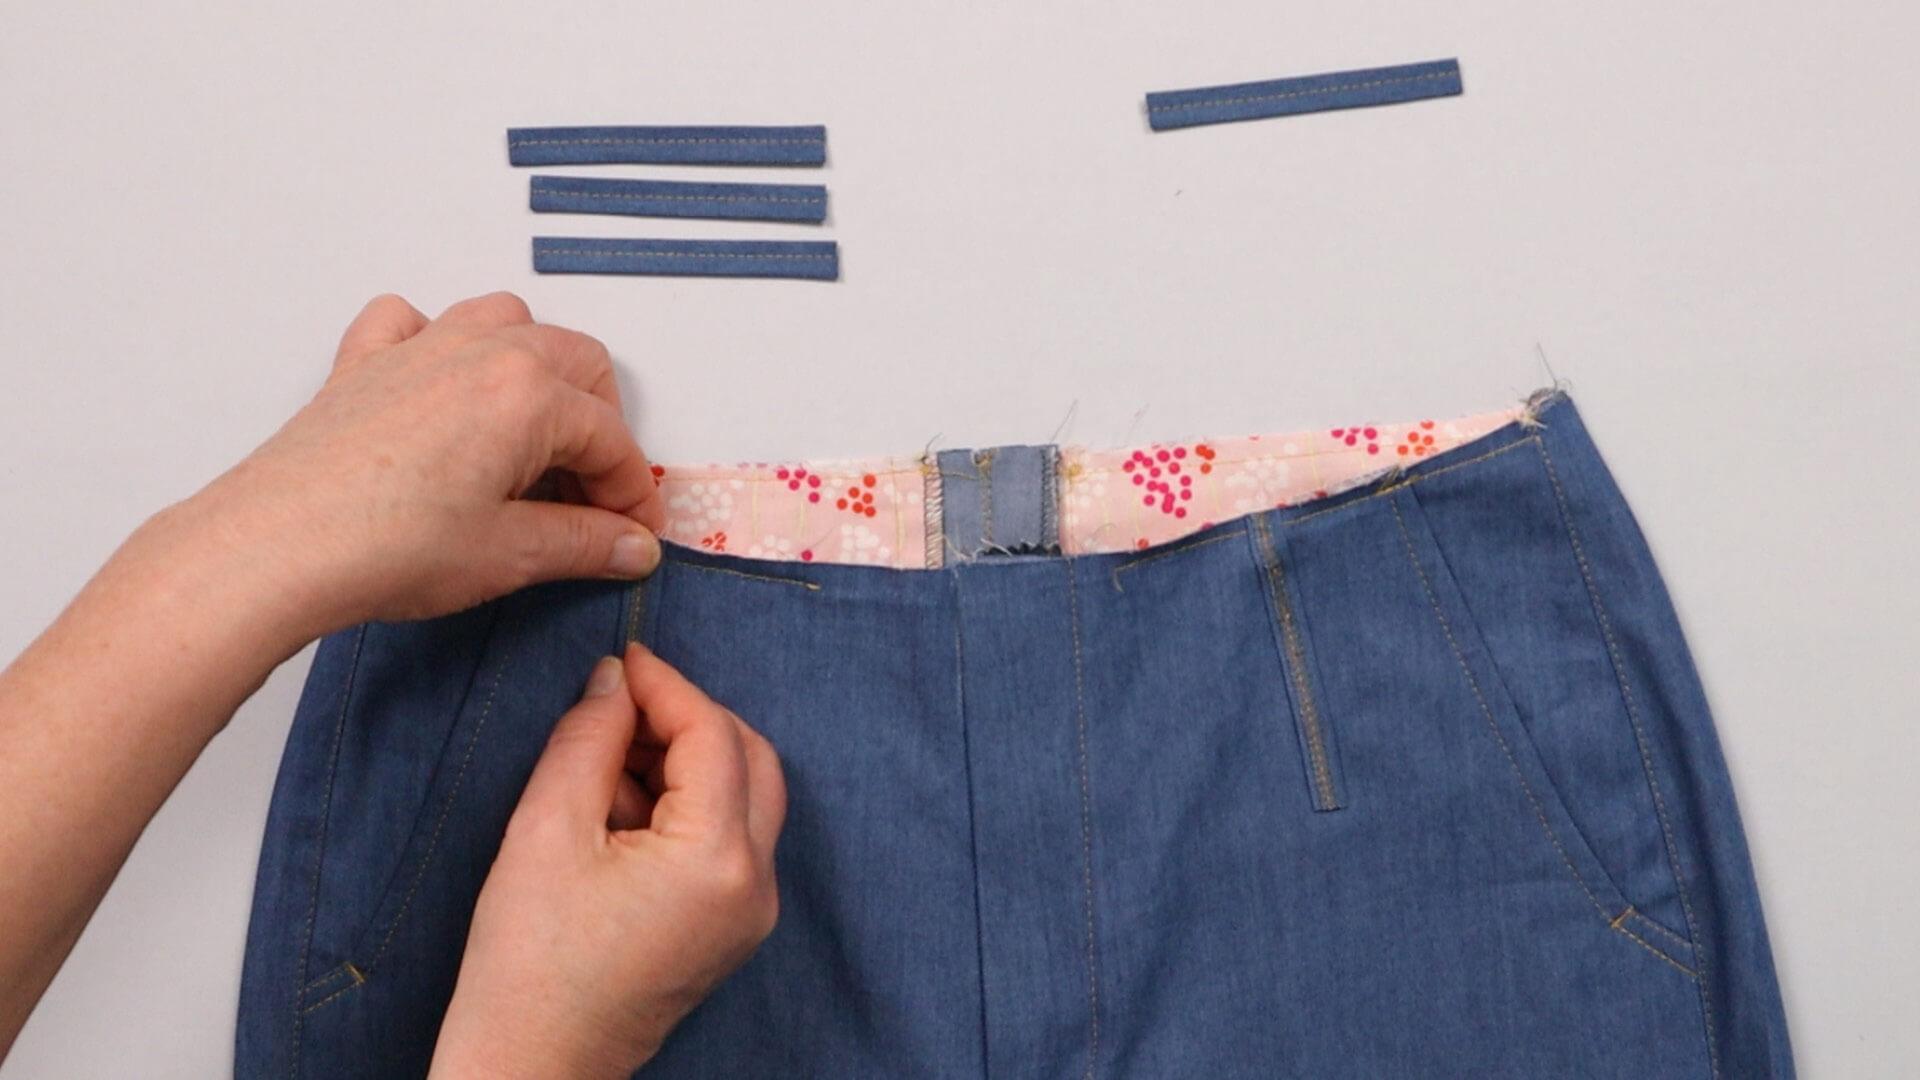
You can pin the belt loops in place or secure them within the seam allowance to prevent them from slipping.
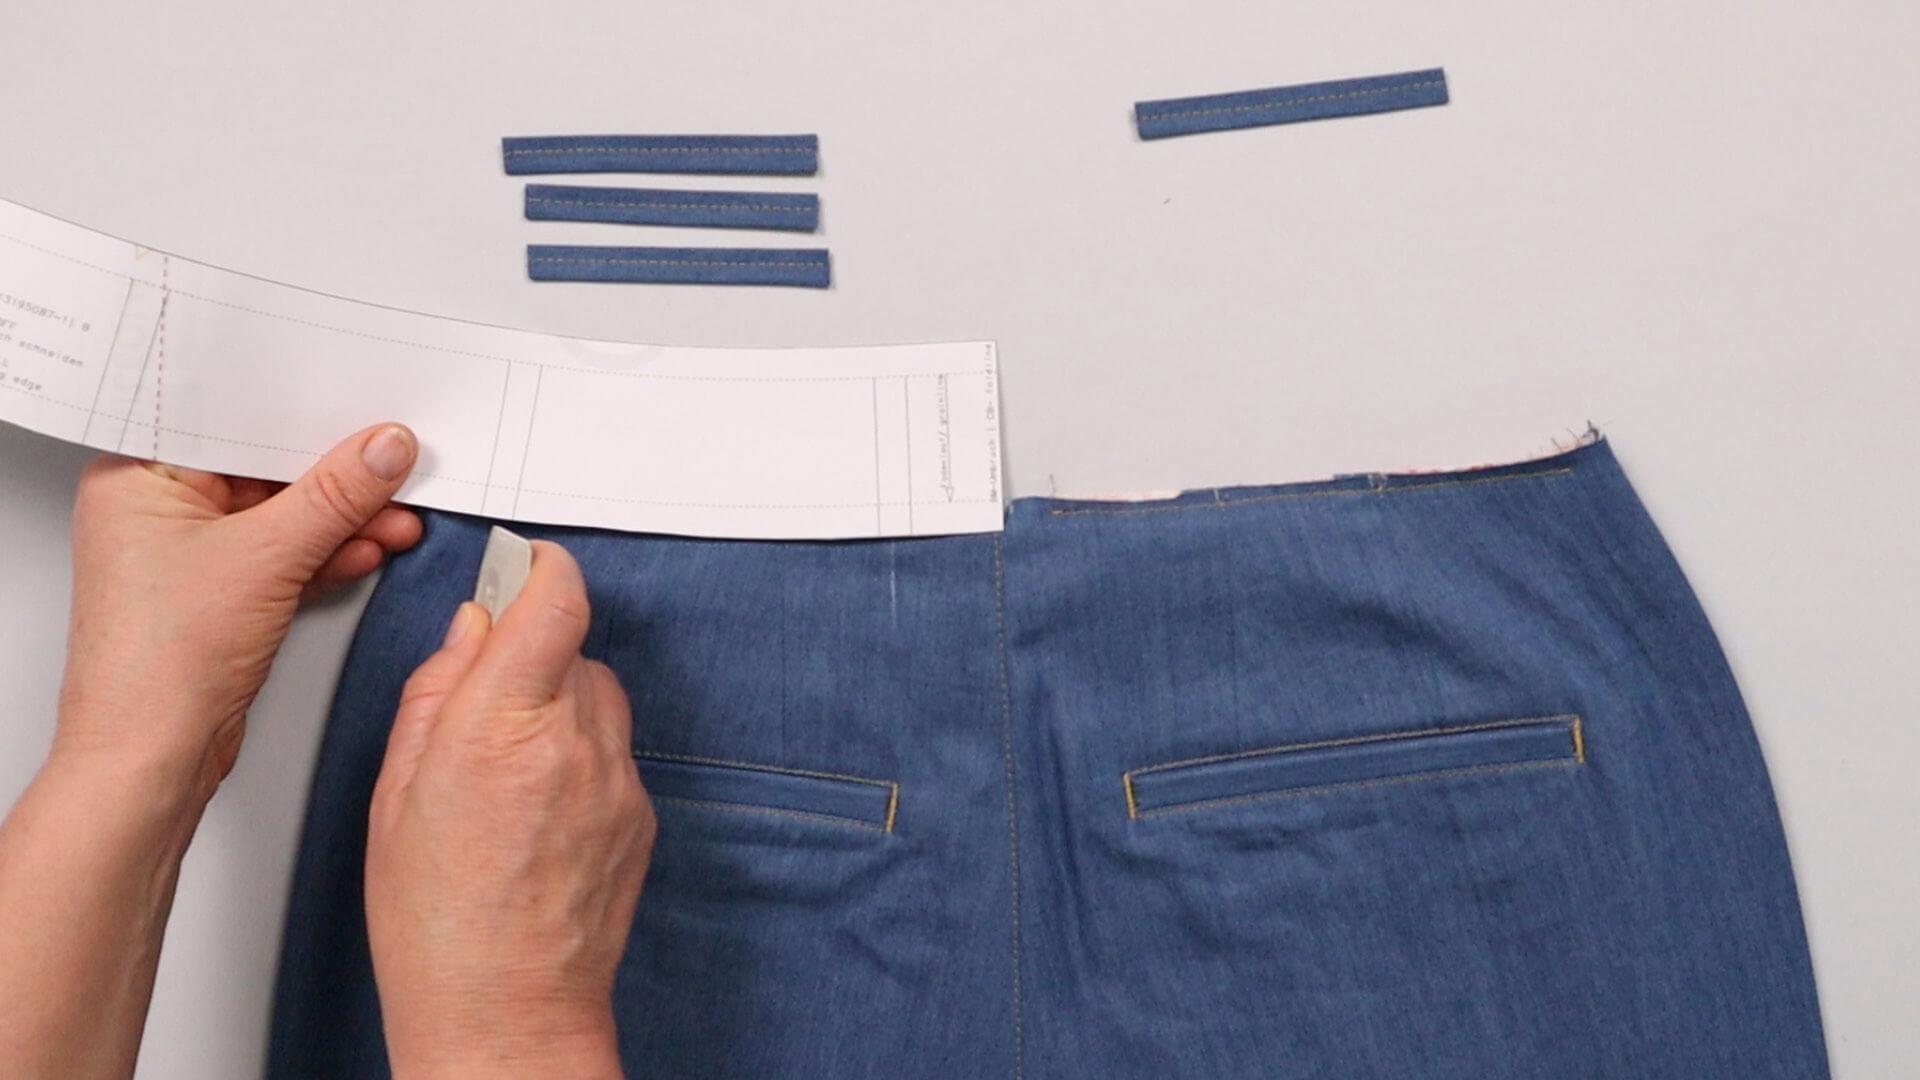
I proceed in the same way with the distances from the center back and side seam to the belt loop. According to your personal preferences, you can e. g. attach only one belt loop to the center back and sew it on at an angle.
3. Prepare the waistband
If you have followed the instructions Preparing trousers with wasitband for fitting #F02, you can continue further down. If you have skipped the fitting, follow these instructions.
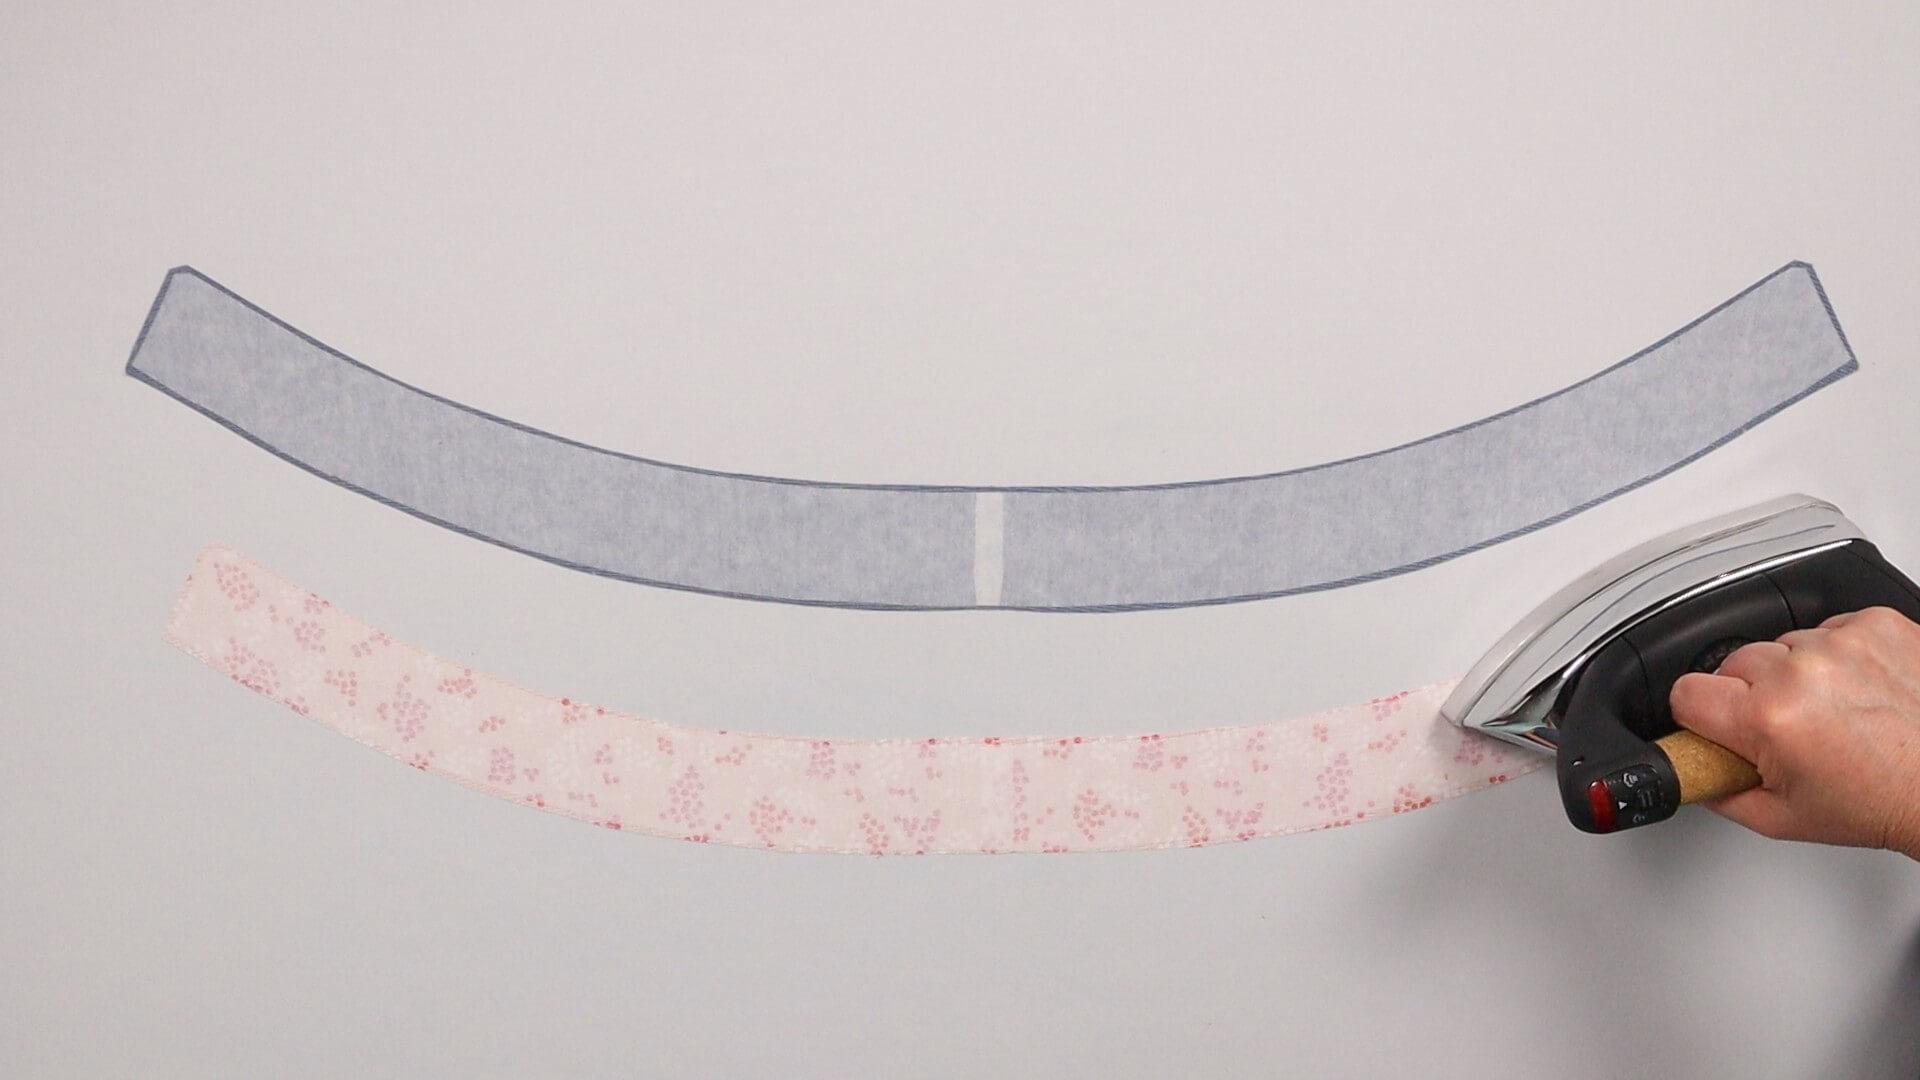
Before the waistband can be attached, I prepare it. First I iron the interfacing. If you are using a sturdy fabric, it is not absolutely necessary to reinforce the inner waistband side as well. However, this is a matter of taste and depends on whether you prefer the waistband to be stable or softer.
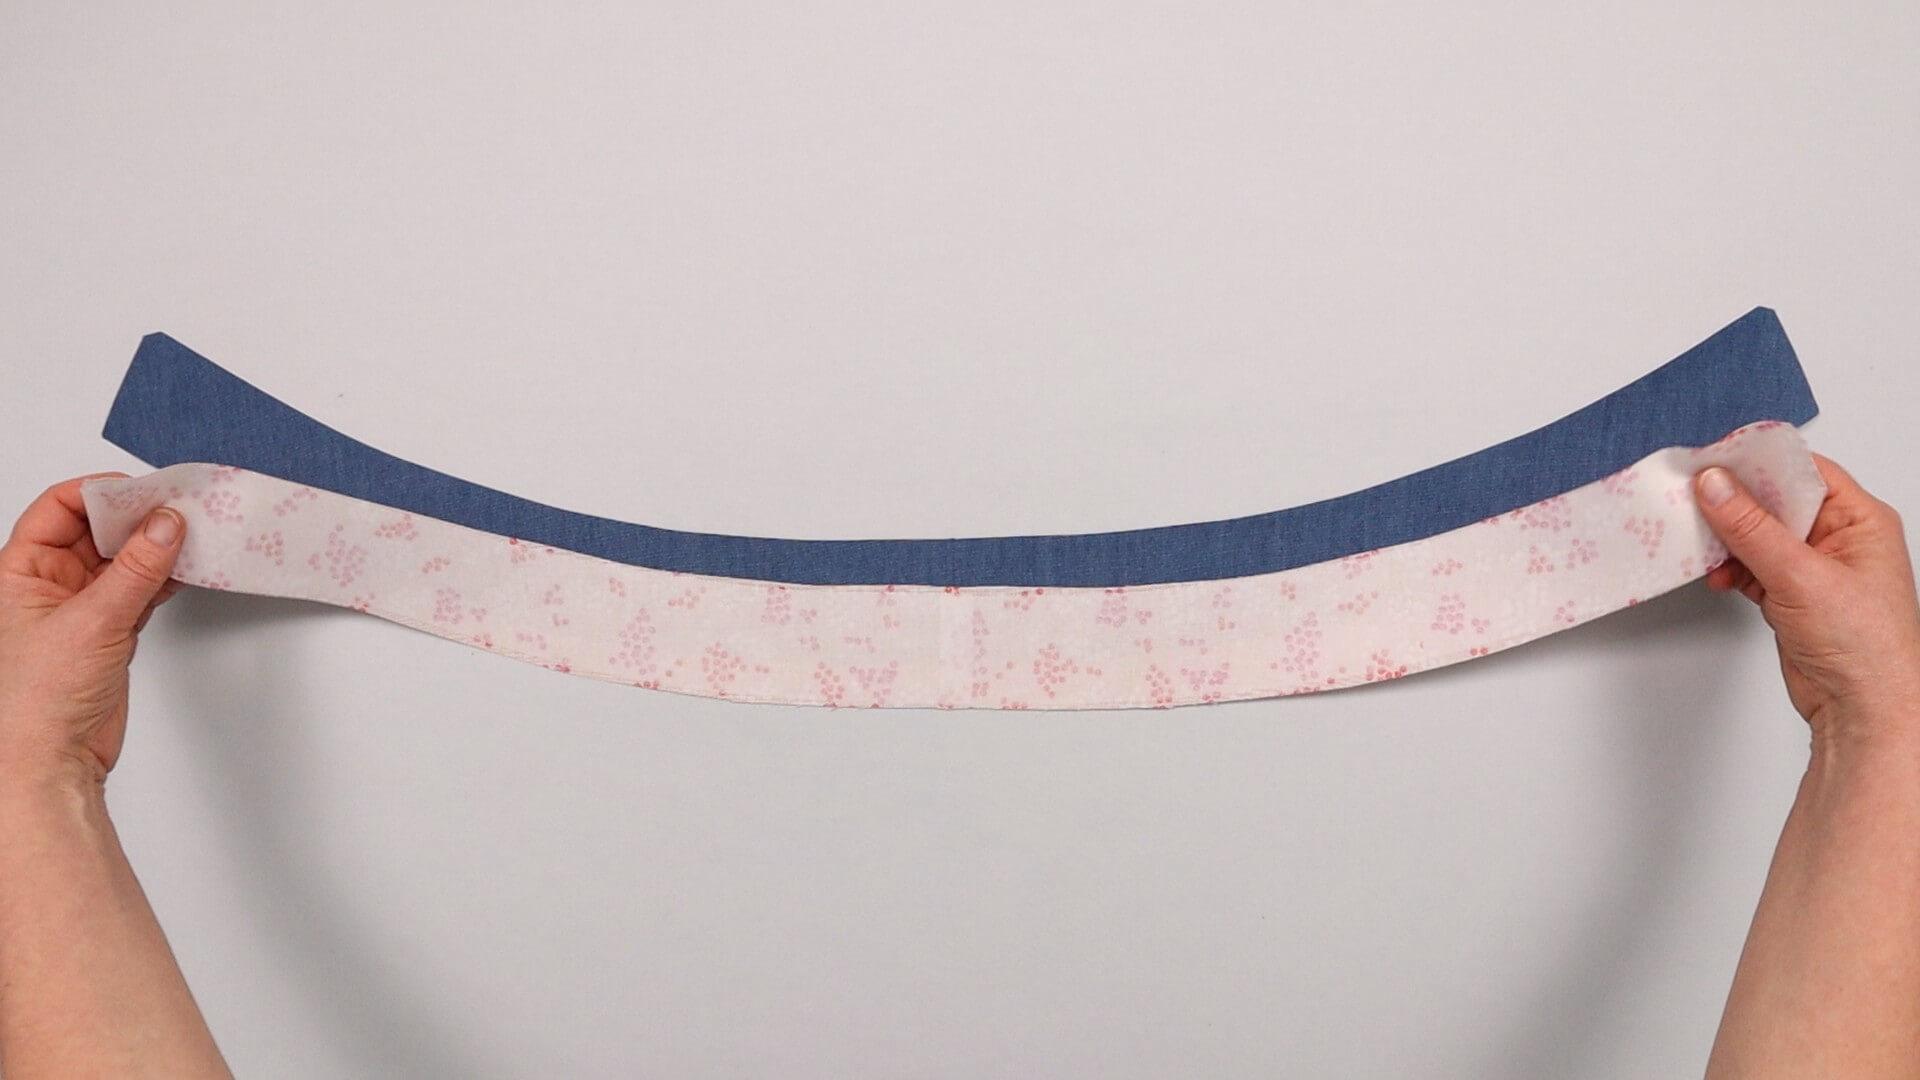
I place the strips right sides together and pin them in place at the top edge.
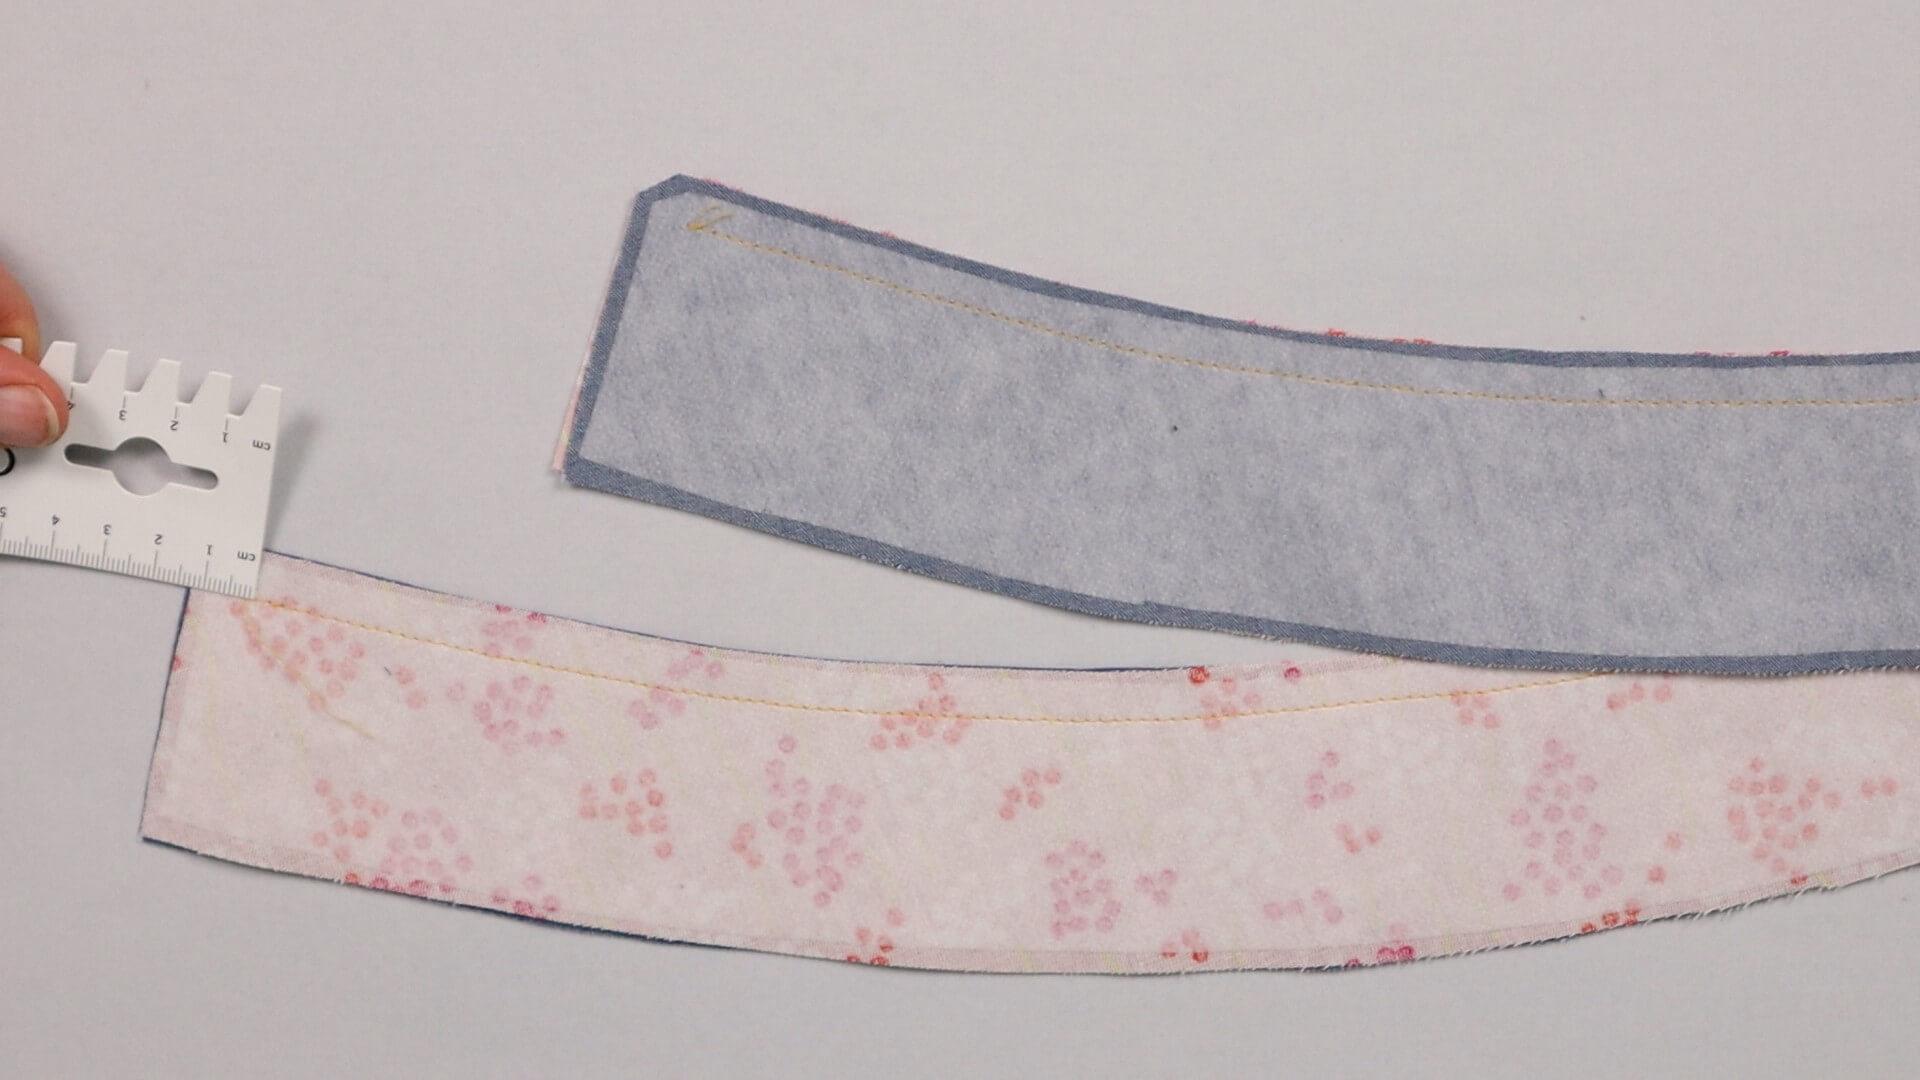
Since this seam will not be undone, I sew the top edge by 1 cm seam allowance using a normal stitch length. I start and end approx. 1.5 cm before the shortedges. The beginning and end are not secured, as a short piece may have to be undone later, depending on how the corners are worked.
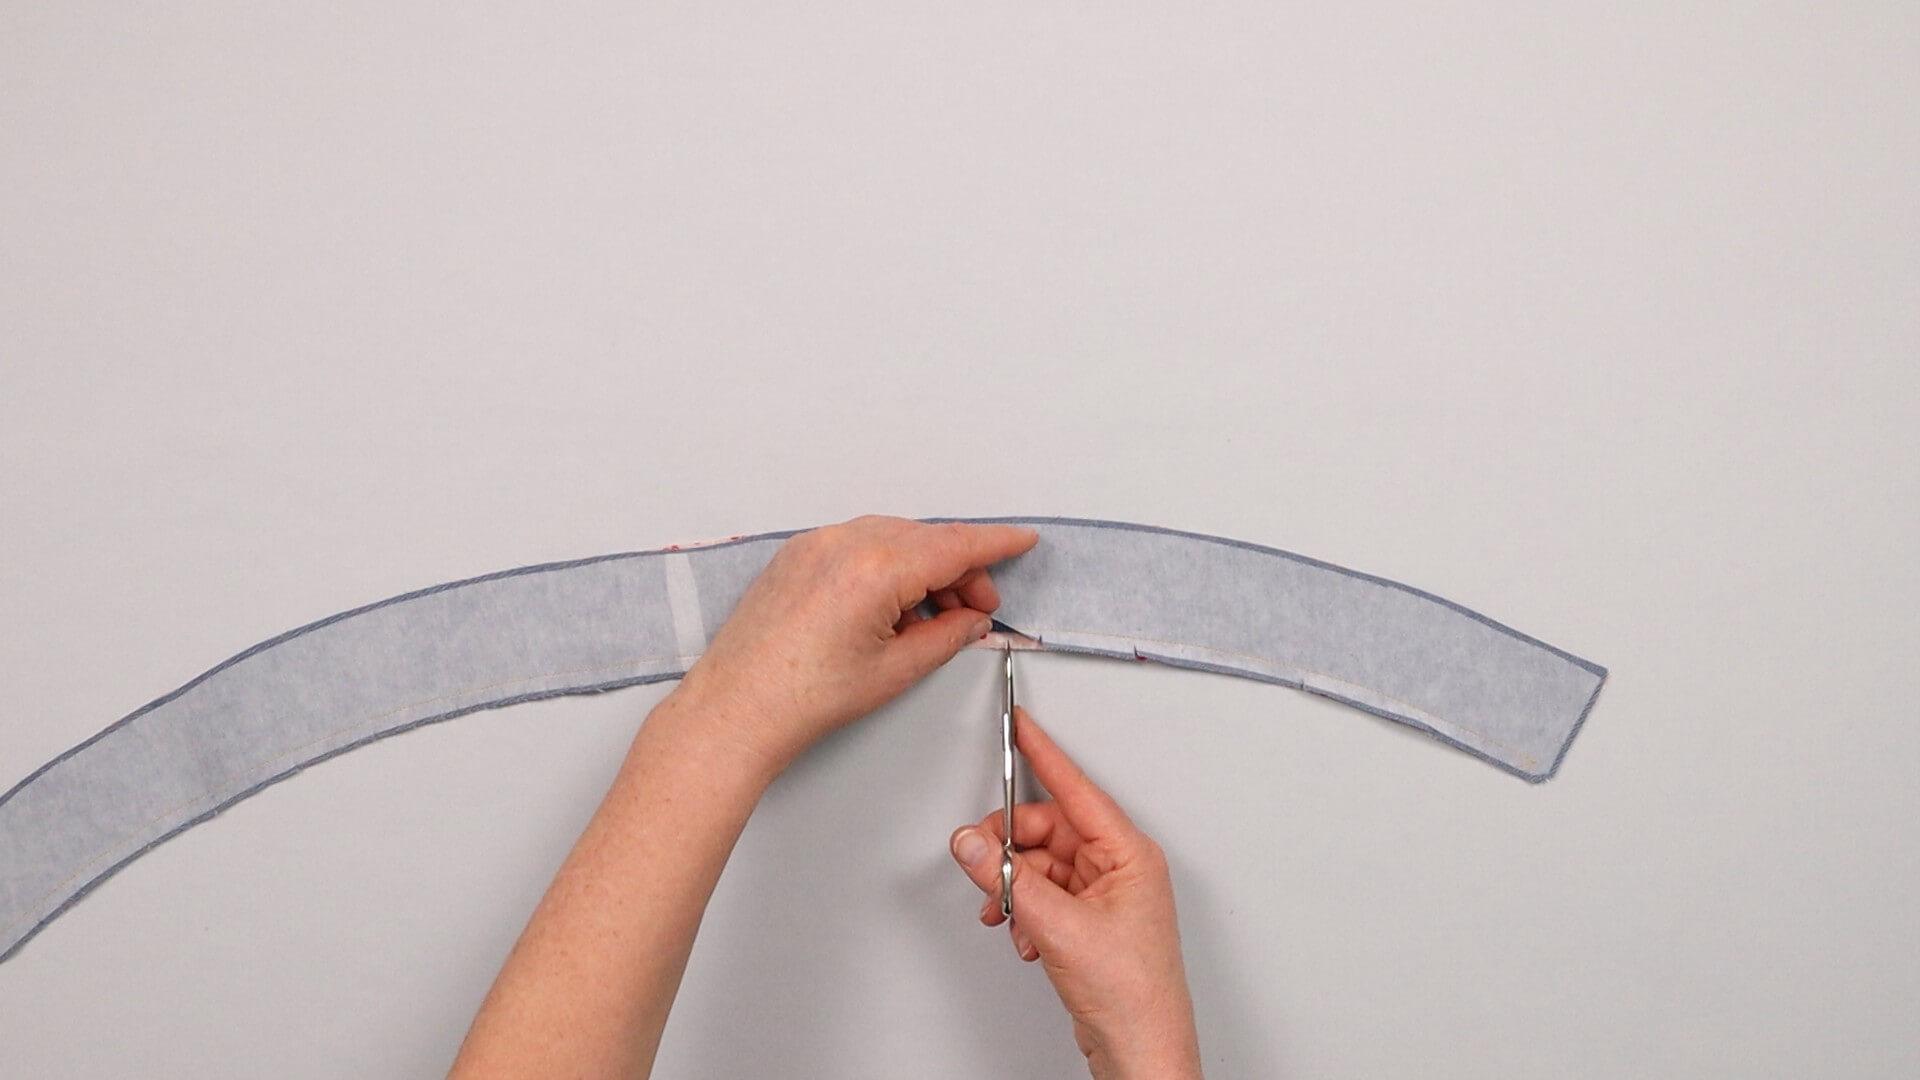
Tip
I cut into the seam allowance of a shaped waistband at intervals of a few centimeters so that it does not stretch at the top edge. Preventing the clips from being visible on the outside, it makes sense to offset them slightly in the two layers.
You can skip this step if you have opted for a straight waistband.
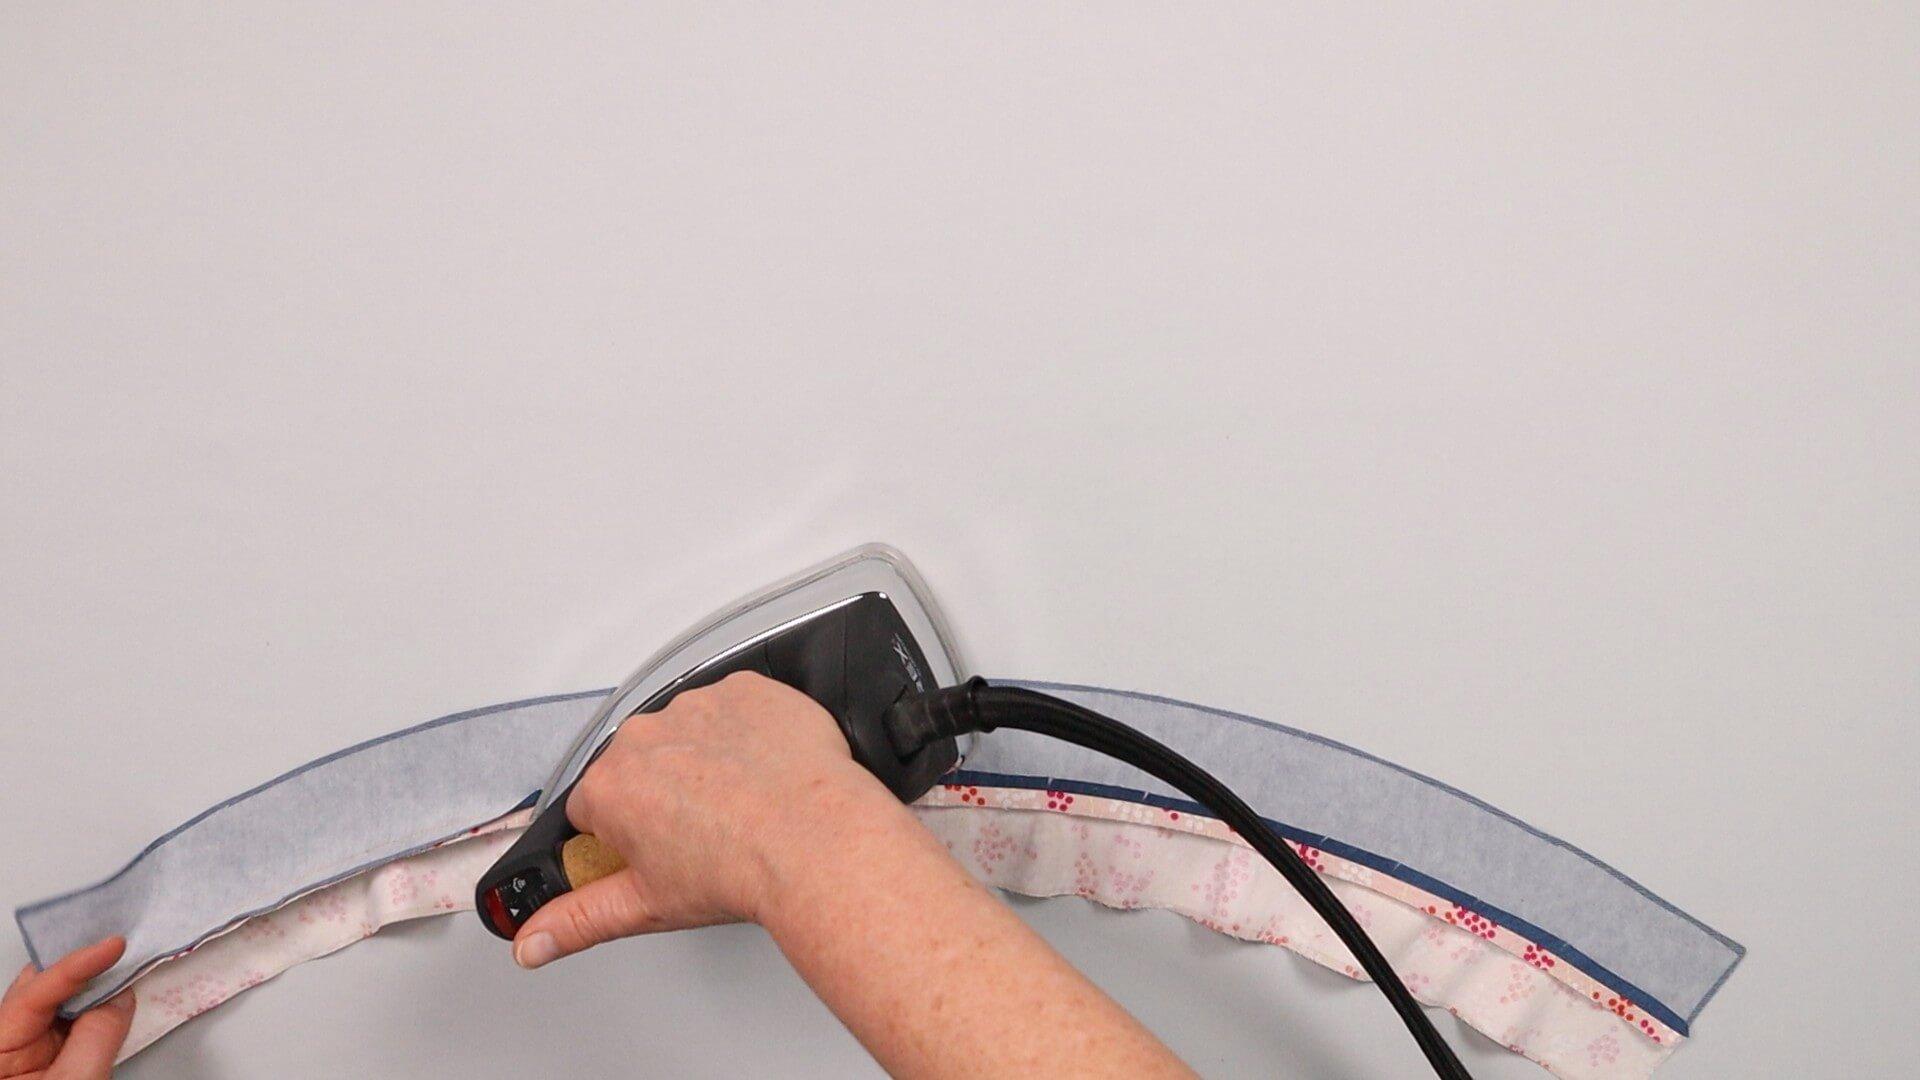
Next, I press the seam allowances open at the top edge of the waistband.
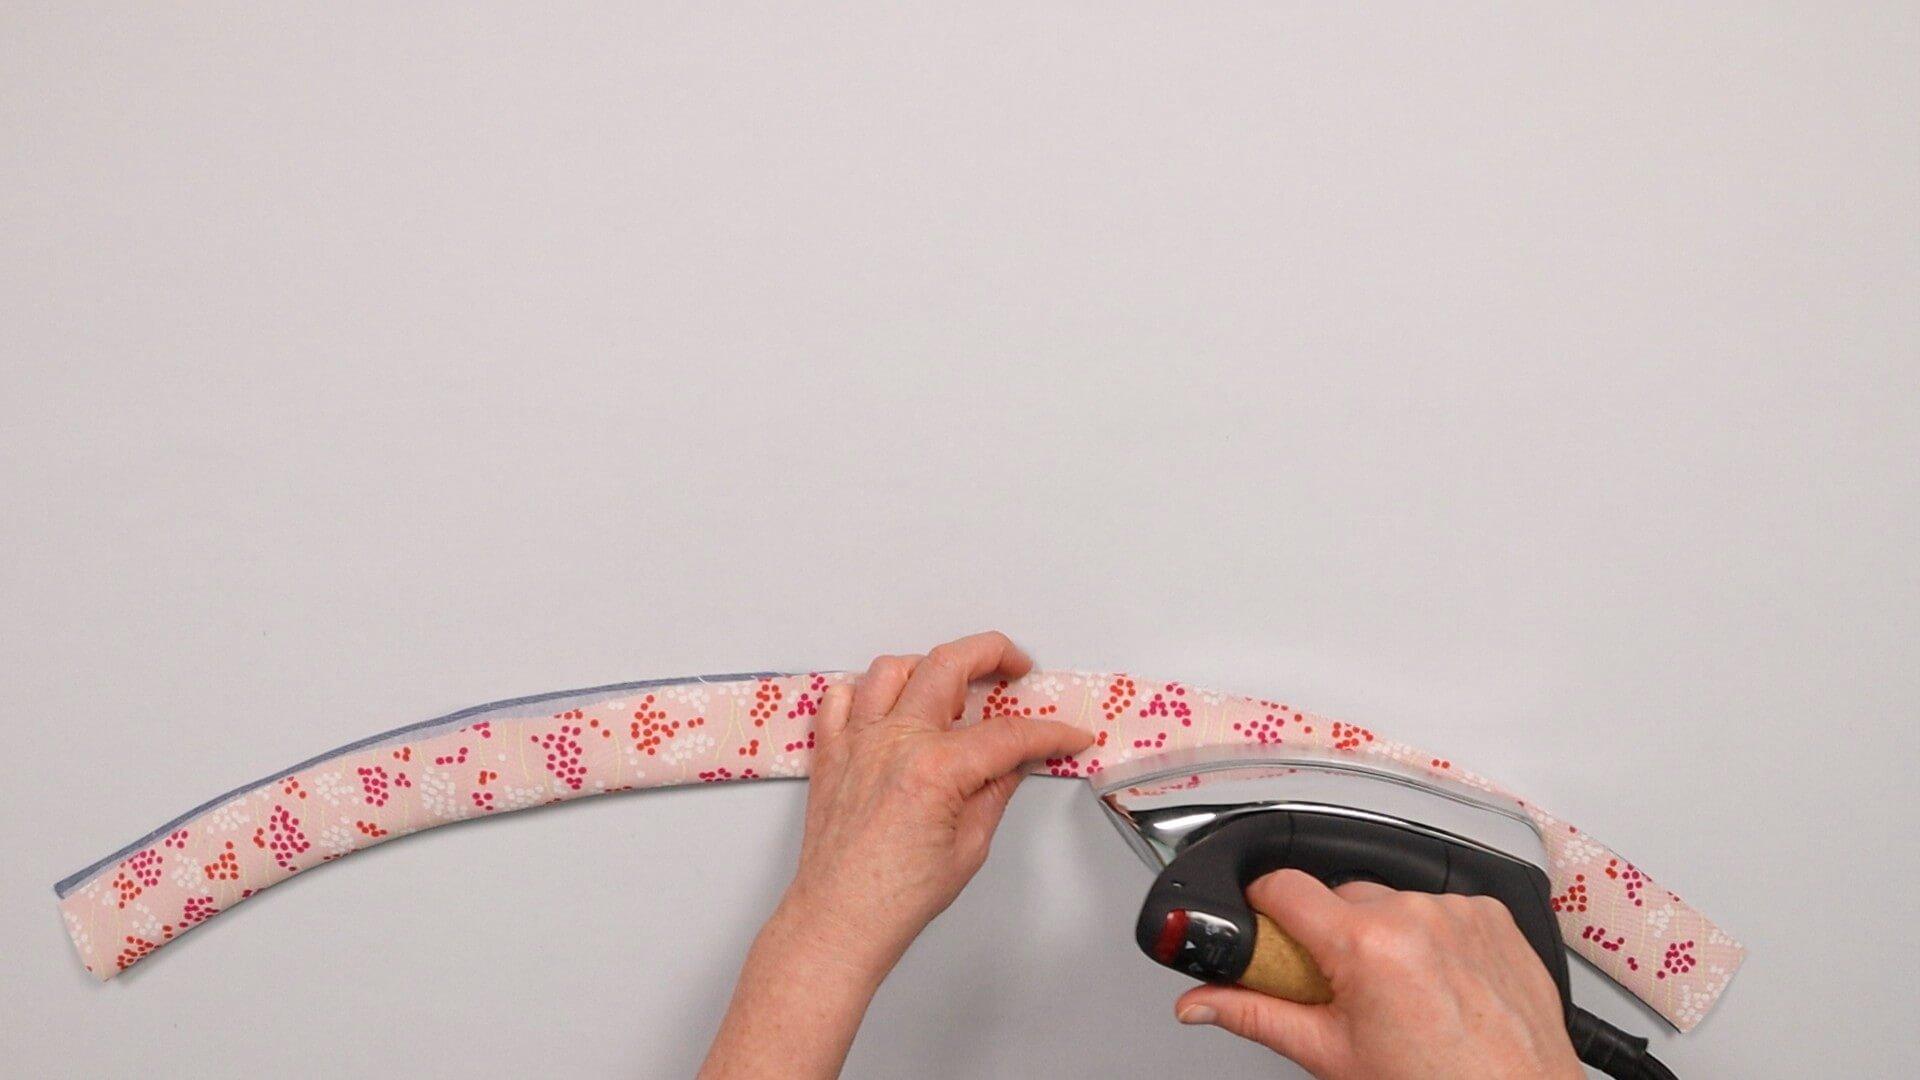
Then I turn the waistband, wrong sides facing, and press the seam flat from the inside. I make sure that it lies slightly inwards at the top and does not push to the outside.
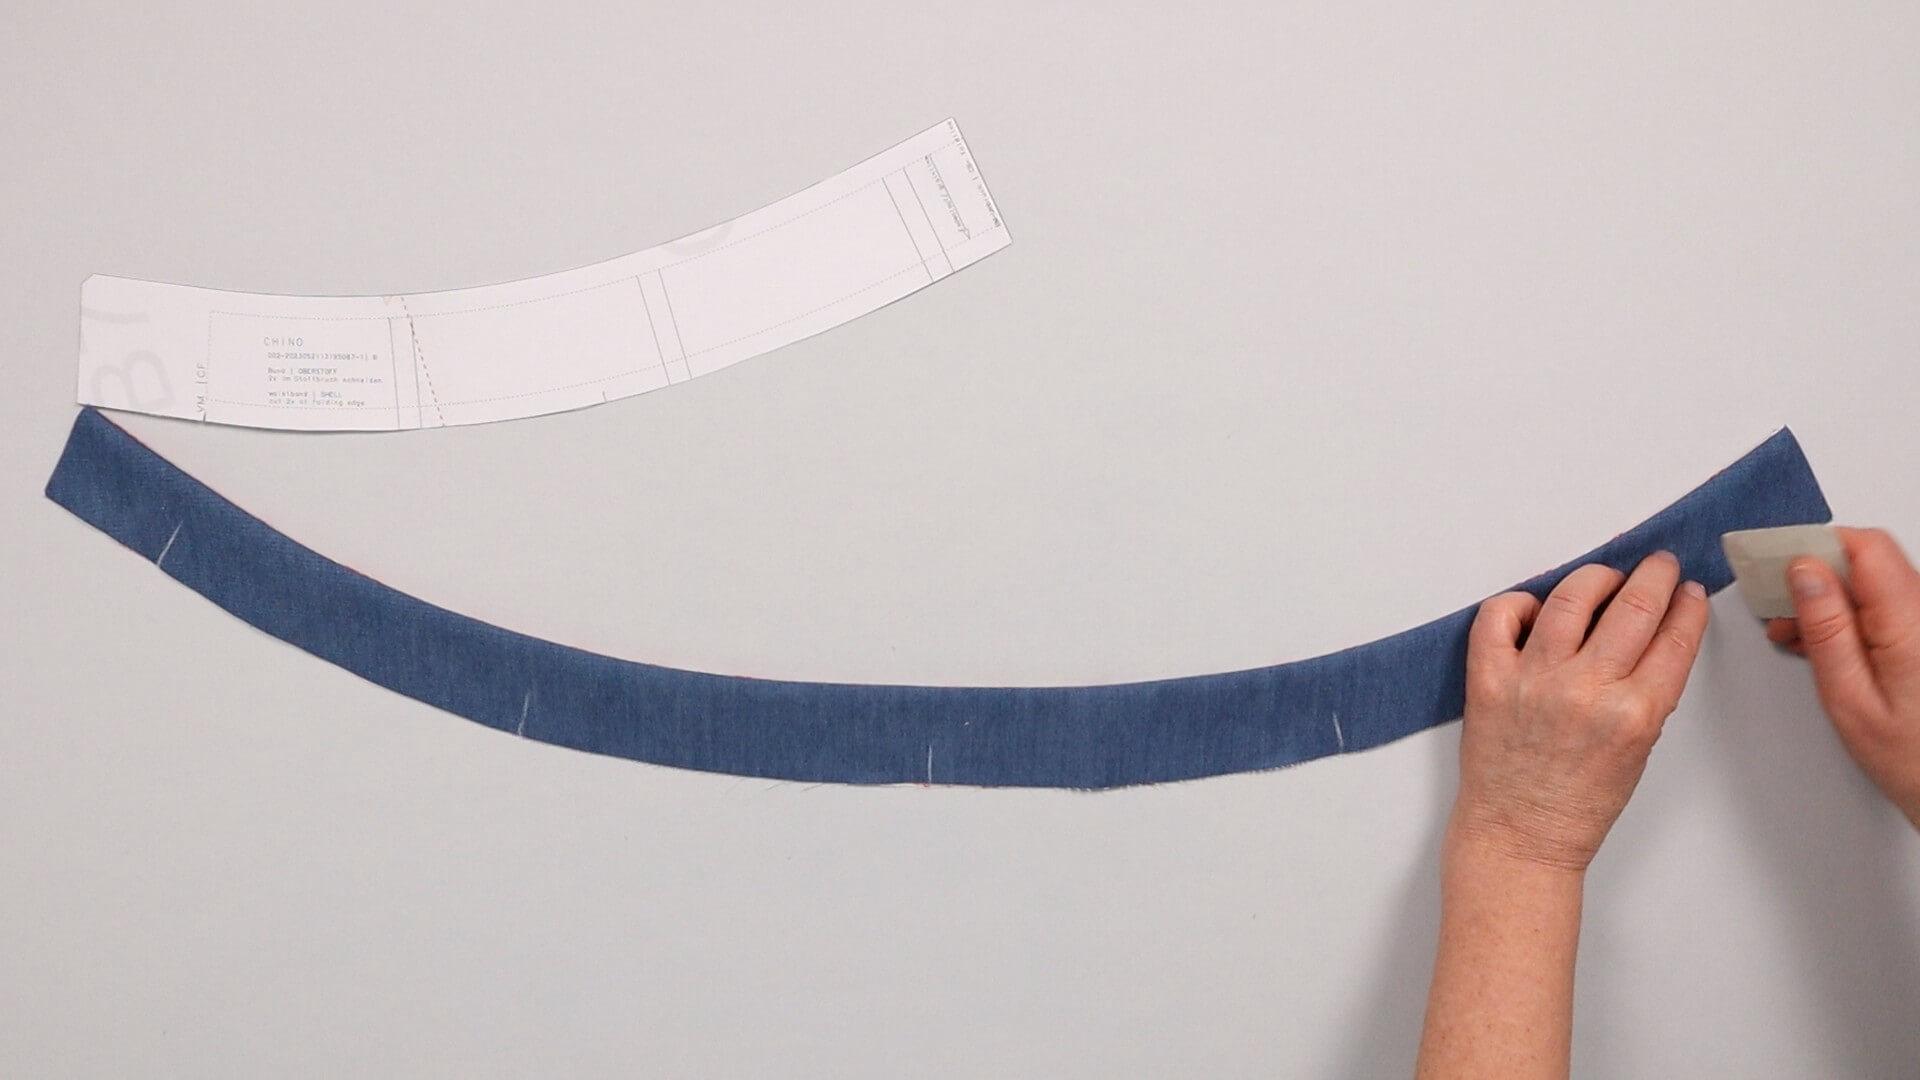
I transfer the notches for the center back, the side seam and the center front to the outside of the waistband if I haven’t already done so when cutting.
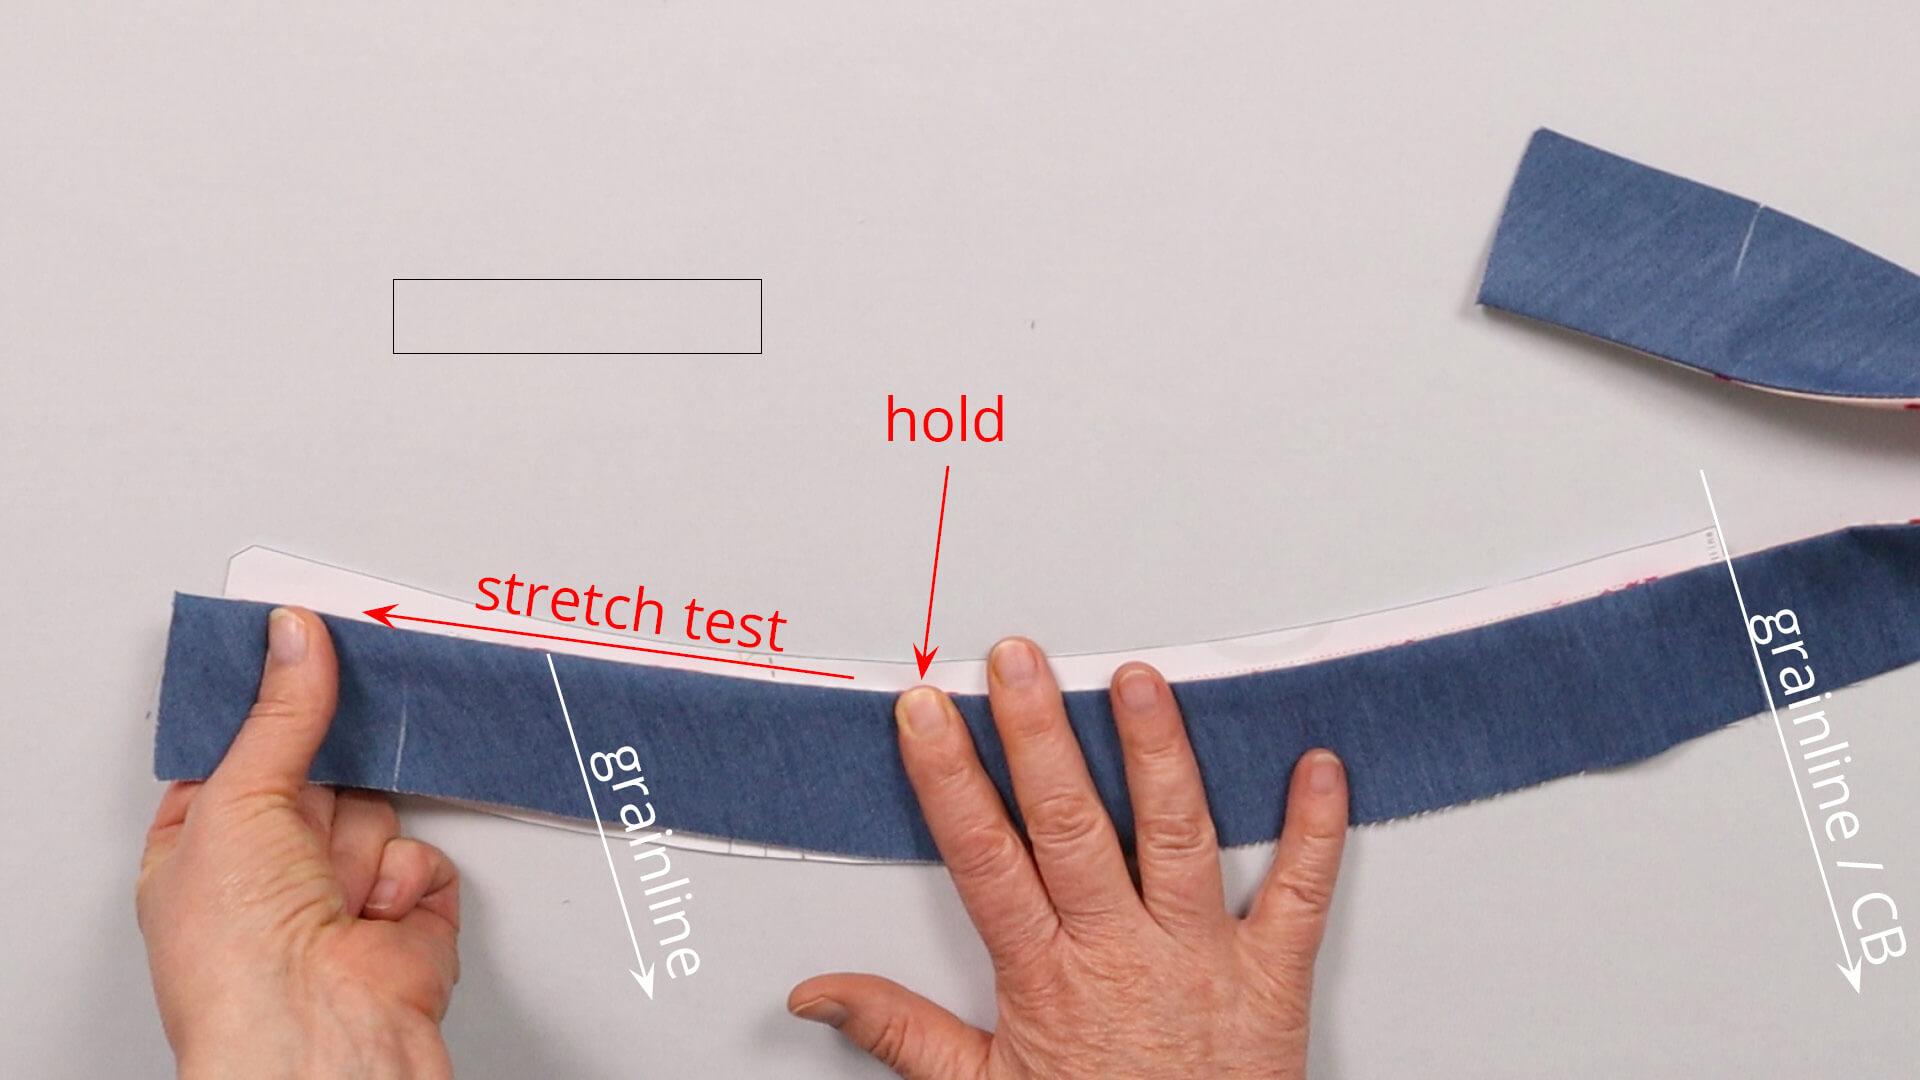
Now is a good opportunity to check whether the waistband length still matches the pattern. It could be that it has been altered by sewing or ironing. I also check whether the seam in the front area of the shaped waistband, where the fabric lies in the diagonal grain, is still stretchy.
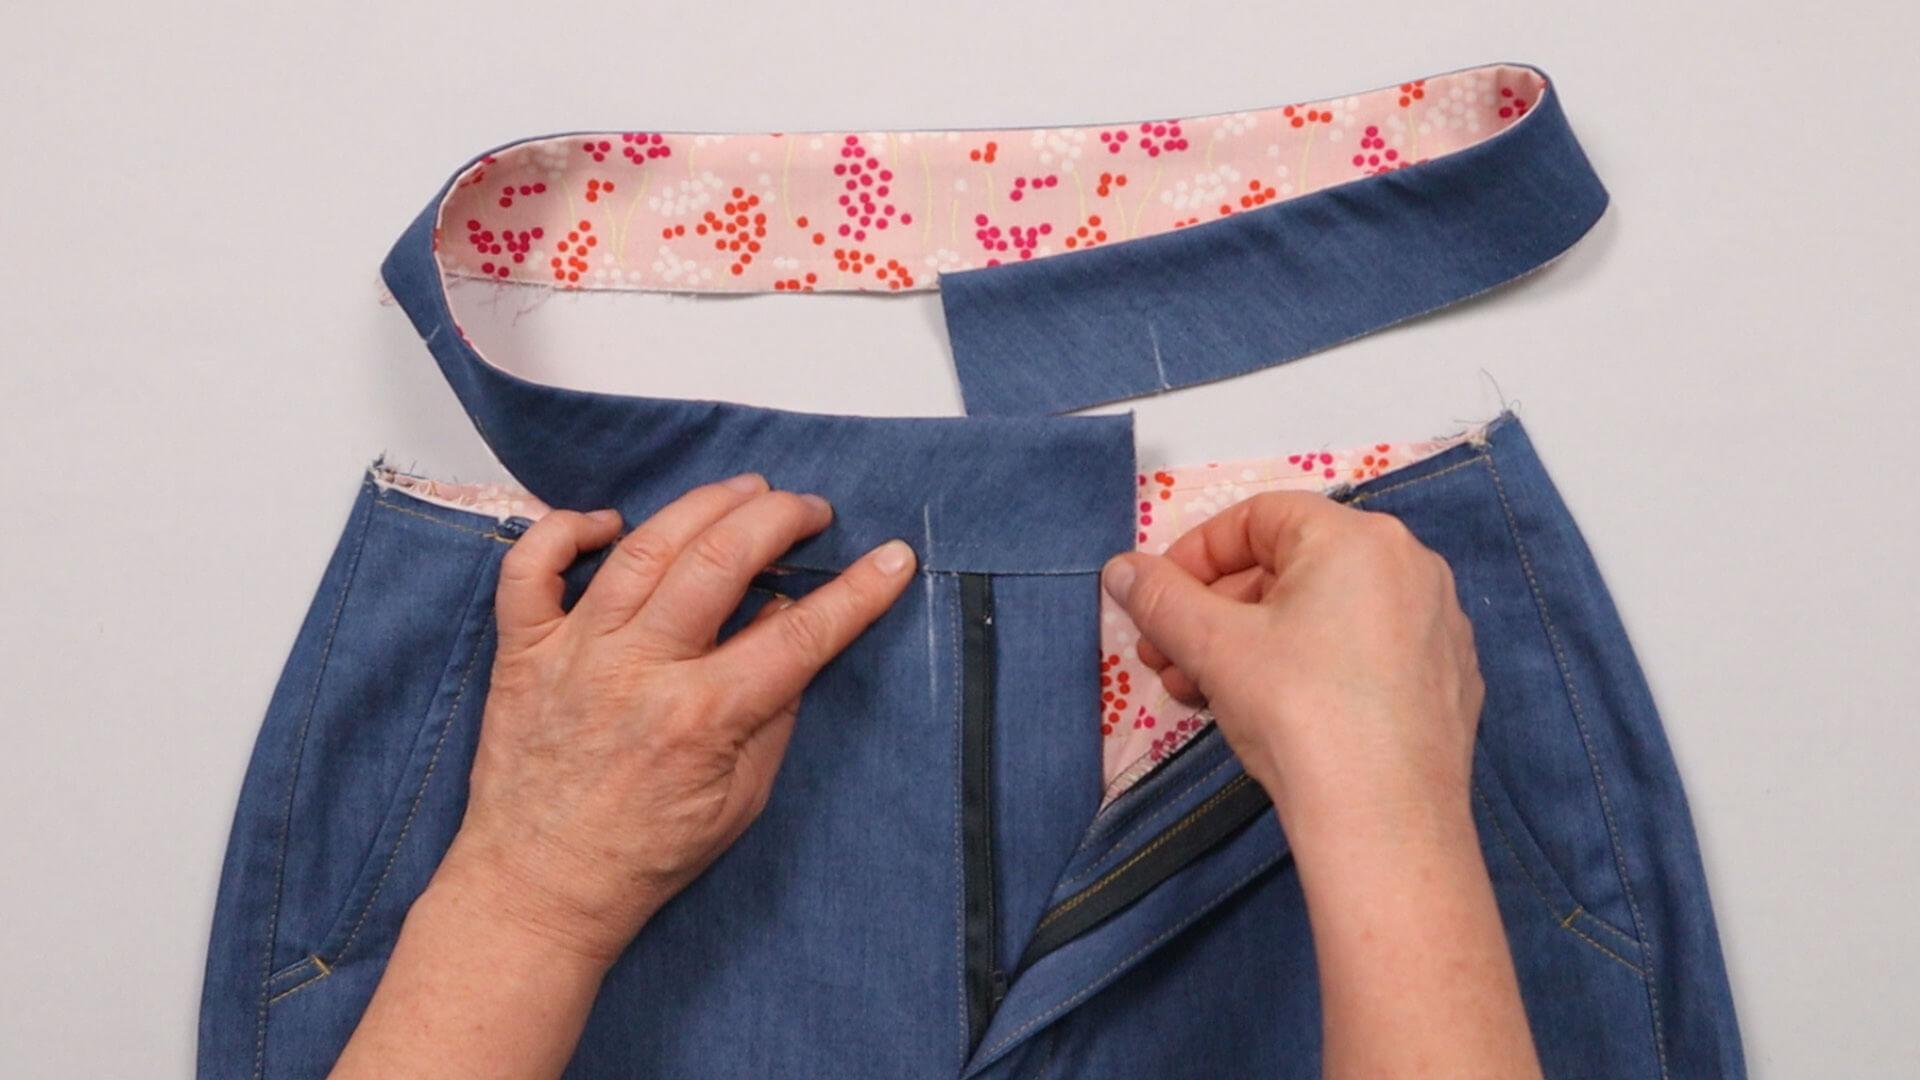
I place the waistband above my pants and decide which side meets the right trouser front with the fly shield and which the left on with the fly facing. The front notch on the lower edge of the waistband indicates the position of the center front on both sides. On the right front, the waistband strip protrudes the center front by 1 cm.
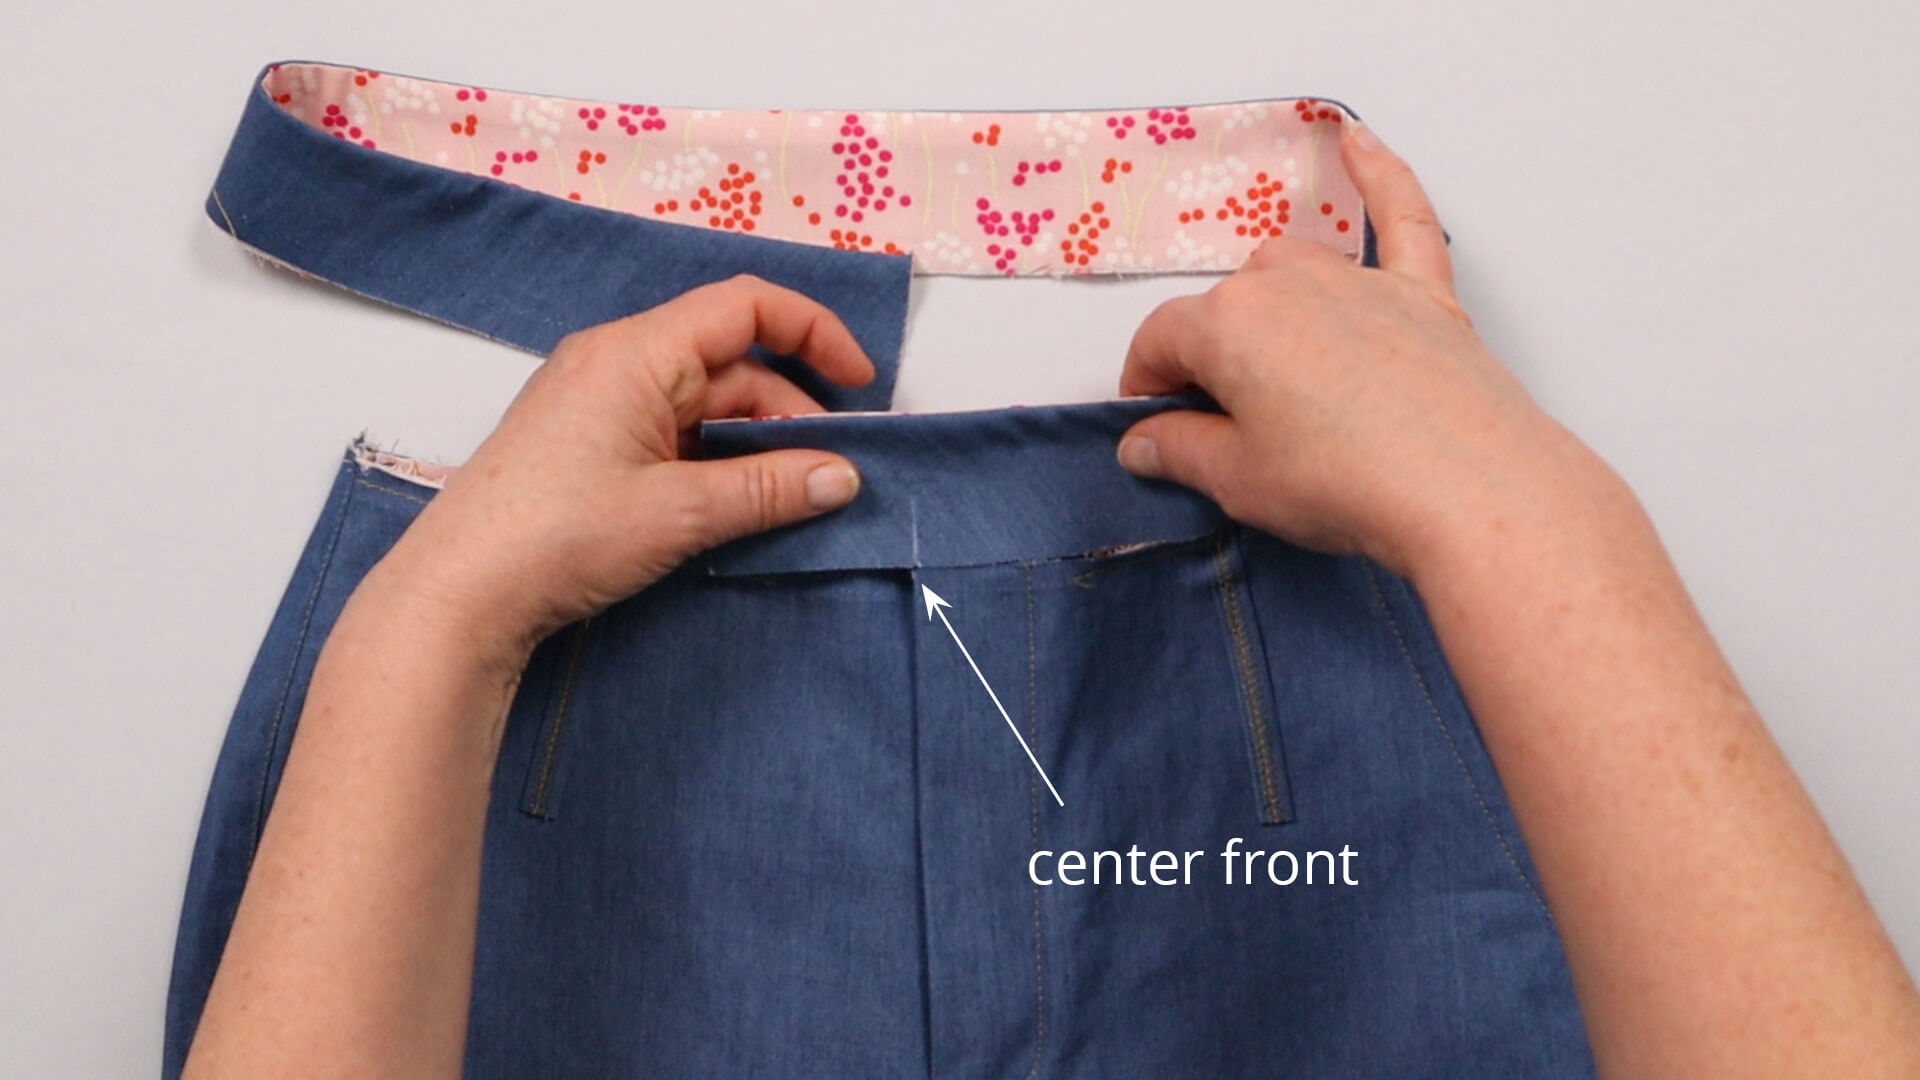
Meeting notches at the left center front, there are still a few centimeters of fabric left over.
However, only 1 cm is needed for the seam allowance. The fabric can be cut off there unless you would like to have a waistband extension at the fly shield (see pictures below) or if you have noticed that the waistband is too tight when trying on the pants.
If the waistband is too tight, you will have to move the notches at the bottom edge:
For example, if the waistband is 4 cm too tight and you have extended the side seams by 2 cm, move the notches on the waistband to the left by the following amounts:
- the notch for the right side seam by 1 cm
- the center back by 2 cm
- the left side seam by 3 cm
- the left center front by 4 cm
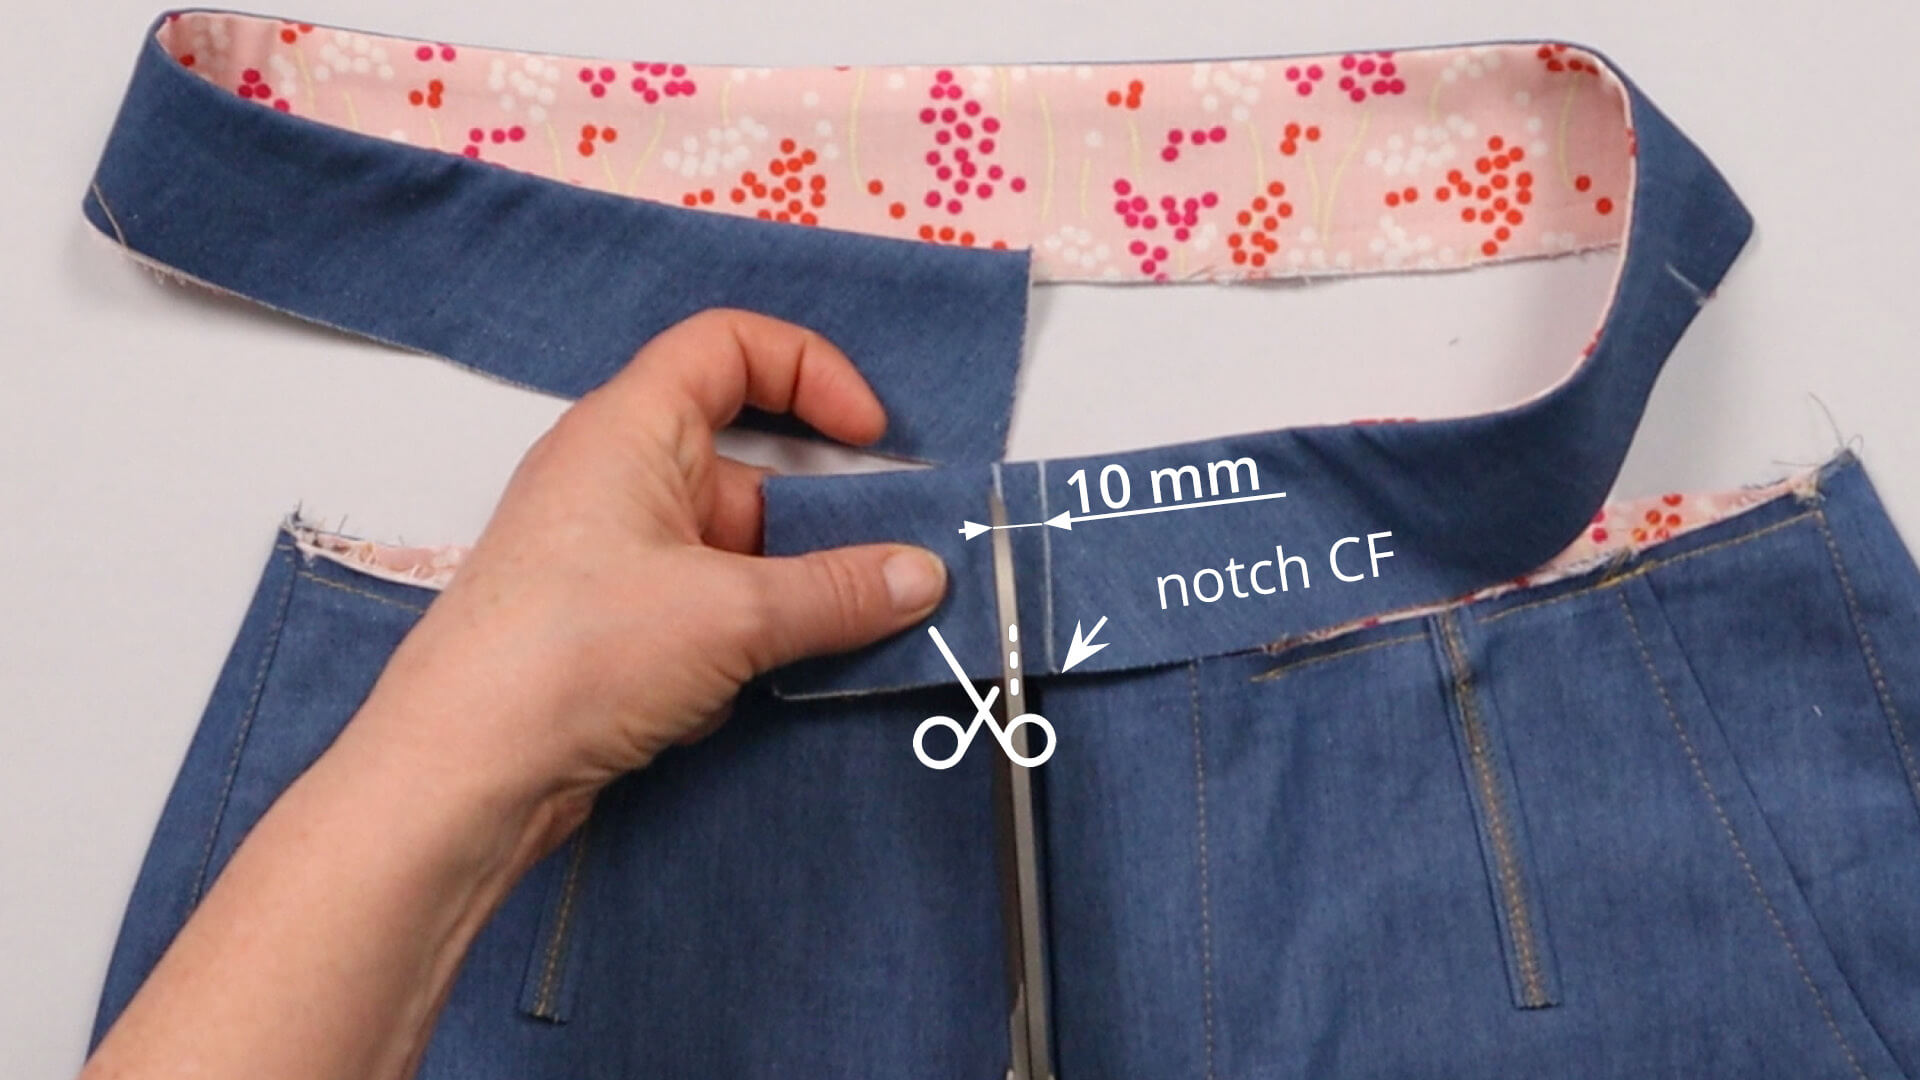
Here I am making the version where the waistband edge ends with the center front, so I mark 1 cm seam allowance from the center front and cut away the remaining fabric there.
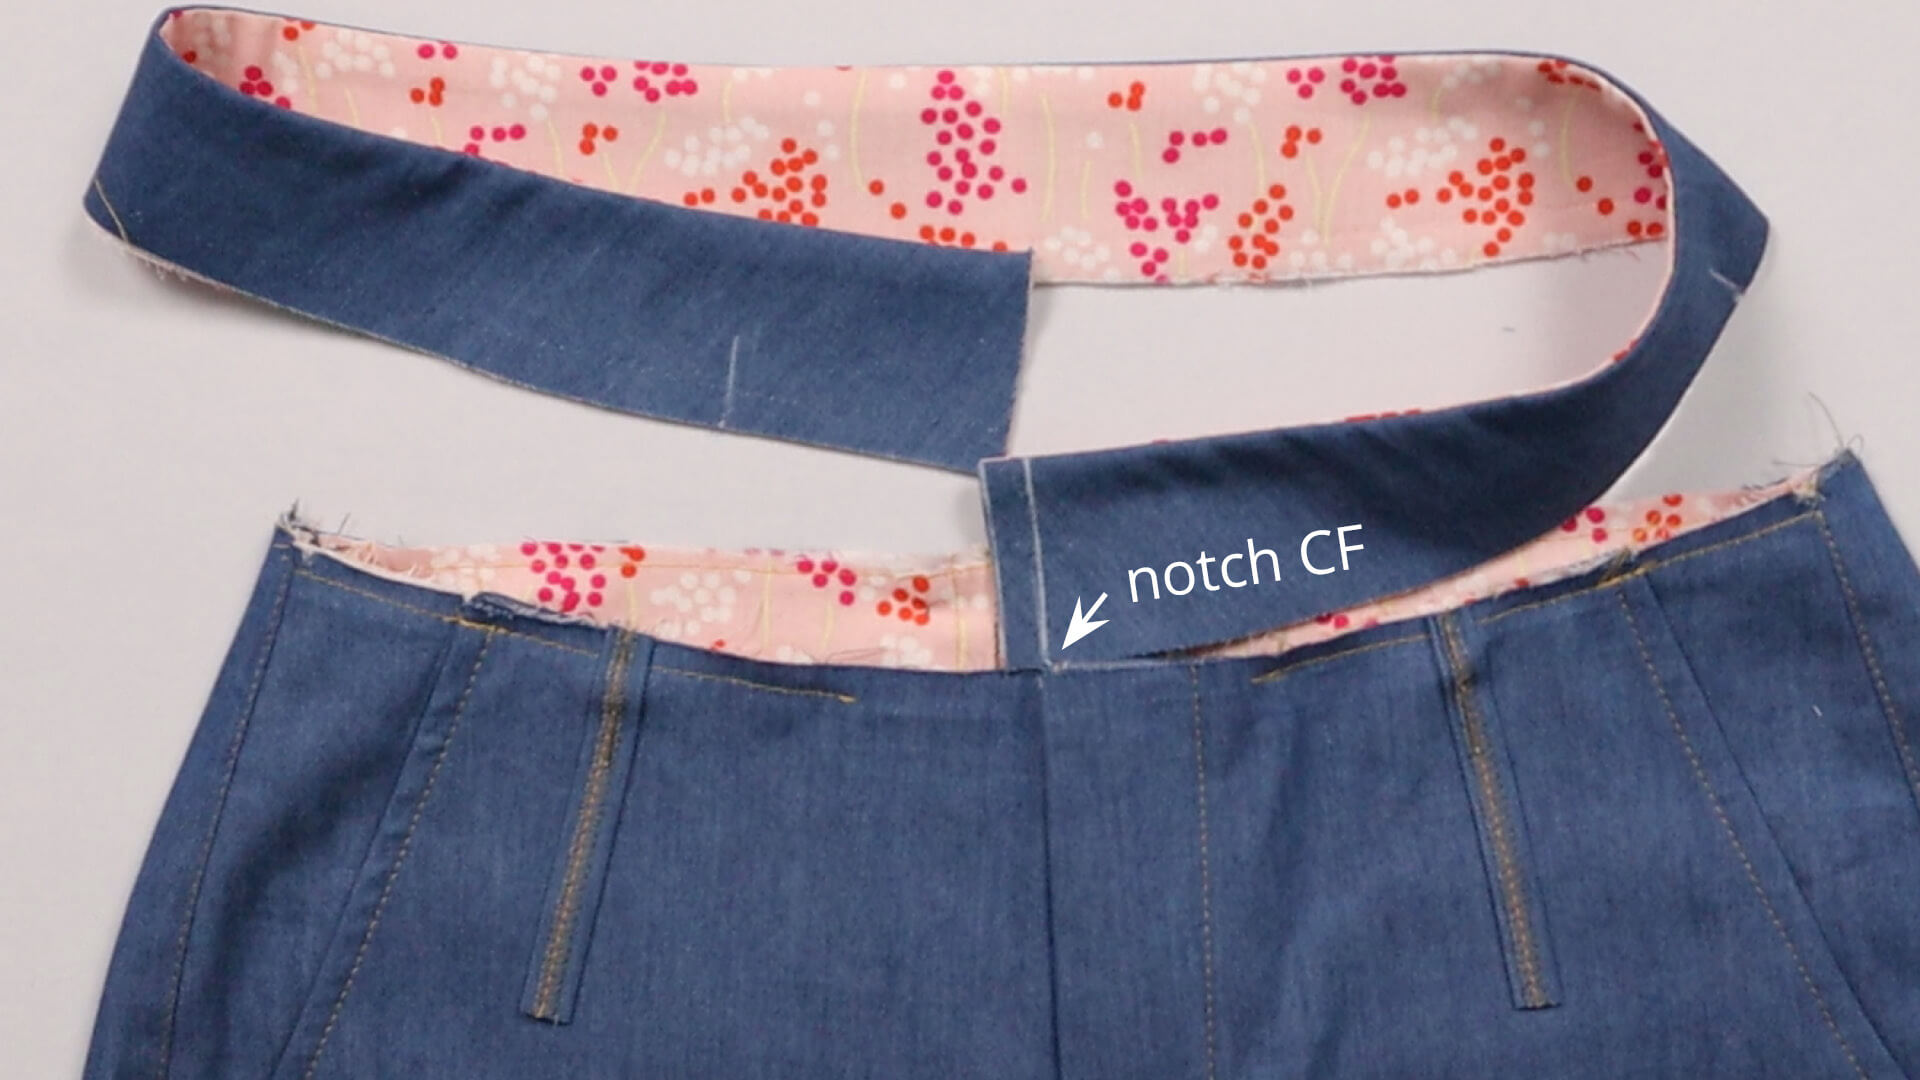
This is what it looks like after I have shortened the waistband to the right length.
4. Finish the front waistband edges/corners
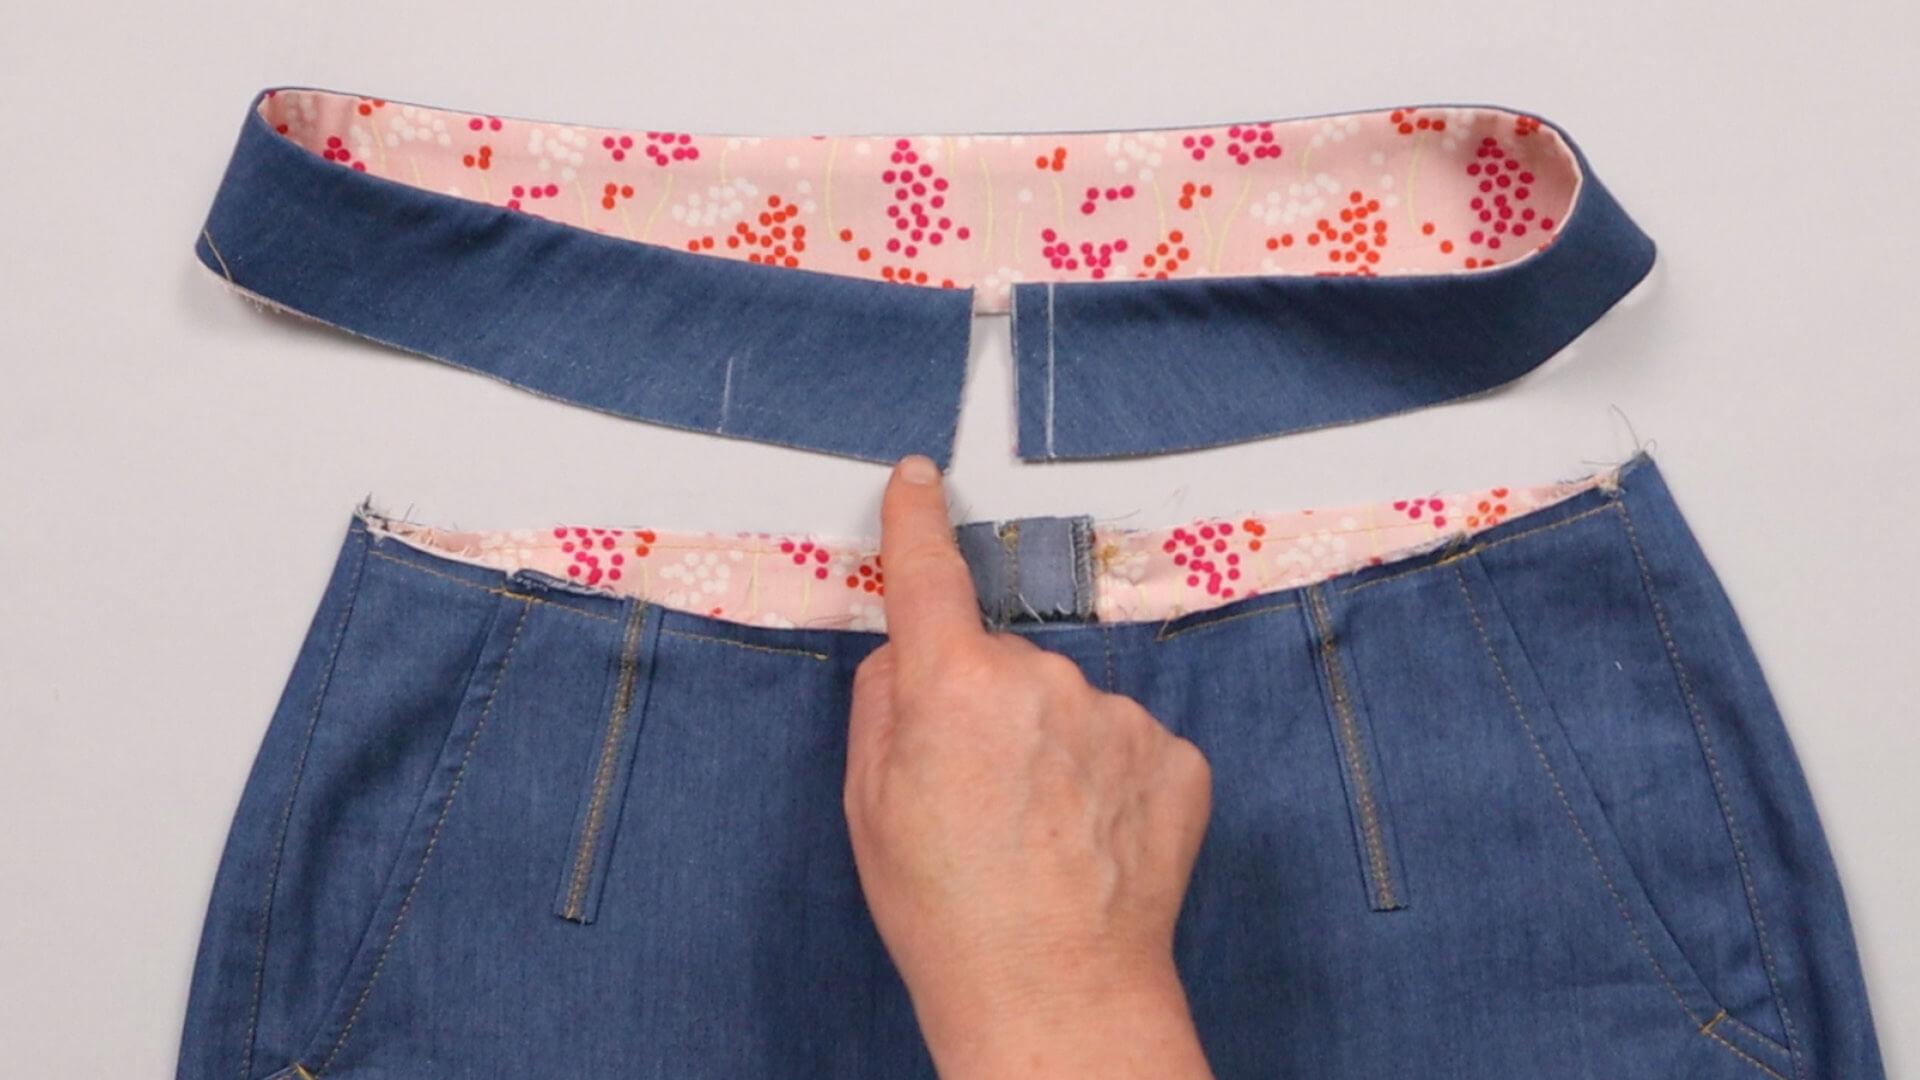
Now the waistband strips can also be finished at the front and the upper corners. I do this as follows:
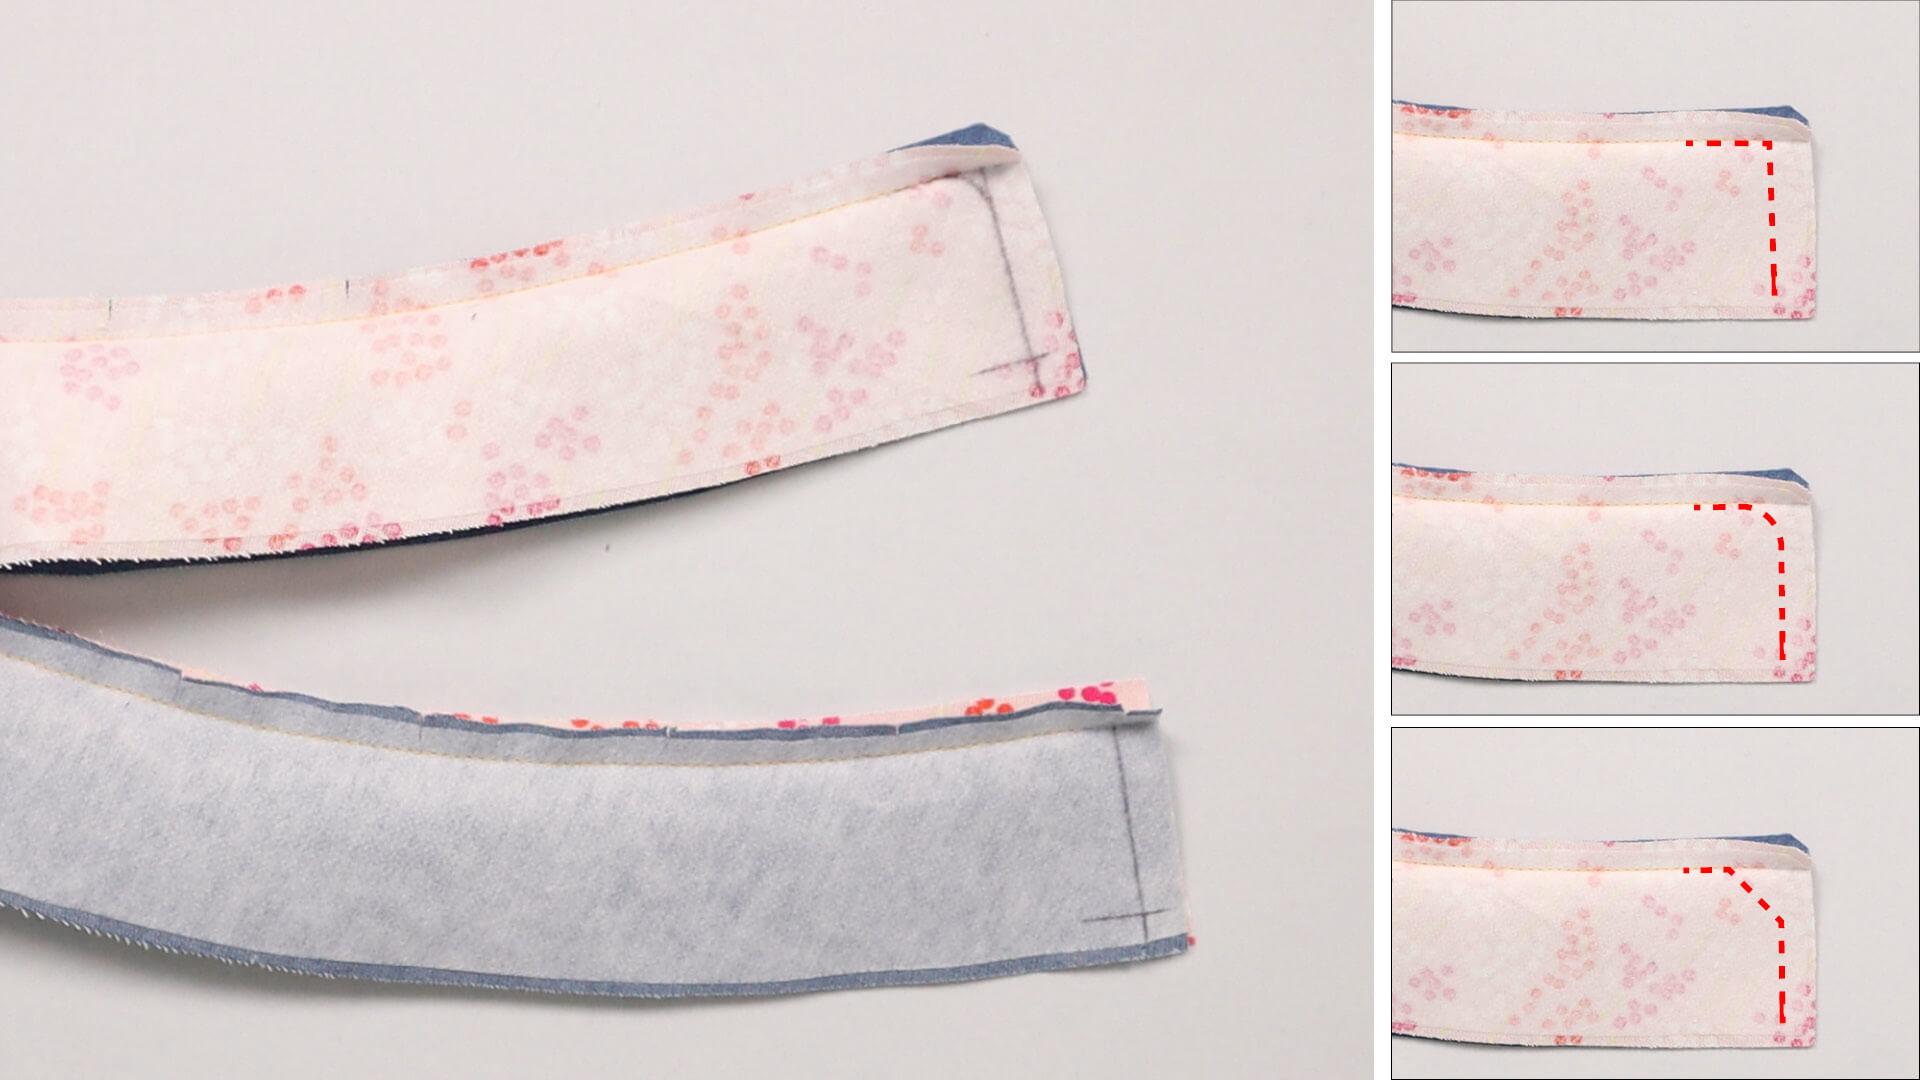
The corners can be rounded or slanted. I turn the waistband right sides facing. Later I start sewing at the top edge in the existing seam. Therefore I mark the front (short) edge on the later sewing side; the top edge is on top.
For the square version I draw 1 cm parallel to the front edge and 1 cm from the bottom edge. I also trace the course of the upper seam with a 1 cm seam allowance.
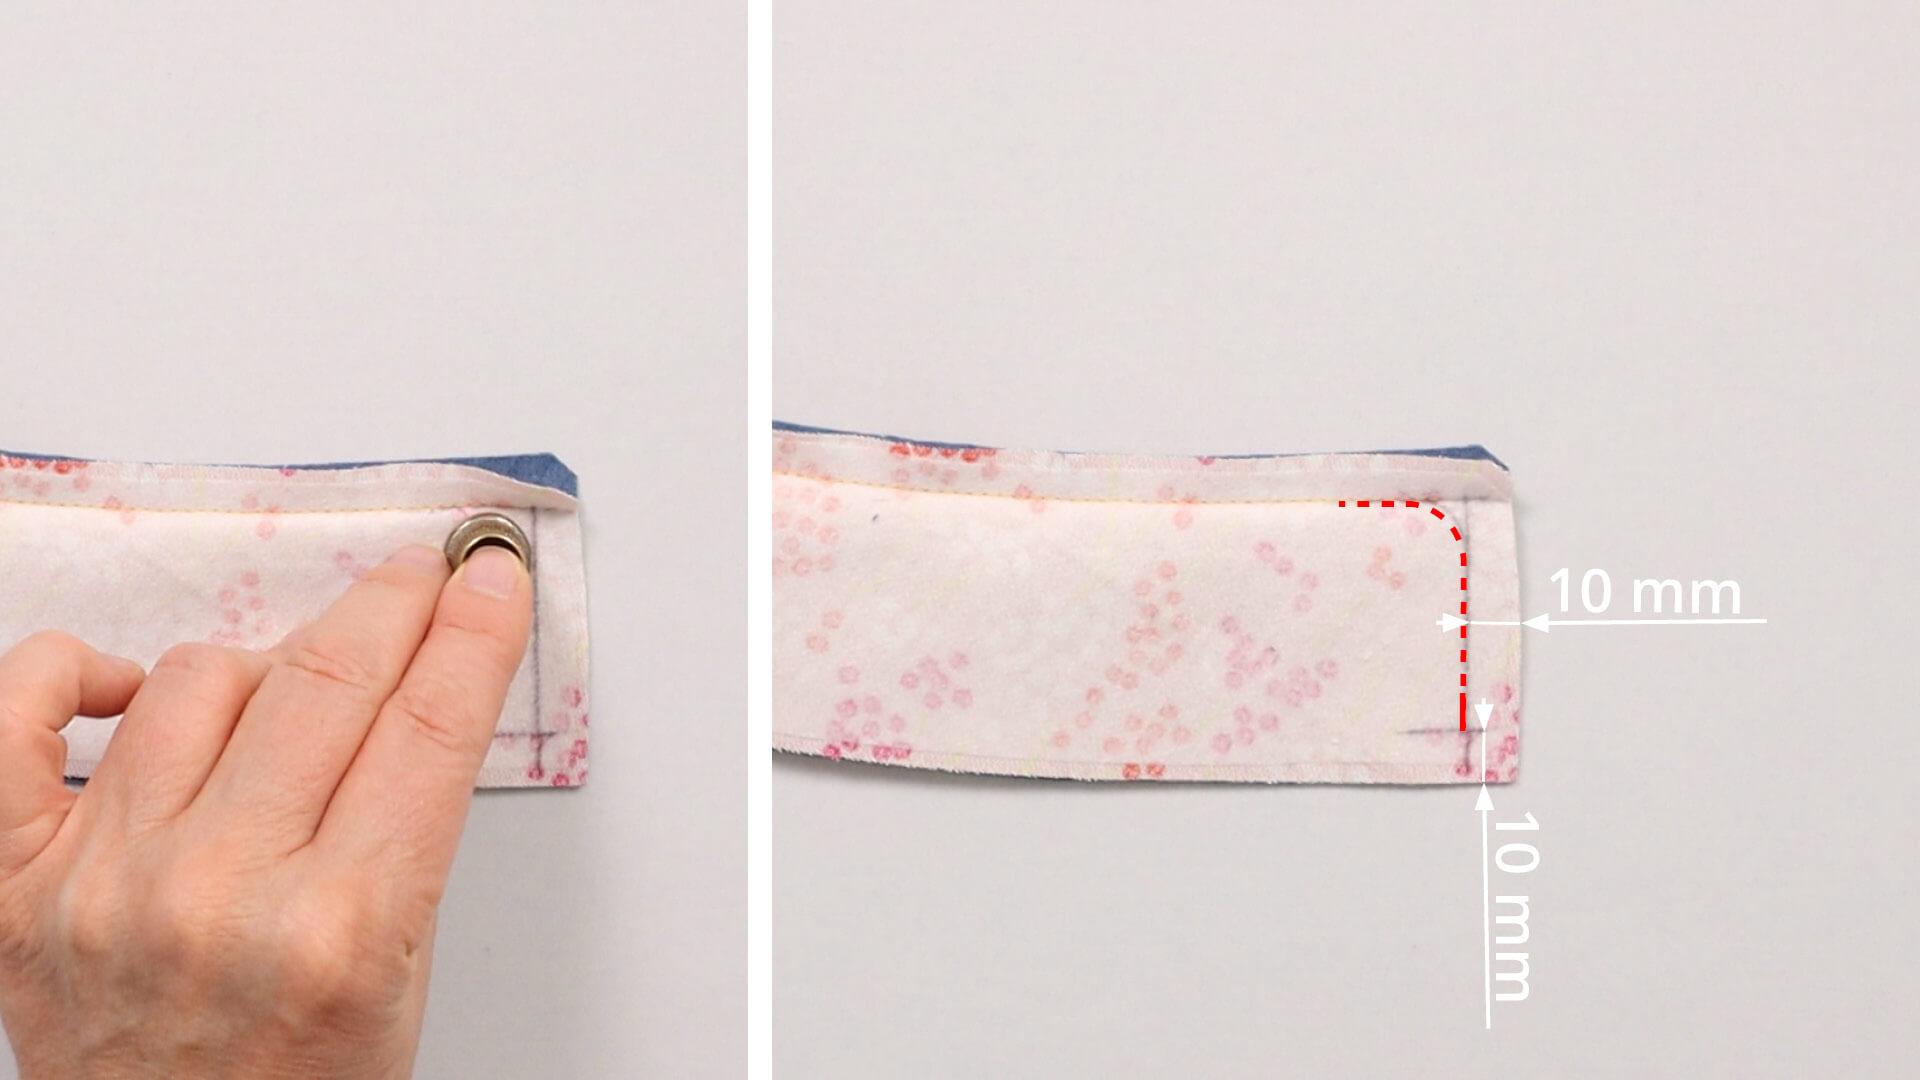
If I want to bevel or round the corner, I also draw the corresponding shape on the top corner. You can e. g. use a coin as a template to draw a curve.
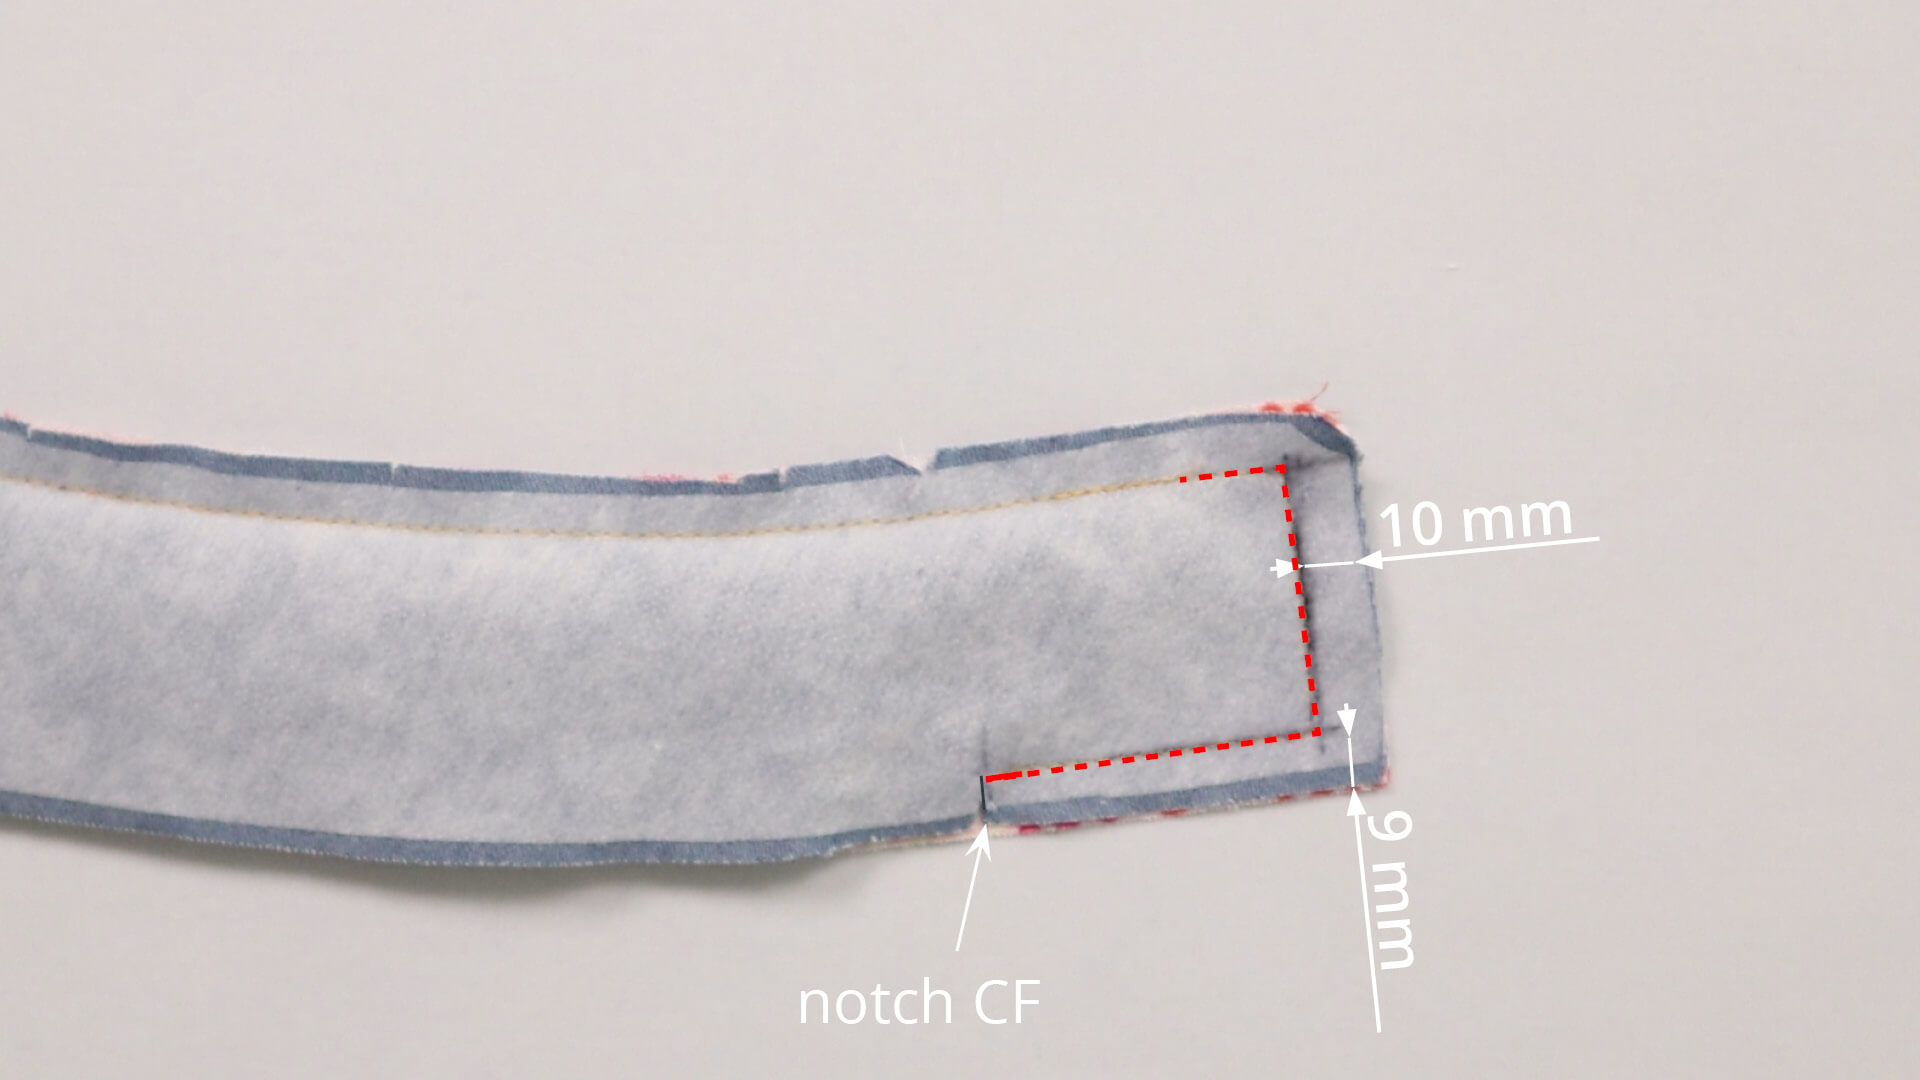
If you want to sew the waistband extension on the left fly shield, mark the center front at the bottom edge at the notch and sew up to this point. Here, too, you can round off the corners, bevel them or leave them straight. In this case, I mark a distance of 9 mm on the bottom edge.
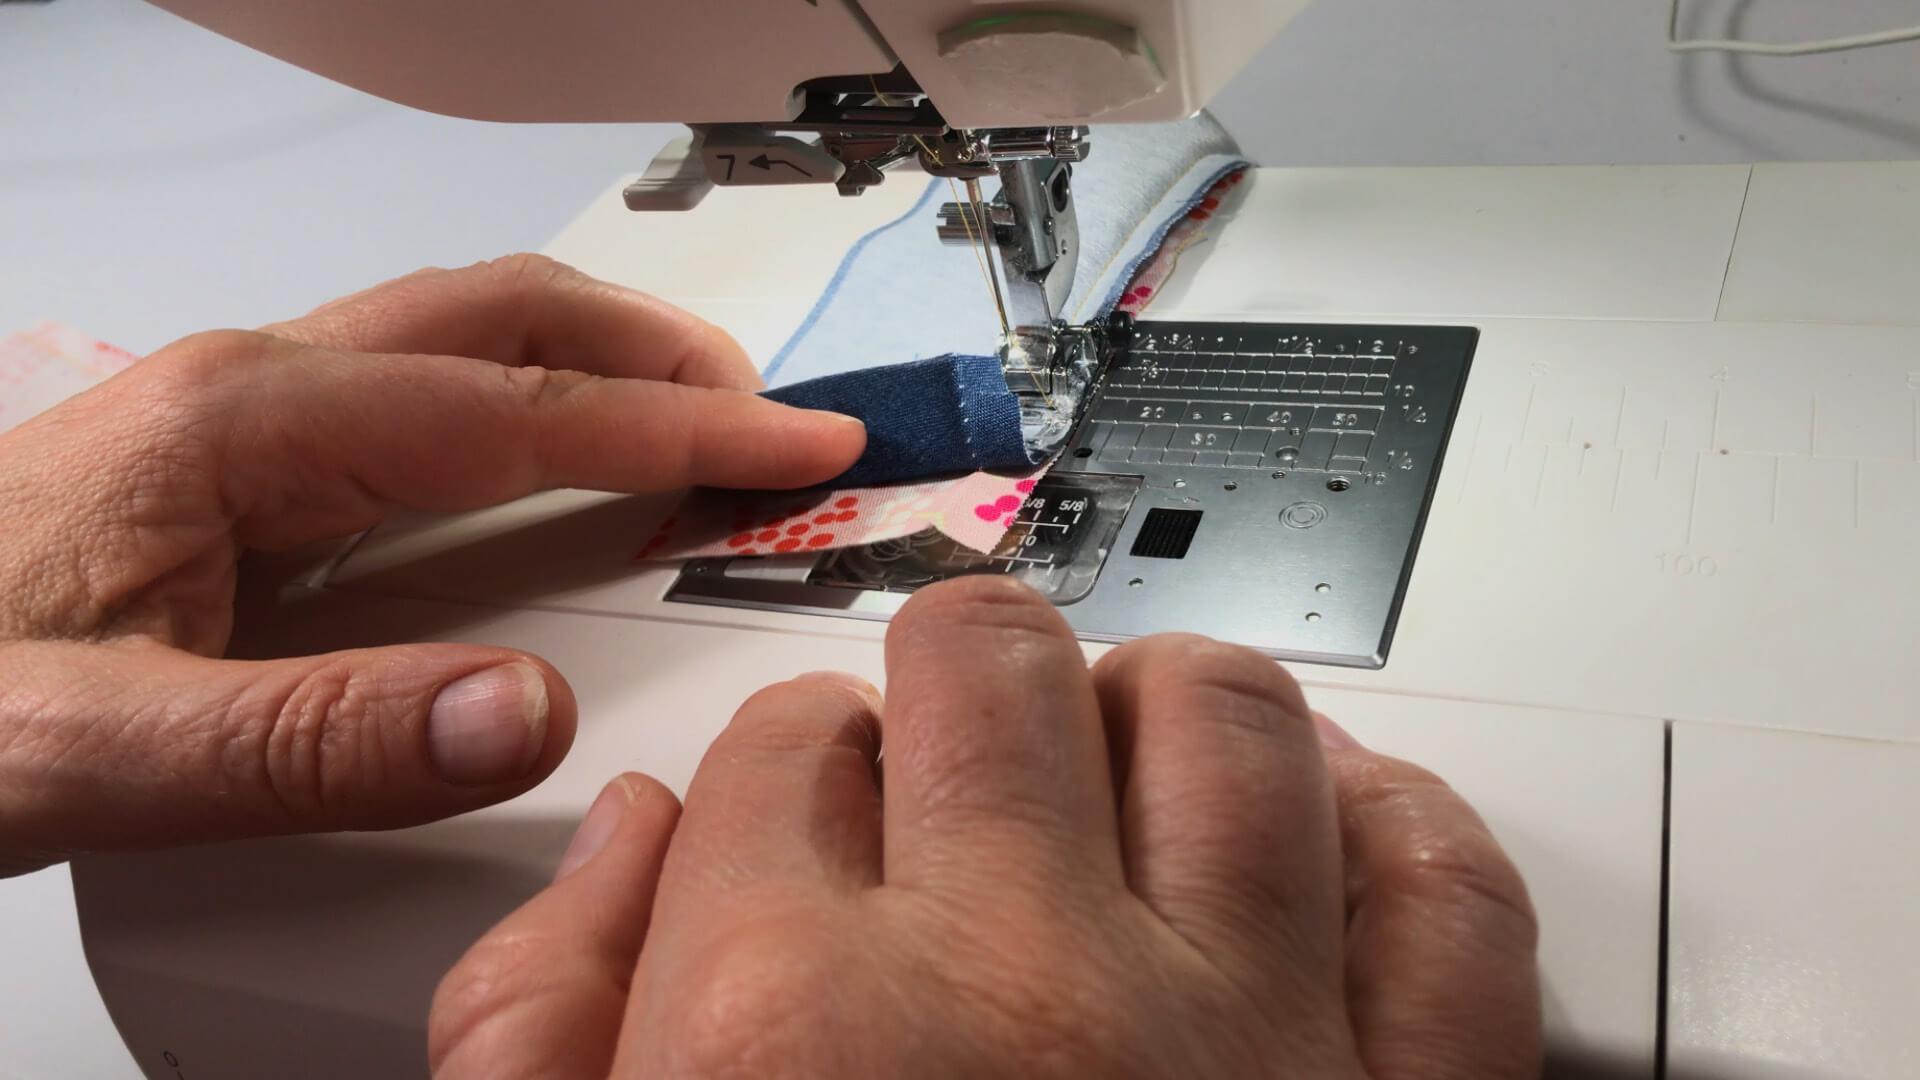
Before I start sewing the corner, I undo the seam up to 1.5 cm before the short edge if necessary.
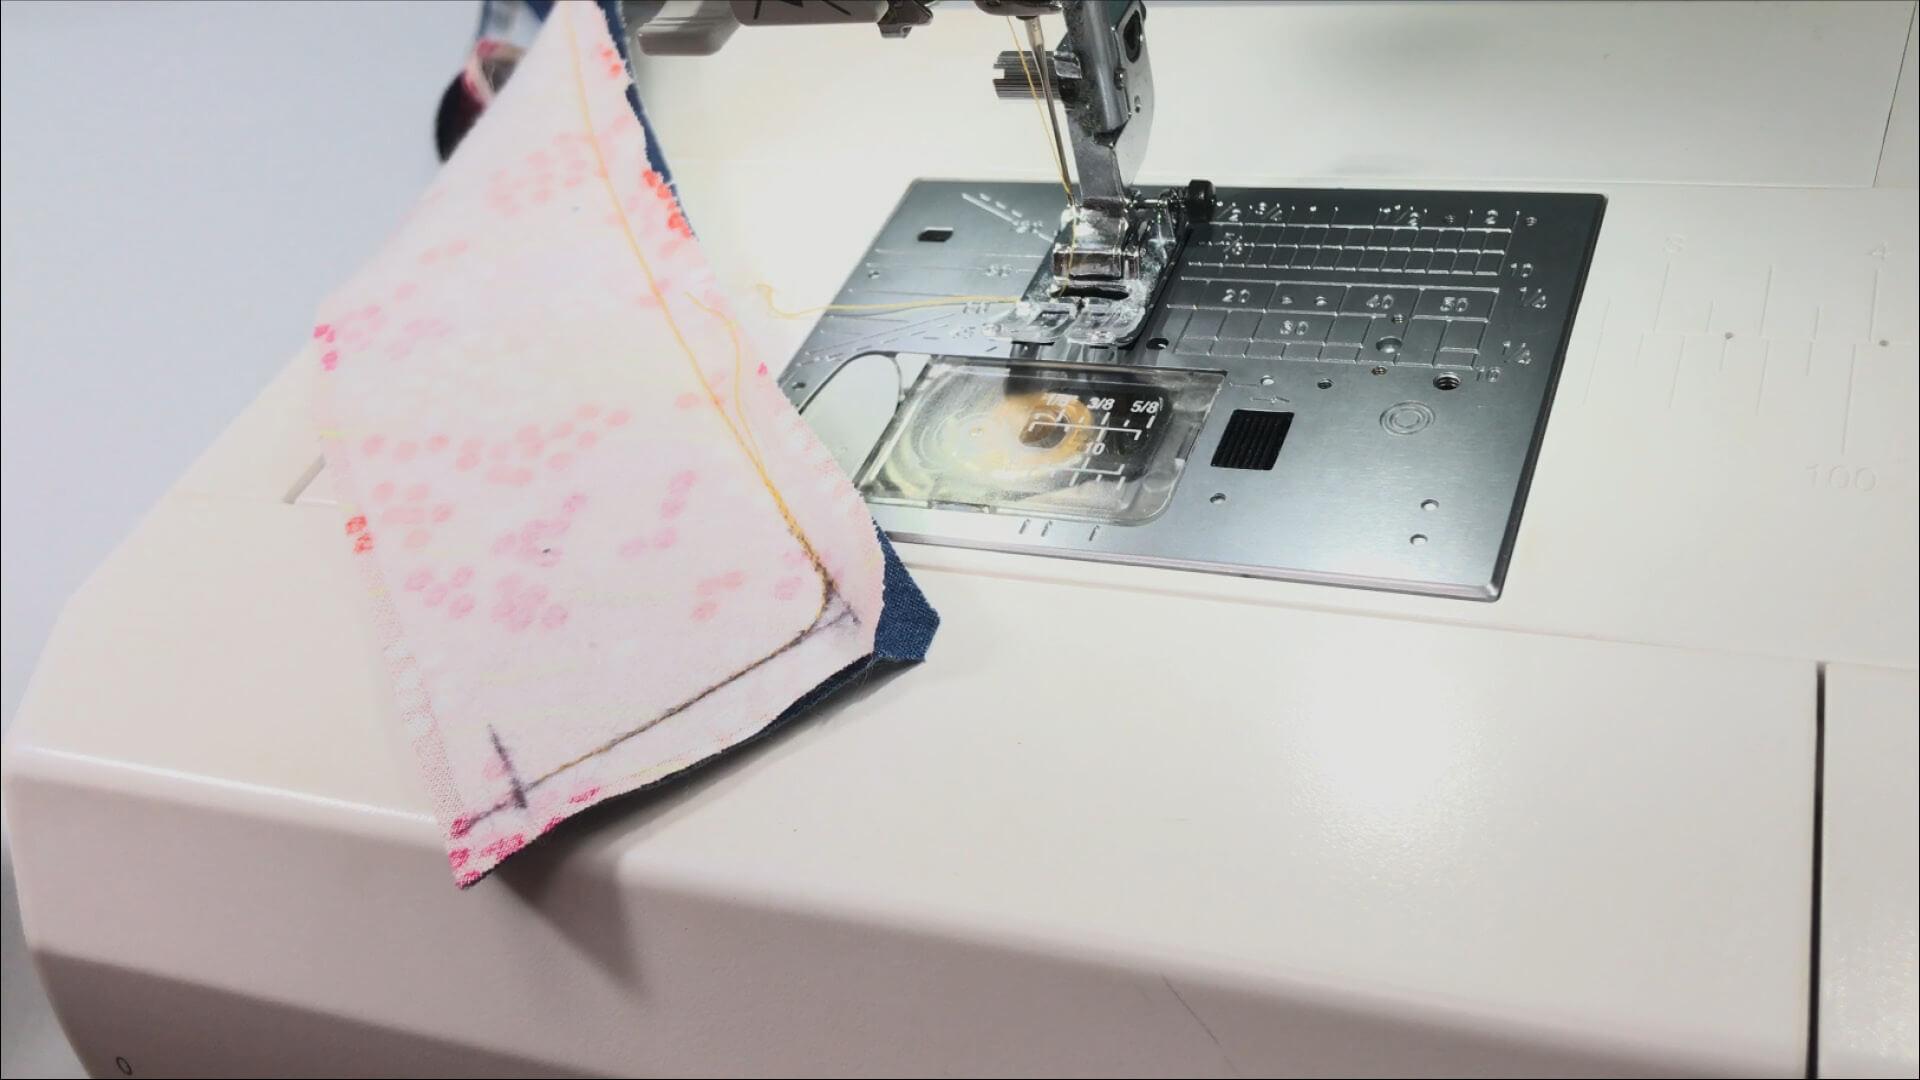
For the rounded or beveled corner, I start directly at the seam line of the top edge and stitch along the marking.
Tip
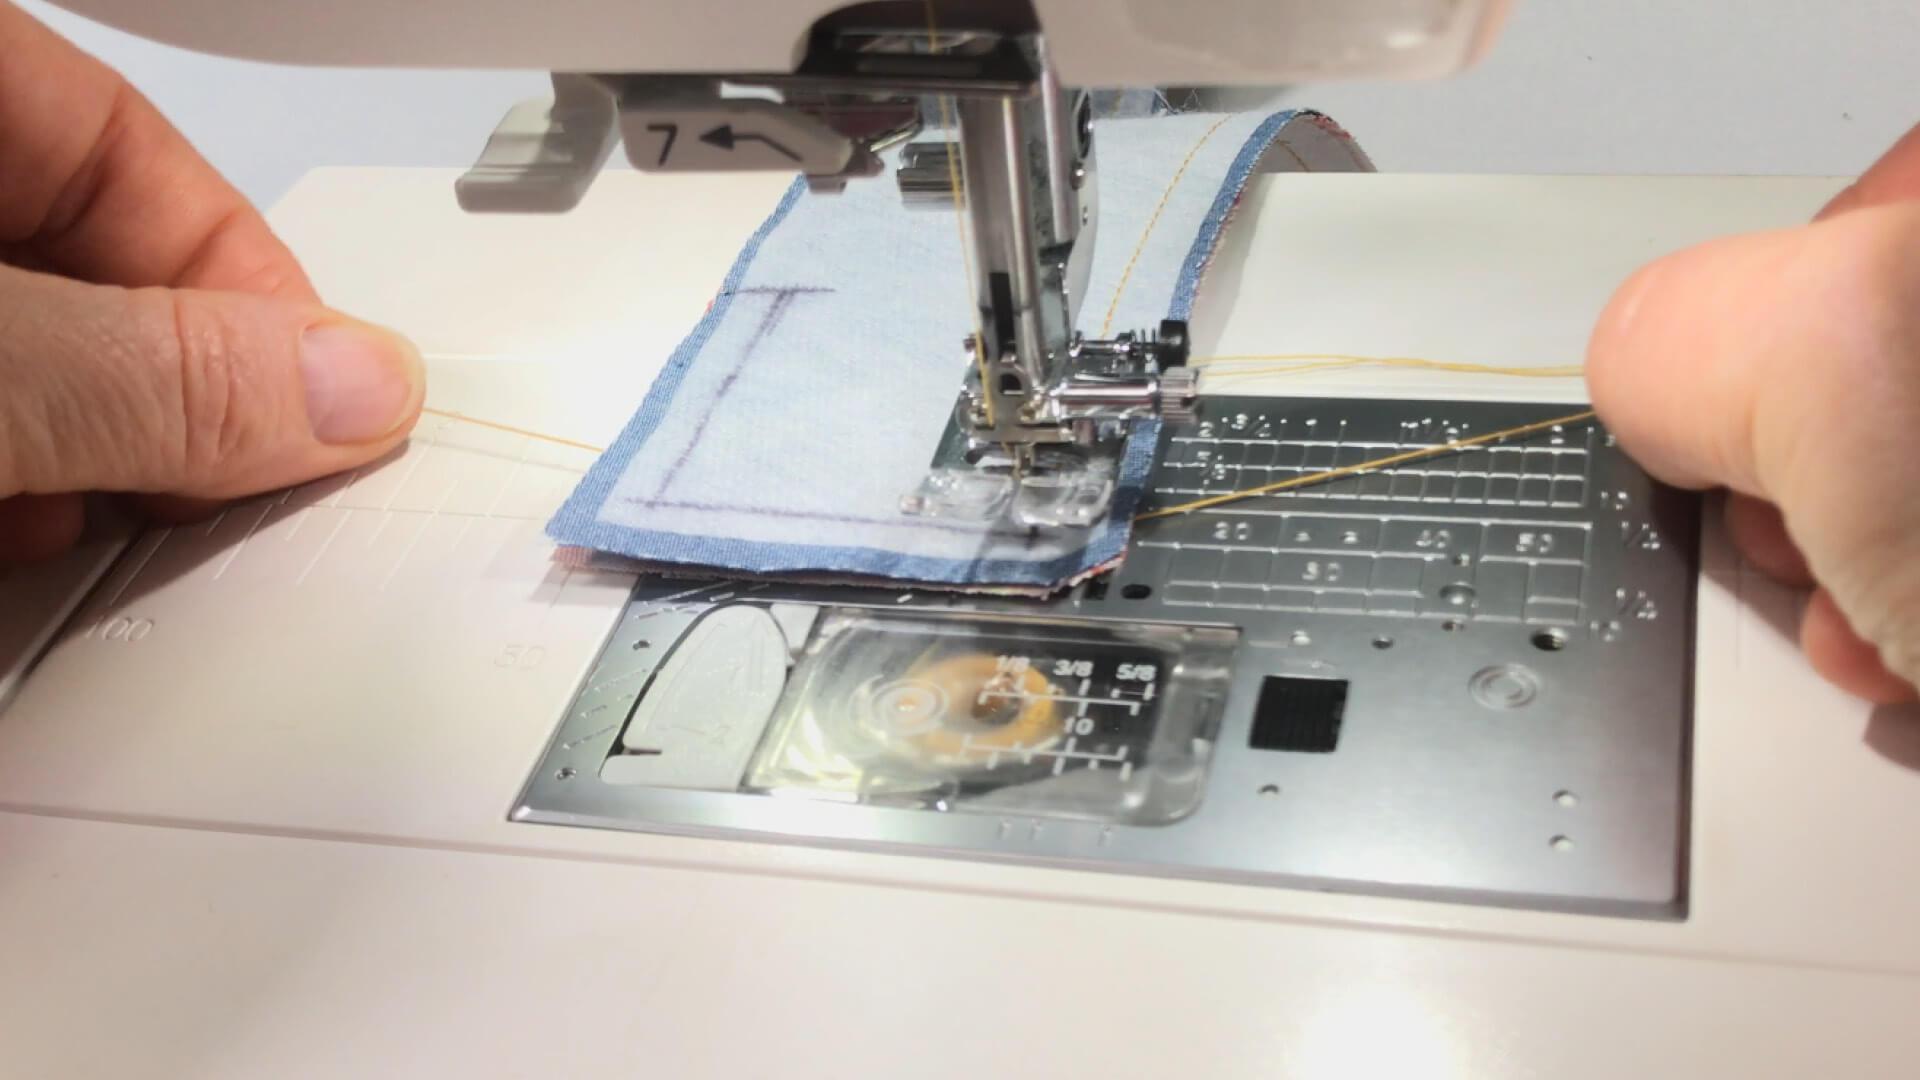
To make it easier to turn and shape the straight corner later, I add a thread at the corner point: before I sew the last stitch before the corner, I stop and place an approx. 15 cm long turning thread between the layers of fabric. The thread is placed right up to the lowered needle. Then I sew a stitch over this thread, leave the needle in the fabric and lift the presser foot.
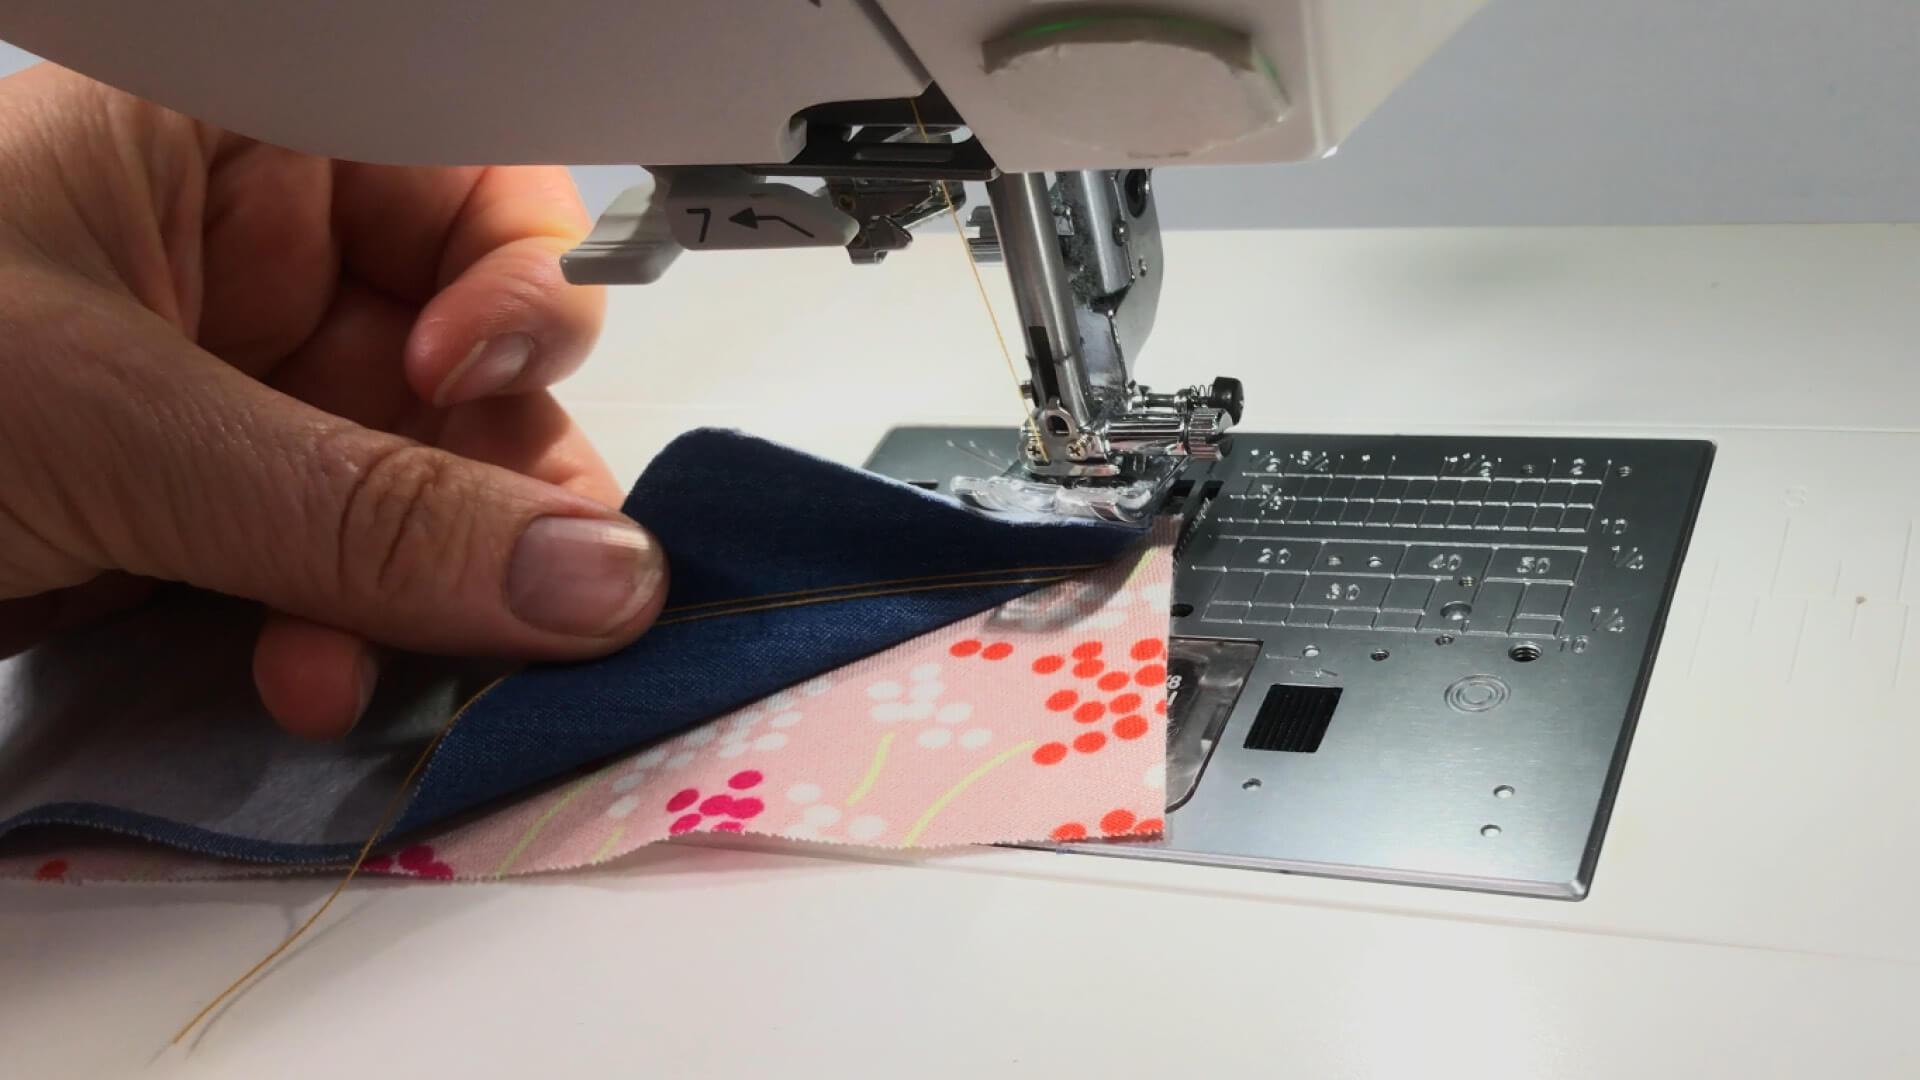
Now I place both thread ends between the waistband strips and continue sewing.
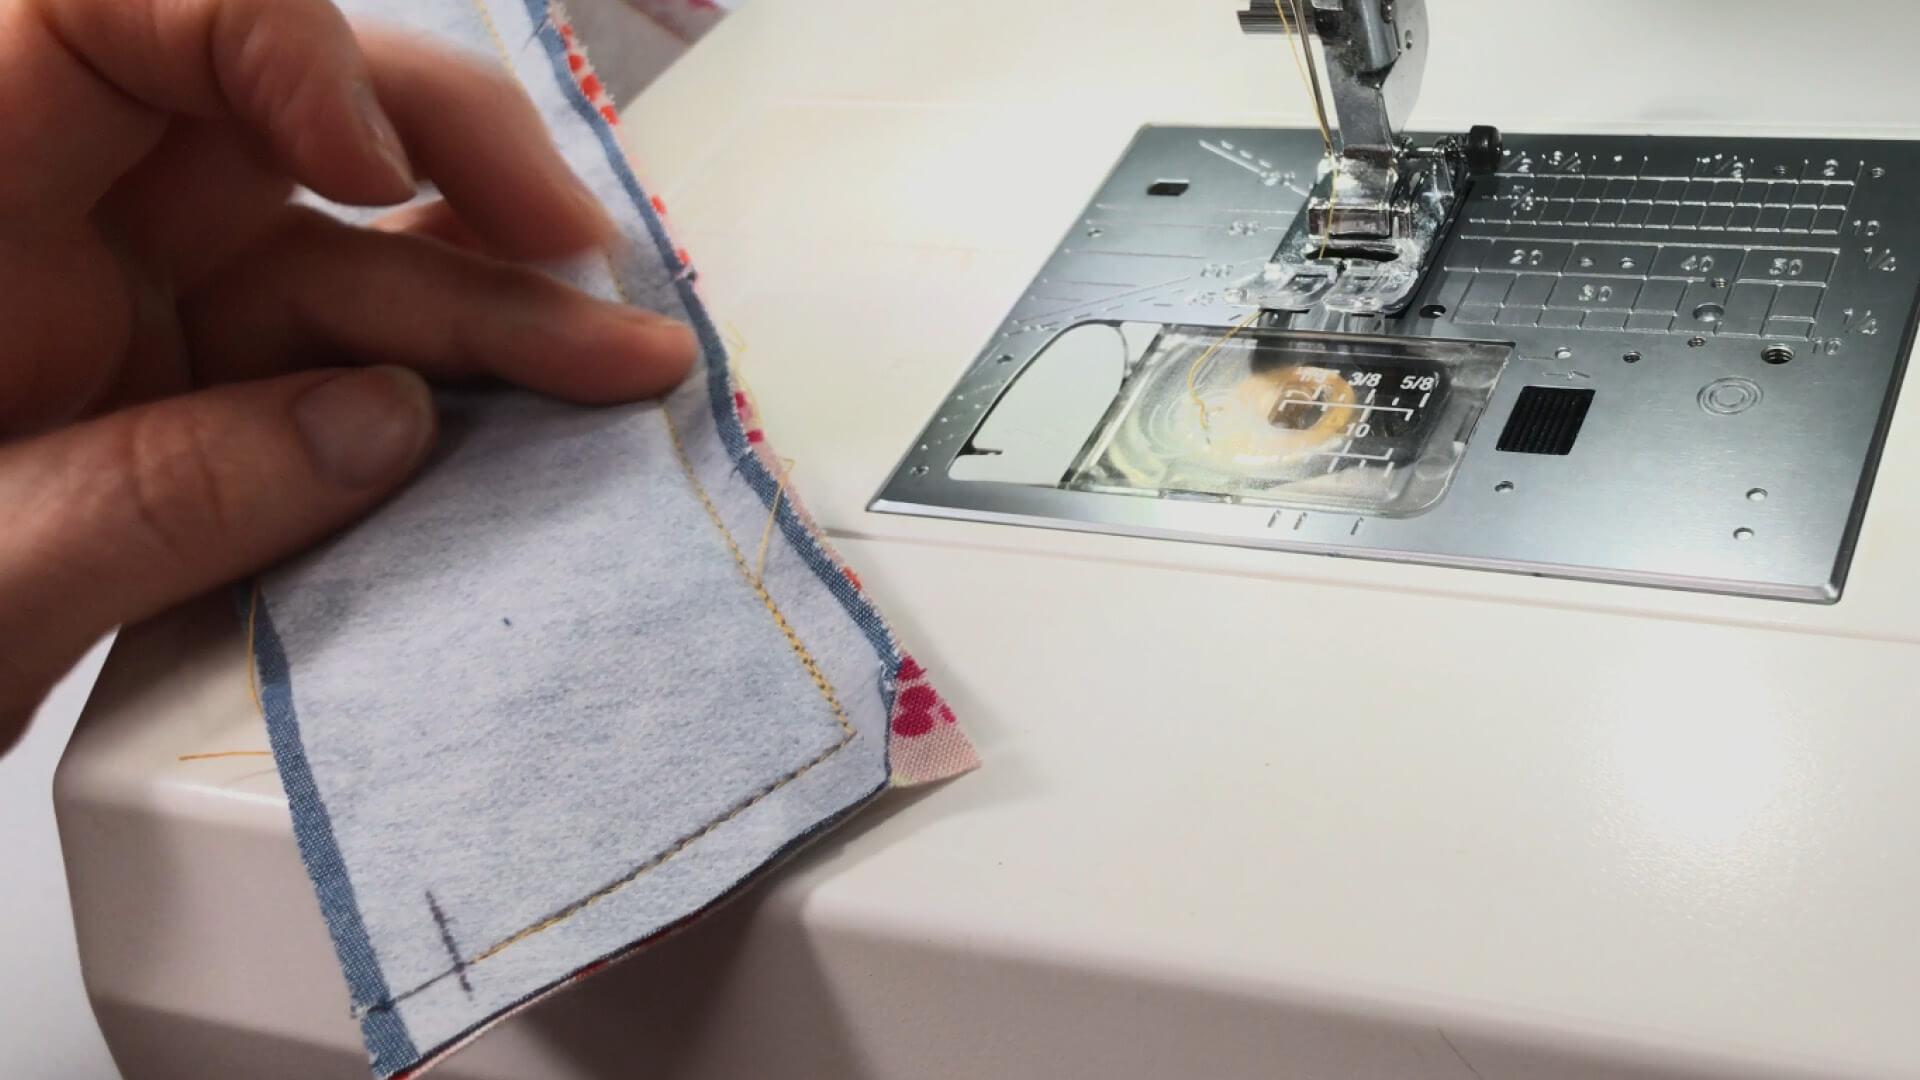
This is what the finished waistband corner looks like.
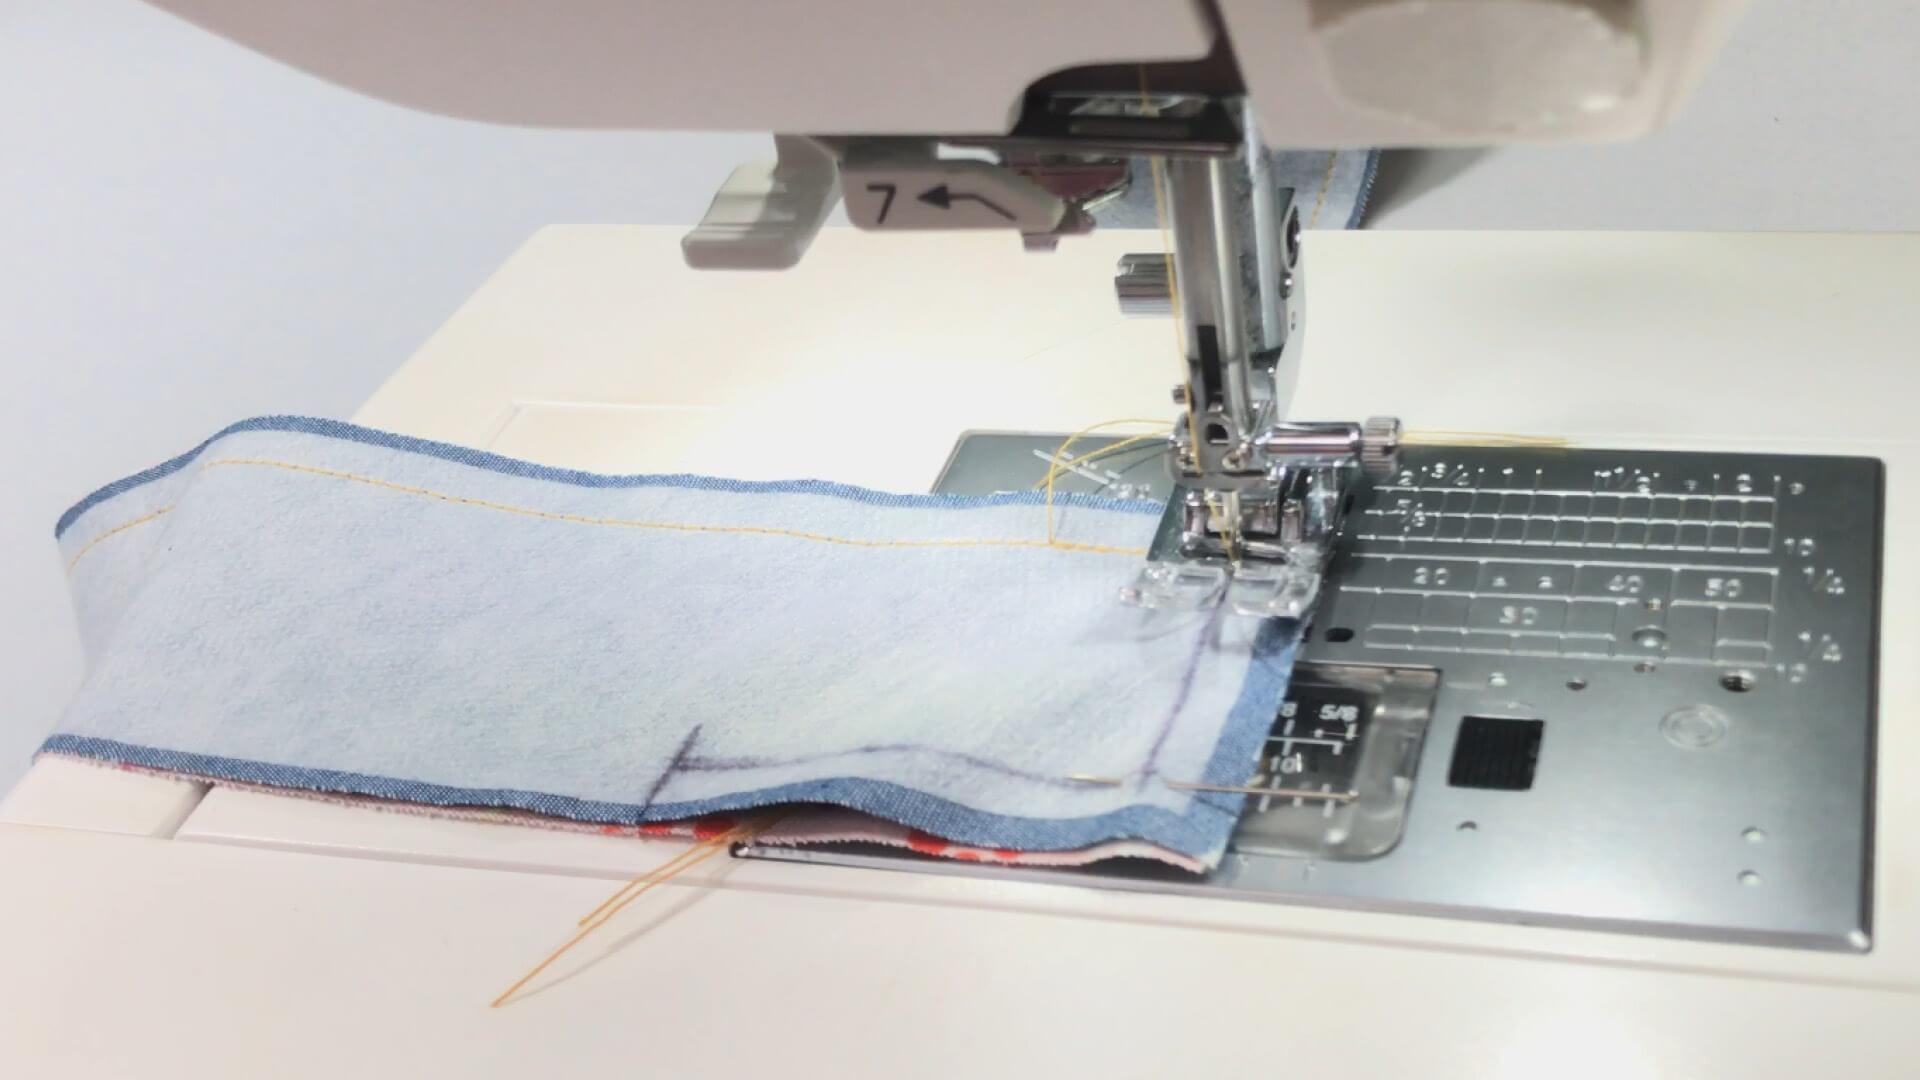
For the version with waistband extension, I sew the bottom corner in the same way as the top corner.
When sewing towards the bottom corner, I stretch the bottom of the inner waistband layer so that it peeks out 1-2 mm at the bottom edge. I use this to push some width into the outer waistband preventing the inner waistband from being visible from the outside after turning.
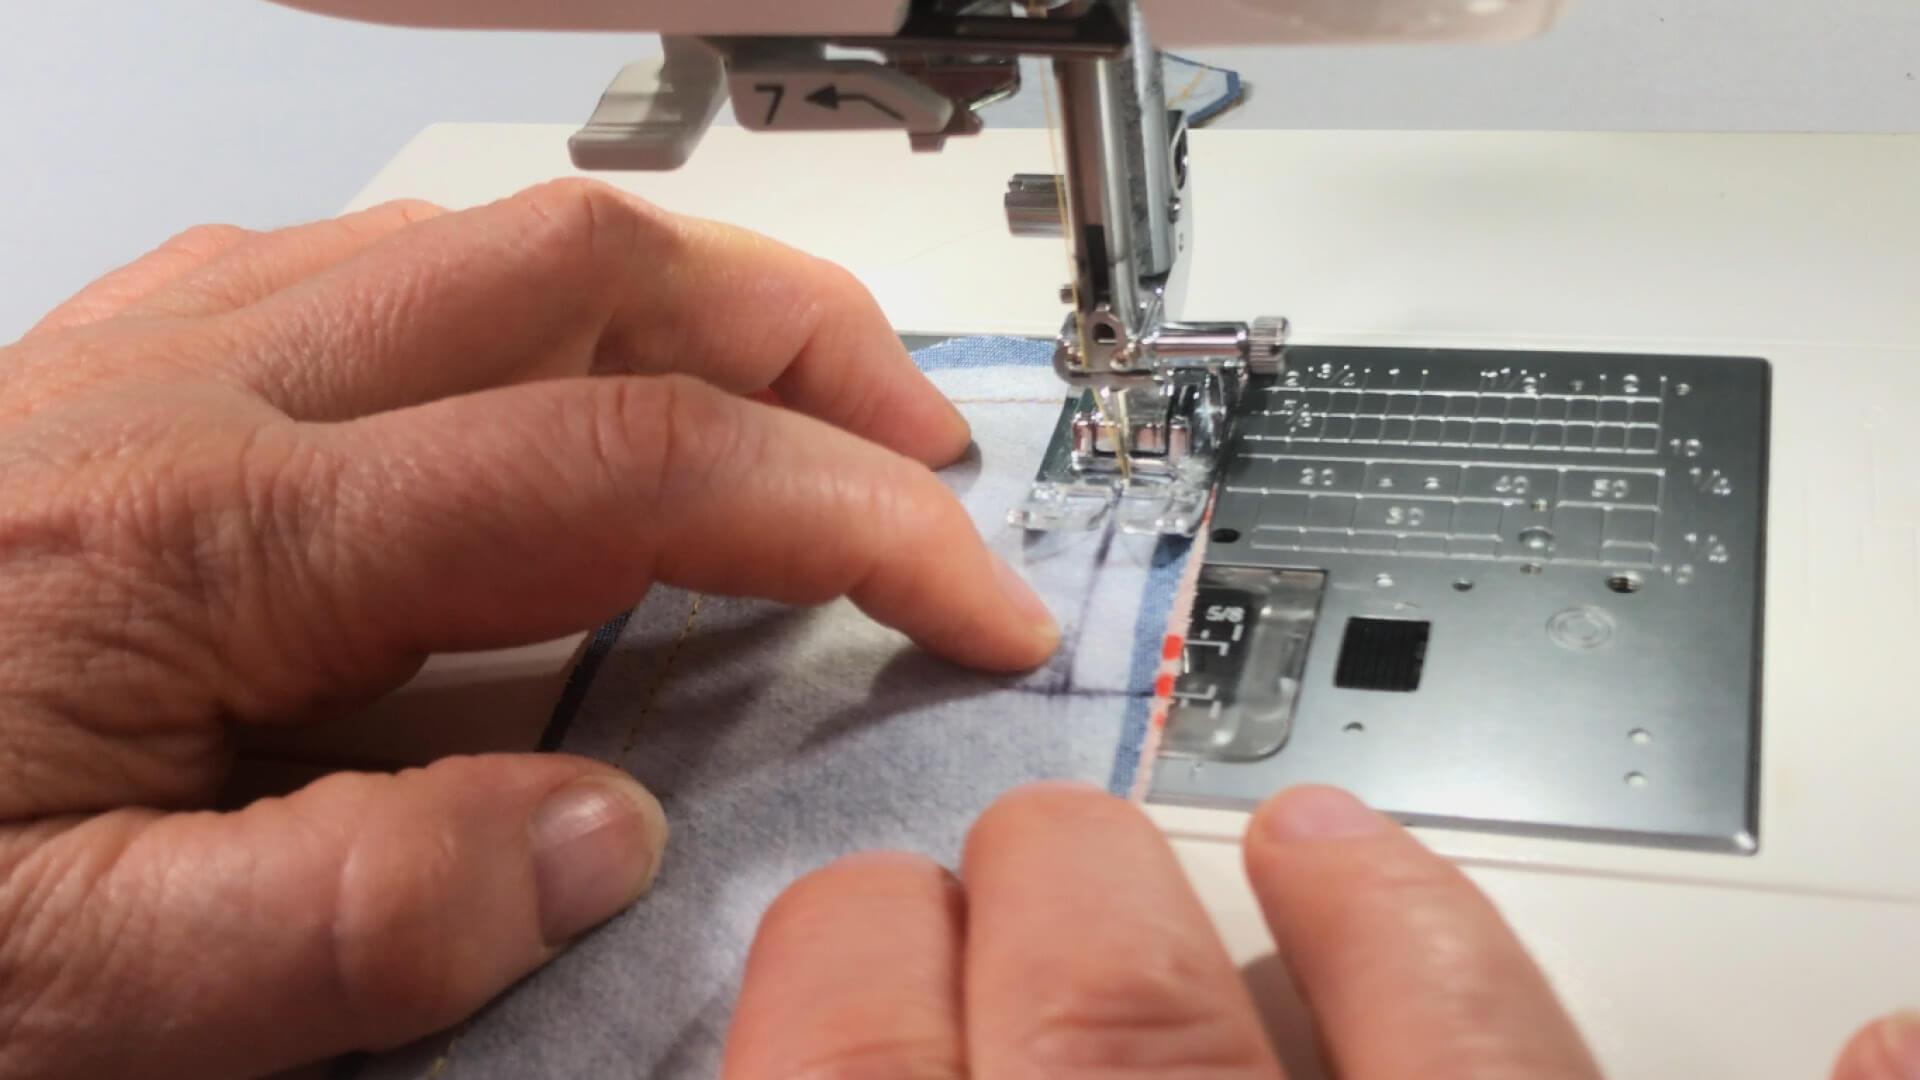
I sew the lower section to the marking on the center front with a 10 mm distance to the protruding edge.
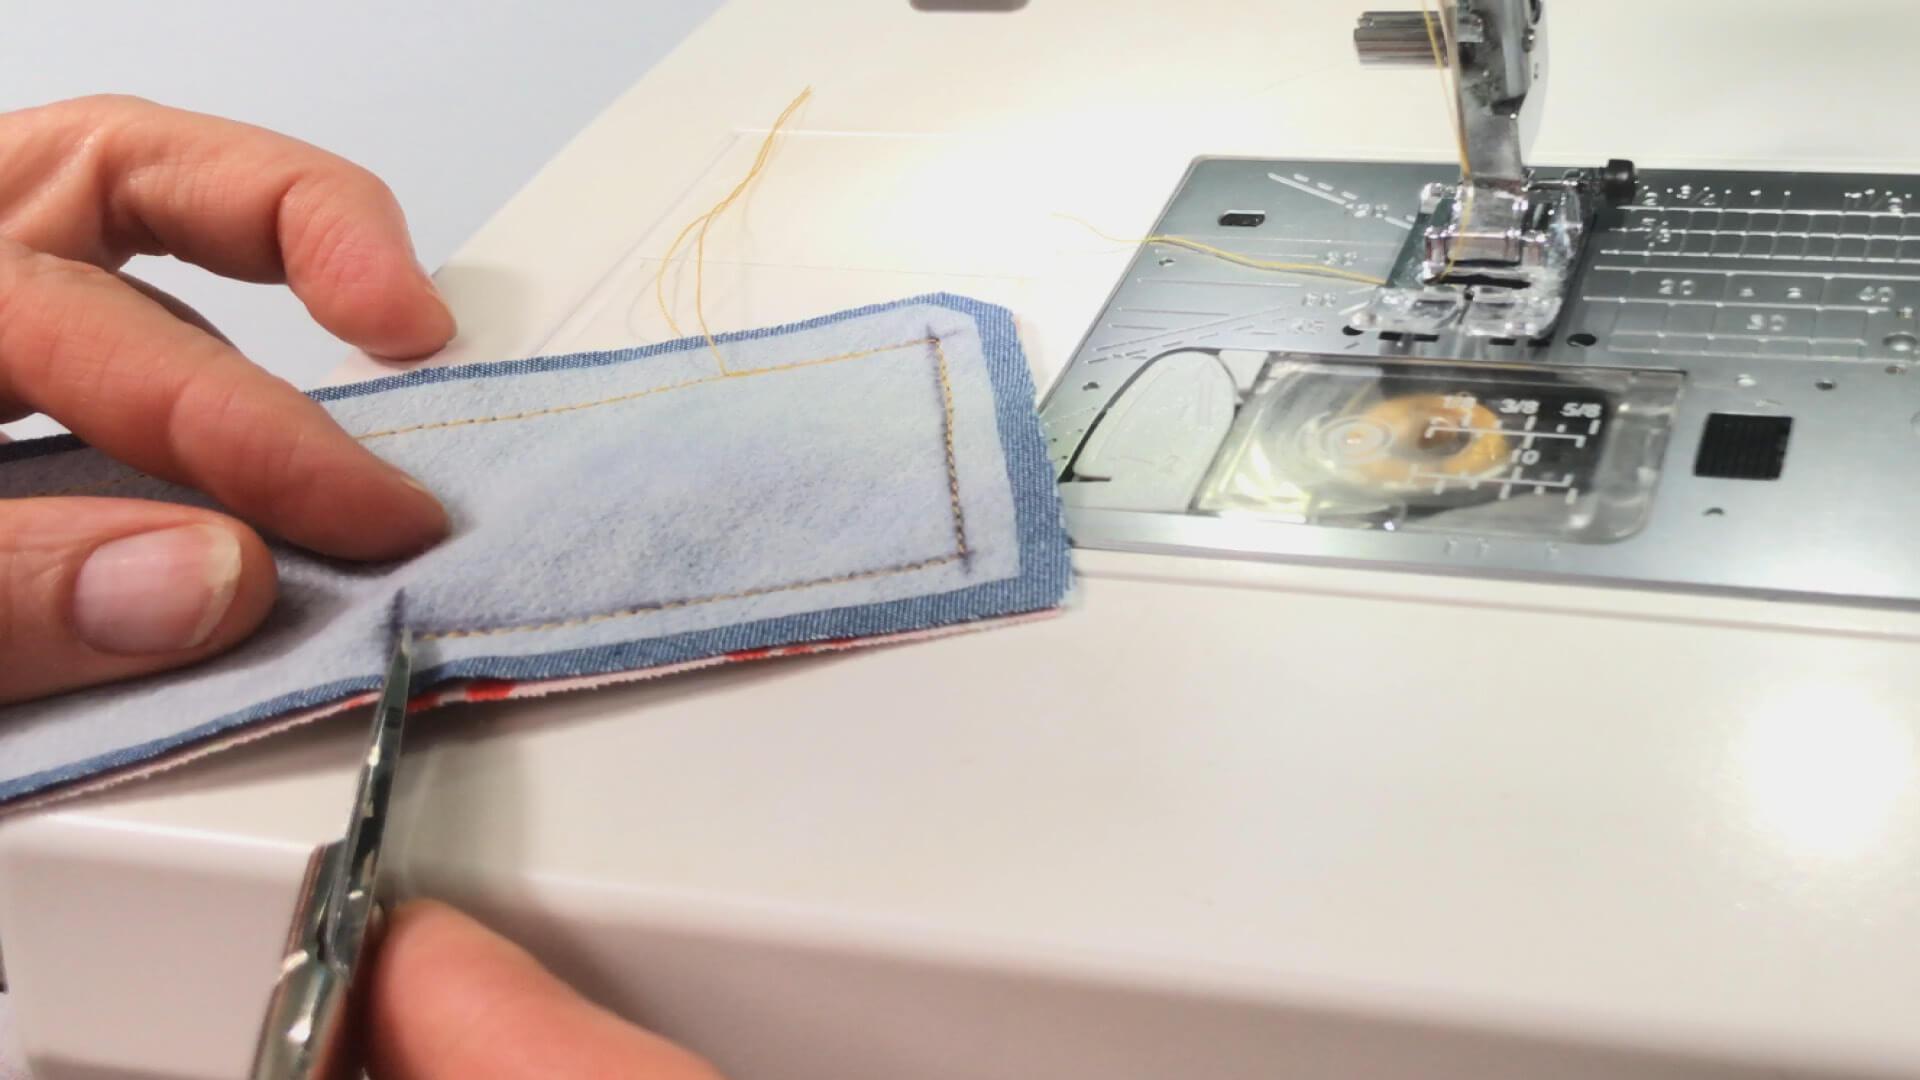
I clip the seam allowance at the center front until just before the last stitch.
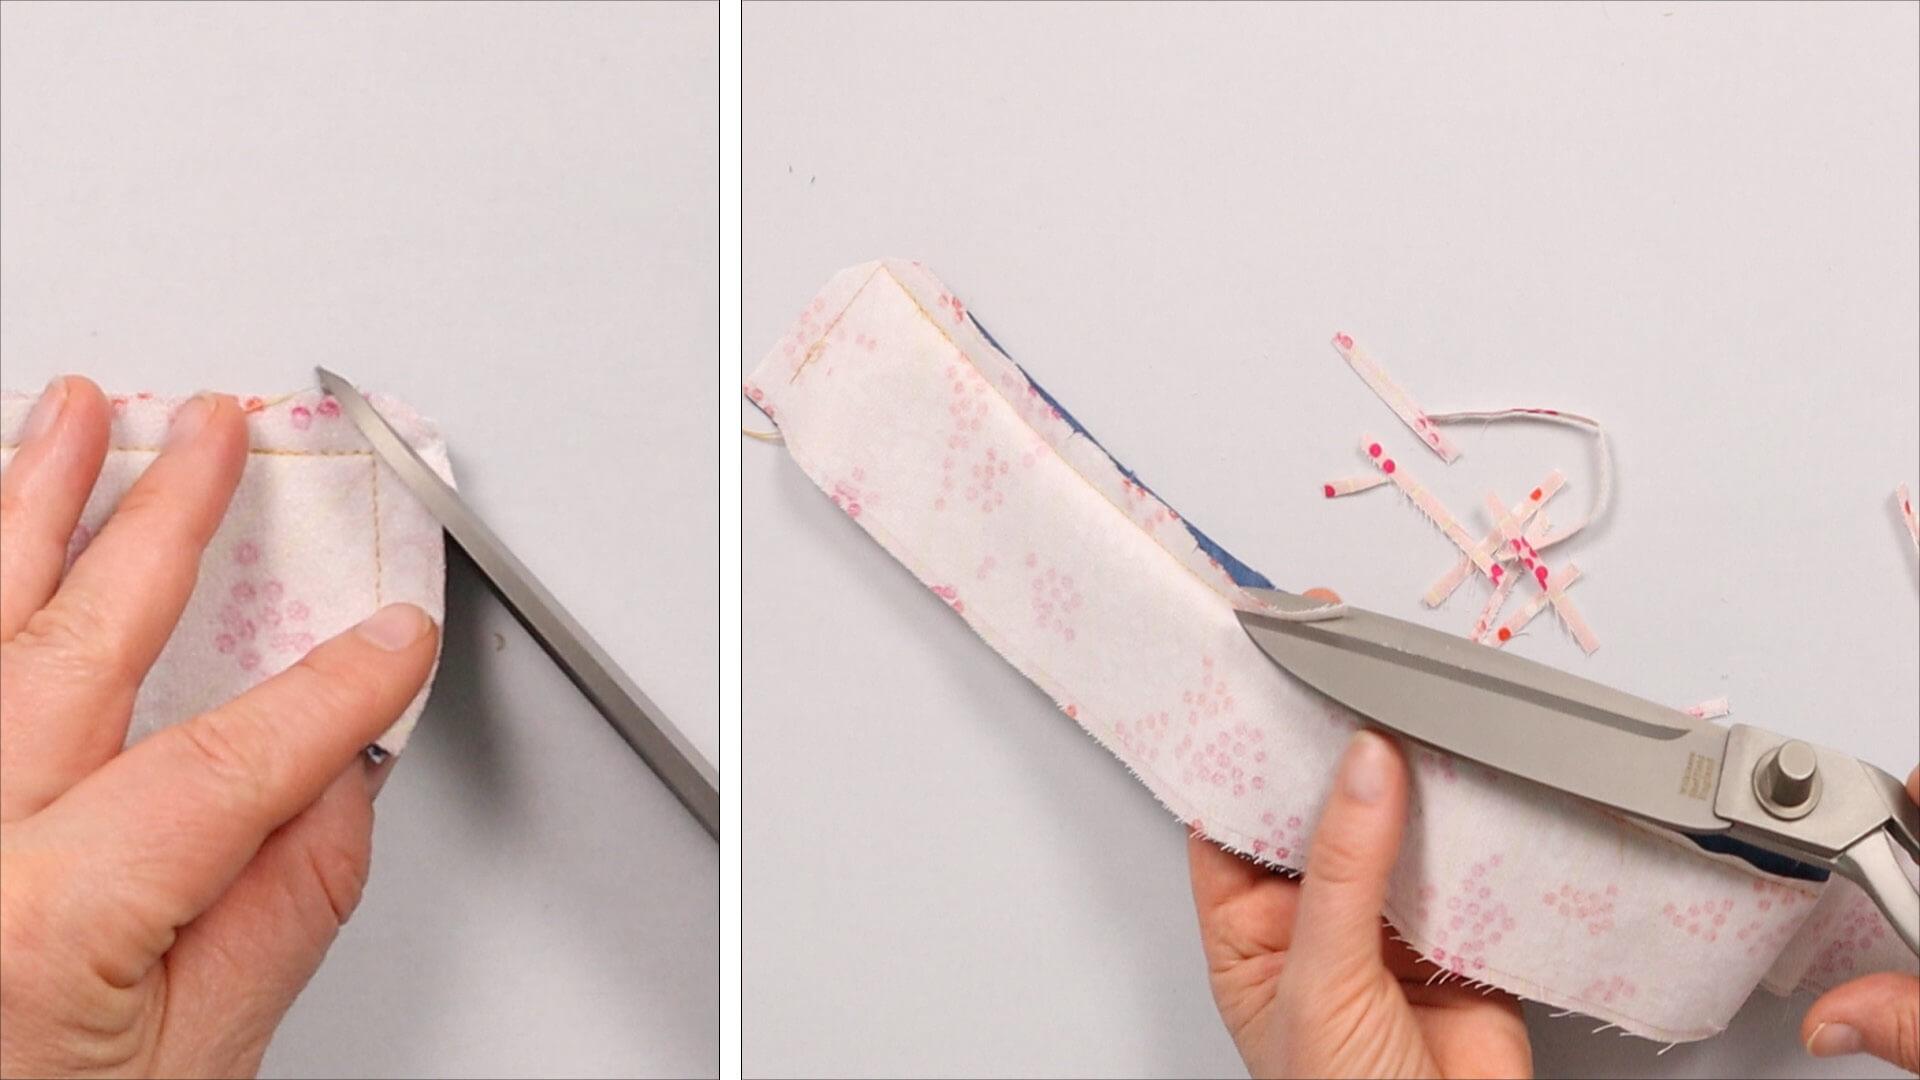
I cut back the seam allowance at the two upper corners at an angle 3 mm from the seam.
I also cut the front and top seam allowance of the inner waistband back to approx. half the width so that the layers lie flatter after turning.
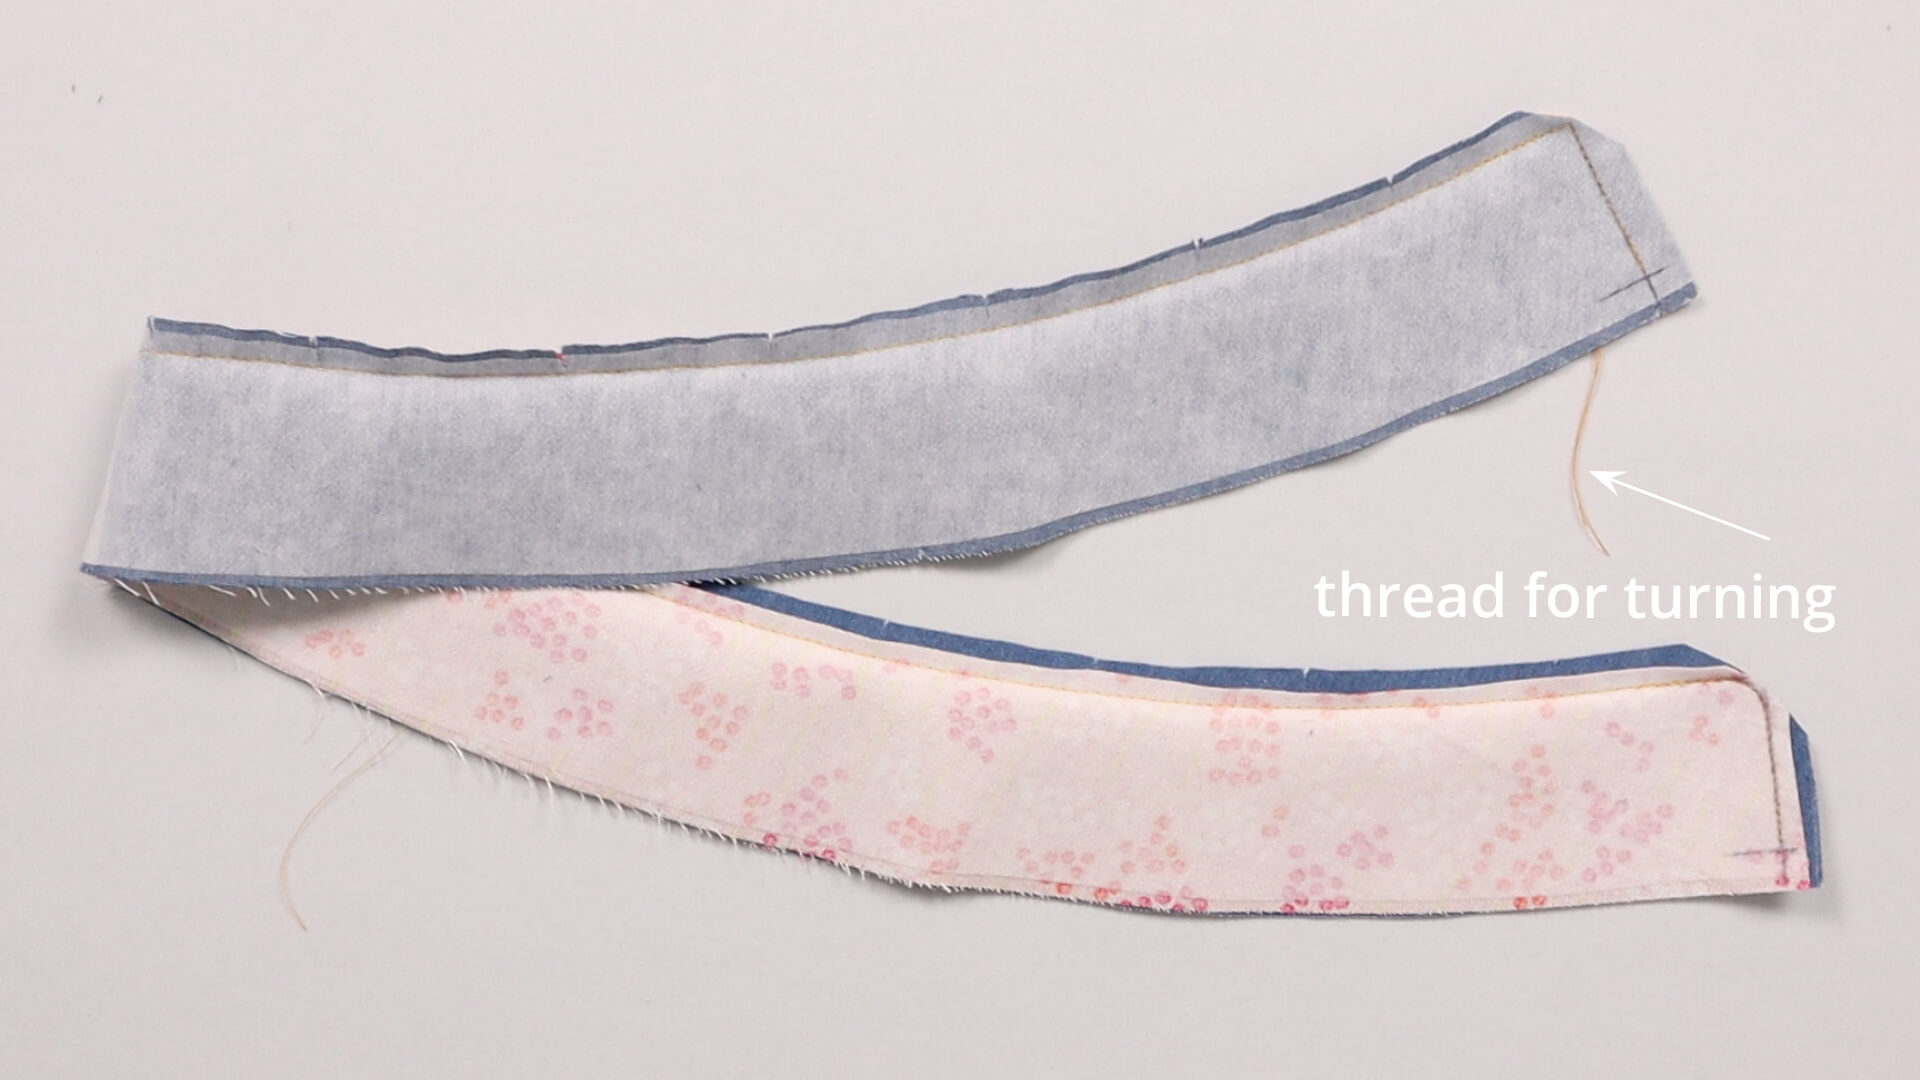
Here you can see an example with a straight corner at the top and a rounded corner at the bottom.
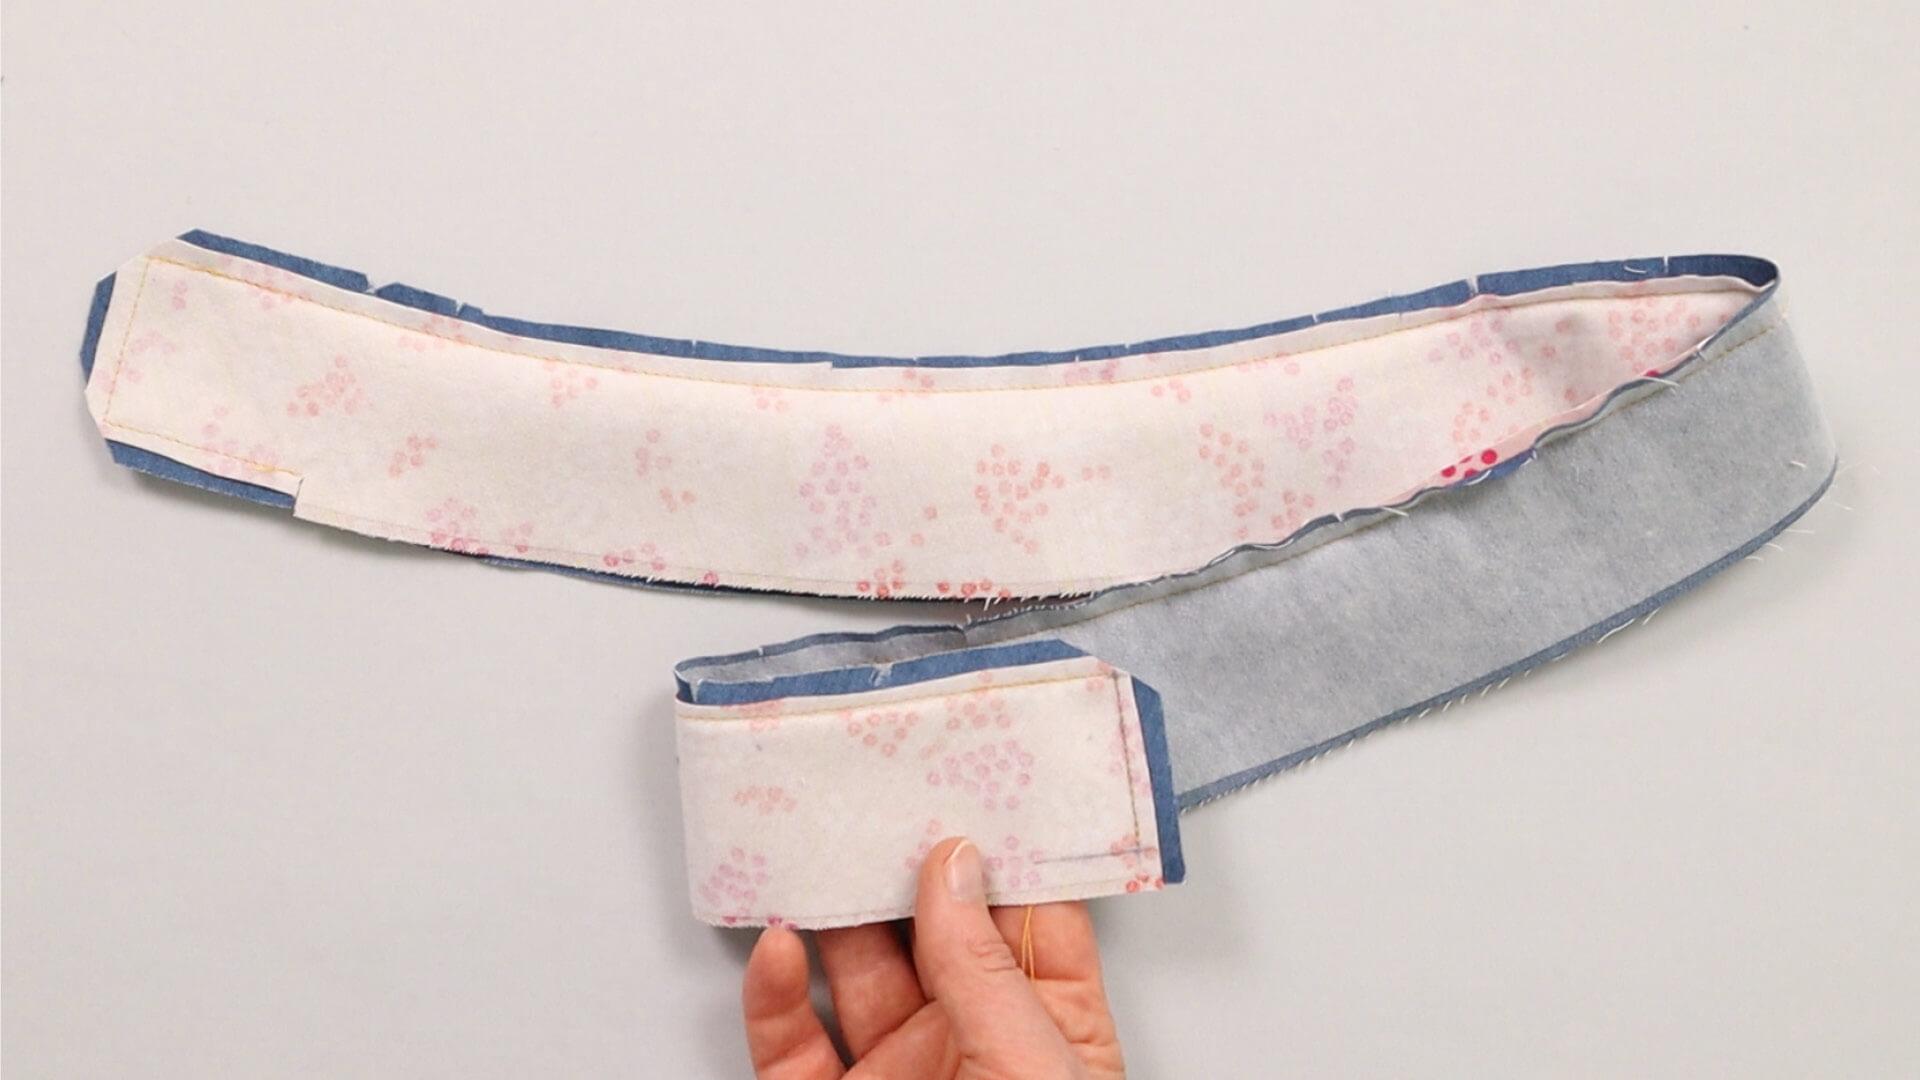
And this is what the version with a waistband extension on the overlap and a straight corner on the underlap looks like from the inside.
5. Understitch the upper edge of the waistband
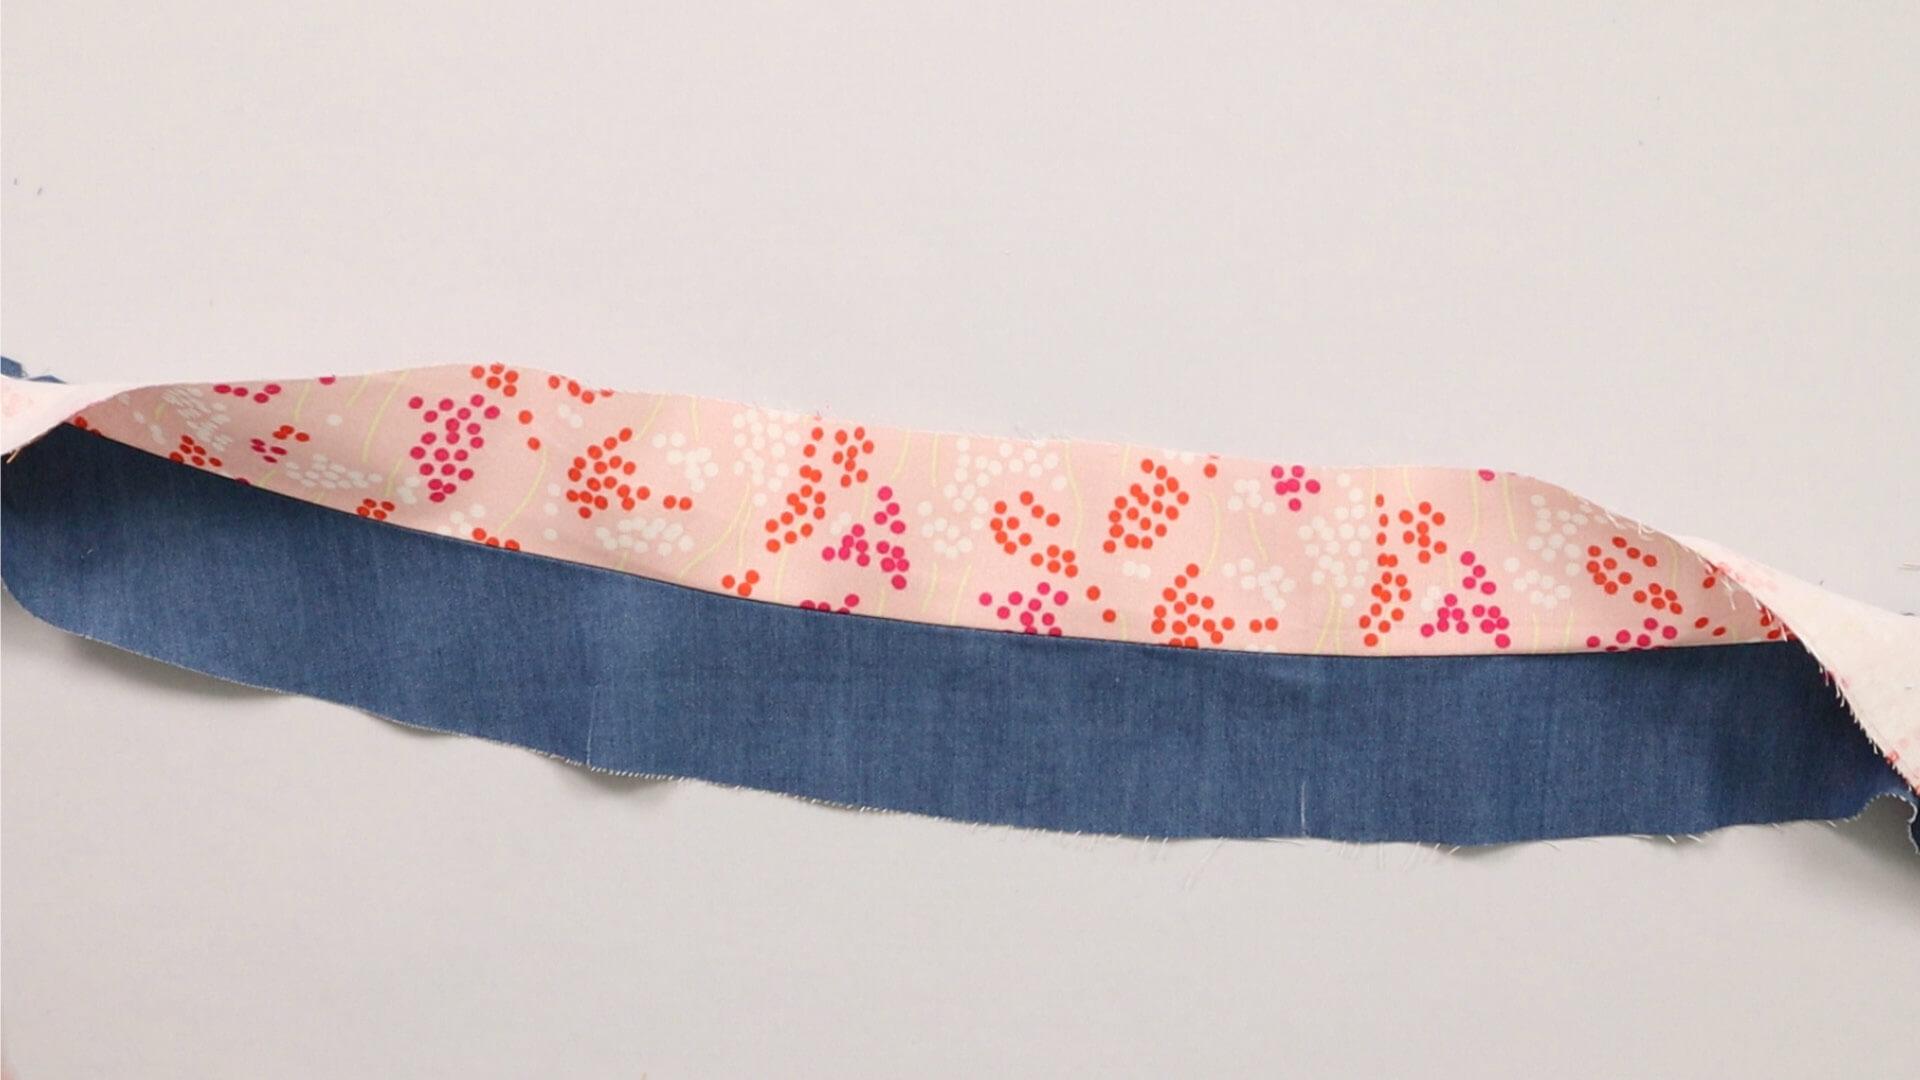
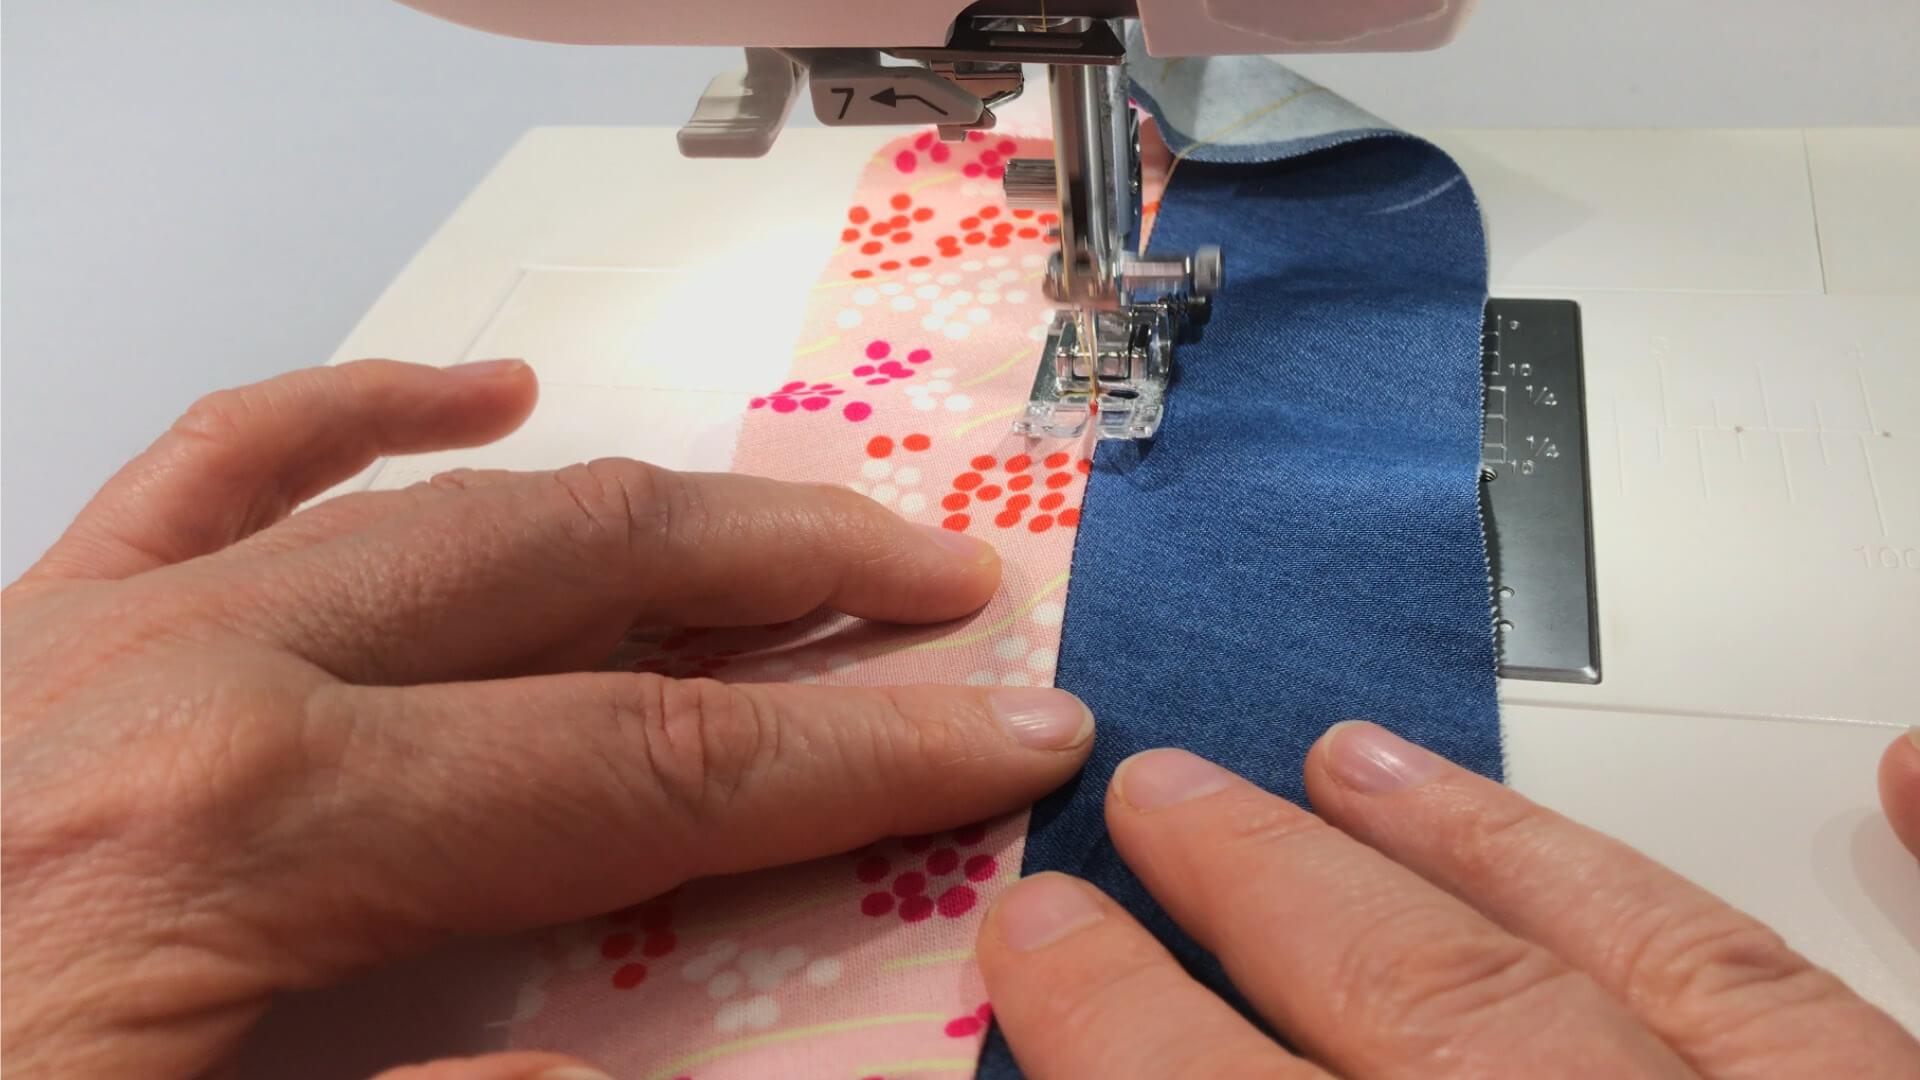
If I want to topstitch the top edge of my waistband through and through later, this step can be omitted. Otherwise, I understitch the seam on the inside waistband to prevent it from being visible from the outside. I start and finish as close to the corners as I can easily reach.
6. Turn the waistband edge
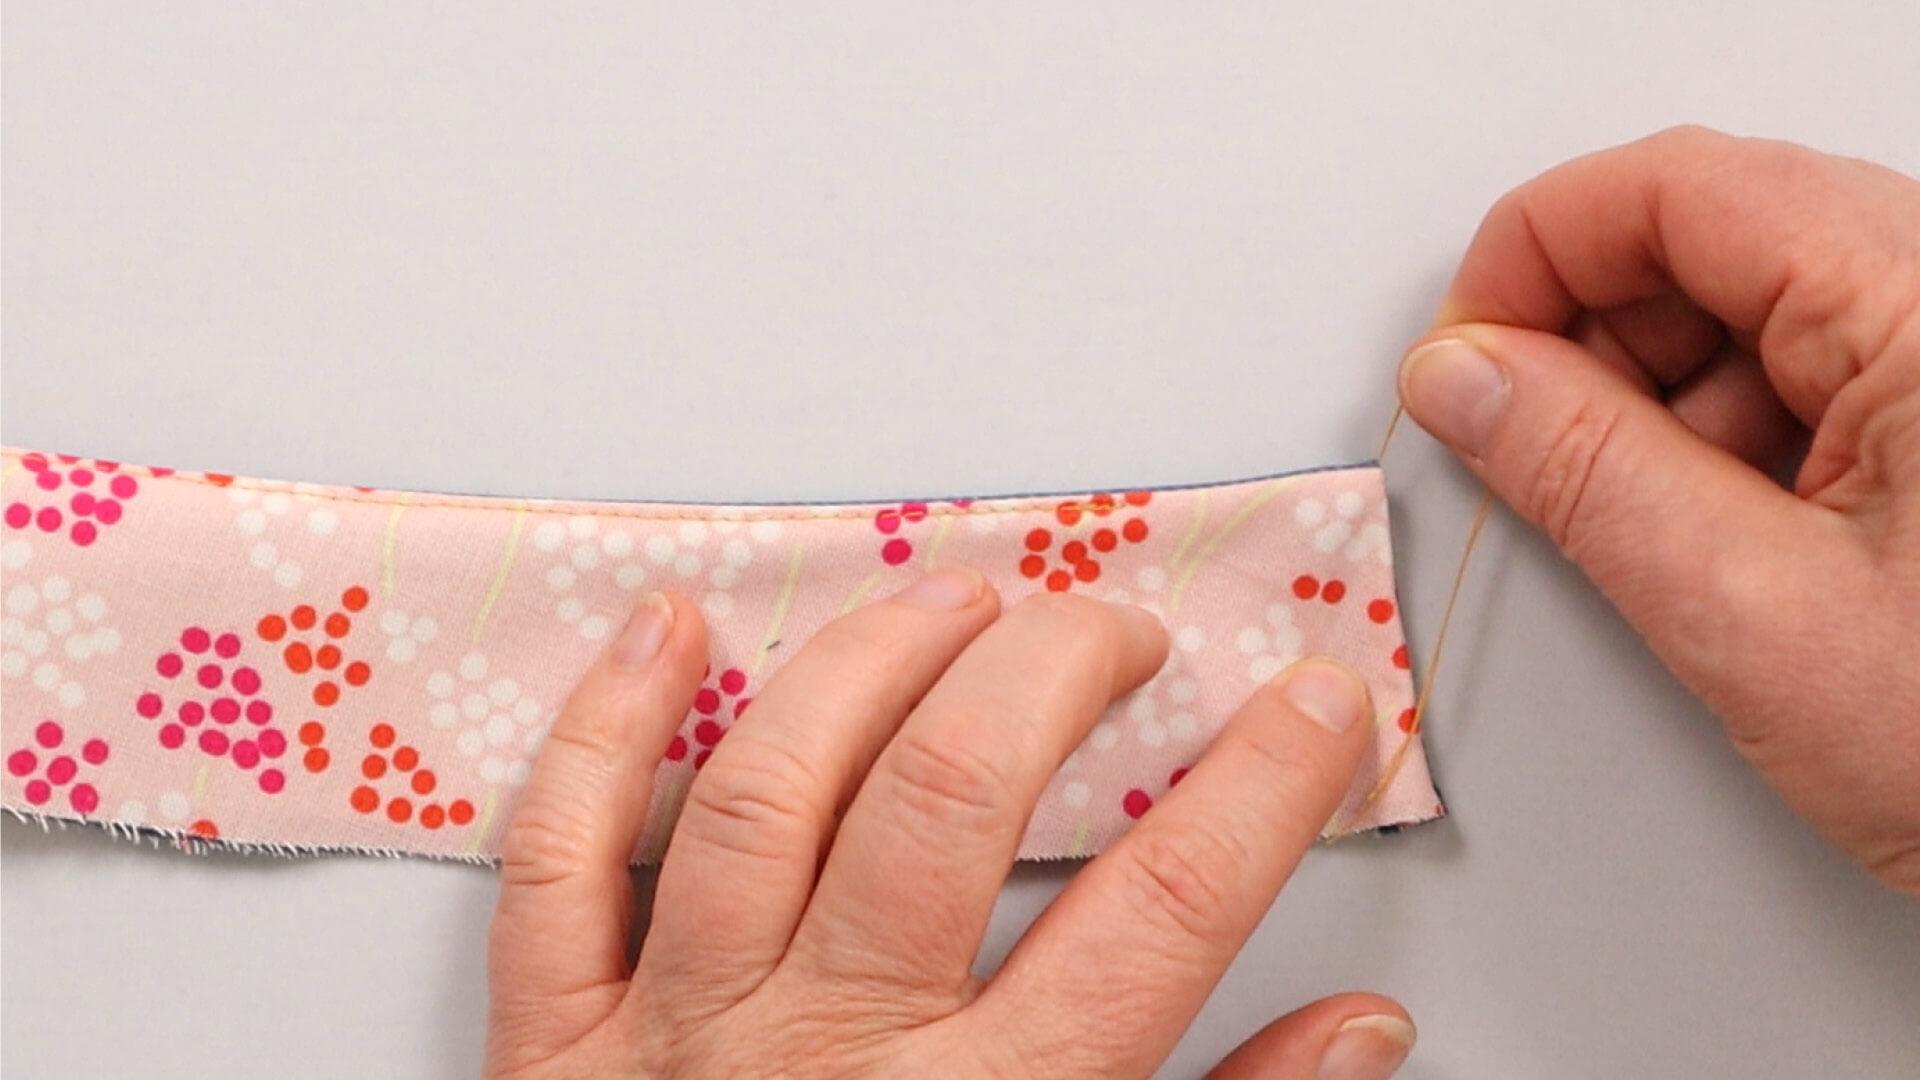
Then I turn the waistband edge.
With the help of the sewn in turning threads, I can shape the straight corners nicely. I leave these in until my waistband is sewn on.
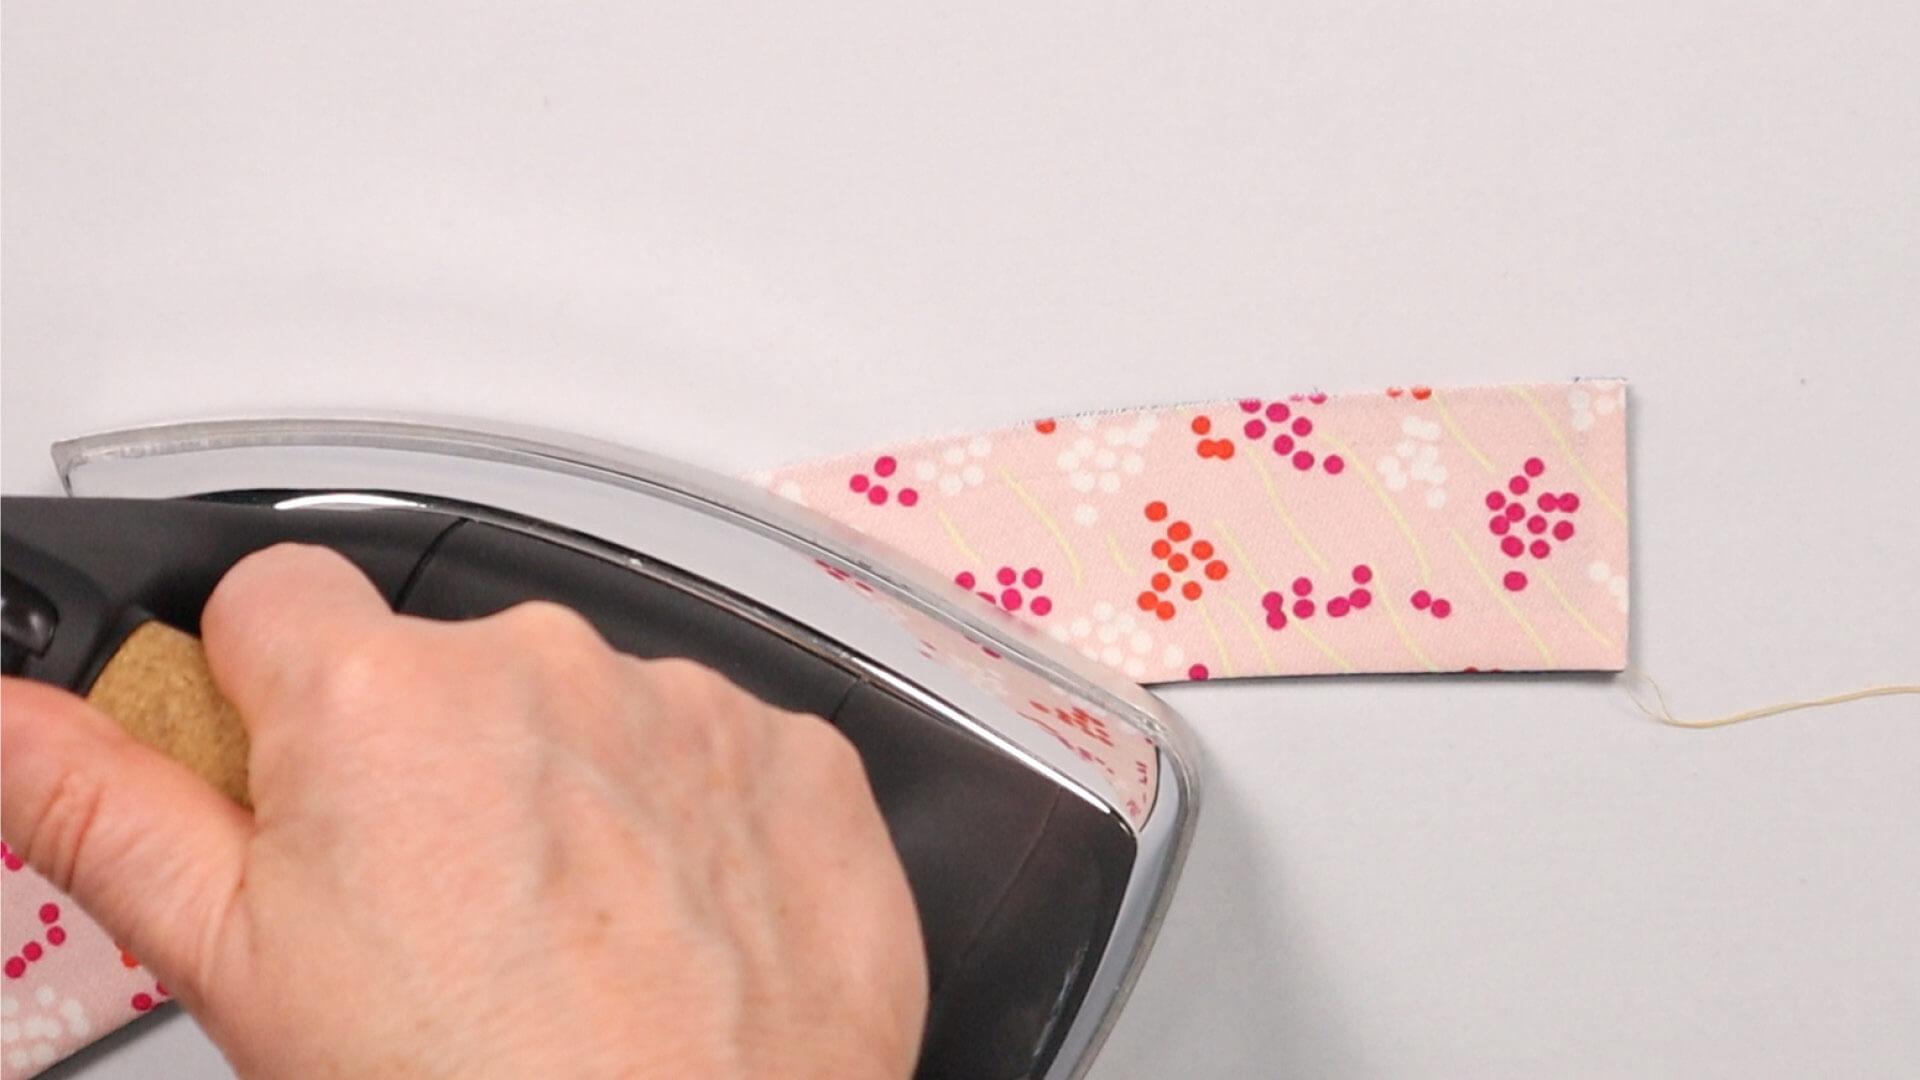
I iron the corners and waistband flat from the inside.
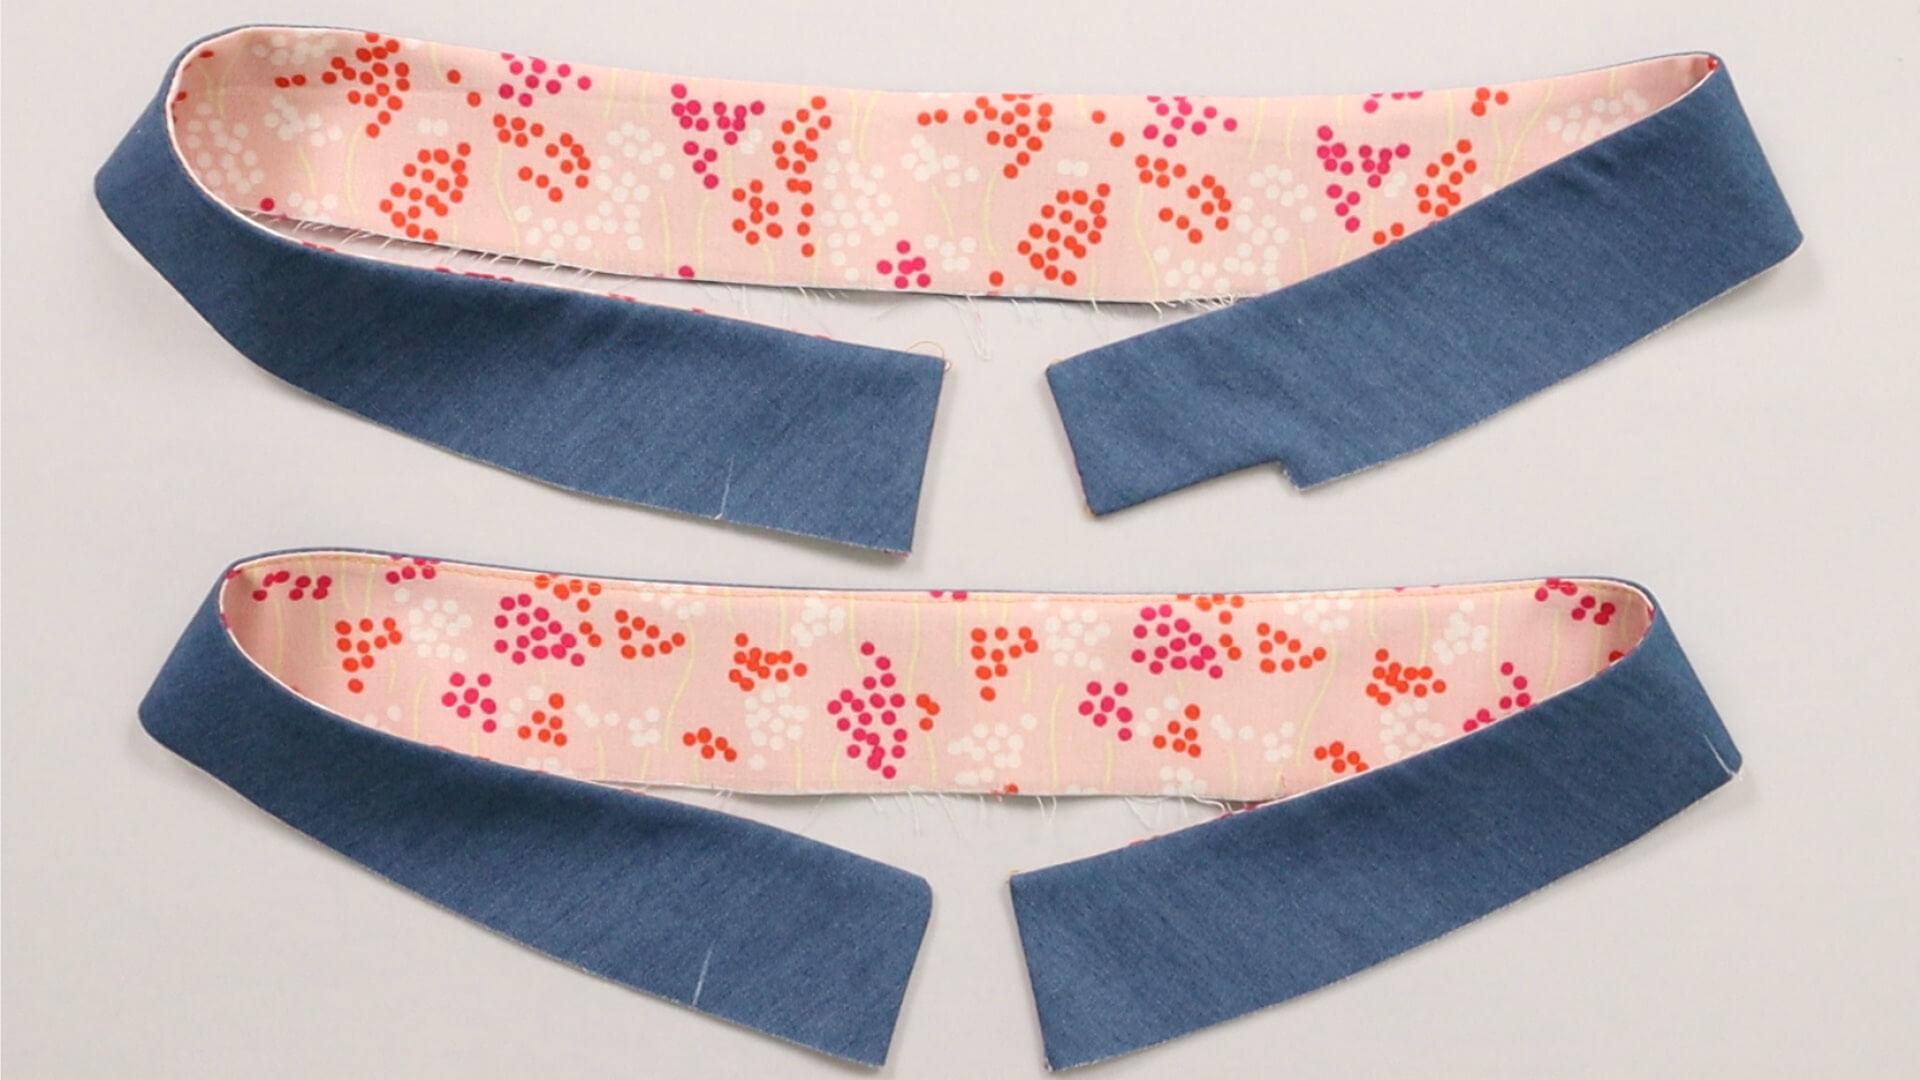
Here you can see two waistband strips with different corner variations, above the overlap side with waistband extension.
7. Design of the waistband
There are various options for attaching the waistband strip, depending on the favoured design and fabric thickness. A few thoughts are necessary in advance.
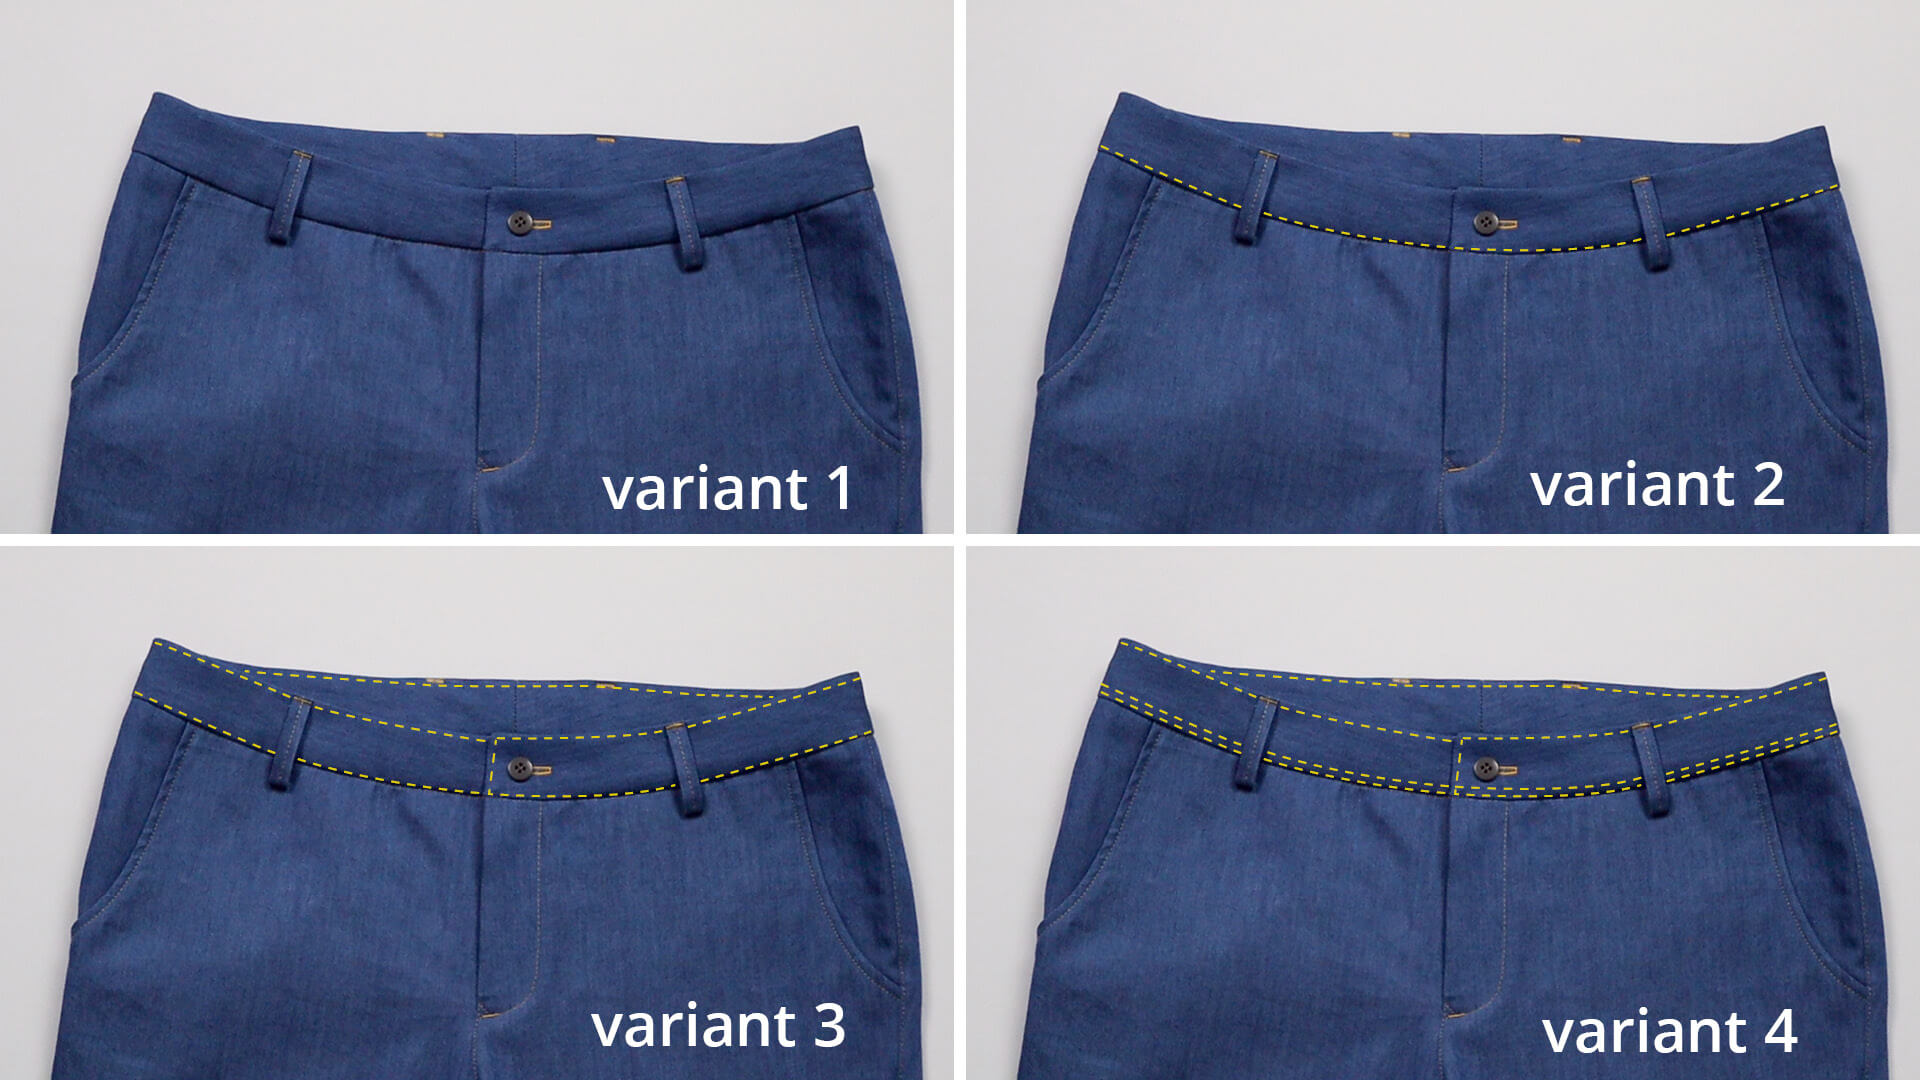
Here you can see various examples for the design of the waistband. If you want to finish the waistband without visible topstitching, first sew the outer waistband strip to trousers. You can proceed in the same way for the versions that are topstitched. It’s also possible to sew the inner waistband strip to the inside of the trousers first and stitch the outer waistband strip to the outside. I show this variant in the instructions for sewing a waistband on jeans trousers.
Here I explain how to proceed if you do not want to have a visible topstitch on the waistband, as in variant 1.
8. Lower edge of the inner waistband
Before I sew on the waistband, I think about how I will finish the raw edge of the inner waistband.
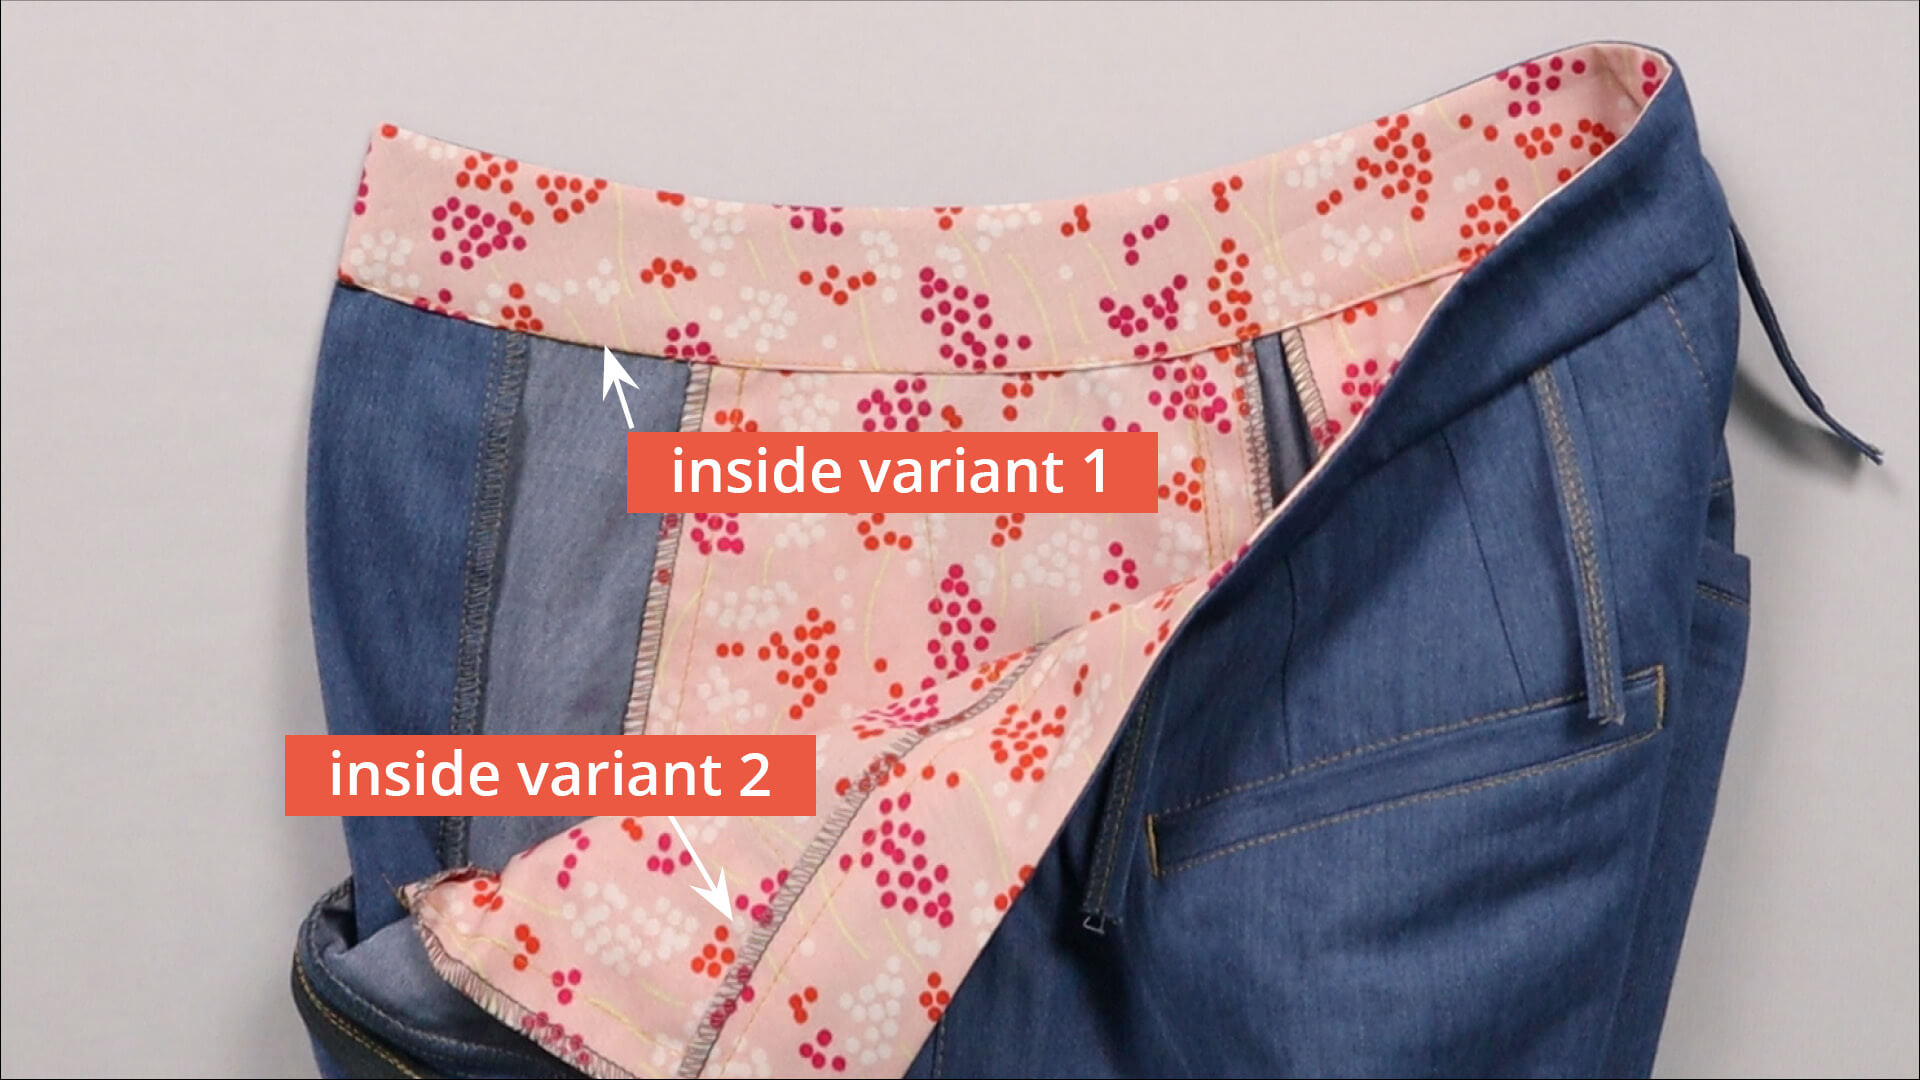
The cut edge can be finished with an overlock seam or bias binding (inside variant 2).
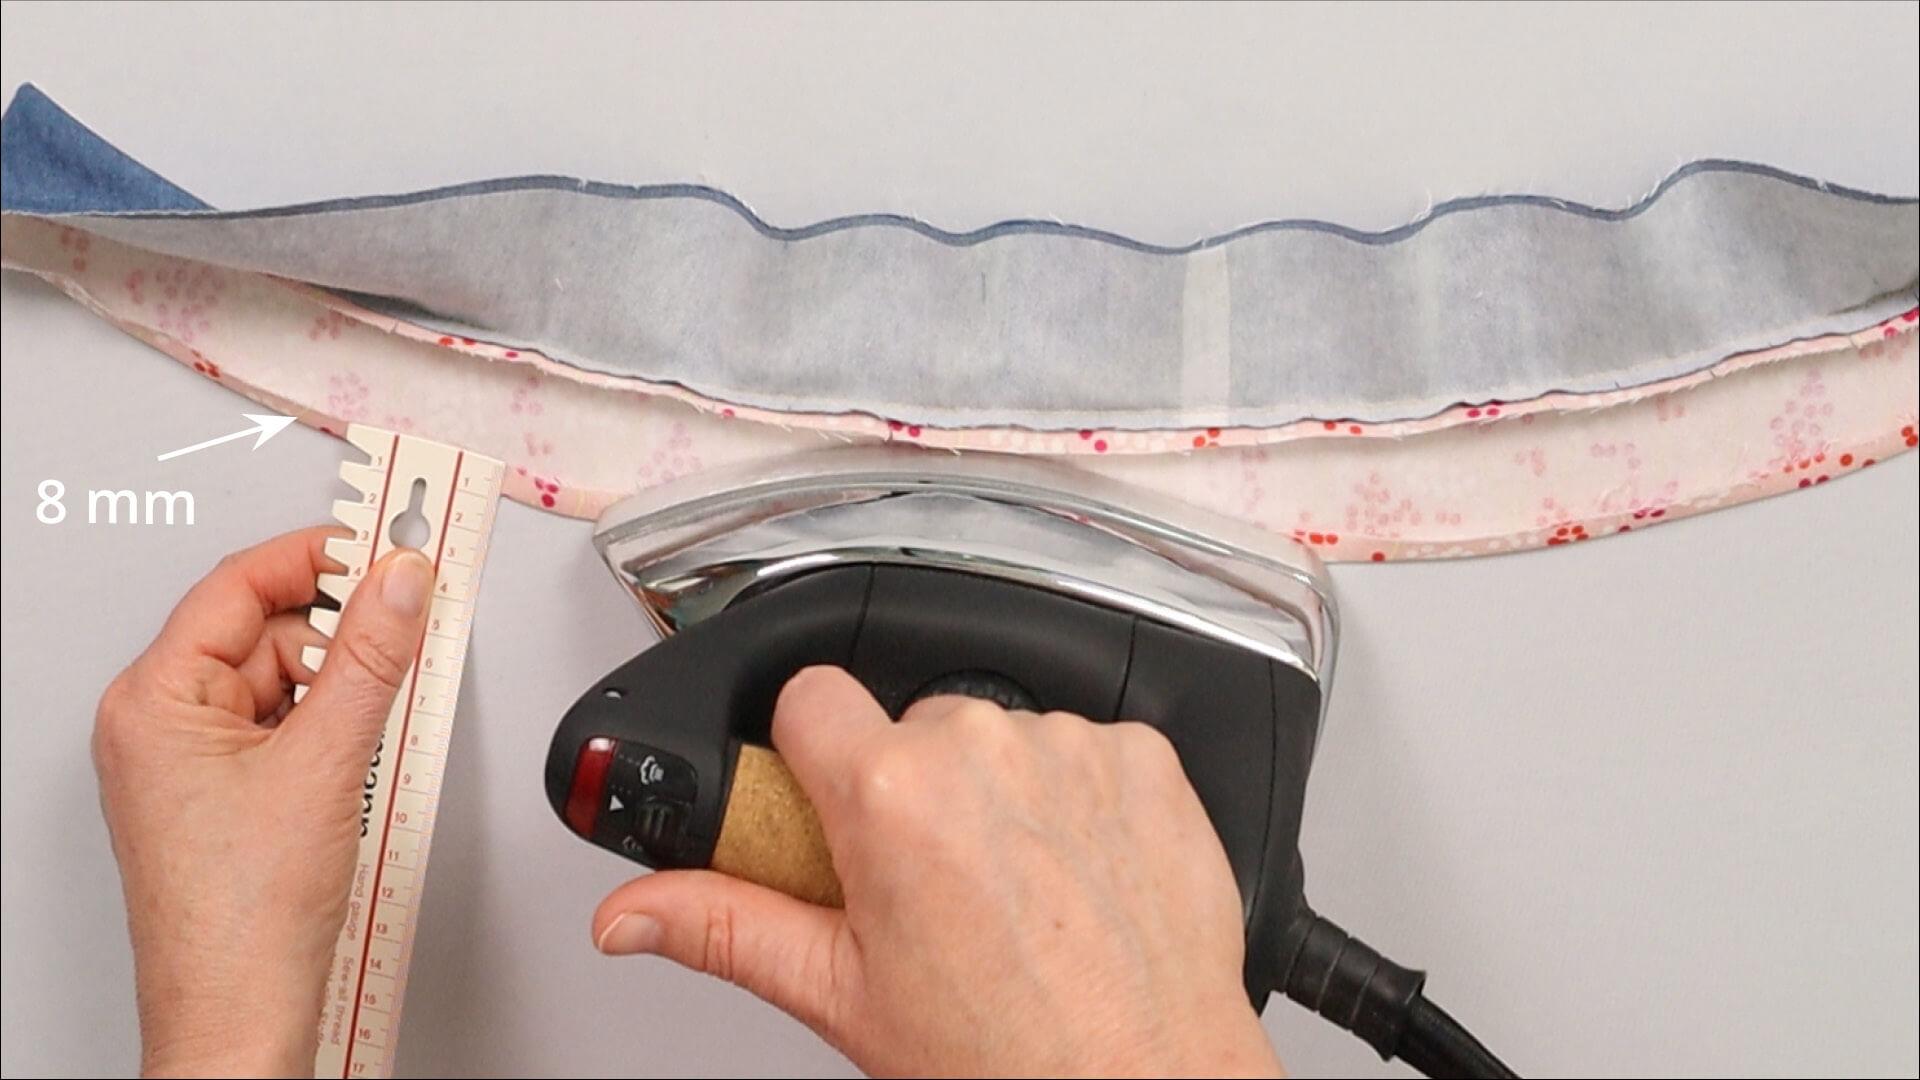
or the the inside of the waistband is pressed by 8 mm so I can catch the folded edge when topstitching from the outside. (inside variant 1)
9. Sew on waistband
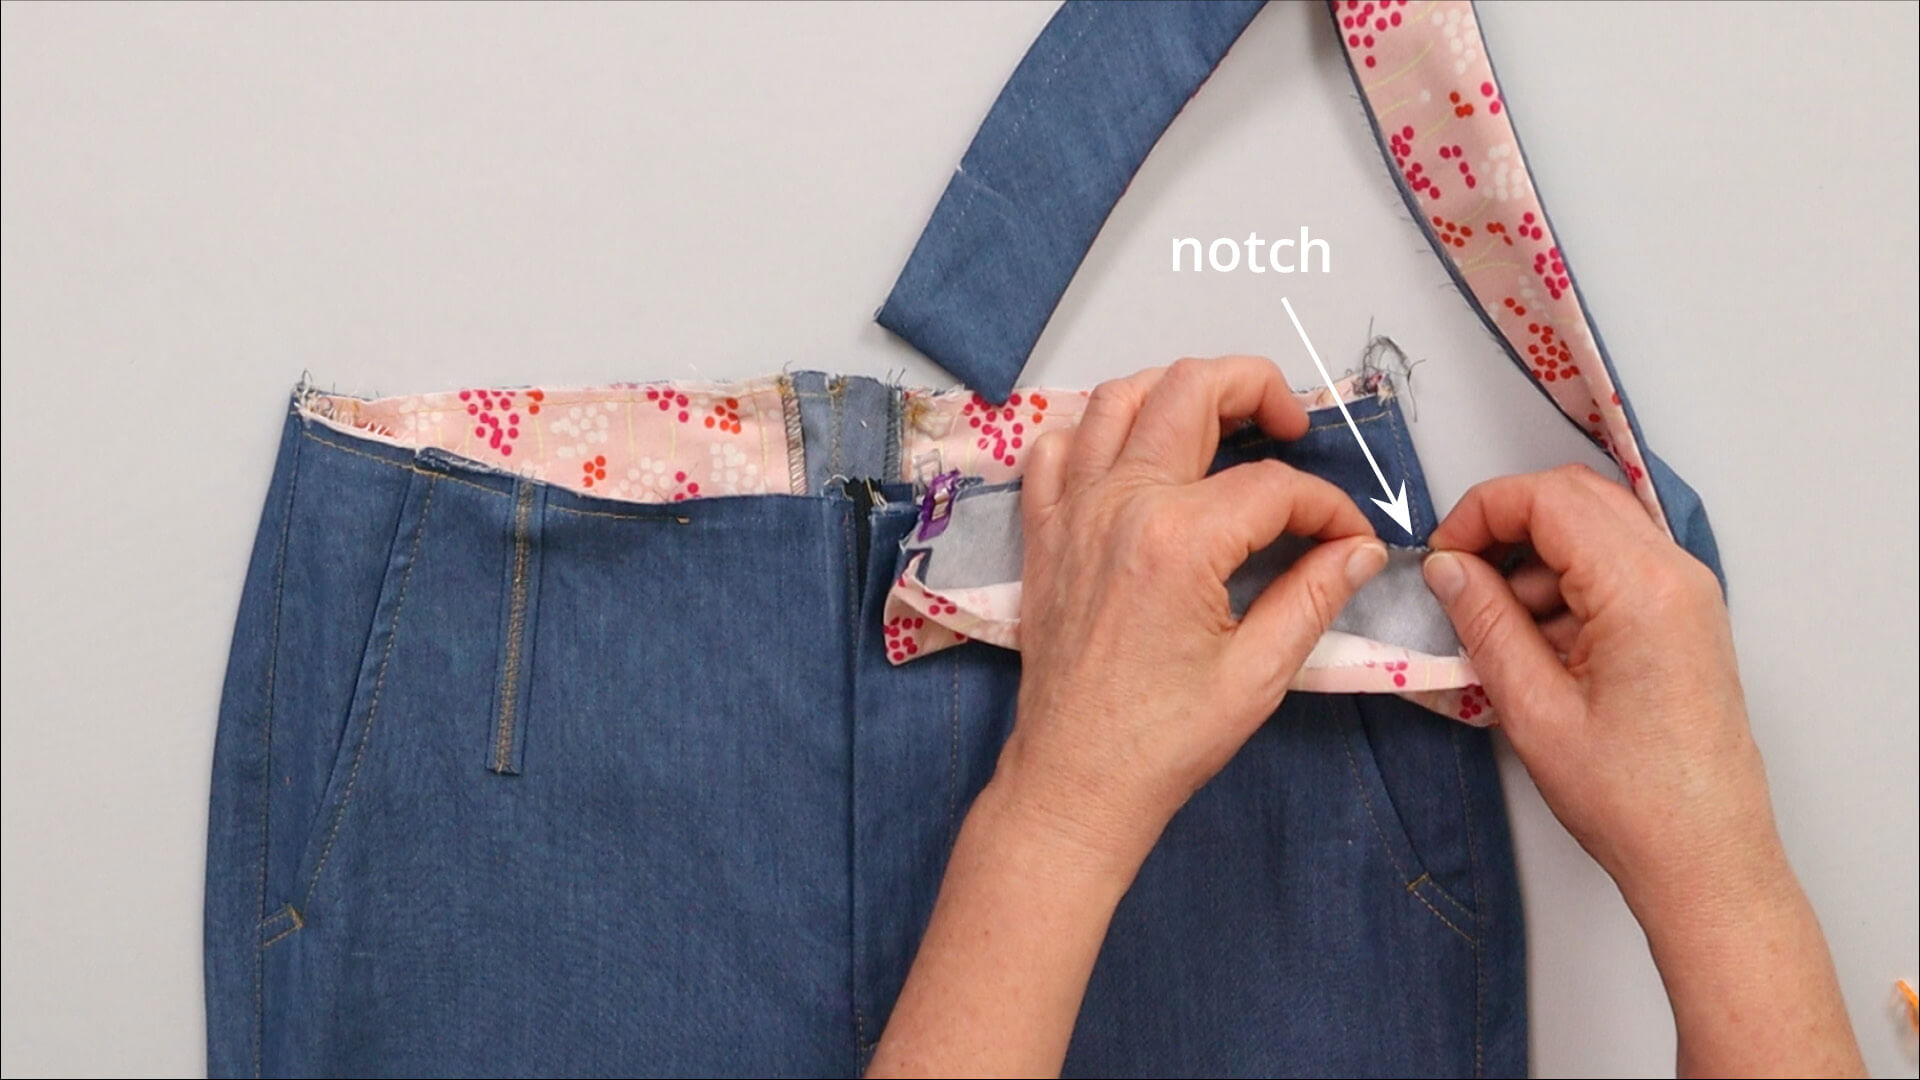
Now I pin the waistband onto the trousers, right sides facing, all the way round.
I make sure that the waistband markings for the center front and center back as well as the side seams match the corresponding points of the trousers exactly.
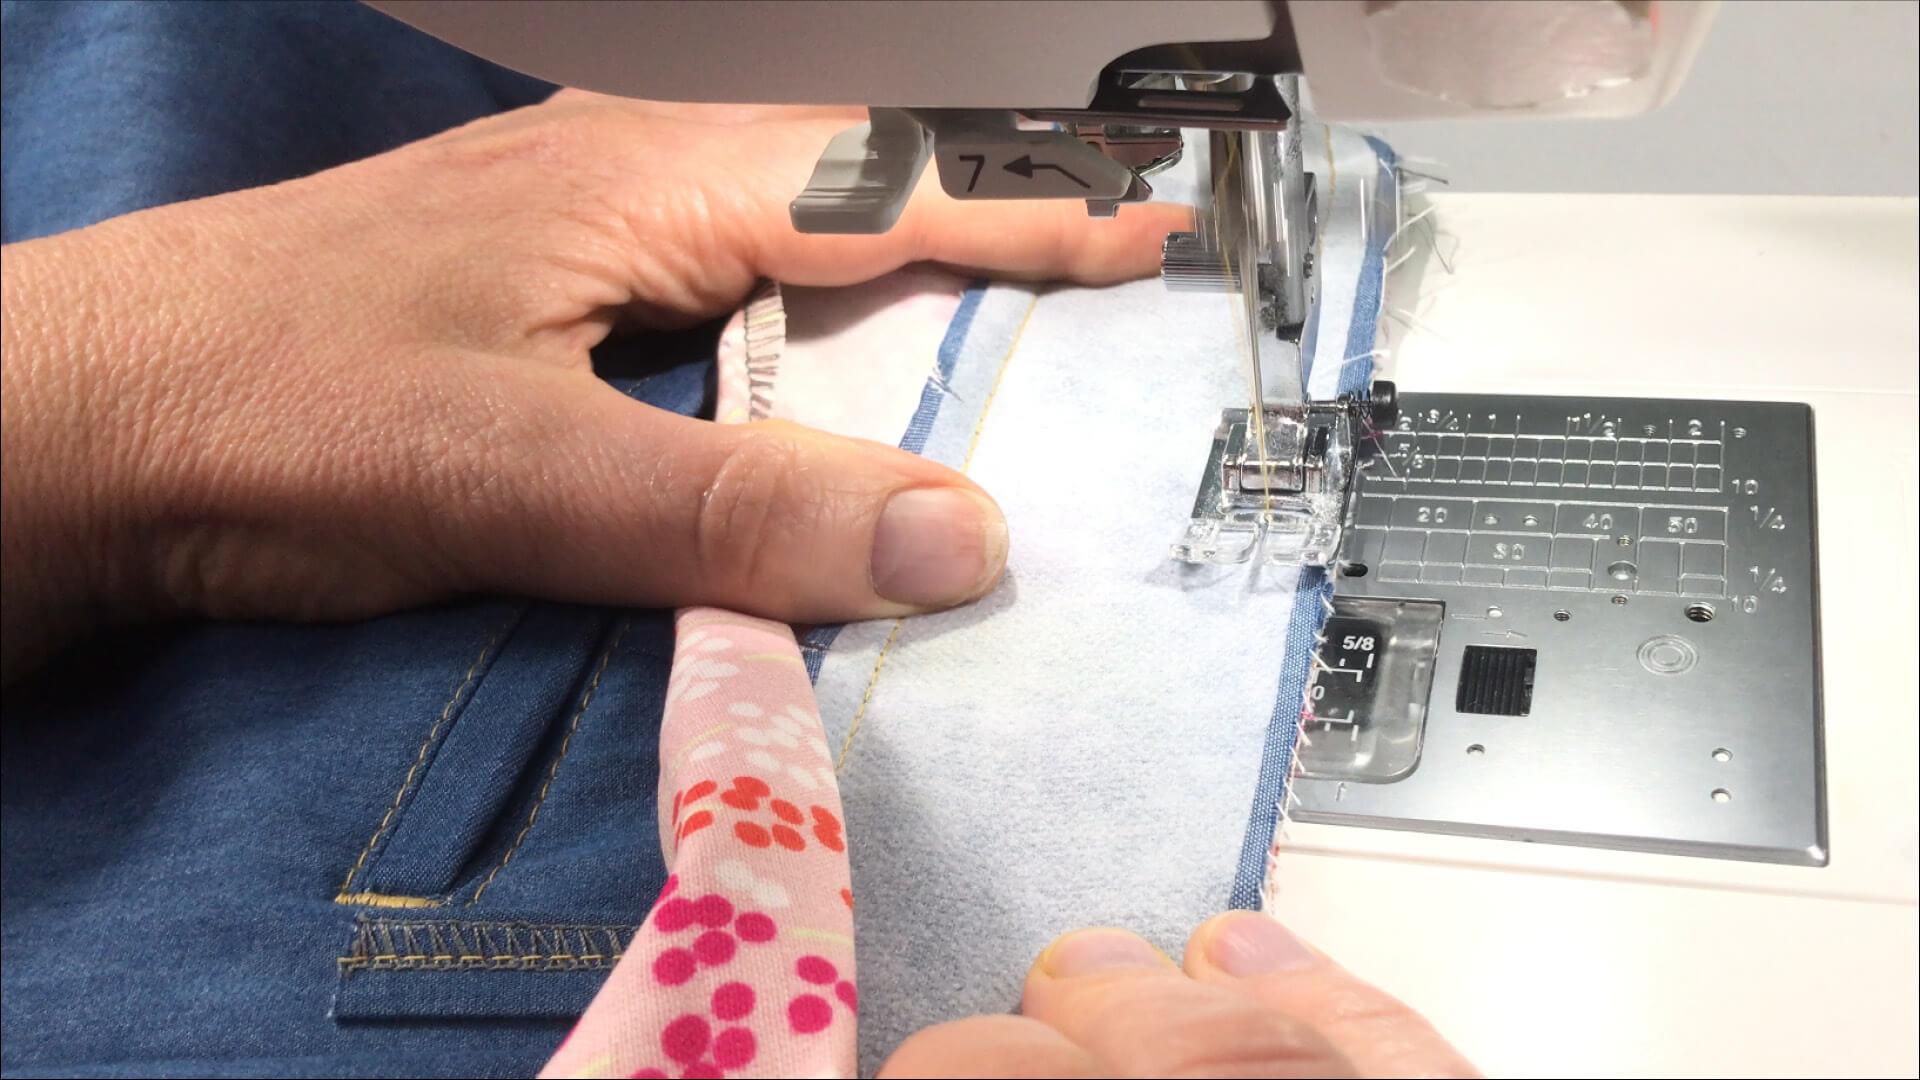
Then I sew the waistband with a 10 mm seam allowance, making sure the belt loops point straight down. If you have only pinned the loops in place, carefully stitch over the pins.
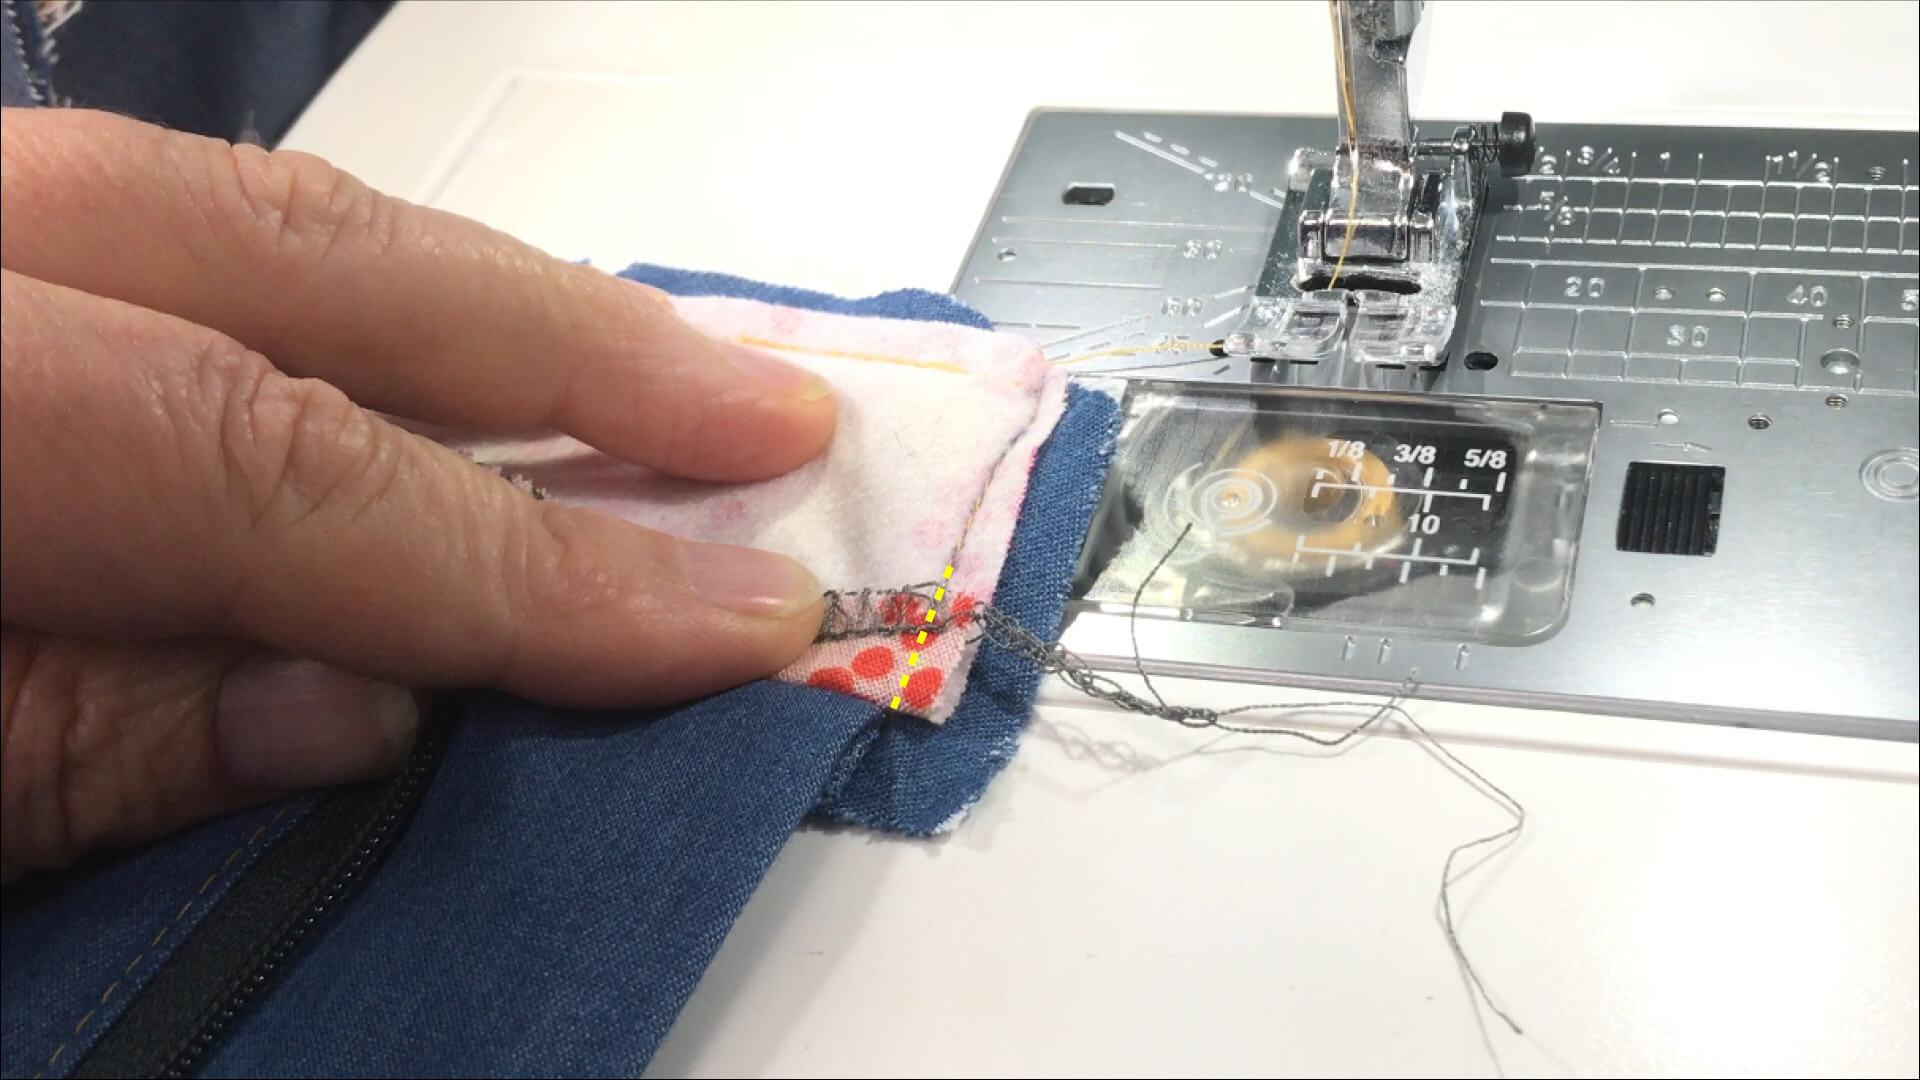
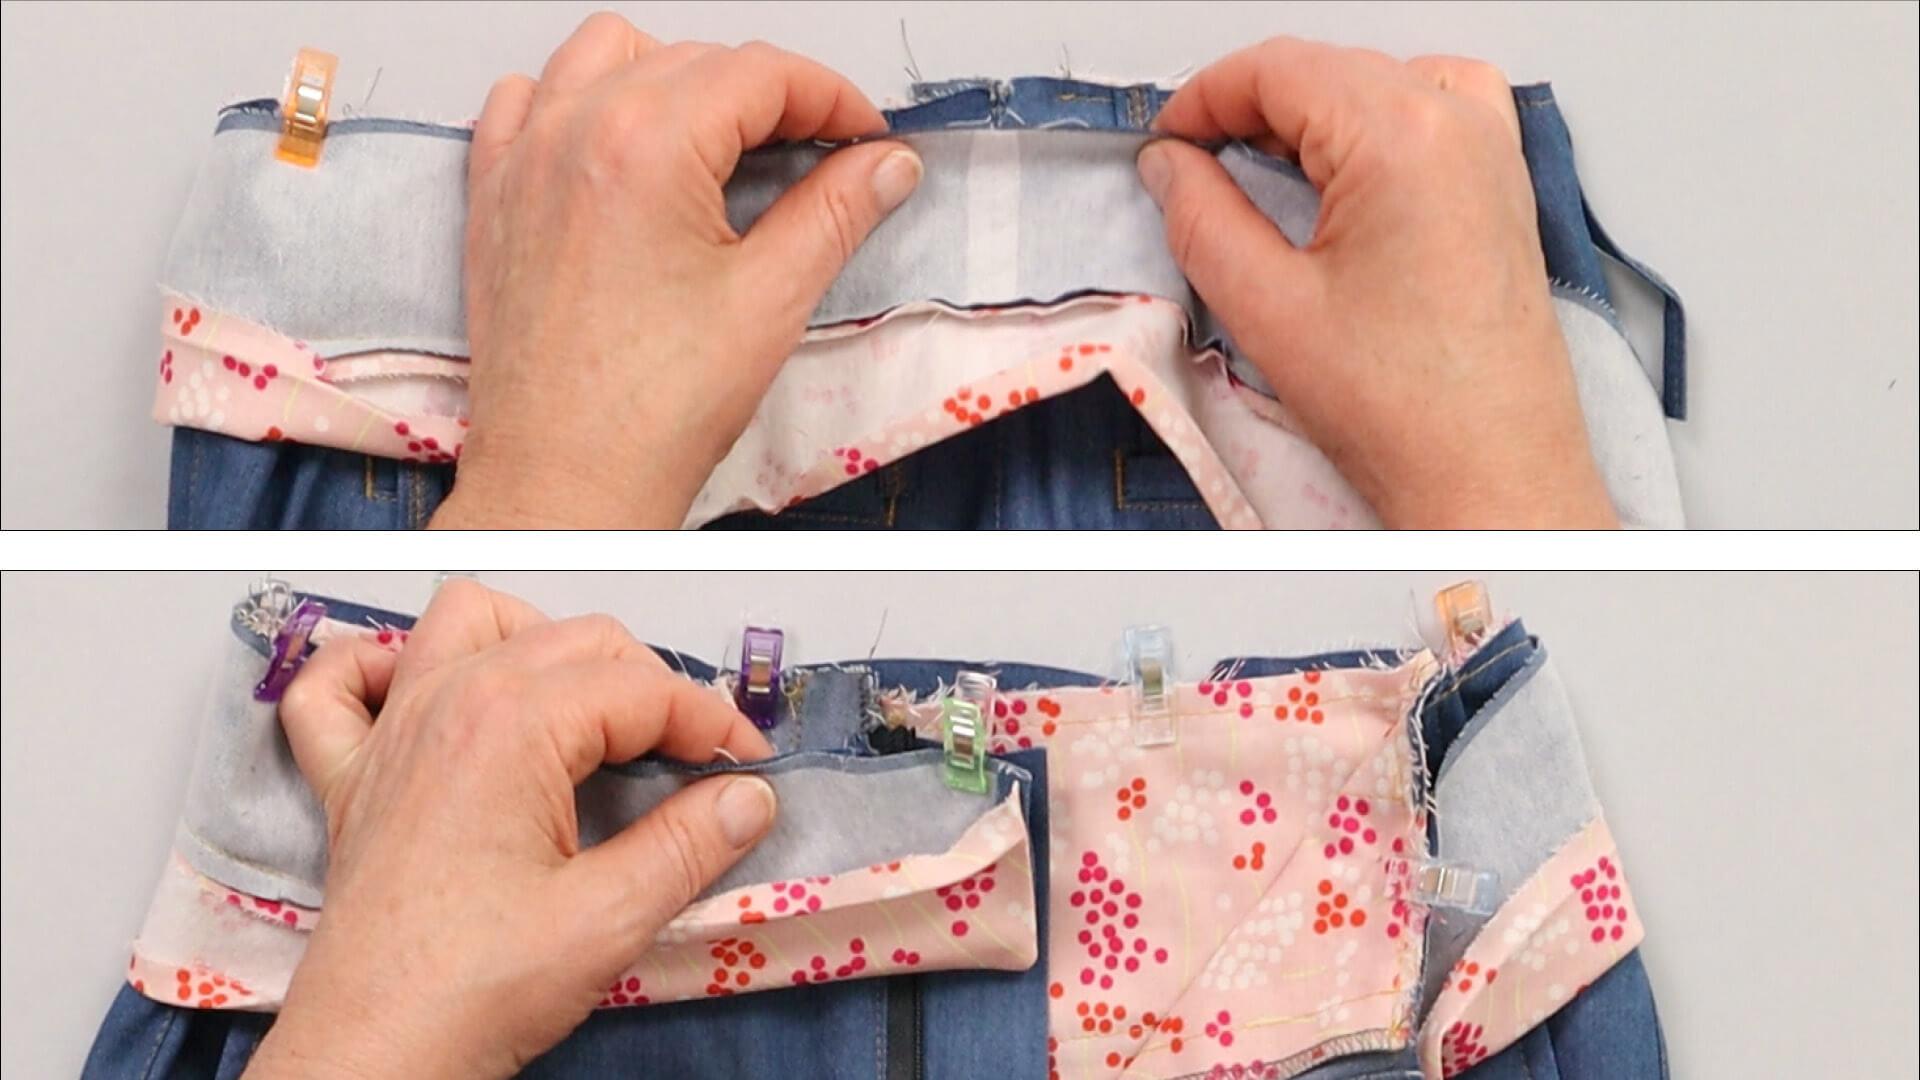
At this point, you can turn the waistband edge to catch the lower cut edge of the inner waistband in the front seam. This makes it easier to fold the front edge over afterwards.
10. Stitch down the inside waistband
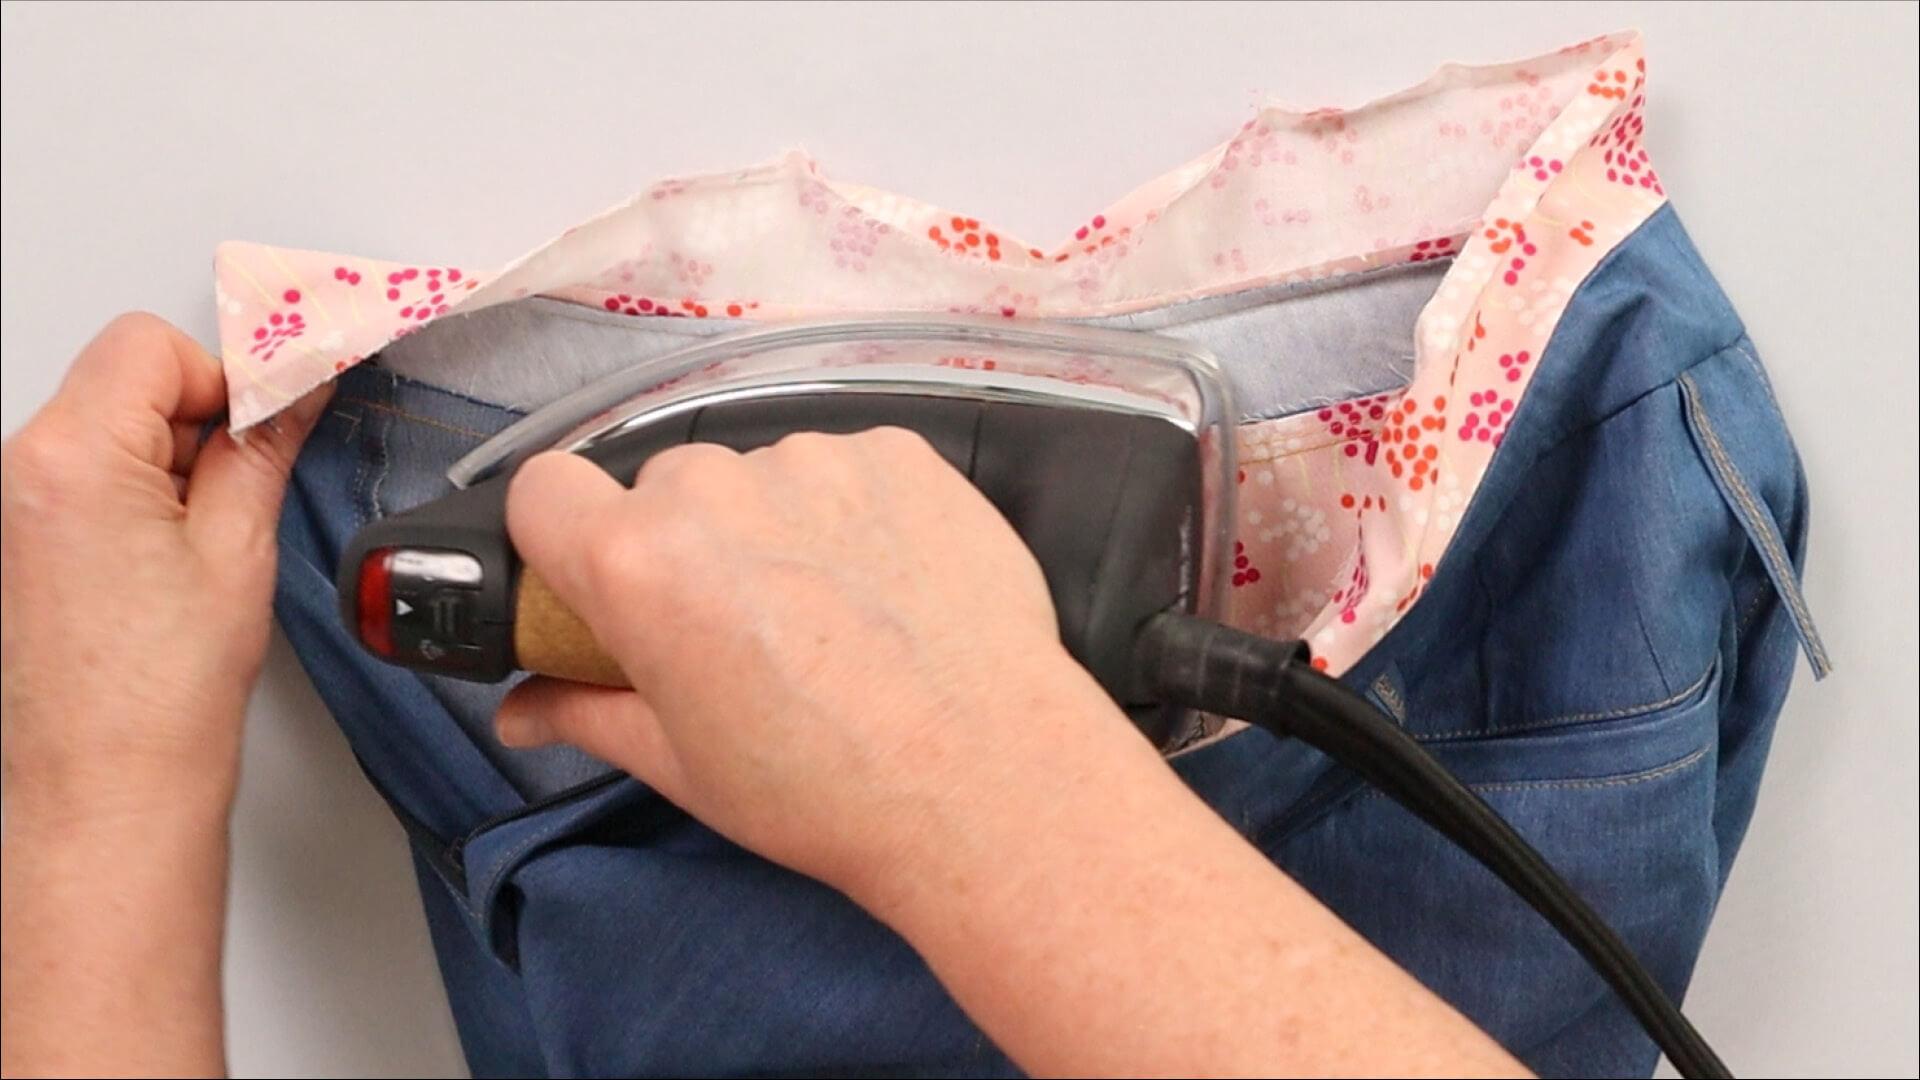
After the outer waistband is sewn on, I press the seam towards the waistband.
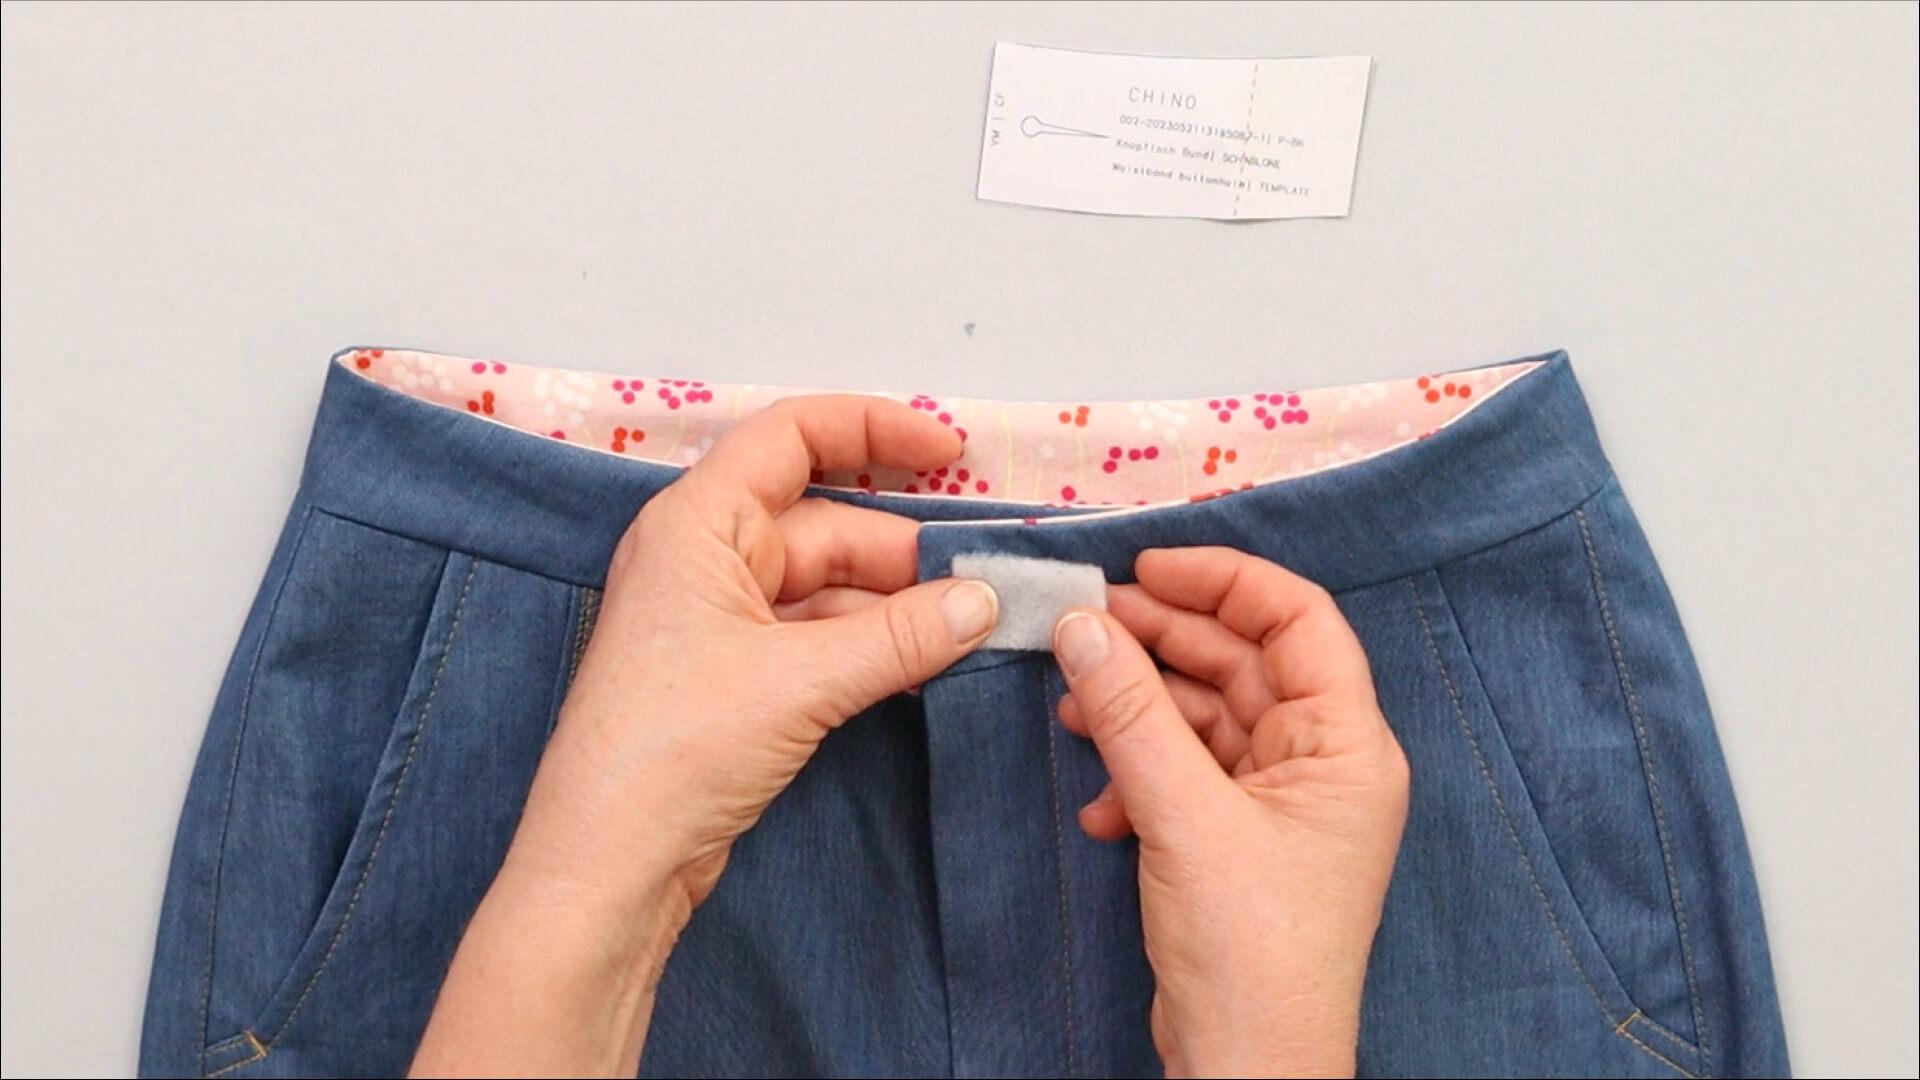
Depending on the thickness of the fabric, it may be helpful to place a remaining piece between the layers of fabric on the left side of the waistband in the area where the buttonhole will later be sewn and pin it in place from the outside.
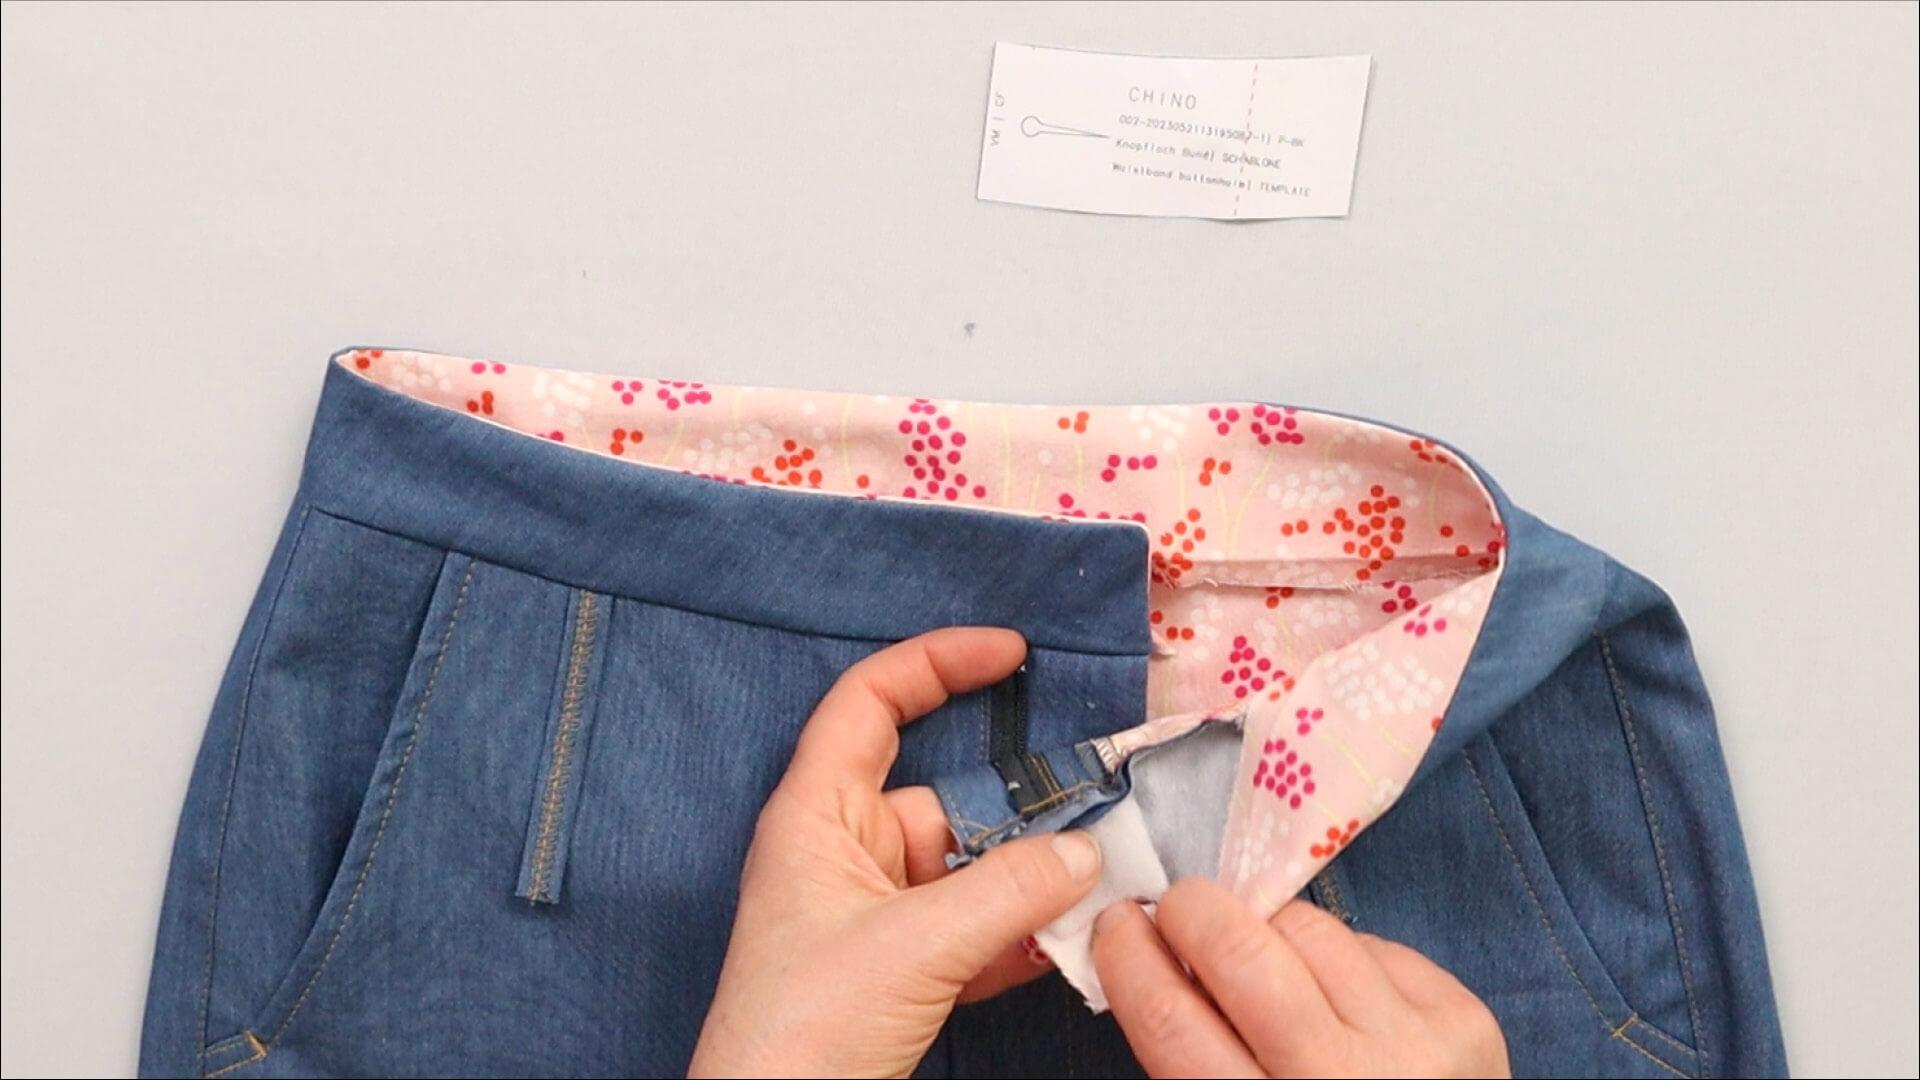
It also helps to grade the layers in this area, i.e. to cut them slightly offset to flatten the edge.
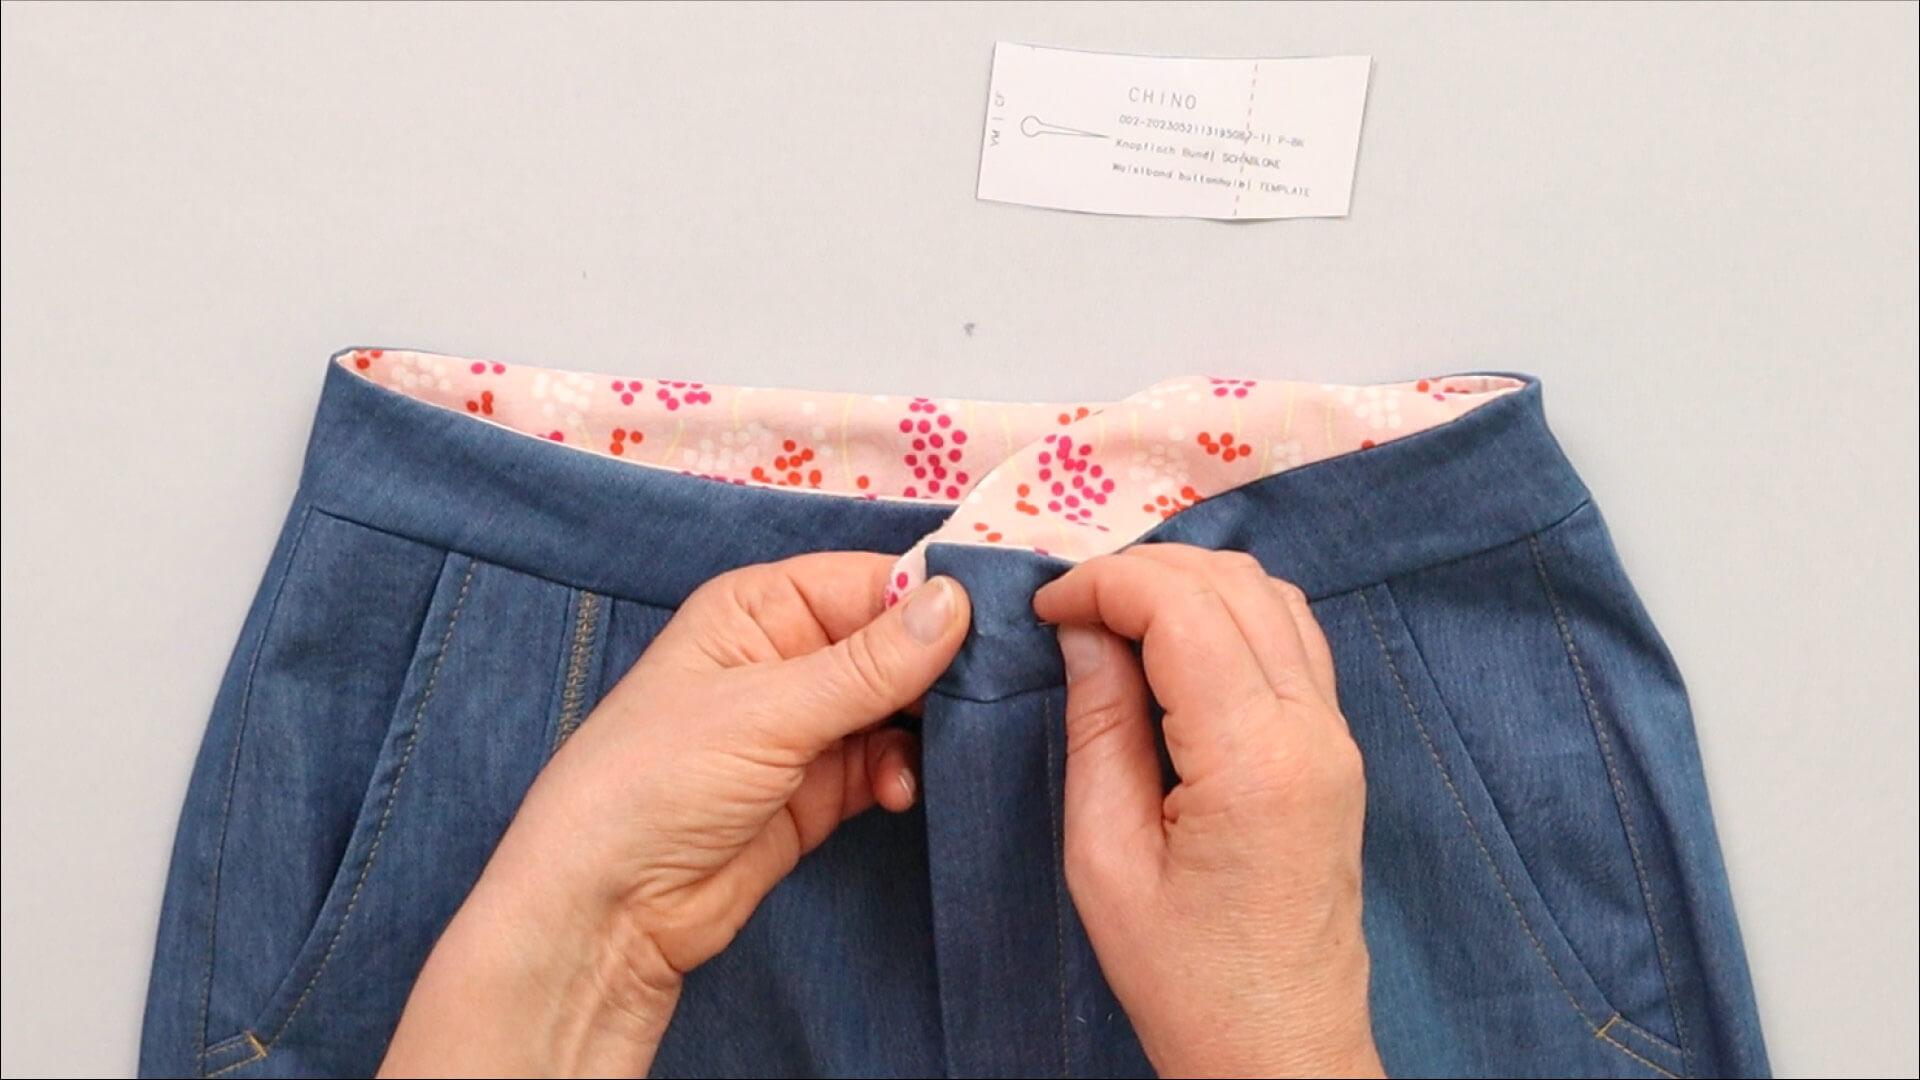
This will even out the difference in hight between the seam allowances and make it easier to sew the buttonhole.
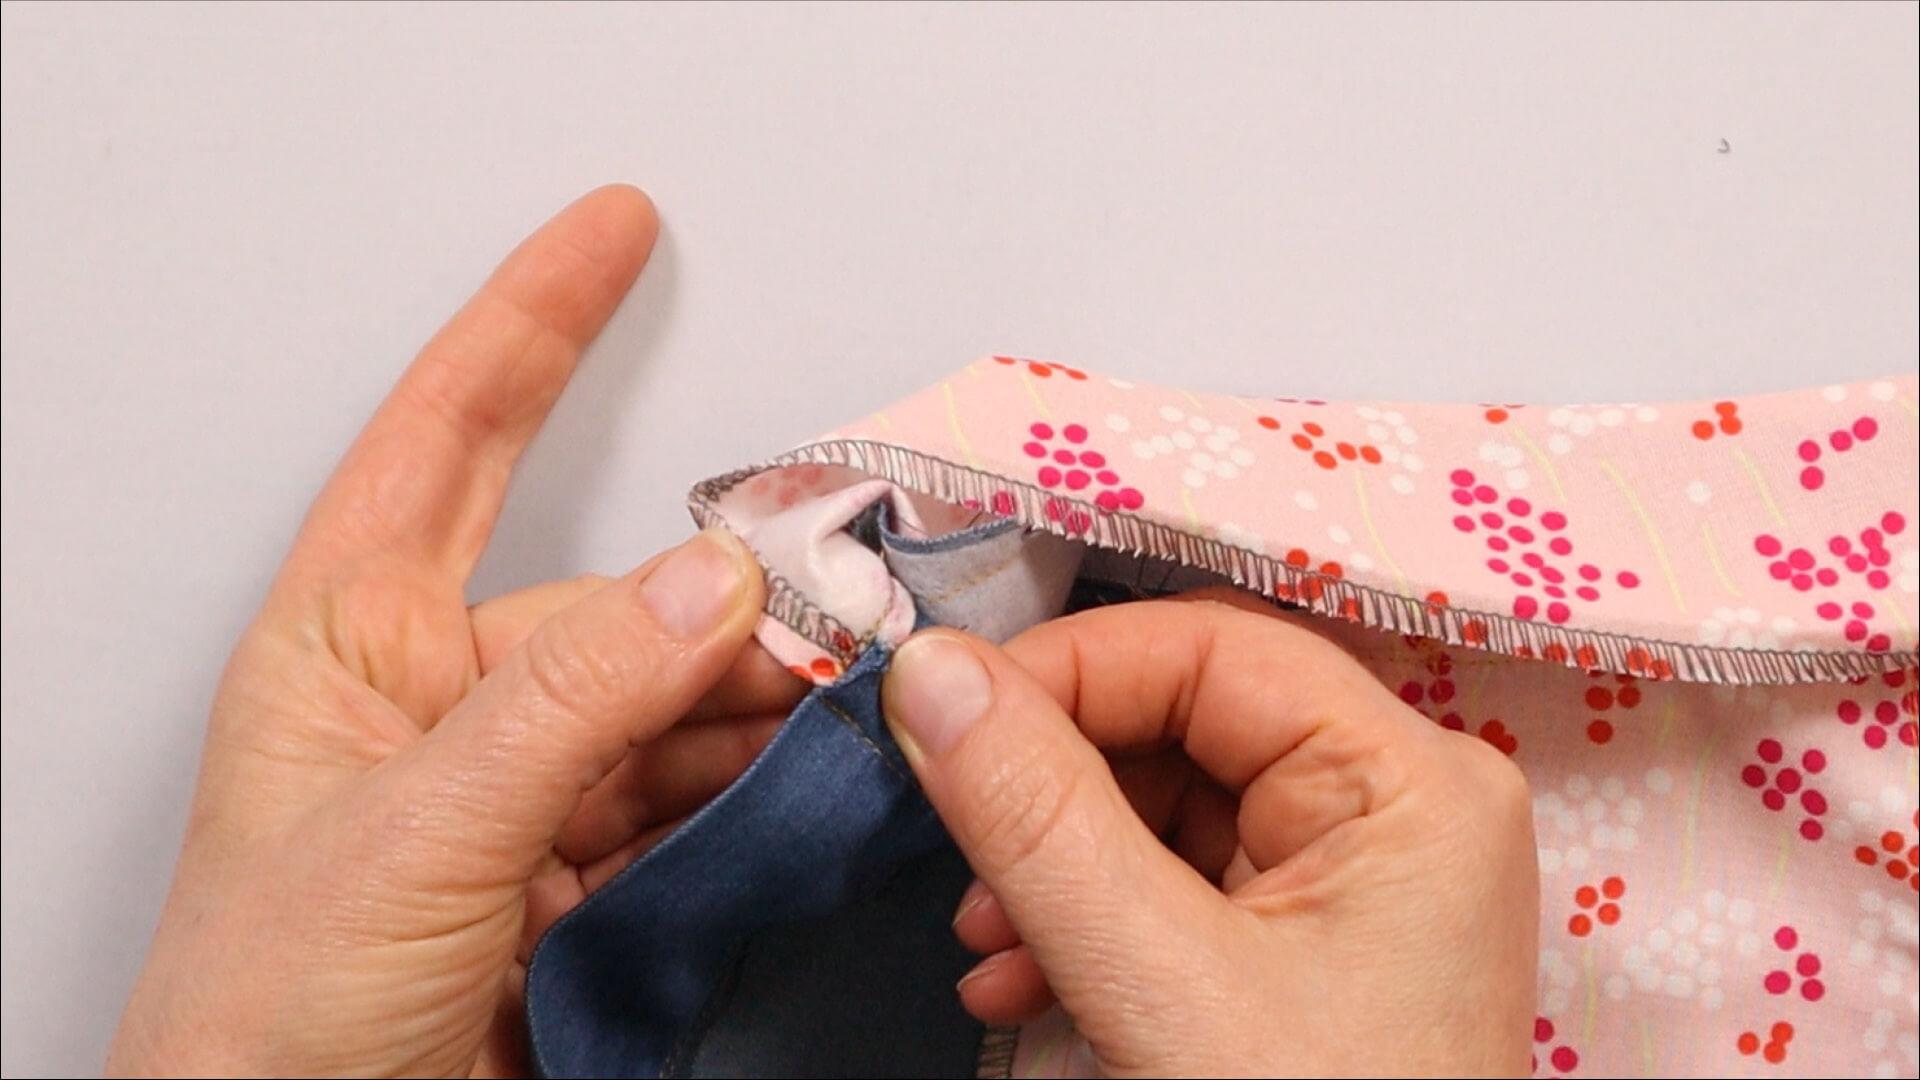
Here you can see how I place the seam allowance of the trousers at the front edge and fold the bottom edge of the inner waistband over it.
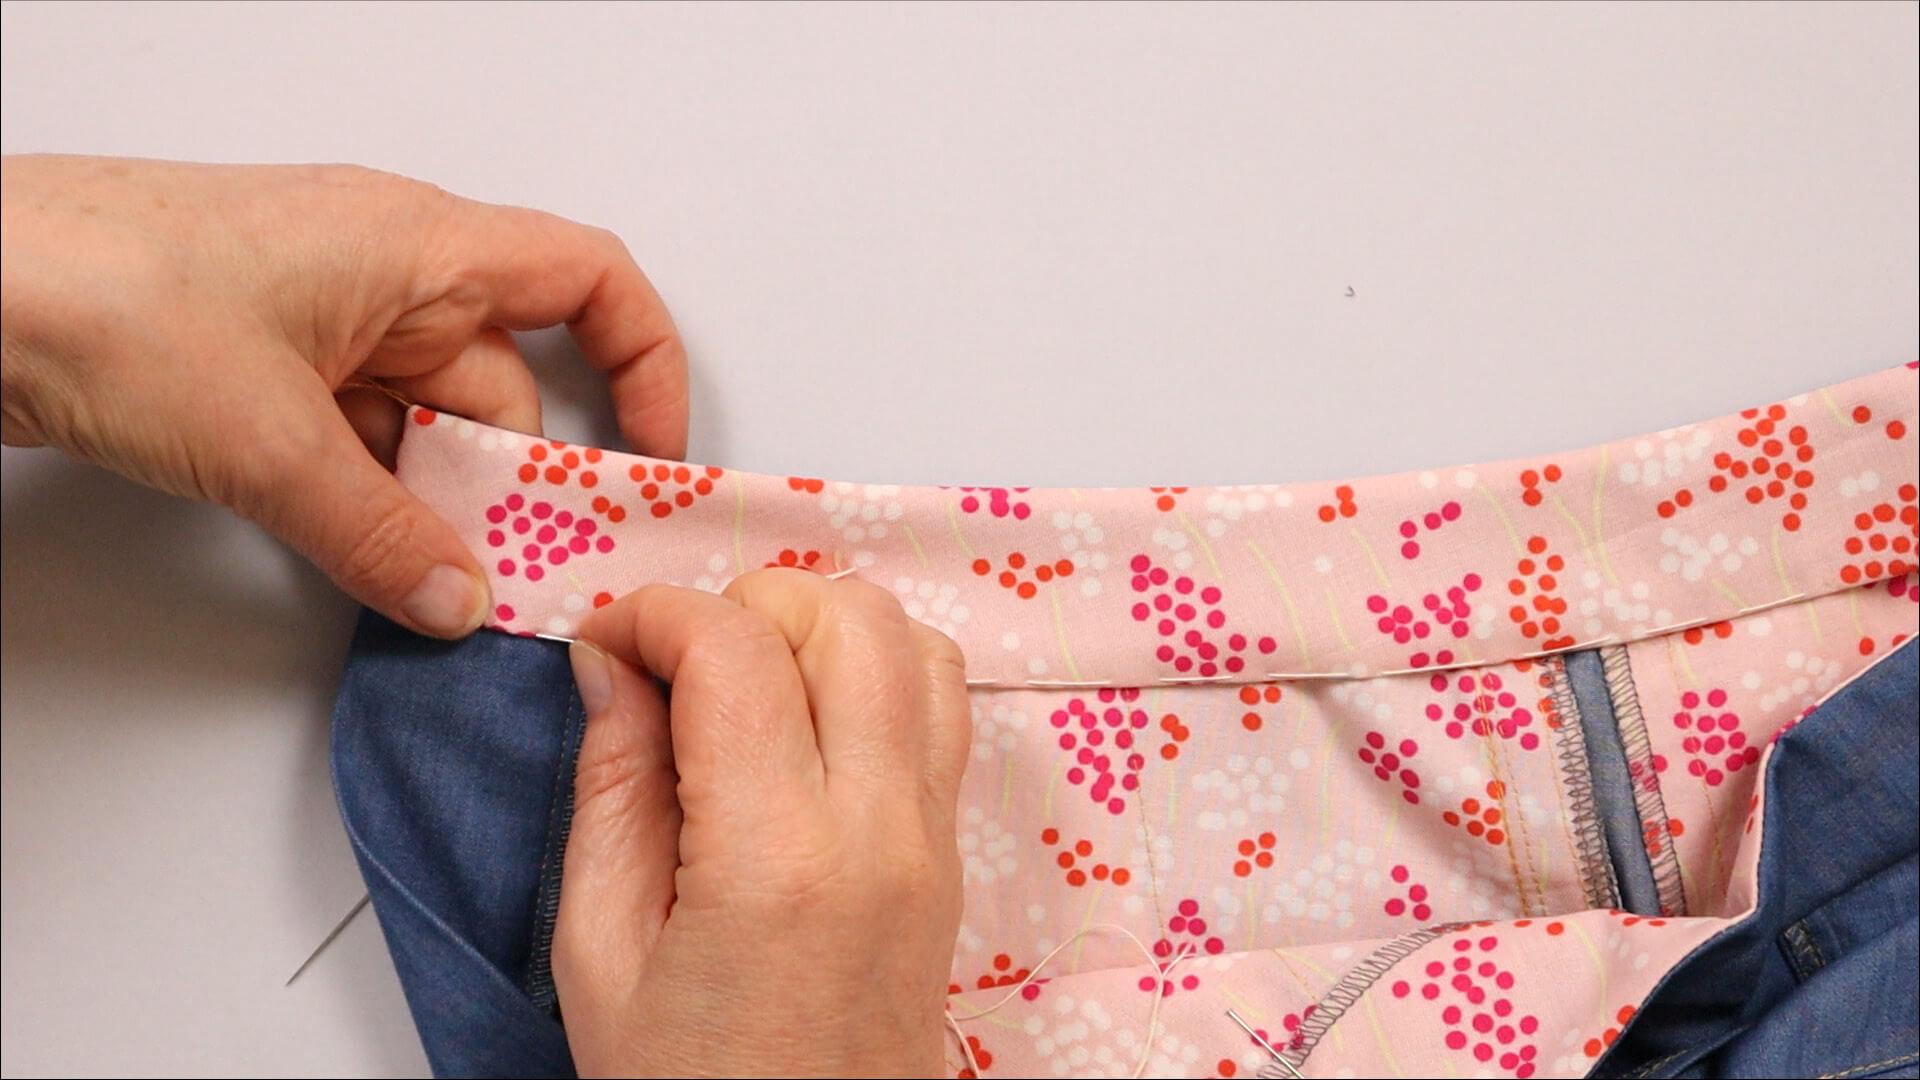
To position the bottom edge exactly 2 mm below the seam, I like to use needle and thread and baste the inner waistband. After topstitching, I can remove the basting.
You can also use pins instead of the basting thread. These are inserted from the outside.
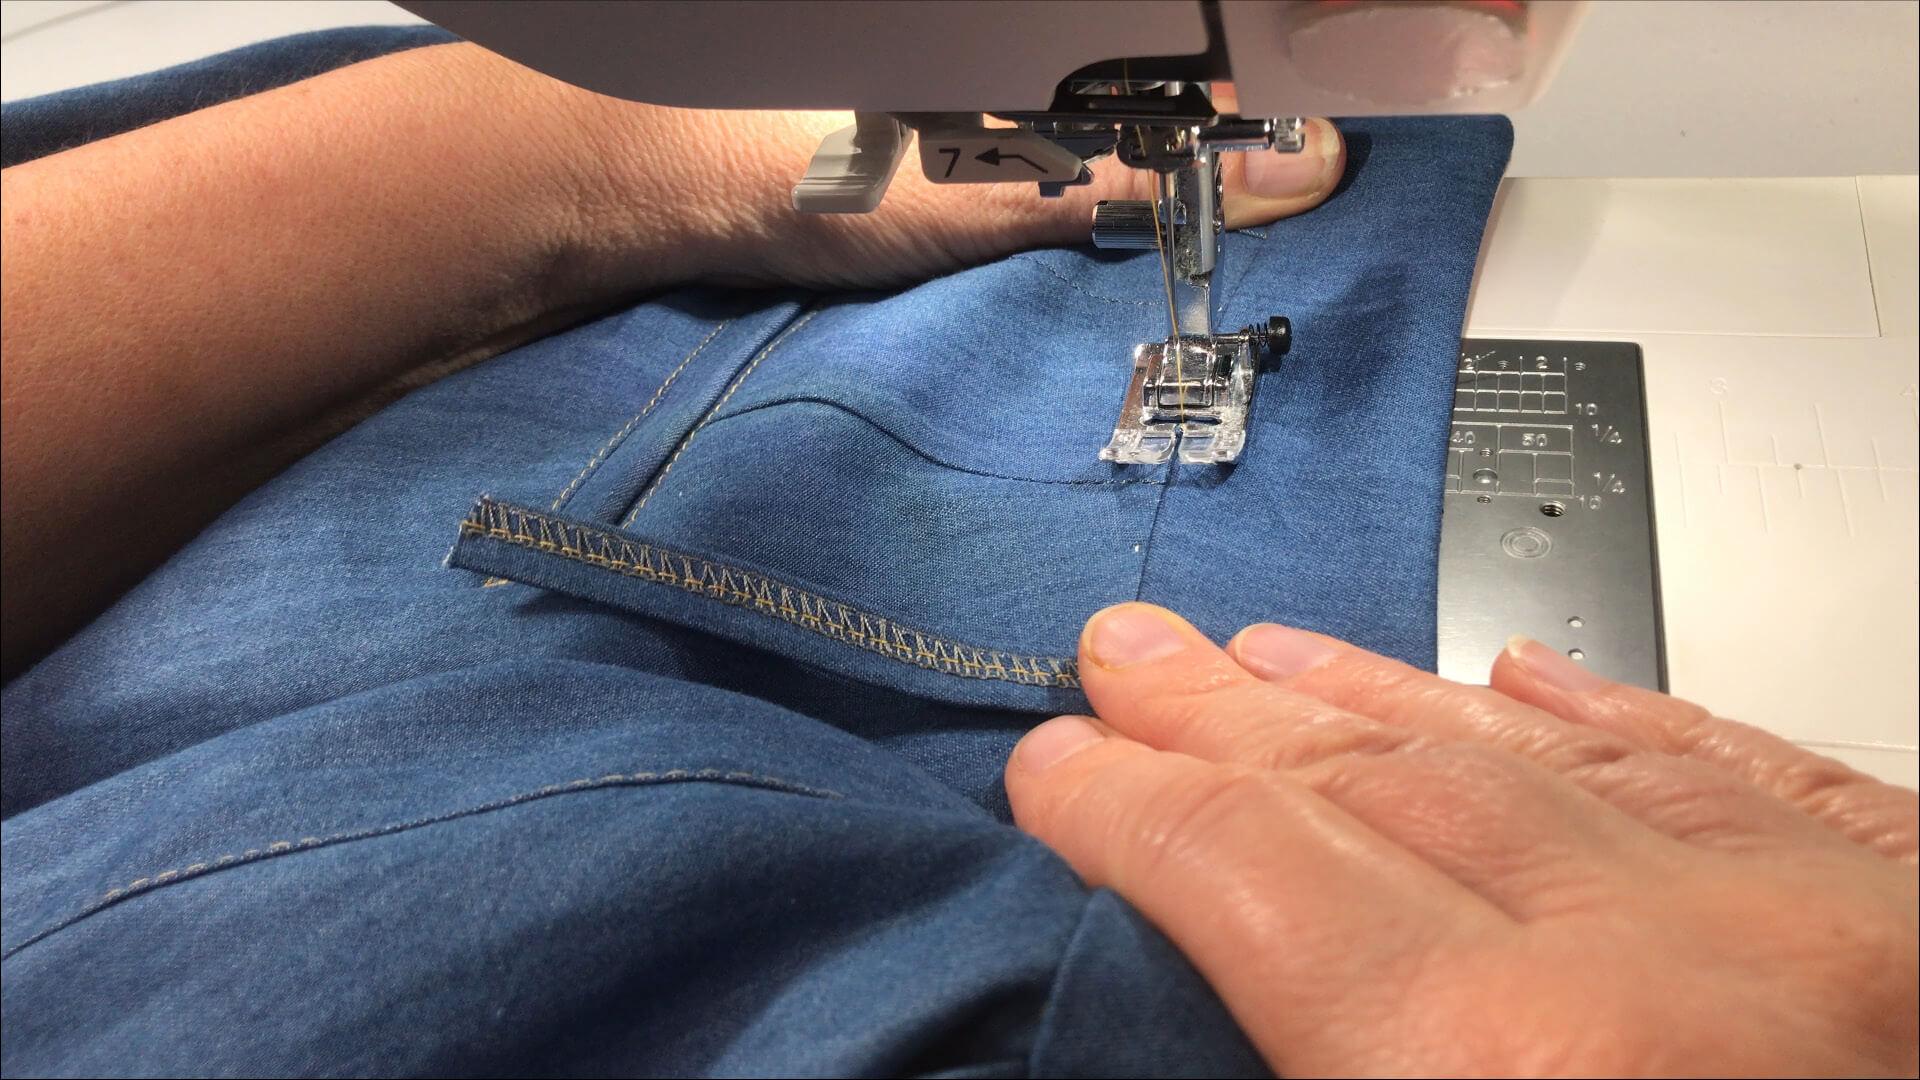
Now I topstitch the inner waistband from the outside. I chose this version because I want the stitching to be as invisible as possible. That’s why I don’t topstitch on the waistband, but just below. This is also known as “stitch in the ditch”.
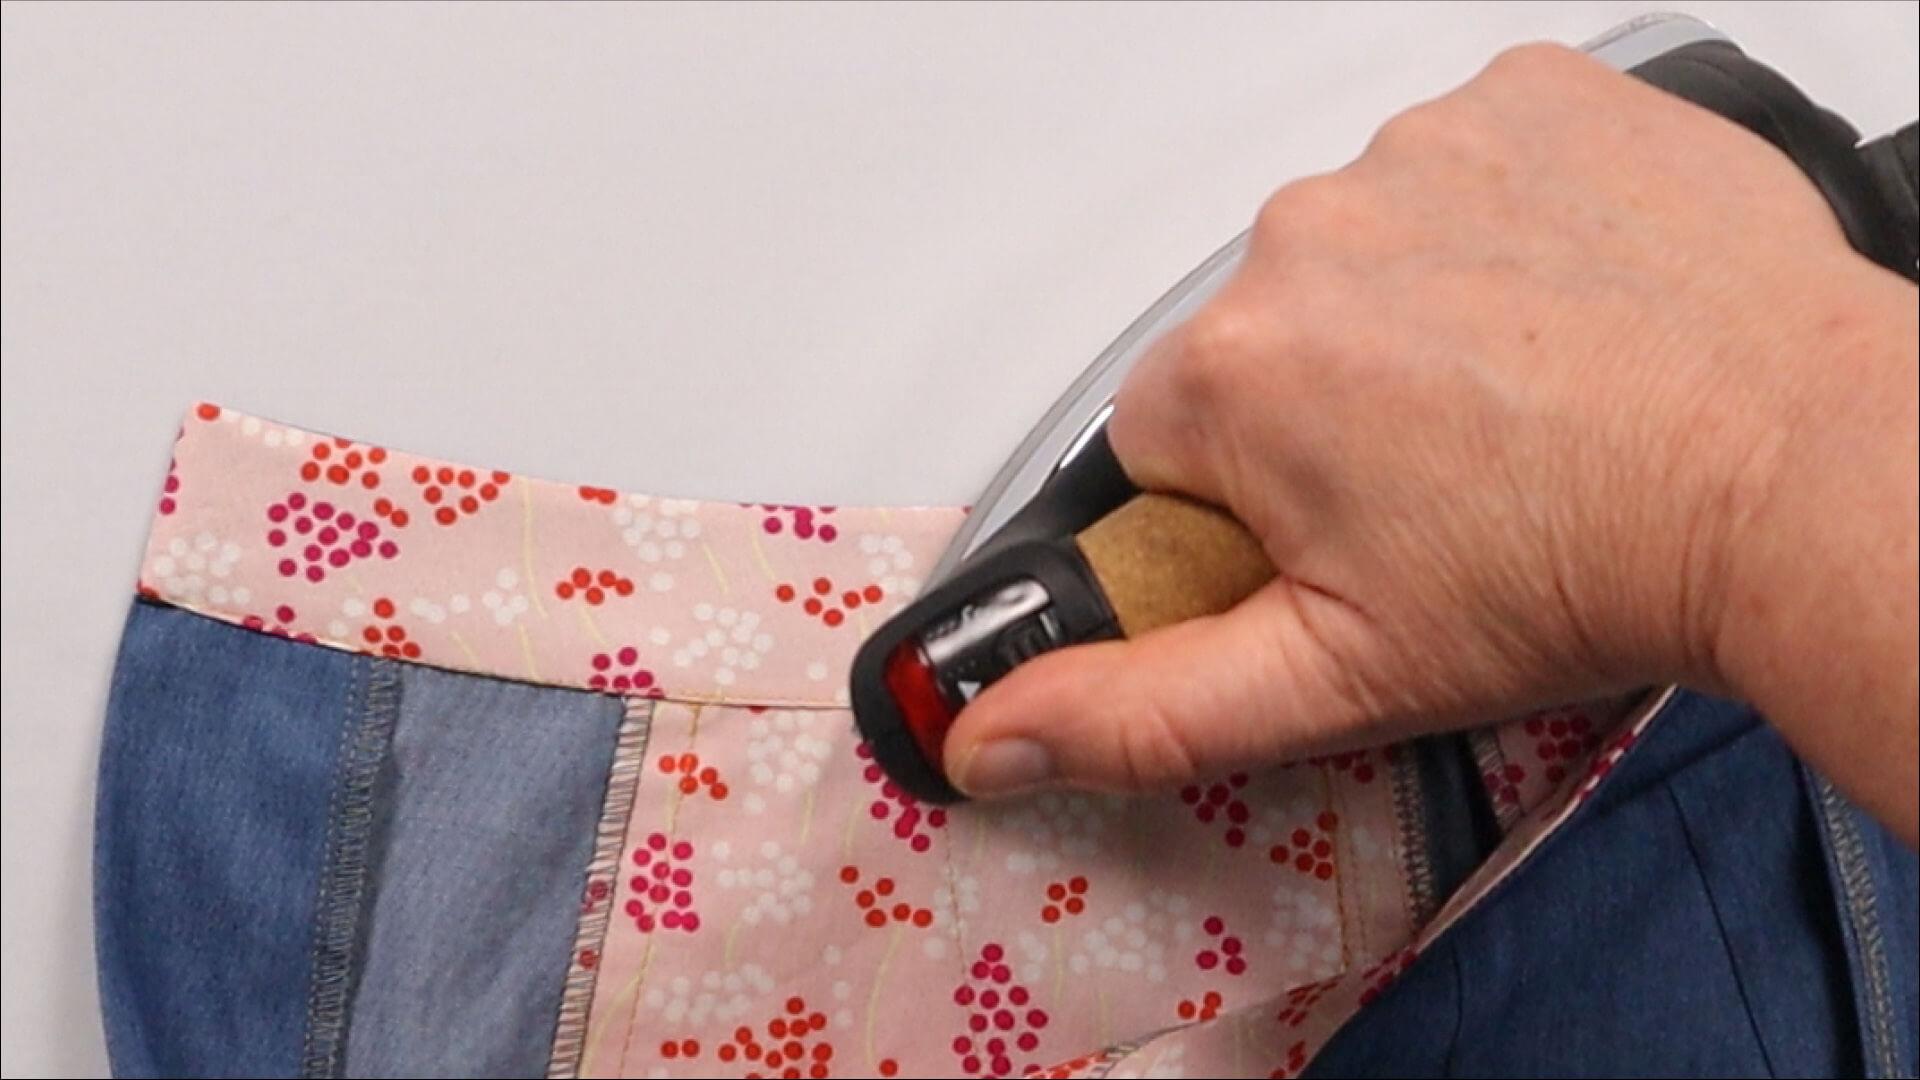
Now I press the waistband again.
11. Sew the buttonhole into the waistband
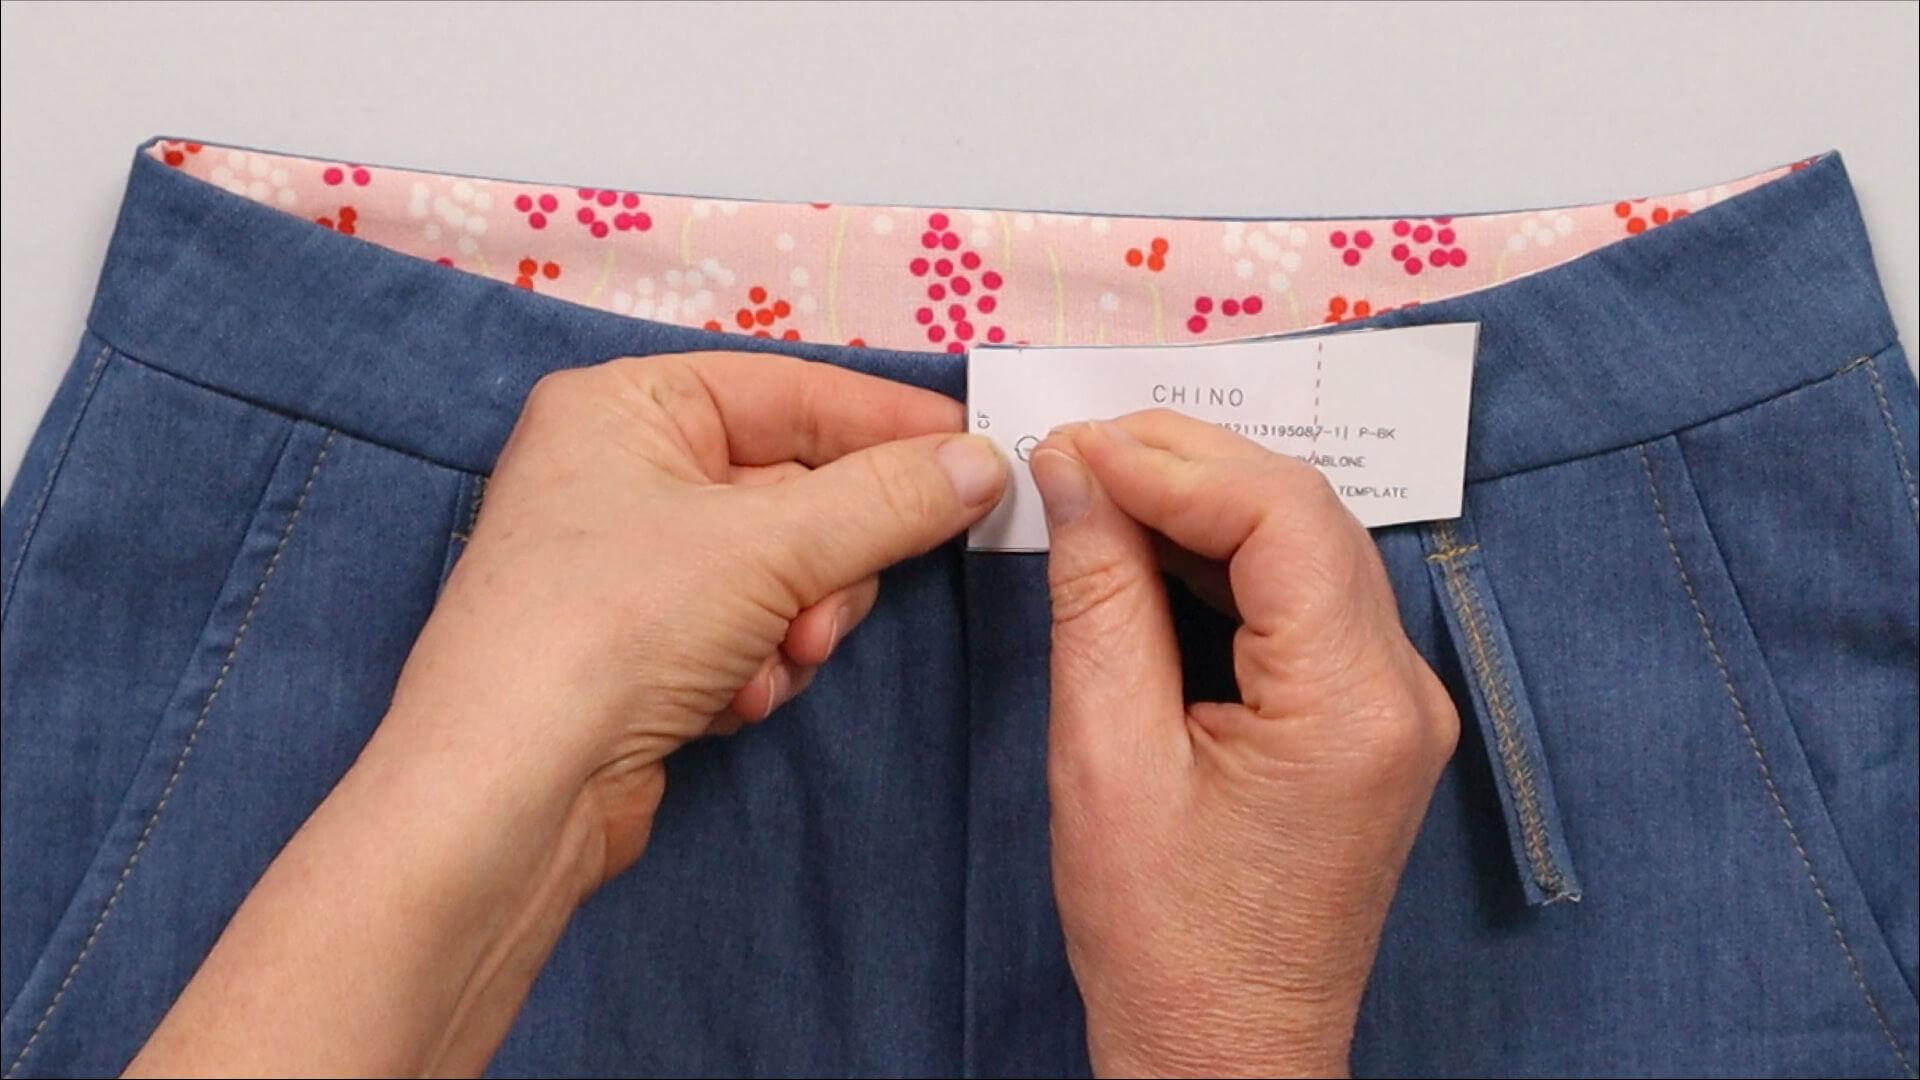
The buttonhole (2 buttonholes for the wide waistband version) is now sewn into the left side of the waistband. I transfer the starting point from the template to the waistband.
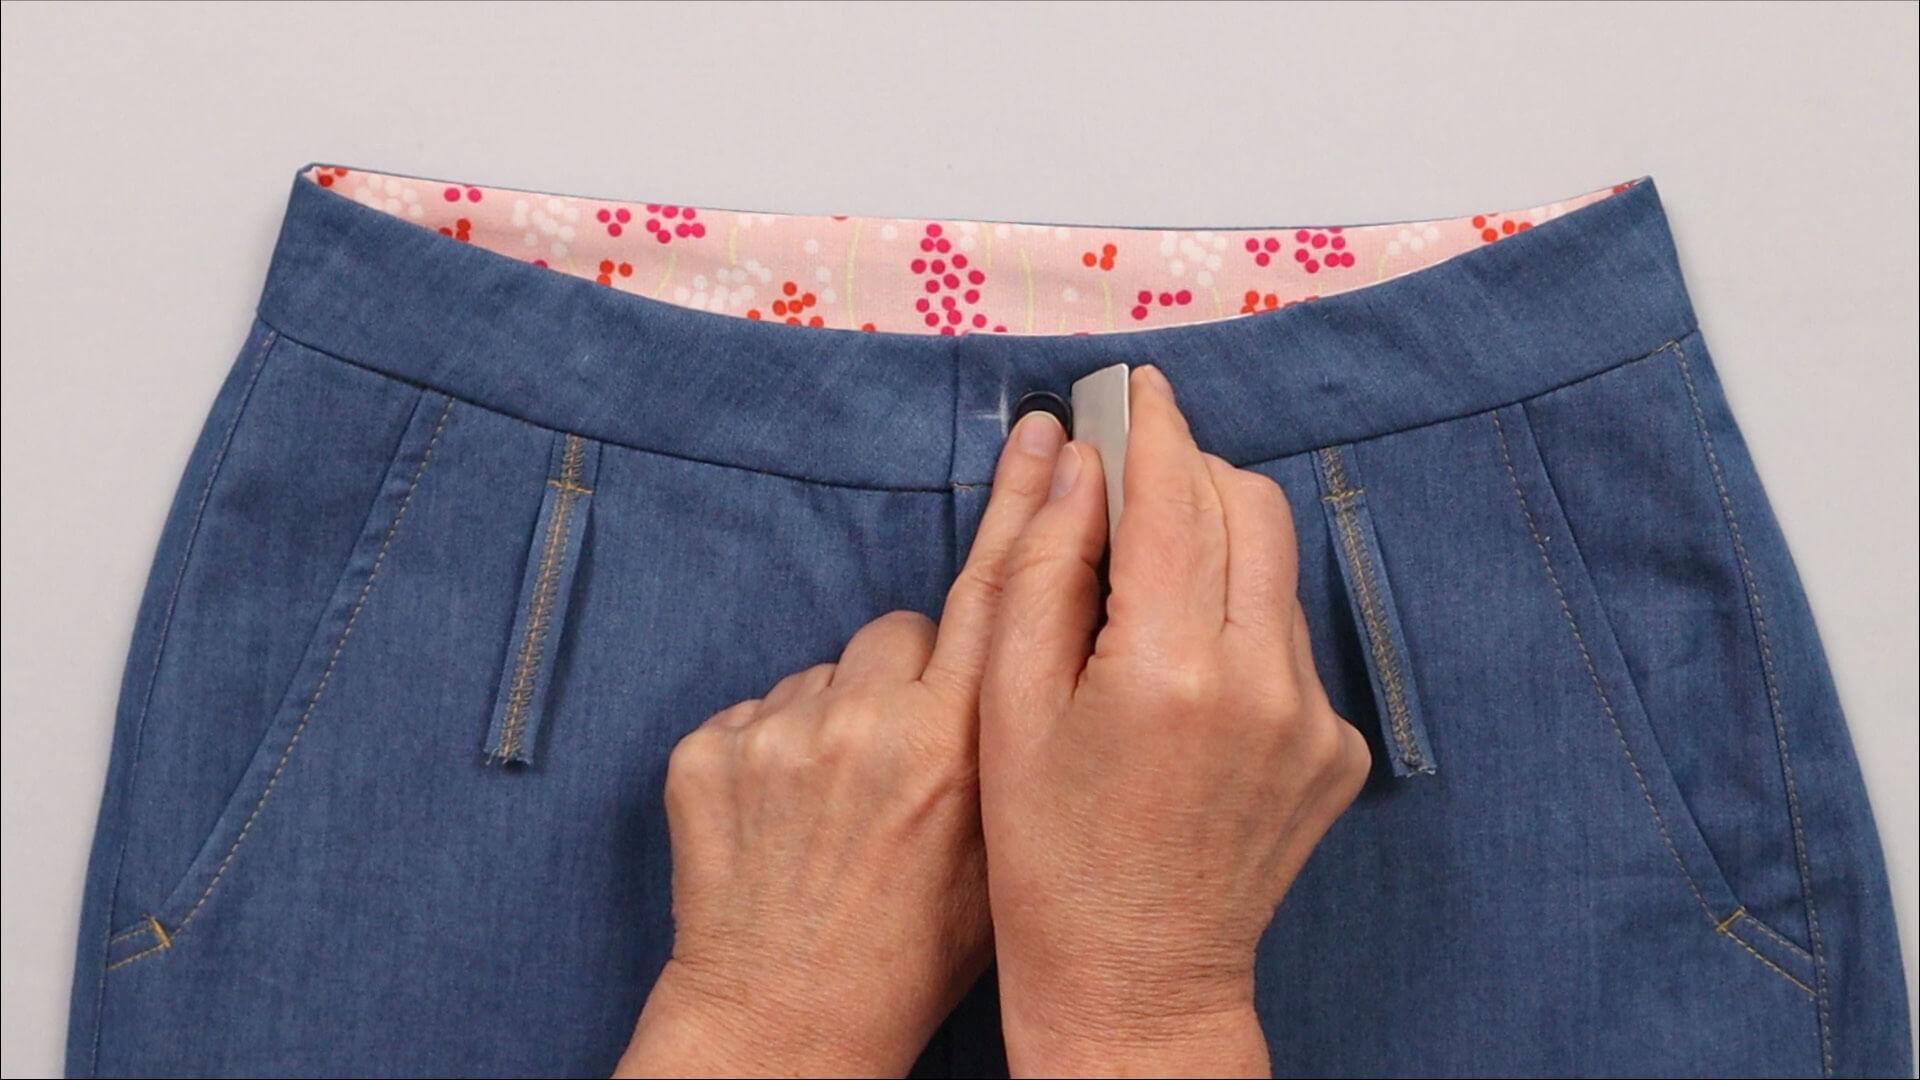
I measure the size of the button to make sure the buttonhole has the right size.
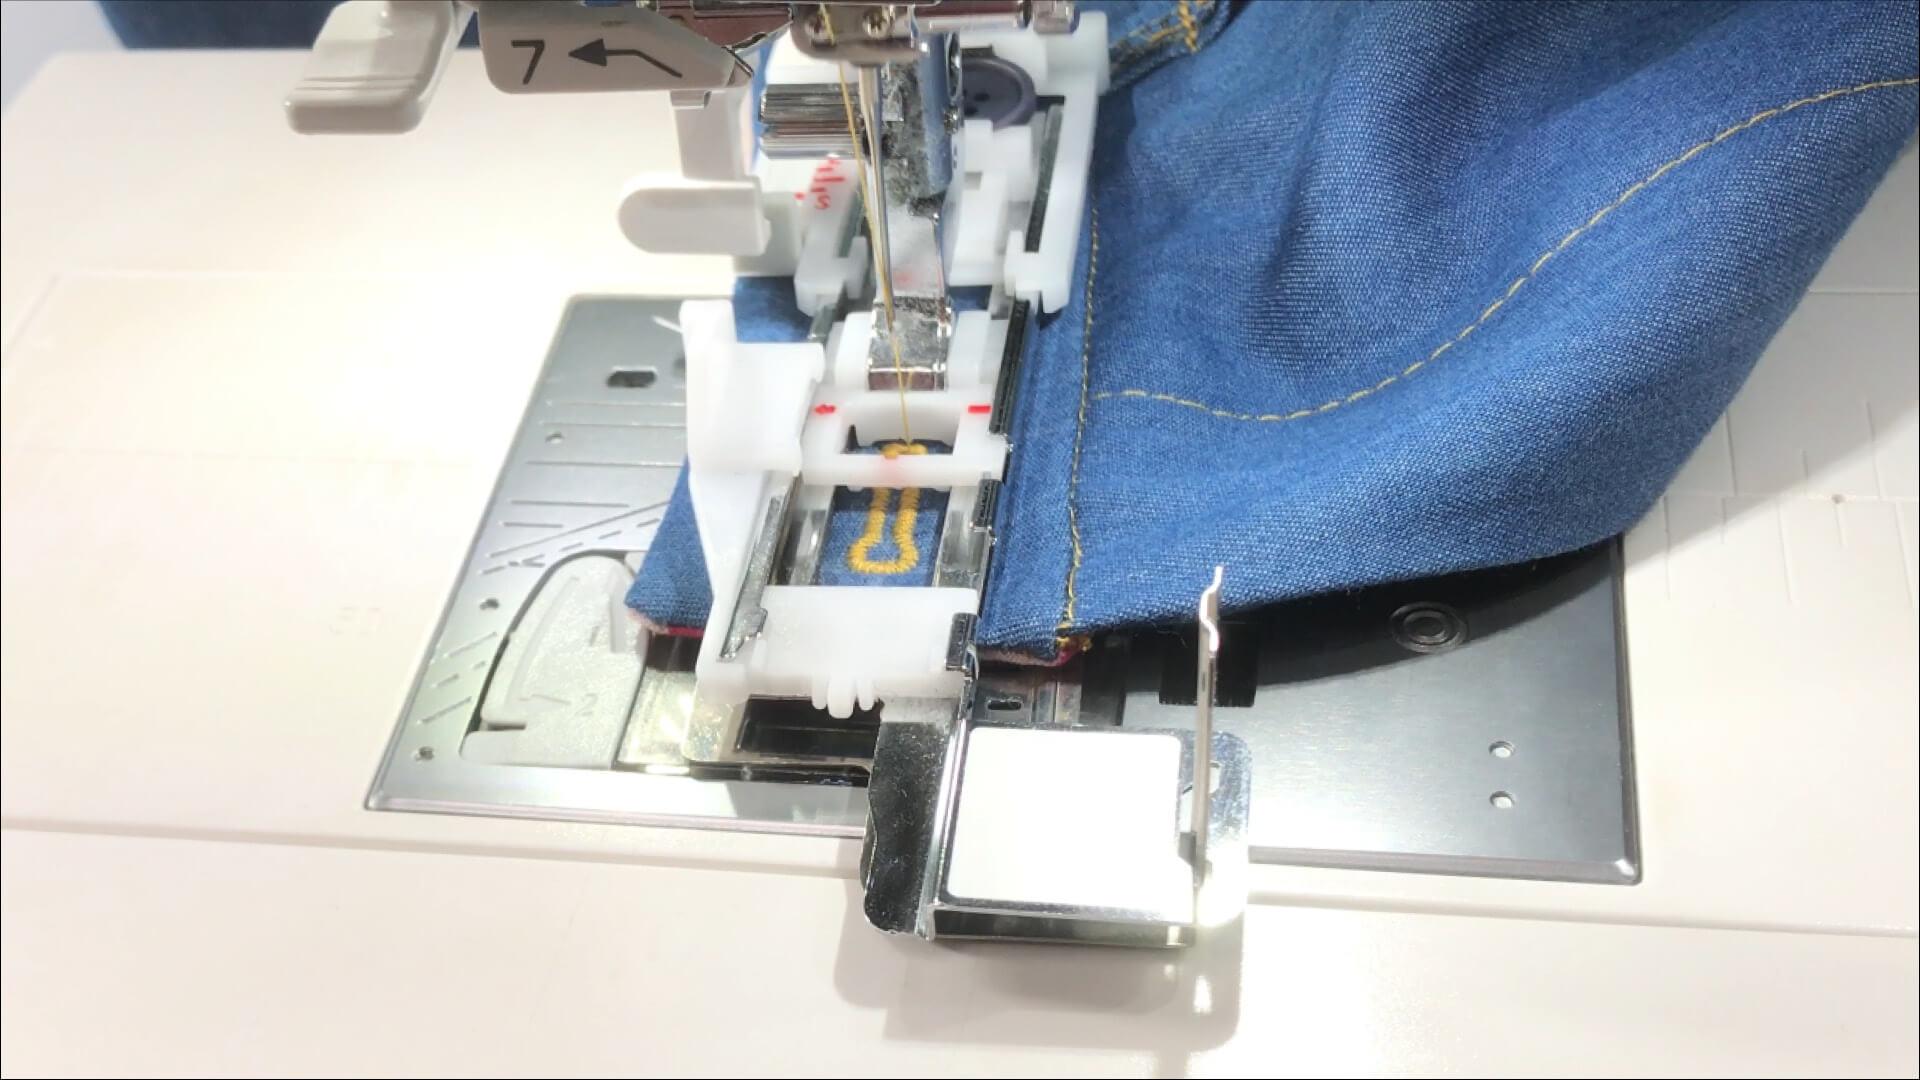
The buttonhole is sewn using the automatic buttonhole foot and stitch setting. Beforehands I make a sample on a comparably thick test piece.
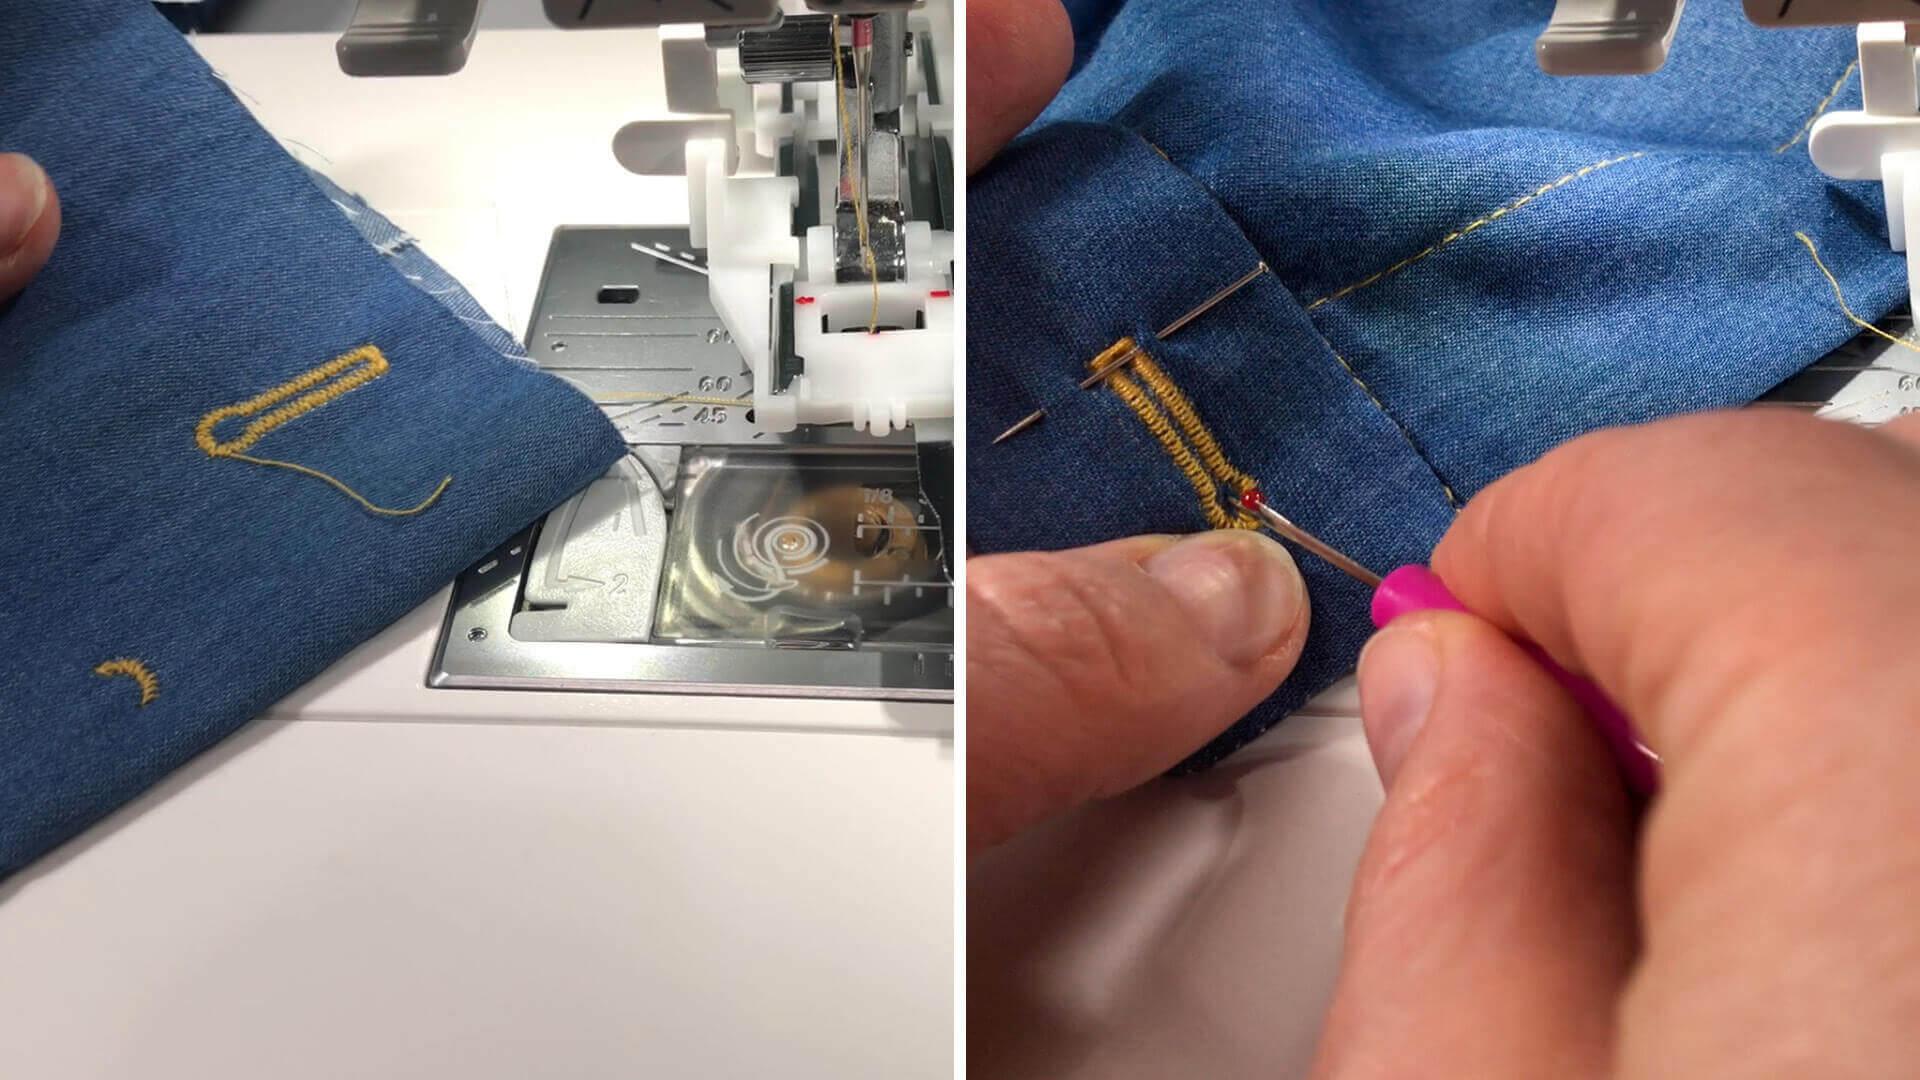
Tip
If you do not have such a setting on your sewing machine, you can mark the length of the button and sew the buttonhole with two different zigzag stitches.
The two long bartacks at the top and bottom are sewn with a small stitch width. A wider bartack is sewn at the beginning and end of the buttonhole. If necessary, the needle position can also be shifted to the right or left to achieve a beautiful result.
I sew such a buttonhole using the following settings:
long bartack: stitch length 0.4 – stitch width 1.3 – needle position -2 (shifted to the left)
short bartack: stitch length 0.05 – stitch width 3.8 – needle position 0
Be sure to try out this variant on a leftover piece of the same thickness. You can sew the buttonhole without taking off in between. To do this, leave the needle lowered in the fabric between the individual bartacks and carefully turn the trousers underneath with the presser foot raised. If your machine has a walking foot, this can be very helpful, especially with thicker fabrics.
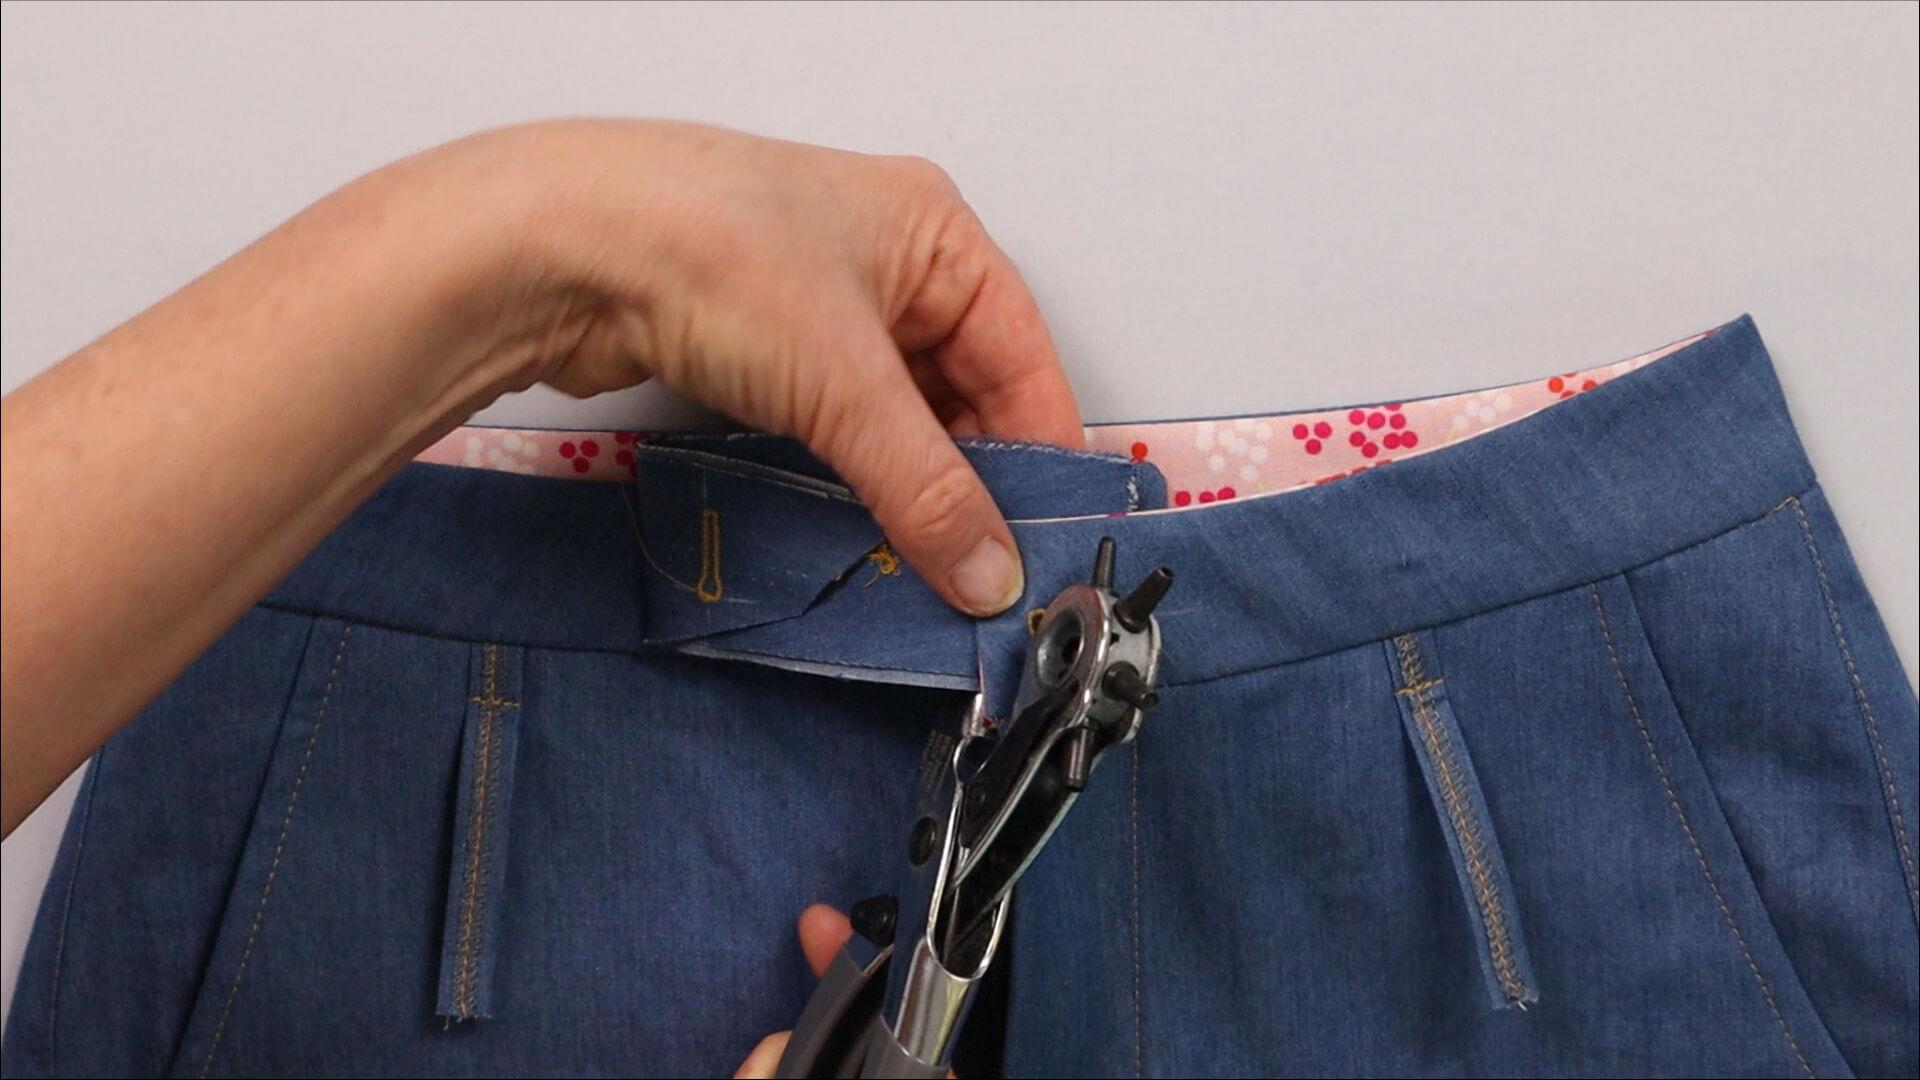
If you have sewn a buttonhole with a keyhole, you can punch it out with a small punch (approx. 2 mm diameter).
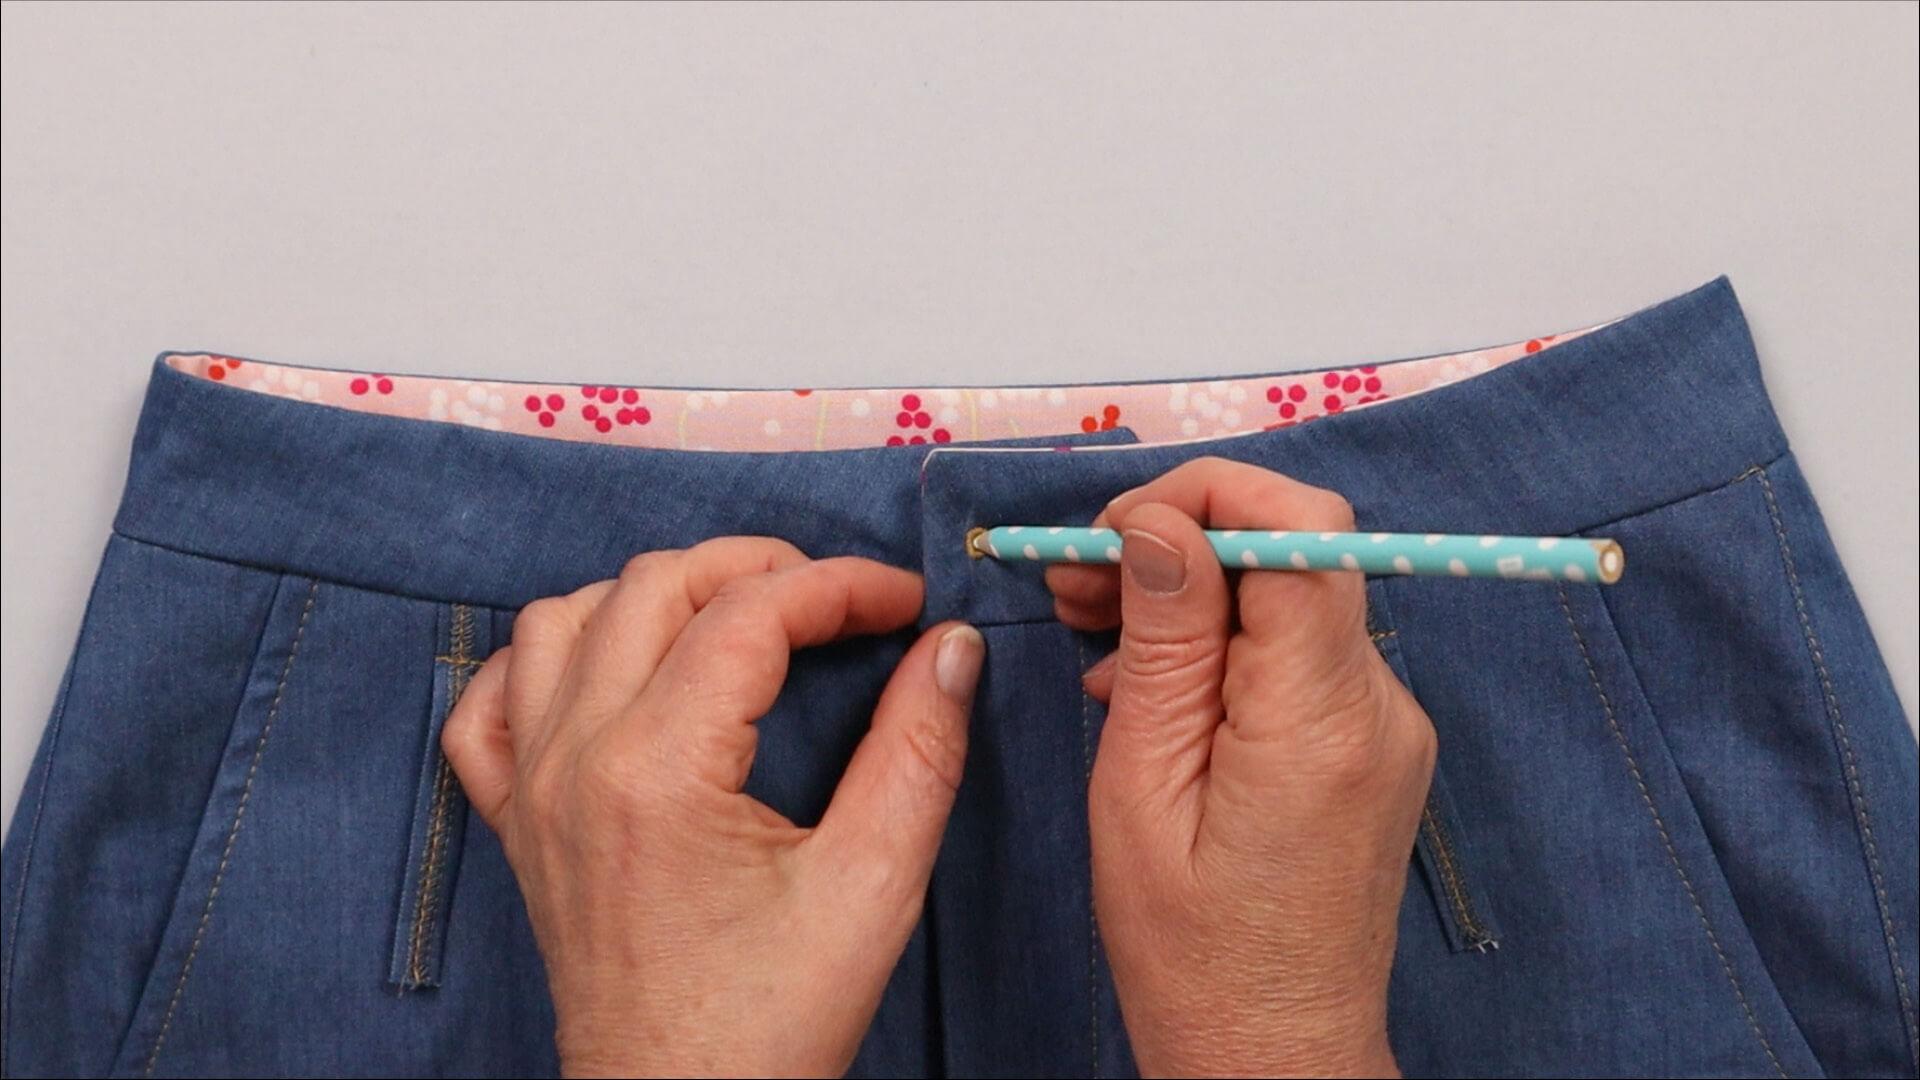
Once the buttonhole has been carefully cut open, the button position can be marked. First, I close the slit so that the left waistband edge lies over the right underlap. The center front of the left and right front pieces meet exactly.
Then I sew on the button.
12. Sew belt loops onto the waistband
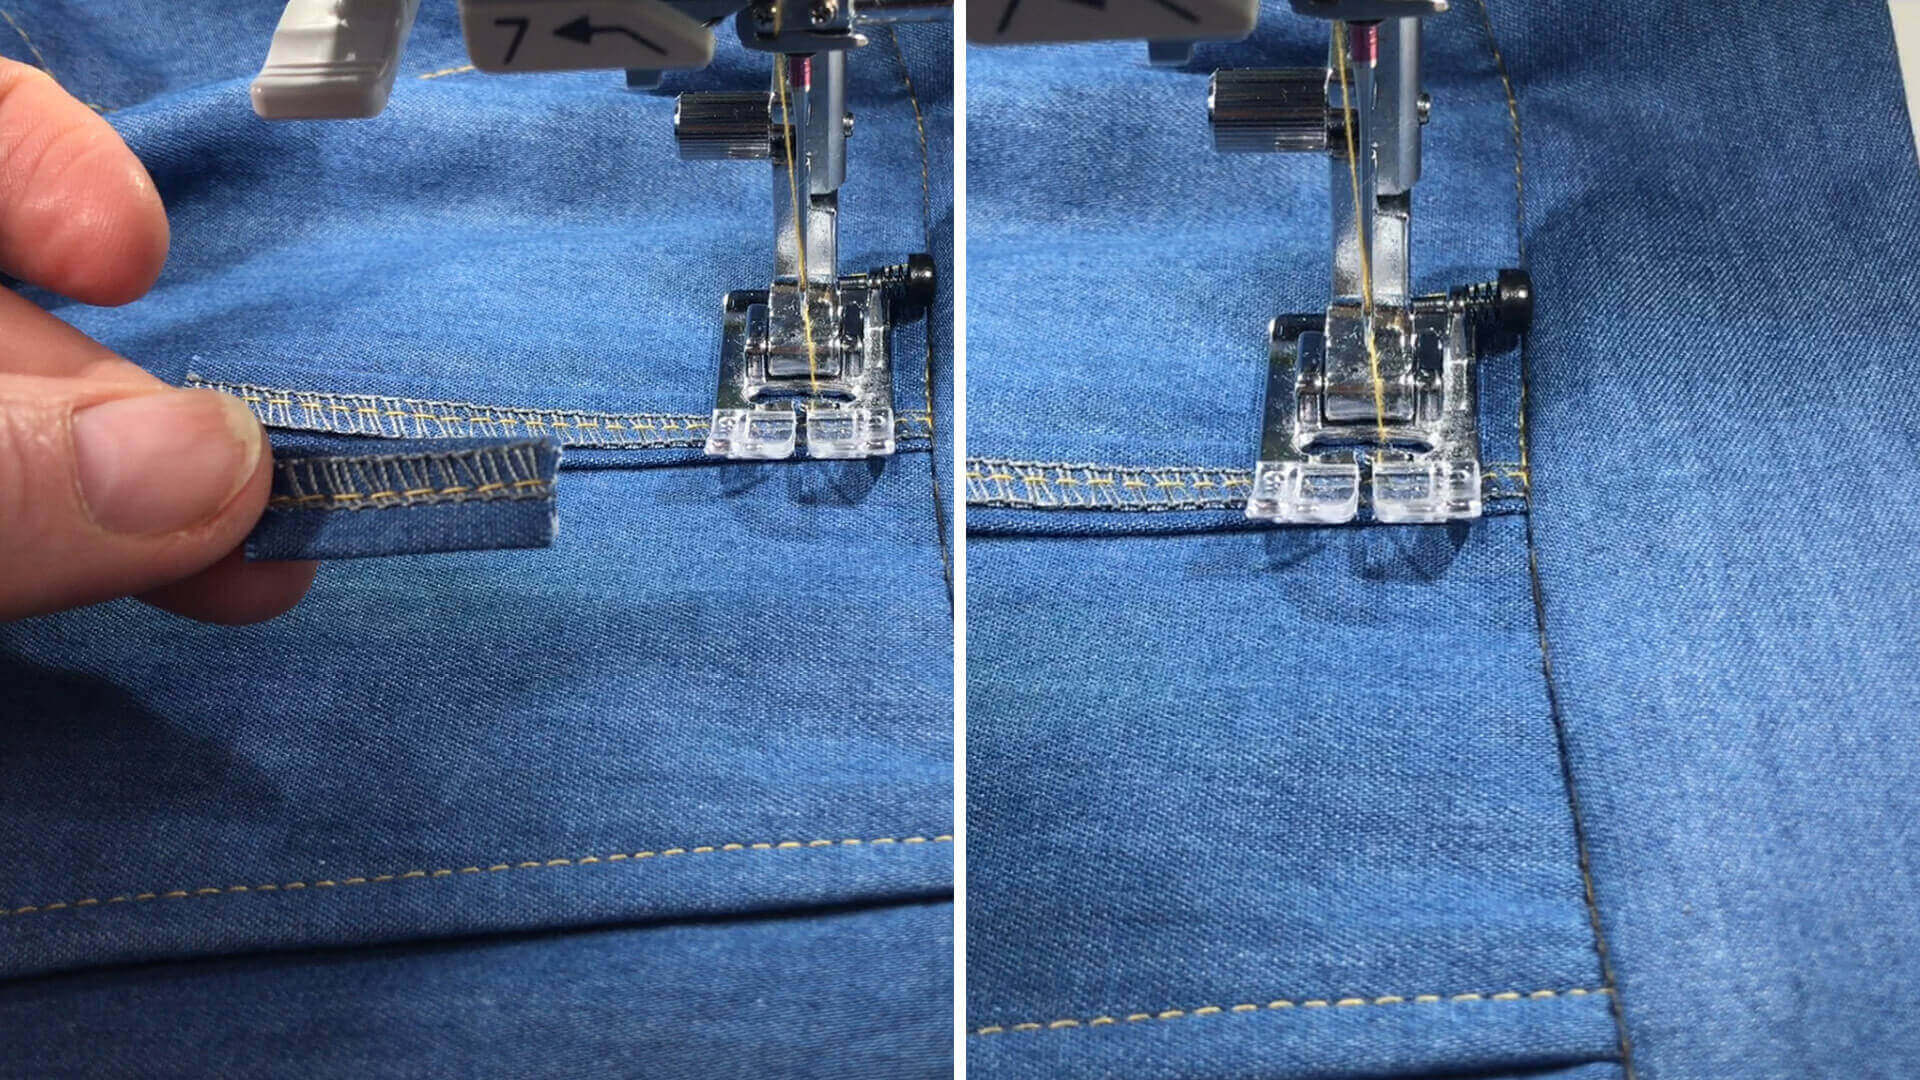
The belt loops are first stitched 15 mm parallel below the waistband seam. It is advisable to place a piece of fabric (e.g. a leftover piece from the belt loop cut) in front of and, if necessary, behind the loop. This means that the presser foot is already at the correct hight when quilting and can feed better. A so-called hump jumper made of plastic can of course also be used.
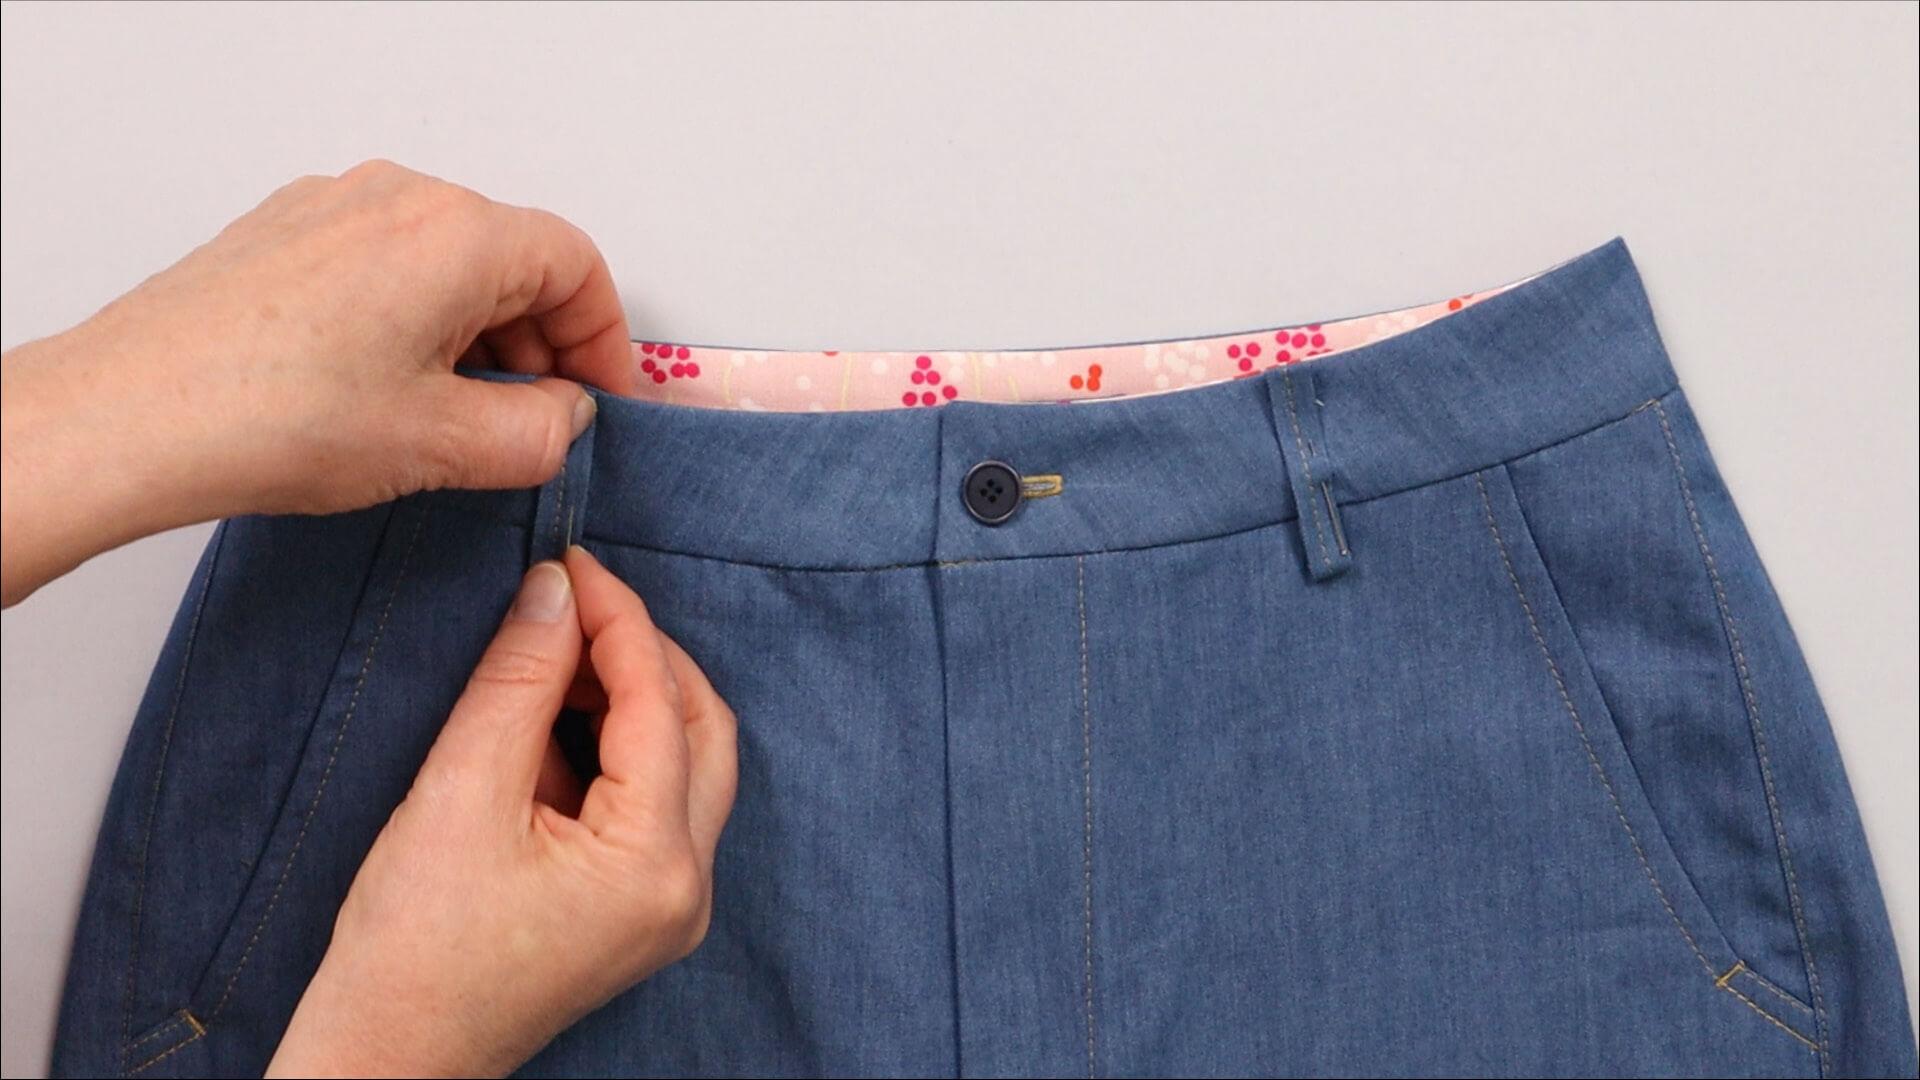
I pin the belt loops to the waistband. The top edges are folded over consisely with the top edge of the waistband and sewn on top.
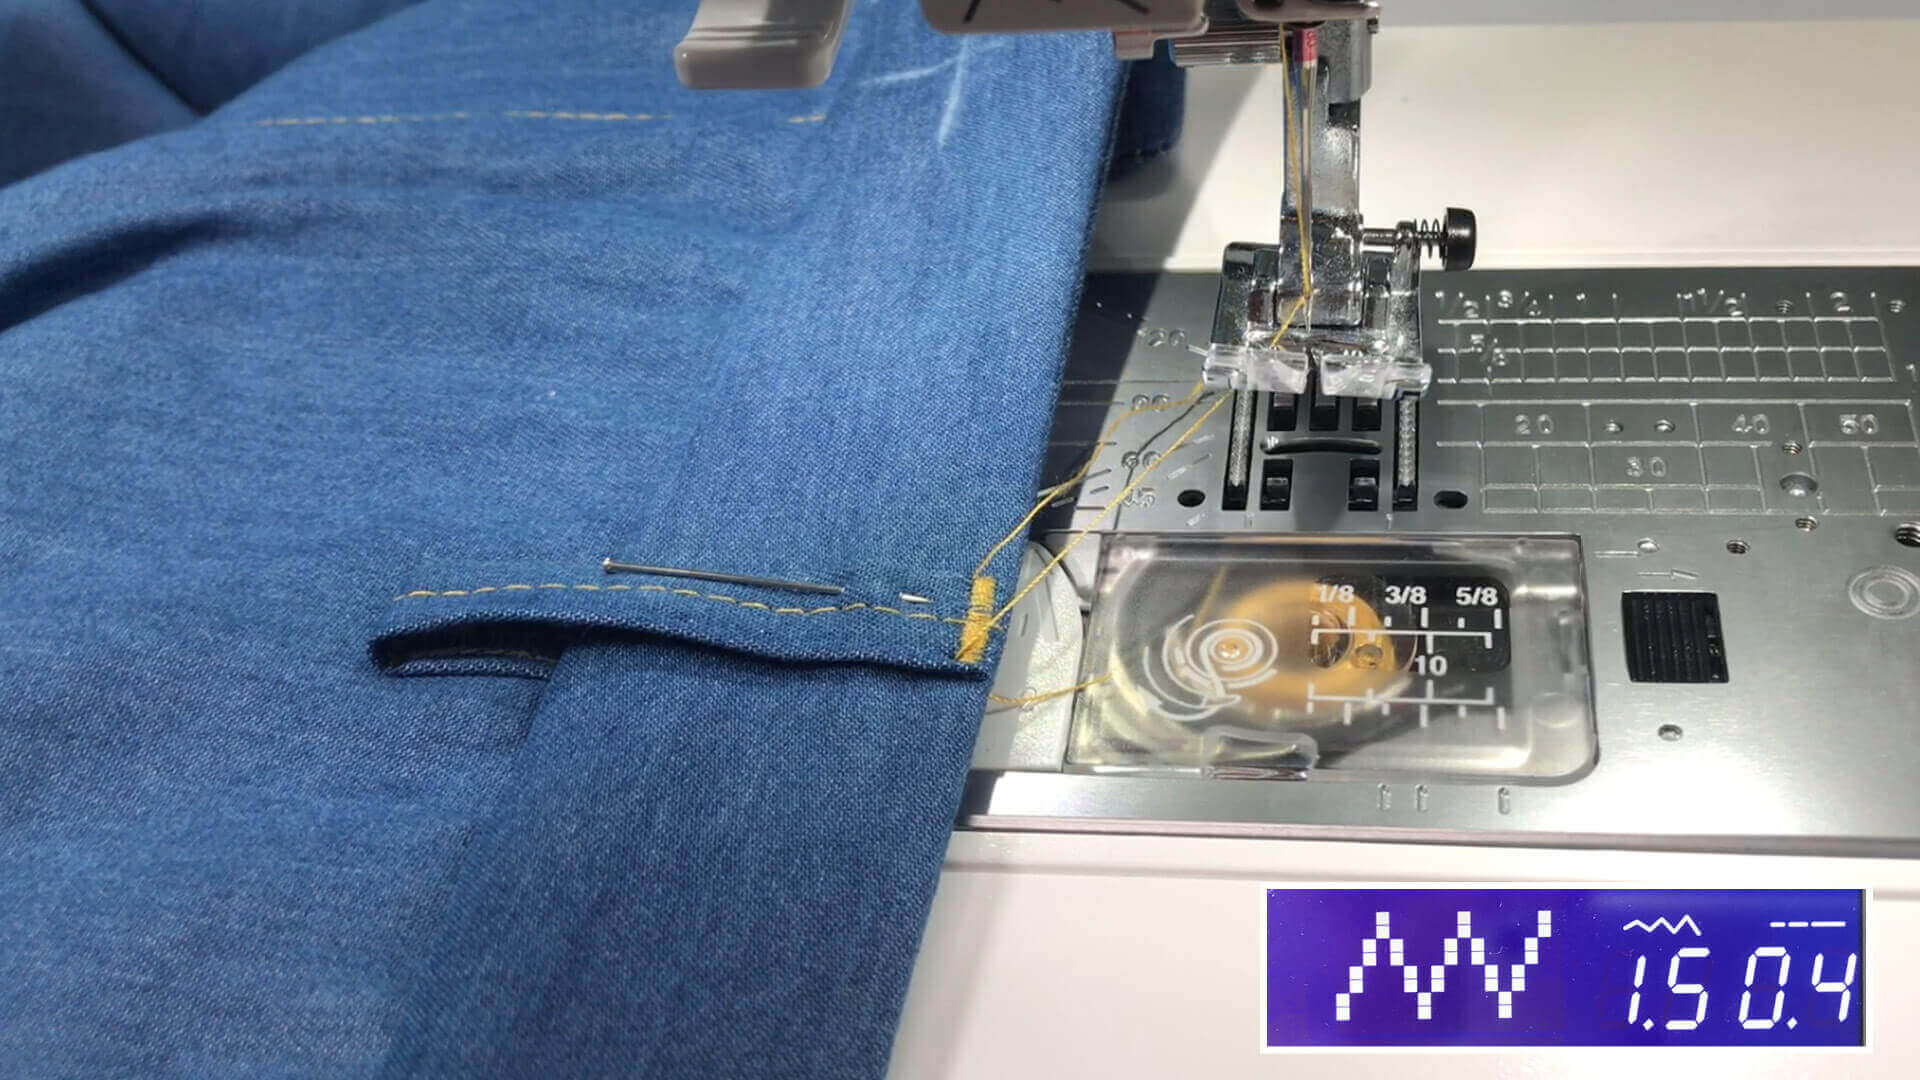
In this example, I used a narrow zigzag stitch with a stitch width of 1.5 and a stitch length of 0.4 mm. I recommend to try out the stitch on a test piece first.
Again, it is helpful to use the height compensation tip to bring the presser foot into a straight position.
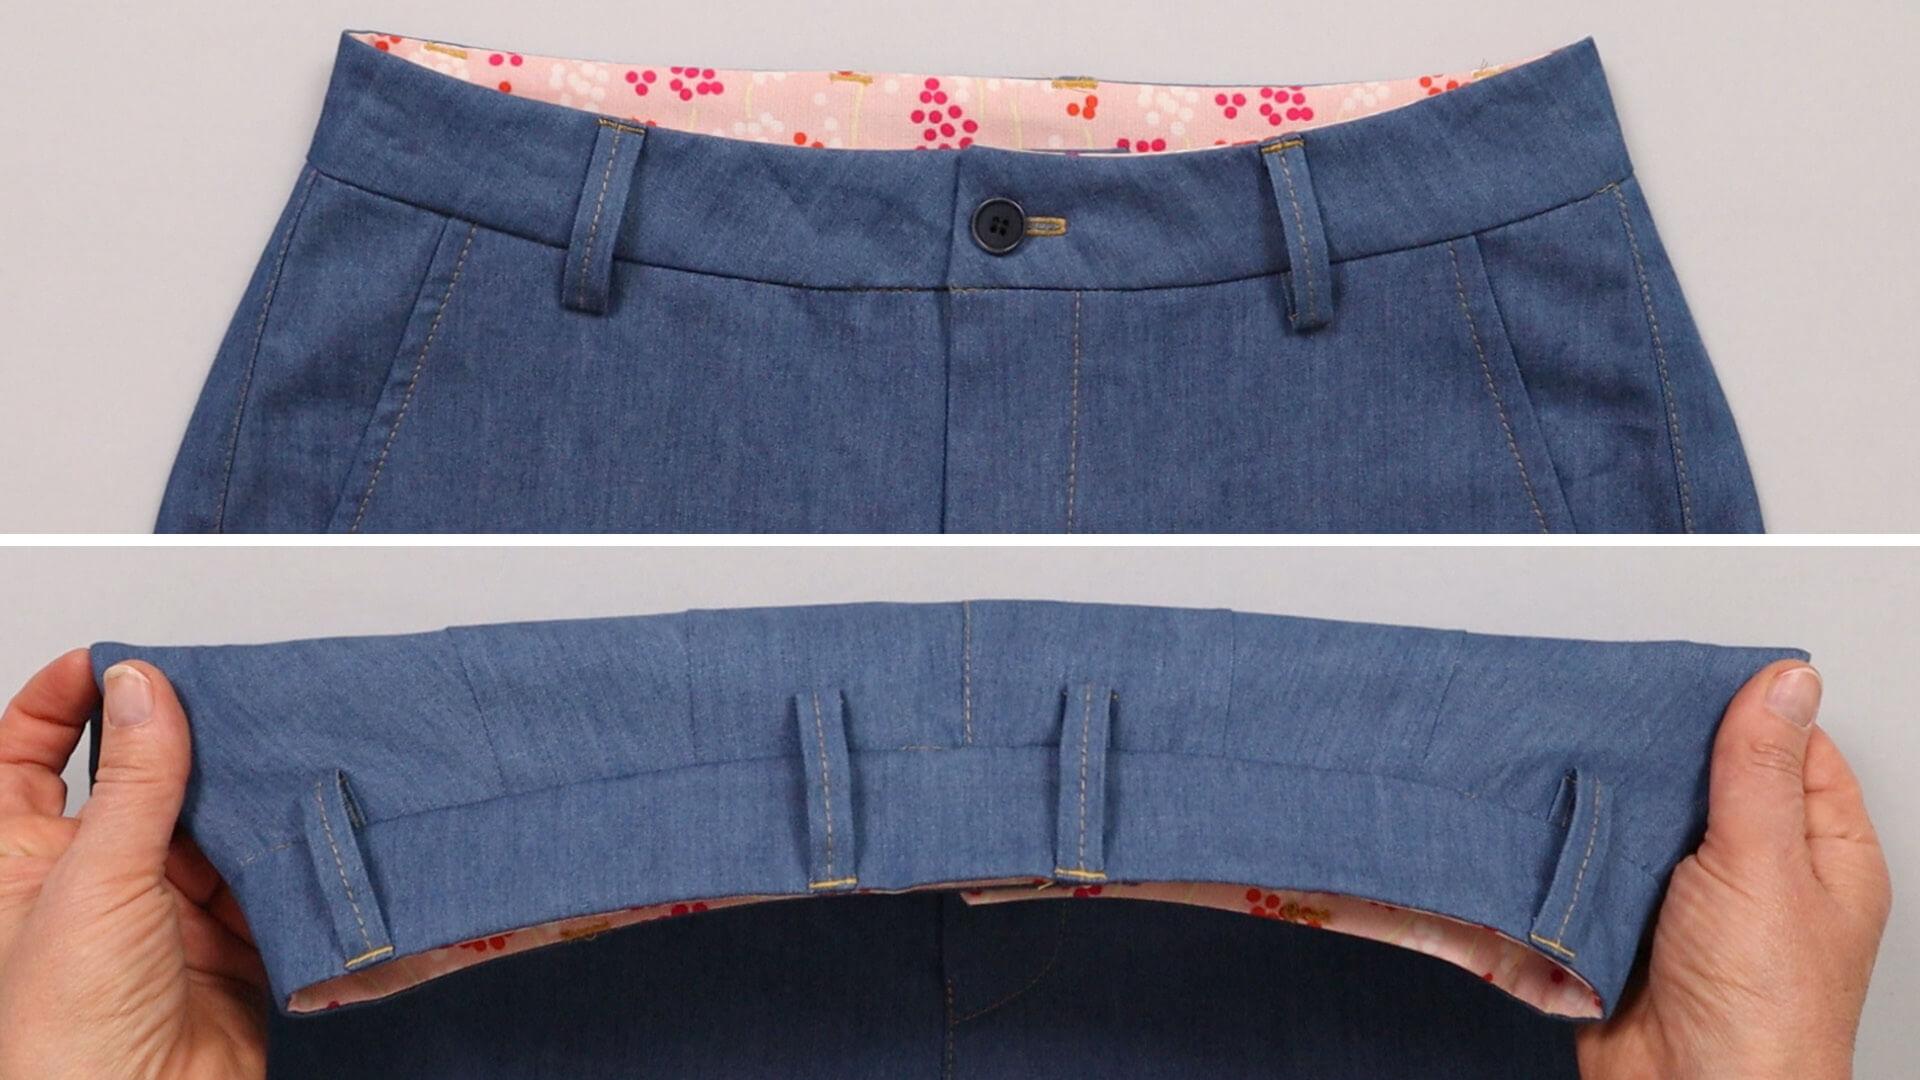
When all the belt loops are sewn in place, your waistband is finished!
Here is the link to the next step:
If you’re not quite ready yet and perhaps want to start at the beginning, you’ll find some links here:


