Loading cart contents...


Sewing folded trousers hem #S01
In the following video and illustrated text instructions, I explain step by step how to make a folded trousers hem. As often, there is a wide range of design and processing options. I will show the single and the double folded version here. Have fun!
1. Mark the trousers hem

The most skillful way to prepare the hem turn-in is when one leg seam is still open. I mark the finished hem length 40 mm parallel to the raw edge on the right side of the fabric. You can find out how wide the turn-in for your trousers is by measuring the distance between the side notches and the hem or on the pattern.
2. Iron the hem edge

I fold the turnin to the inside.

The hem can be folded over once, as shown here as variant 1. In this case, finish the raw edge with an overlocker or a zigzag stitch and topstitch it at a distance of 35 mm after closing the leg seam. Using a double folded hem(variants 2 and 3) you can omit serging. You can fold the cut edge by 10 mm (variant 2) and later topstitch with 28 mm edge distance. Alternatively, fold the turin inwards up to the pressed, finished hem edge (variant 3) and later topstitch at a distance of 18 mm.
3. Close the leg seams

As soon as the leg seams are closed, the hem can be topstitched from the outside.

You can prepare the hem turnin in the same way if the leg seams are already closed. This is a little more work as you will have to turn the trouser leg more often for ironing.
4. Topstitch the folded trousers hem

When I topstitch the hem, I start at the inner leg seam. As described above, the stitching distance depends on the width of the fold(s).

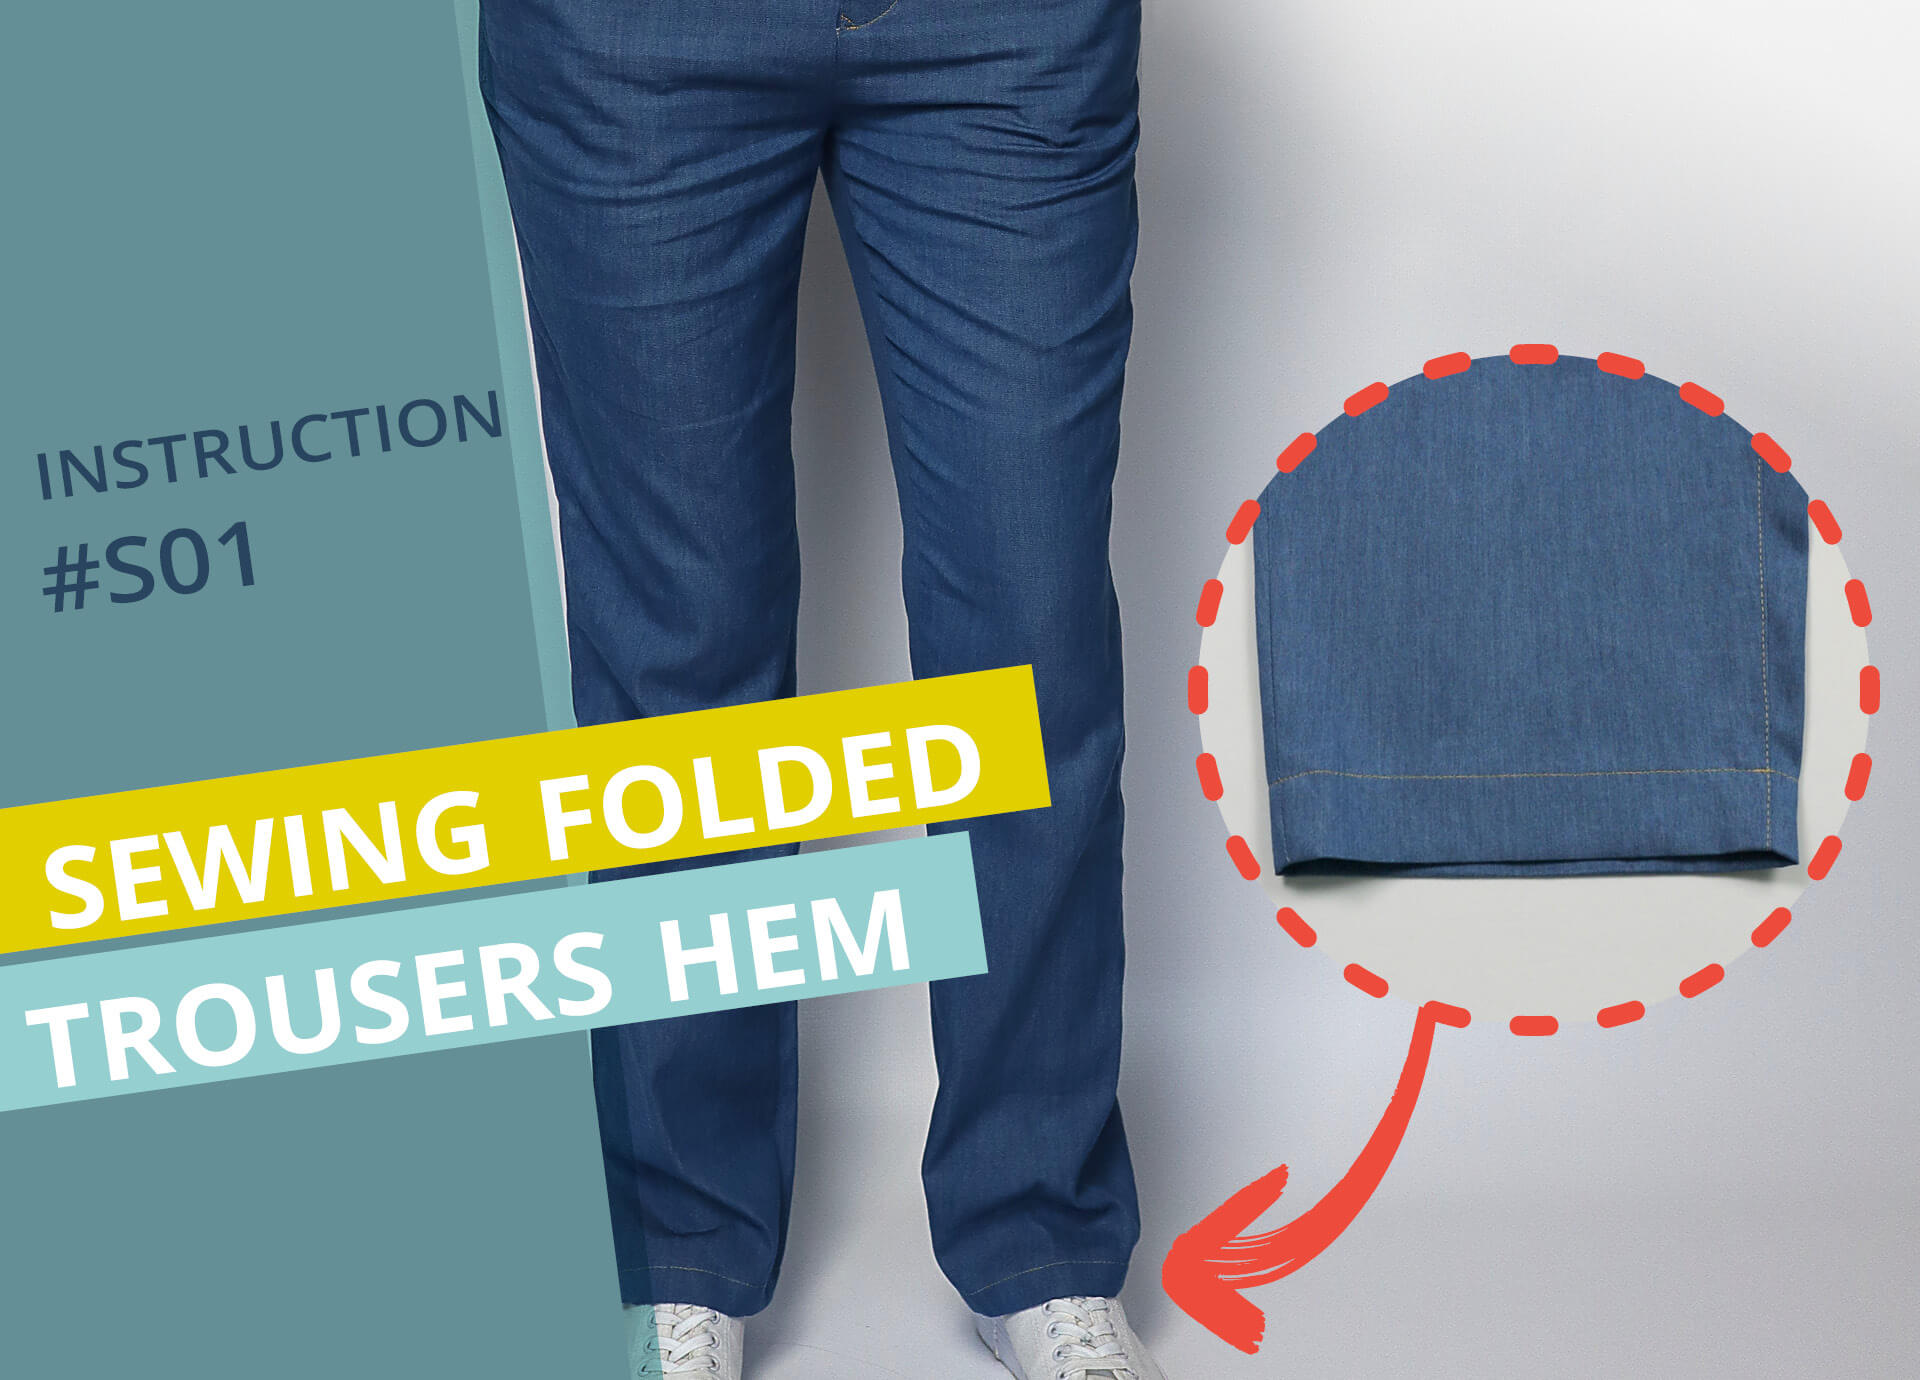
Here you can see the finished hem; at the top variant 3 with double folded hem and at the bottom the single folded variant 1 with overlocked edge.
If you would like to add rivets to your jeans, you can find instructions on how to do this under the following link:
If you’re not quite ready yet and perhaps want to start at the beginning, you’ll find some links here: