Insert pleats into trousers #BF01
In the following article and the step-by-step video tutorial, I explain how I work pleats into trousers in different ways and what types of pleats there are. Pleats are a great design element for trousers, which also give them more width and make them more comfortable.
Enjoy sewing!
1. This is required:
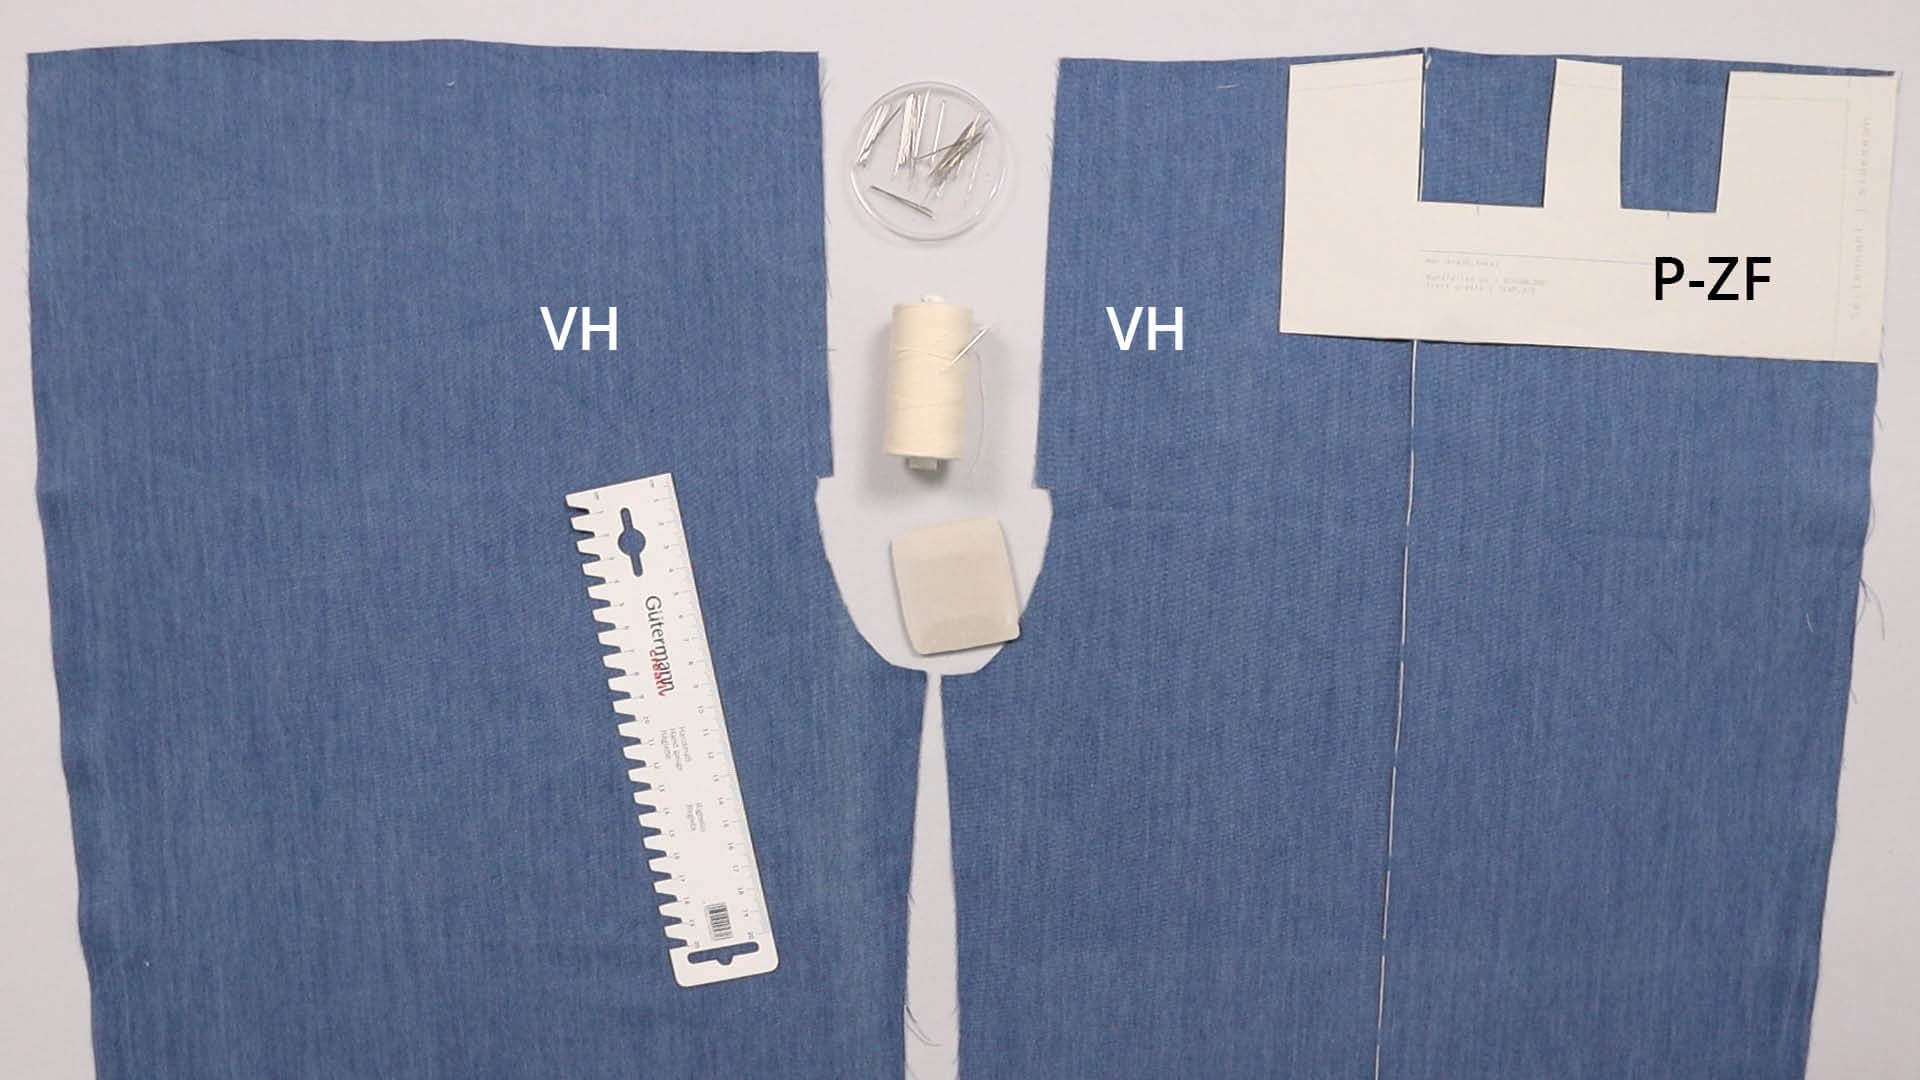
Pattern pieces made from shell fabric:
- front trousers (VH) – 1 pair
To explain both options, you can see a piece with and a piece without a pleat here.
Paper pattern pieces
- the template for the pleats (P-ZF)
Tools and aids:
- ruler
- chalk or fabric marker
- basting thread and hand sewing needle
2. Different types of pleats
First, I would like to show you the most common types of pleats:
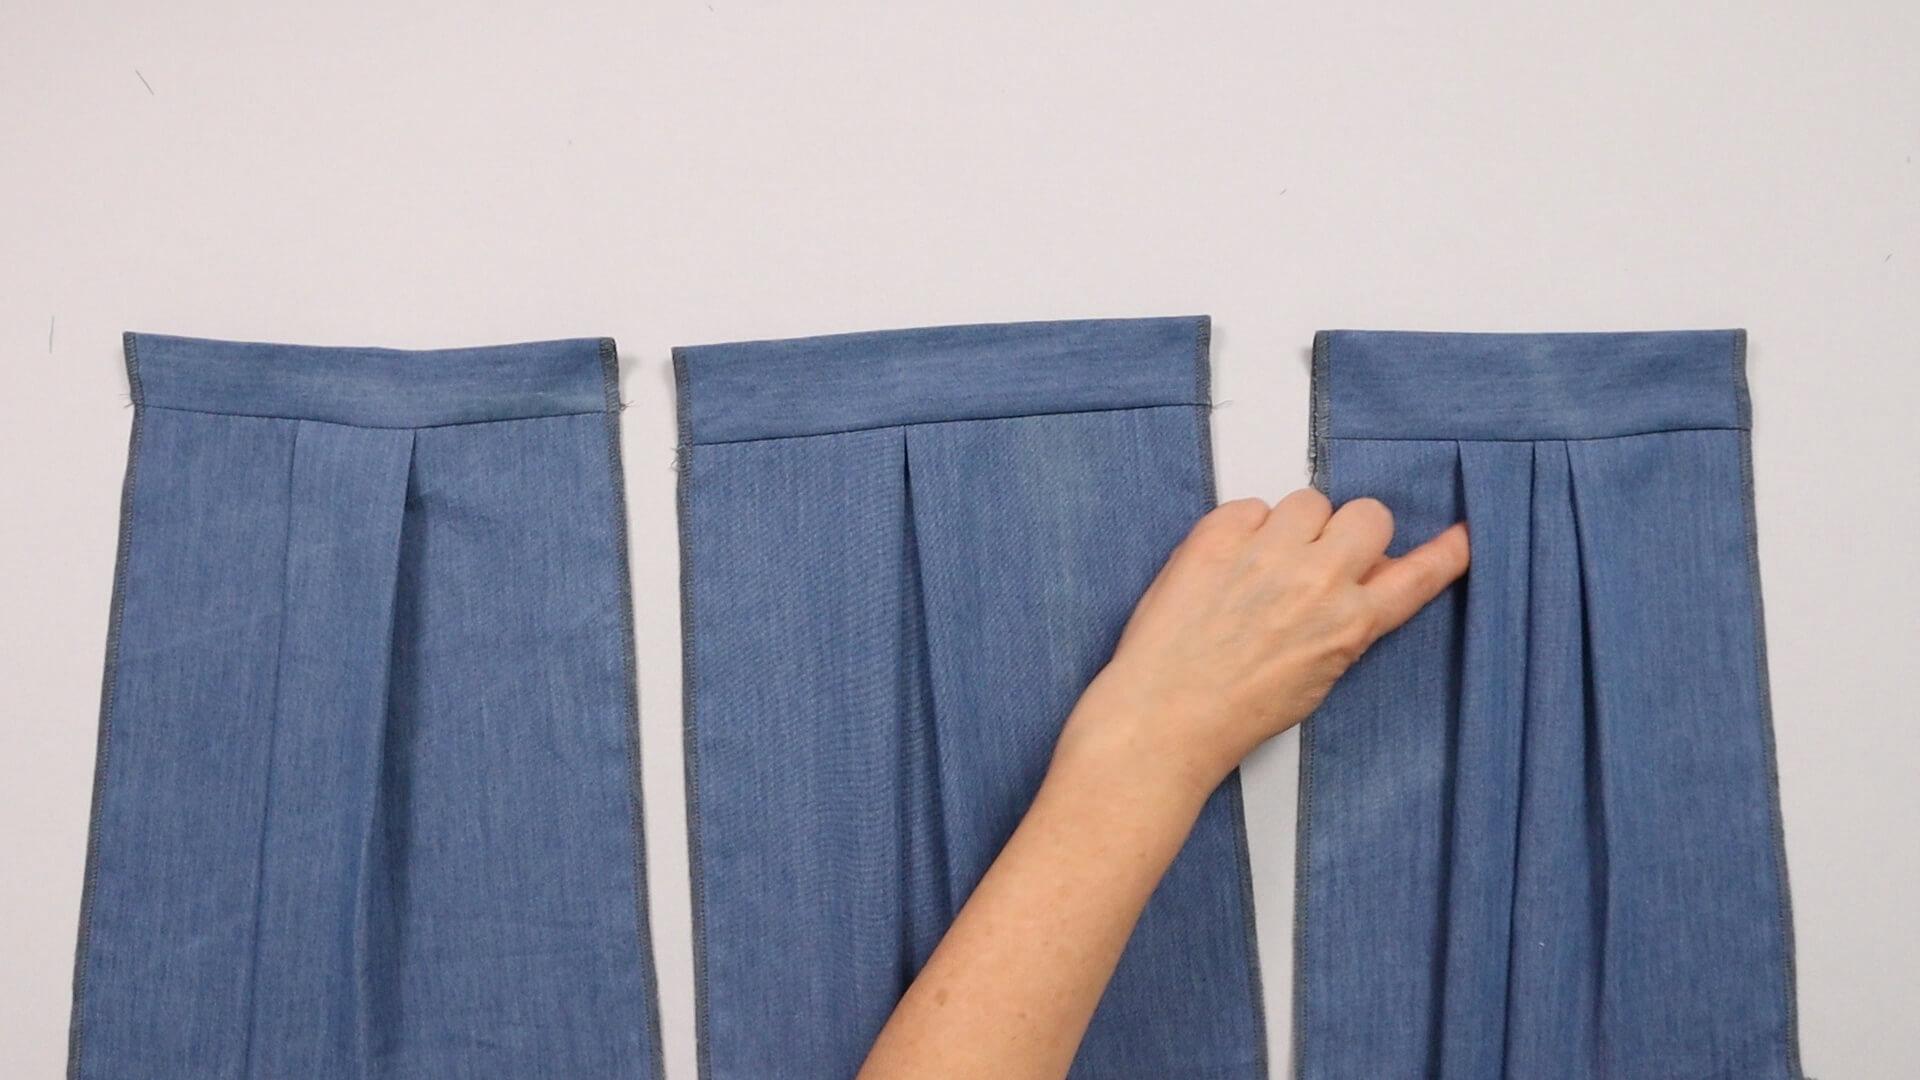
On the right side you can see the so-called one- or single-sided pleat. They can be placed with the opening to the right or the left.
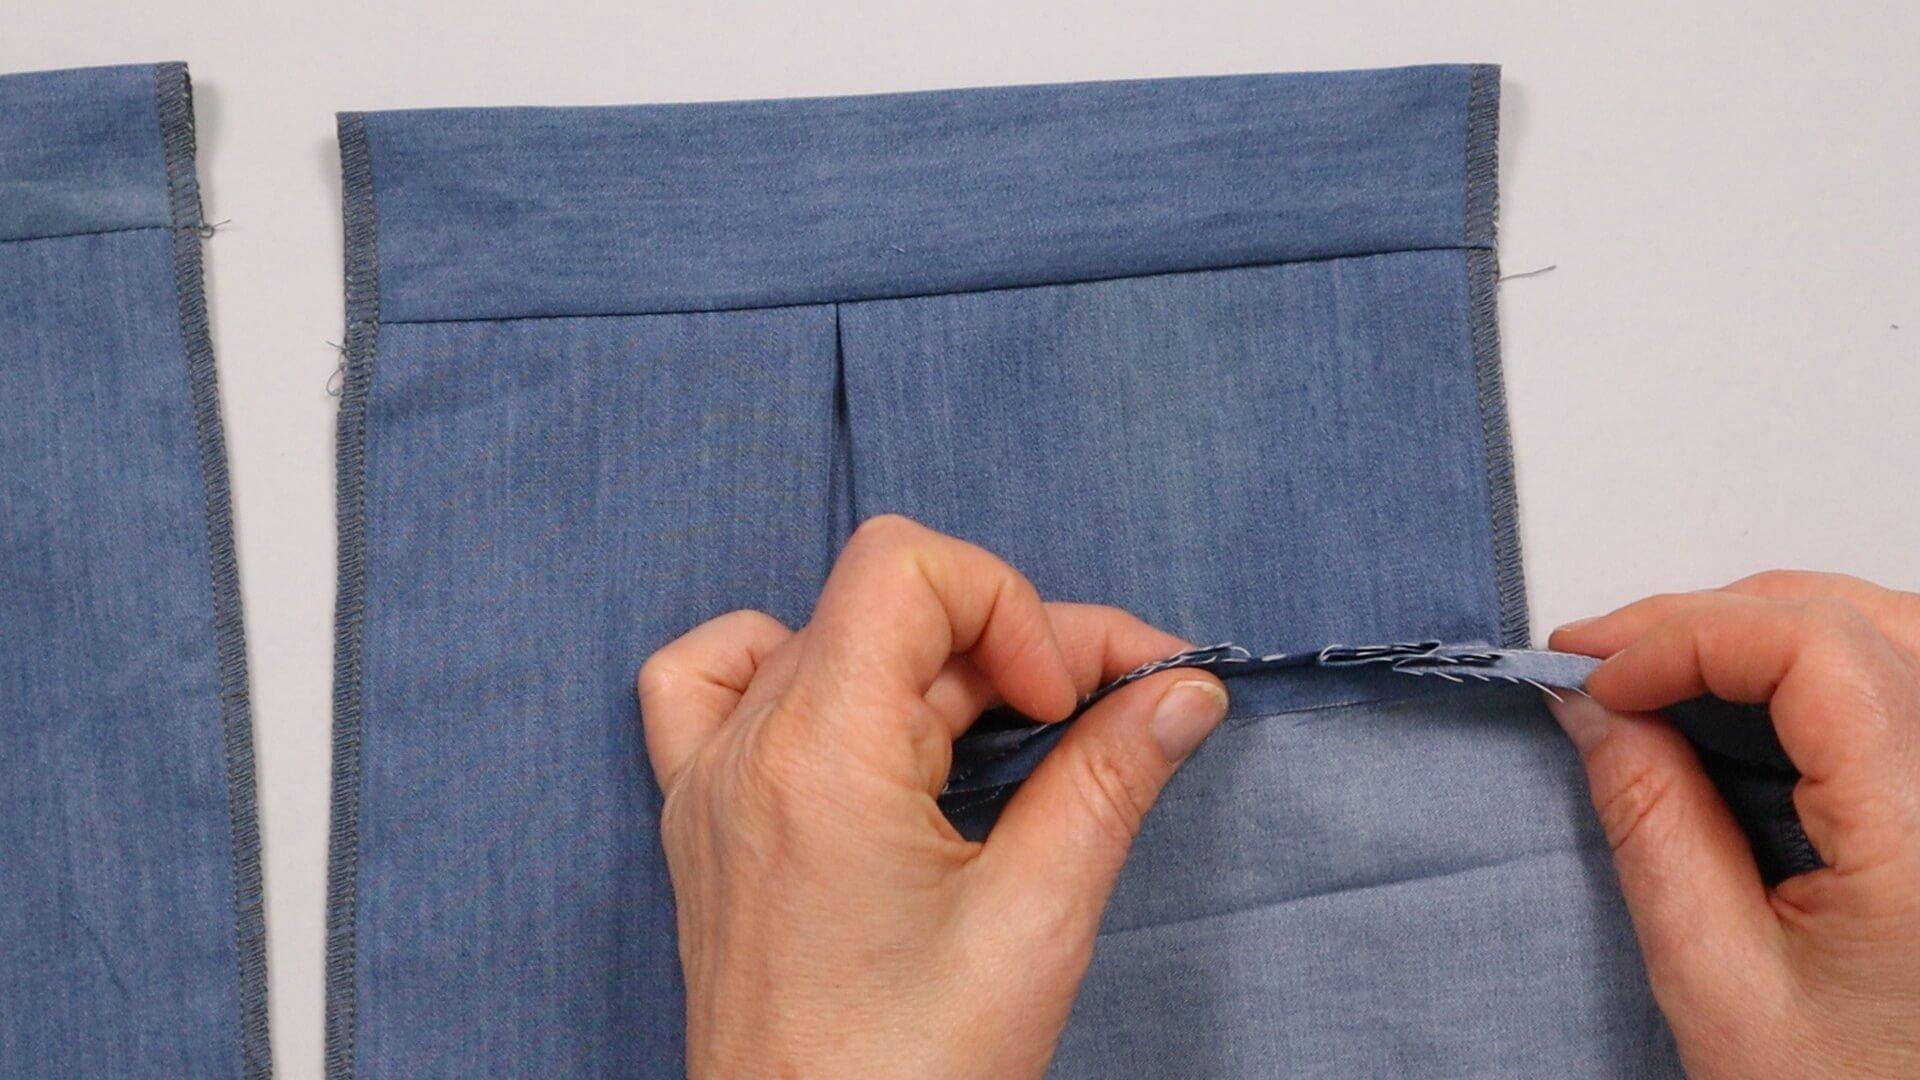
If you have more than one of these pleats, you can also place them in a way that they overlap, as you can see here.
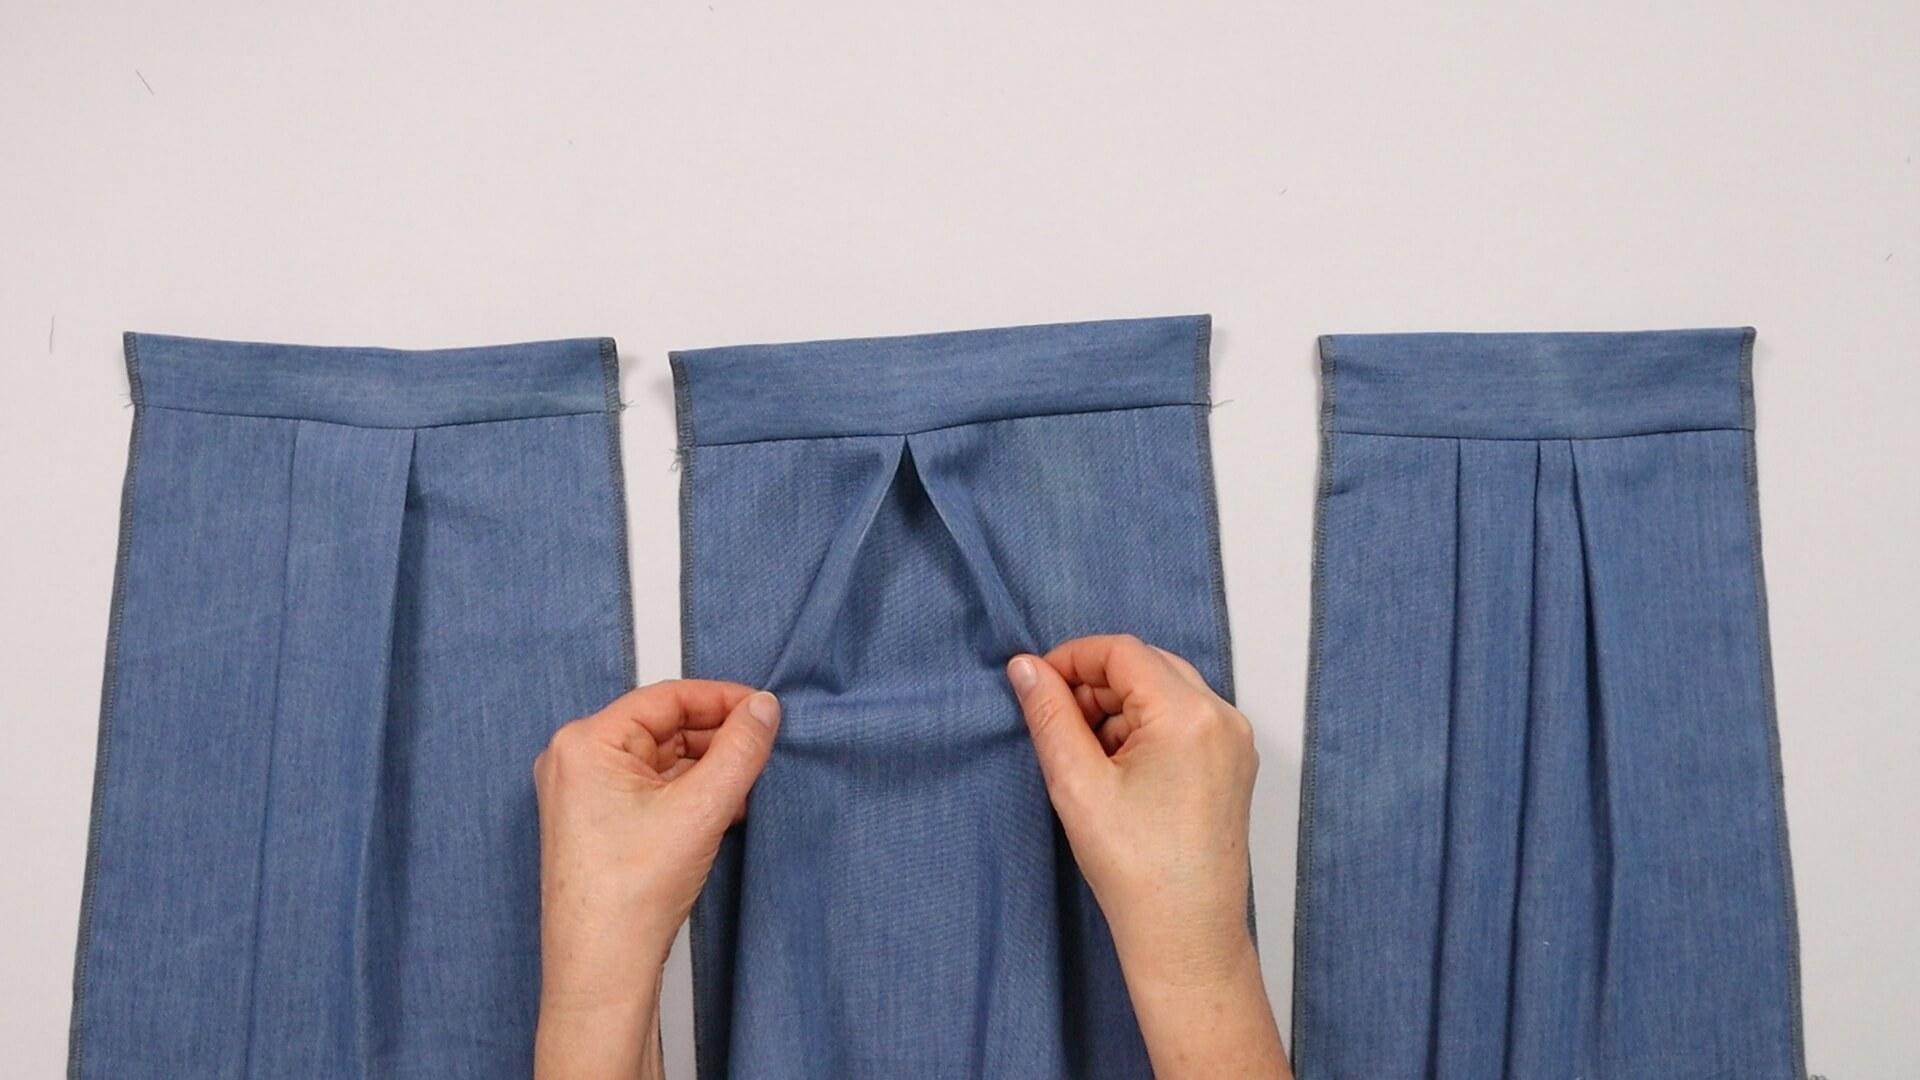
The type of pleat in the middle is called a box pleat. One half of the pleat is folded to the left and the other to the right, both to the inside.
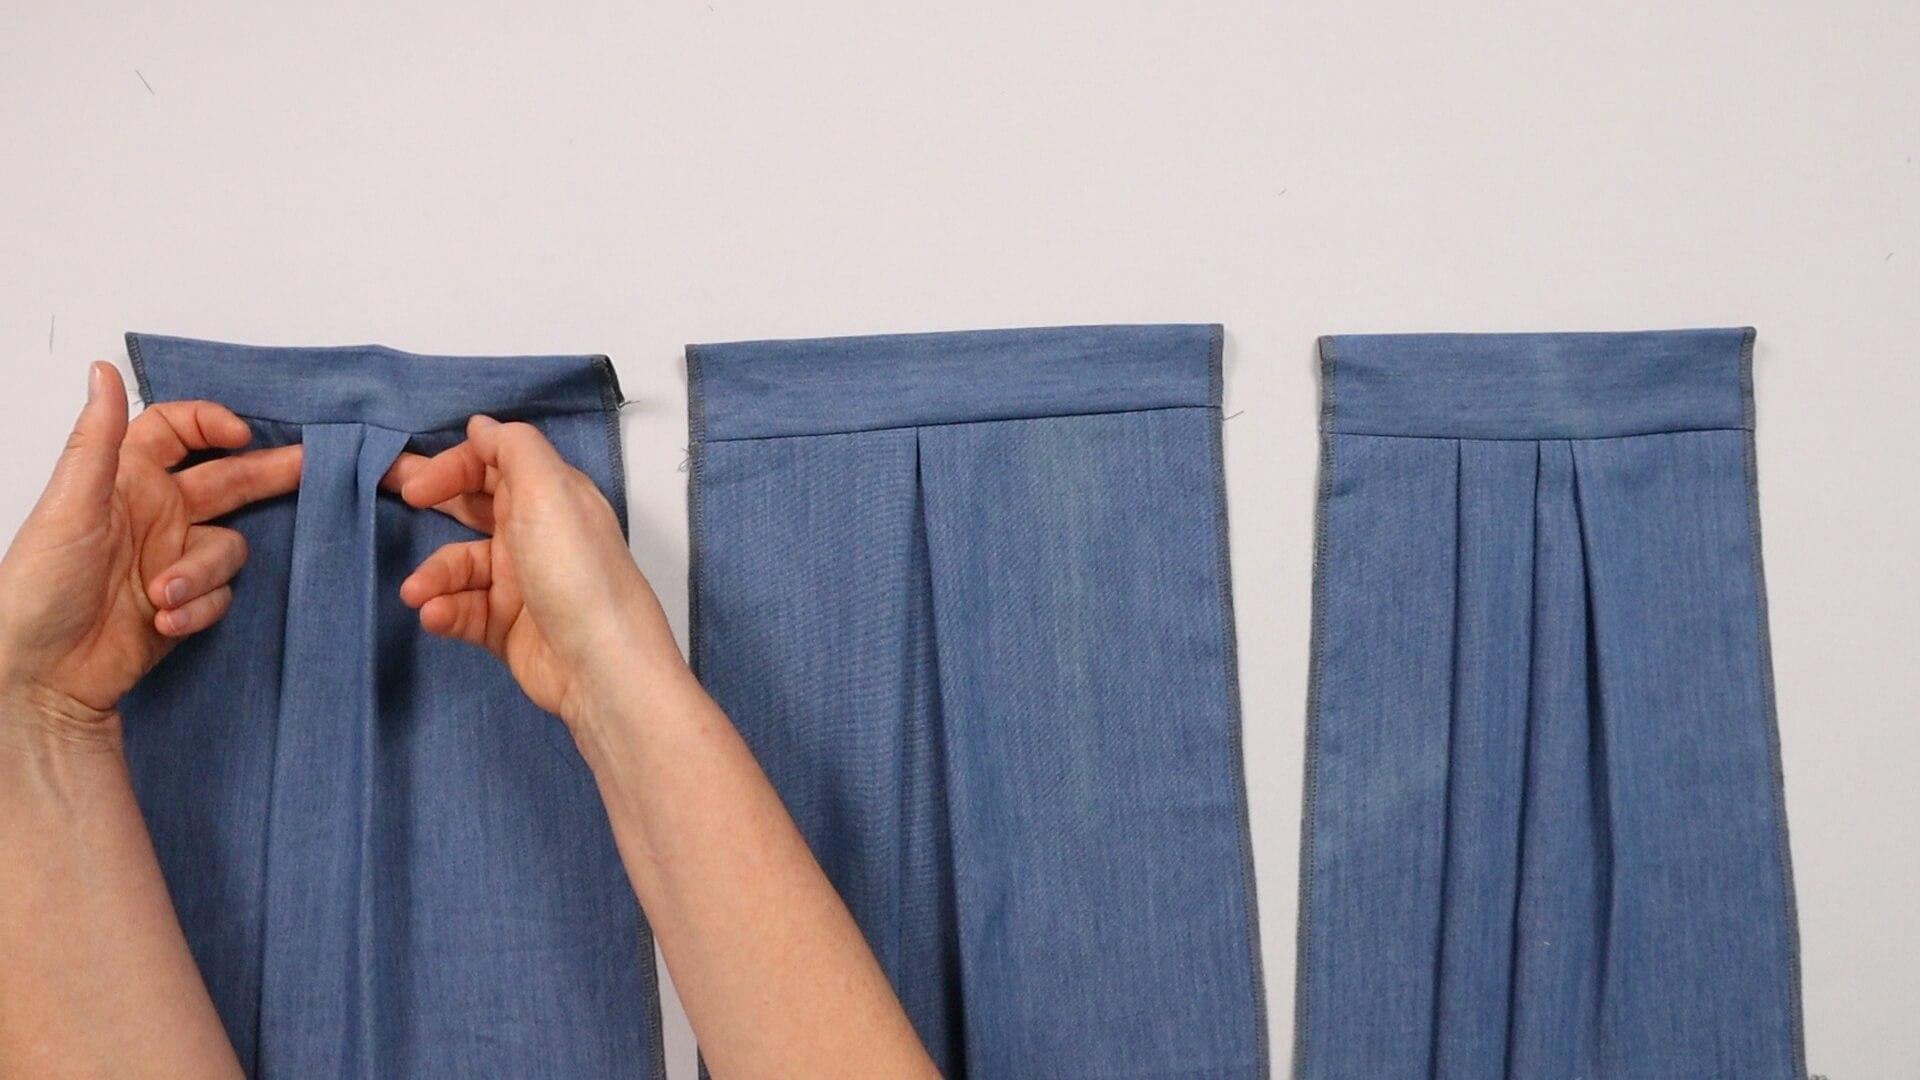
The pinch pleat on the left is similar, but the pleat halves are placed on the outside. The box pleat looks the same on the inside as the pinch pleat does on the outside. In my opinion, however, this pleat shape does not play a role in trousers.
I have worked the pleats “open”. They are attached when the waistband is stitched on.
You can also stitch them for a few centimeters and topstitch them with a decorative seam if desired.
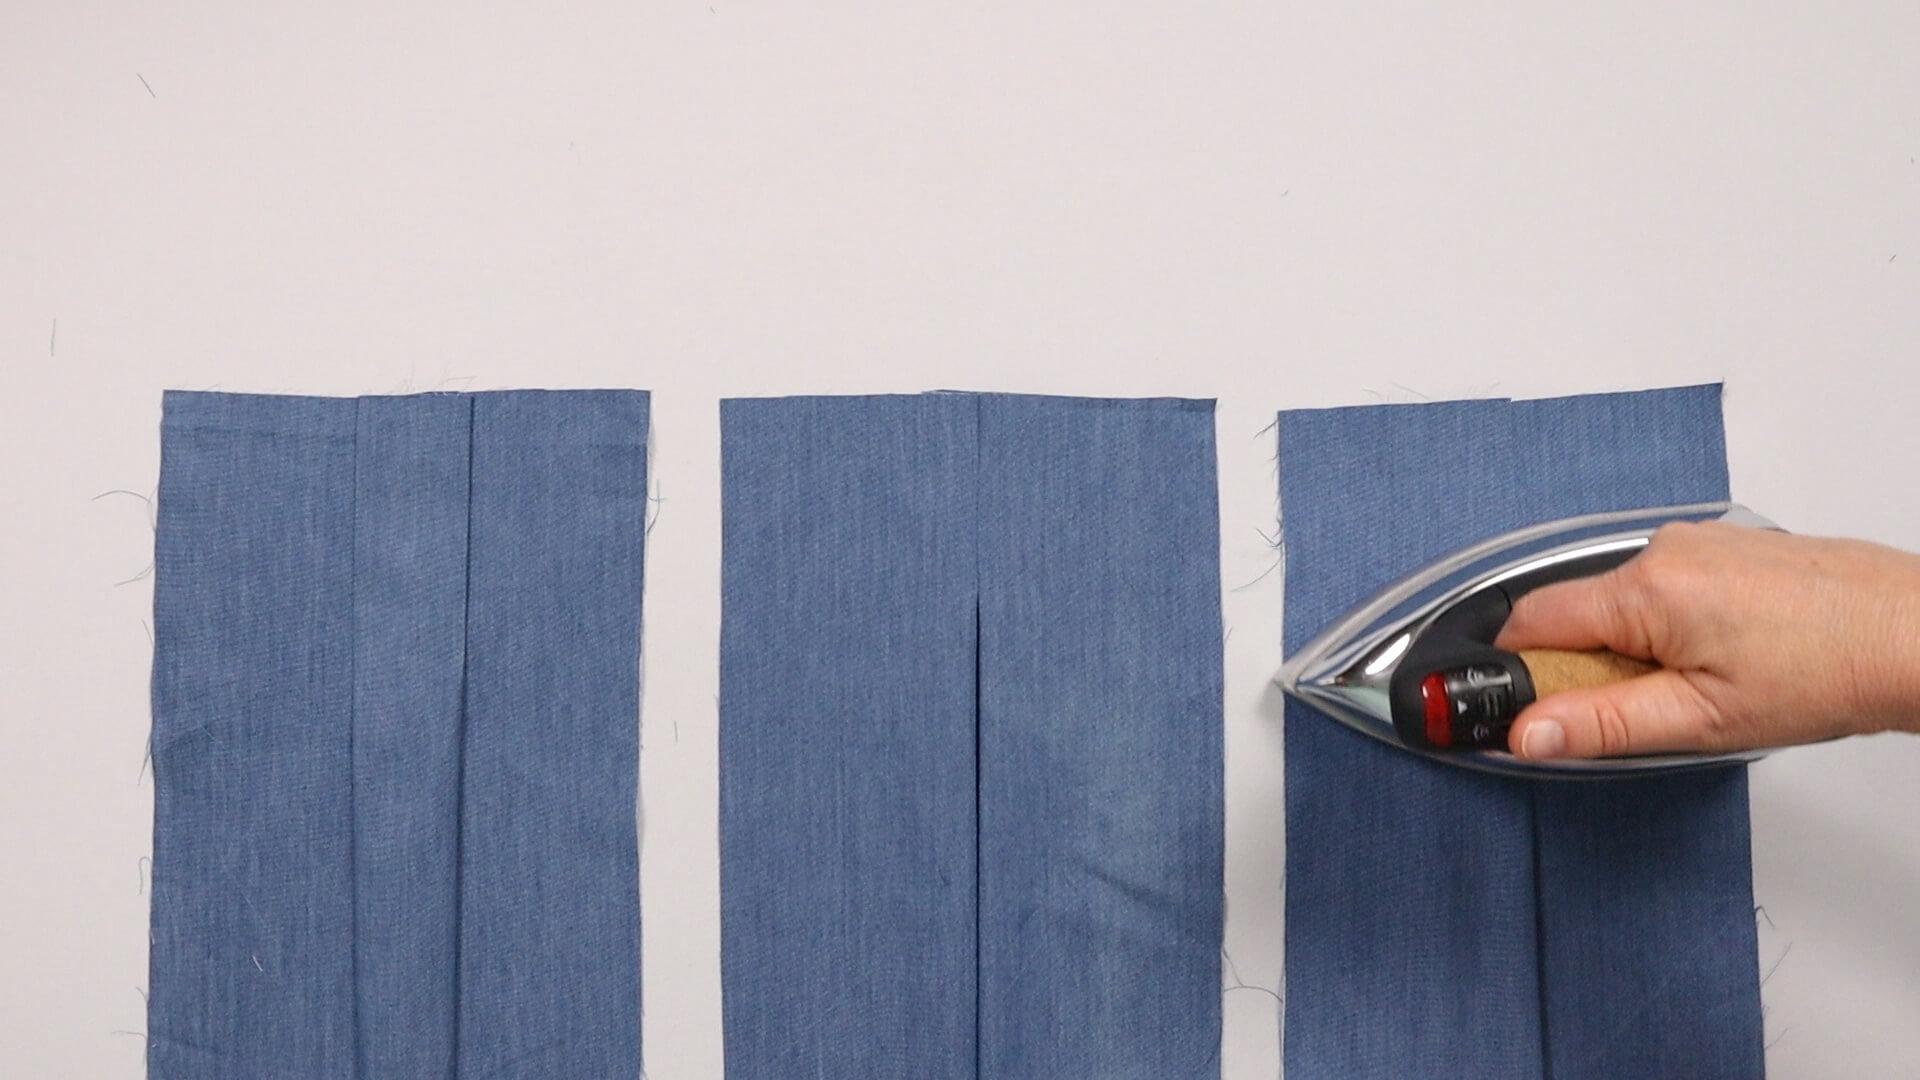
Another design feature is whether and in what direction you iron the pleats. That is entirely up to your personal preference. However, make sure to work the front pieces symmetrically and in mirroring directions.
3. Prepare open pleats for fitting
In order to be able to make any adjustments, you should wait until the fitting is complete before sewing and pressing the pleats. Therefore, I will first show you how to prepare pleats placed to on one side for the fitting. Note the special prcessing if your trousers have a crease!
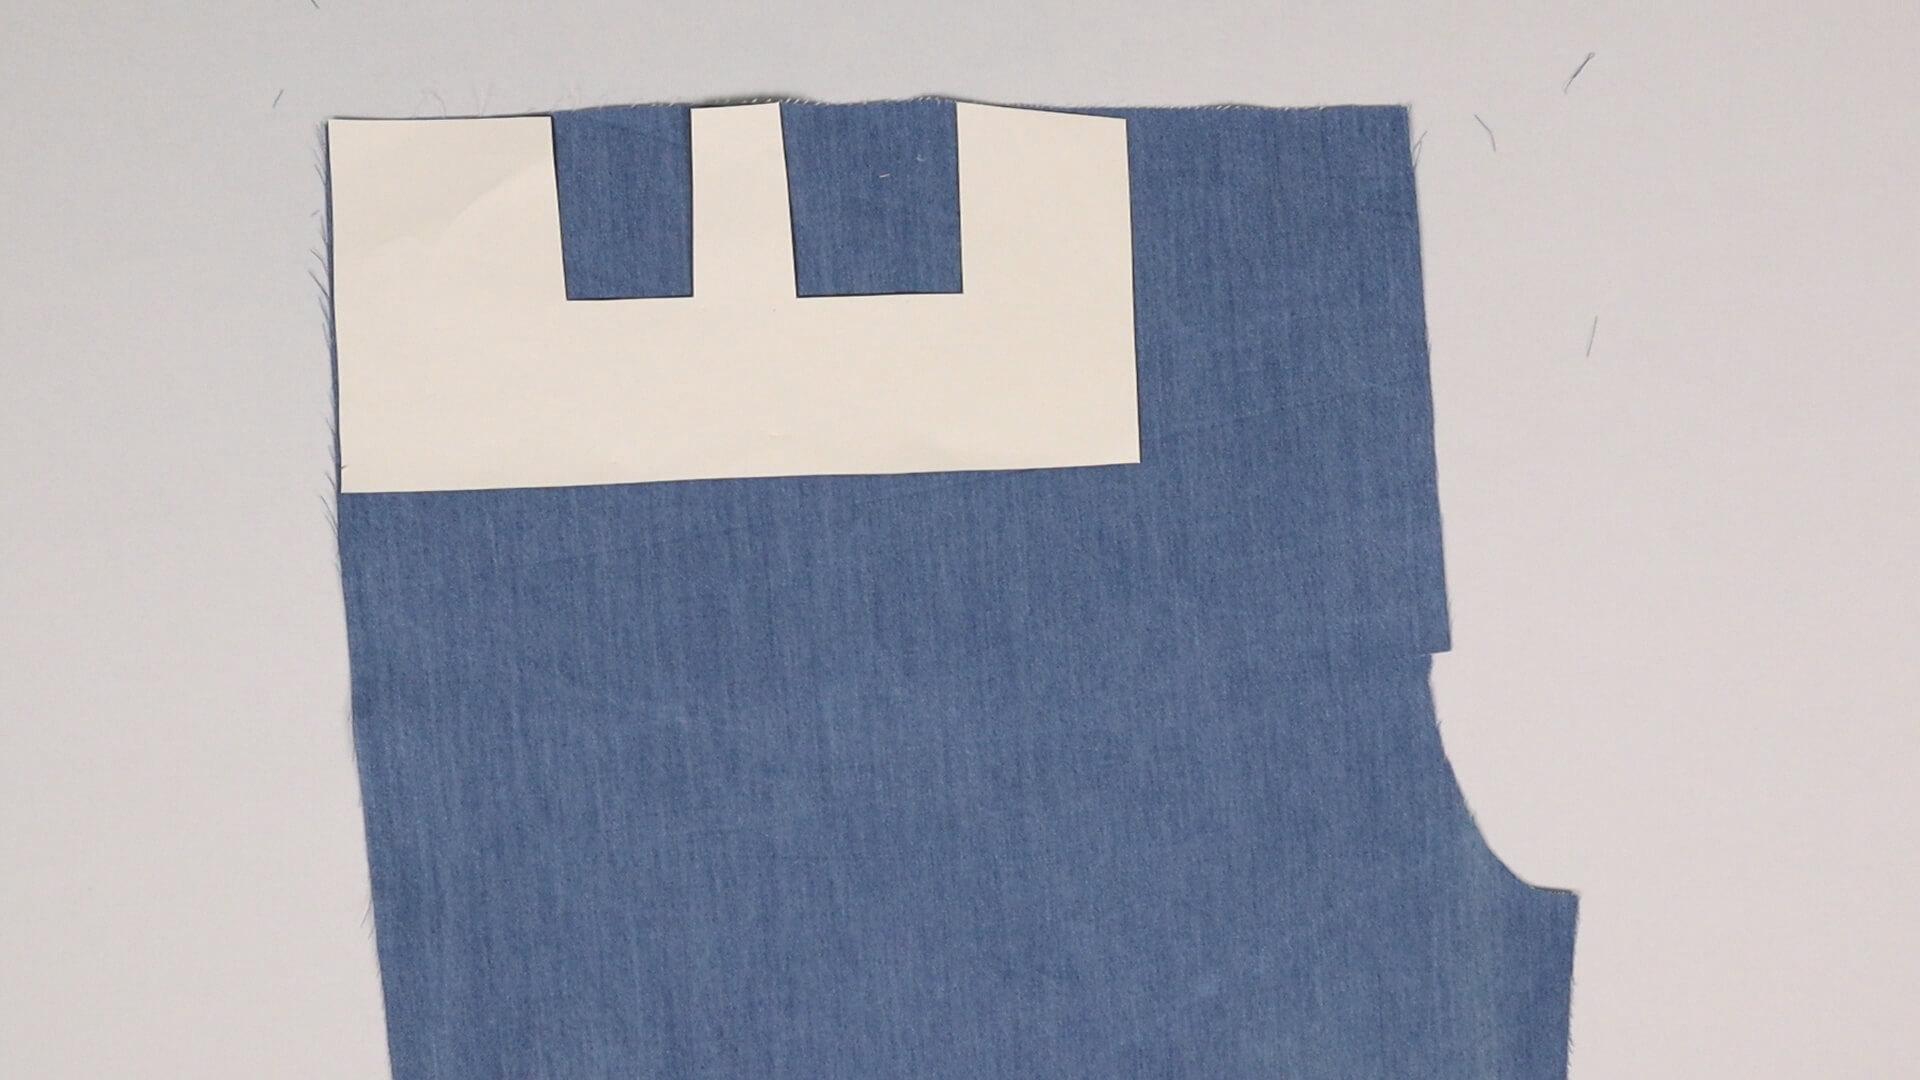
Place the pleat template on the front piece so that it lies against the side seam and top edge.
The template in the example contains two cut-outs, as it is intended for two pleats.
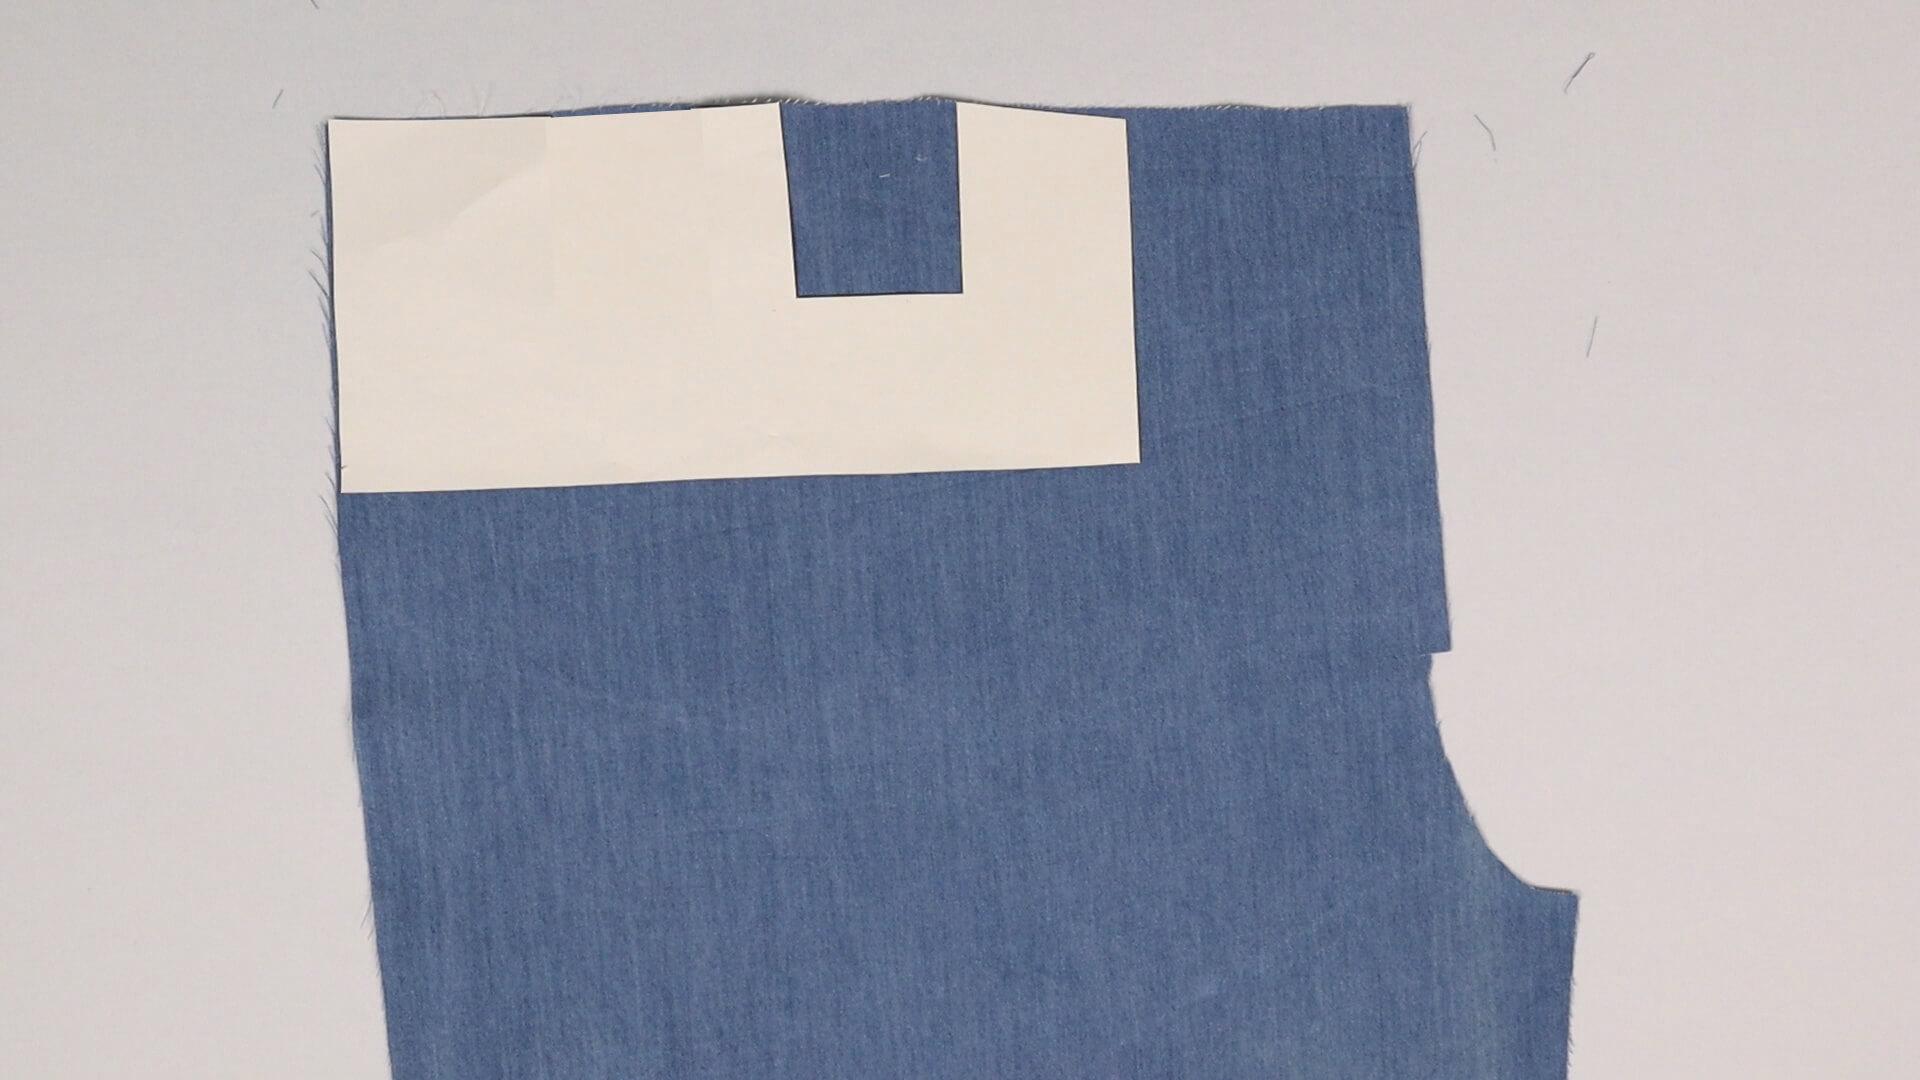
If you have only selected one pleat, you will only find one cut-out in your template.
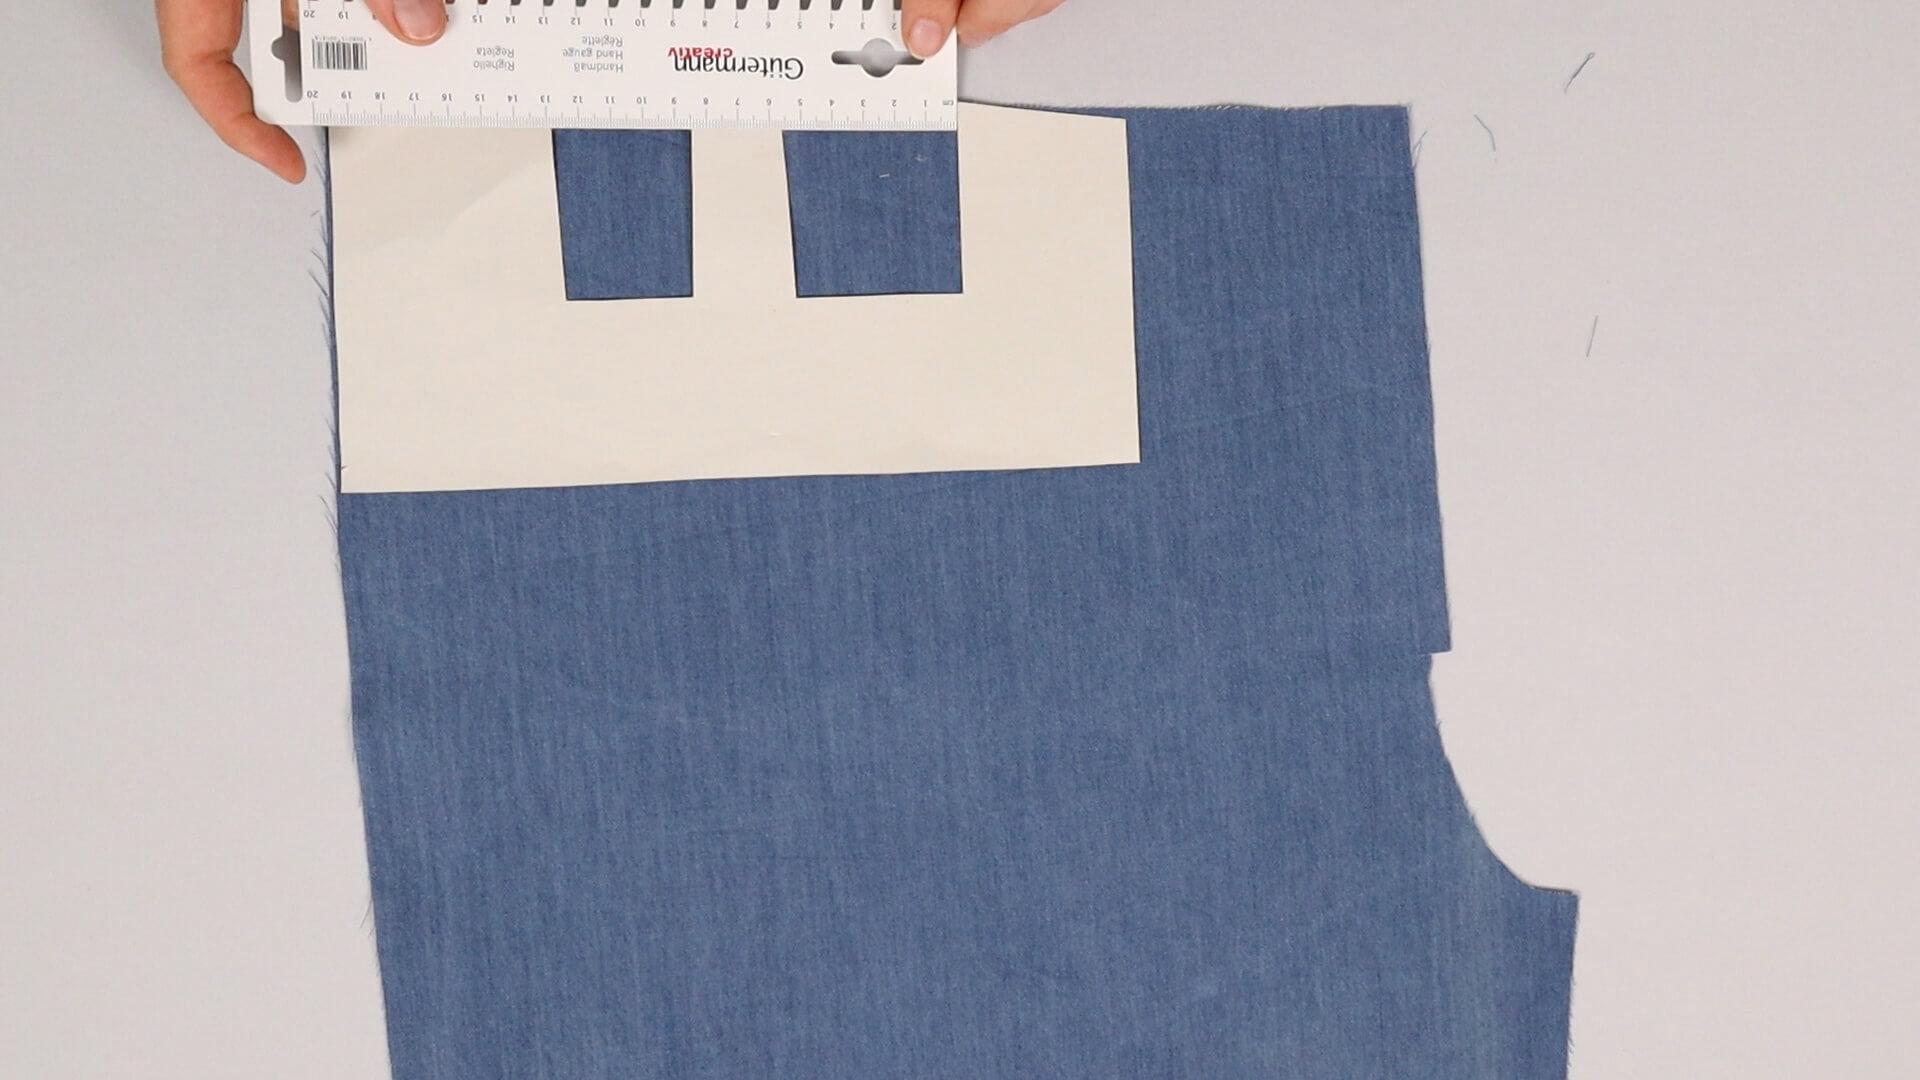
The width of the pleat is referred to as the “pleat content”. In this example, the right pleat, which is further forward in the finished trousers, has a pleat content of 5.5 cm. The pleat content of the left, later lateral pleat is 4.5 cm. This means that the waist will be 10 cm narrower after the pleats have been added.
If you have several pleats, you can also divide the pleat content differently. However, the front pleat should be at least as large as the side pleat. It is important that the entire pleat content does not change.
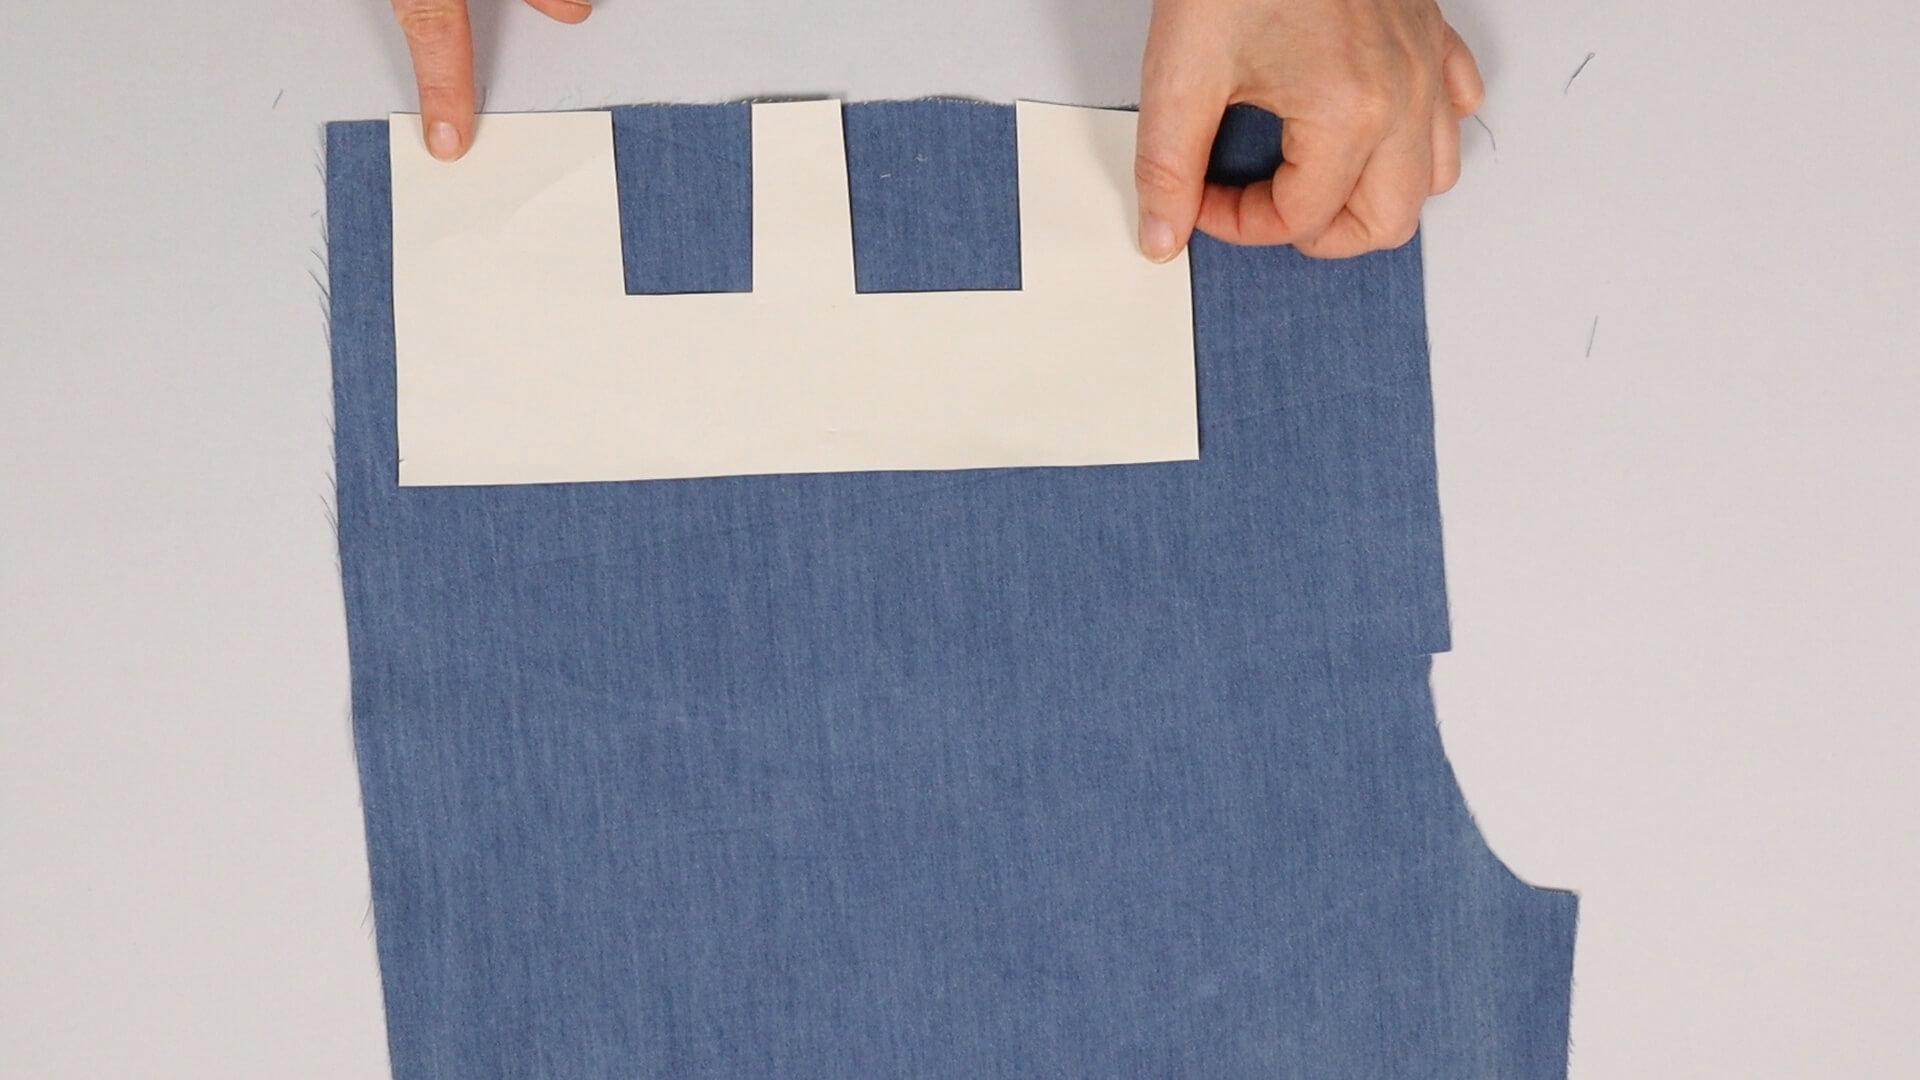
The position does not necessarily have to be adhered to, as in the template. During the fitting you can still decide whether you like the position and width distribution and change them if necessary.
If you add a wing pocket (a pocket with a visible side opening), make sure that the pleats do not come too close to the pocket opening.
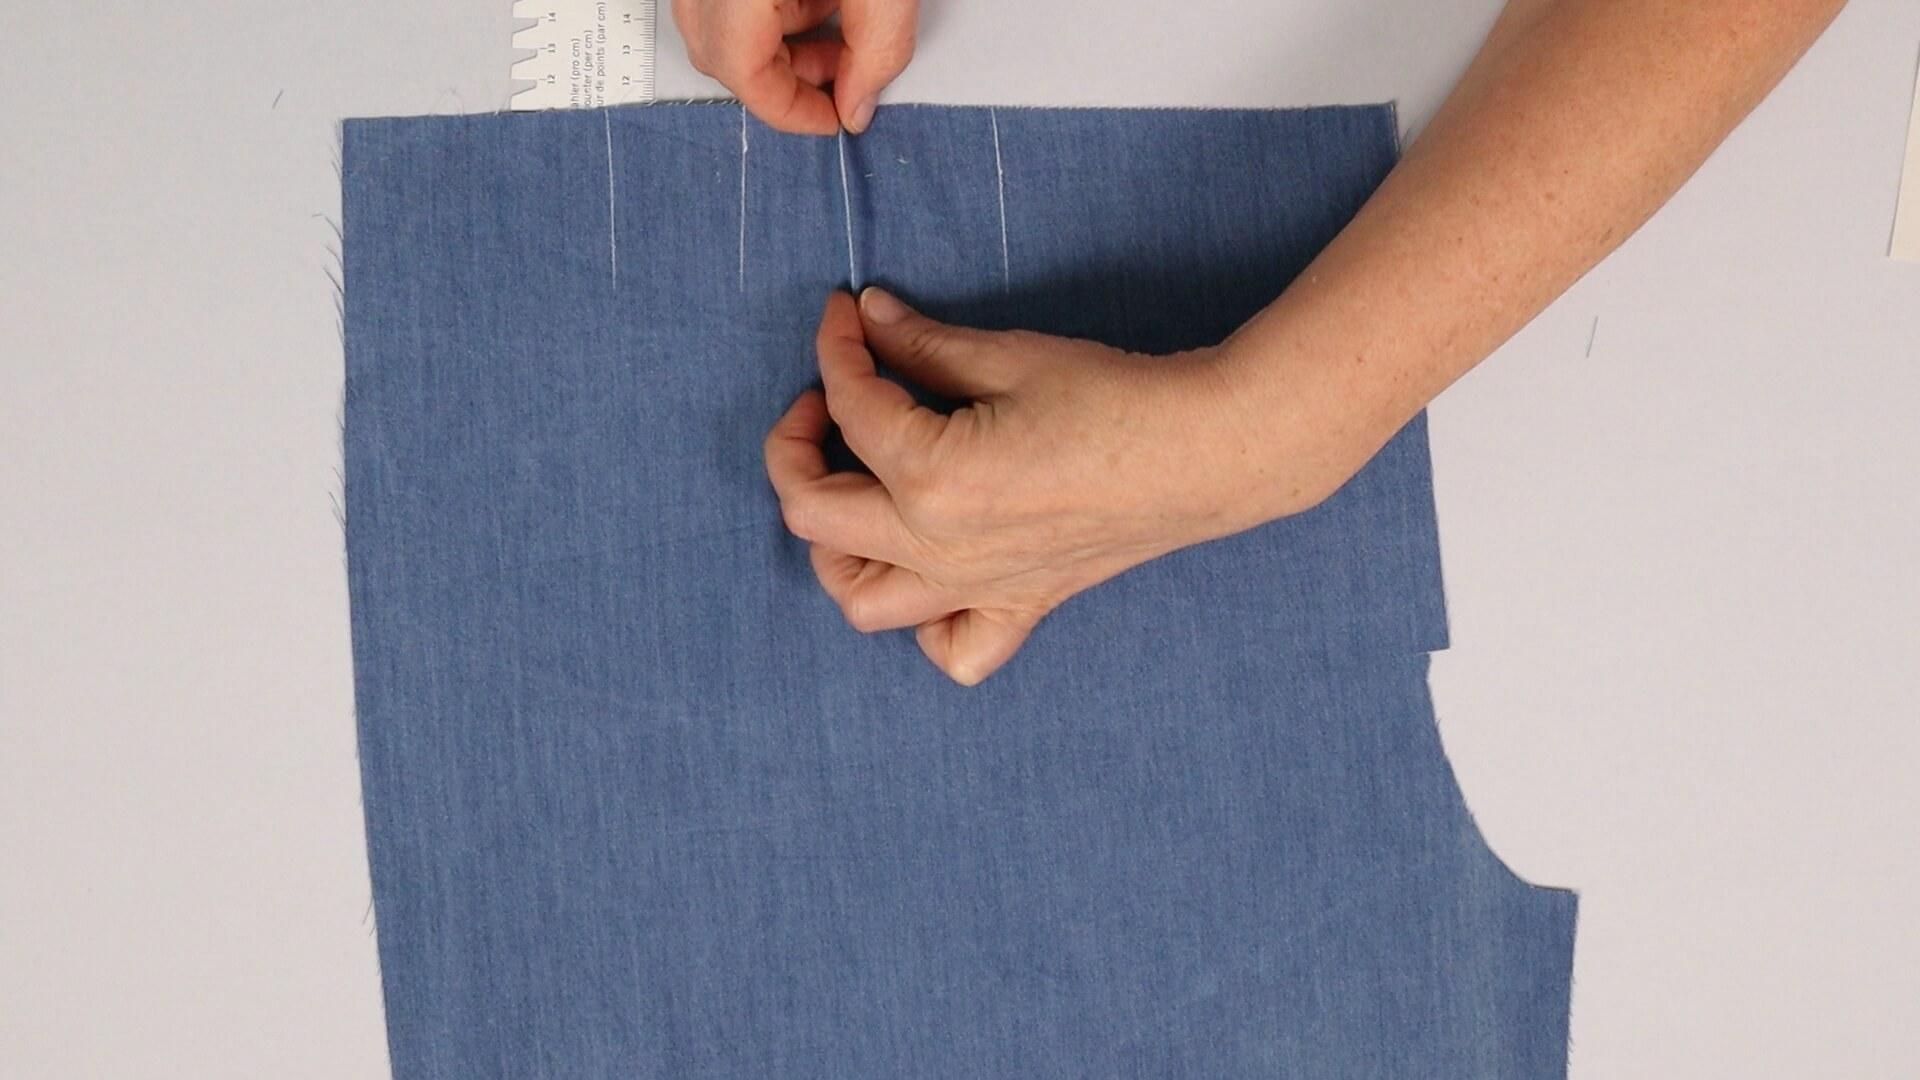
If the pleats should not be stitched, I mark the position on the right side of the fabric.
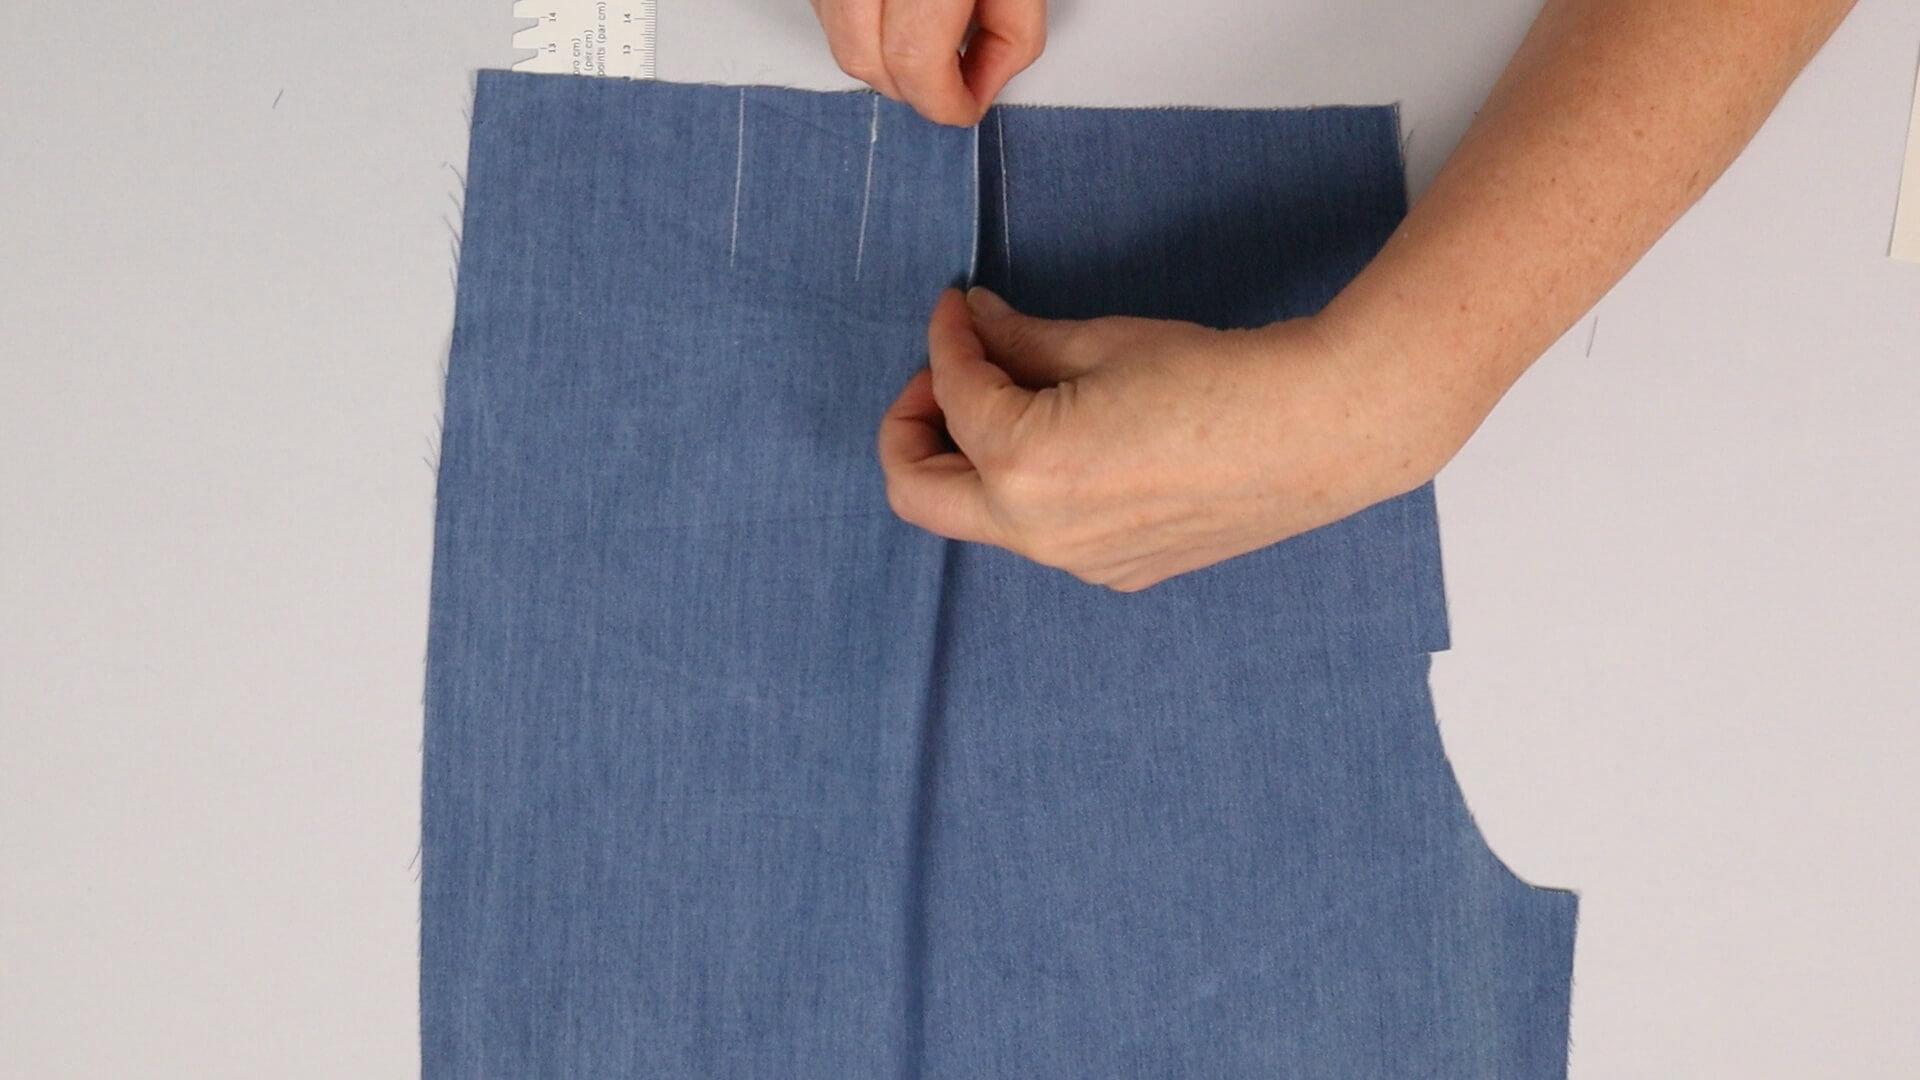
Pleats can open towards the center front or towards the side seam. When opening towards the center front, I place the side leg on the front leg.
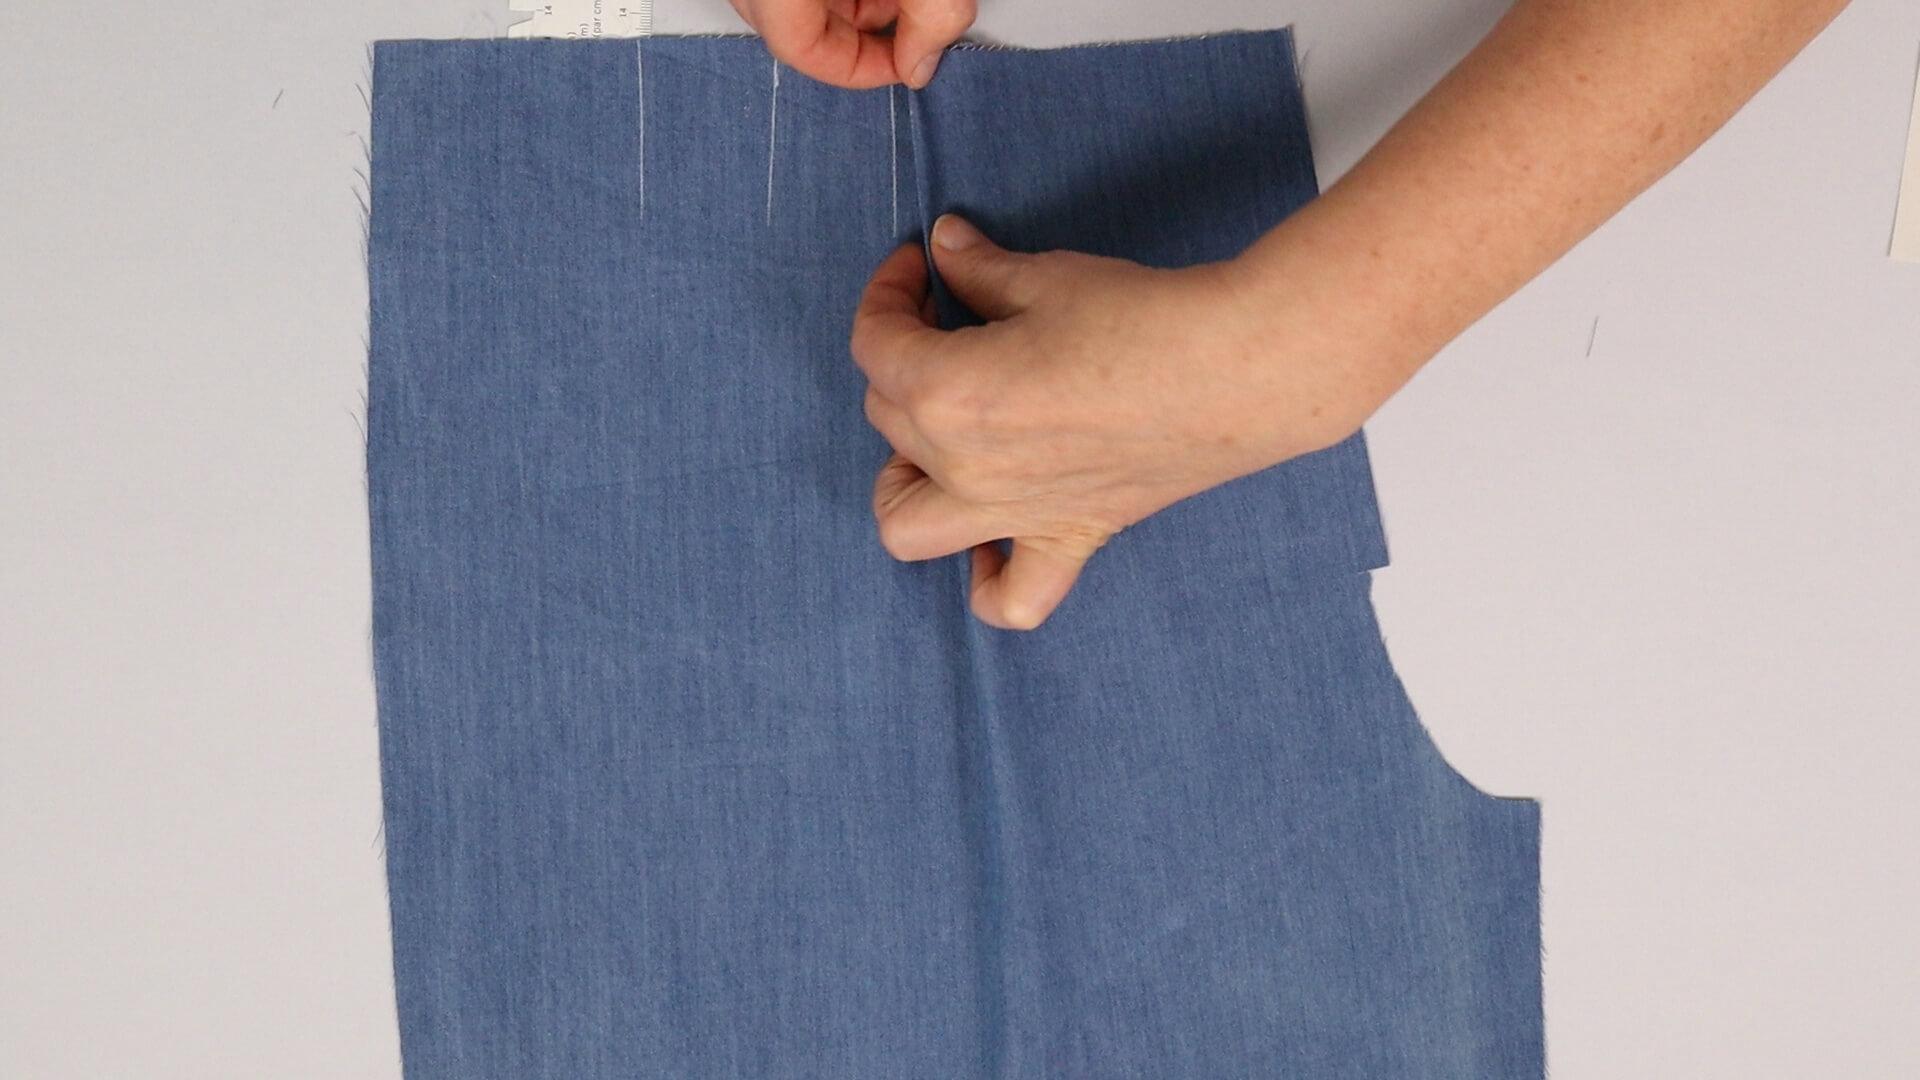
If you want the pleats to open towards the side seam, place the front leg on top of the side leg.
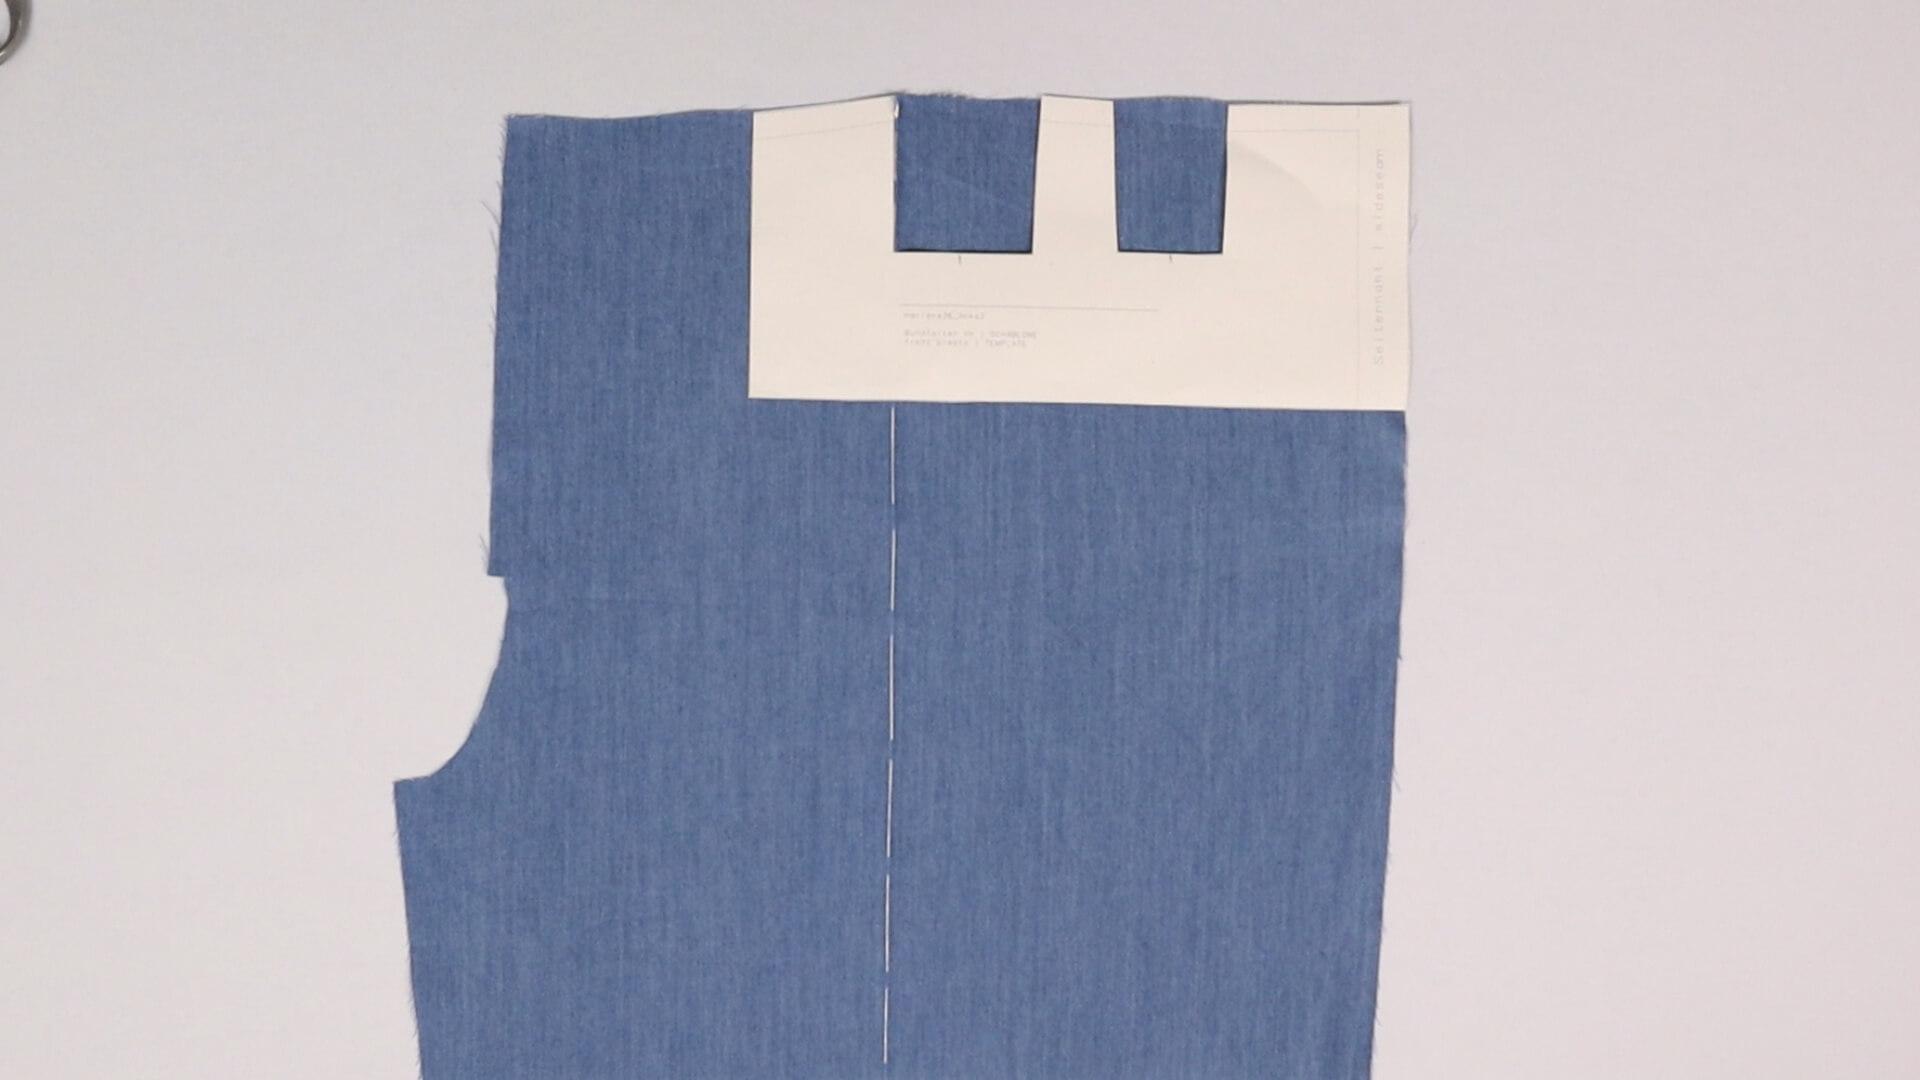
In case of trousers with a crease, the crease forms one leg of the pleat, namely the one that is laid on the other leg nearer to the center front. It ist the outer fold of the pleat. In this example, the pleat is placed towards the side seam.
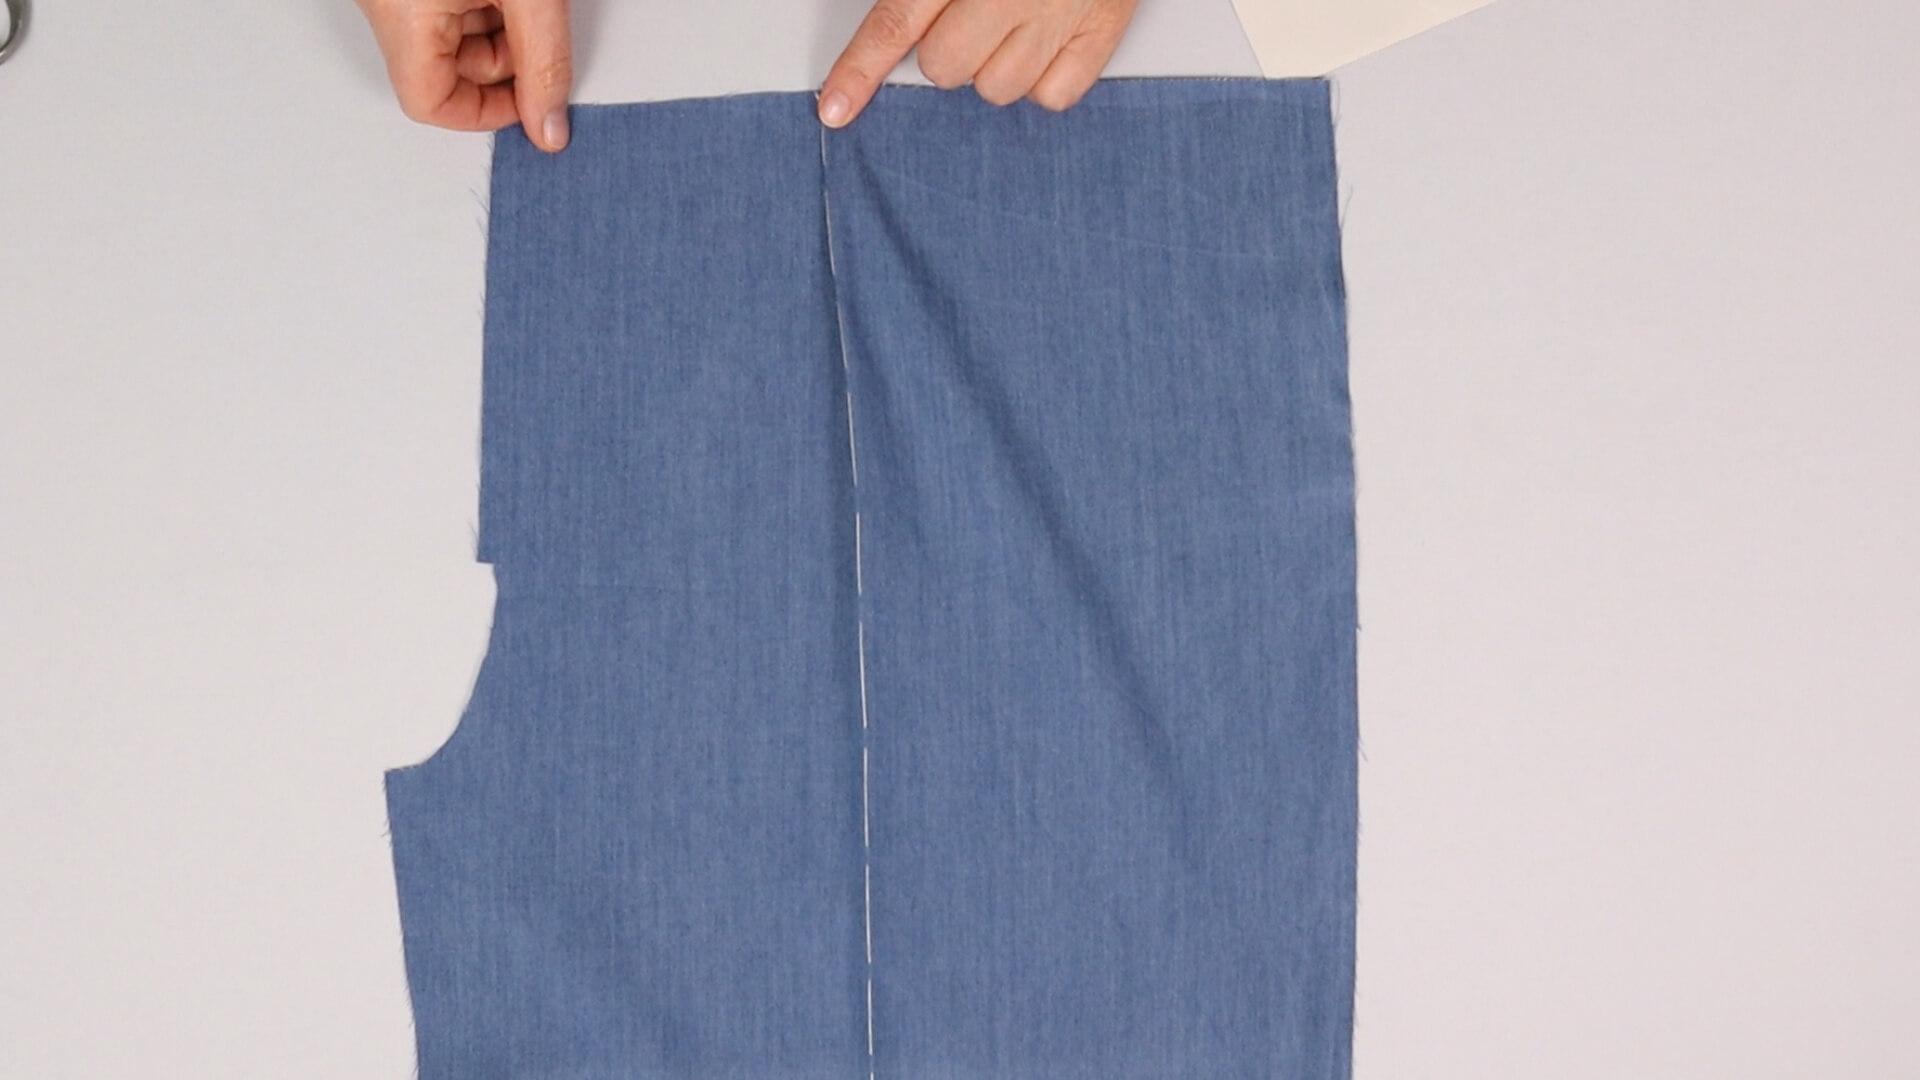
If you want to place the pleat so it opens towards the center front, you must move the pleat content of the crease to the front. If you get too close to the center front, reduce the pleat content of the front pleat and increase it accordingly on the other pleat(s). If there is only one pleat in your pattern, you may have to make a second one.
Again, check during the fitting whether you like the pleats that way.
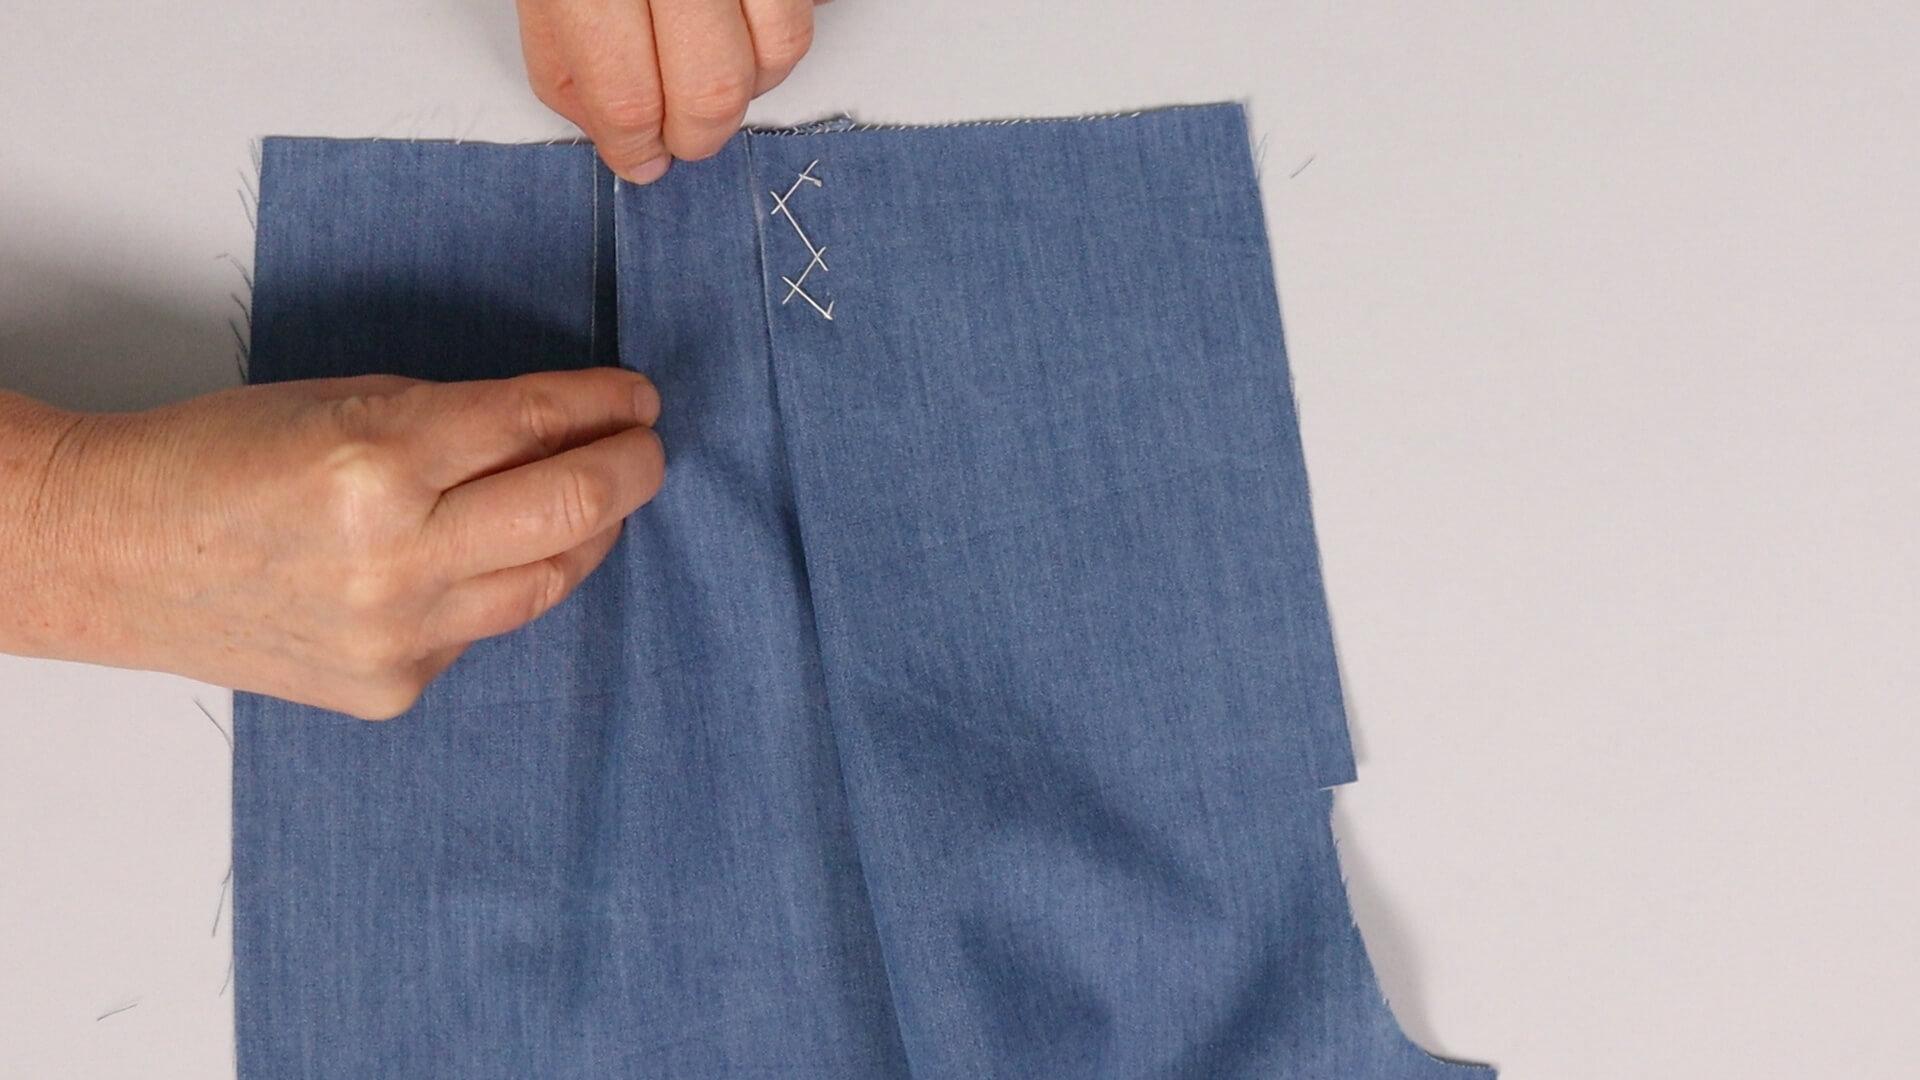
I align the pleats so they have a nice flow. Then I baste them with a few stitches. I proceed in the same way with a second and further pleats.
I repeat these steps on my other front piece, making sure that the pleats are exactly opposite each other. Then it’s time to prepare your trousers for fitting.
I remove the basting threads at the very end when the trousers are finished.
4. Prepare closed pleats for fitting
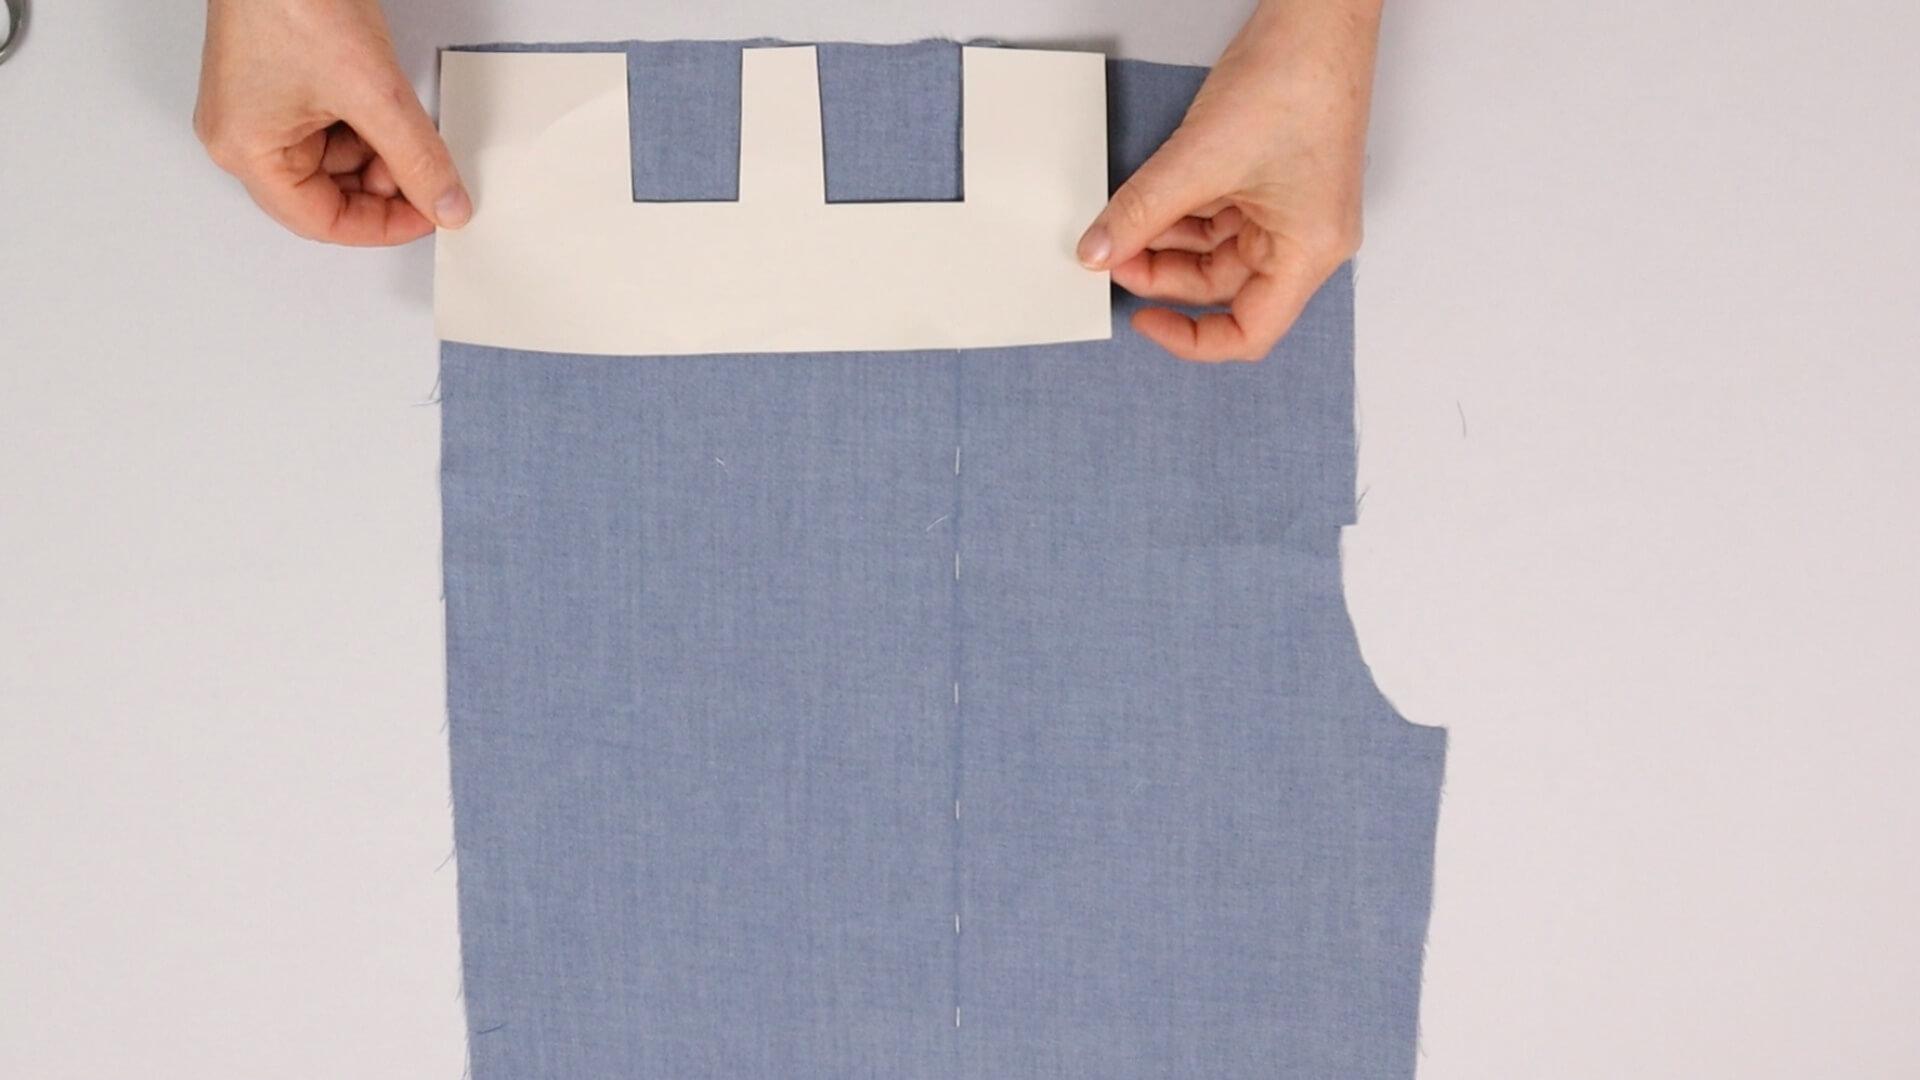
If you are working with closed pleats, mark them on the wrong side of the fabric. An exception is the pinch pleat, which should be marked on the outside.
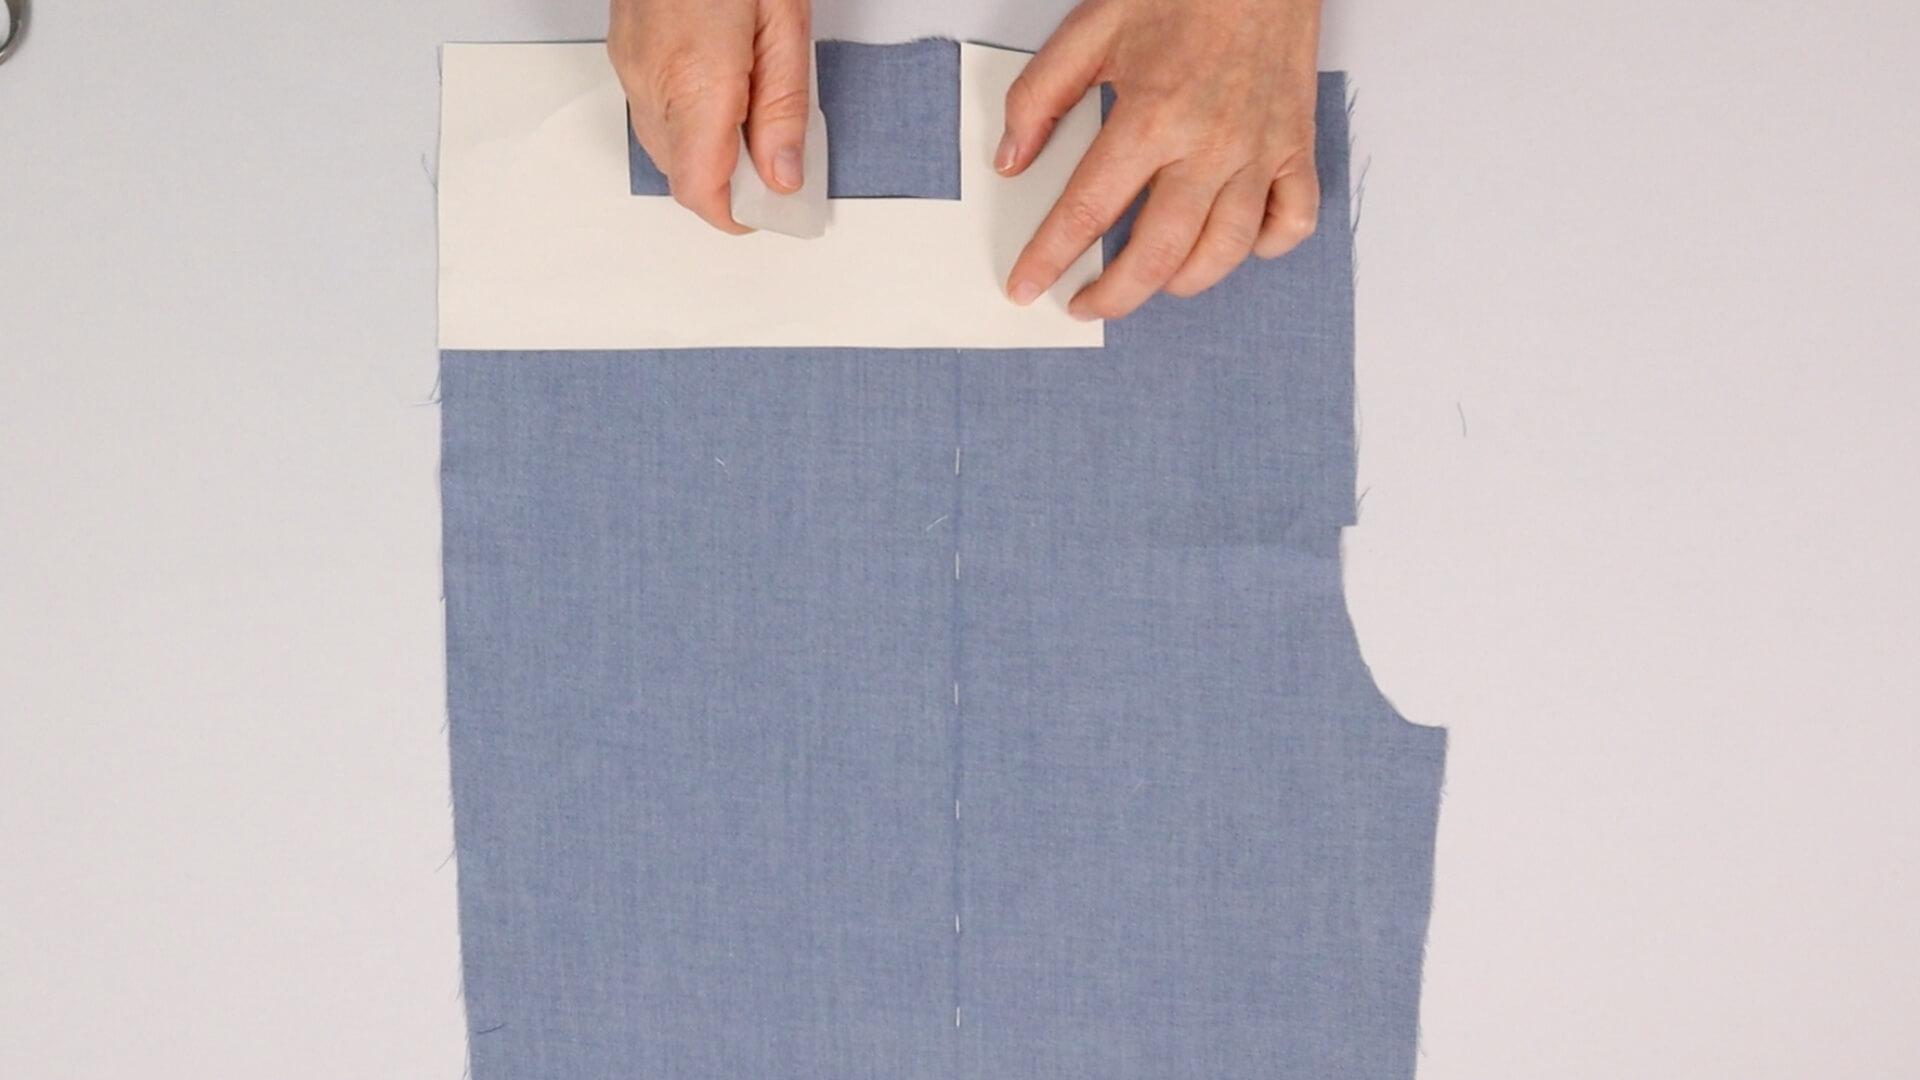
I mark the two pleat legs on the fabric and extend them as far as I want to close the pleat.
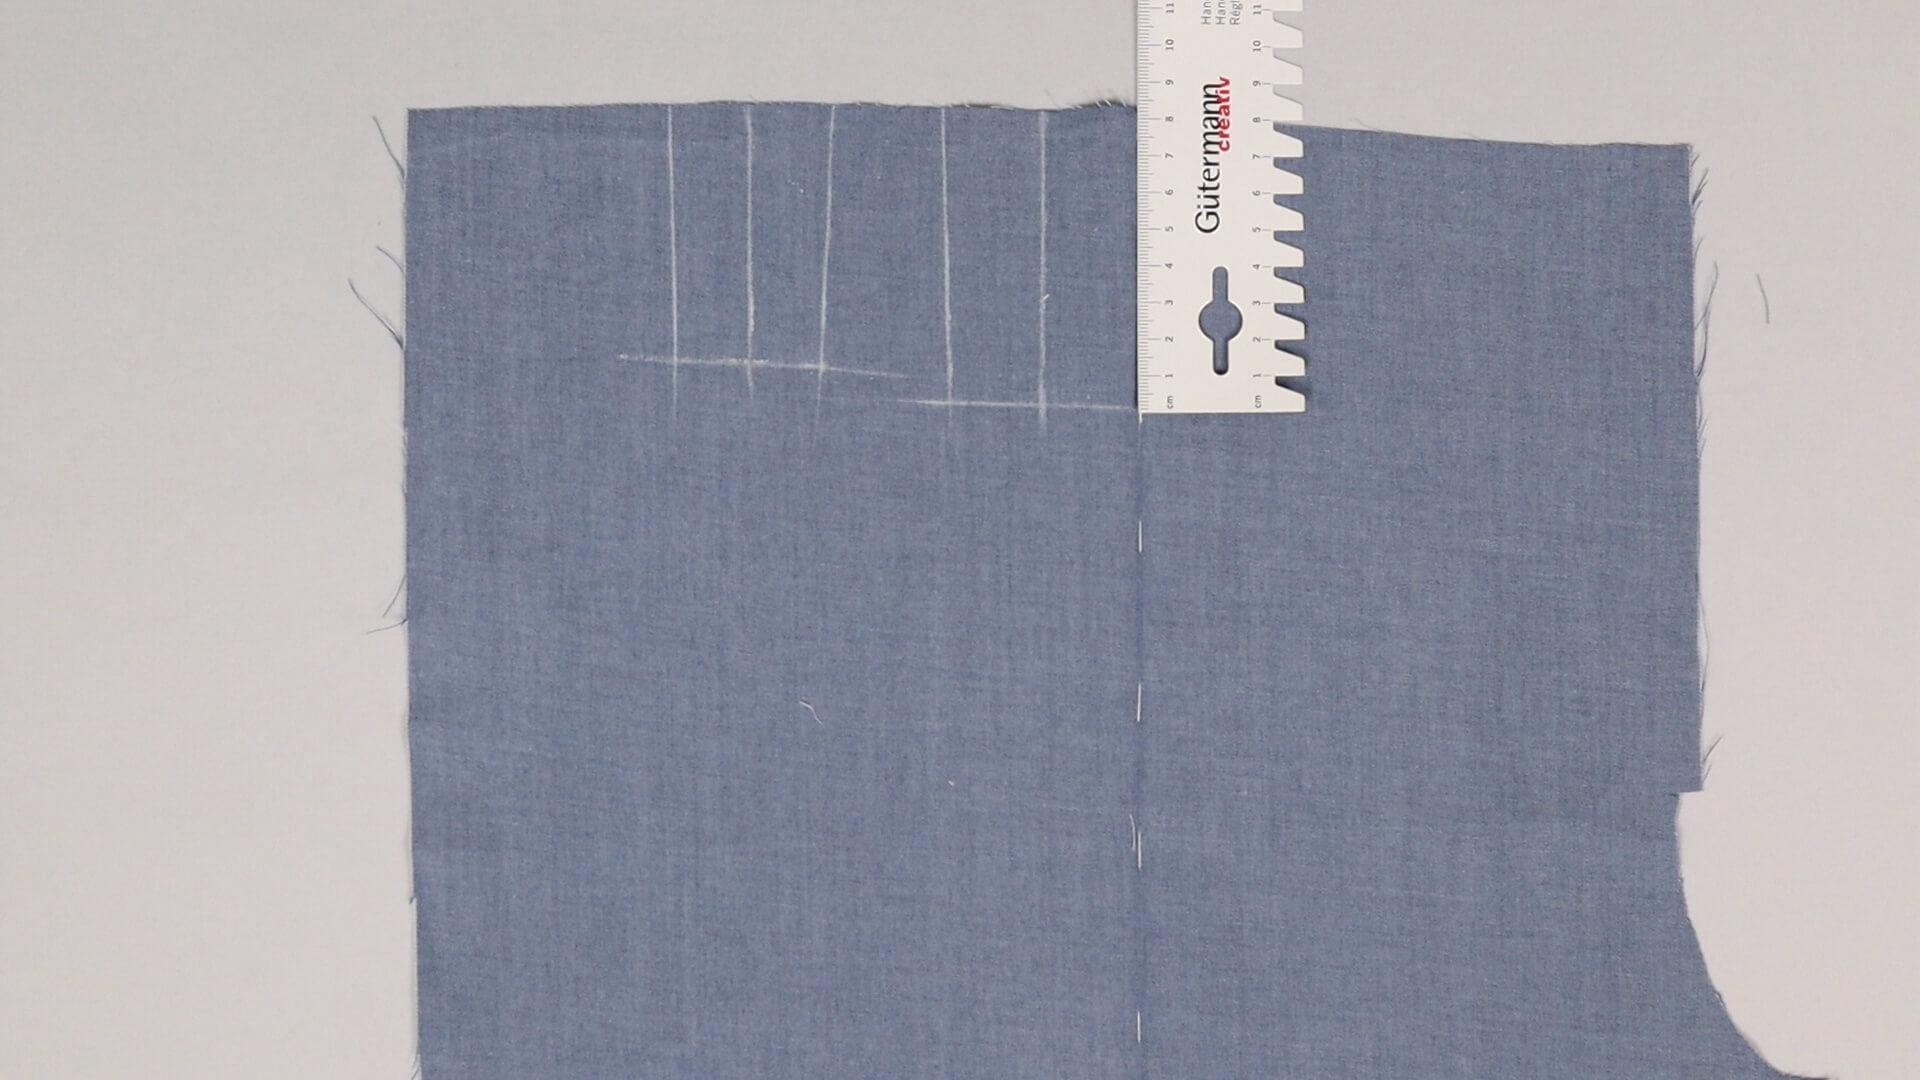
Here I decided on a finished length of 7 cm for the front pleat. The side pleat will be a few millimeters shorter. You can work according to your personal preferences.
Then I mark the exact center of the pleat.
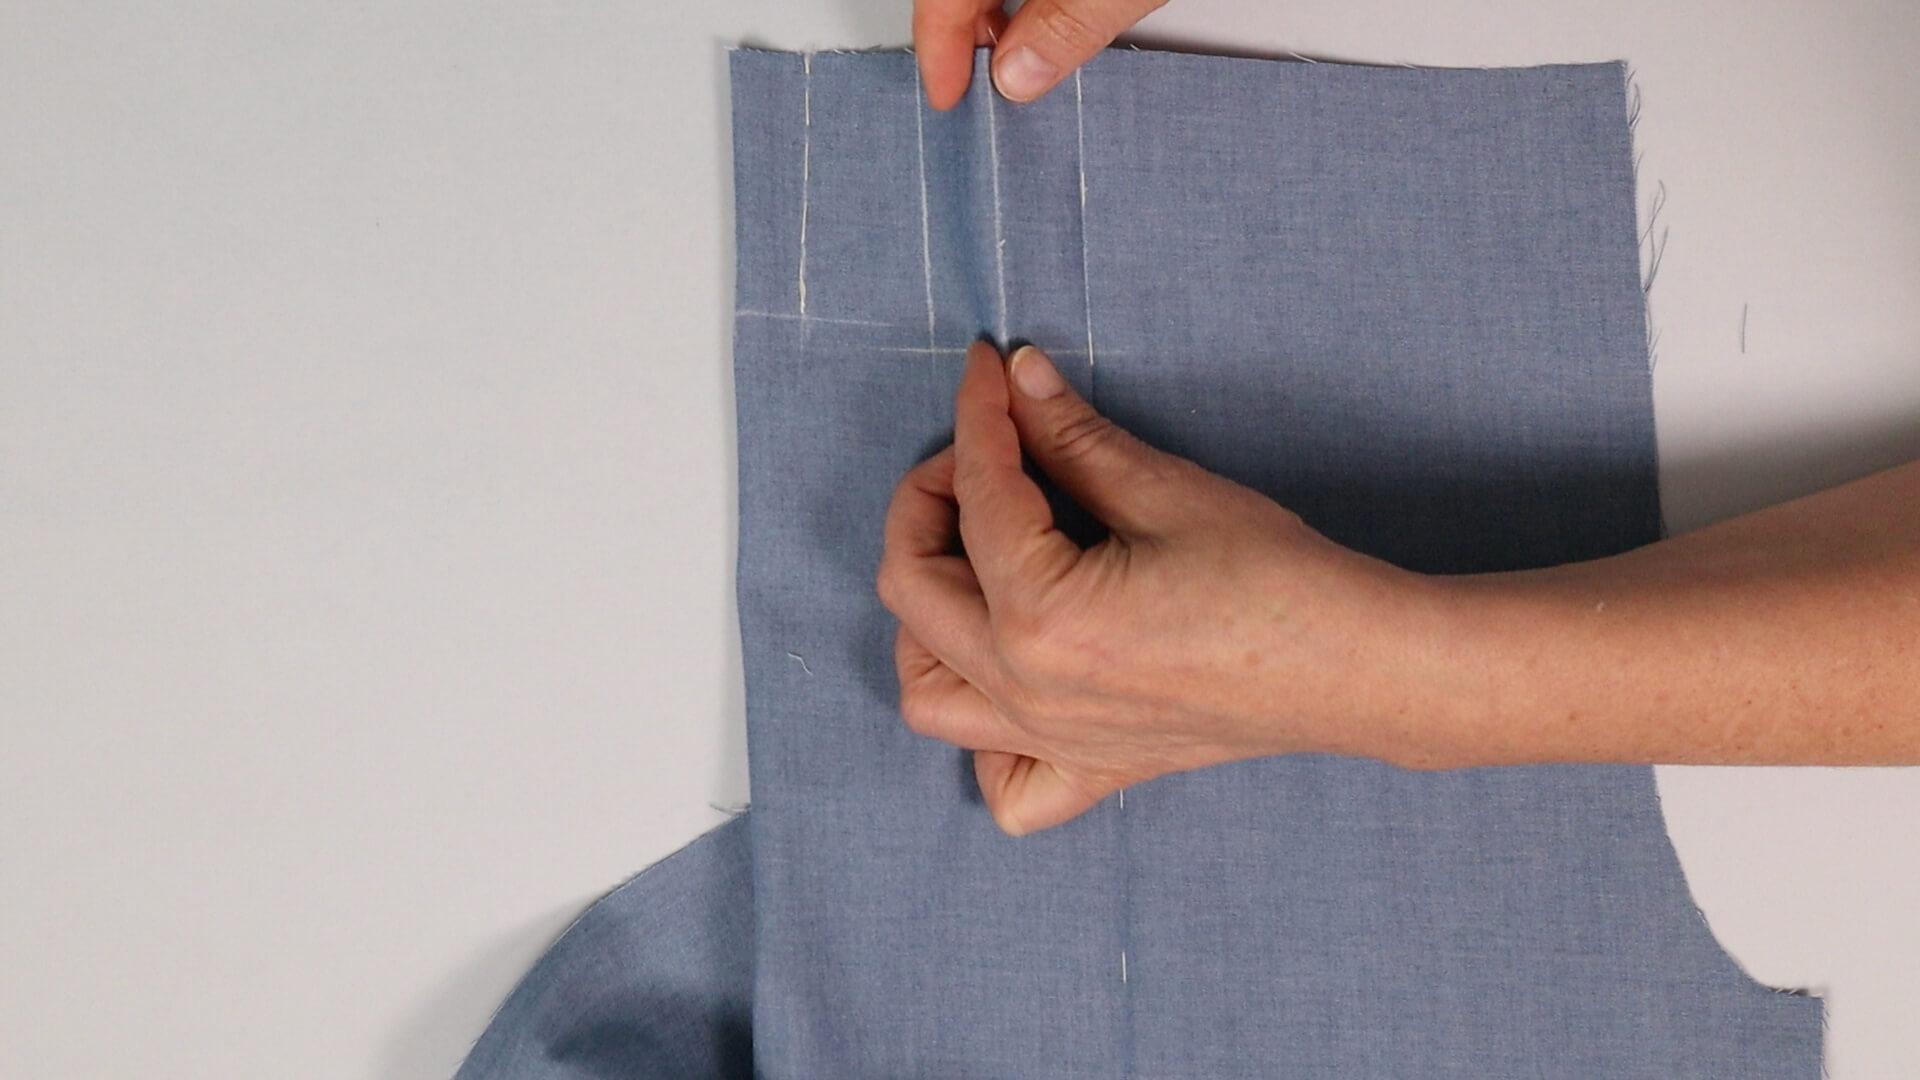
I fold the fabric exactly at this center notch.
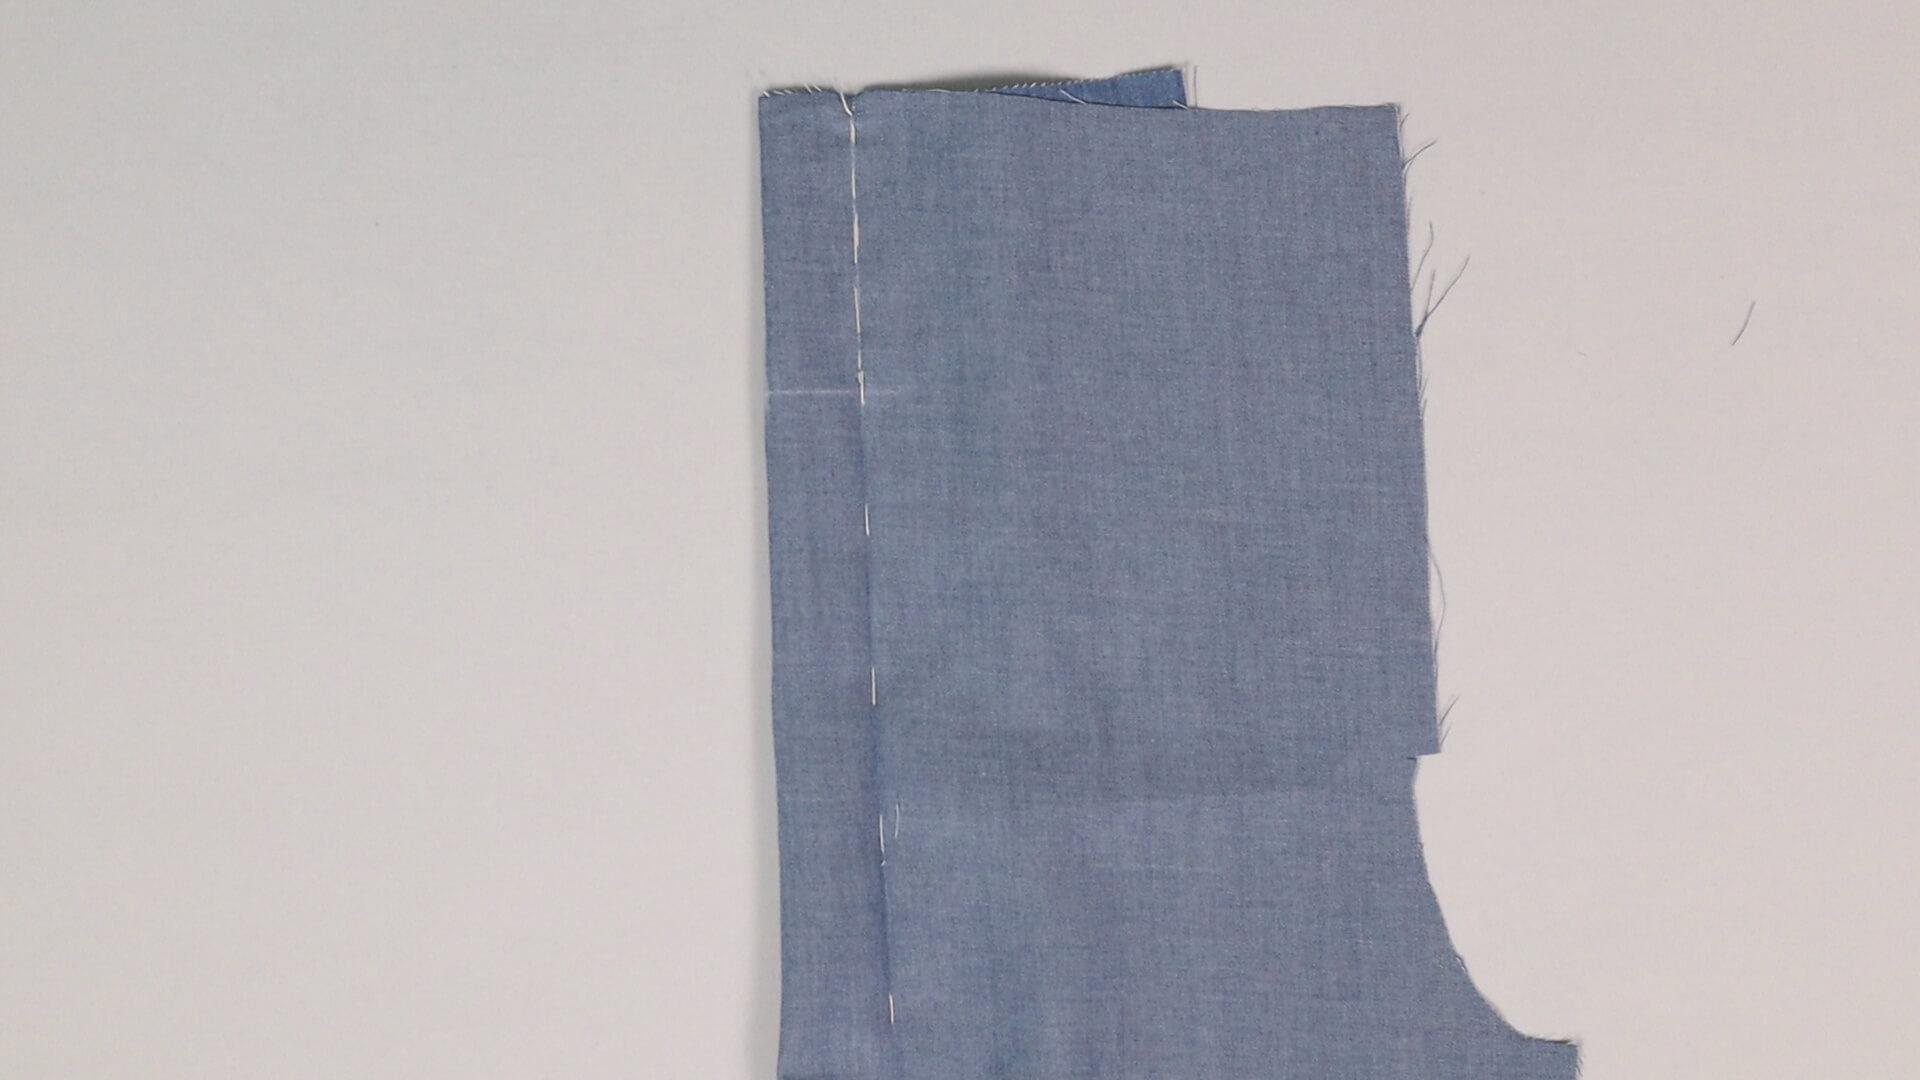
Then I baste the fold according to the length marked.
The basting thread that goes further down is for the crease – don’t let this confuse you.
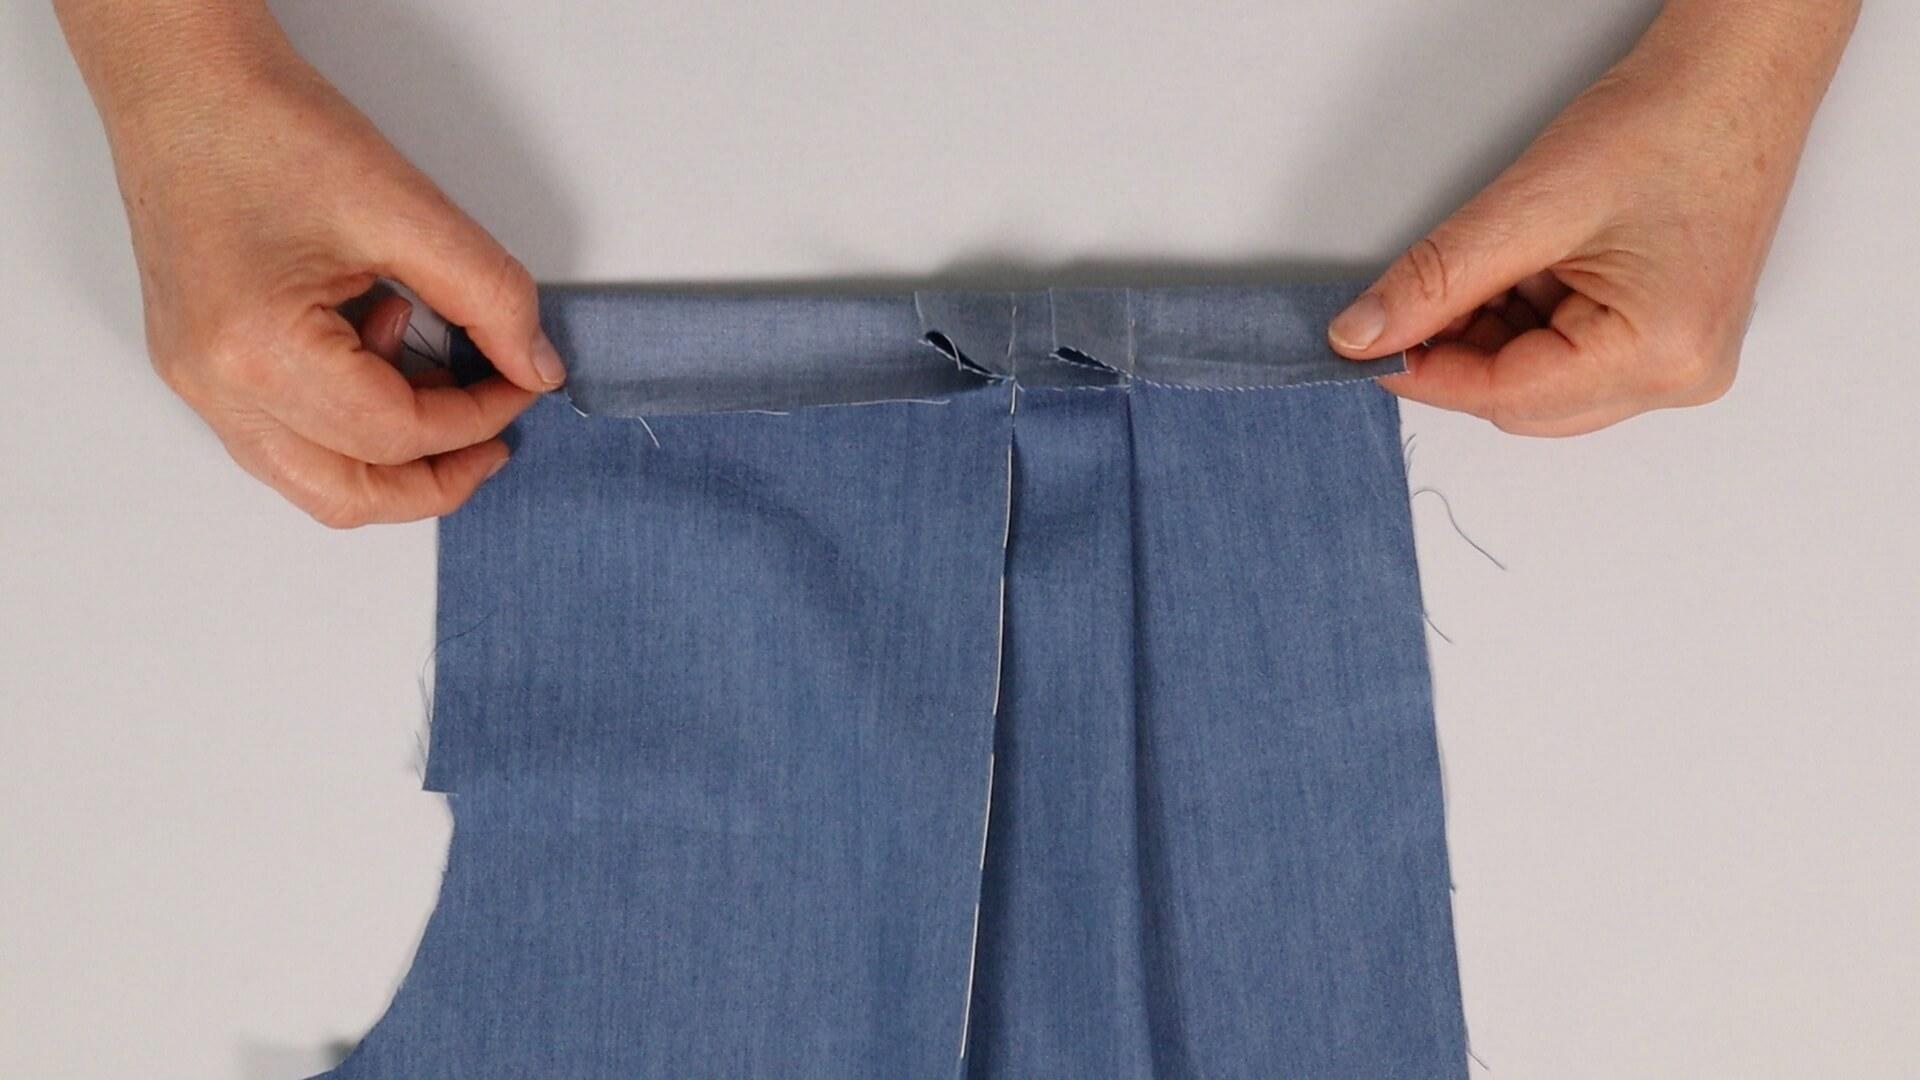
Again, the direction in which you place the pleats is a matter of personal preference for trousers without a crease. If you sew trousers with a crease, the crease forms the outer edge of the pleat, as already mentioned. Make sure to work both front pieces in the opposite direction.
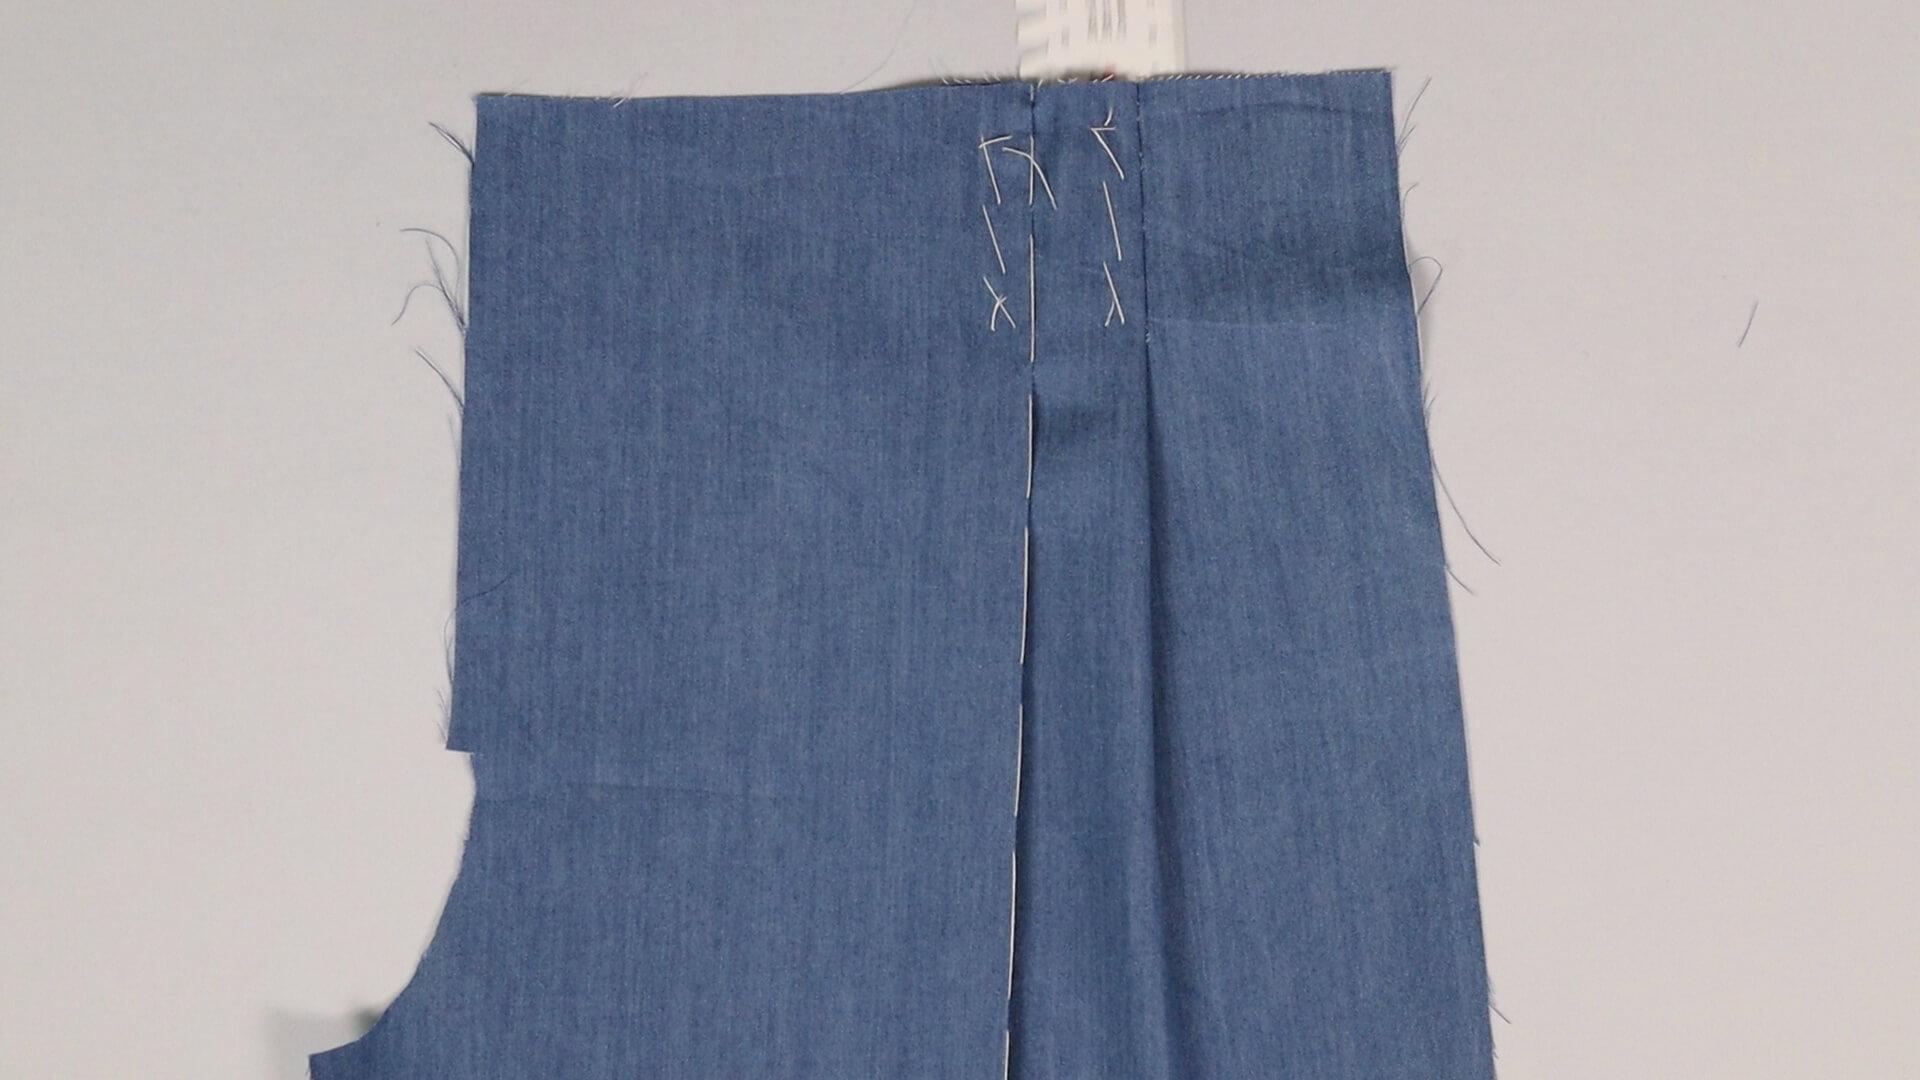
I baste the pleats from the outside so that they lie in the right direction when I try them on. Now it’s time to prepare your trousers for fitting.
5. Sew closed pleats after fitting
After the fitting and any alterations, I stitch the closed pleats. I will show you different variants of stitching using different pieces of fabric.
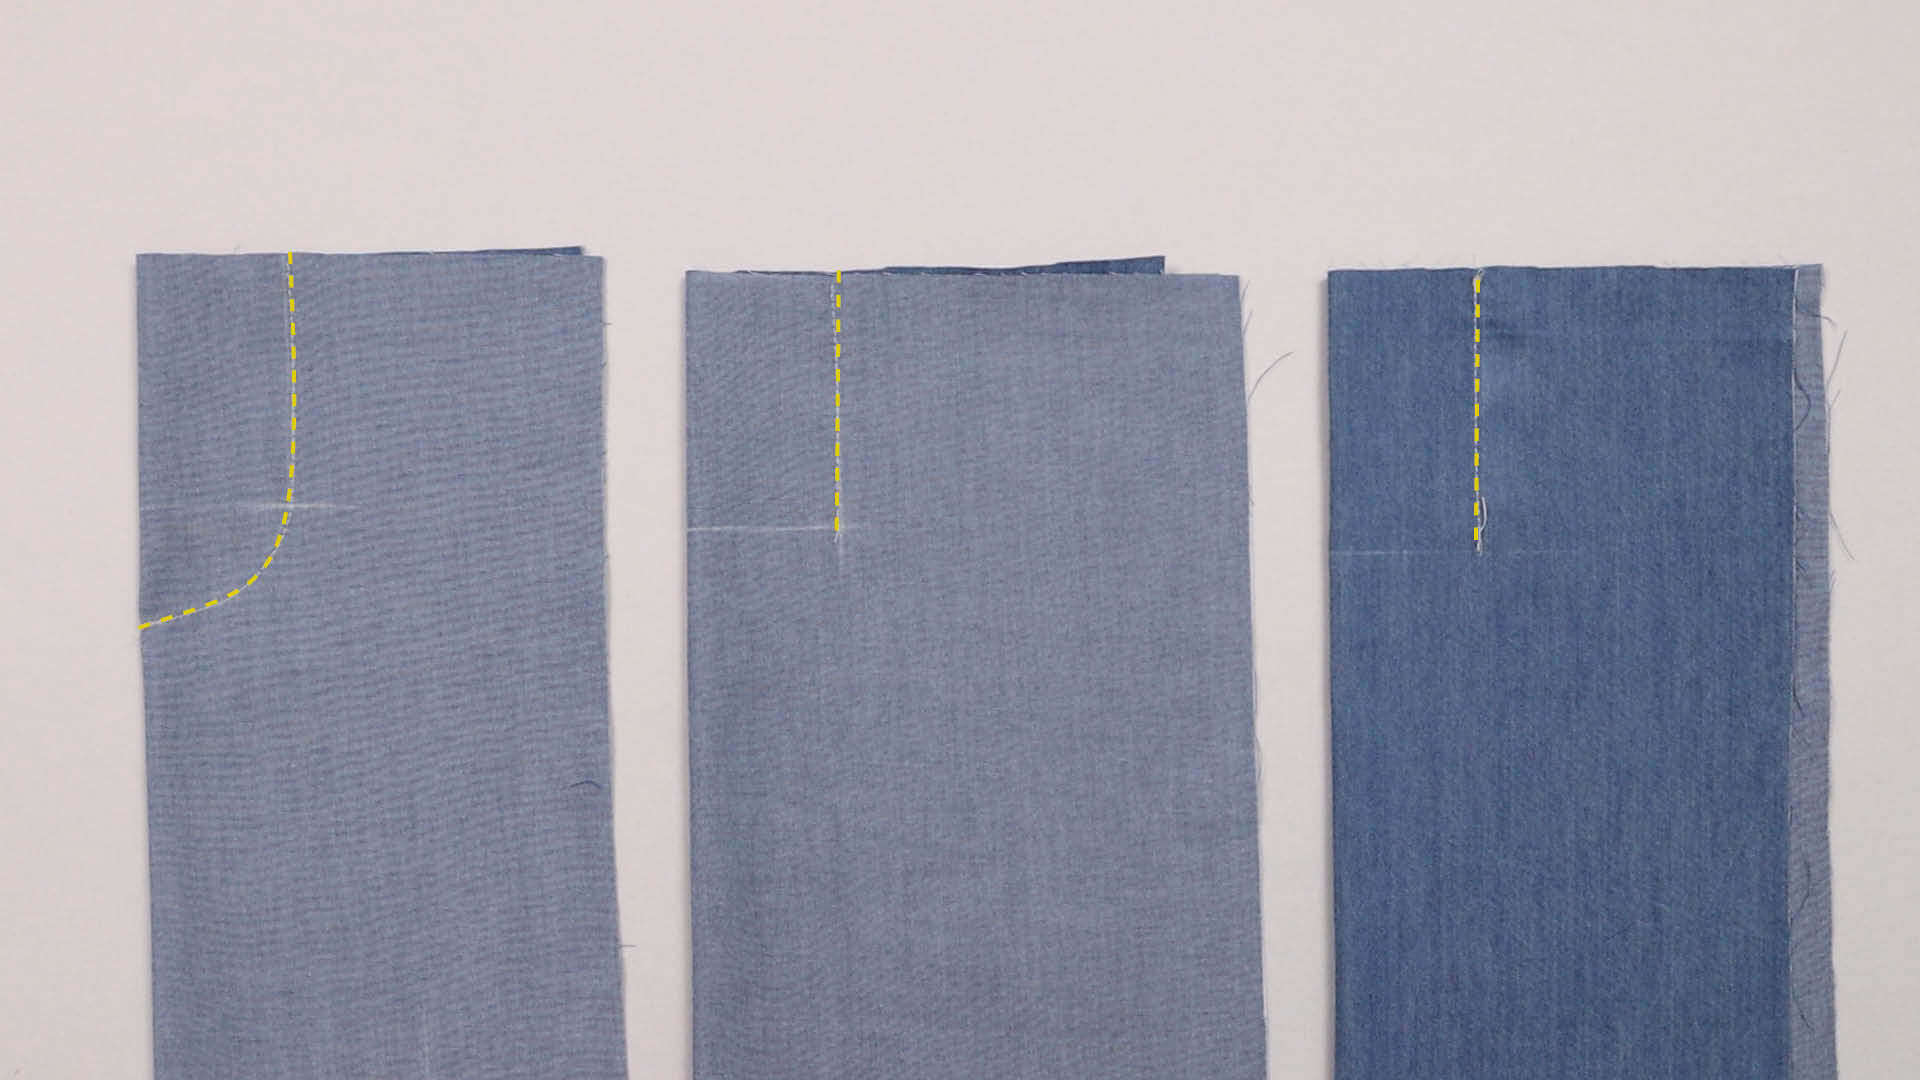
If the pleats are laid on one side, I sew a curve from the end of the legs to the pleat break (left side in the picture).
In the middle you can see the box pleat, which I stitch exactly on the vertical leg. The pinch pleat stitched from the right side of the fabric can be seen on the right.
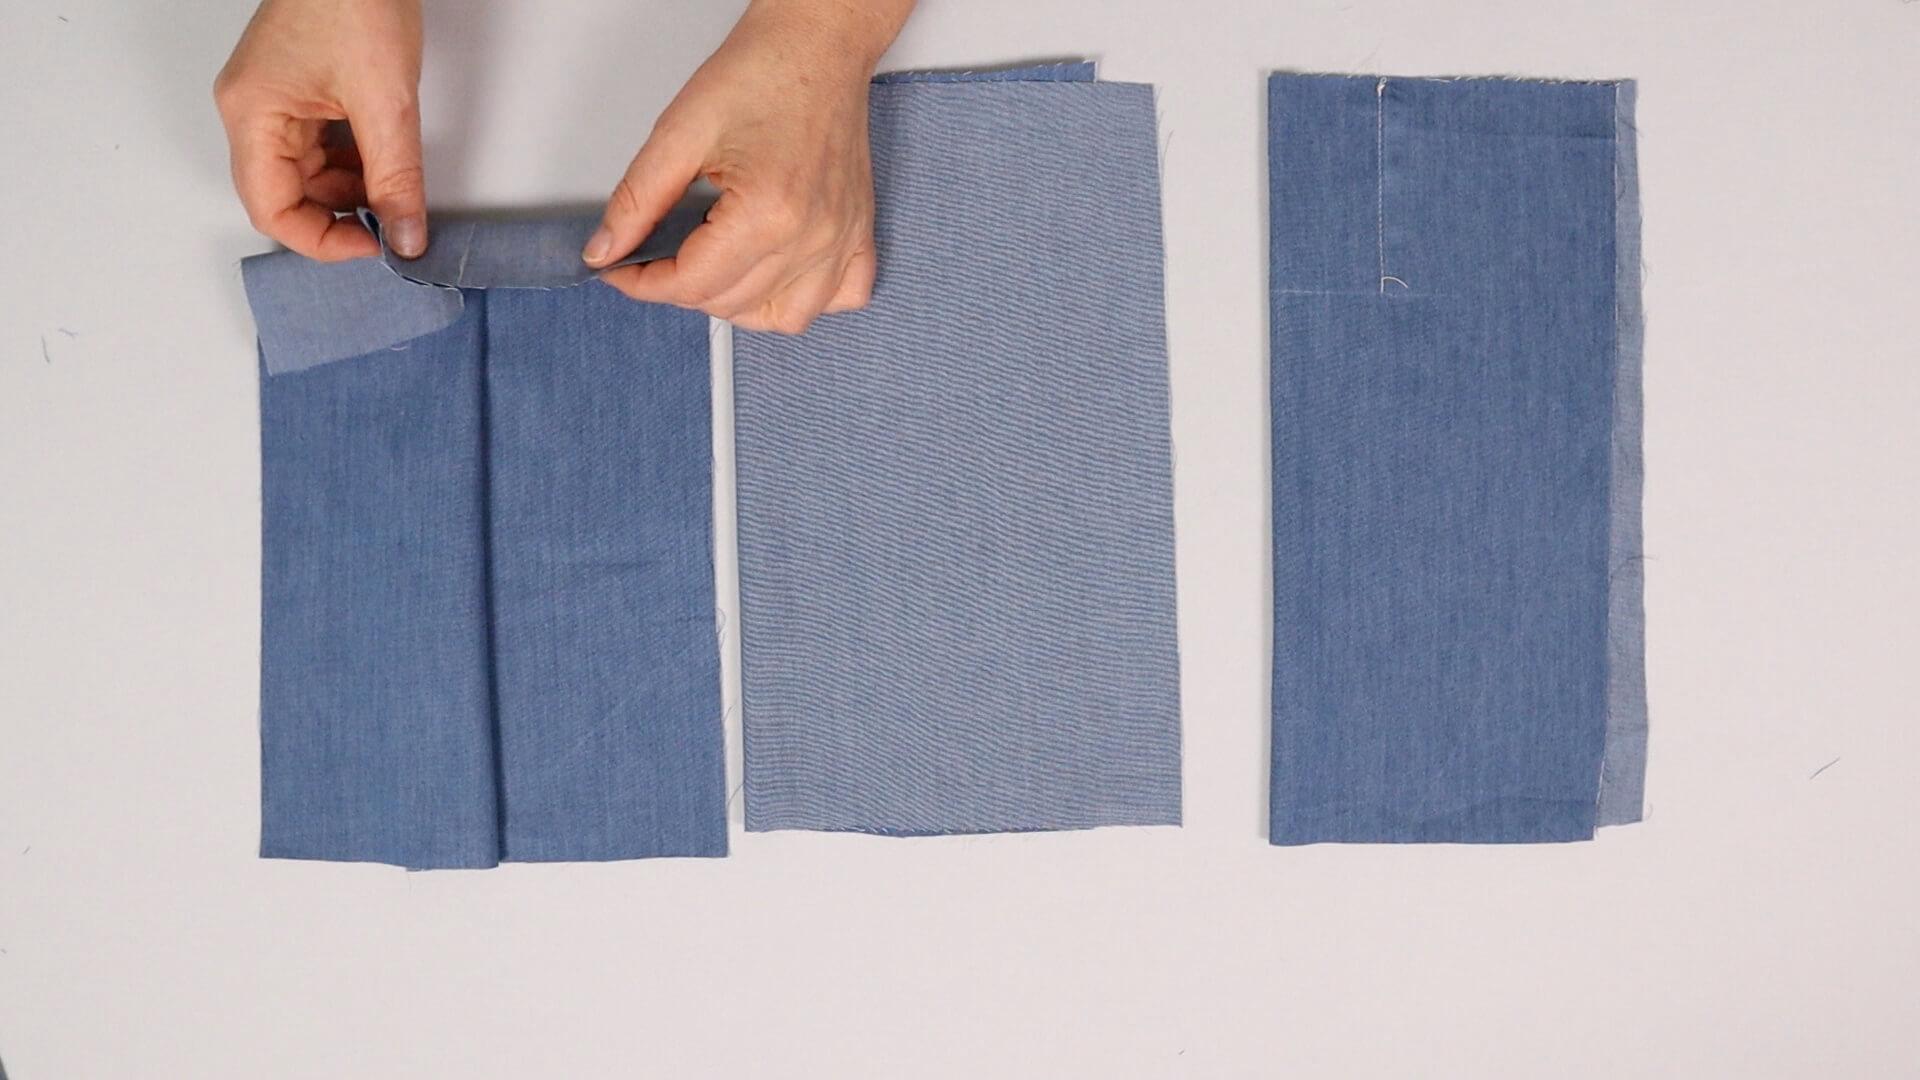
I place the contents of the one-sided pleat to the right or the left.
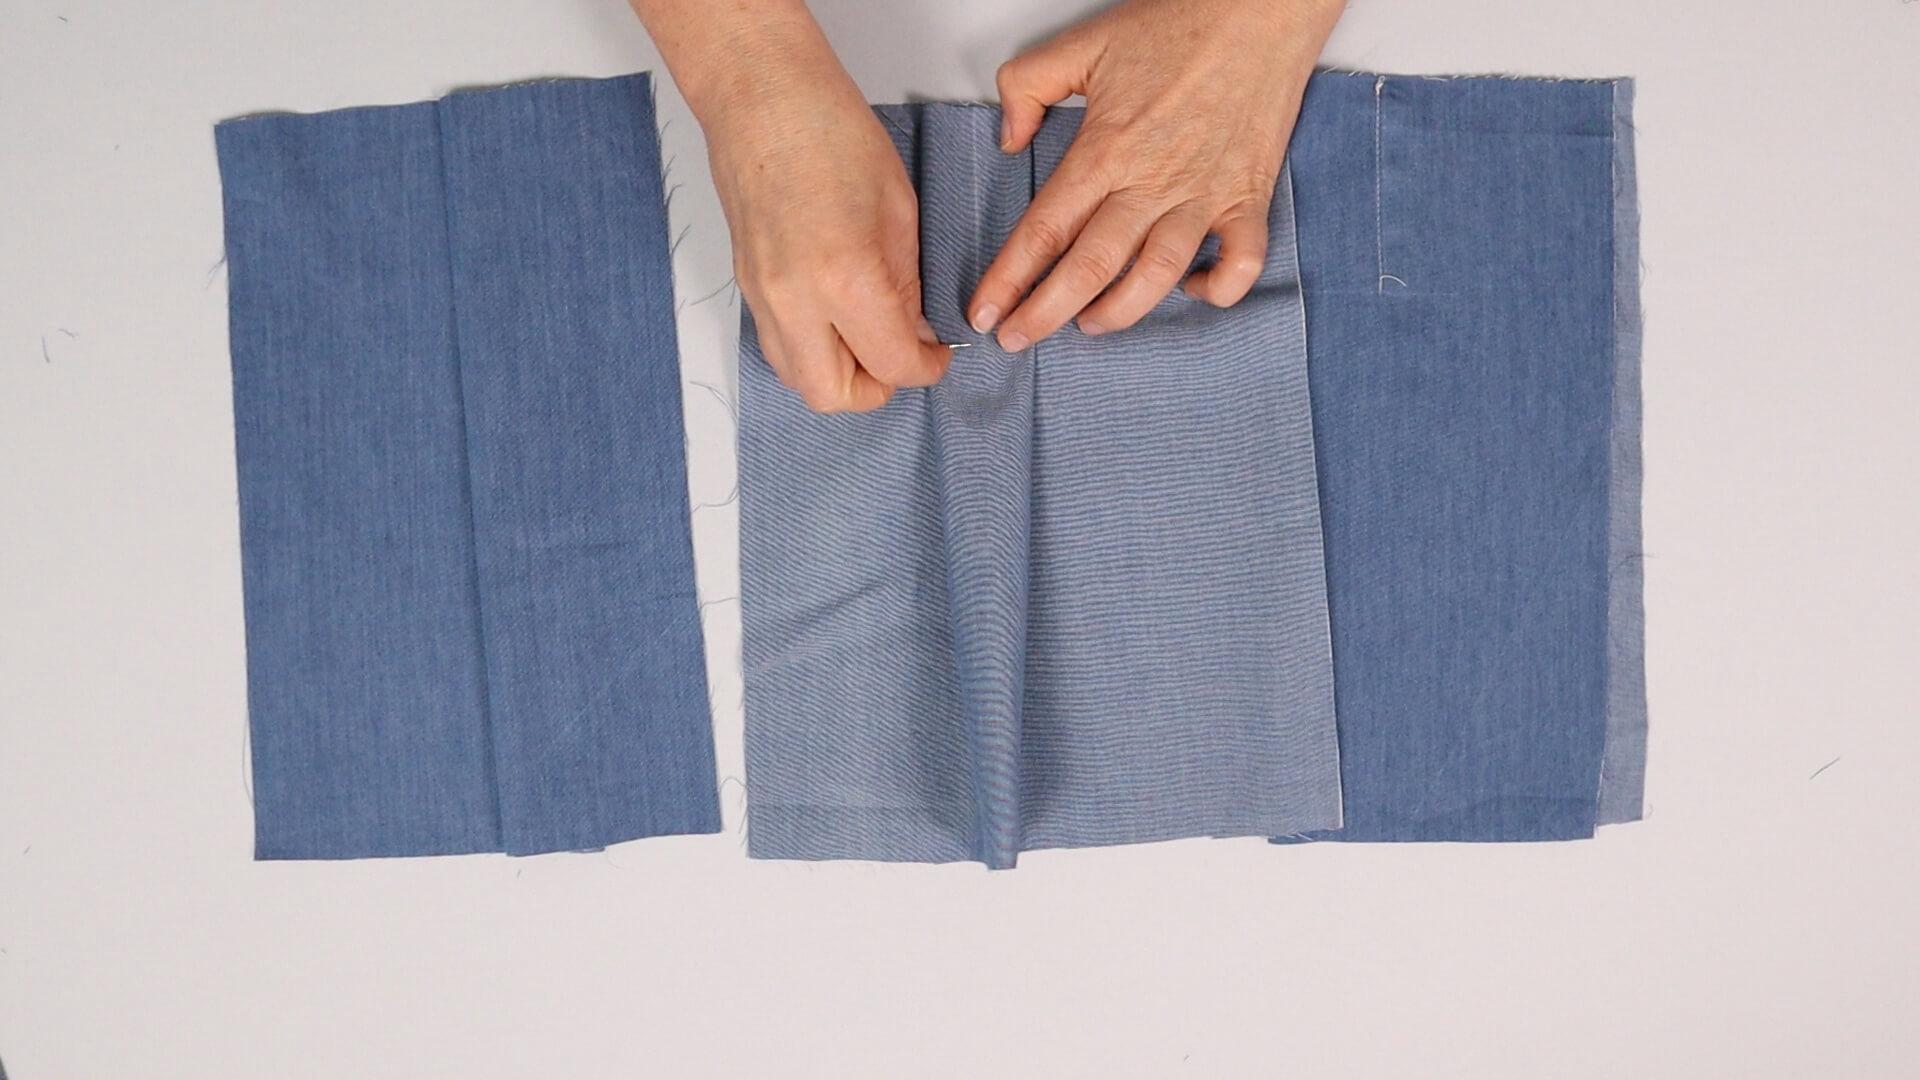
For the box pleat, I place the center of the pleat exactly on the seam.
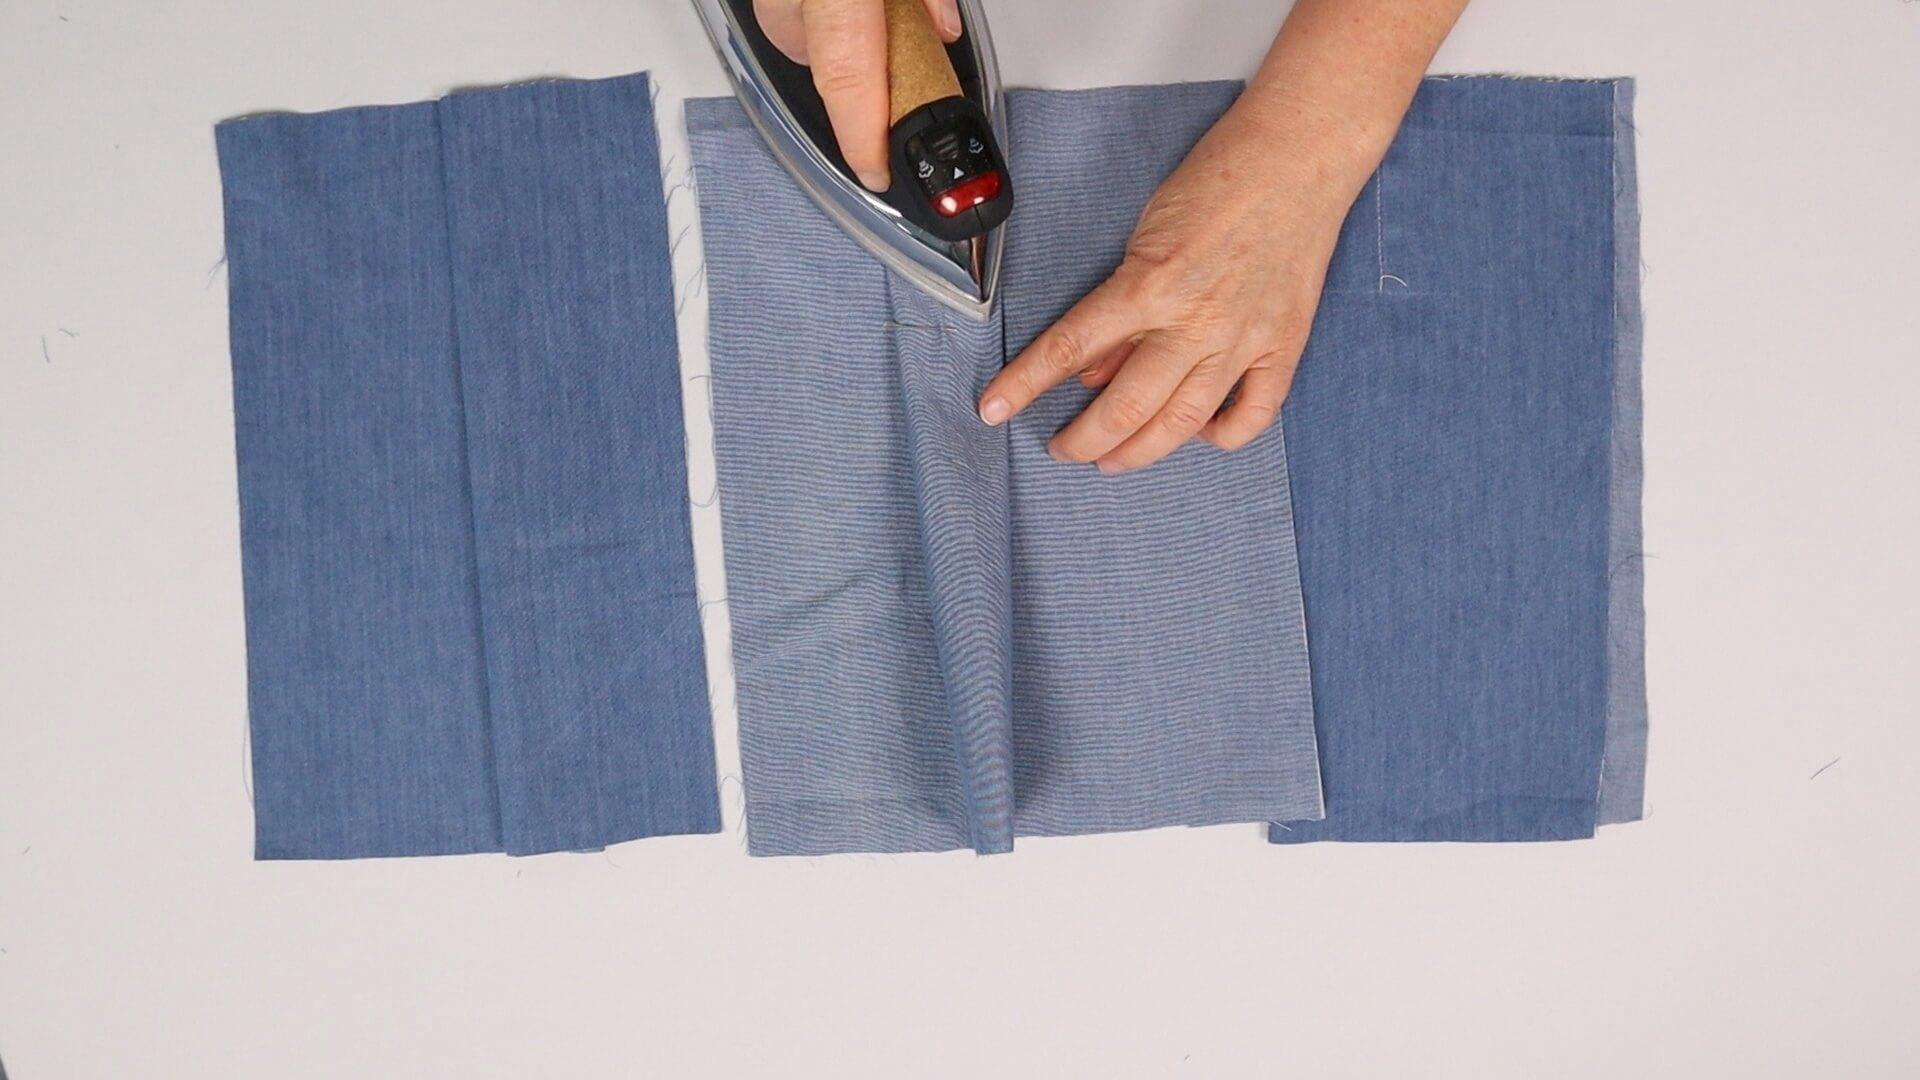
Then I press the pleat.
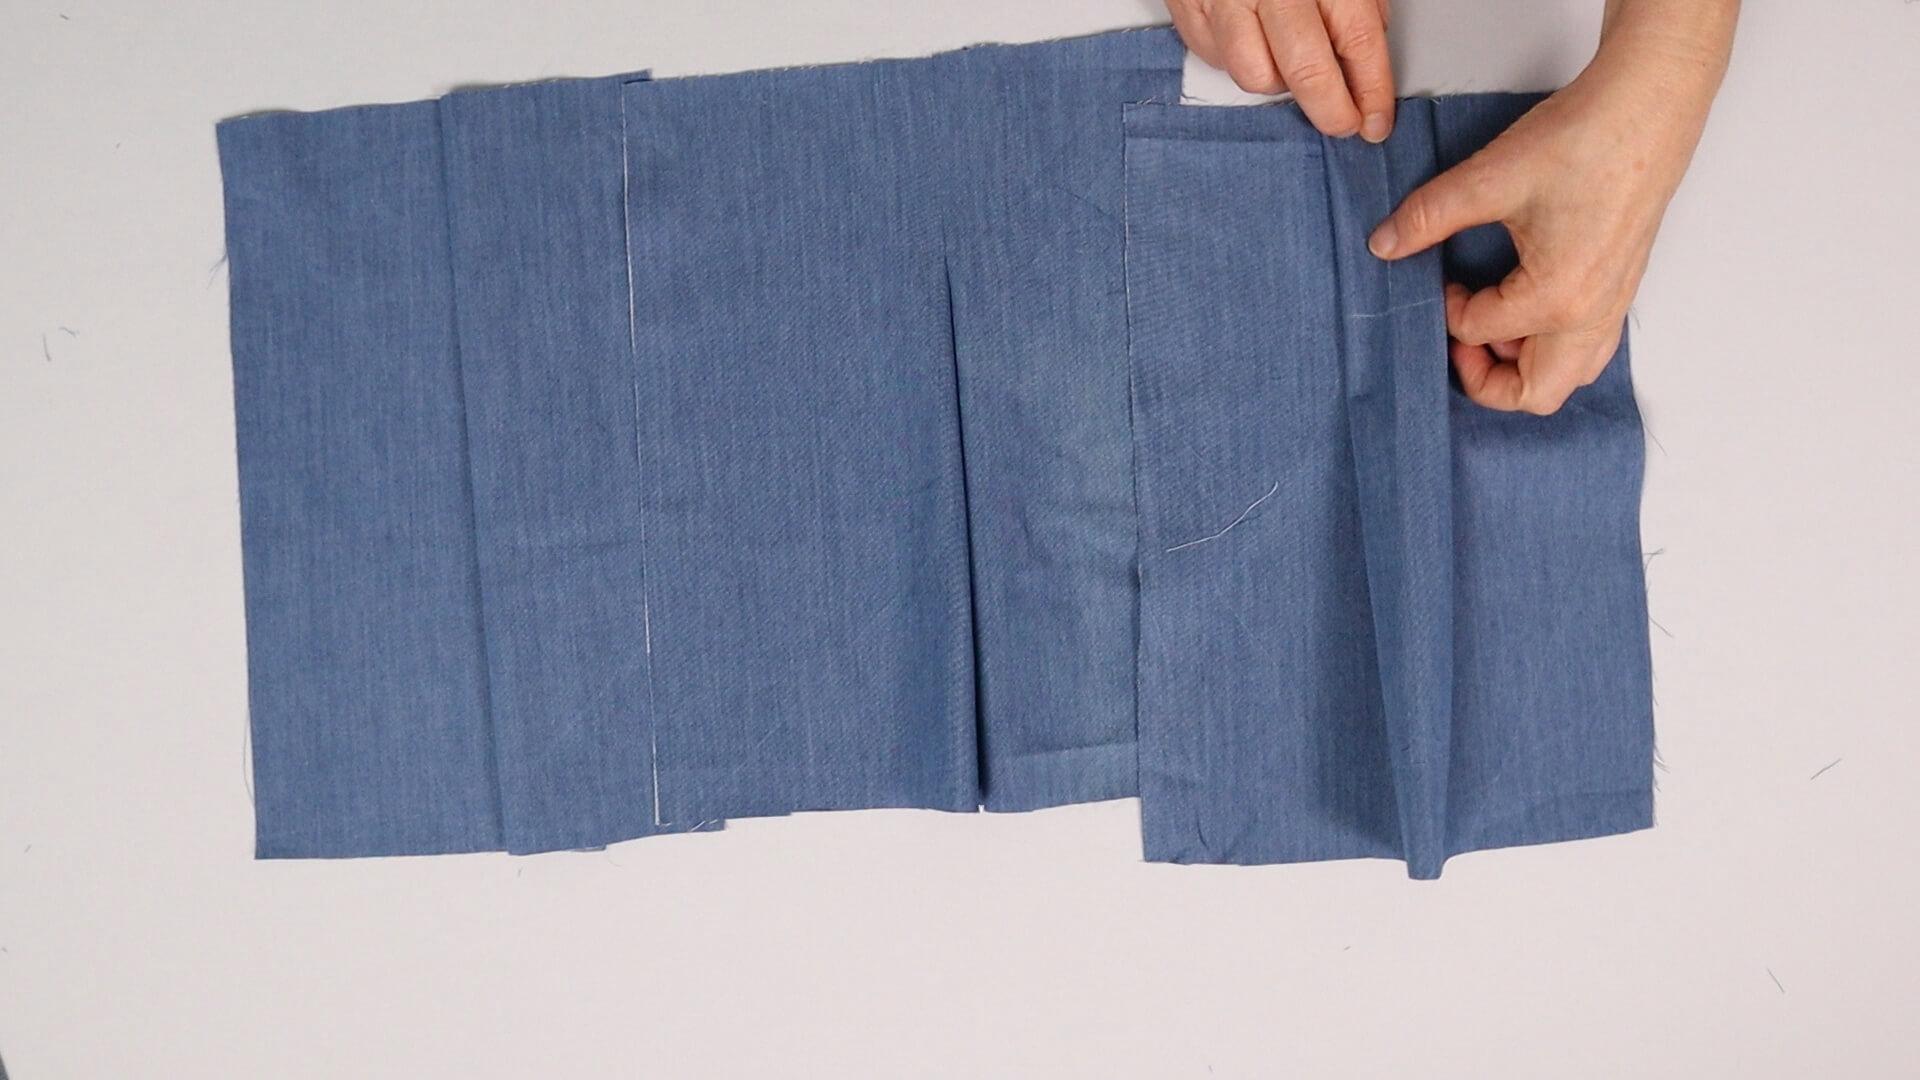
The pinch pleat works the same way, only from the right side of the fabric.
You can now topstitch the pleats as desired.
Here you will find links to the next steps:
- Preparing classic trousers for fitting #F03
- Sew french front trouser pocket #TV01
- Sewing seam pockets into trousers #TV04
If you’re not quite ready yet and perhaps want to start at the beginning, you’ll find some links here:


