Sew welt pockets into trousers #TH03
In the following video and illustrated text instructions, I explain step by step how to sew welt pockets into the back of the trousers. As sewing this kind of pockets requires a bit of practice, you can download a practice pattern, which you can use to copy the individual steps. Enjoy sewing!
1. This is required:
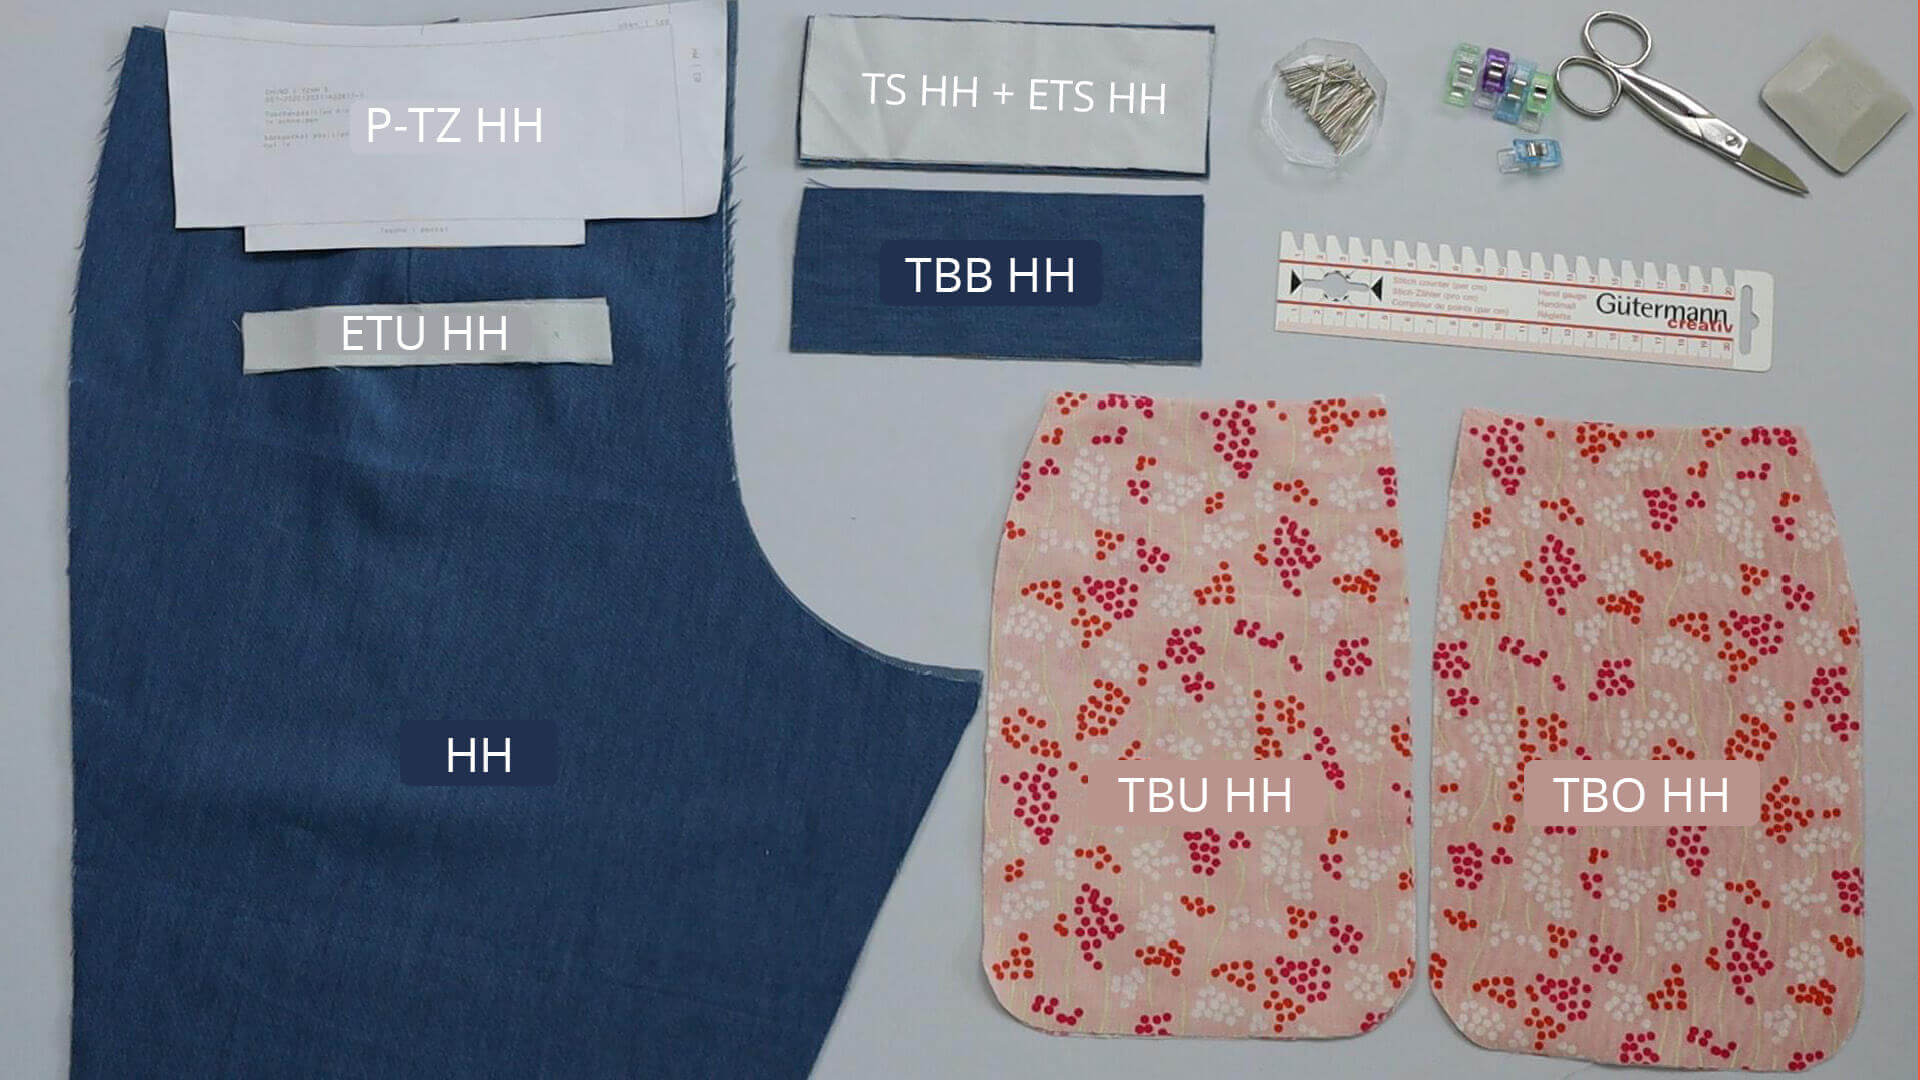
Pattern pieces made from main fabric:
- back trousers (HH) – 1 pair
- pocket bag facing (TBB HH) – 1 pair
- pocket welt (TS HH) – 1 pair
Pattern pieces from interlining:
- pocket welt (ETS HH) – 1 pair
- pocket underlay (ETU HH ) – 1 pair
Pattern pieces made from lining fabric:
- upper pocket bag (TBO HH) – 1 pair
- lower pocket bag (TBU HH) – 1 pair
- Note: The two pattern pieces are identical. The area on the lower pocket bag is marked in the pattern where the pocket bag facing will be sewn on later.
Tools and aids:
- template for the pocket position (P-TZ HH) out of paper
- pins
- scissors
- Tailor’s chalk or fabric marker
- ruler
2. Reinforce the welt pockets entry
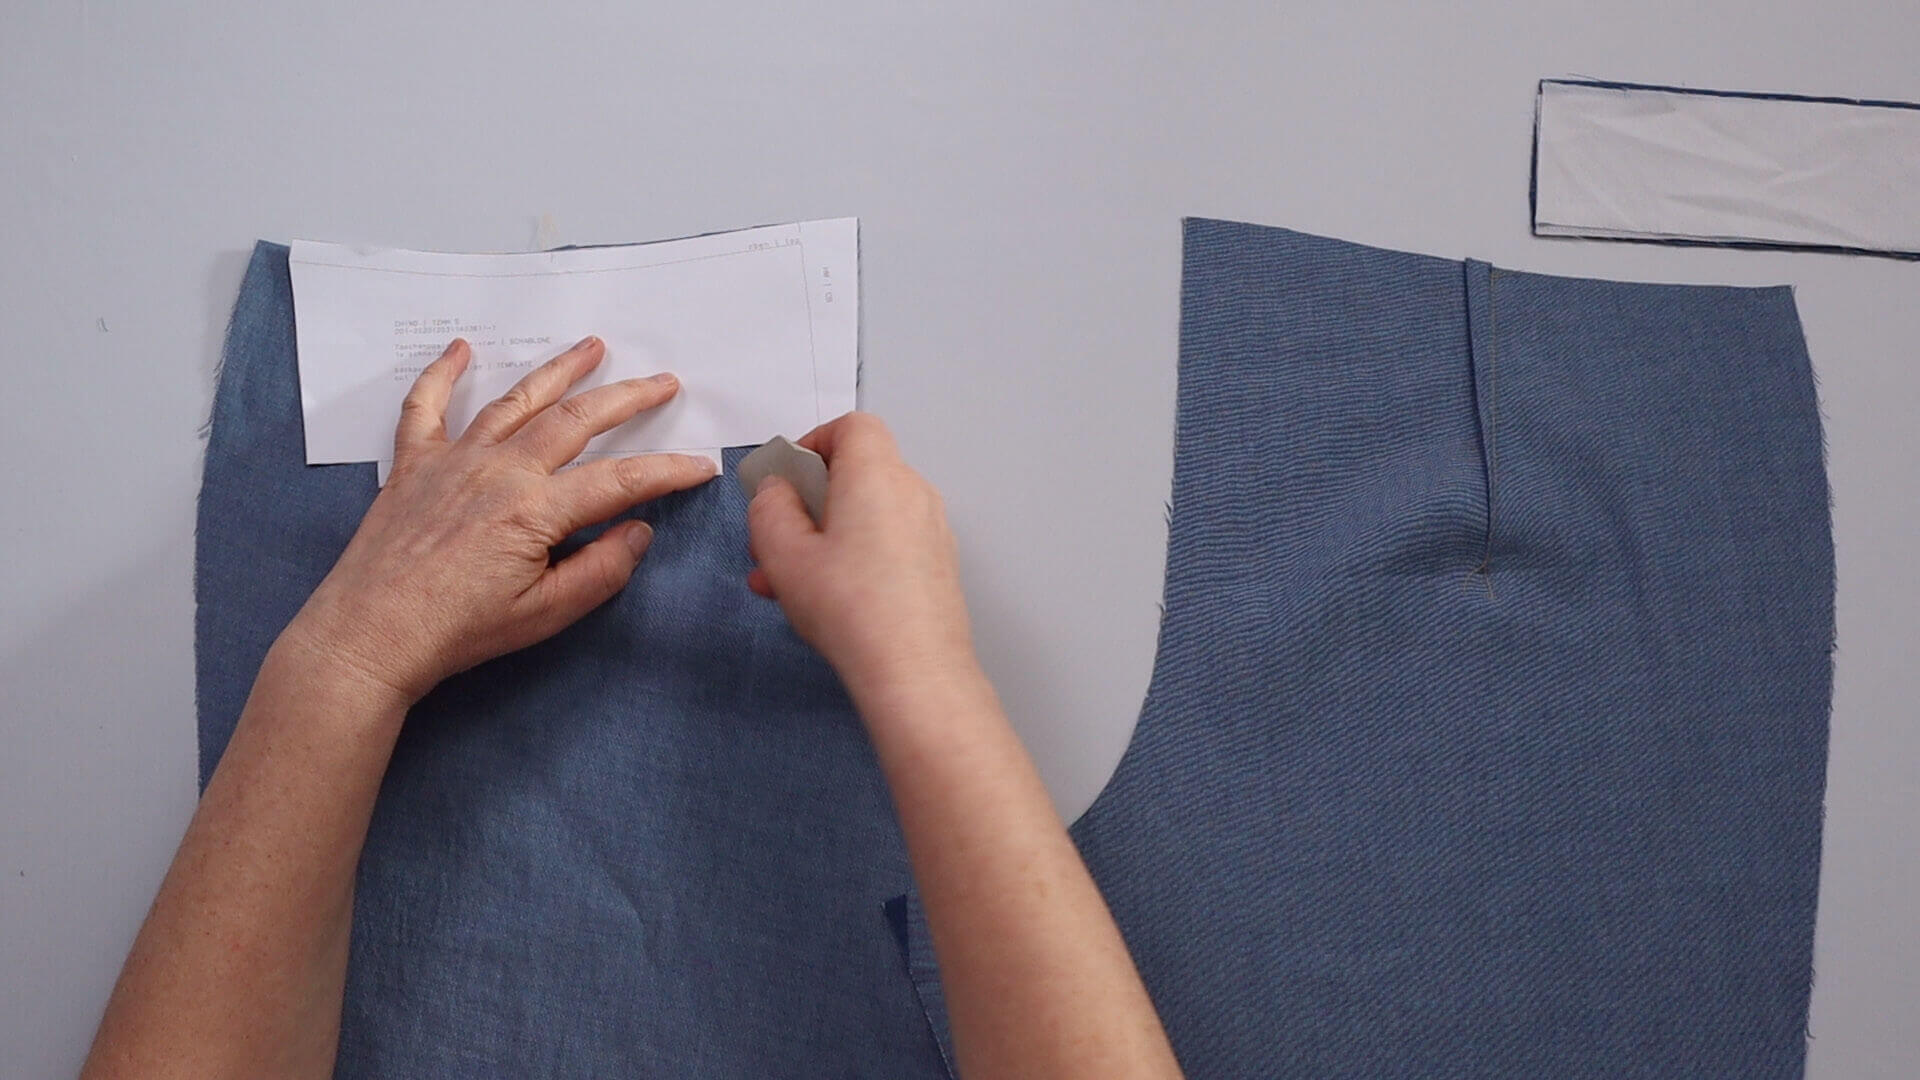
I place the back pieces in front of me, wrong sides facing up, and mark the pocket position. I align the template with the centre back and top edge and transfer the pocket rectangle with tailor’s chalk.
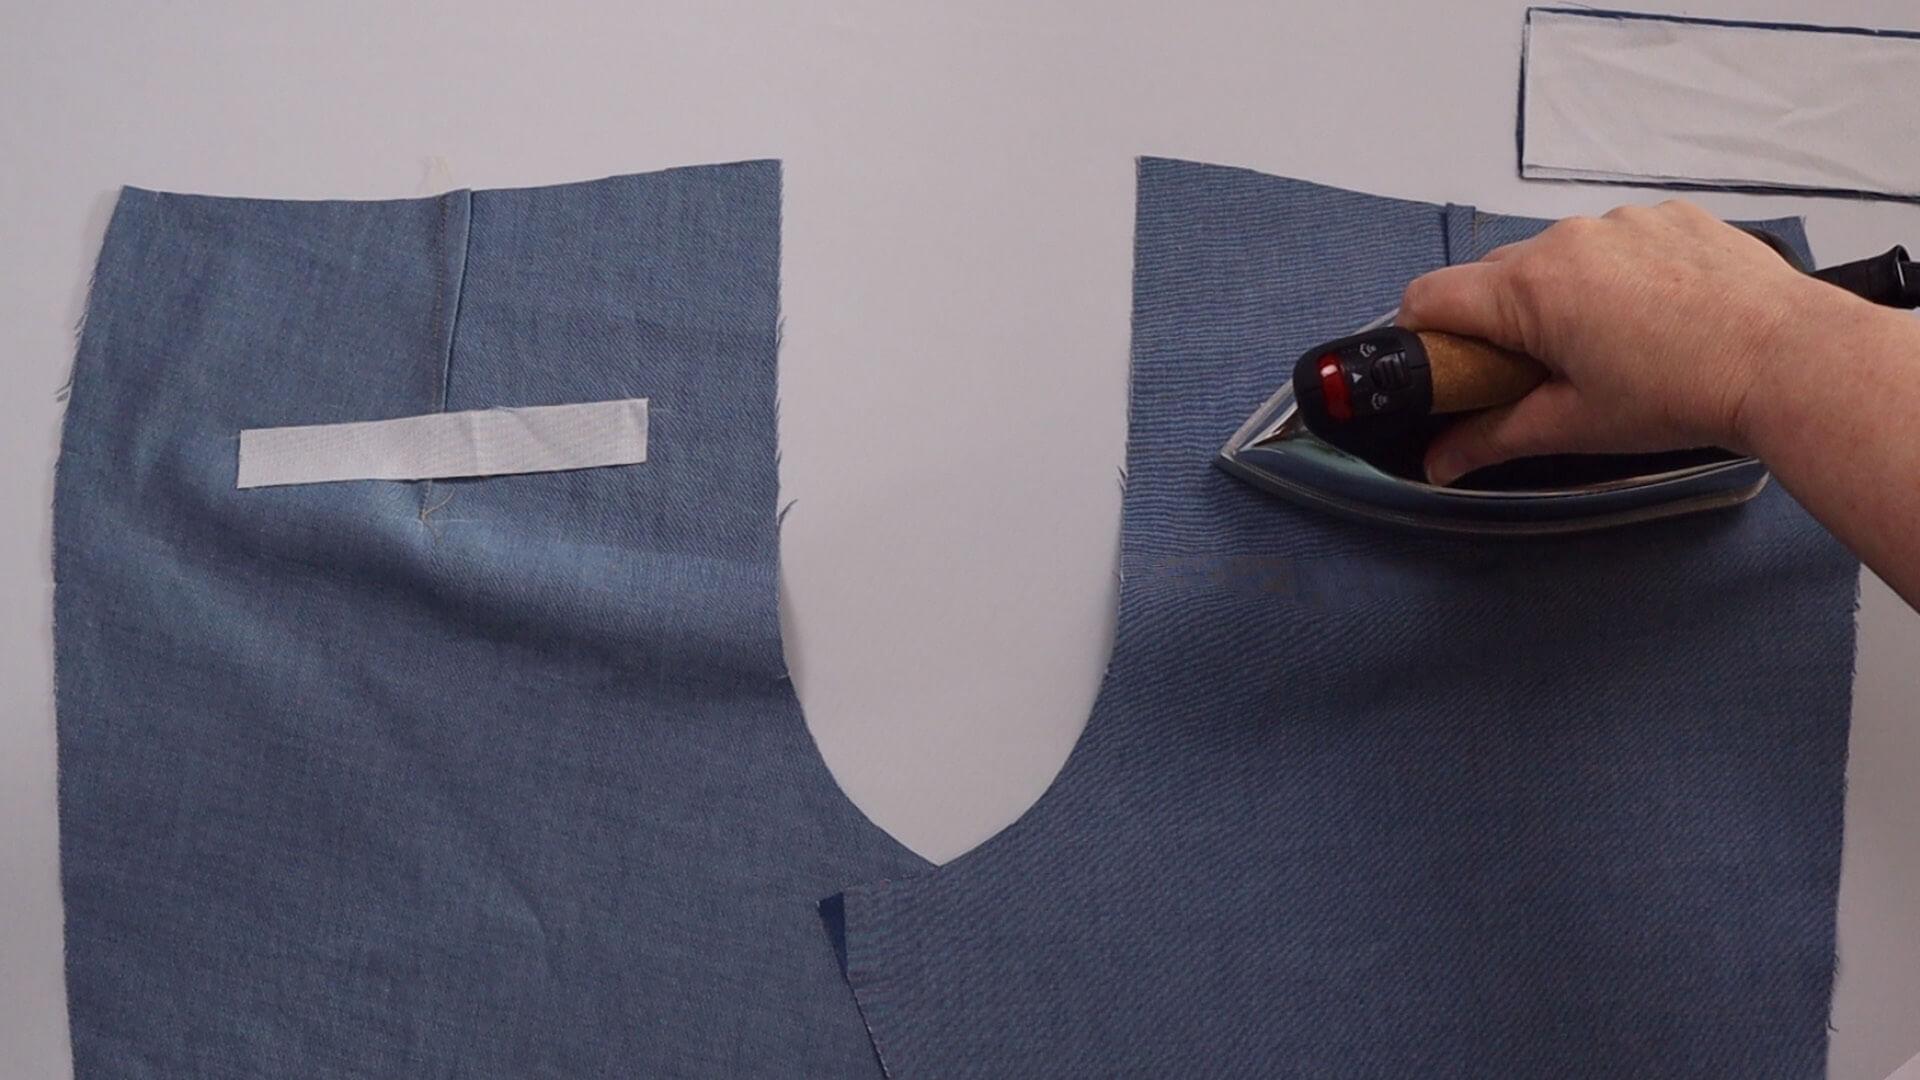
The interfacing strip is placed over the center of this rectangle and ironed on.
3. Prepare the pocket welt
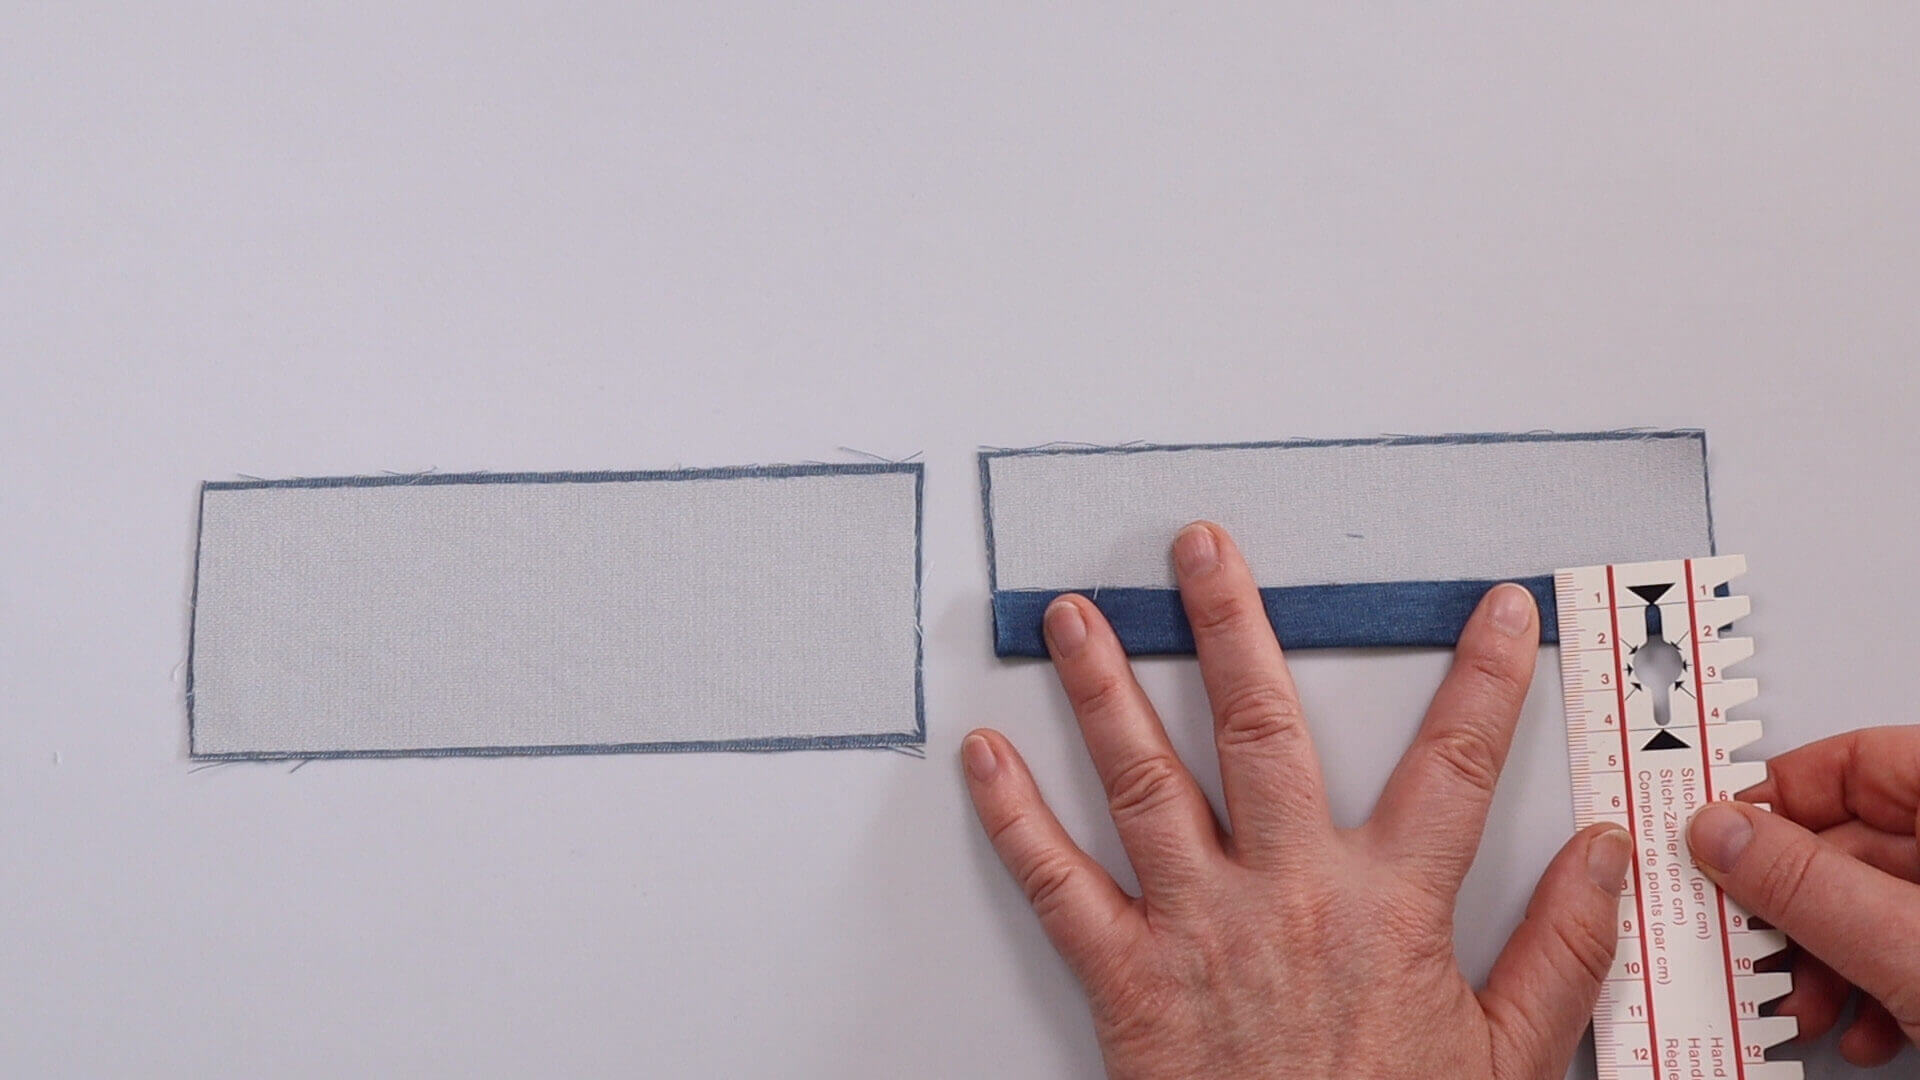
I attach the fusible interfacing onto the pocket welt and press ist over by 18 mm, according to the notches. The value of 18 mm results from the piping width of 12 mm plus 6 mm seam width.
4. Place the upper pocket bag
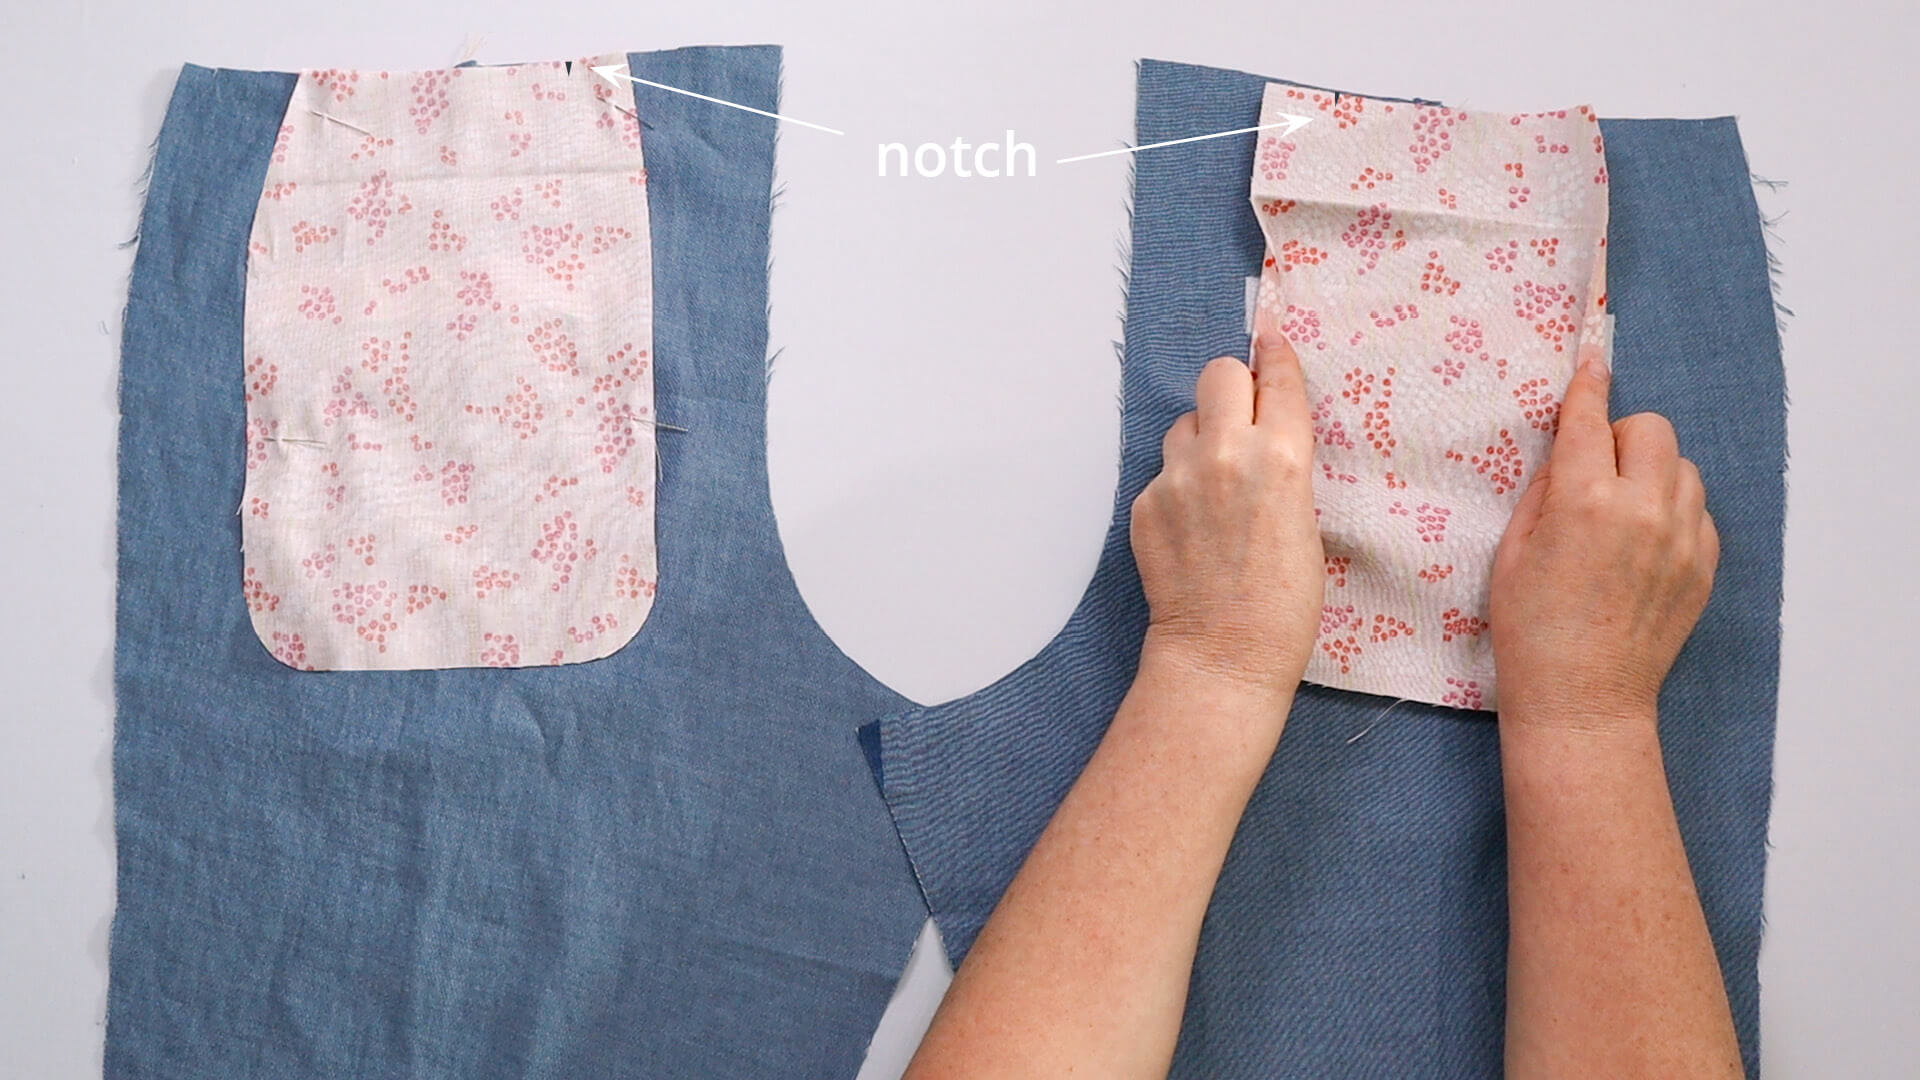
Place the upper pocket bag on the trousers. The pocket’s right side is facing the trousers’ left side of the fabric. This way the right sight of the pocket bag will be visible on the inside of the pocket. Align the upper pocket edge with the upper edge of the back trousers. Place the pocket back central to cover the retangle and pin it to the trousers preventing it from moving.
5. Mark the welt pockets position
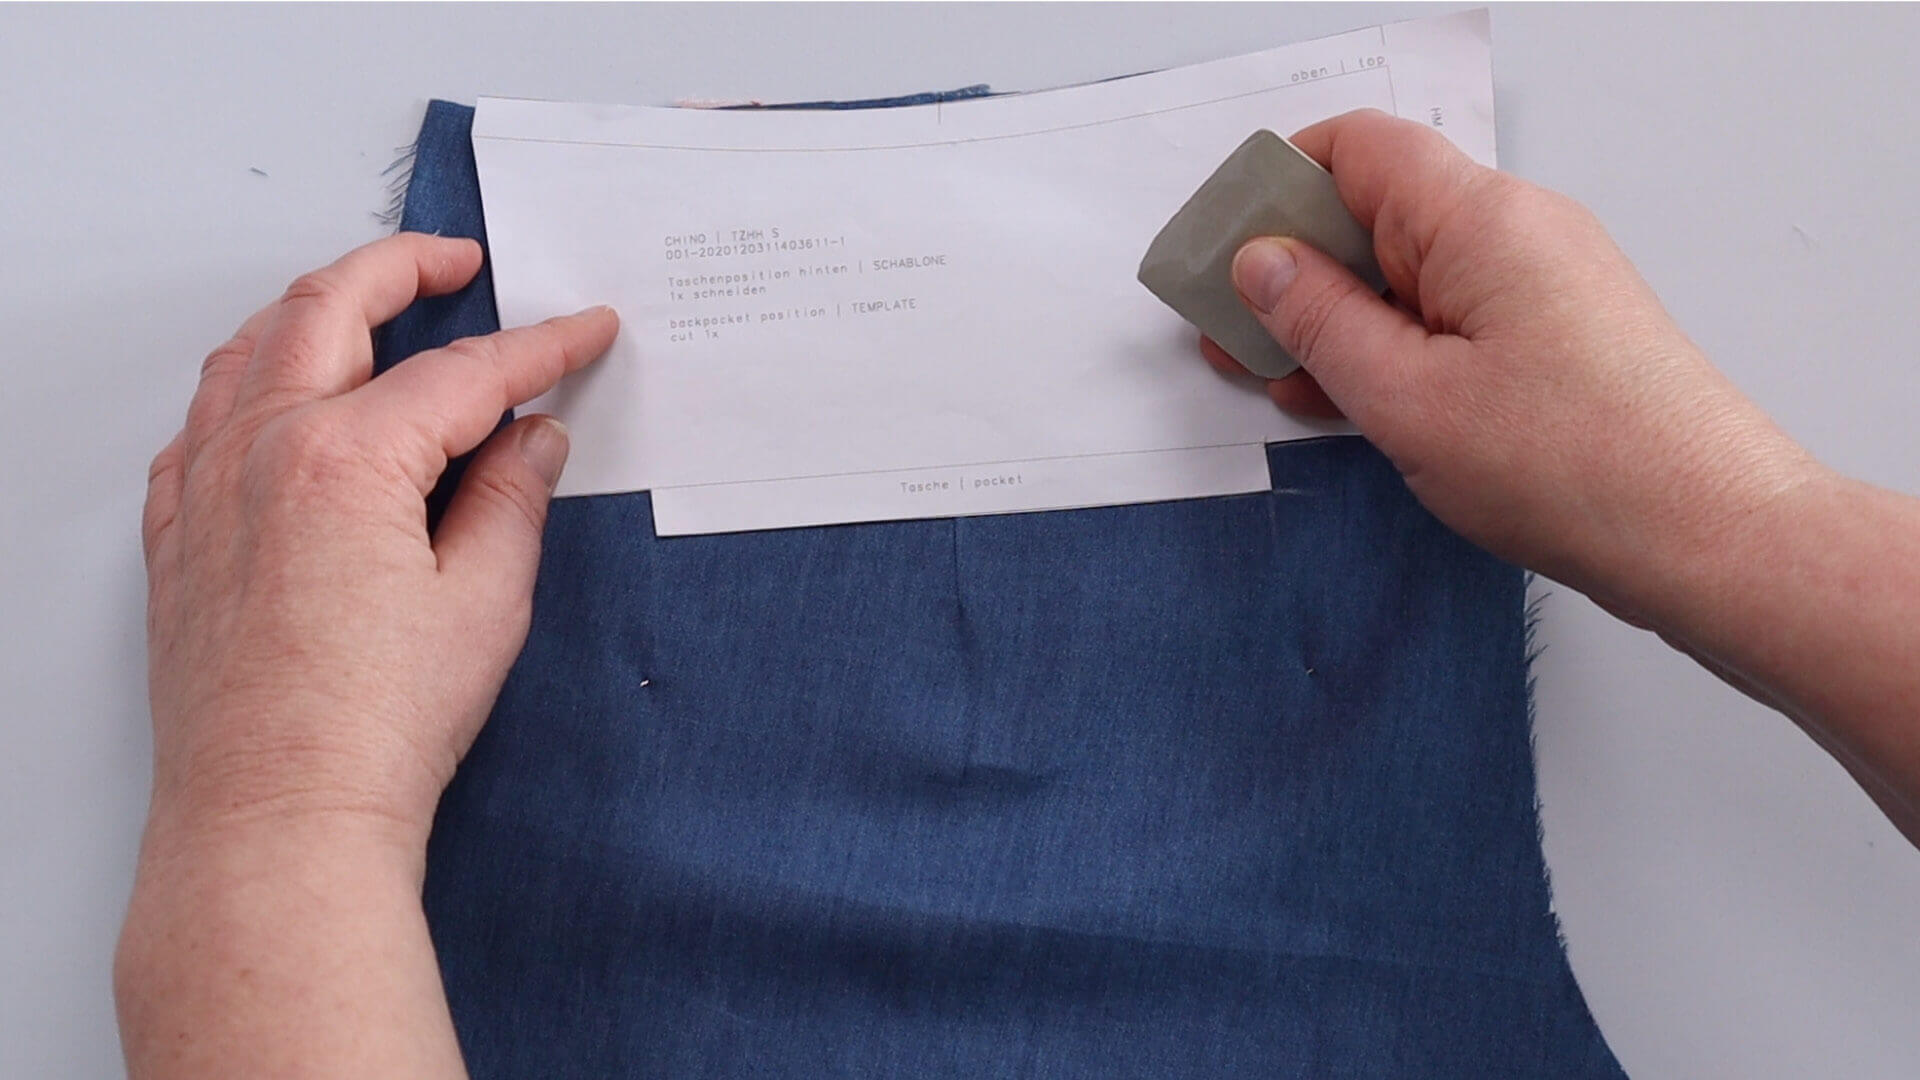
I turn the back pieces right sides facing up and use the template to mark the welt pockets position.
6. Topstitch the pocket welt and facing
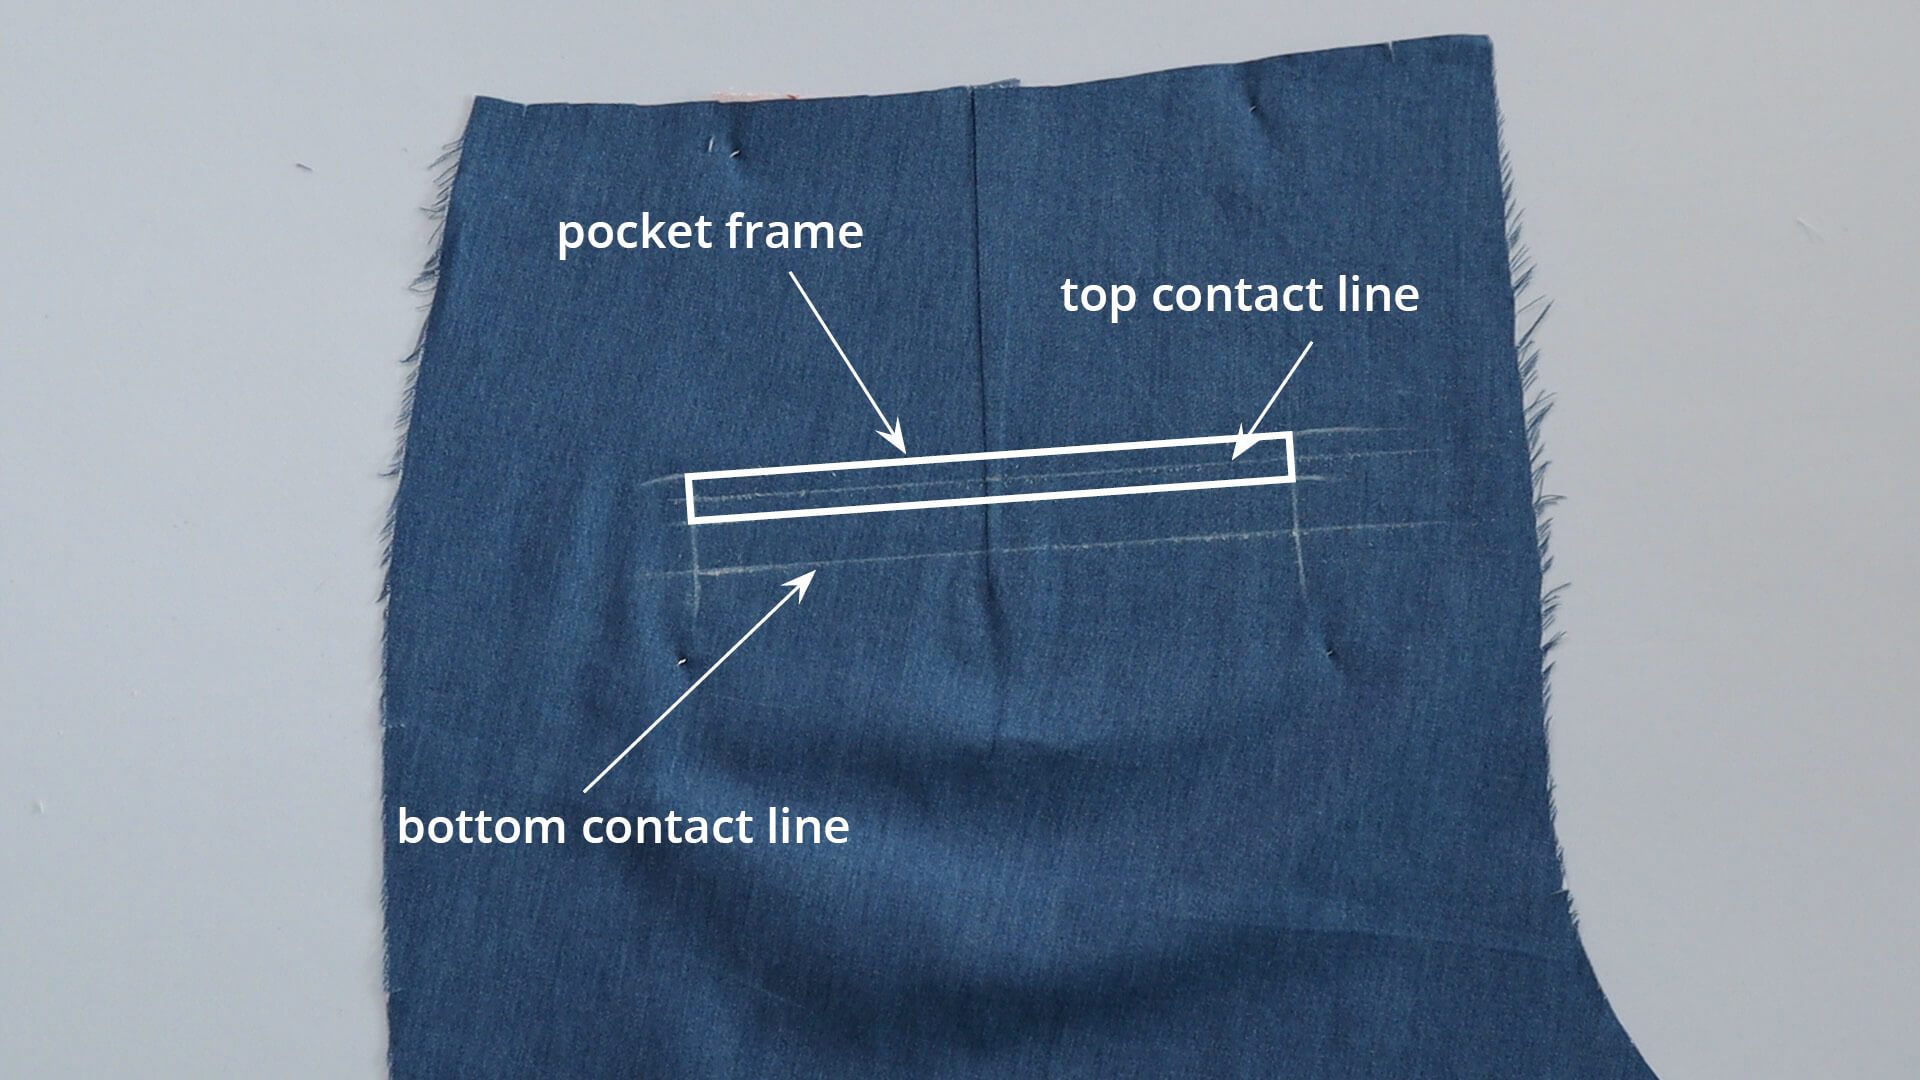
I measure the exact hight of the pocket on the template. In this example it’s 12 mm. Starting from the bottom of the retangle, draw another retangle measuring 12mm in hight. This will be the bottom contact line for the welt.
Draw a parallel line 6mm (half of the pocket size) from the top edge of the pocket frame to create the top contact line.
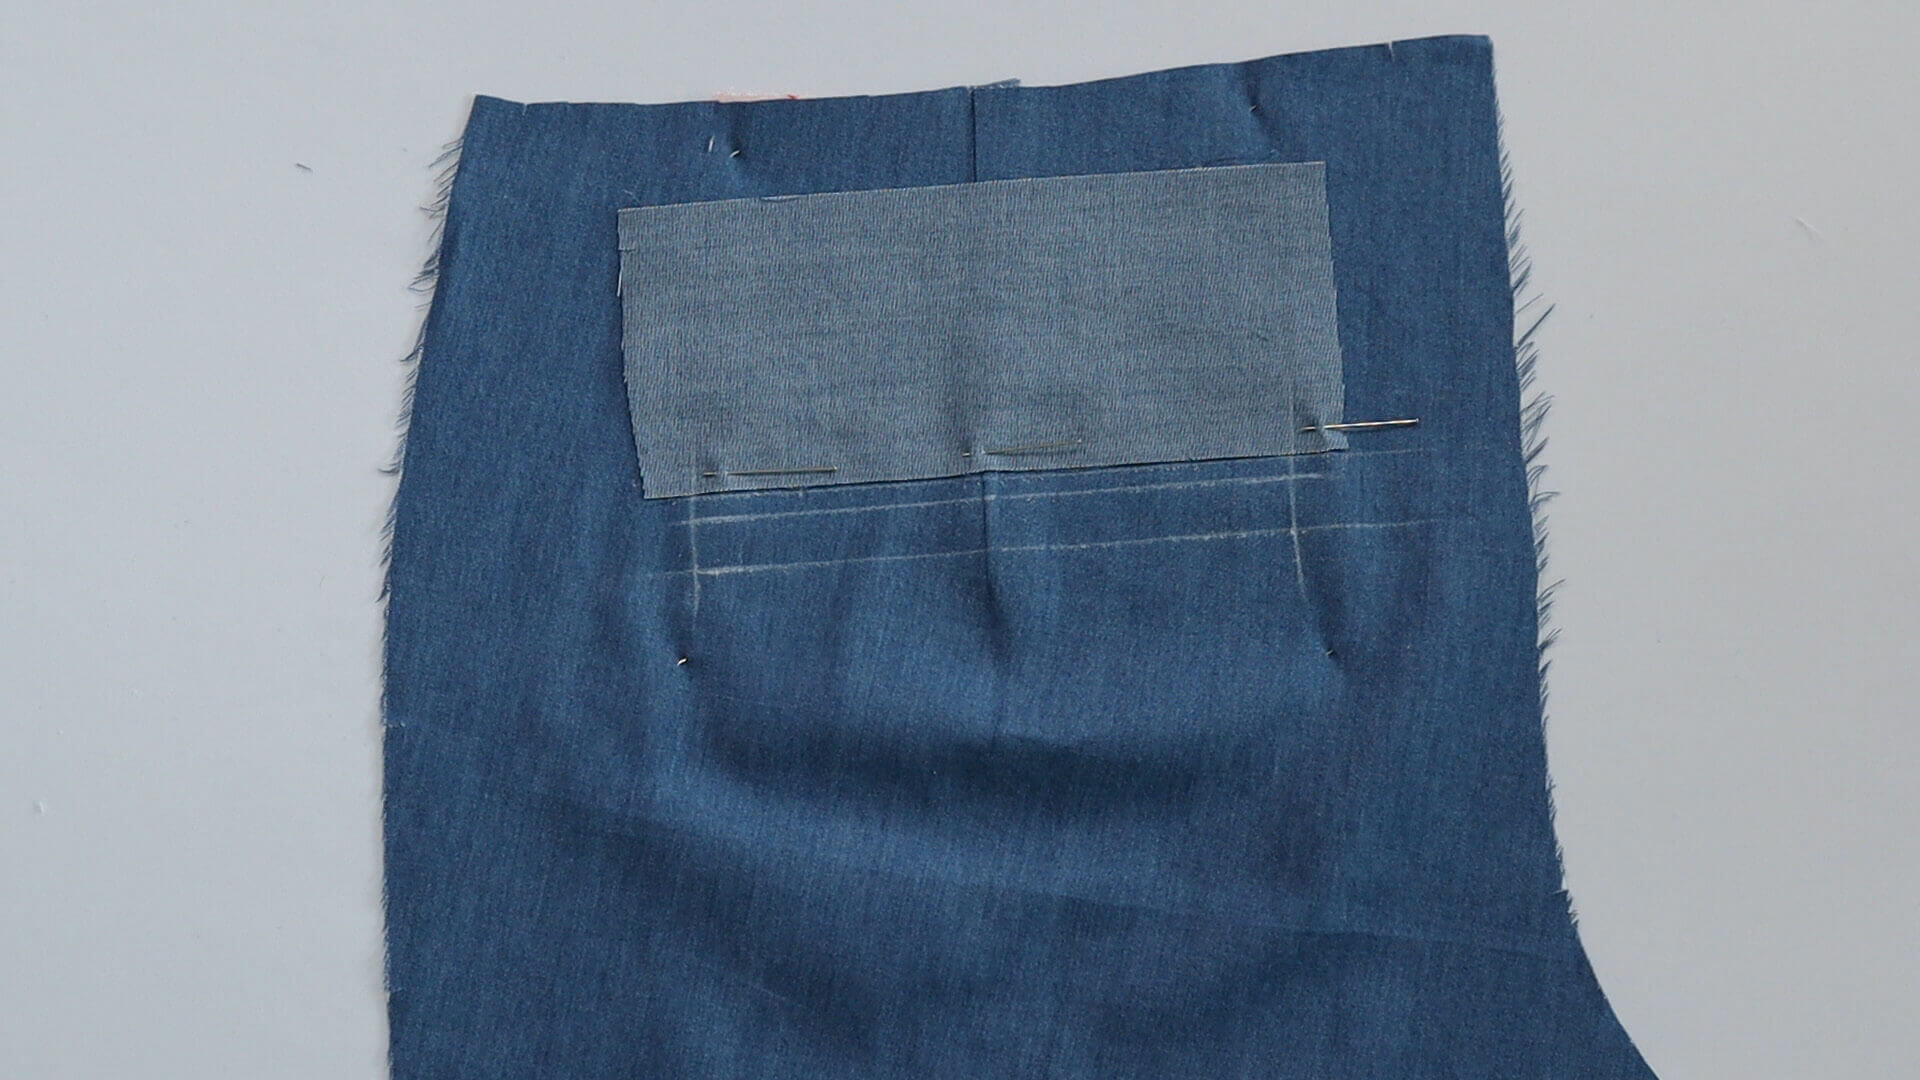
I place the pocket bag facing right sides together above the upper line of contact and align it to the top contact line. If you wish, you can transfer the top edge of the pocket frame onto the pocket bag facing, as this will be the sewing line.
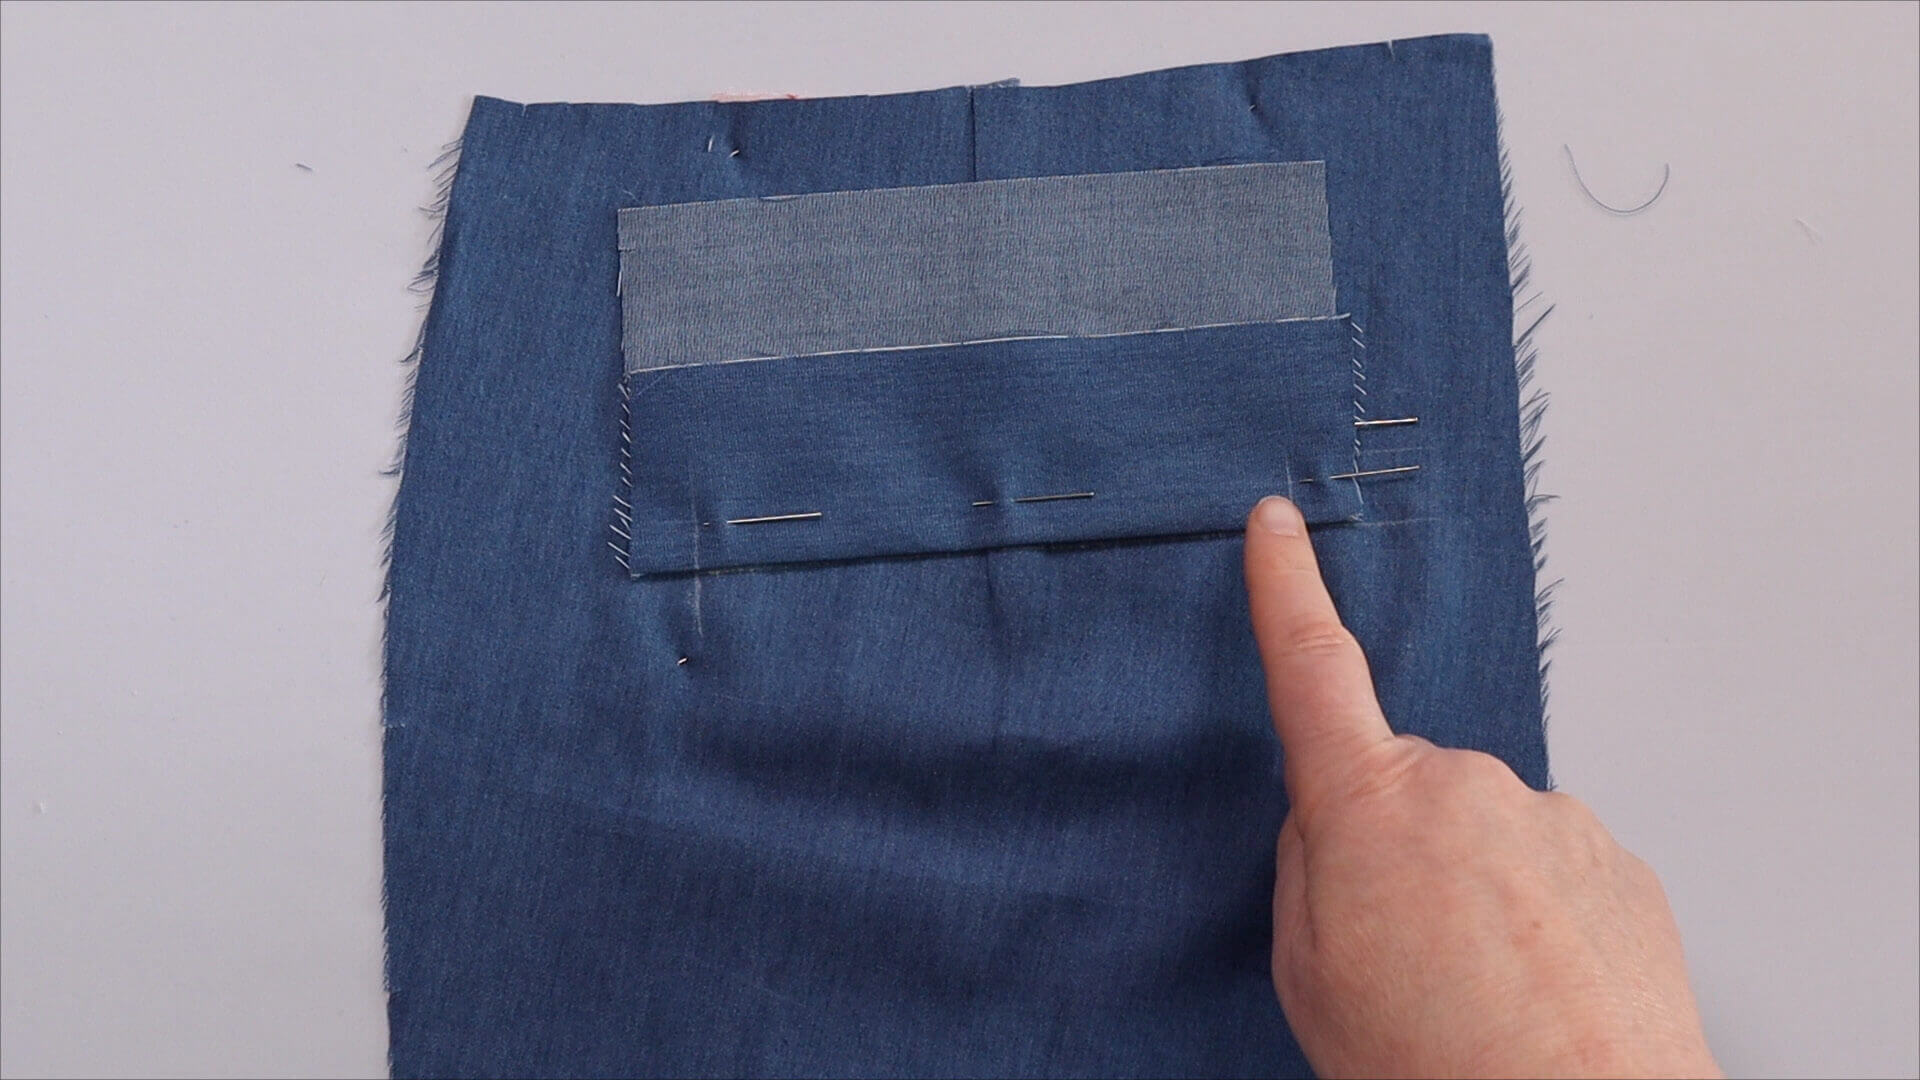
Next I place the pocket welt. The left side of the welt is facing the right side of the trousers. The ironed fold is aligned to the bottom contact line and the raw edge is facing towards the waistband. Mark the width of the pocket frame and make sure the welt is overlapping the frame equally on both sides. Transer the bottom edge of the pocket frame, too.
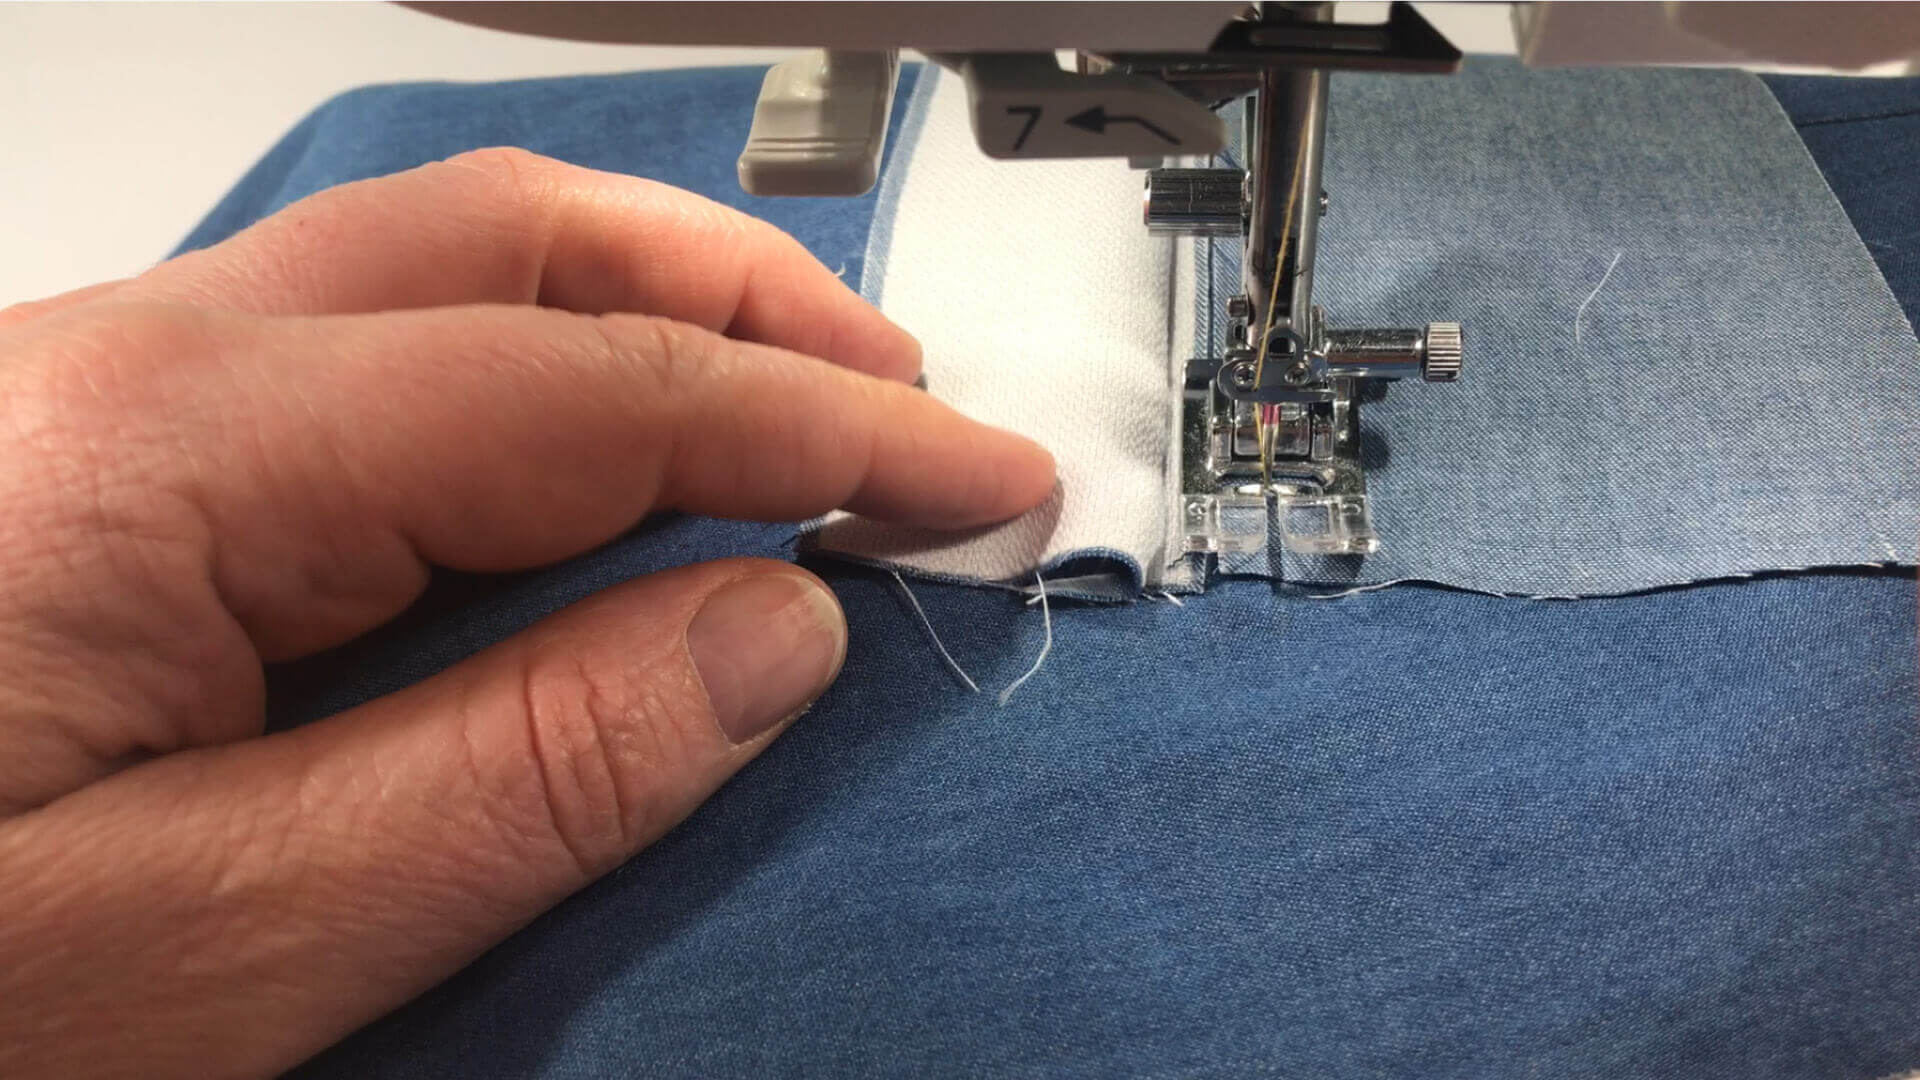
I stitch the pocket welt and pocket bag facing using a straight stitch according to the markings drawn before.
It is important to work very precisely and to secure the start and finish of each stitch line with some stitches.
7. Cut in the pocket opening
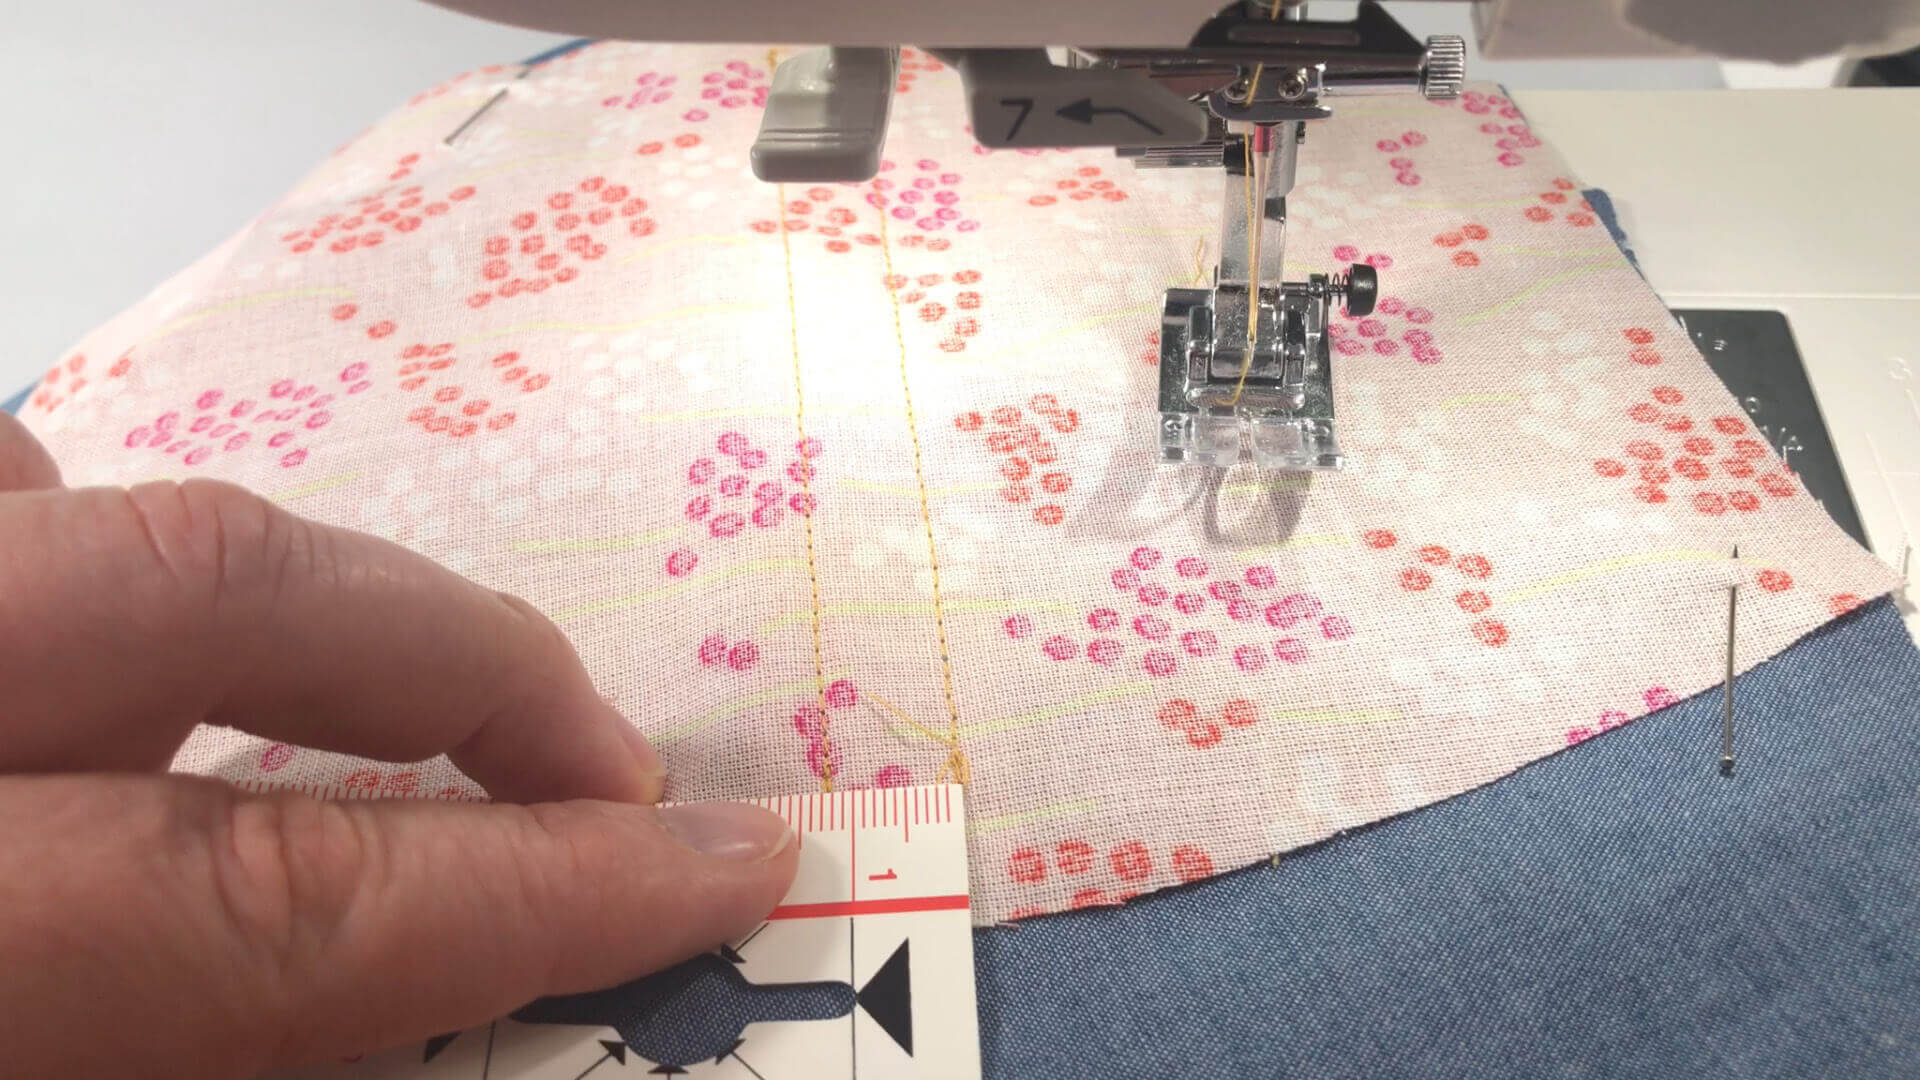
I measure the distance between the stitch lines to make sure it equales the size of the pocket frame, in this case 12mm.
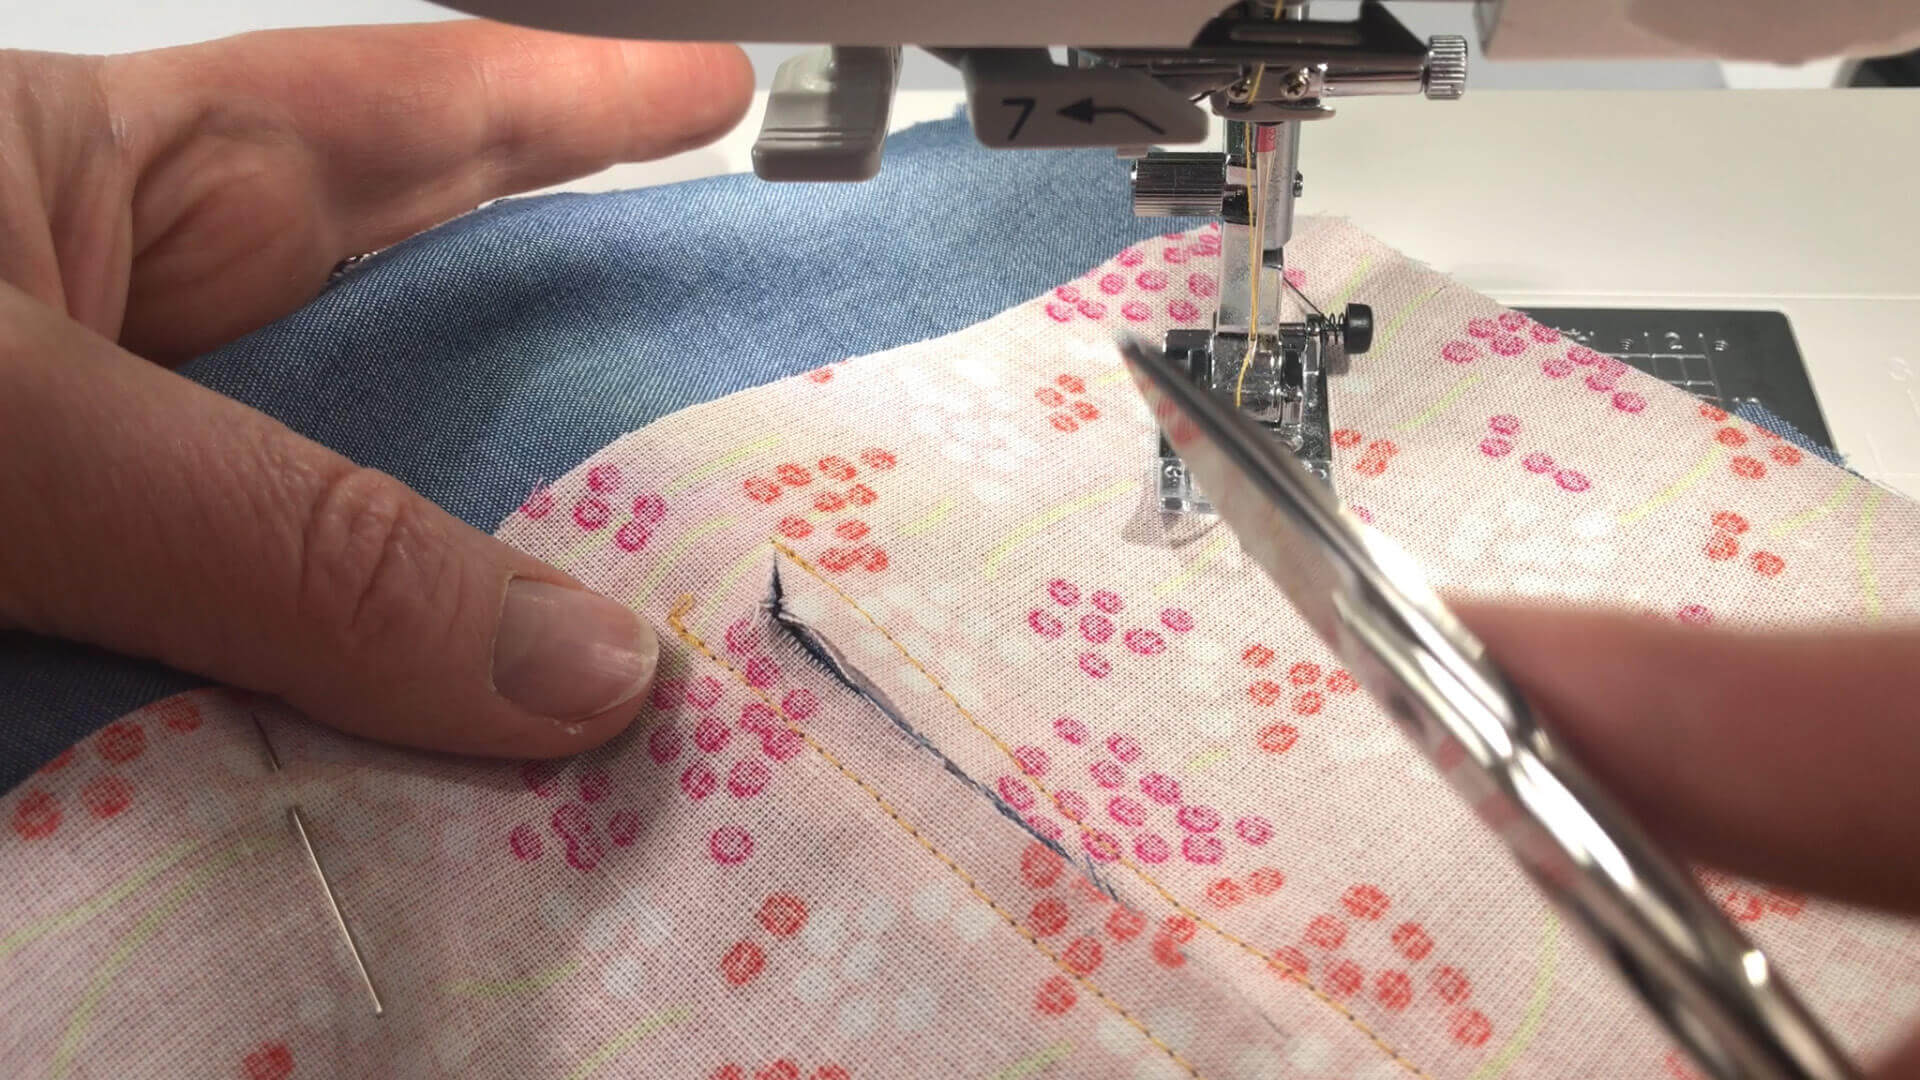
Make a small incision in the middle of the two lines. Stop approx. 6mm before the end of the line and cut diagonally toward the stitches. This is done best on the left side of the fabric. Make sure not to cut the fabric or through the stitches.
8. Iron welt and pocket opening
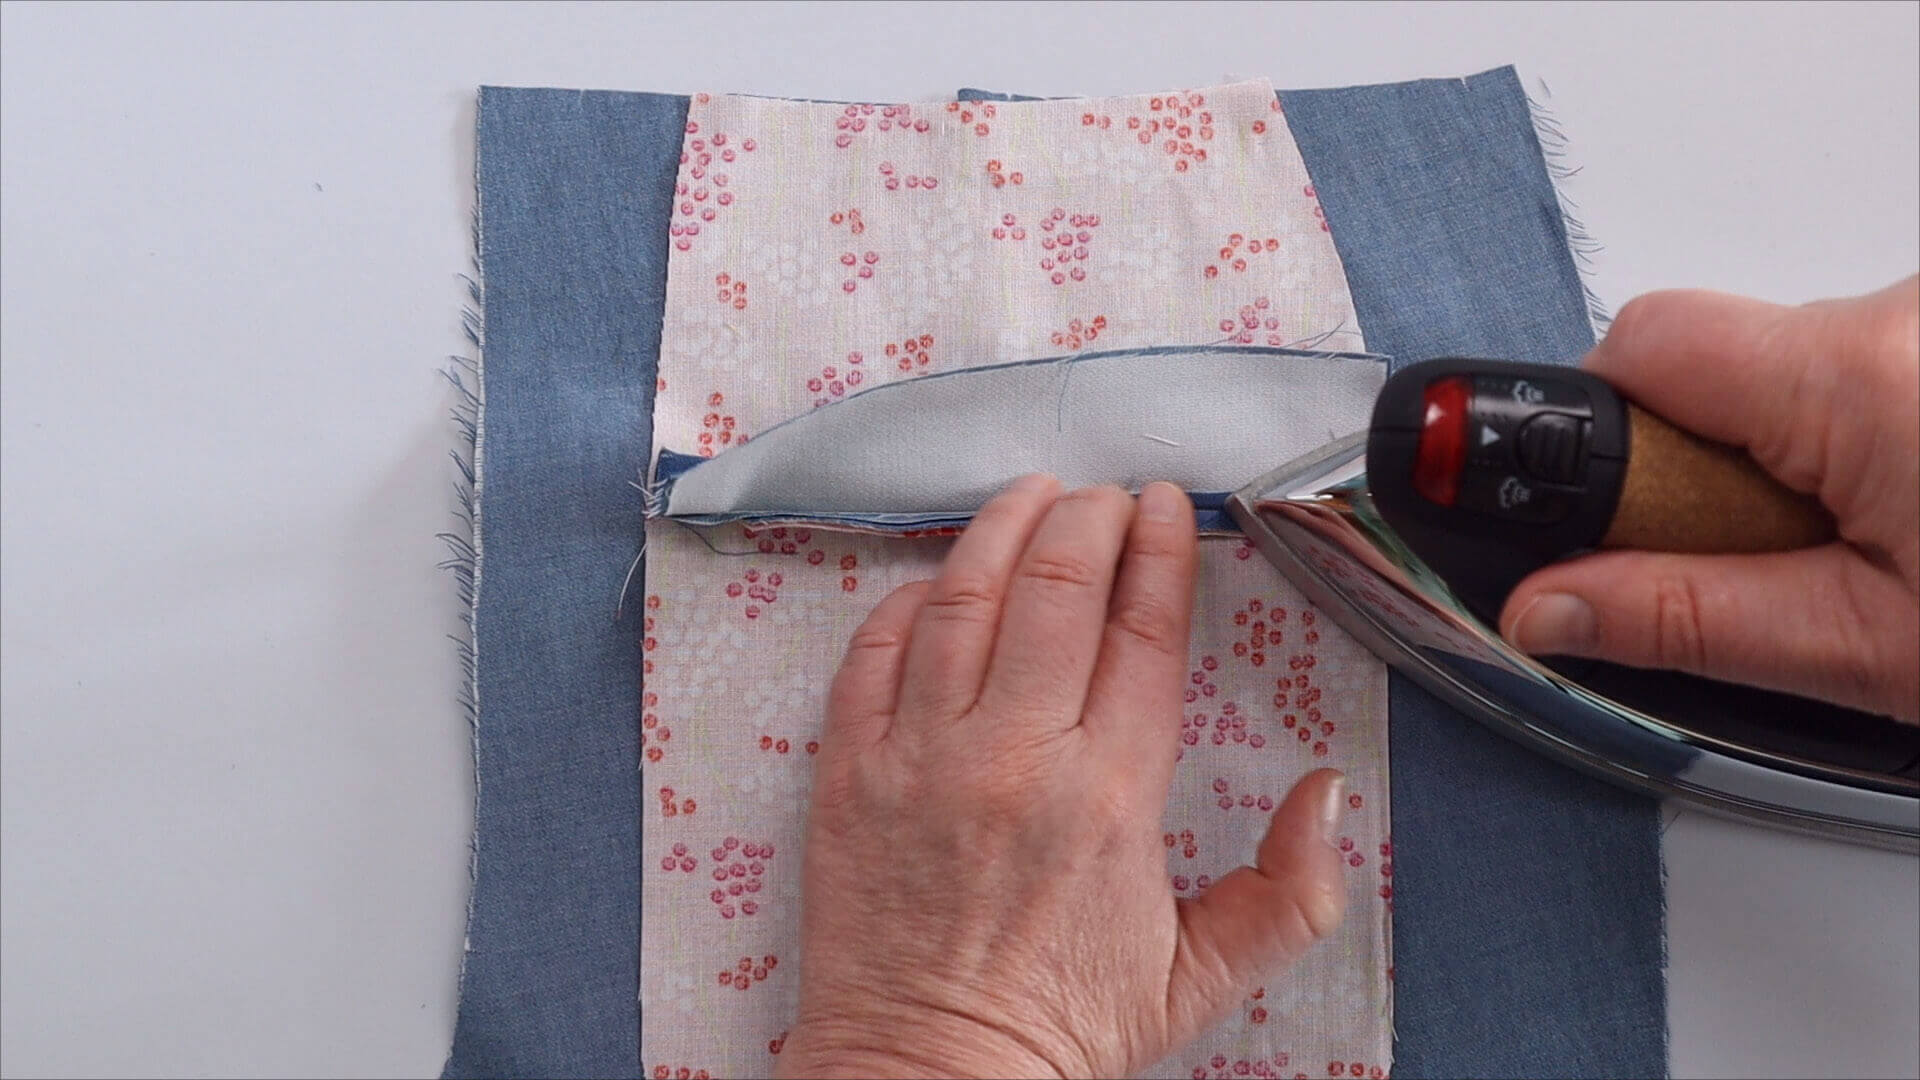
Wrong sides up, I pull the welt through the incision and press the fold of the welt up.
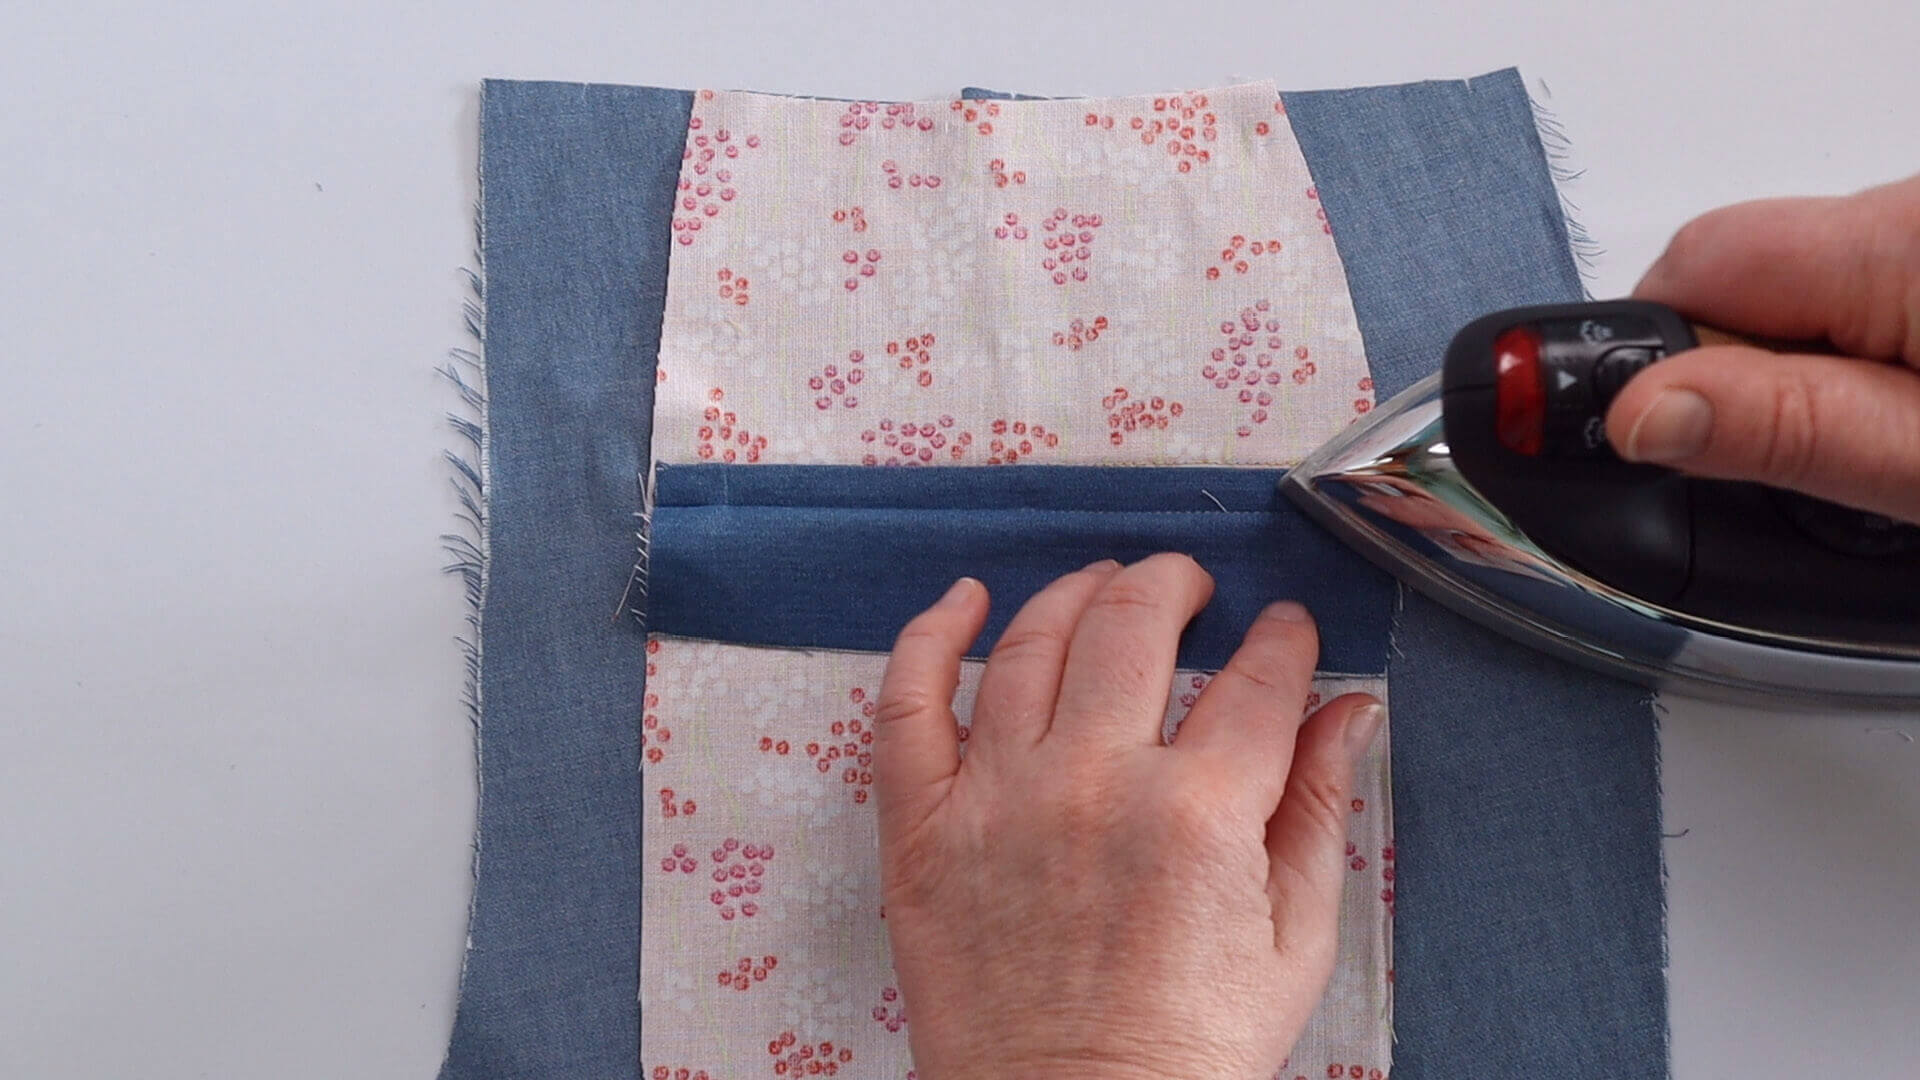
Then I press it down again and place it over the seam.
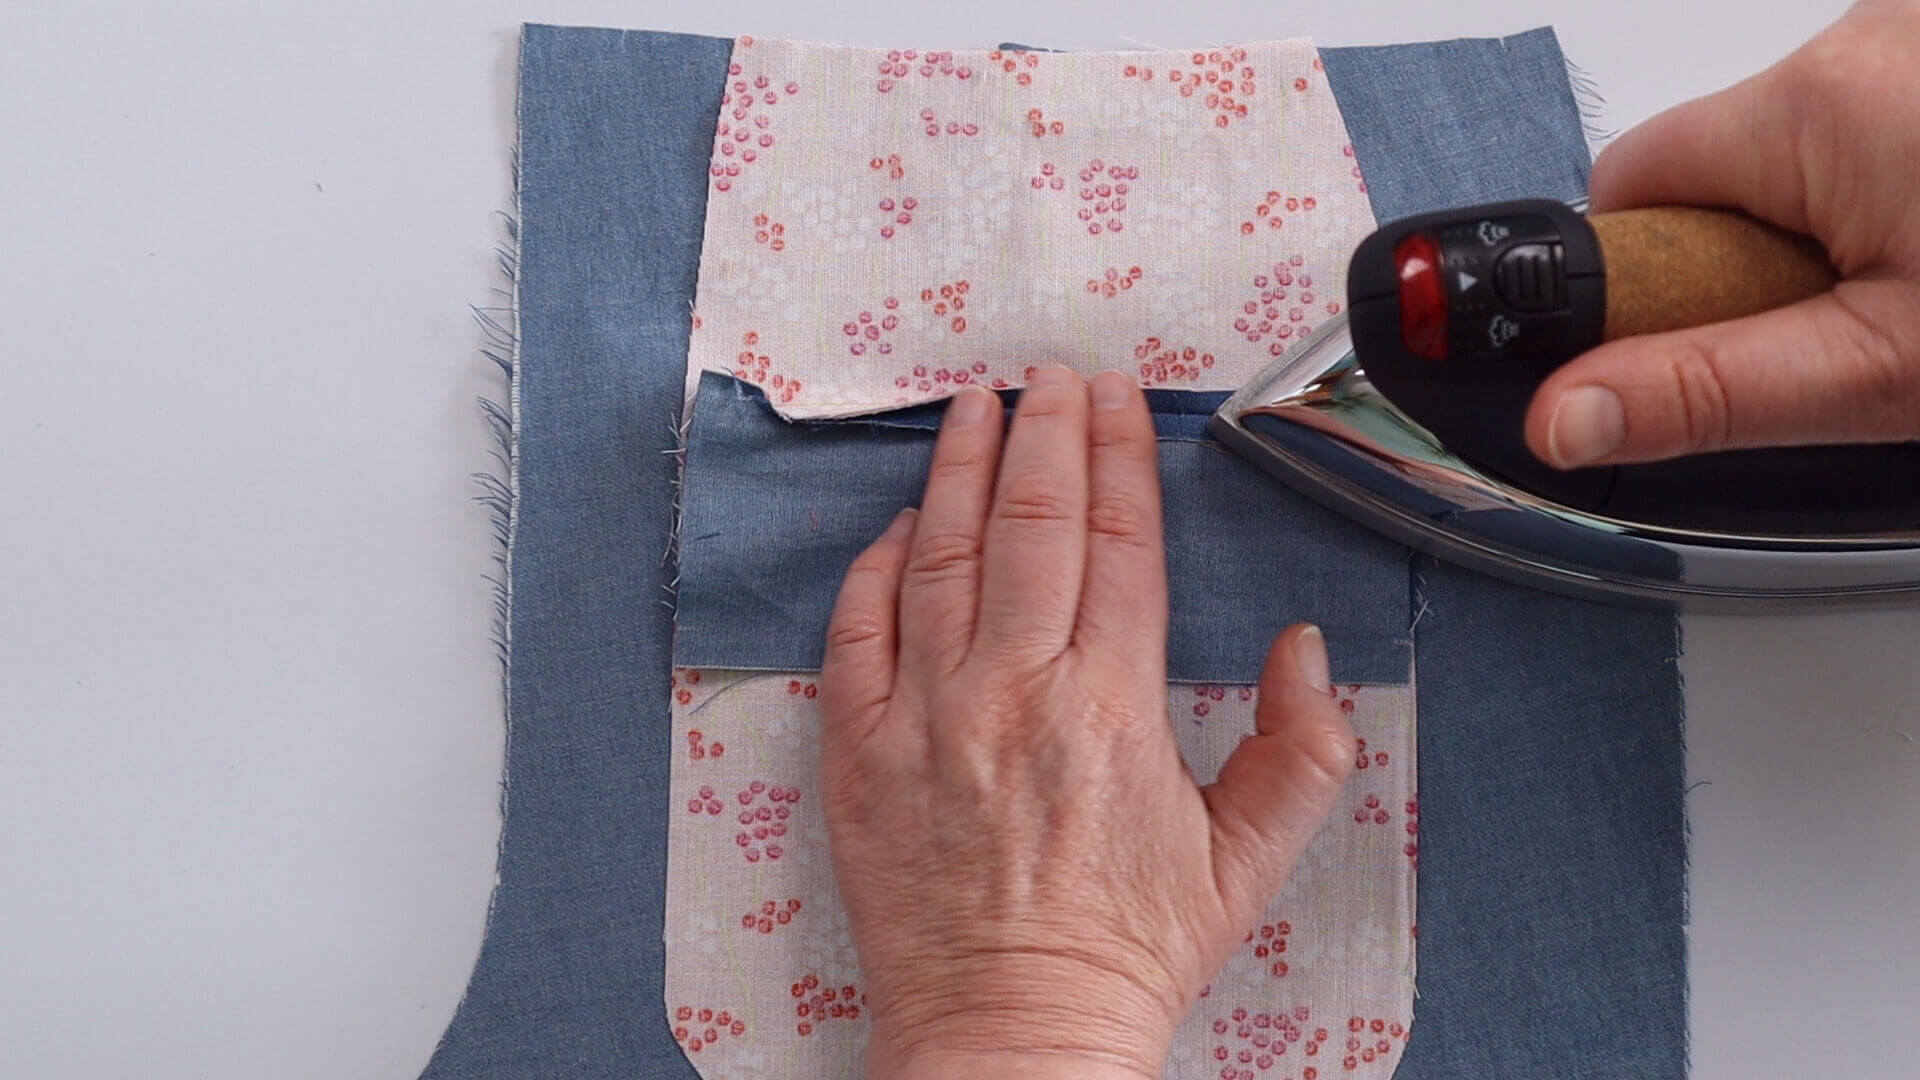
Now I also pull the pocket bag facing to the inside and press the seam open.
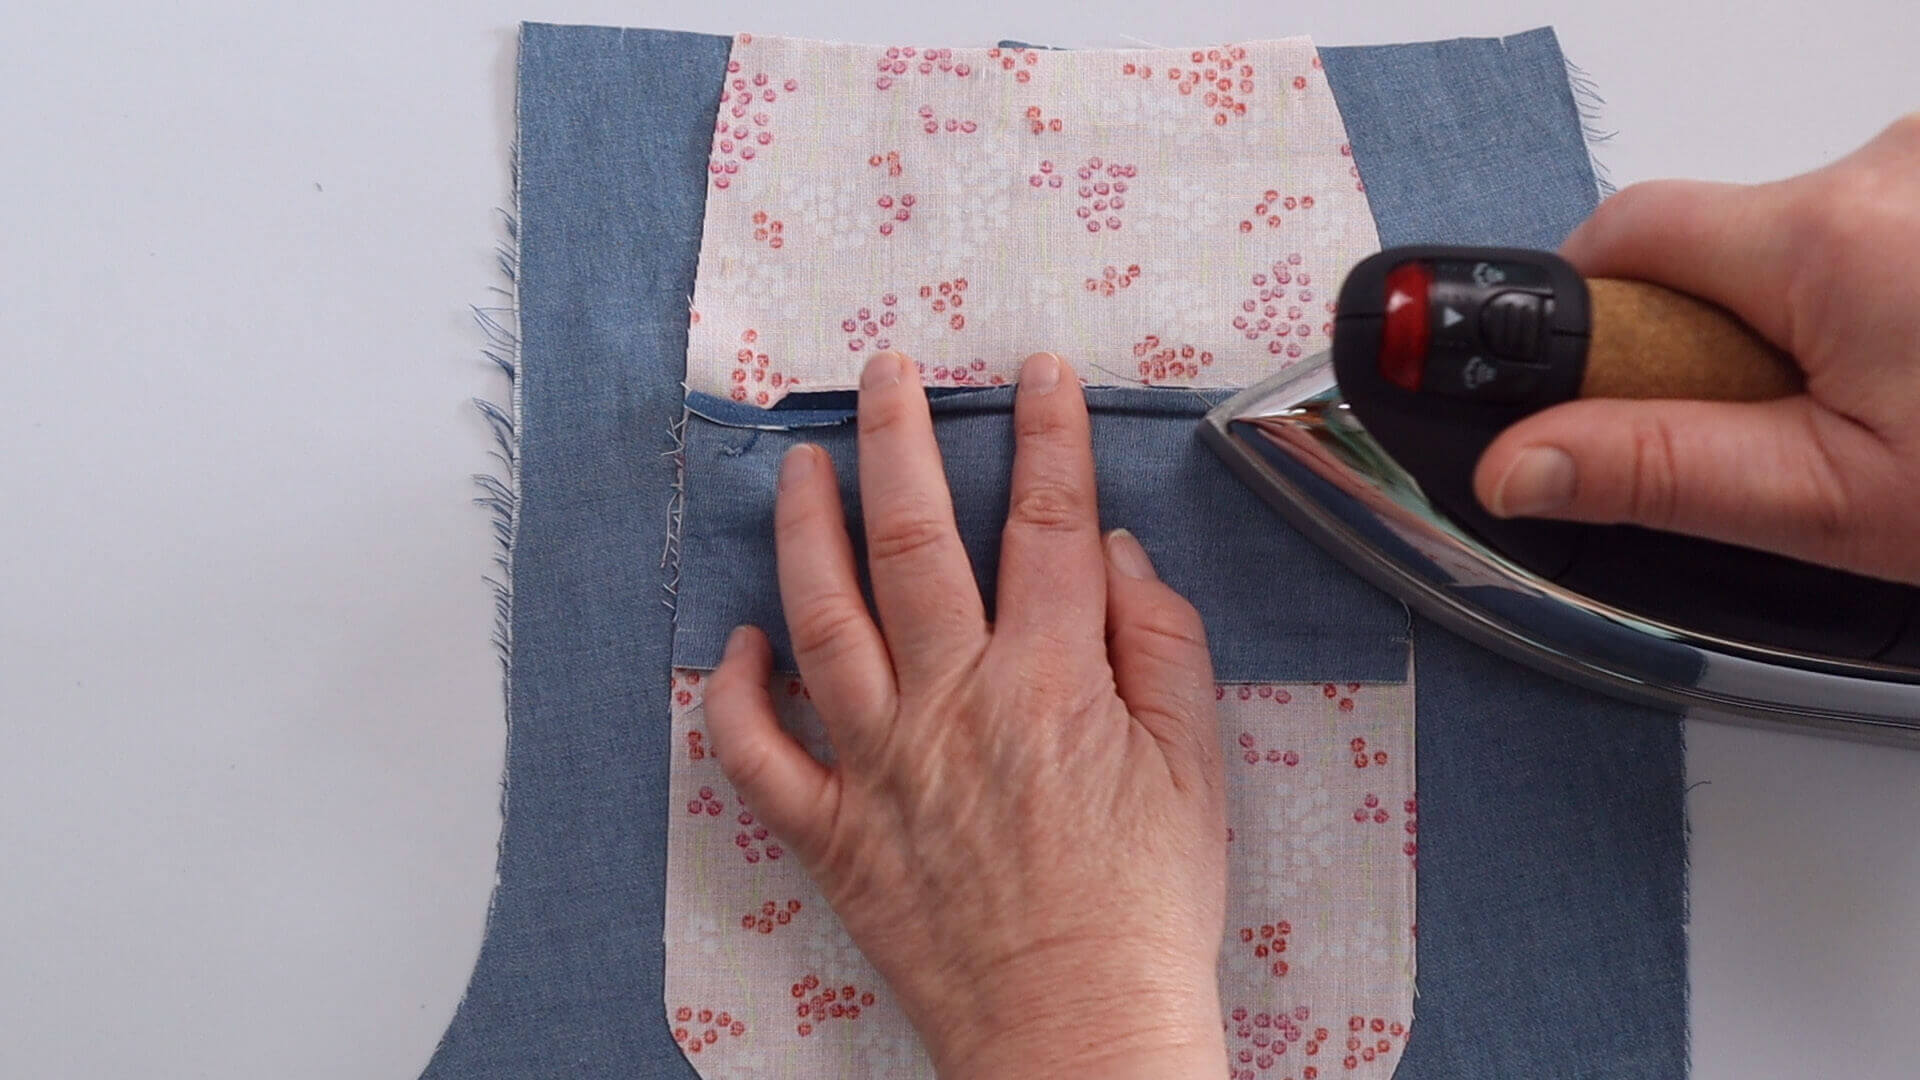
I then press the seam allowance over towards the waistband edge.
9. Secure the triangle at the corners
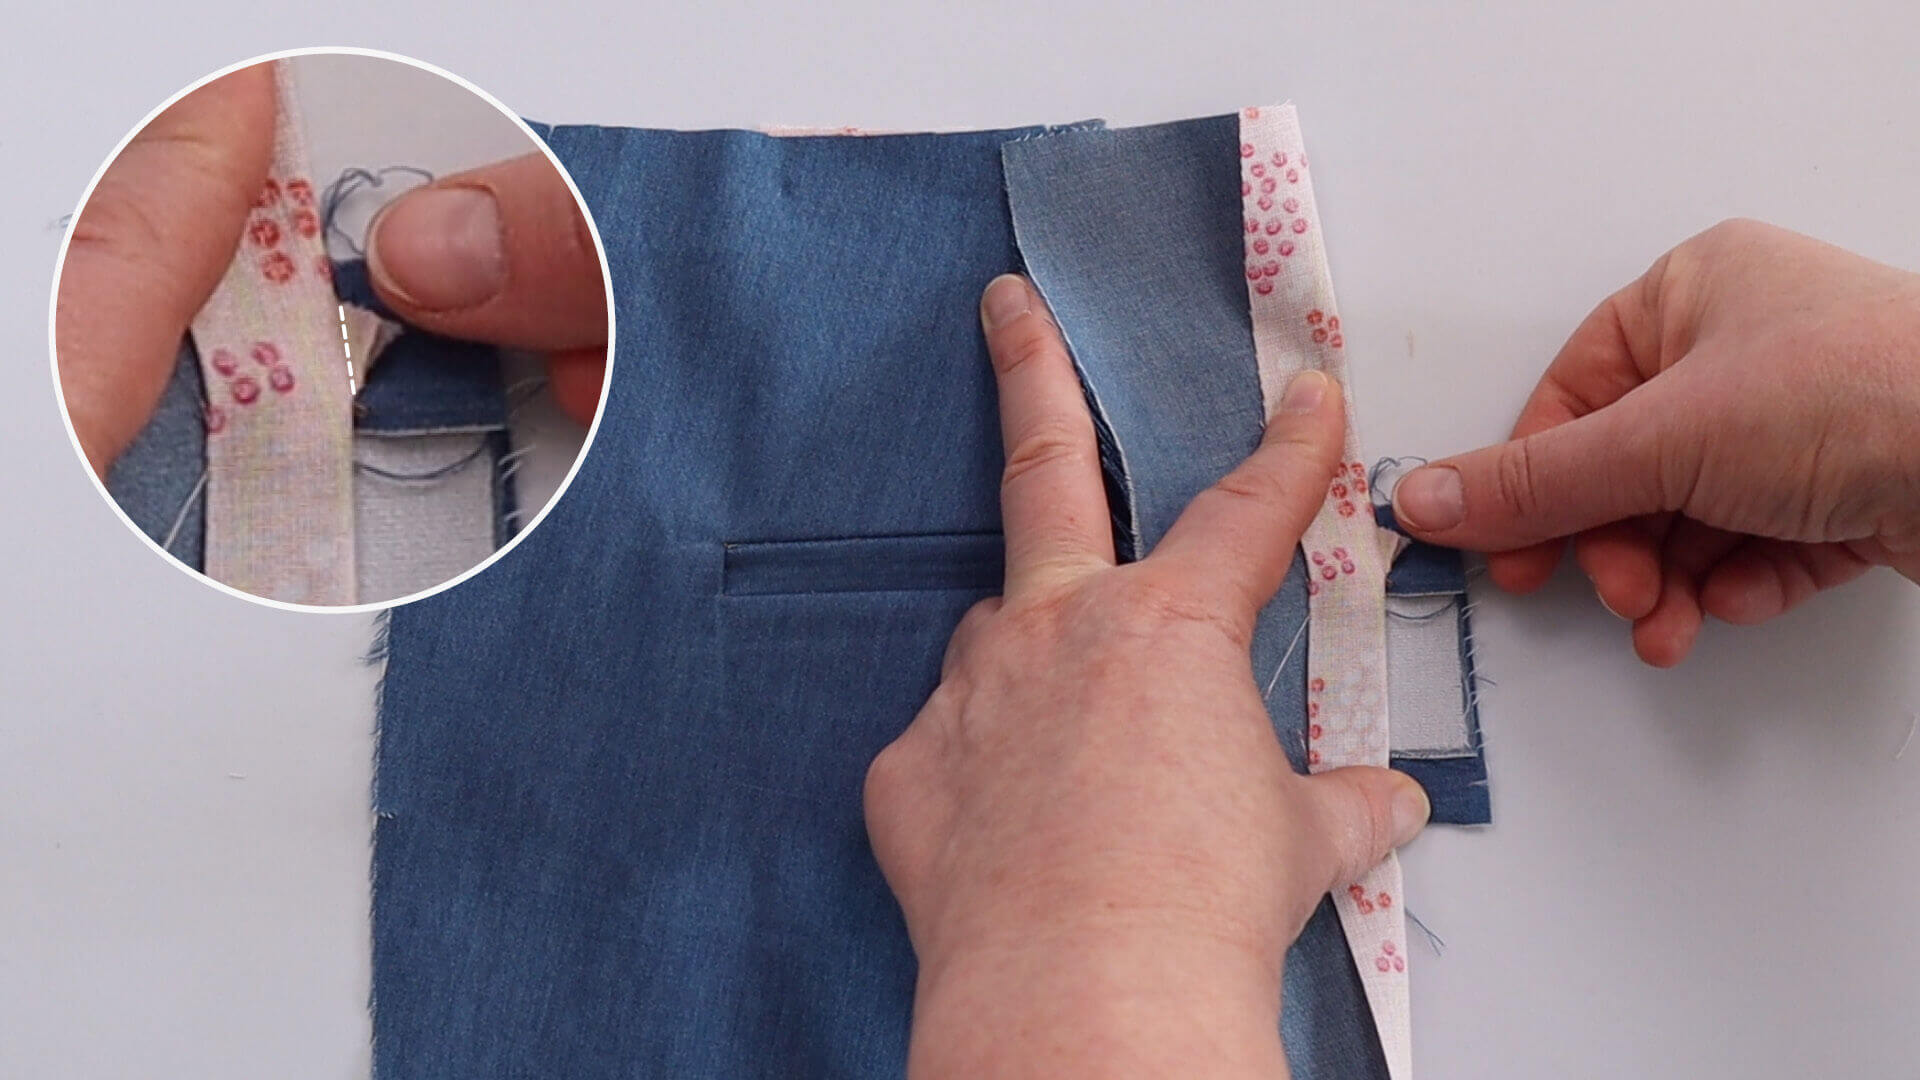
I secure the triangular notches to the piping from the inside. The tip of the triangle needs to be pointing towards the edge of the pocket bag before sewing. Press in place when needed. Make sure that the pocket bag facing is pulled completely smooth underneath so the fold of the welt is exactly at the top seam. As this step can be a bit tricky I recommend to not secure the first stitch in case you have to unpick it. Leave a tail and make a knot once you are happy with the result.
10. Design variants for welt pockets
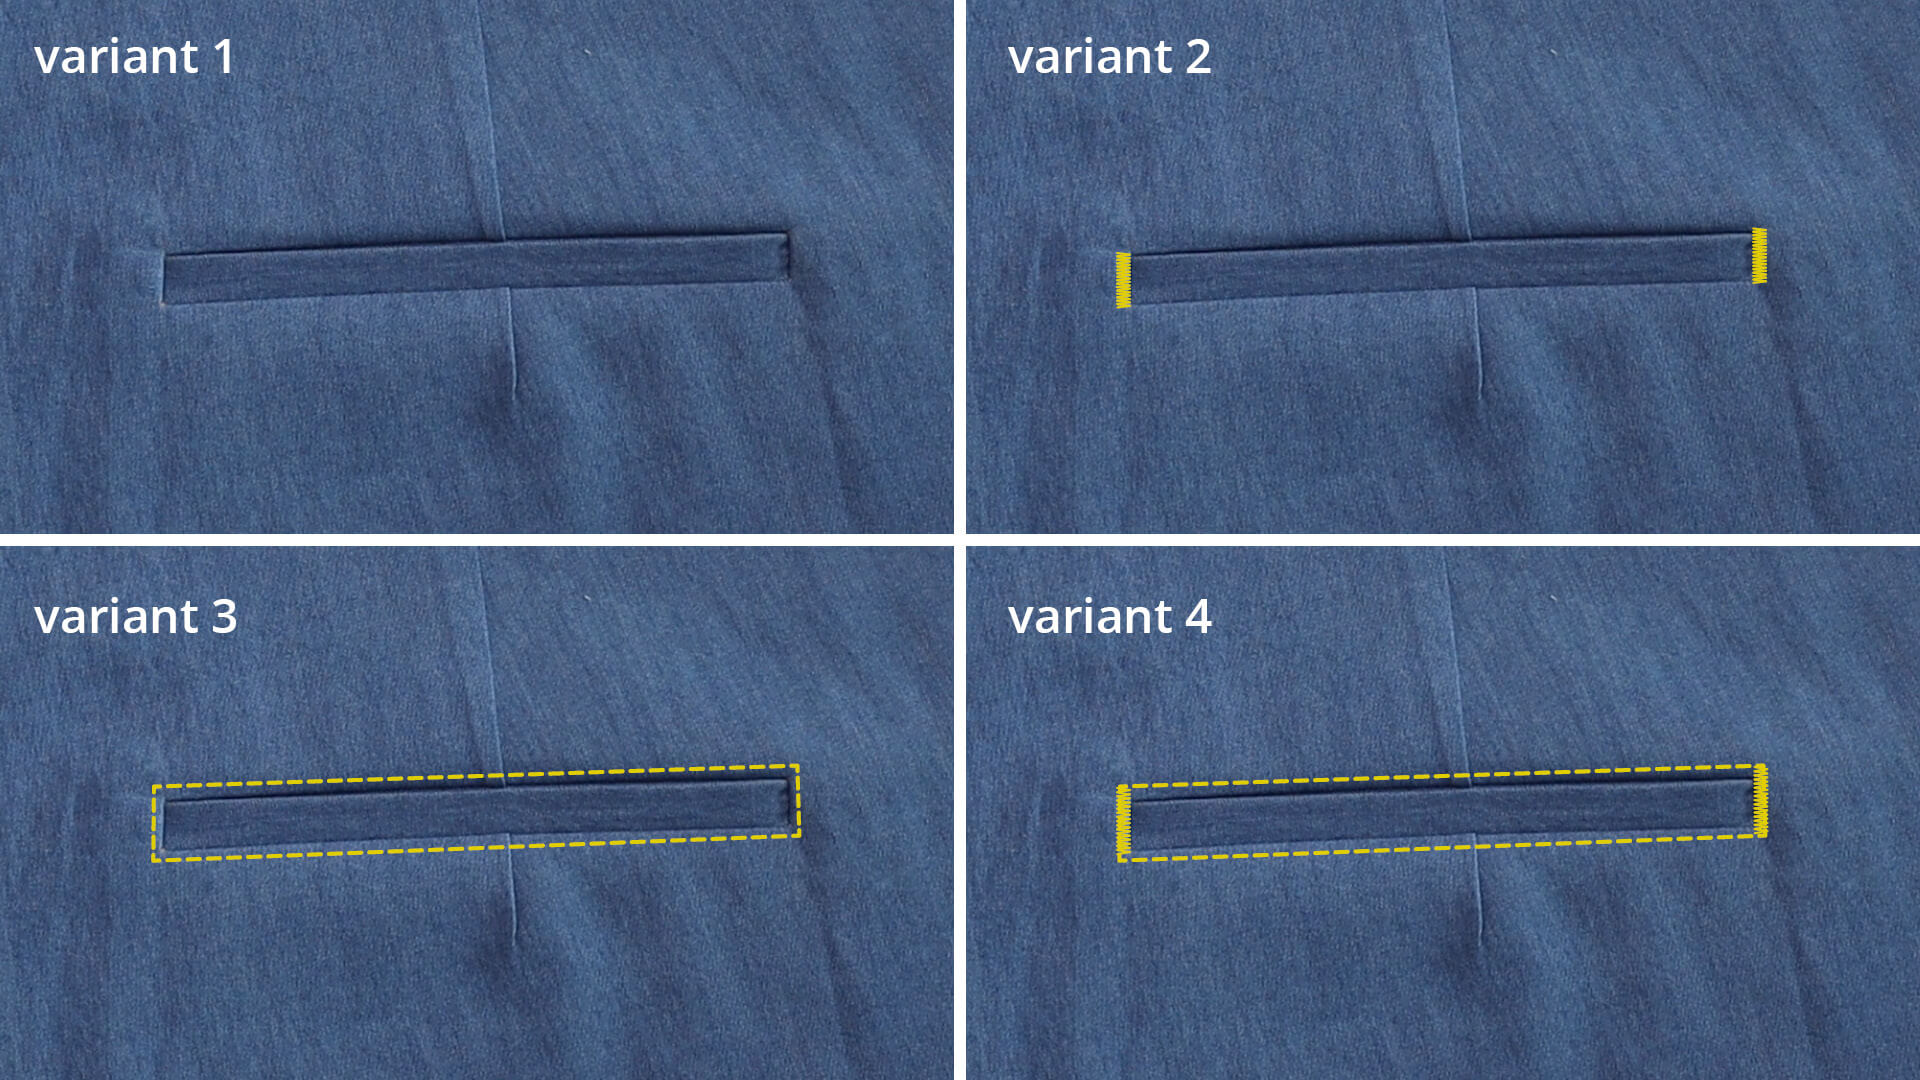
Depending on your preferences you can decide to leave the pocket as is, topstitch all round or only at the bottom. You can also often see narrow bartacks on the sides, as shown in variants 2 and 4.
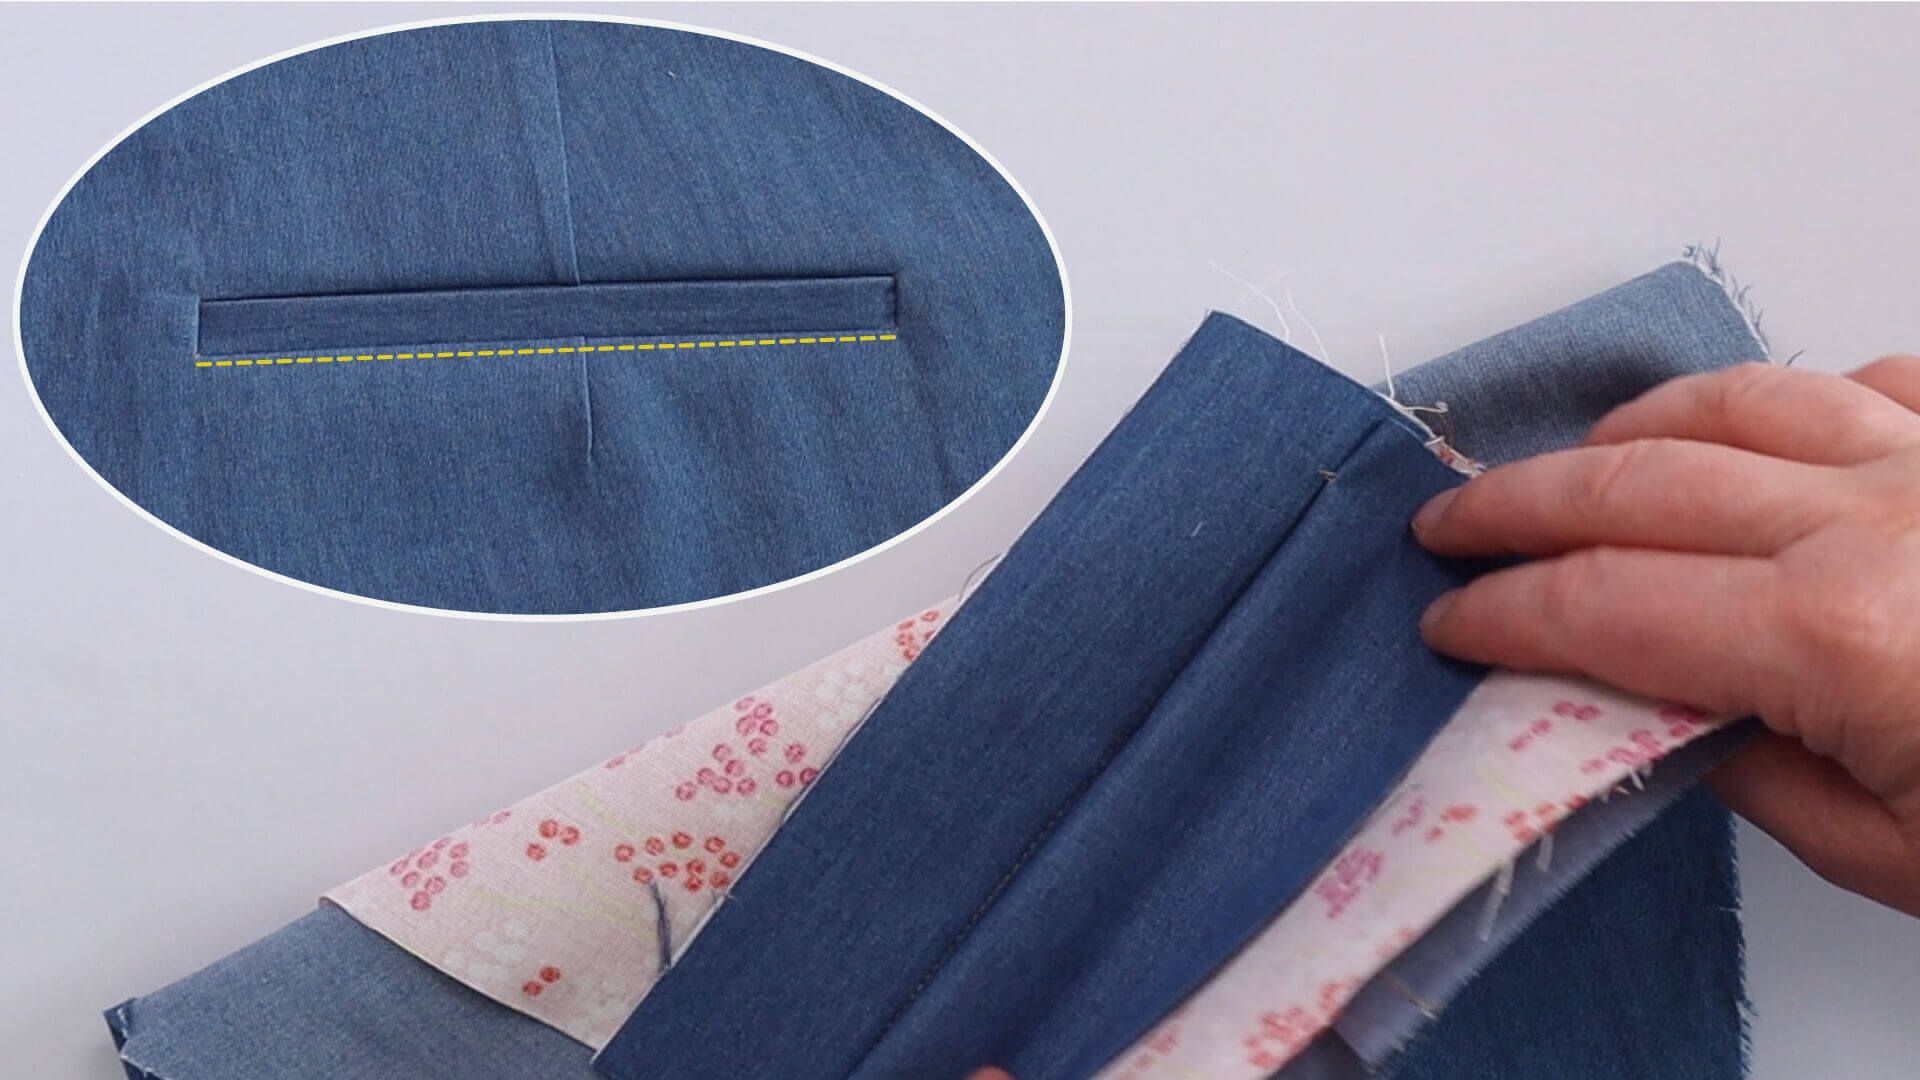
If the design includes topstitching at the bottom piping seam, you must do this before joining the pocket to the bottom pocket bag. To do this, first fold the pocket bag facing upwards so it won’t be stitched down.
11. Connect the lower pocket bag
In the next step, I join the welt to the upper pocket bag and the pocket bag facing to the lower pocket bag. You can serge the bottom edges of the welt strips and the pocket facing or, if the fabric is not too thick, fold it over by 1 cm.
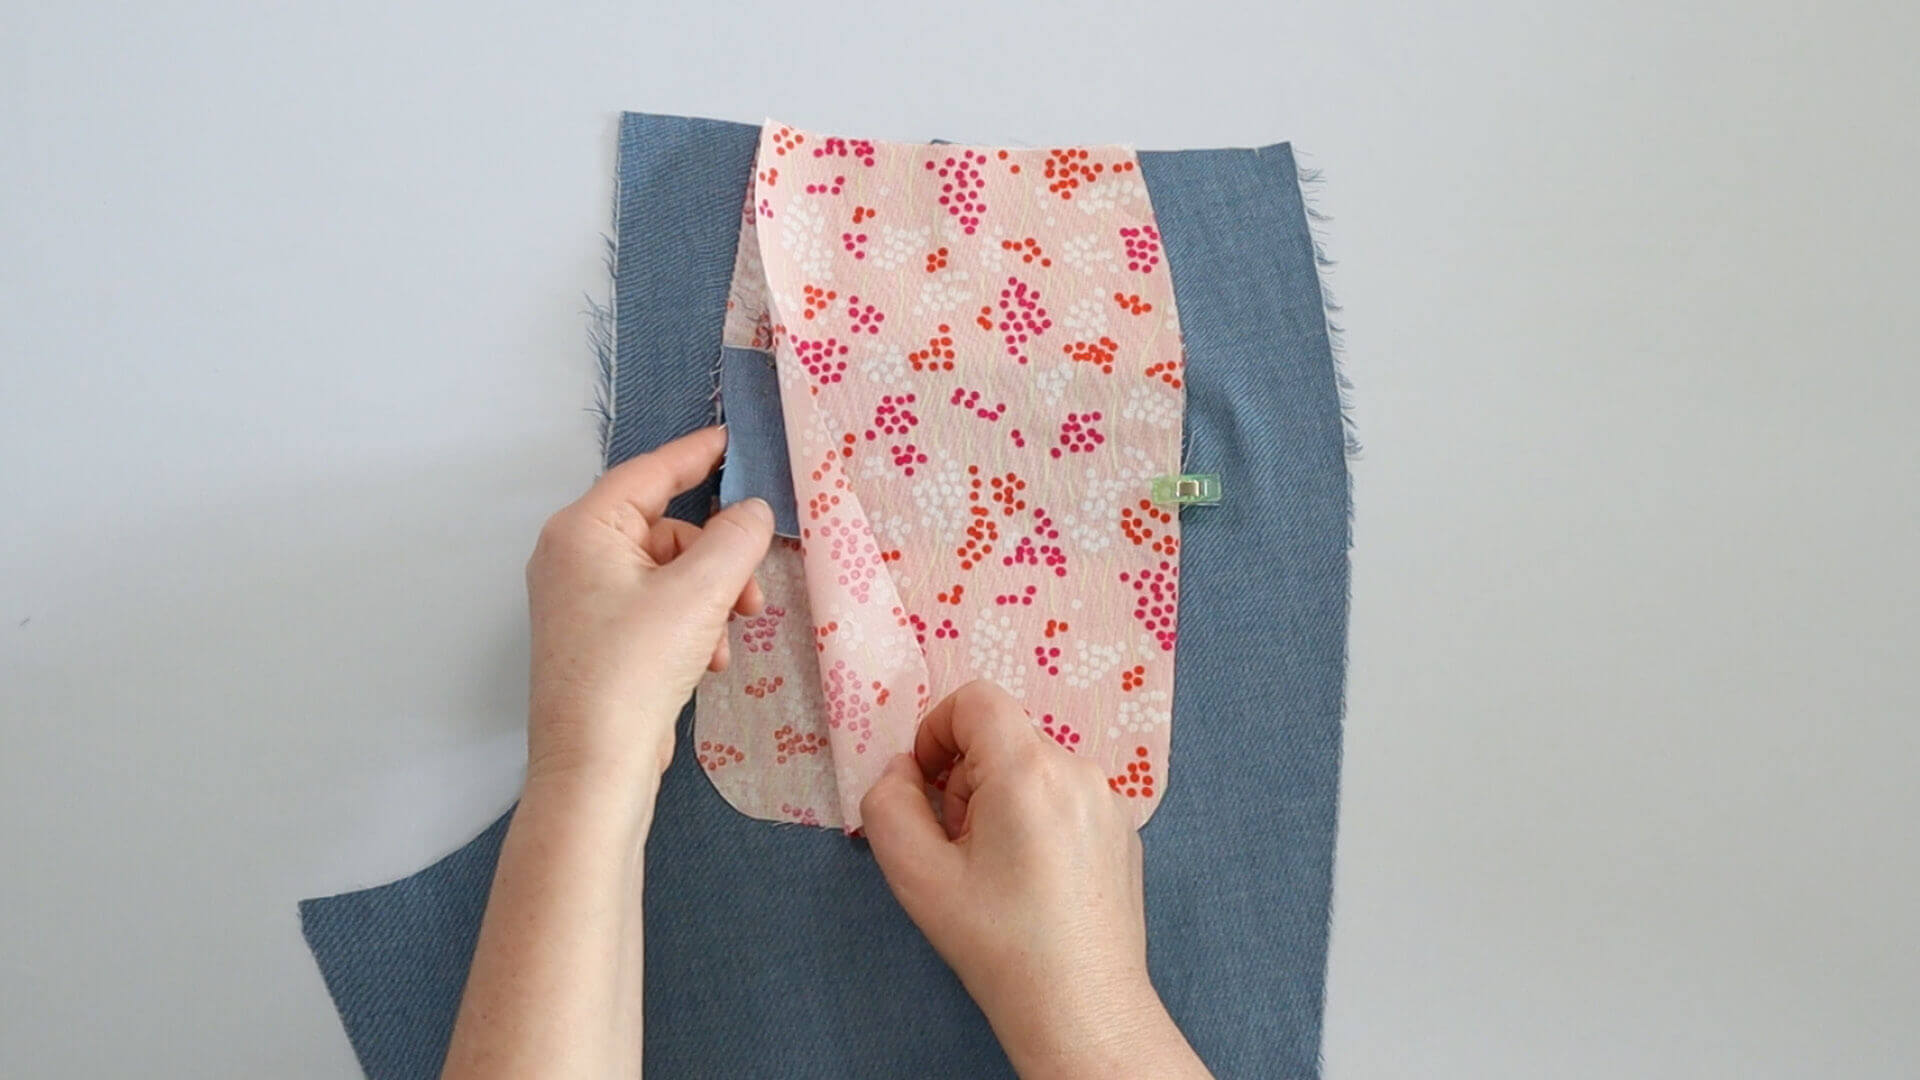
I pin the lower pocket bag to the upper pocket bag, left sides facing. In this position, I pin the pocket bag lining to the side of the lower pocket bag.
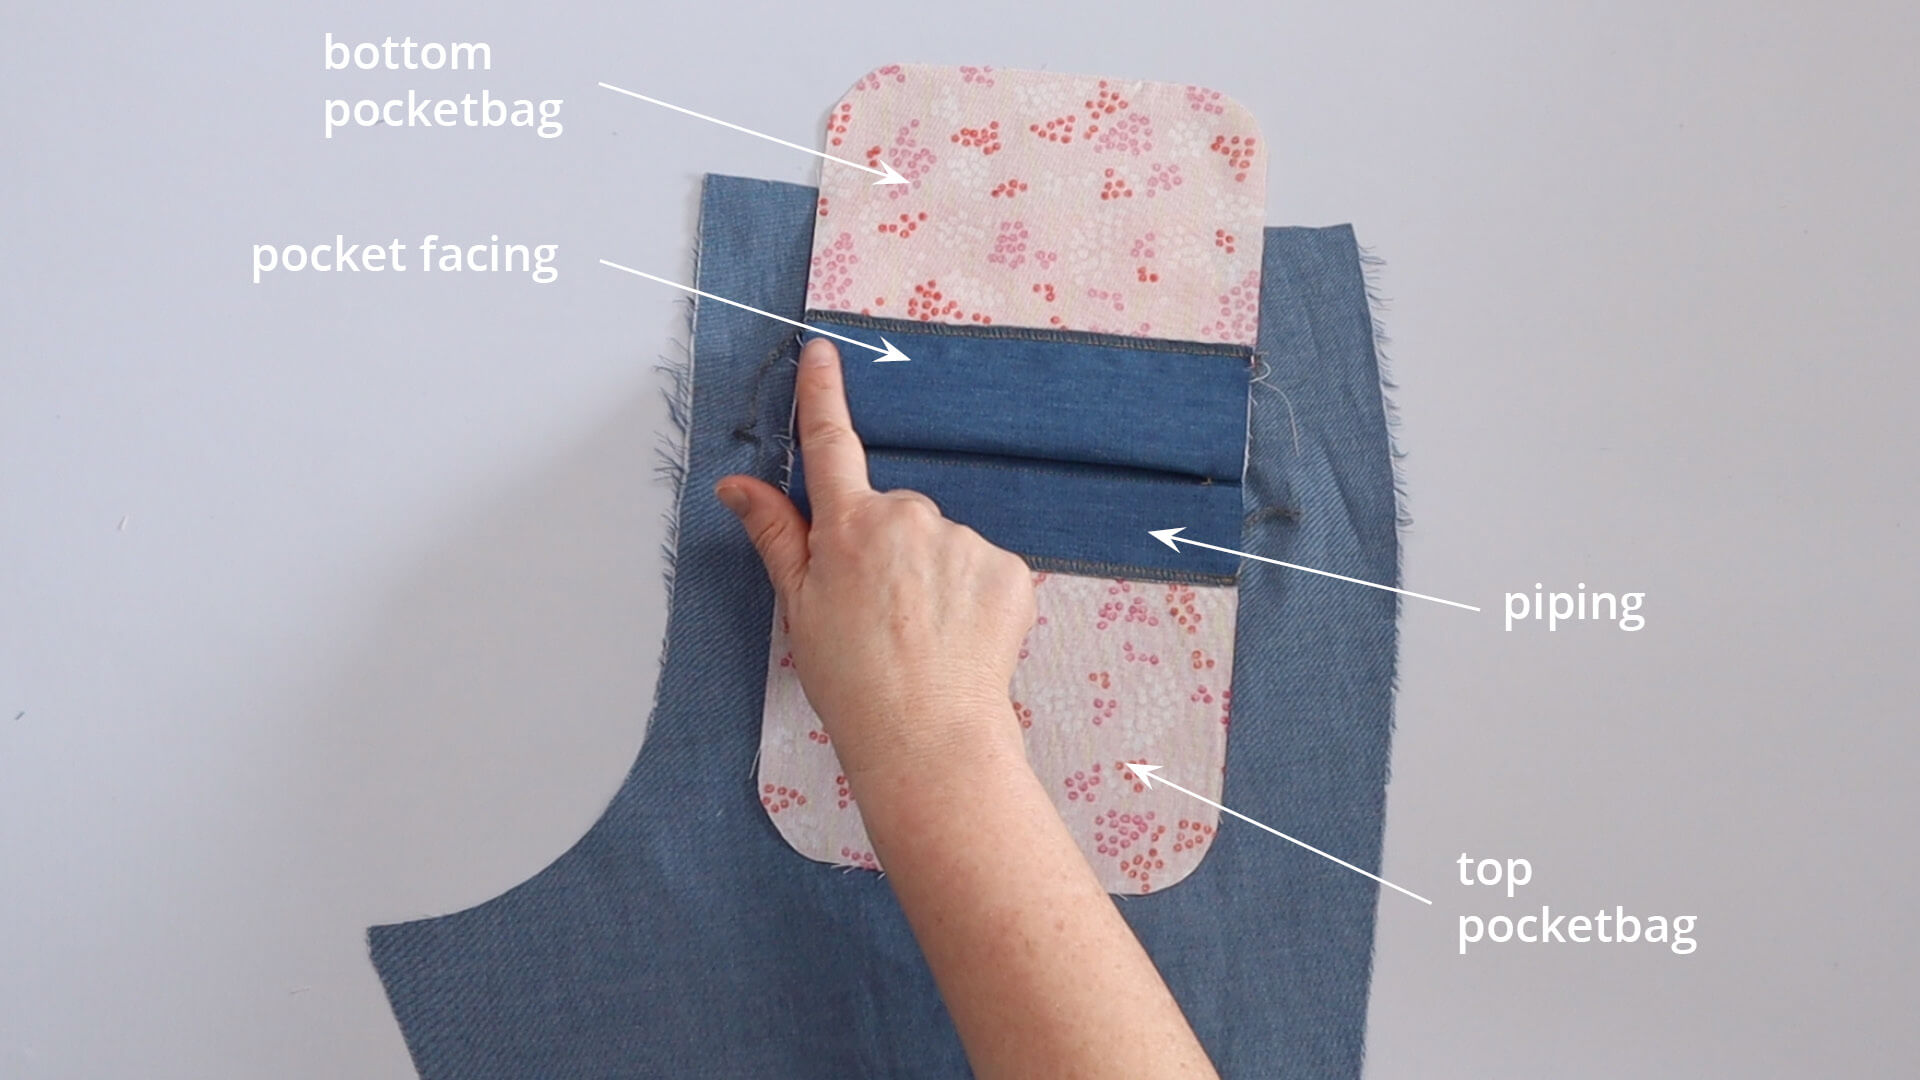
The serged or folded bottom edges of the pocket bag facing and pocket welt are now stitched to the pocket bags.
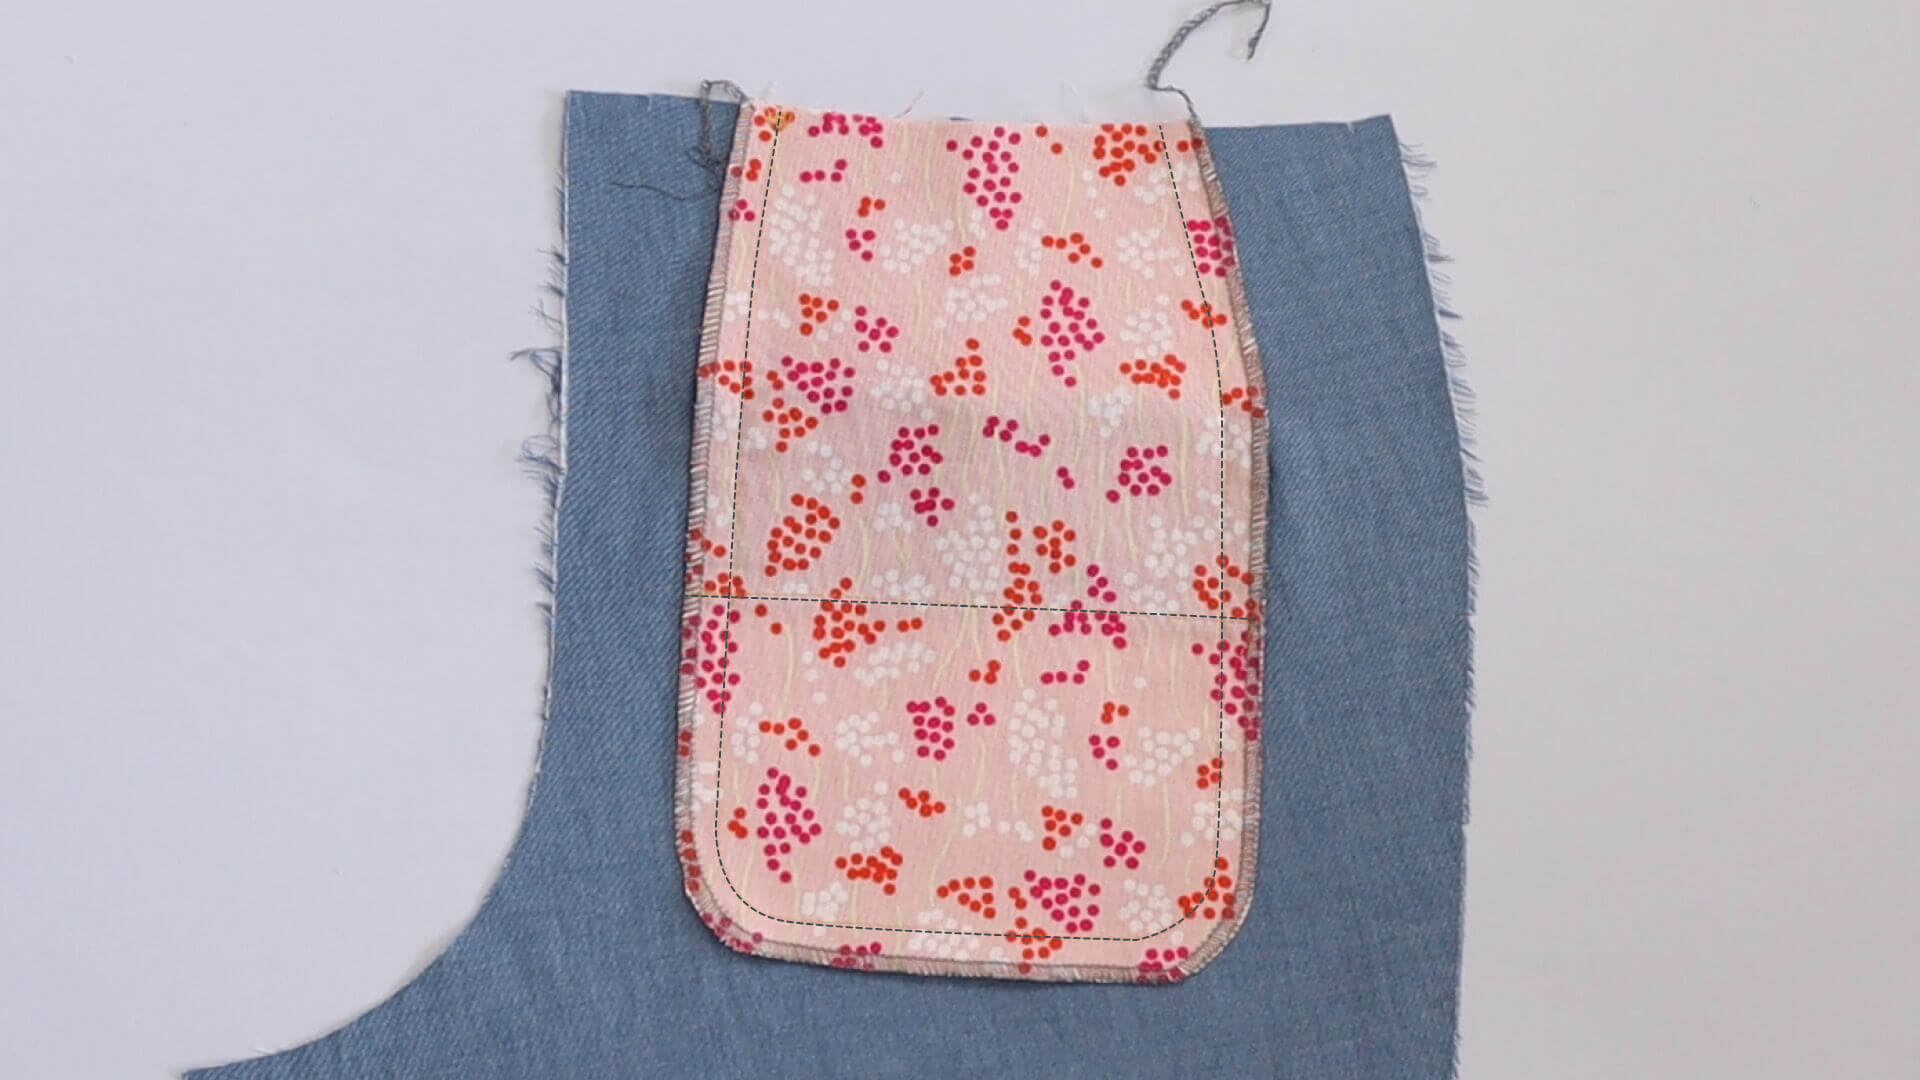
The two pocket bags are joined together at the sides and the bottom edge. I pin them in place and then sew them together using a straight stitch with a 10 mm edge distance and then neaten the edges.
12. Topstitch the top and side edges of the welt pockets
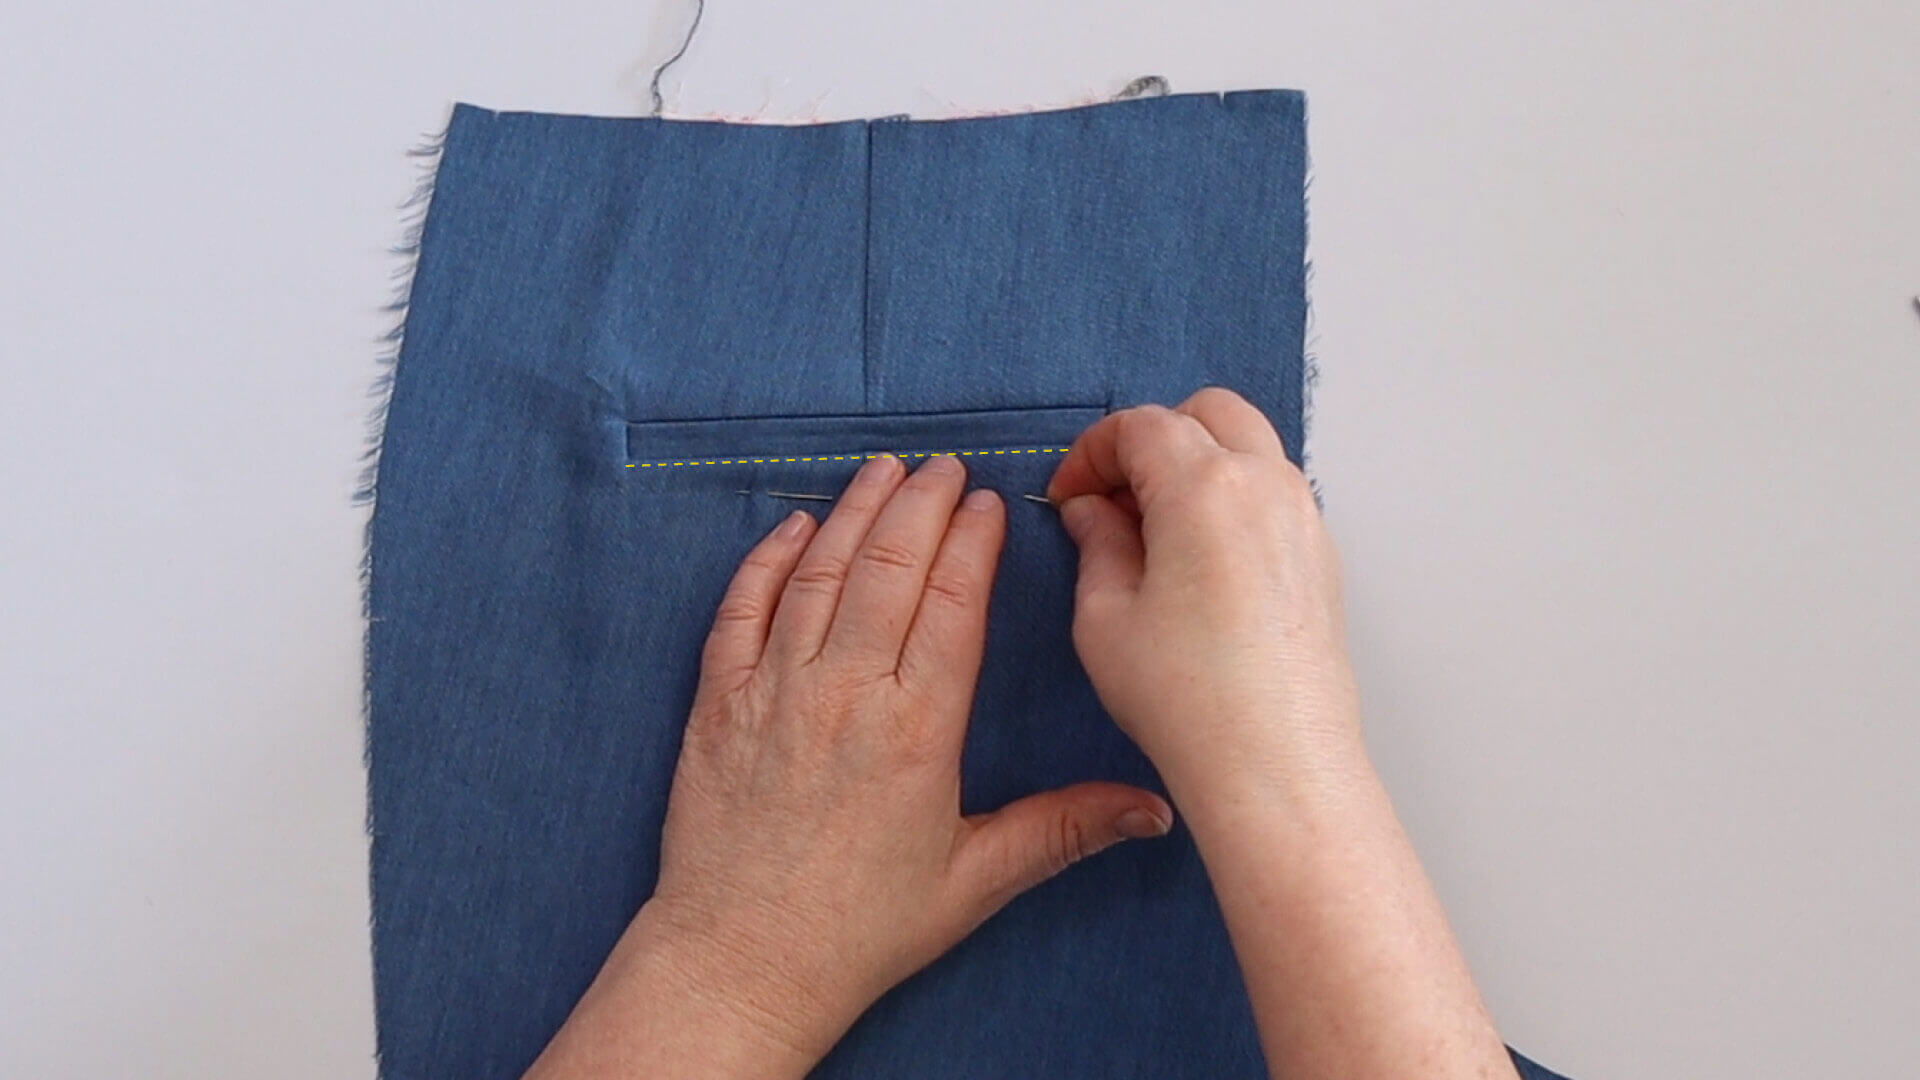
I place the trouser piece in front of me right side facing up. If you have opted for the version with topstitching around the piped pocket, topstitch the sides and top. It is helpful to pin the pocket opening with 1 to 2 pins beforehand.
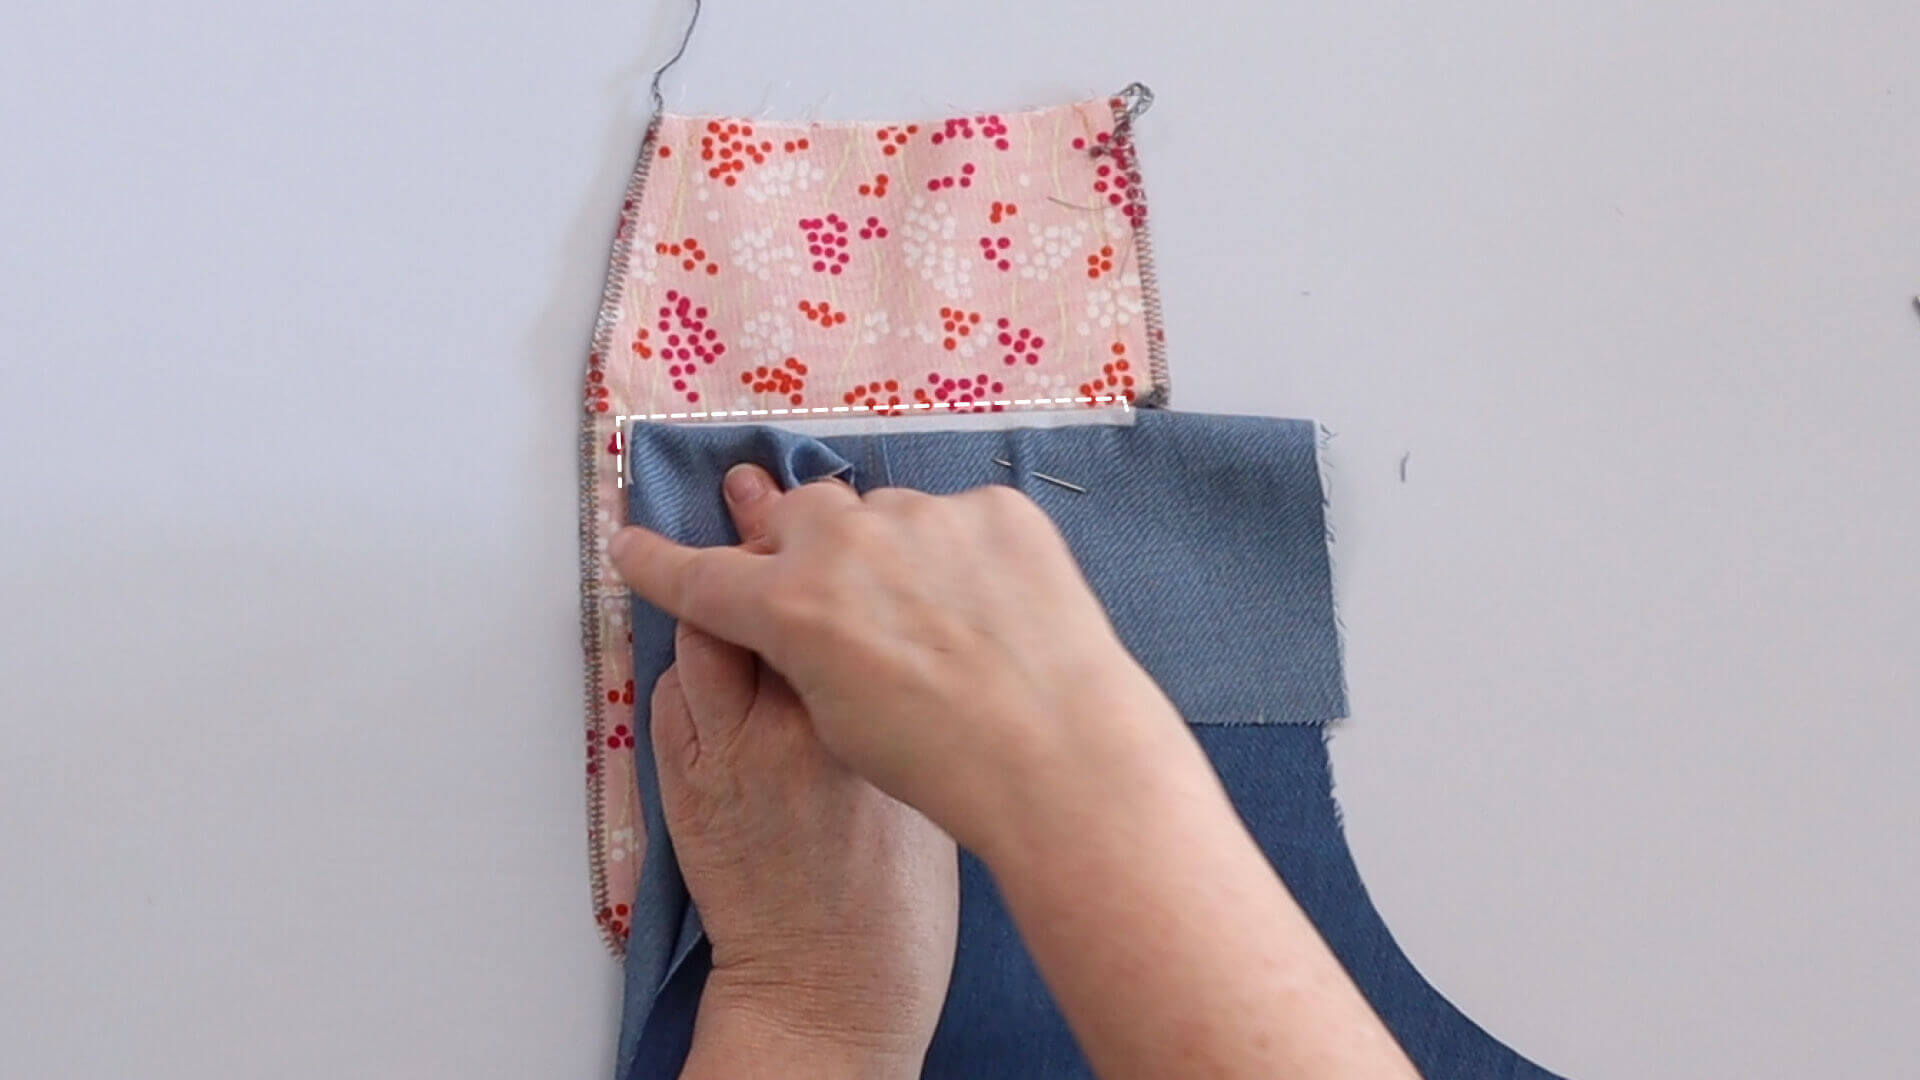
For the version without visible topstitching on the top edge, I fold the fabric down right above the opening and pin it in place. Now topstitch the top pocket bag directly behind the seam at the side and top of the pocket bag so you can only reach down into the pocket.
For the design of the welt pockets with the side bartacks, I recommend trying it out on a piece of fabric first. In this example I use a narrow zigzag stitch with a 2.5 mm width and a 0.5 mm length.
13. Sew welt pockets bag to waistband edge
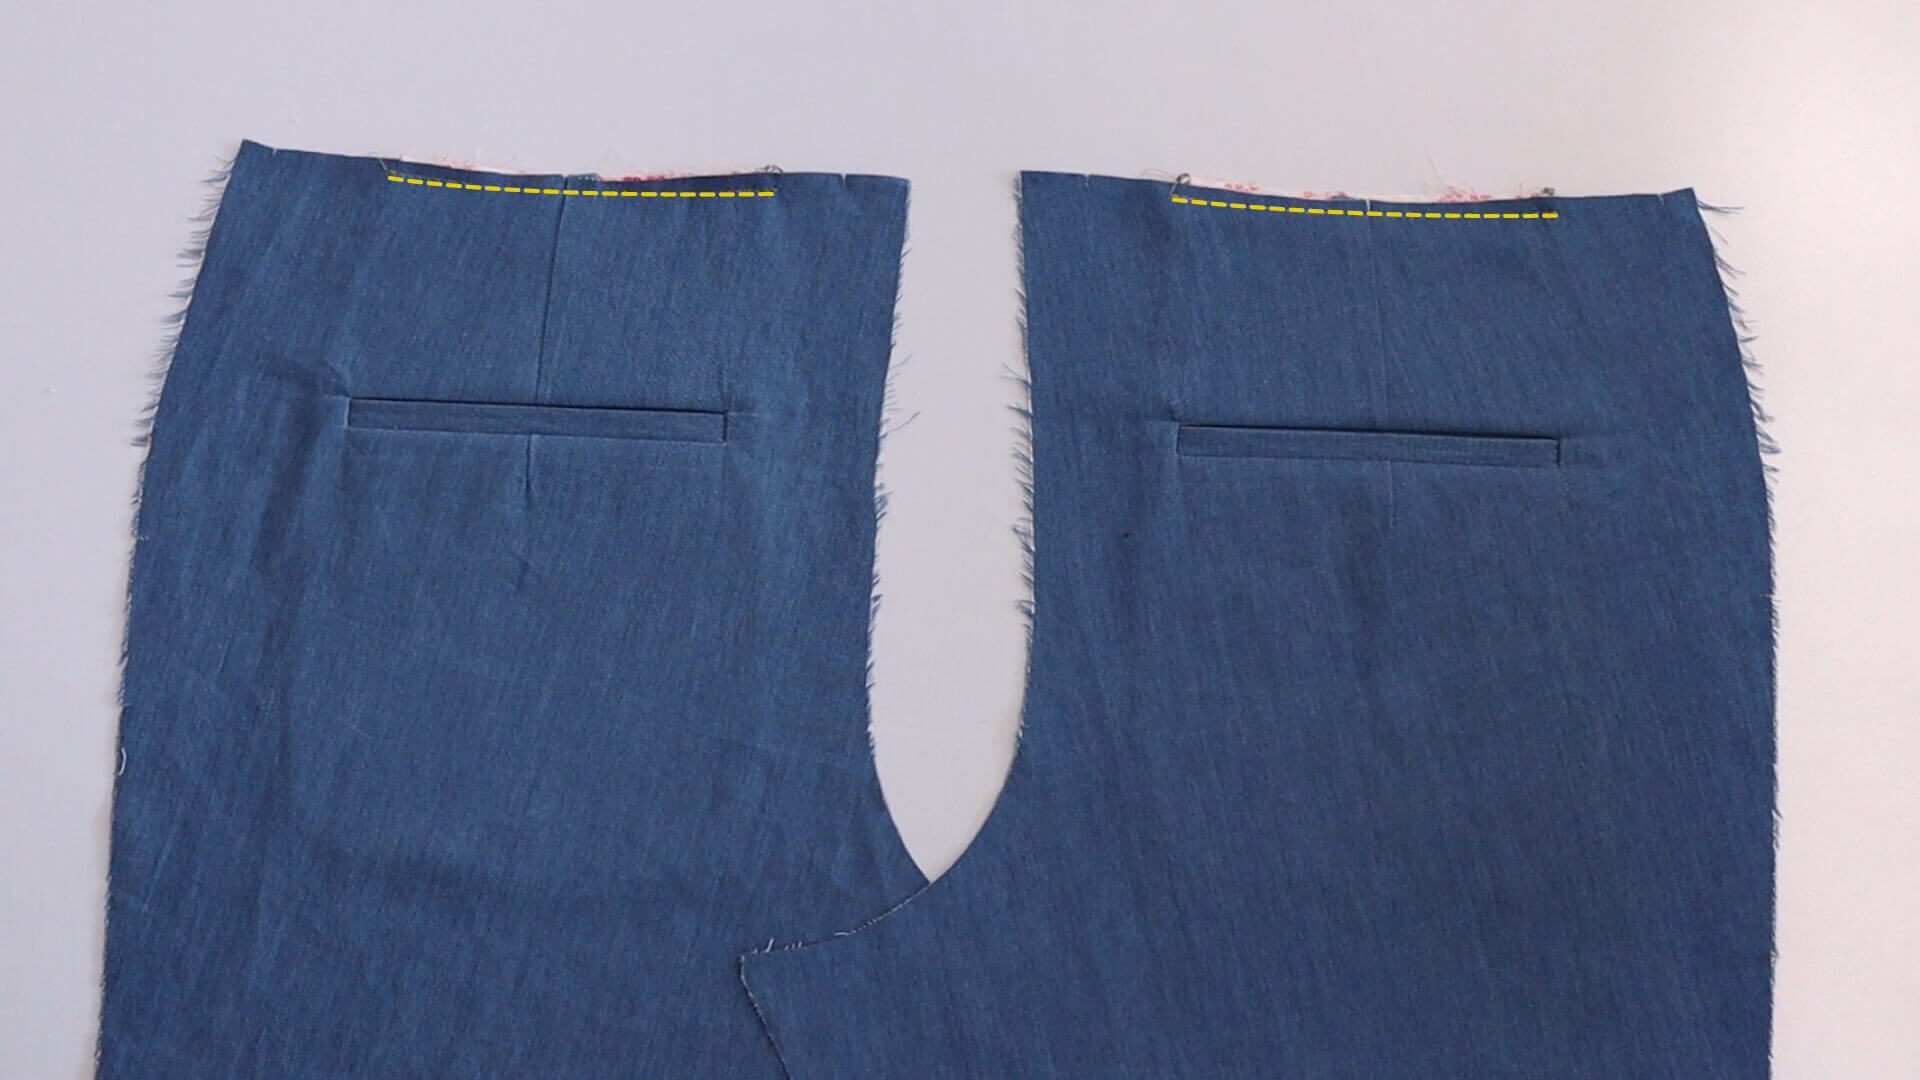
Finally, the pocket bag is sewn to the waistband edge with an auxiliary seam at 5 mm edge distance. Your welt pockets are finished and you can continue with the next step.
Below you will find a selection of links to further steps:
If you are not quite ready yet and perhaps want to start at the beginning, you can find some links here:


