
Loading cart contents...


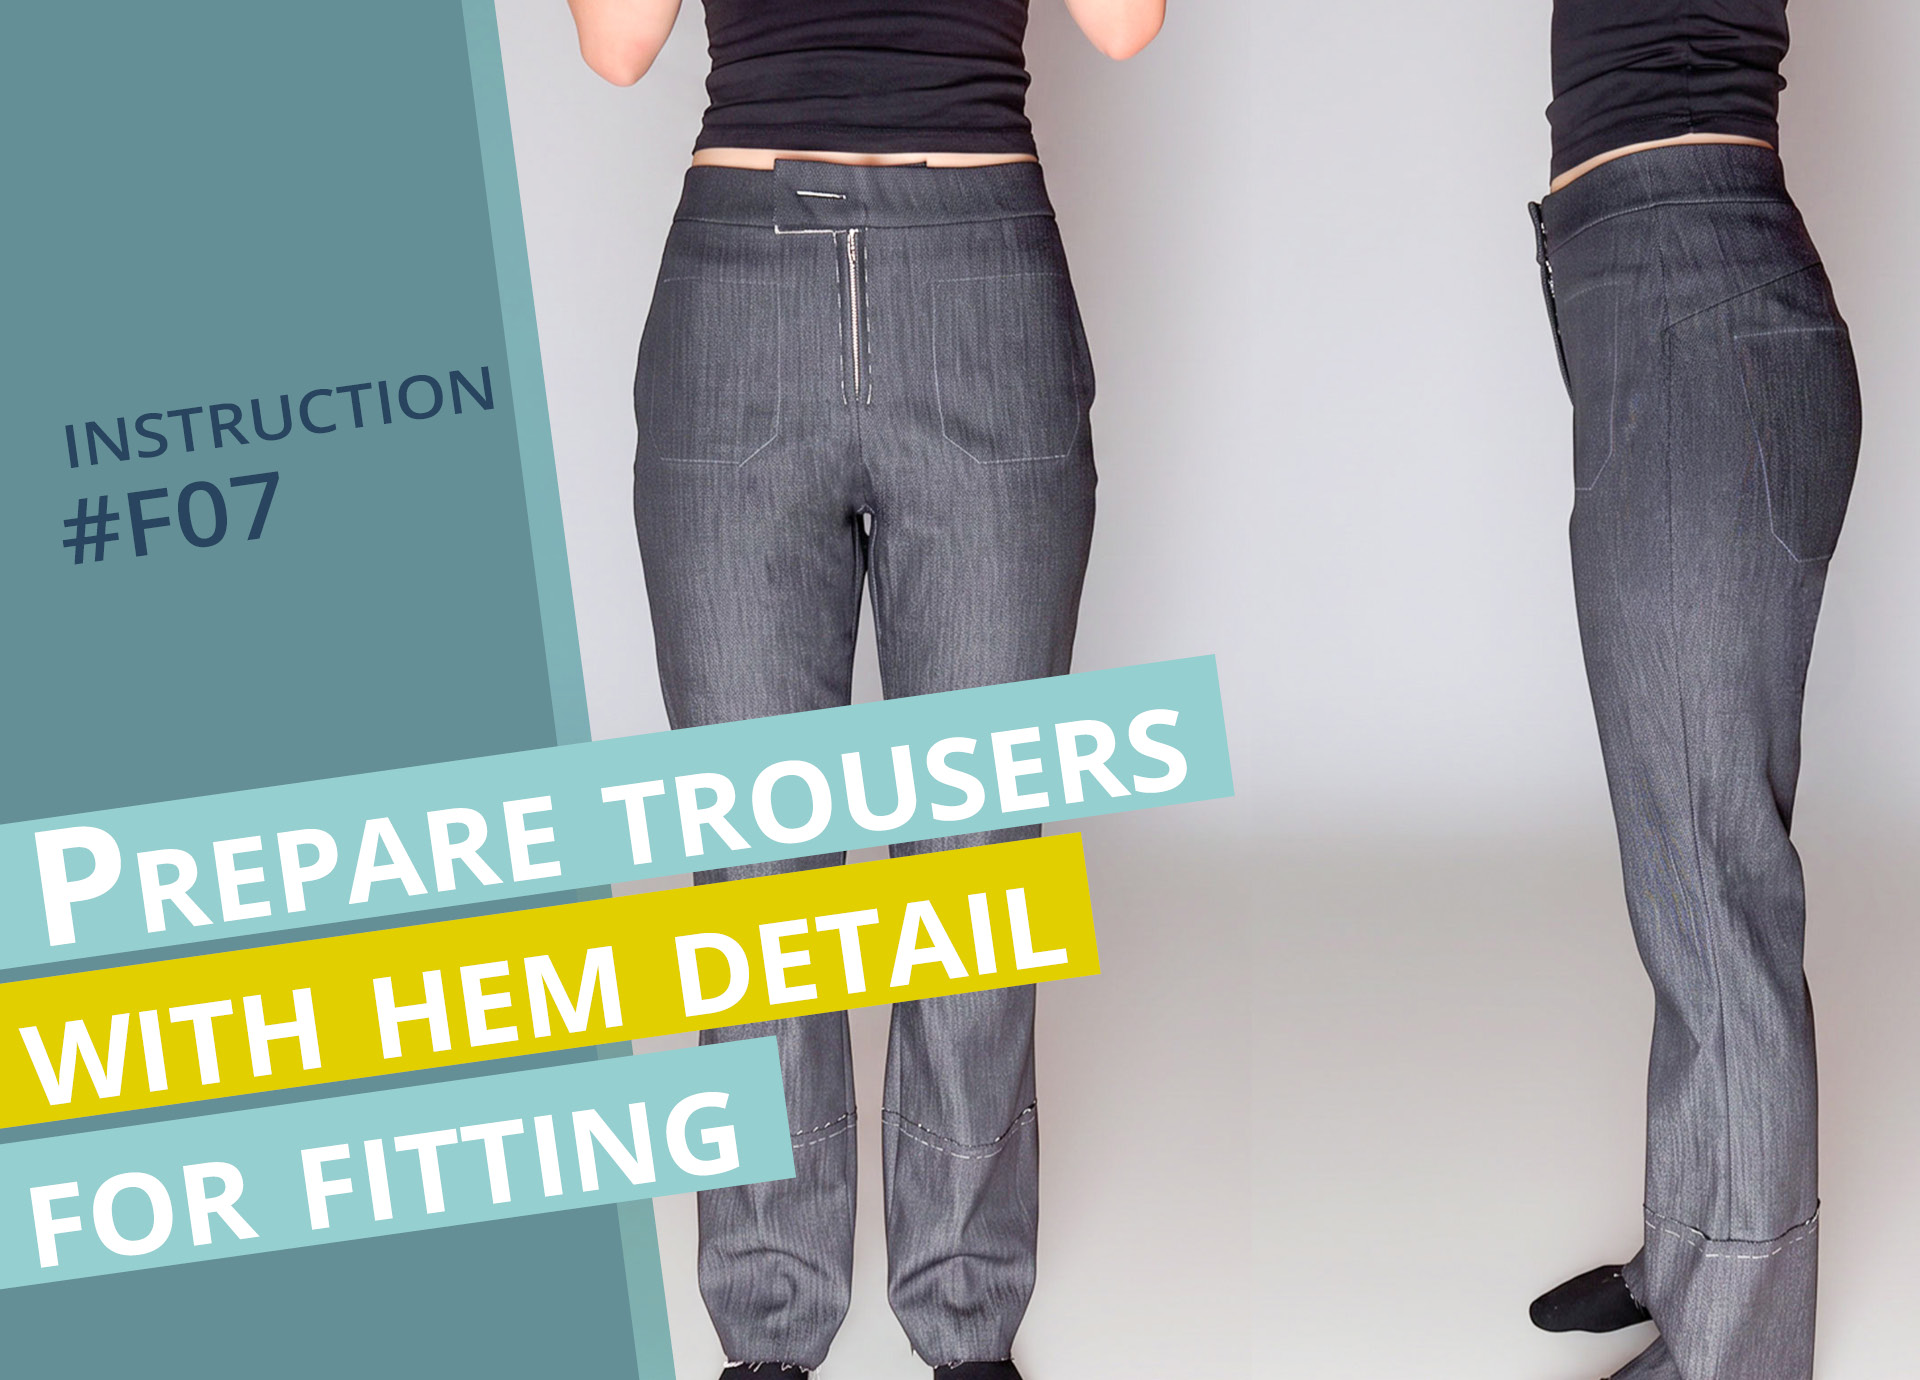
Prepare trousers with front patch pockets and hem detail for fitting #F07
In the following step-by-step guide, I’ll explain how to prepare trousers with front patch pockets and hem detail for fitting.
Even with made-to-measure trousers, I strongly recommend a fitting before completing the garment. After all, even when you have trousers made by a professional tailor, you’ll usually have a fitting before collecting the finished garment.Our patterns intentionally include generous seam allowances, allowing you to make adjustments where needed. It’s important to attach the waistband before trying on your trousers. This provides the necessary stability around the waist and prevents the fabric from stretching out during the fitting. As most of the seams will be unpicked again after the fitting, I sew the pieces together using a long stitch length. Alternatively, you can tack the seams by hand, which is particularly recommended for delicate fabrics.
Have fun, and good luck with your fitting!
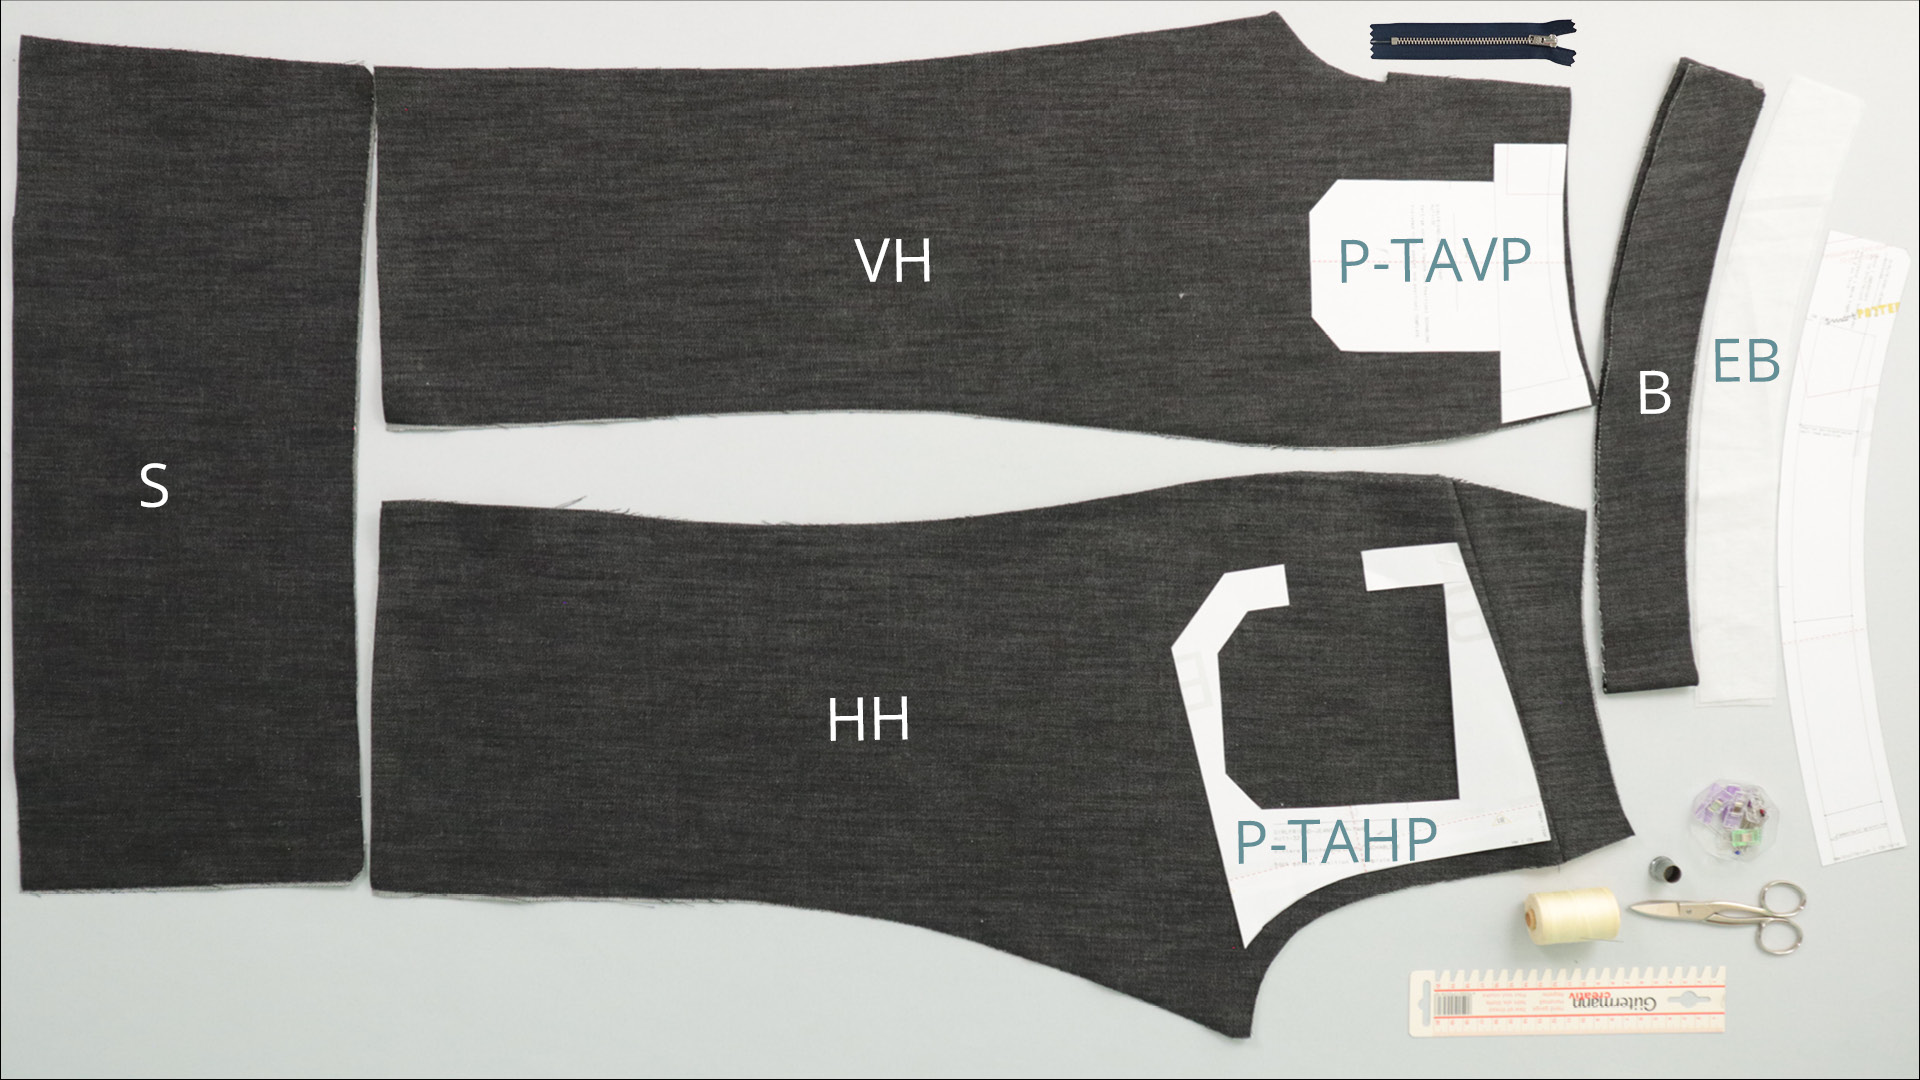
Pattern pieces made from main fabric:
- Back pieces (HH) – 1 pair
- Front pieces (VH)- 1 pair
- Waistband(B) – 1 pair
- Hem (S) – 1 pair
Pattern pieces from interlining:
- Waistband (EB) – 1 pair
Paper pattern pieces:
- Waistband (B)
- Template for the front pocket position (P-TAVP)
- Template for the back pocket position (P-TAHP)
Tools and aids:
- Zipper
- Pins or clips
- Scissors
- Chalk or marker pen
- Ruler
- Basting thread and sewing needle if necessary
- safety pin
2. Press the yoke seam and sew the centre back seam
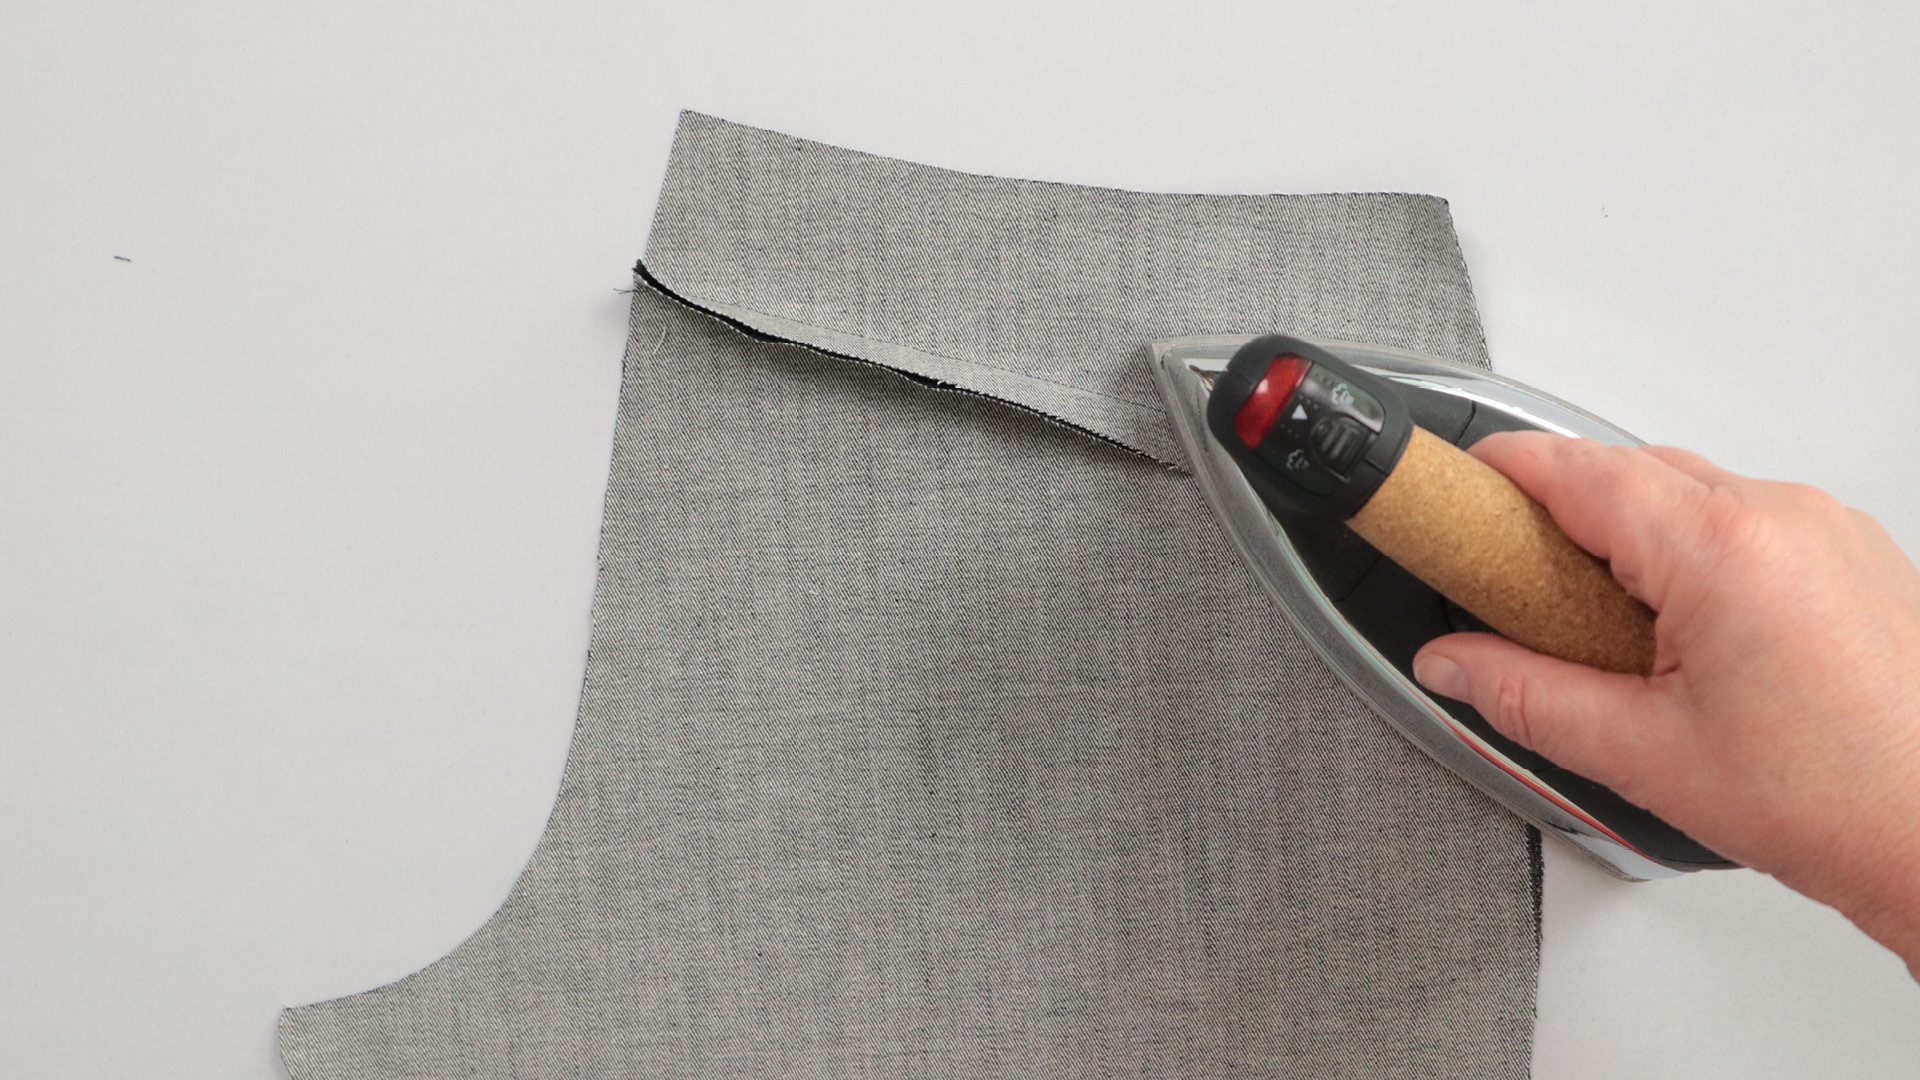
The direction in which you press the seam allowances determines where the topstitching will be positioned later.
I press the seam allowances downwards so that the topstitching will be on the back trouser piece, just below the yoke seam. If you prefer the topstitching on the yoke itself, press the seam allowances upwards instead.
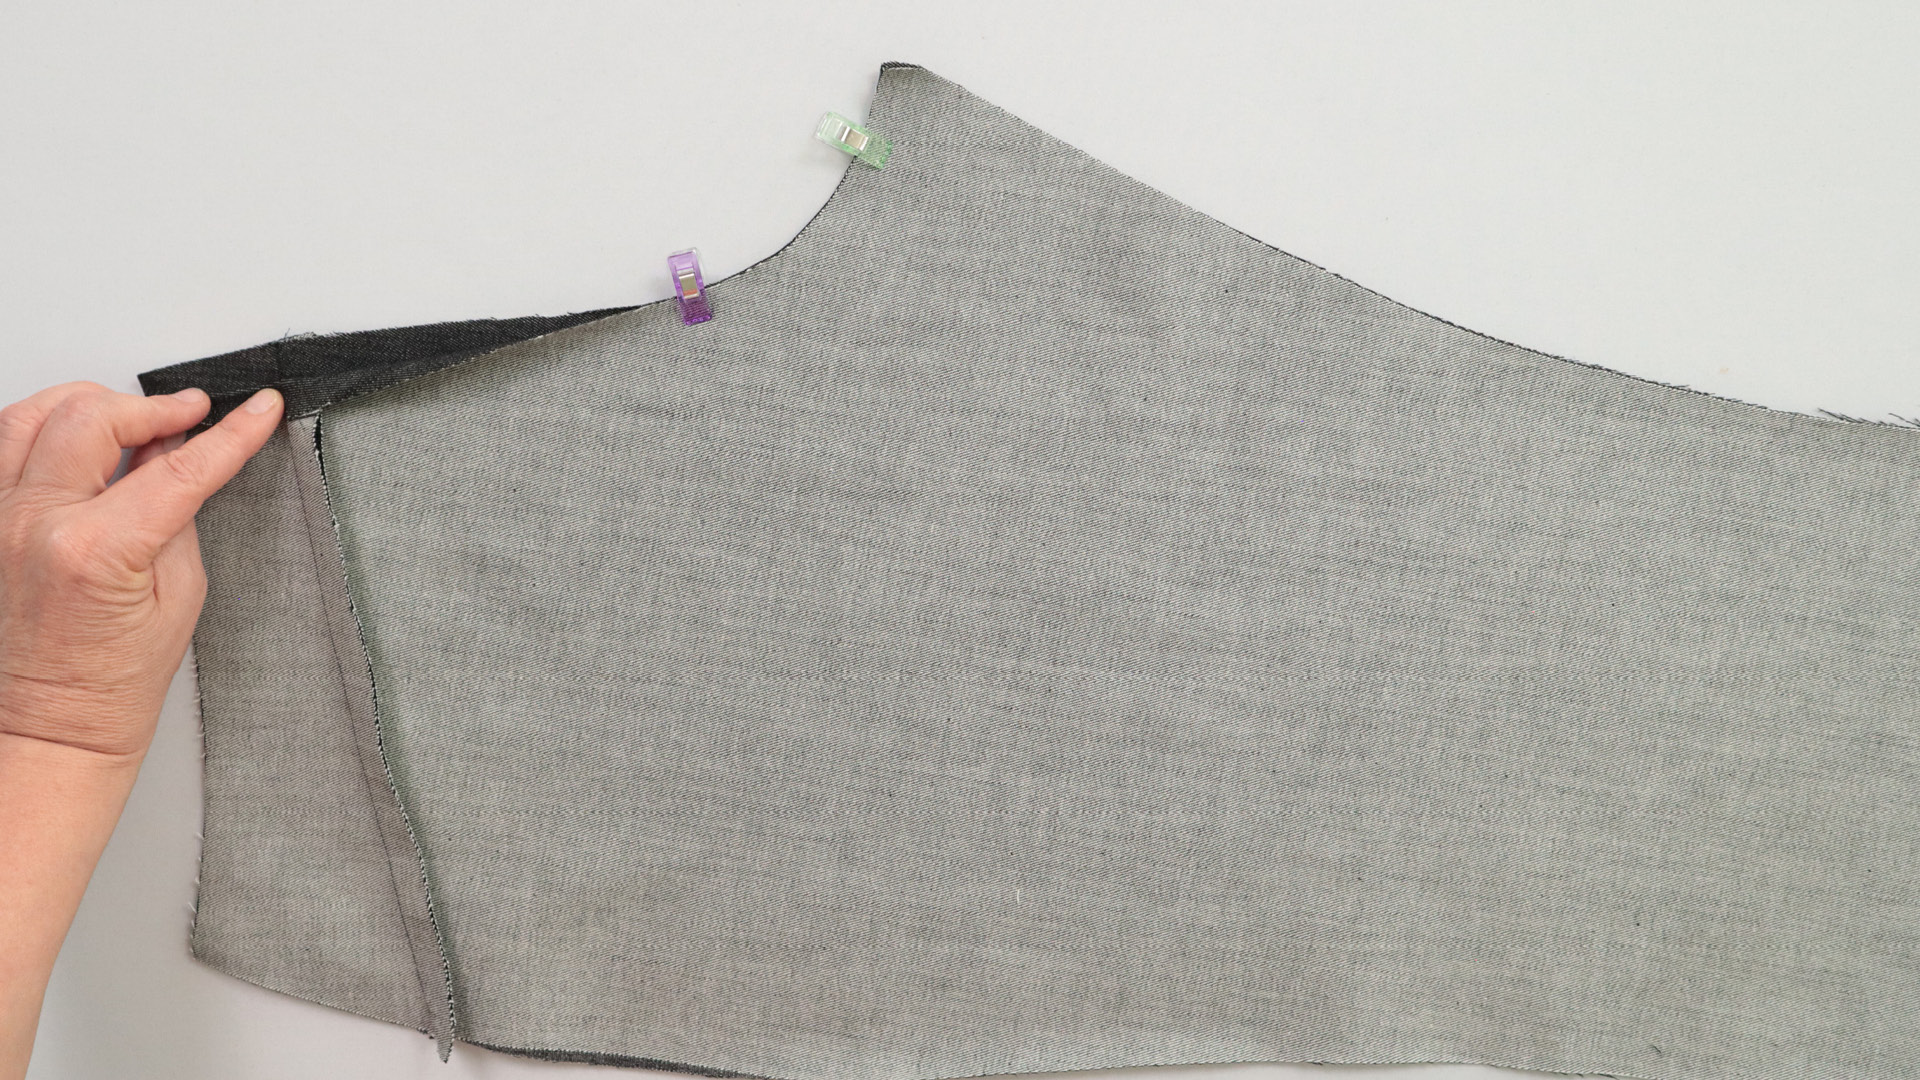
Now I can sew the centre back seam. To do this, I place the two back pieces right sides together and pin them in place. I make sure that the yoke seams line up exactly.
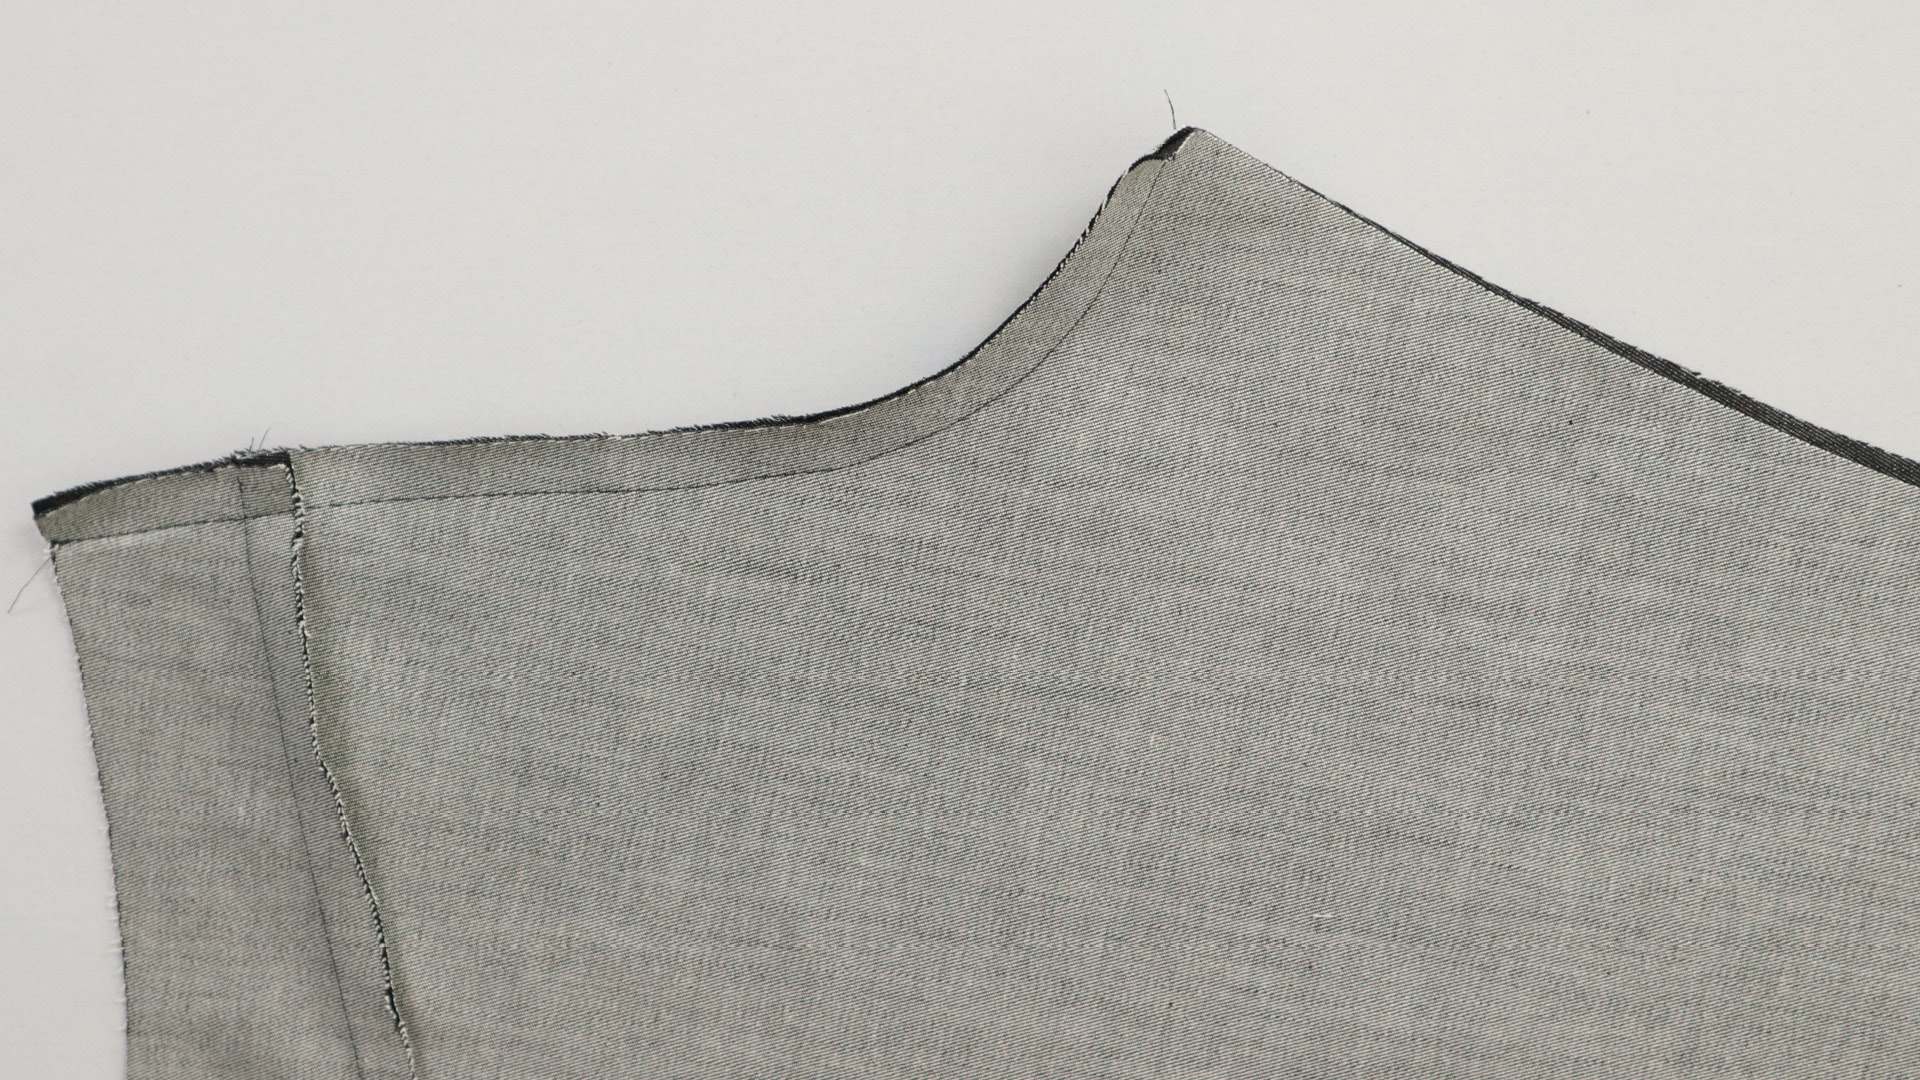
Next, tack the centre back seam, either by hand or using a long stitch length on your sewing machine. The notches indicate the seam allowance width, but you can also check it on the pattern.
The advantage of tacking by hand is that the stitches are quicker to remove and usually leave no visible needle marks in the fabric. However, keeping the stitching line straight takes a little practice.
Machine tacking provides a more secure seam and is therefore particularly recommended for close-fitting trousers.
.
3. Mark the back pocket position for the fitting
When trying on the pants, it’s a good idea to check the position of the pockets as well, since they naturally affect the look of the trousers. If you don’t like the position when you try them on, you can adjust them to your preferences.
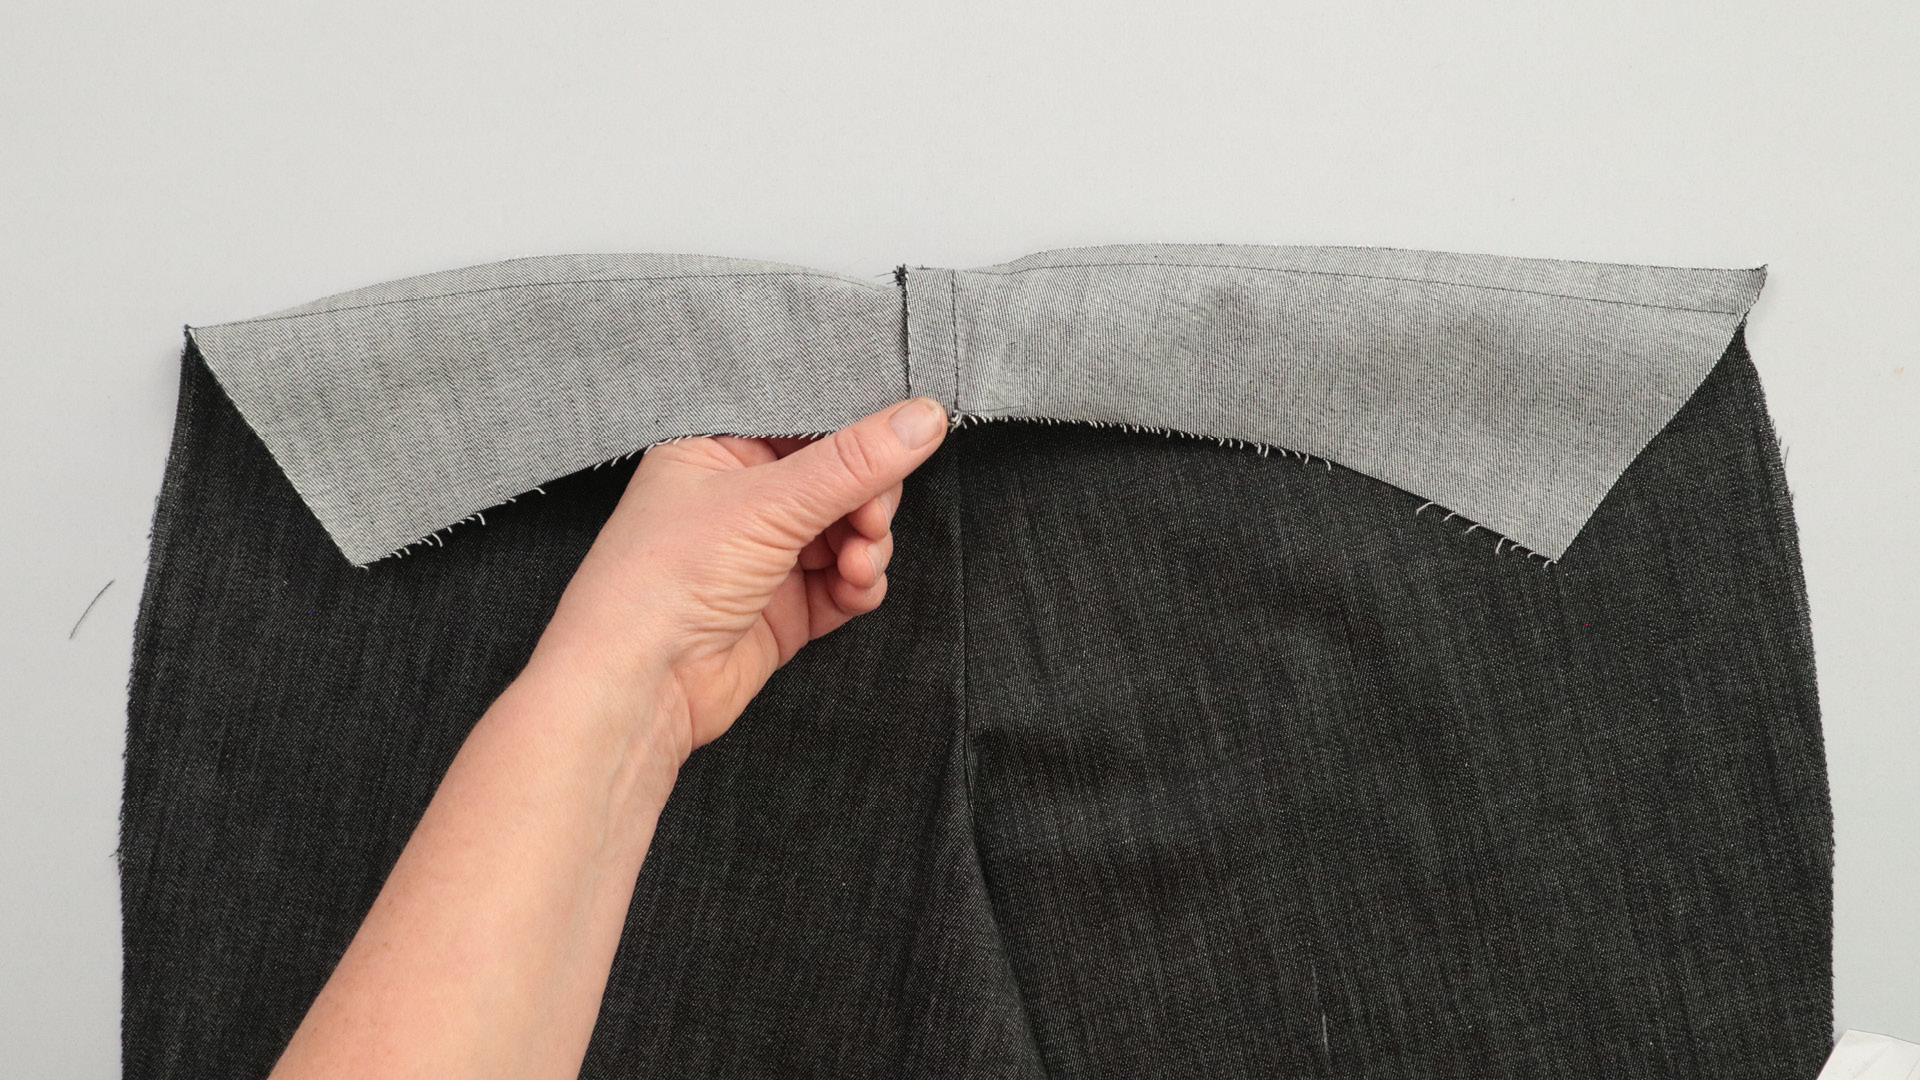
I press the seam allowances of the centre back seam towards the side where I want to add the topstitching later – in my example, towards the left back trouser piece.
Then I lay the trousers out in front of me, right side up.
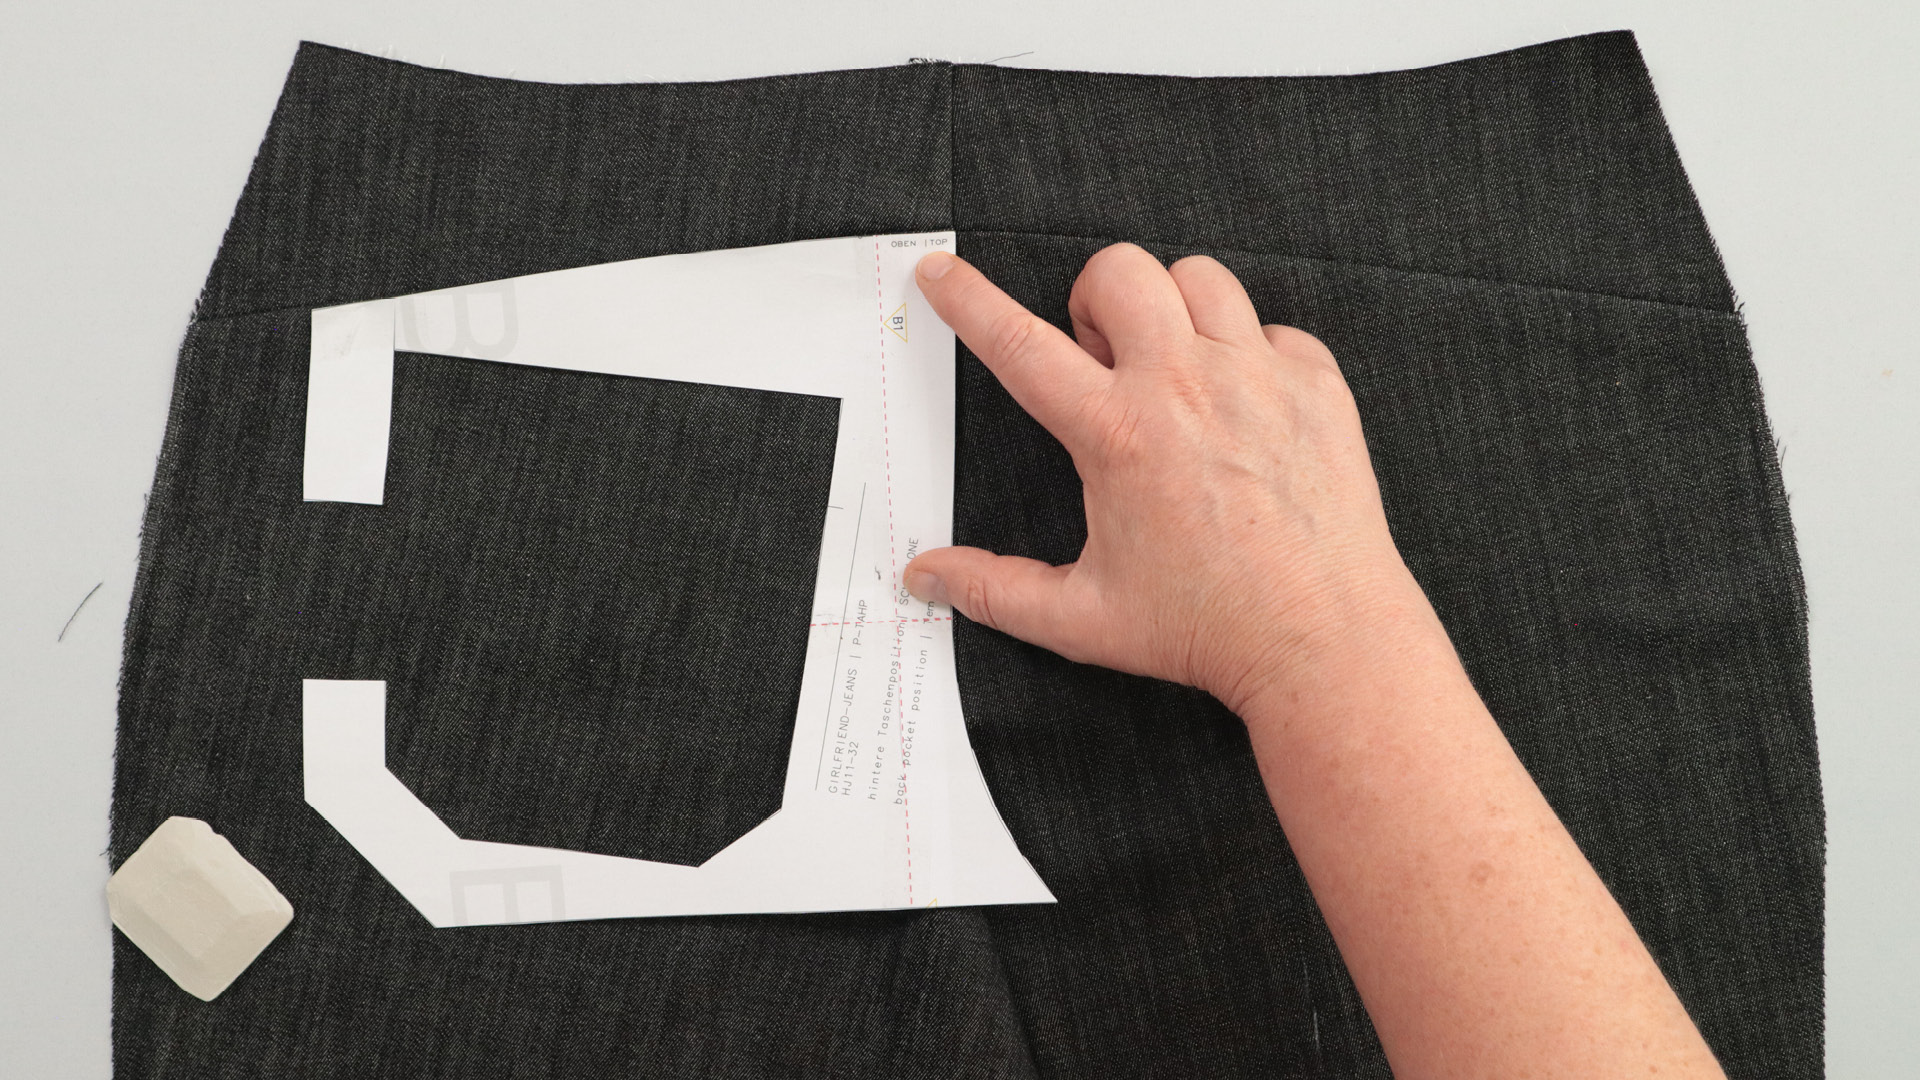
I position the back pocket template on the left back trouser piece, aligning it with the yoke seam and the centre back seam. Then I mark the pocket outline with tailor’s chalk.
Alternatively, you can mark the outline with tacking stitches.
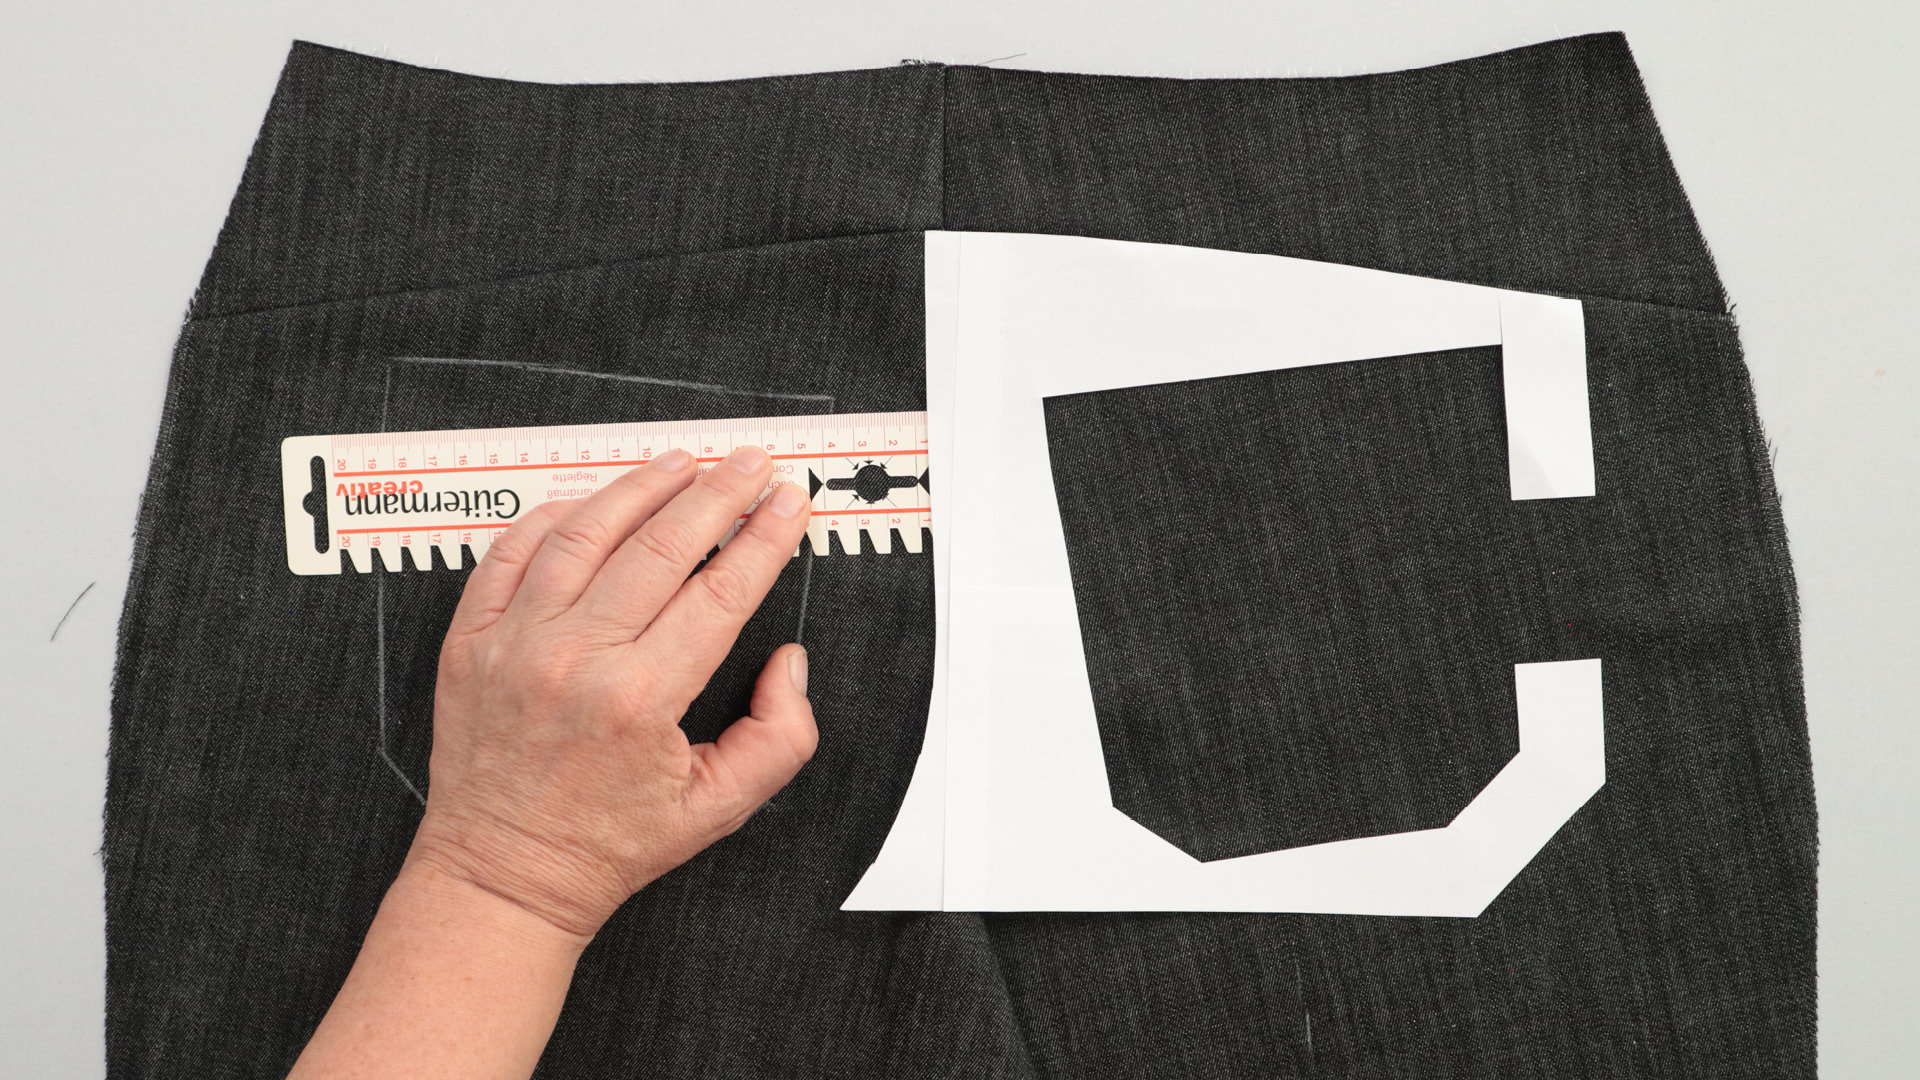
I do the same on the right trouser piece, but place the template in a mirrored position and 8 mm away from the centre back seam. Since I’ll be doing the double-stitching on the left back trouser piece later with a seam allowance of 2+6 mm, the pockets will then appear to be the same distance from the stitching lines.
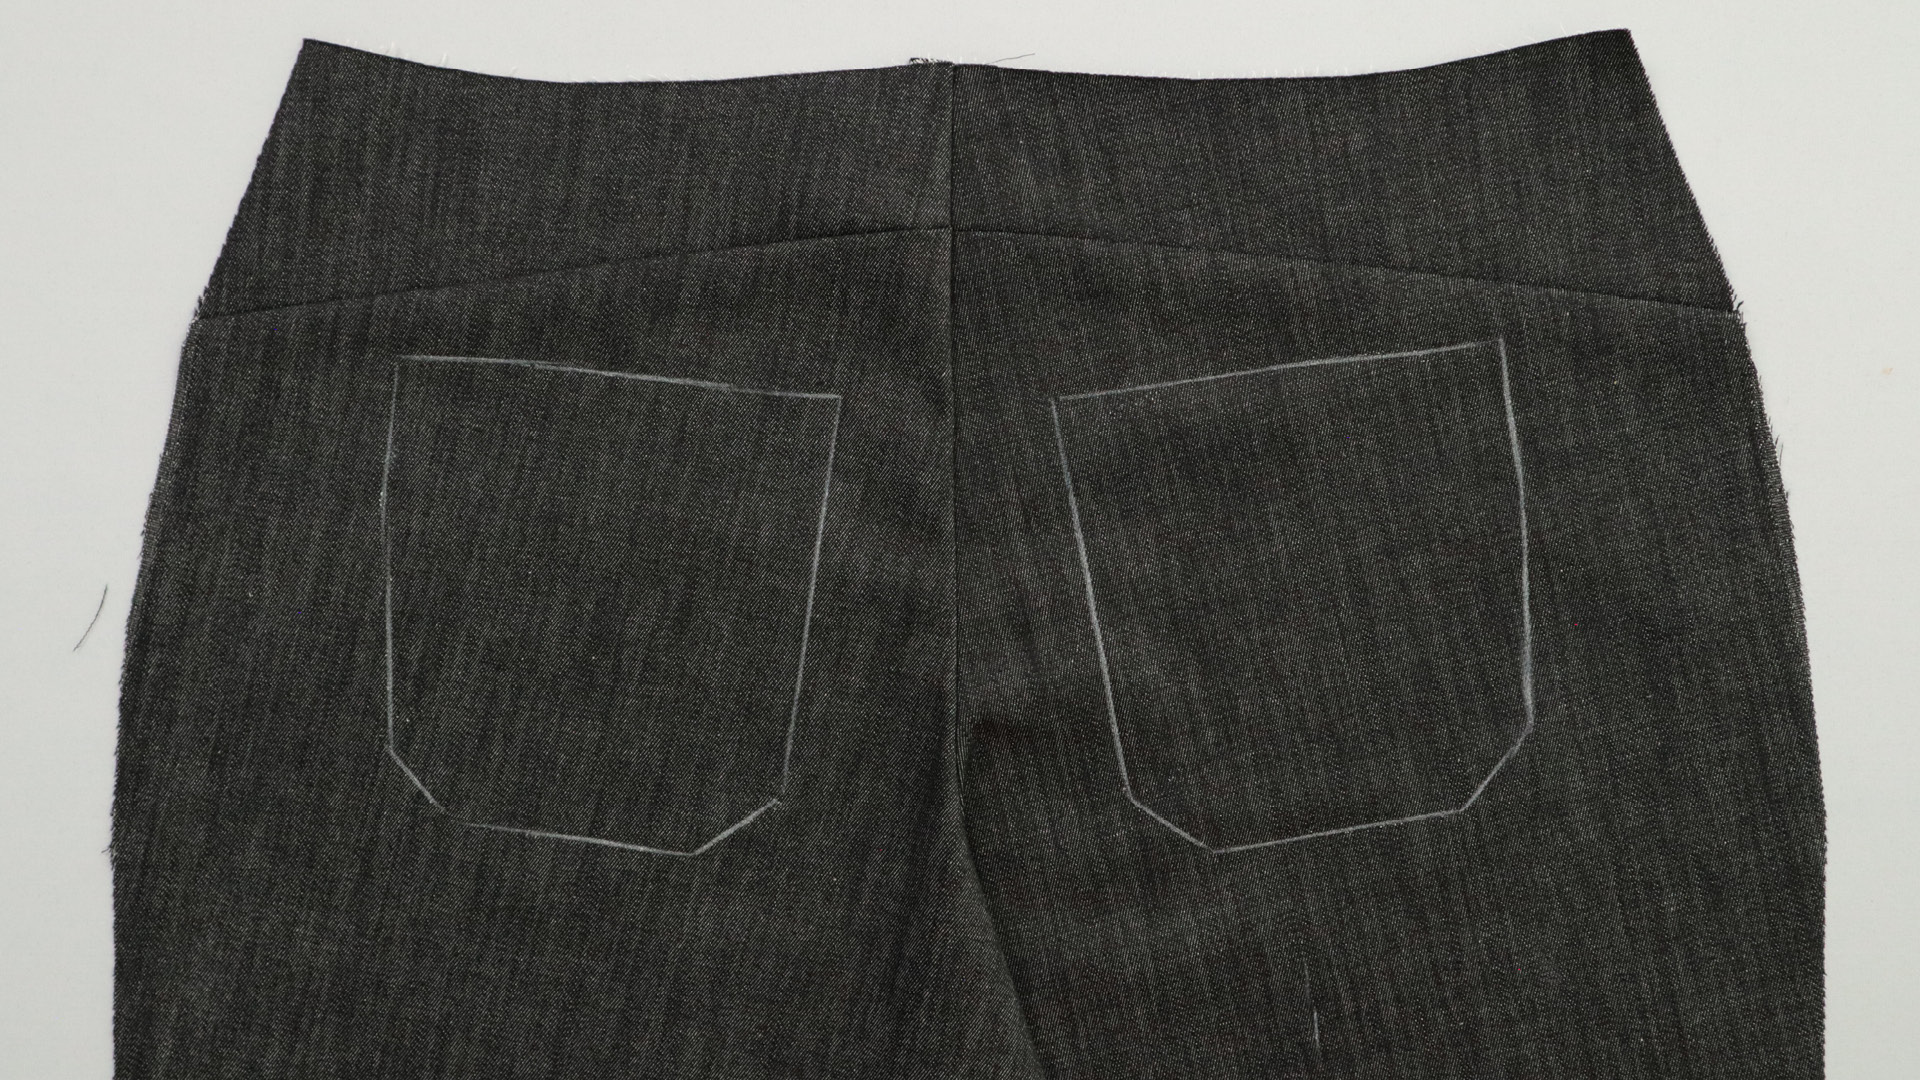
Here’s another look at the back of the trousers with the marked pockets. Right now, it looks a little asymmetrical because the back seam hasn’t been stitched yet. Don’t let that throw you off.
4. Mark the front pocket position for the fitting
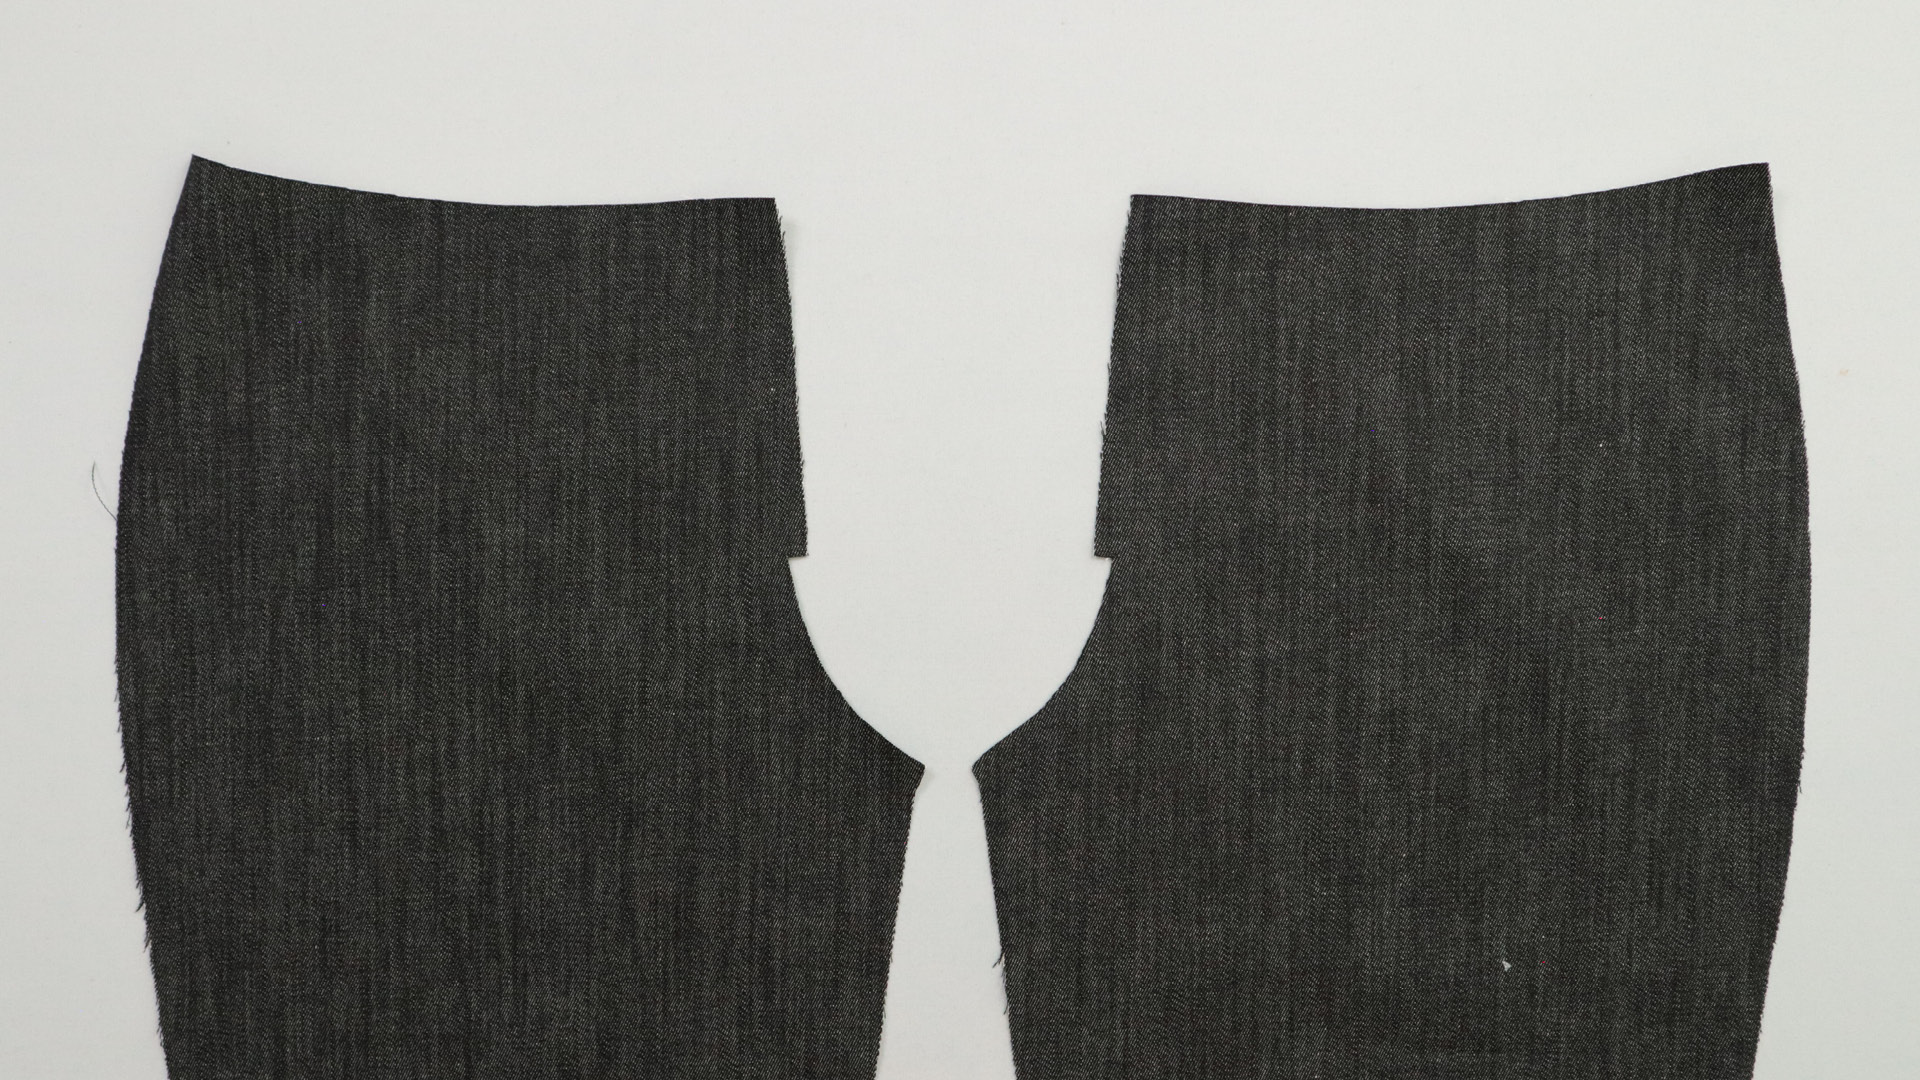
I lay the two front pant pieces in front of me with the right side facing up so I can mark the pocket positions on them as well.
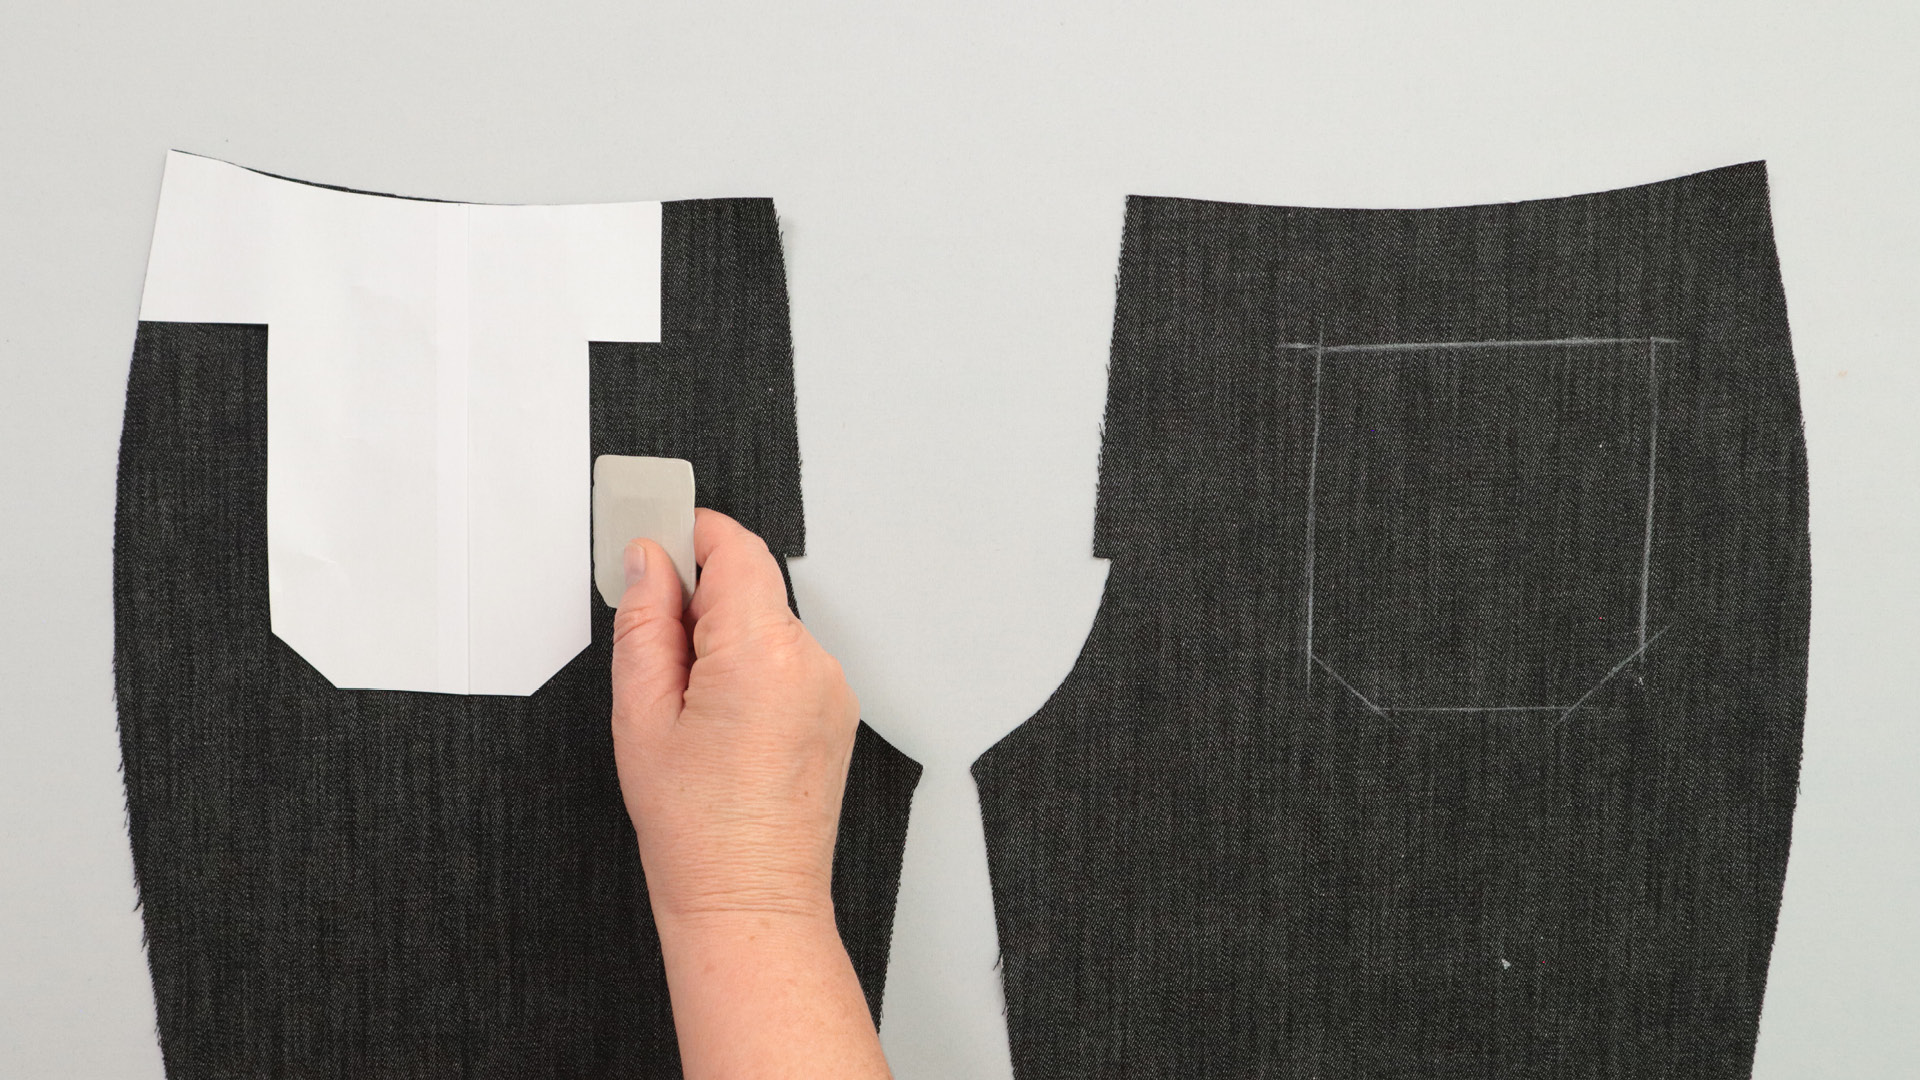
I place the pattern piece along the side and top cutting edges of the pants and mark the pocket position on both pieces.
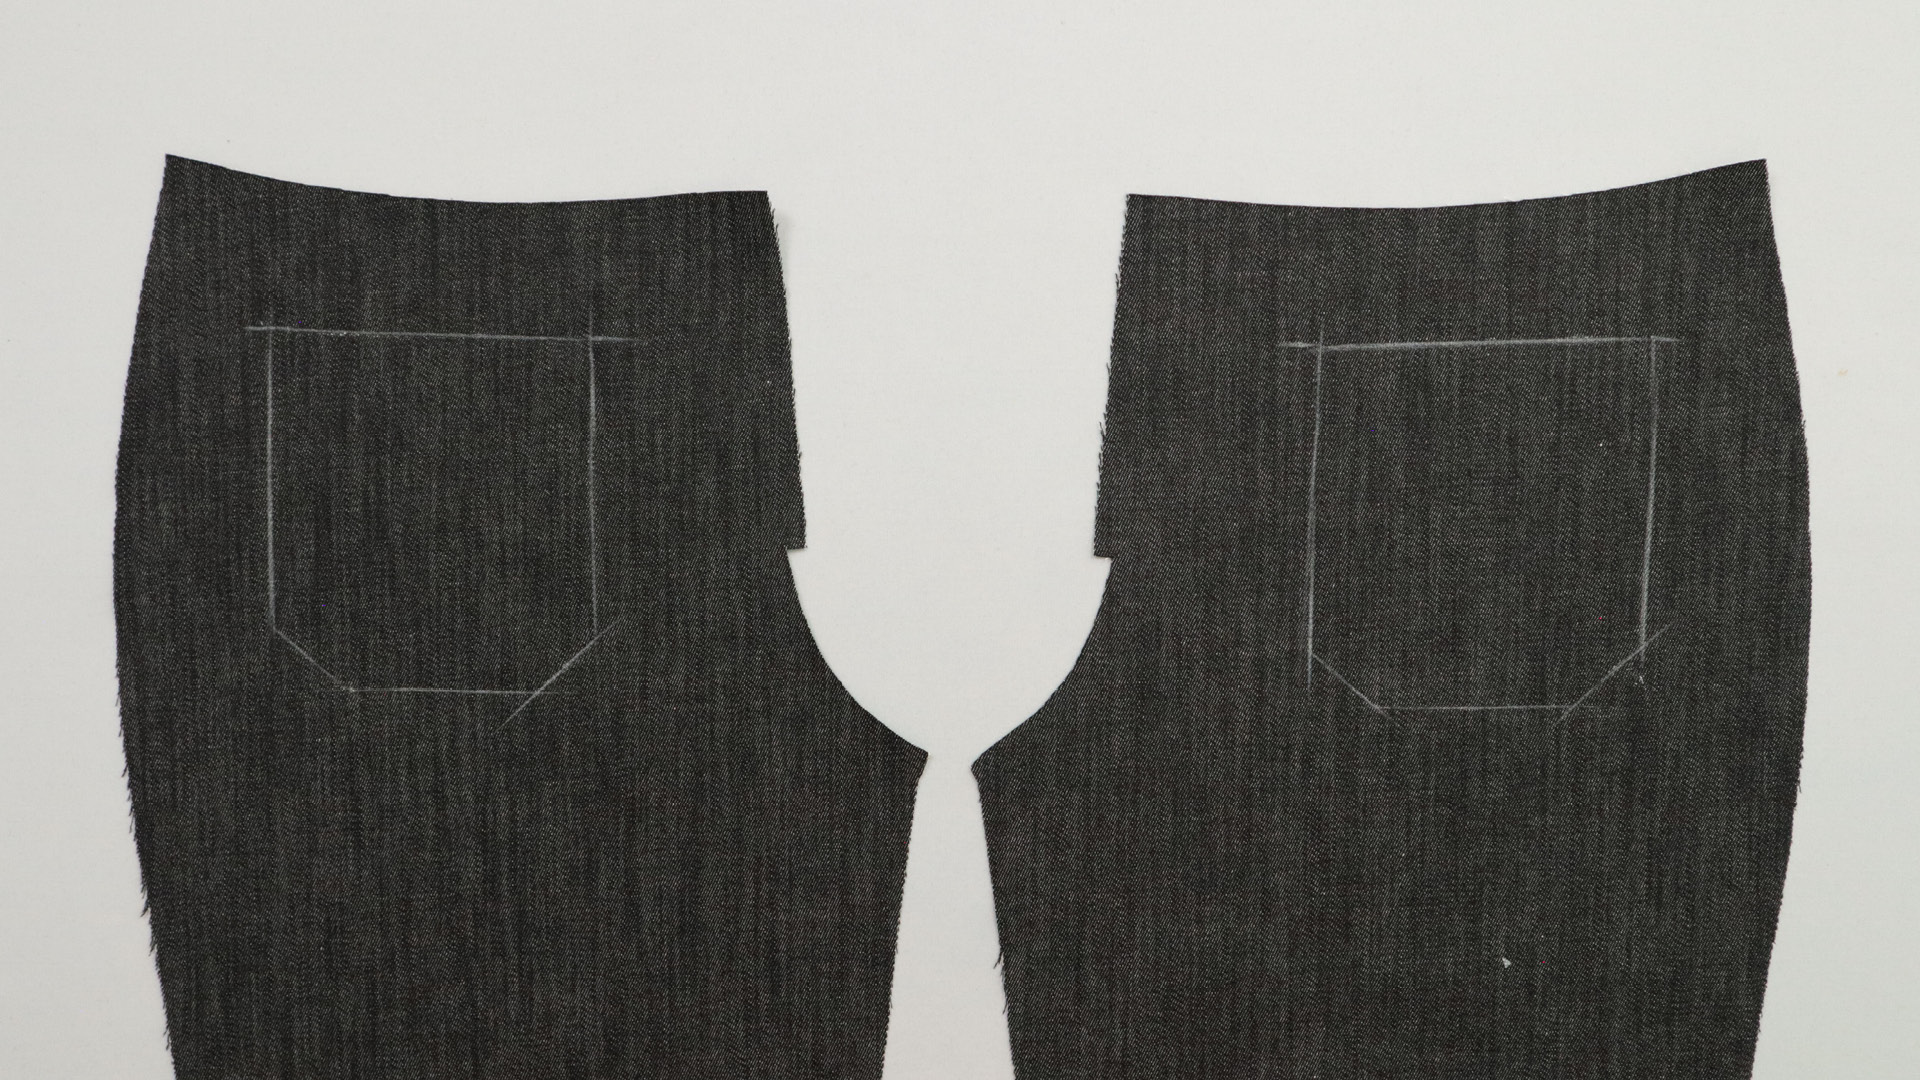
This is what it looks like when the marking is made on both front trouser pieces. Here, too, you can use tacking stitches to make the markings more permanent if necessary.
5. Baste centre front and zipper
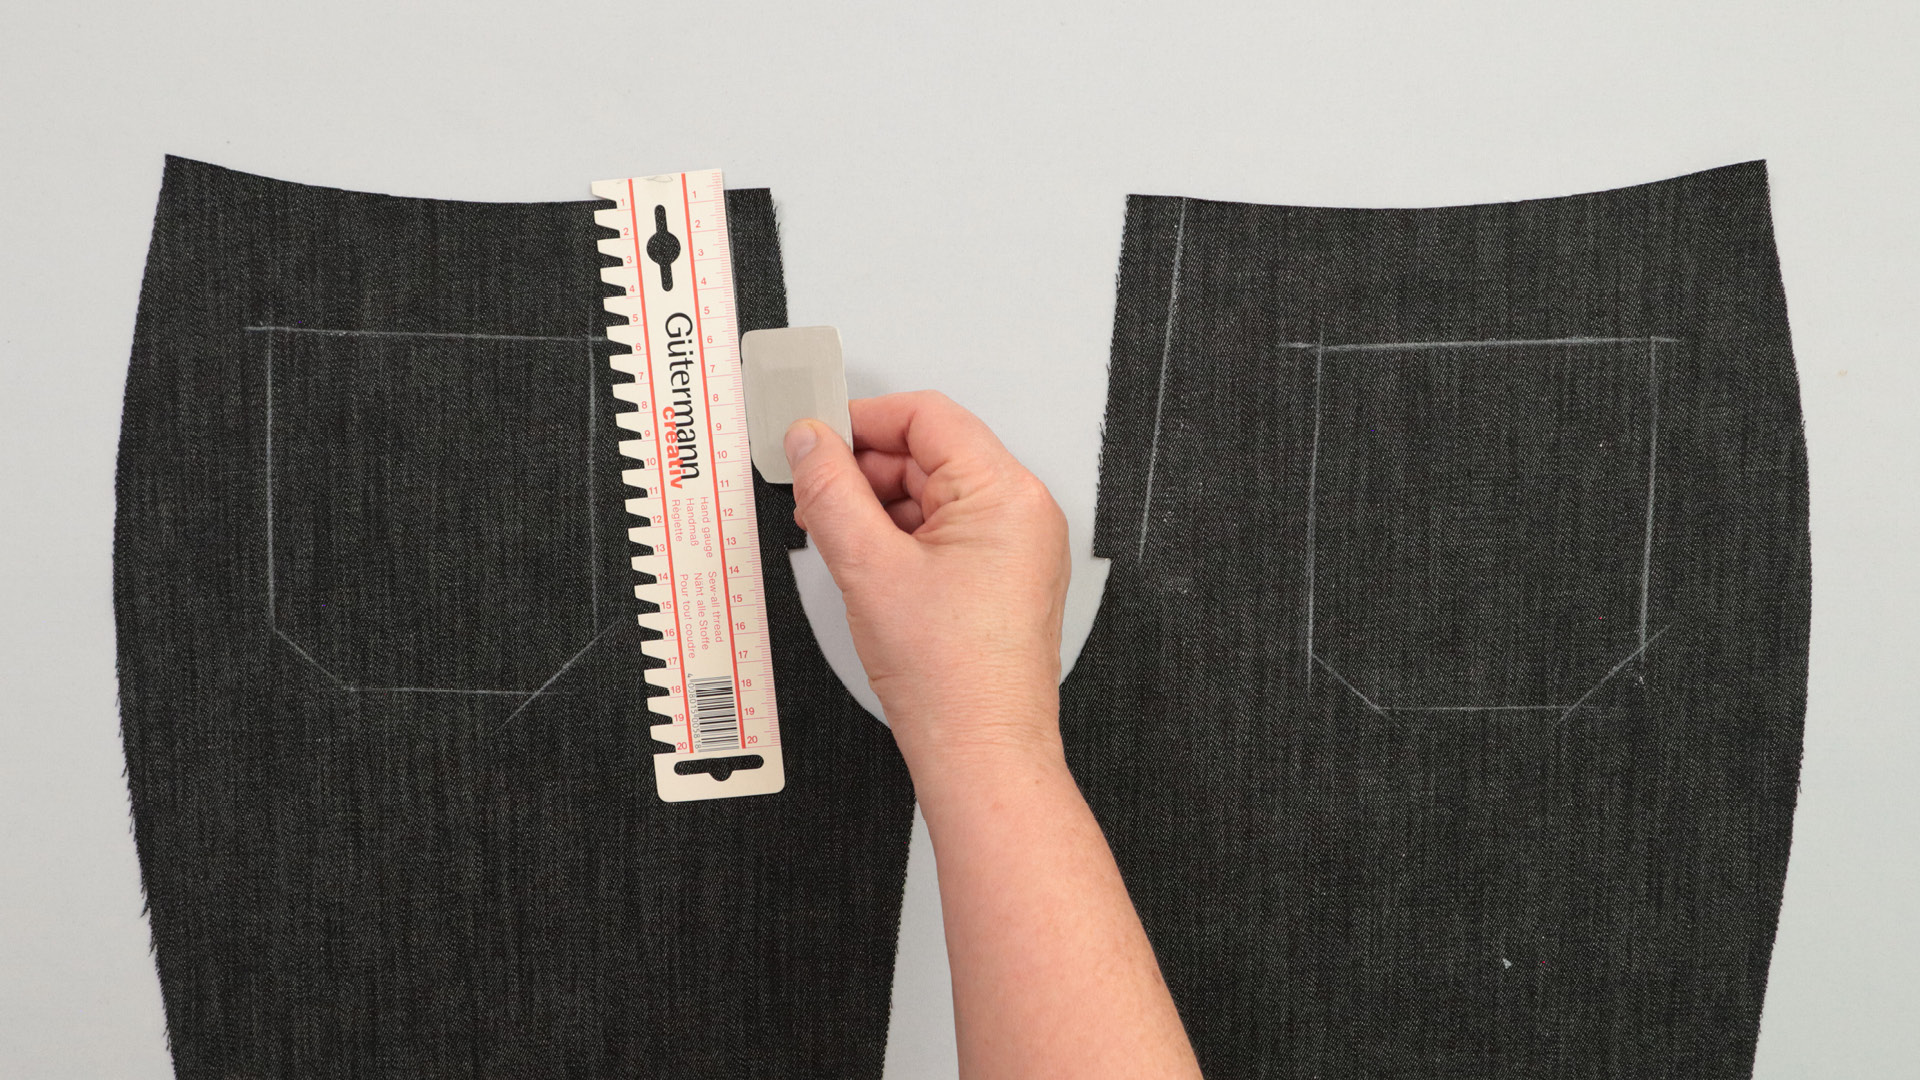
I mark the centre front, starting at the top edge and running parallel to the front edge all the way to the end of the fly. You can measure the distance on the pattern or see it on the top notch. The seam allowance on the crotch curve is 1 cm.
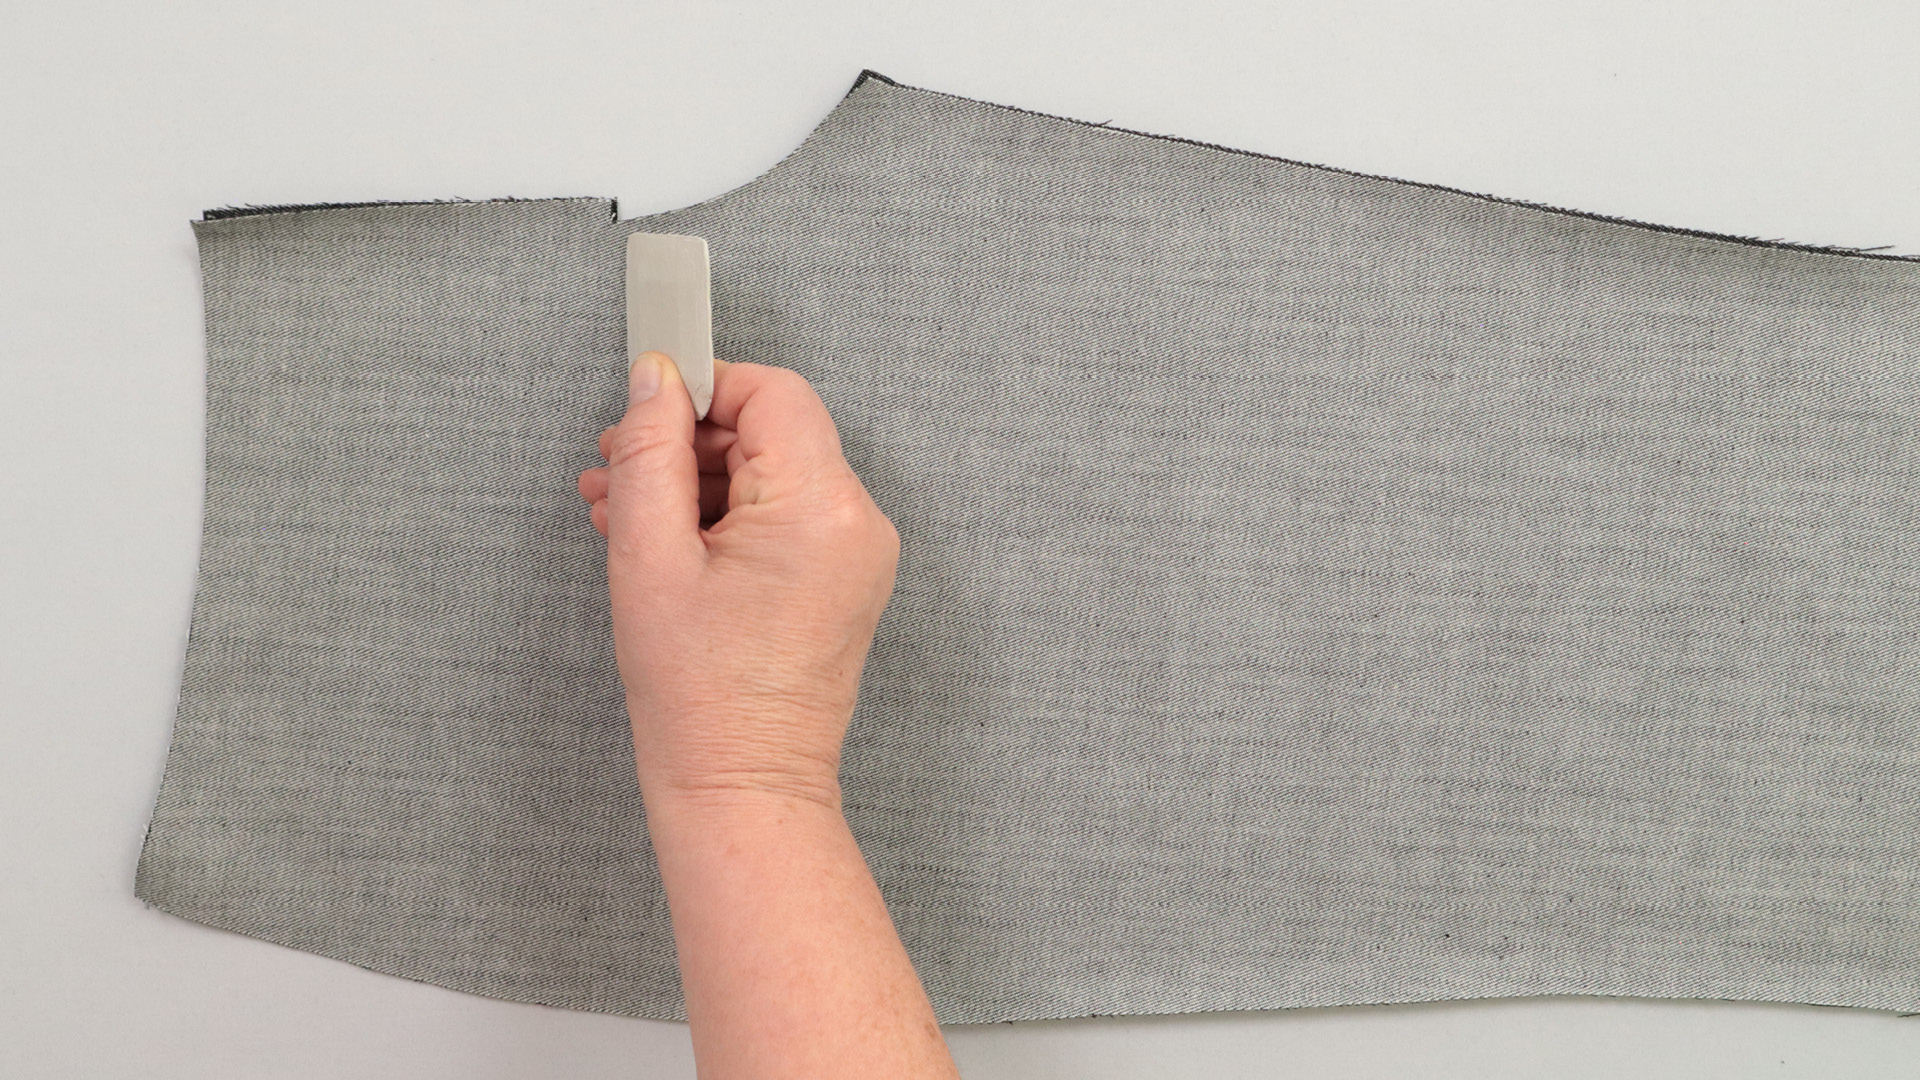
Then I place the front pieces right sides together, aligning them, and mark the end of the fly.
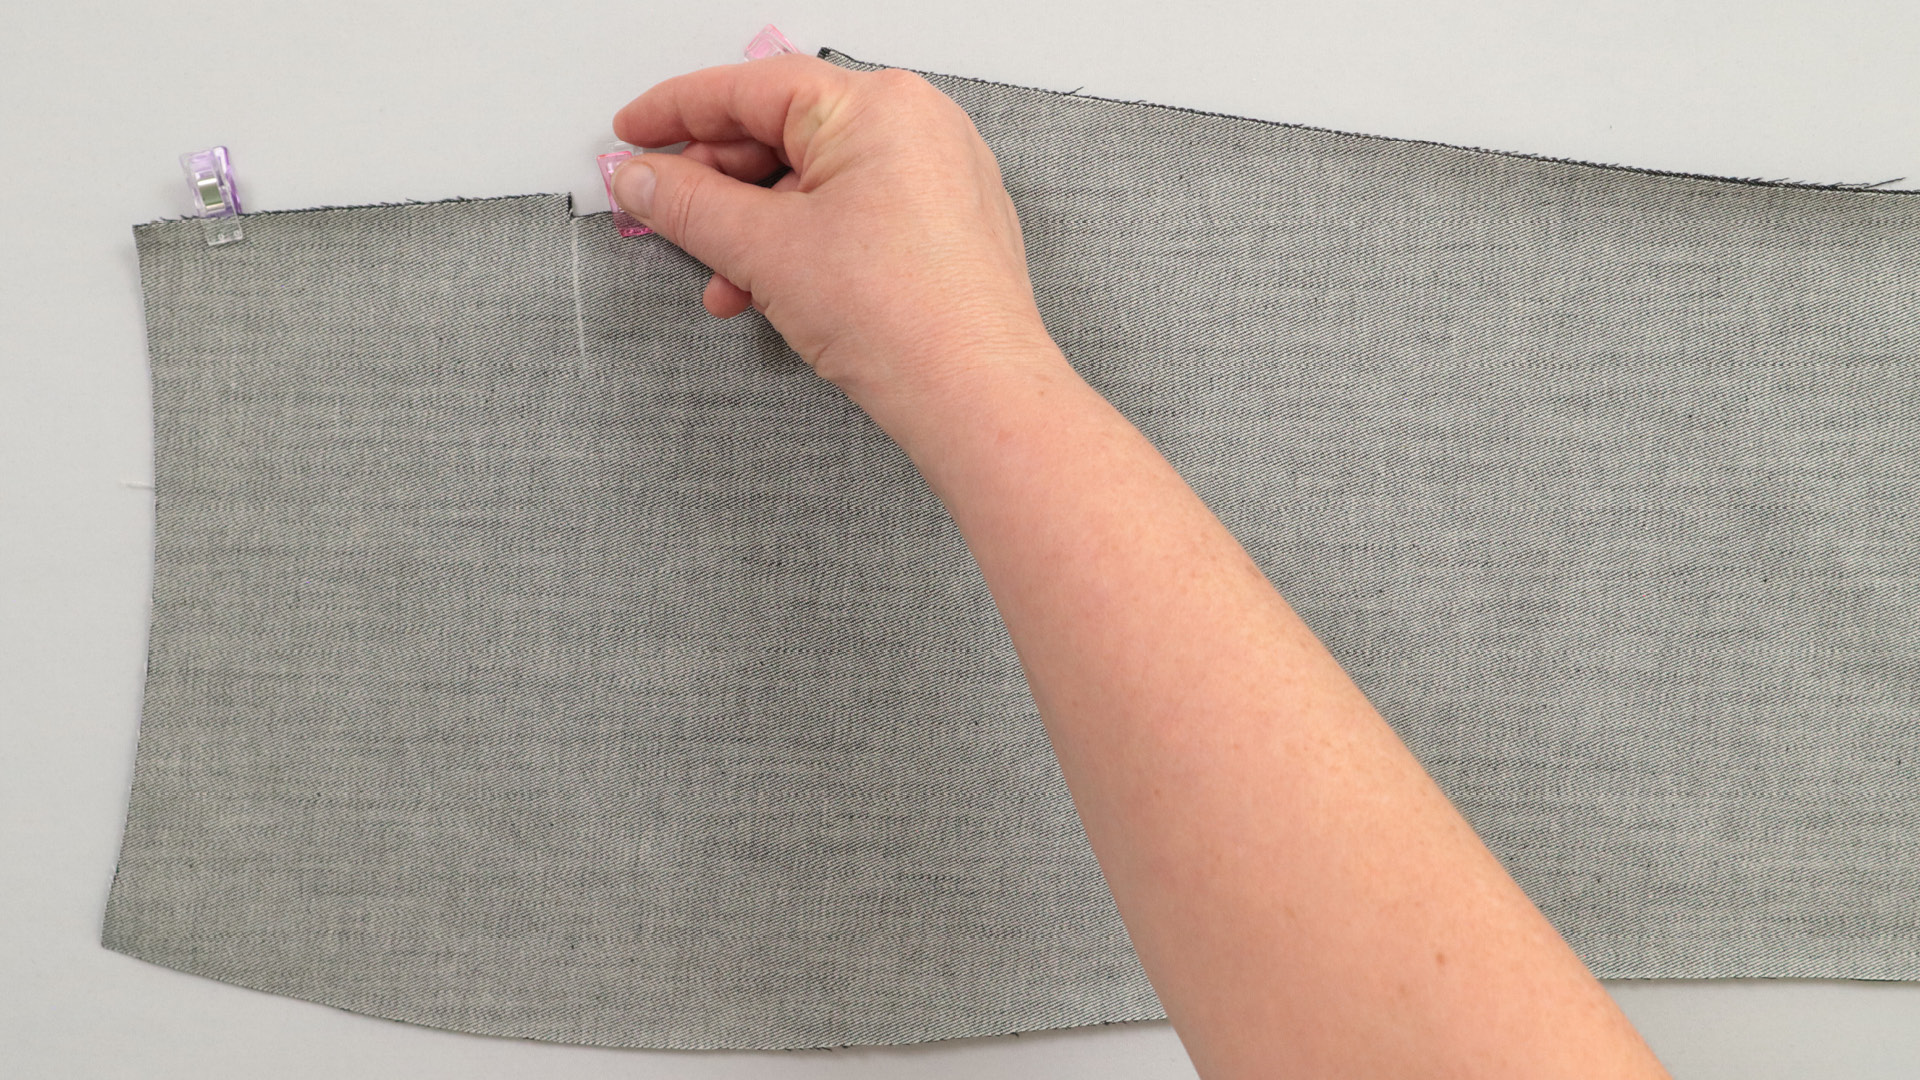
I then align the front edge with the crotch curve, making sure the edges are flush…
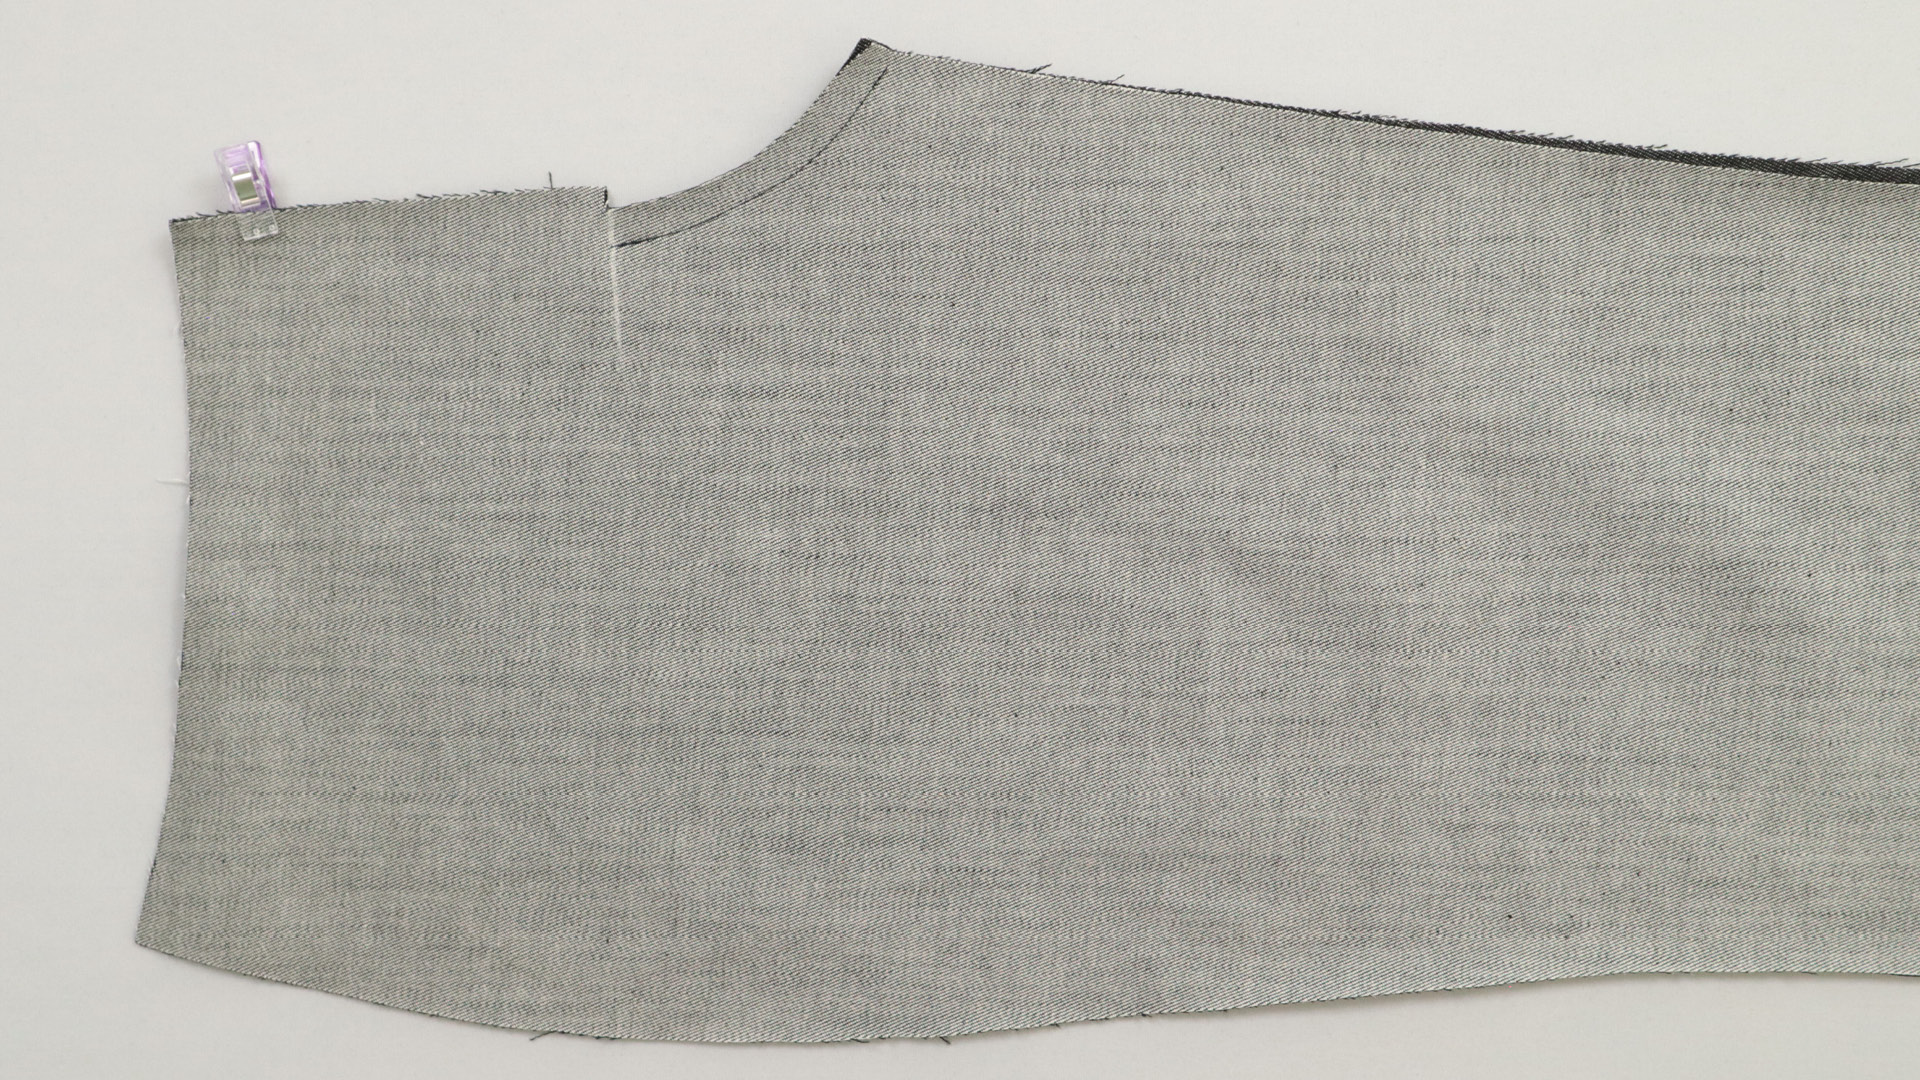
… and pin the layers together along the crotch seam, up to the end of the opening.
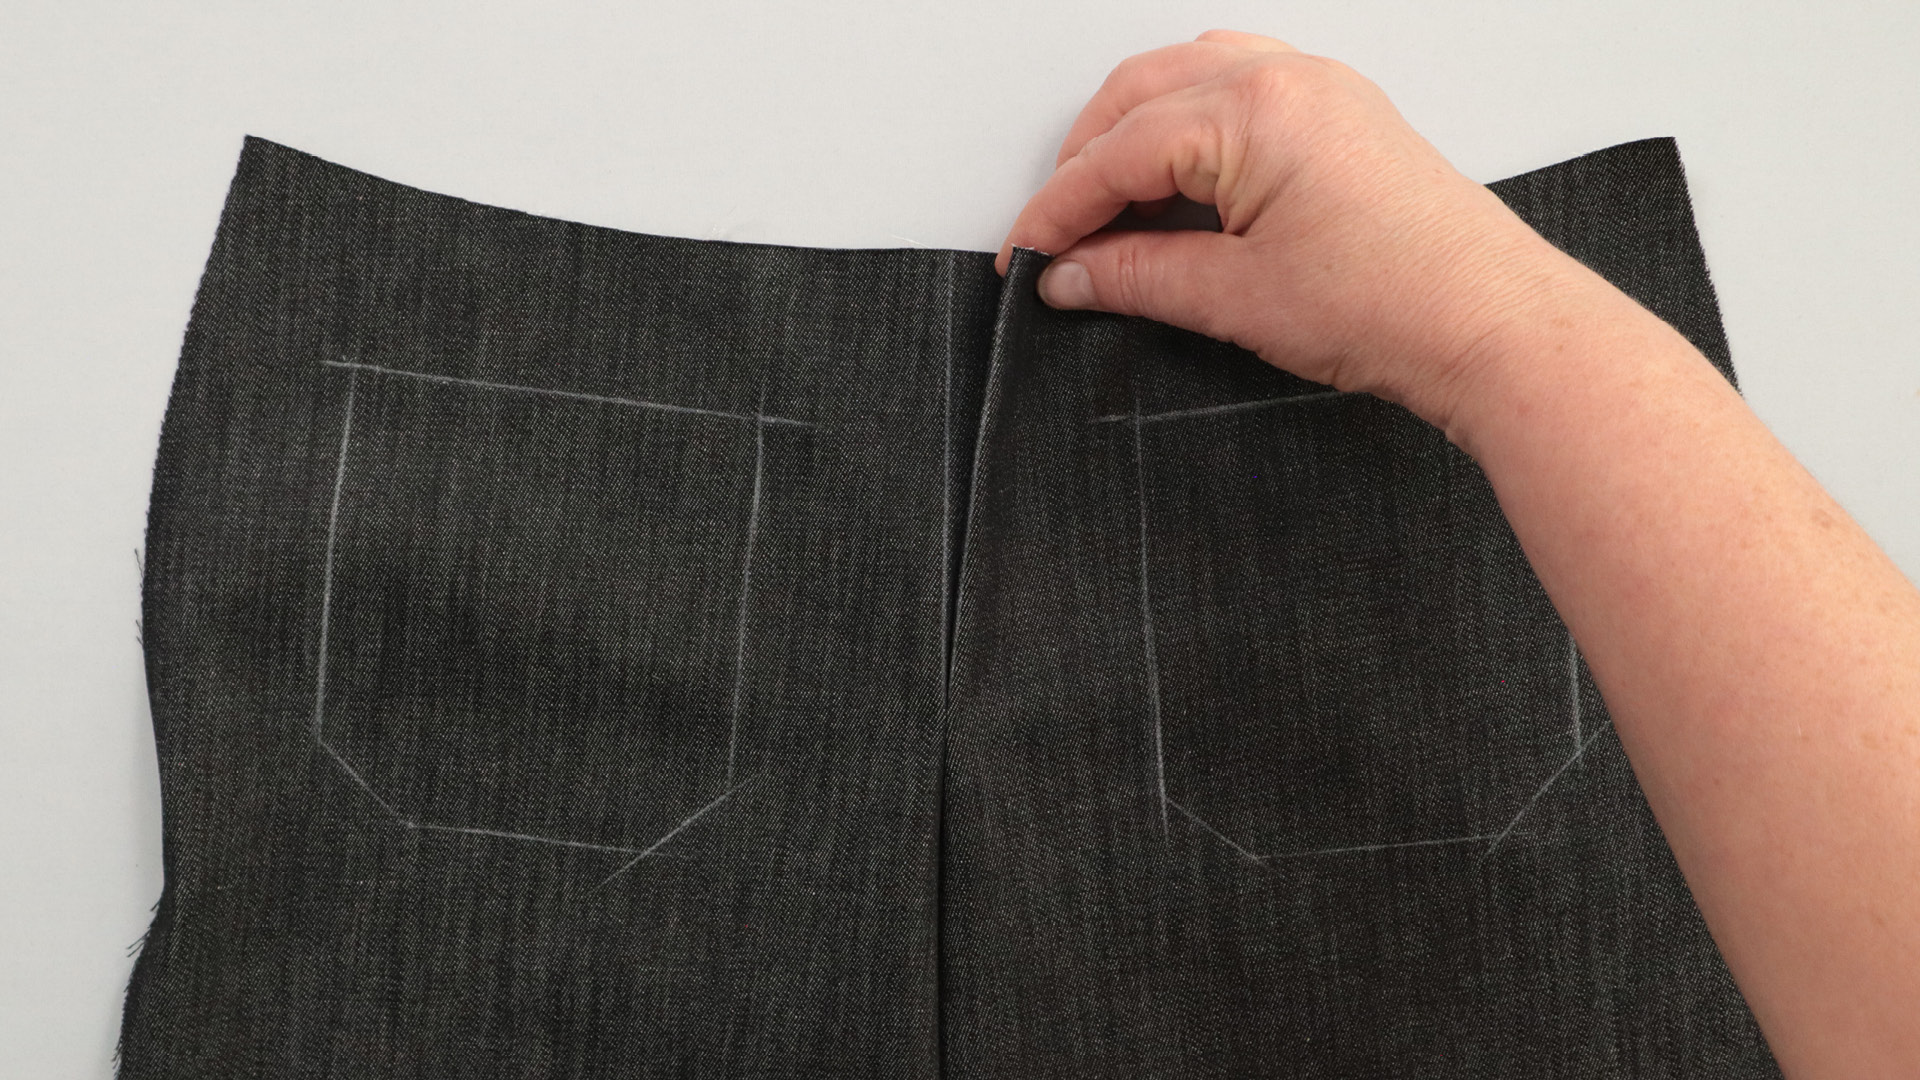
Then I lay the pants in front of me with the right side facing up and fold the seam allowances at the marked centre front inward.
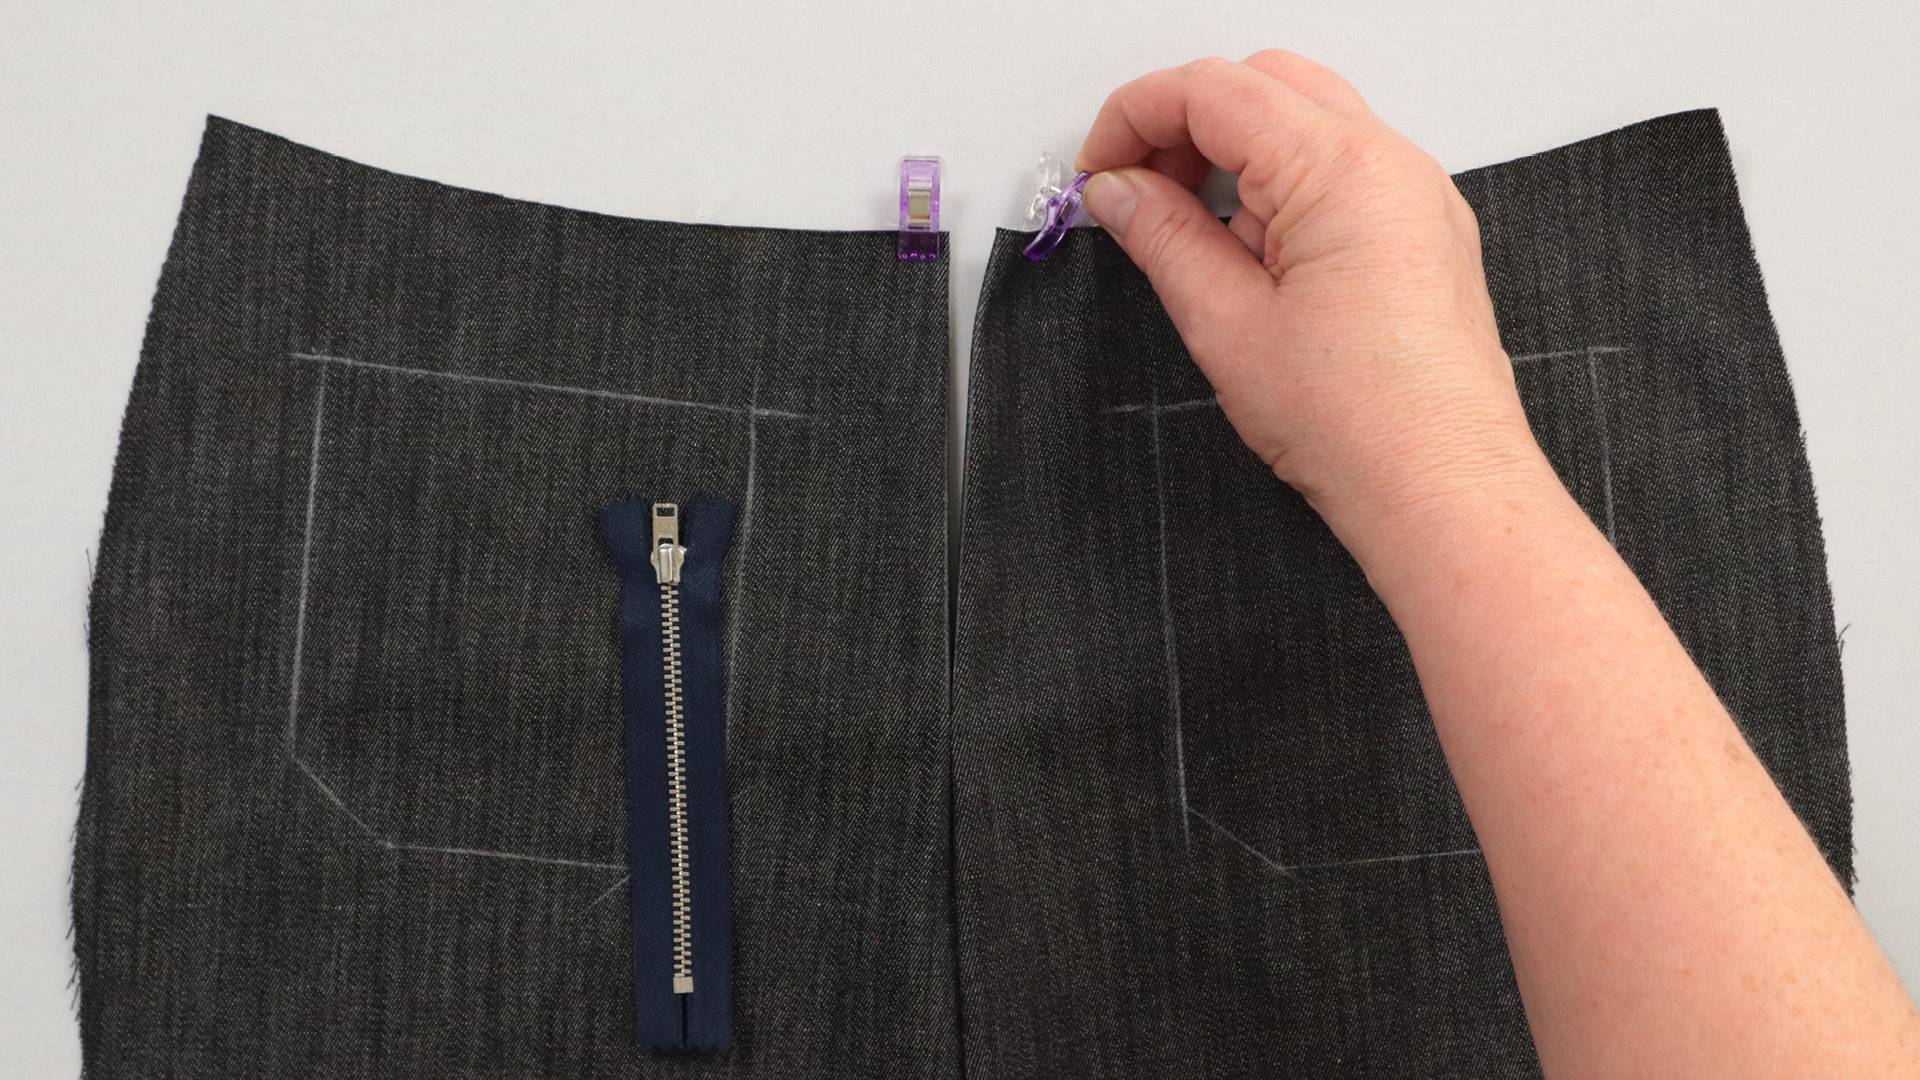
The cut edges line up perfectly. At the top, I pin the seam allowances in place.
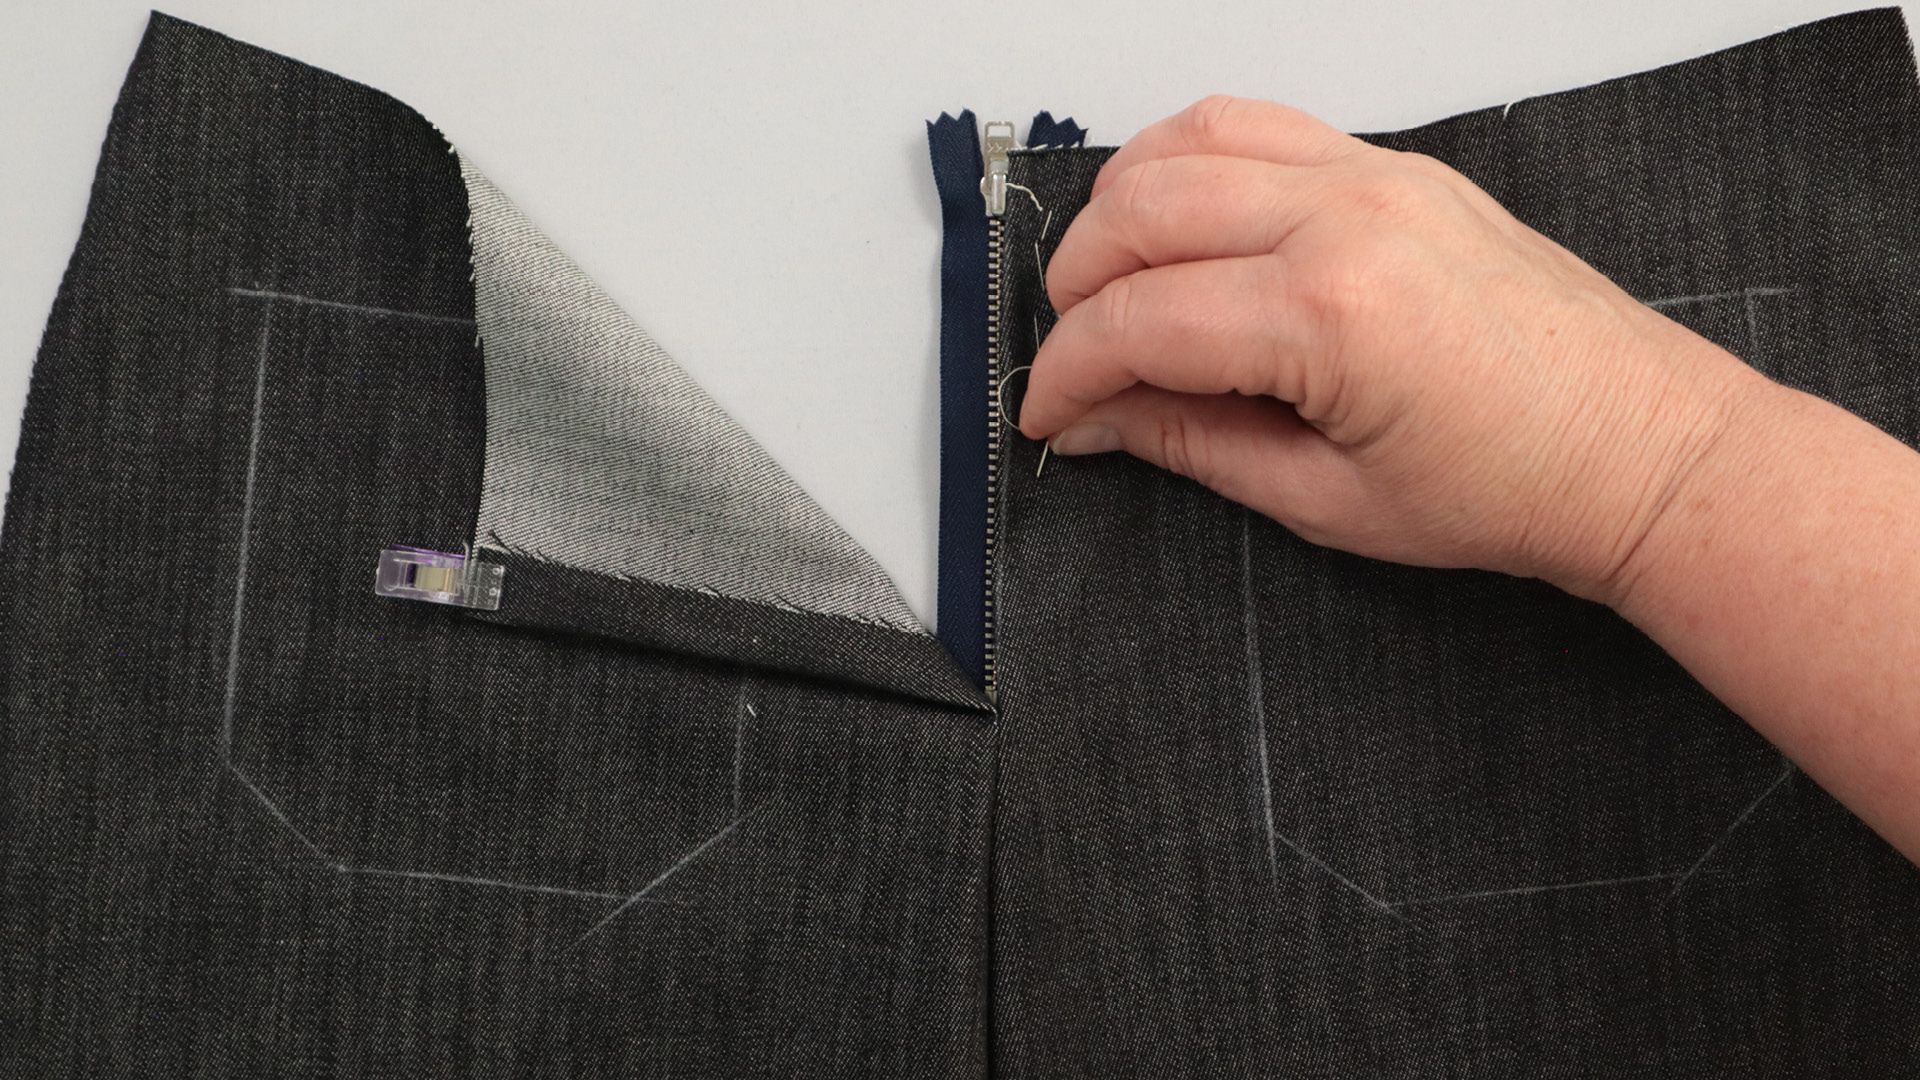
Then I tack the zipper into the centre front, just below the fold line. The end of the zipper should be at least 1.2 cm from the top edge, and the centre of the zipper should be just below the centre front.
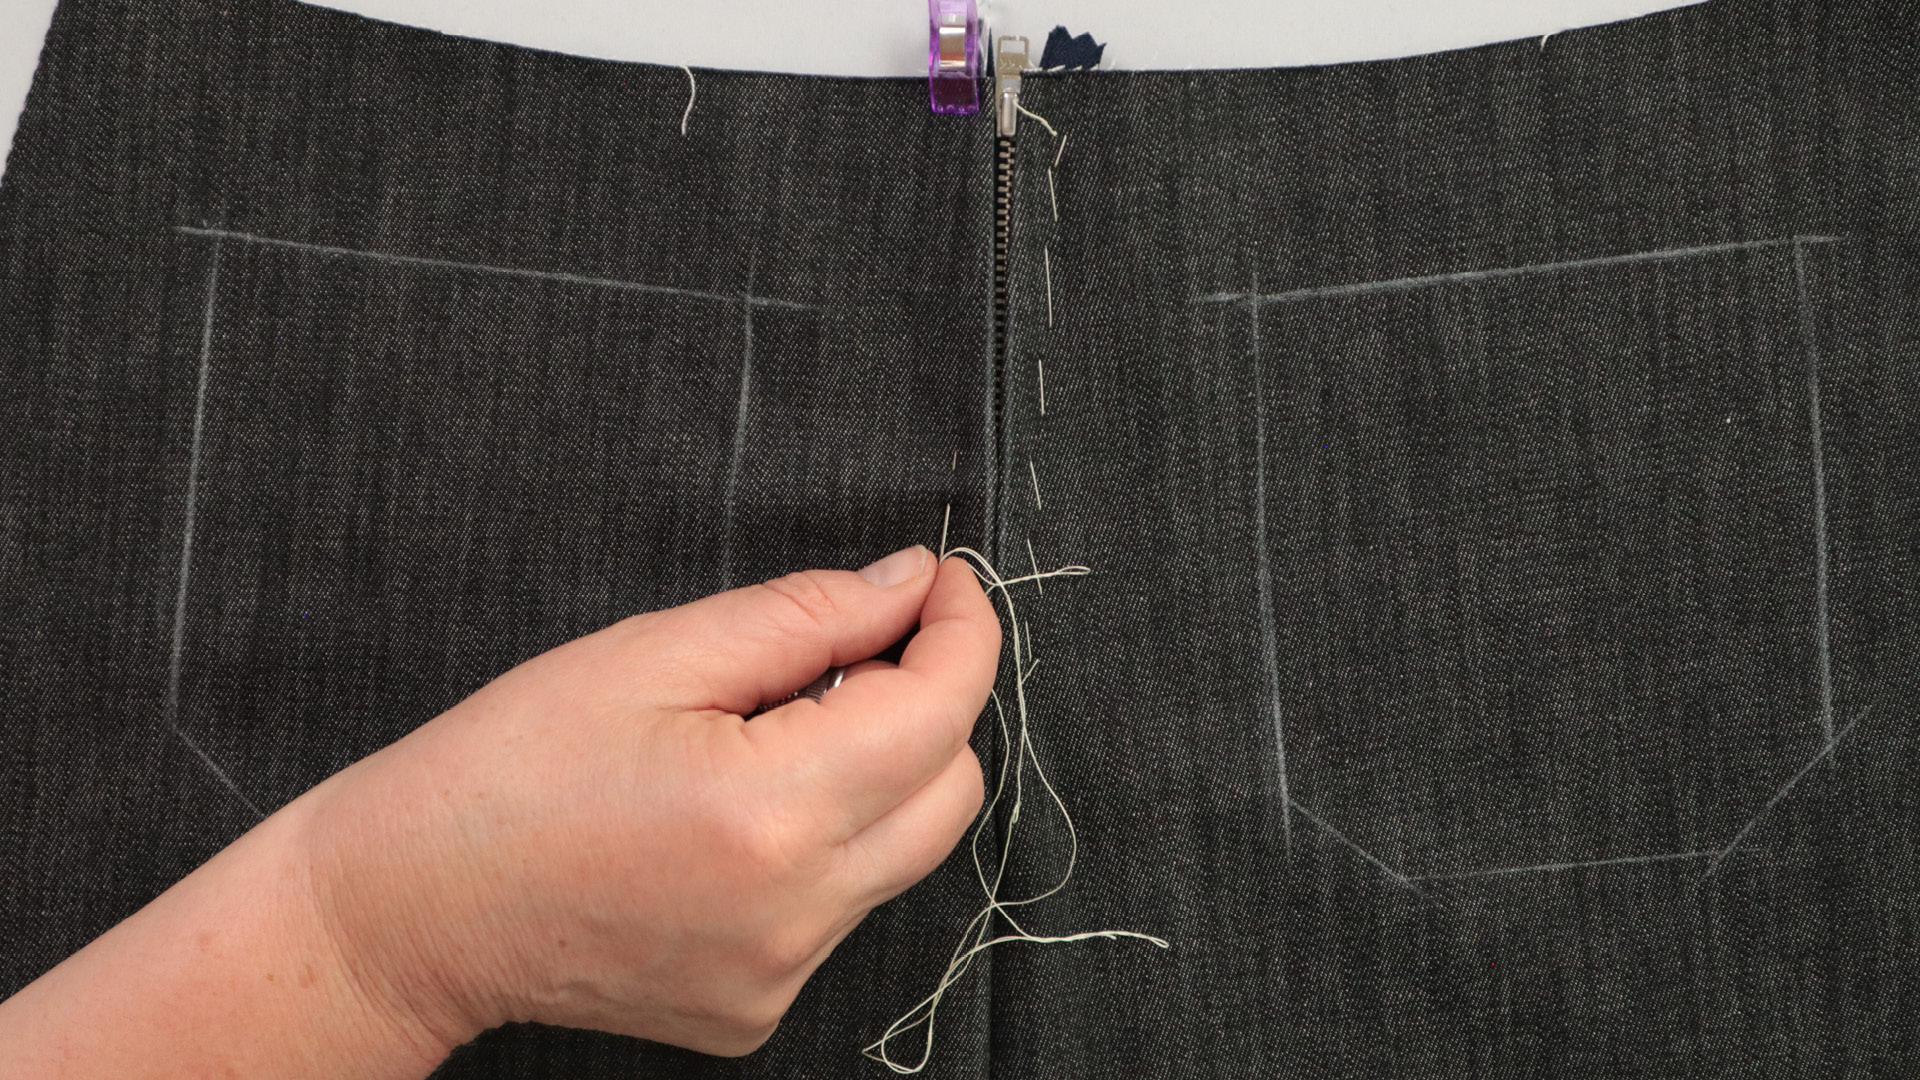
I also tack the other side of the zip in place along its entire length. Alternatively, you can pin the zip in place and then machine-tack it using a long stitch length. This is particularly recommended for close-fitting trousers.
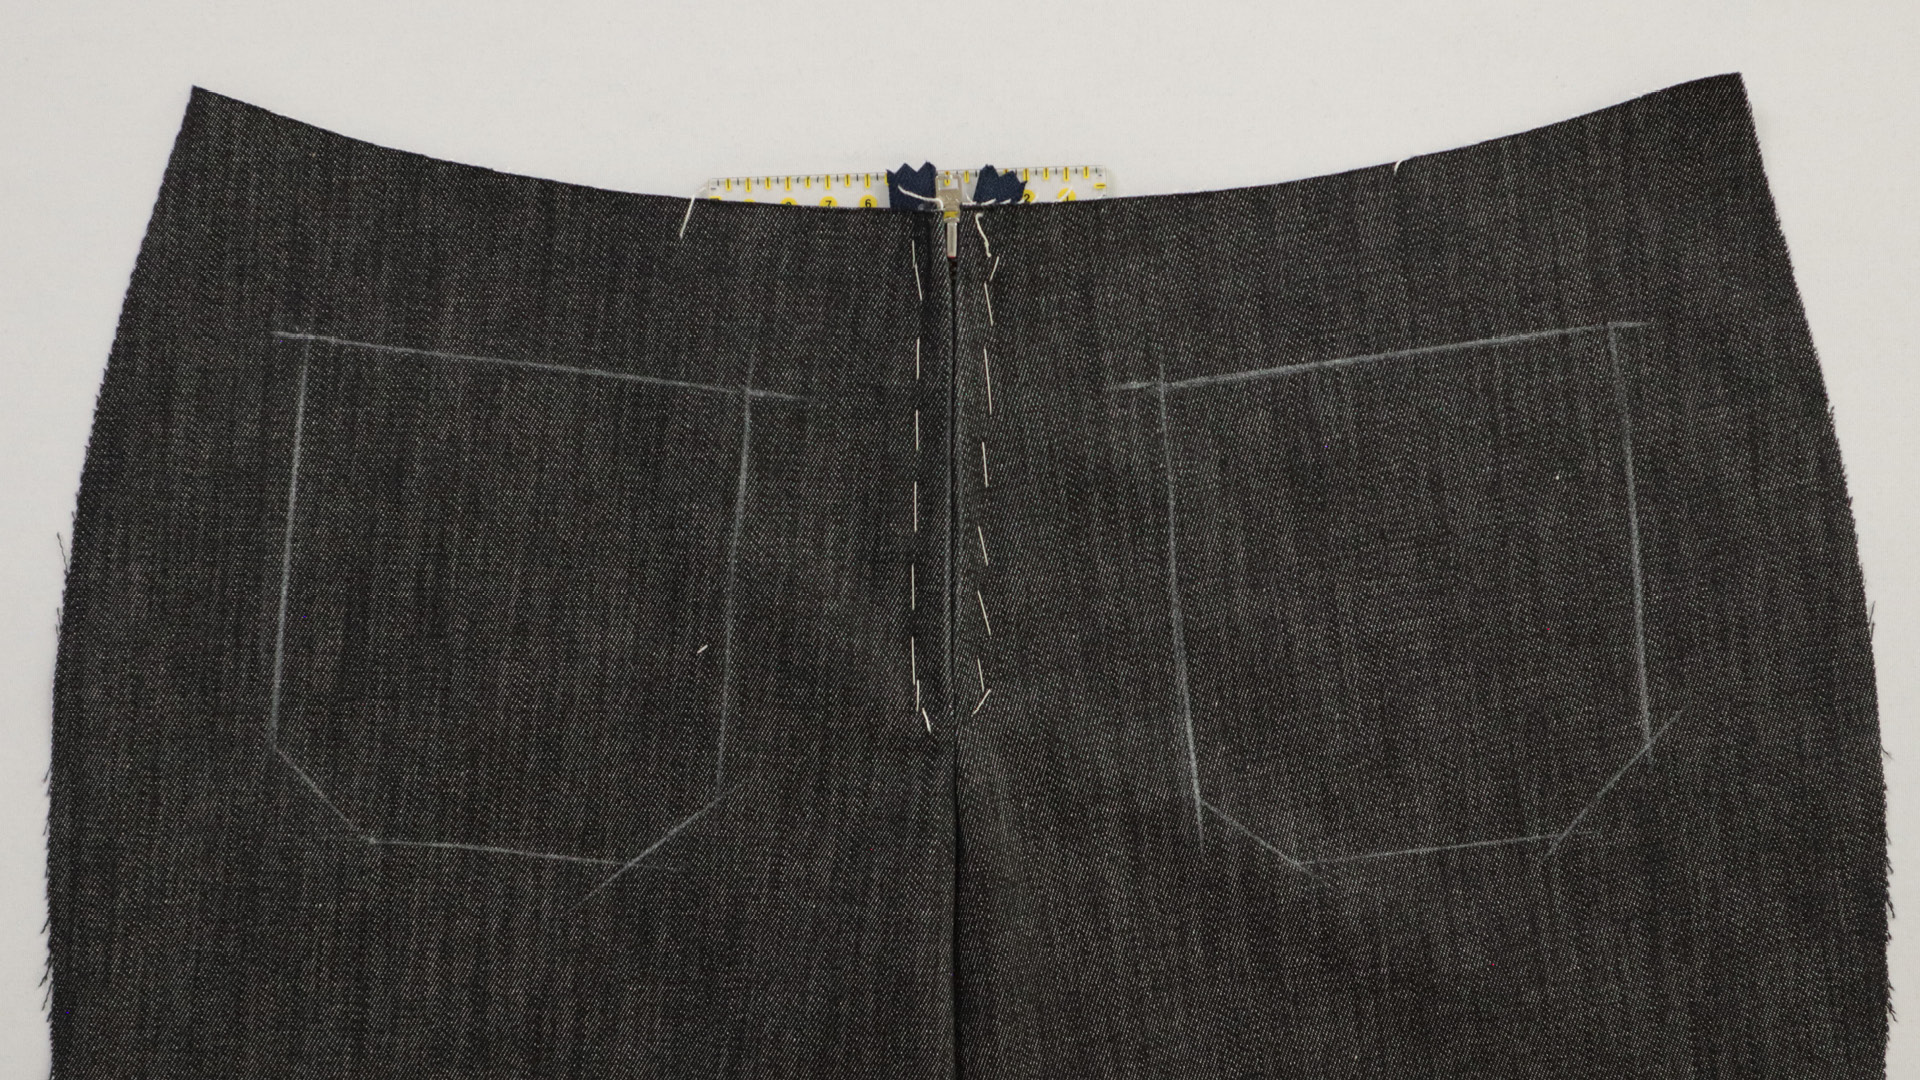
This is what the front of the trouser looks like with the zipper tacked in.
6. Mark the hemline
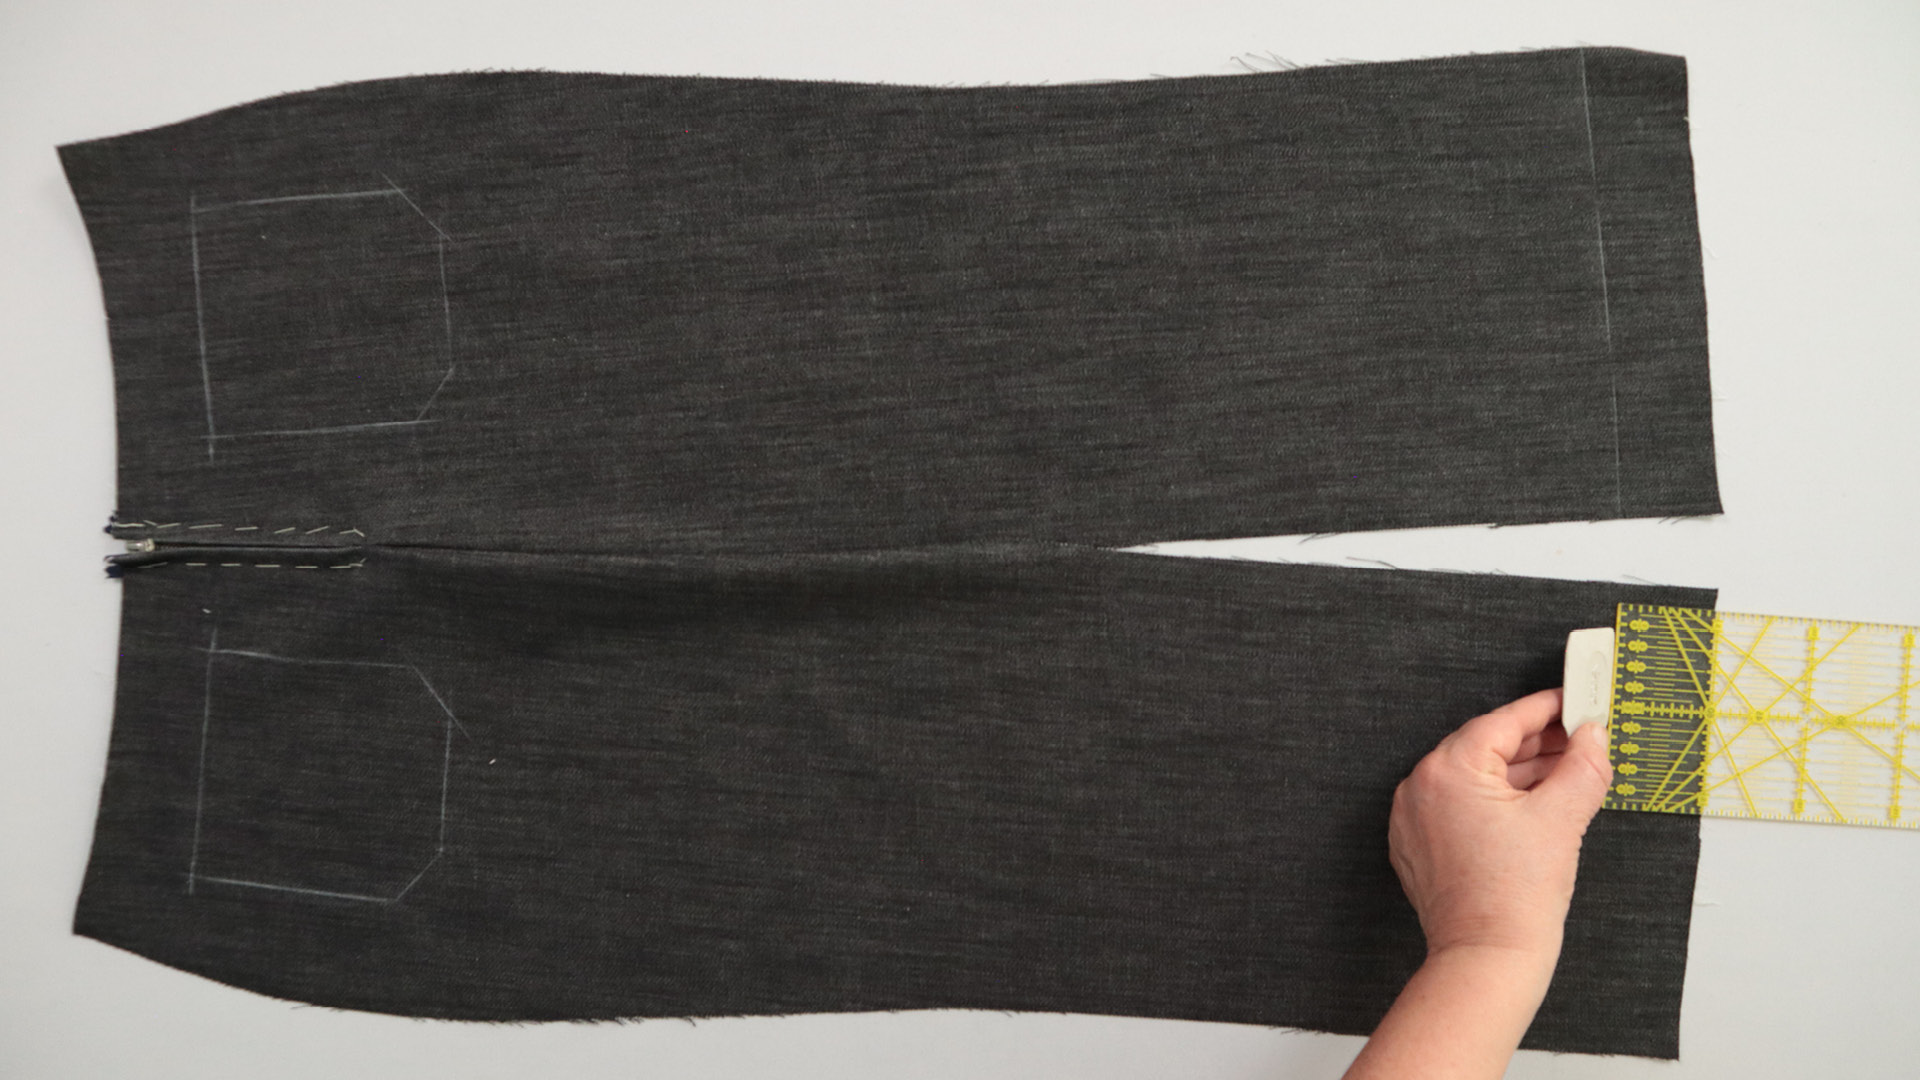
Before sewing the leg seams, mark a line 5 cm above and parallel to the bottom edge of each front and back trouser piece.
Once you’ve sewn the leg seams, align the top edge of the hem with this line and tack it in place.
The 5 cm distance is made up of:
- 3 cm seam allowance at the bottom of the trouser legs
- 1 cm seam allowance at the top of the hem
- 1 cm seam allowance at the bottom of the hem
This ensures that the bottom raw edge of the hem is positioned exactly where the finished trouser hem will be.
The 3 cm seam allowance at the bottom of the trouser legs provides extra length for adjustments. If you find that the trousers are too short during the fitting, you can use this extra allowance to lengthen them.
If you don’t need to adjust the length, trim the seam allowance on the pant leg by 2 cm after trying it on. This leaves a 1 cm seam allowance for sewing on the hem.
7. Close the leg seams
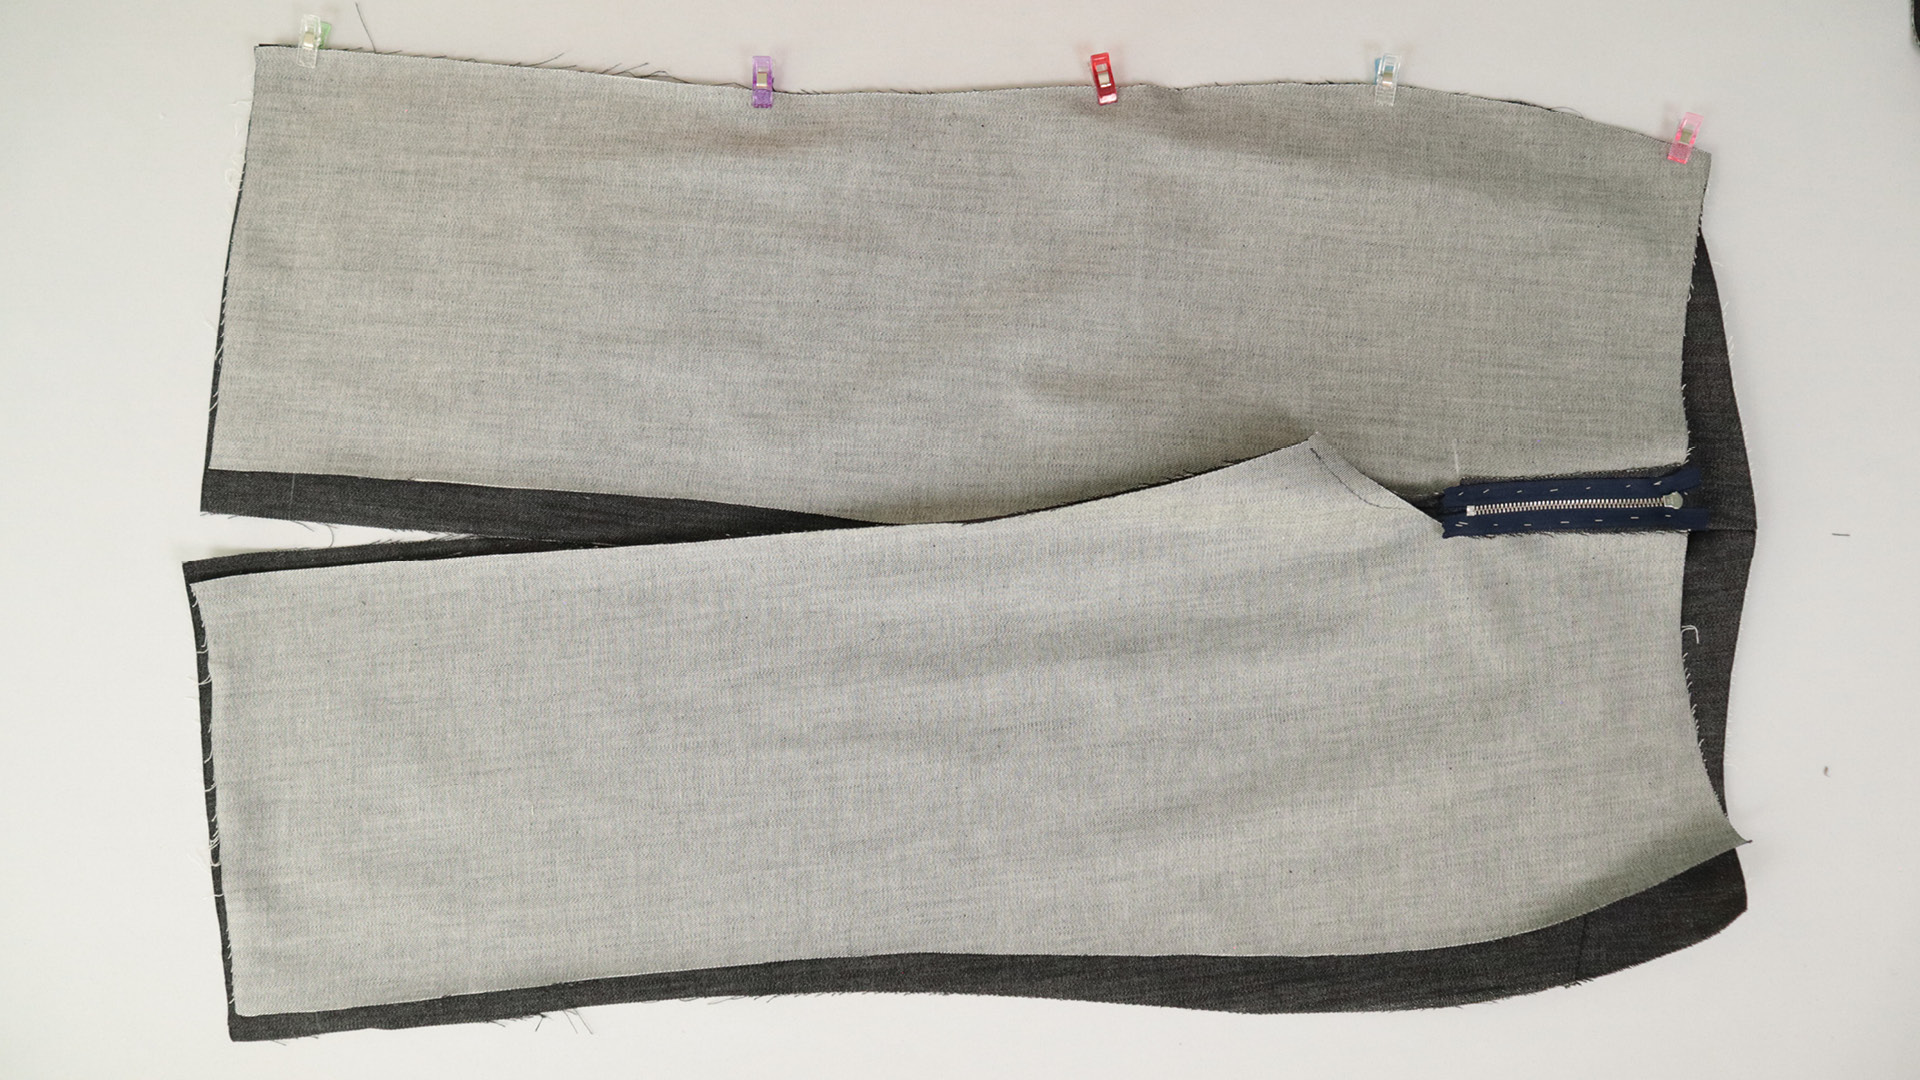
Now it’s time to sew the leg seams. I place the front trouser piece right sides together with the back trouser piece and pin them together along one side seam first. As I do this, I make sure that all the notches line up.
Also note how wide the seam allowances should be. You can measure this on the pattern or determine it by the distance from the notches at the beginning and end of the seam to the fabric edge. If there are no notches, use the standard seam width of 10 mm.
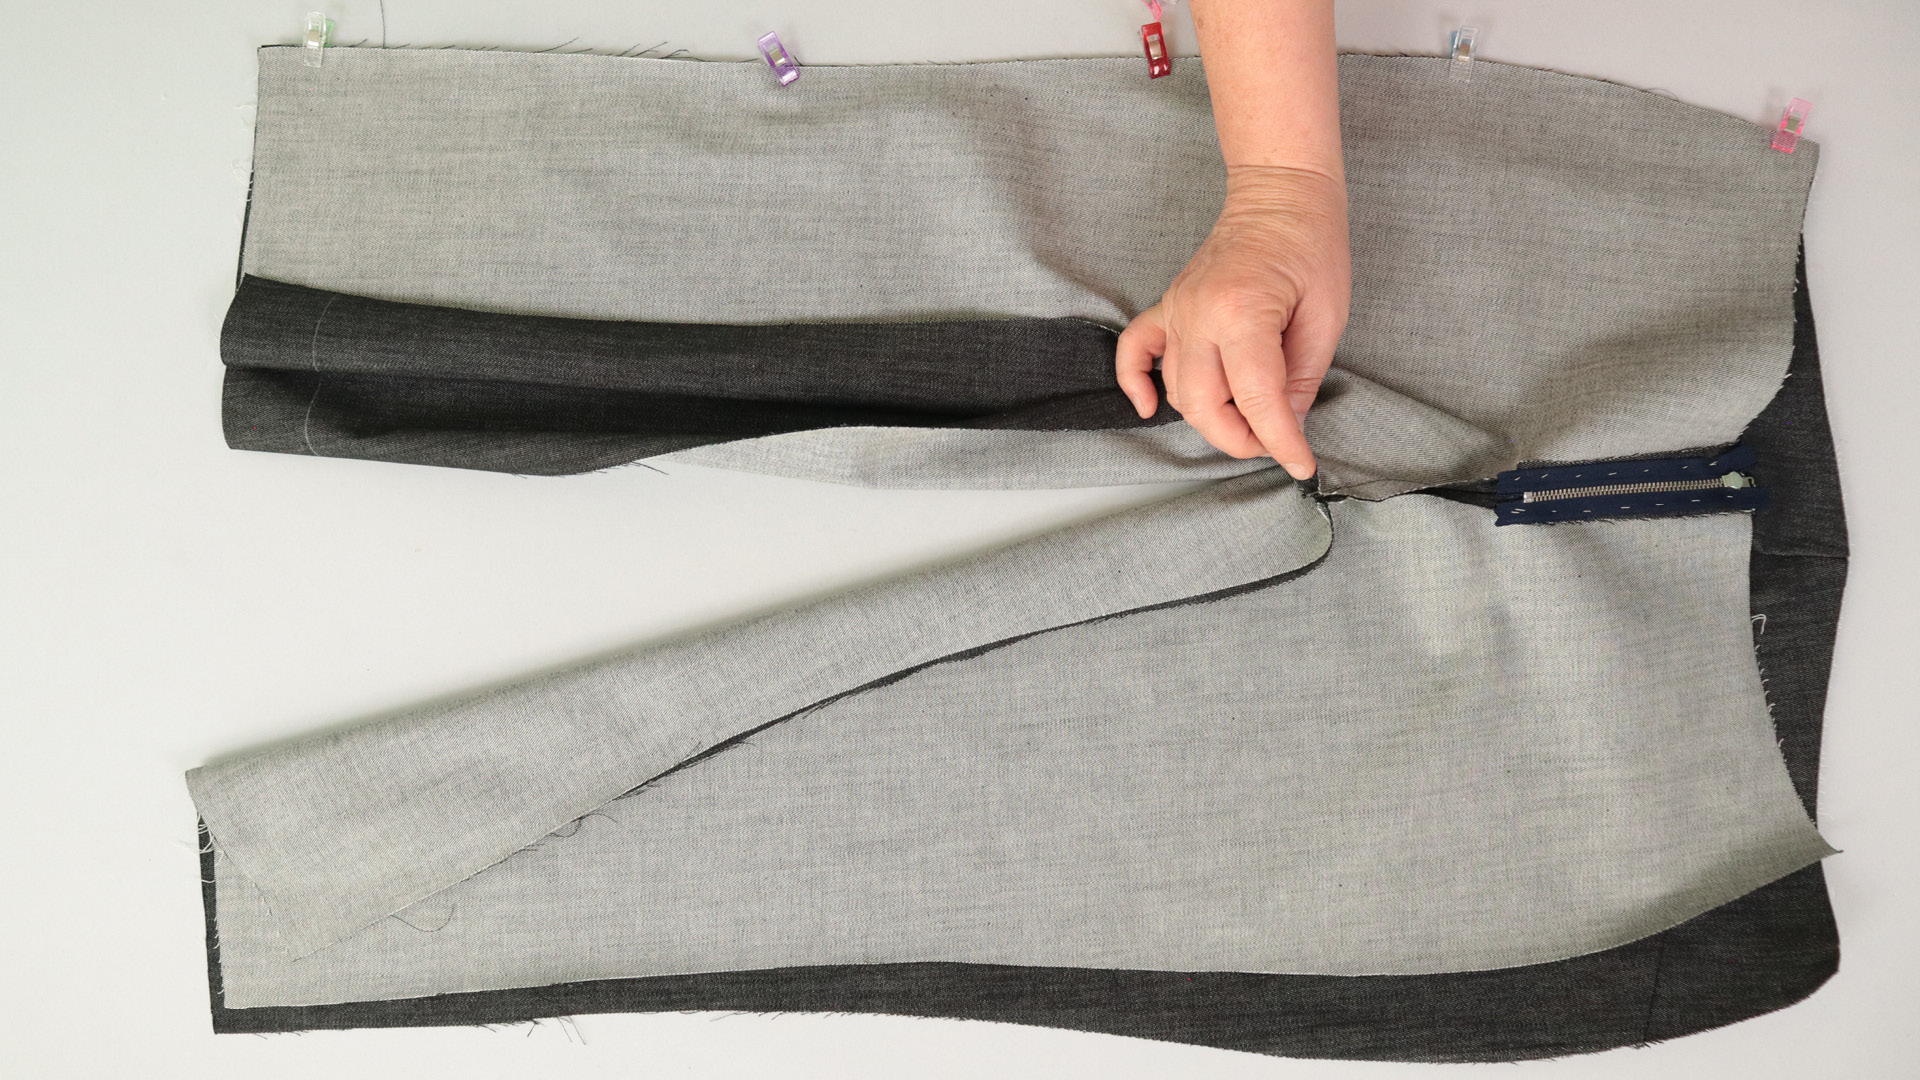
For the inner leg seam, I start at the point where the back seam and the crotch seam meet. Make sure they line up exactly.
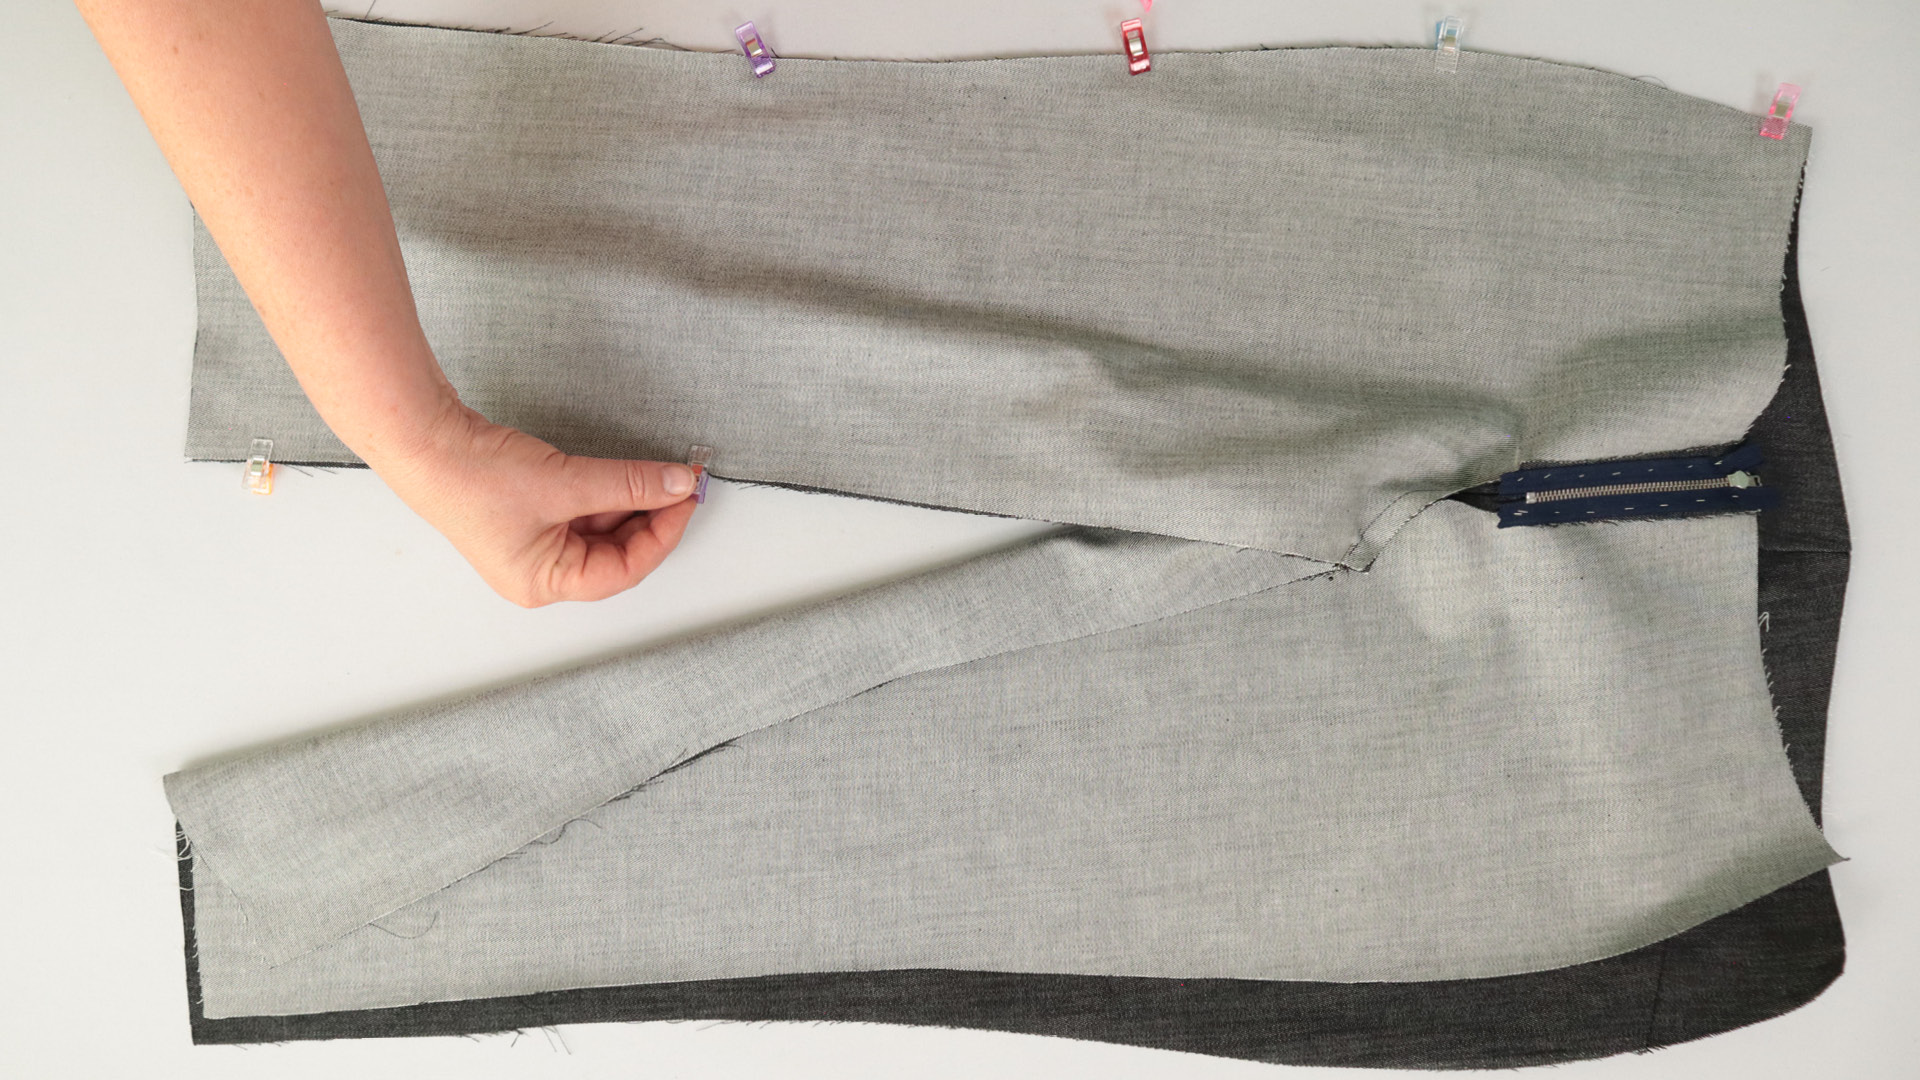
Then I start at the hem and pin the inner leg seam up to the notch at knee height.
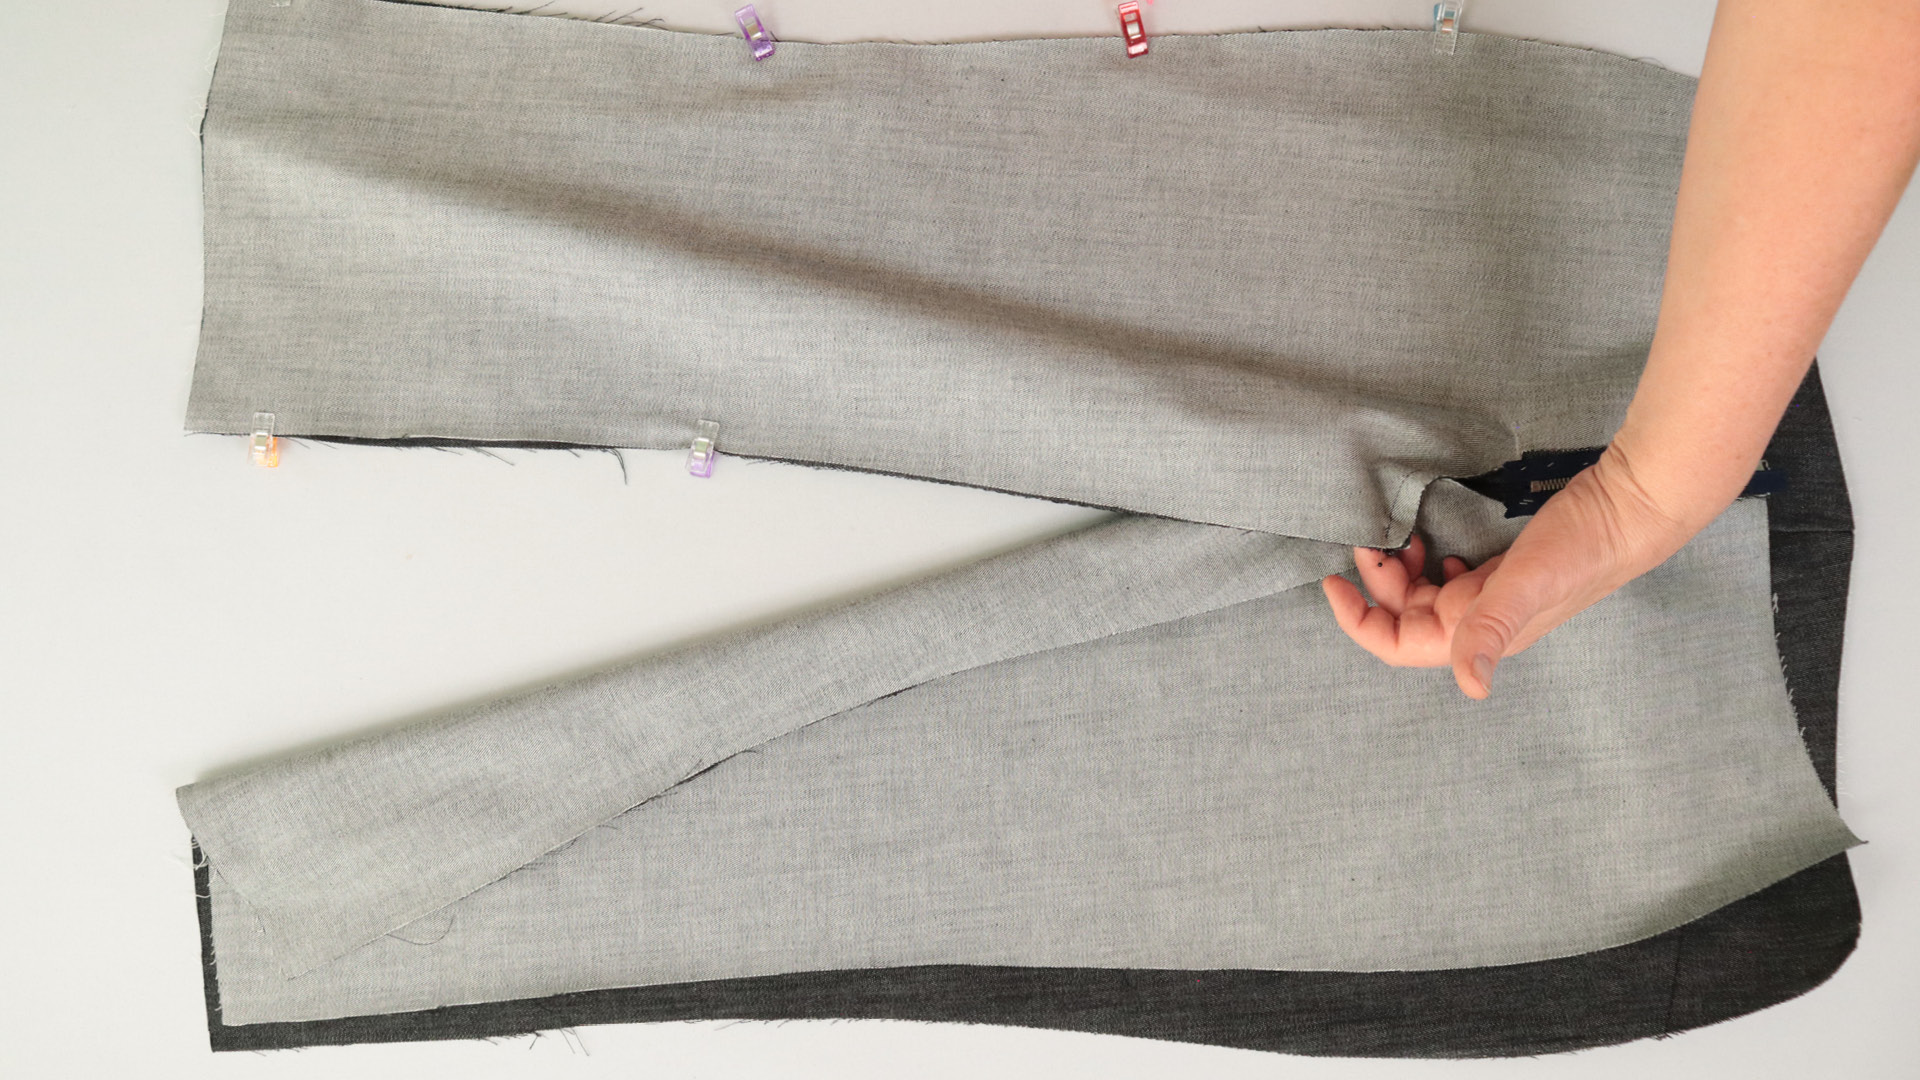
From the knee up to the crotch – where the inseam meets the crotch seam – gently stretch the back trouser leg so that it matches the length of the front.
This slight difference in length is intentionally built into the pattern to ensure a better fit.
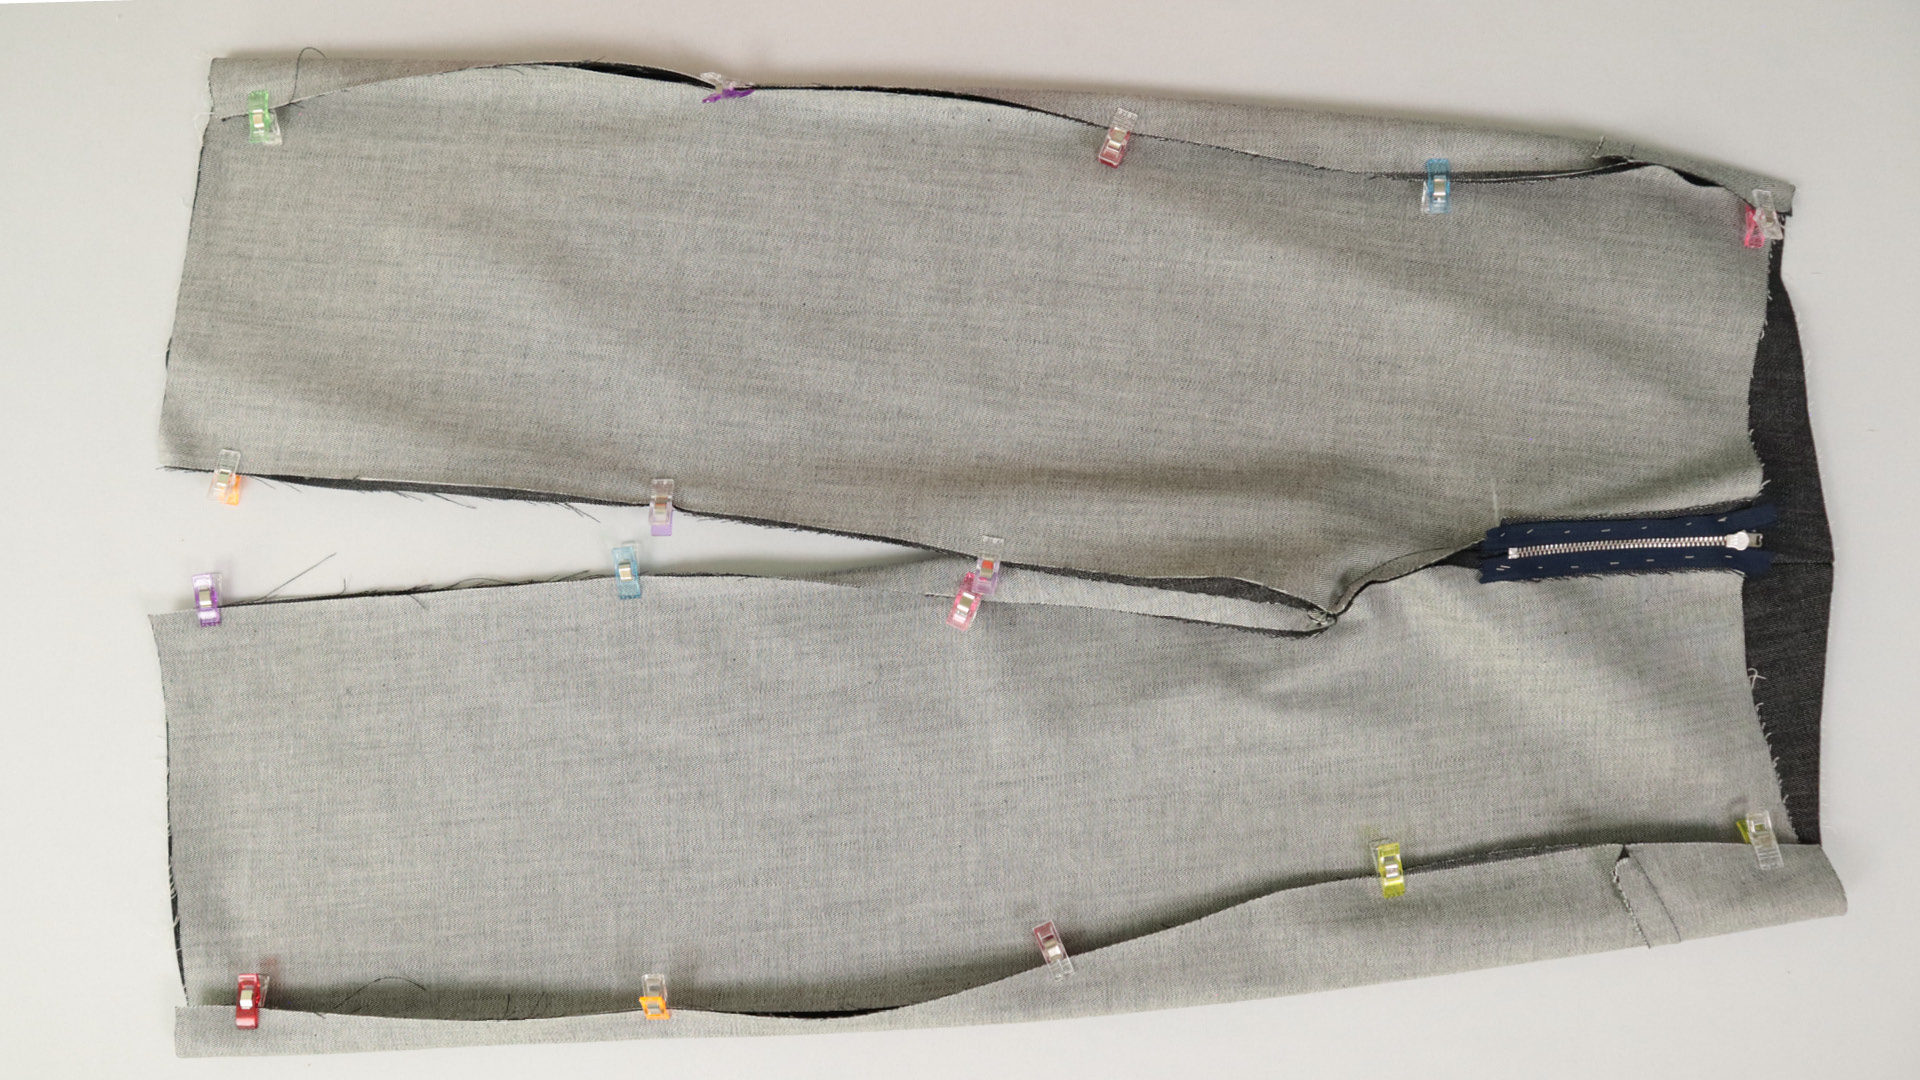
If you haven’t done so already, you’ll need to pin the second side seam now.
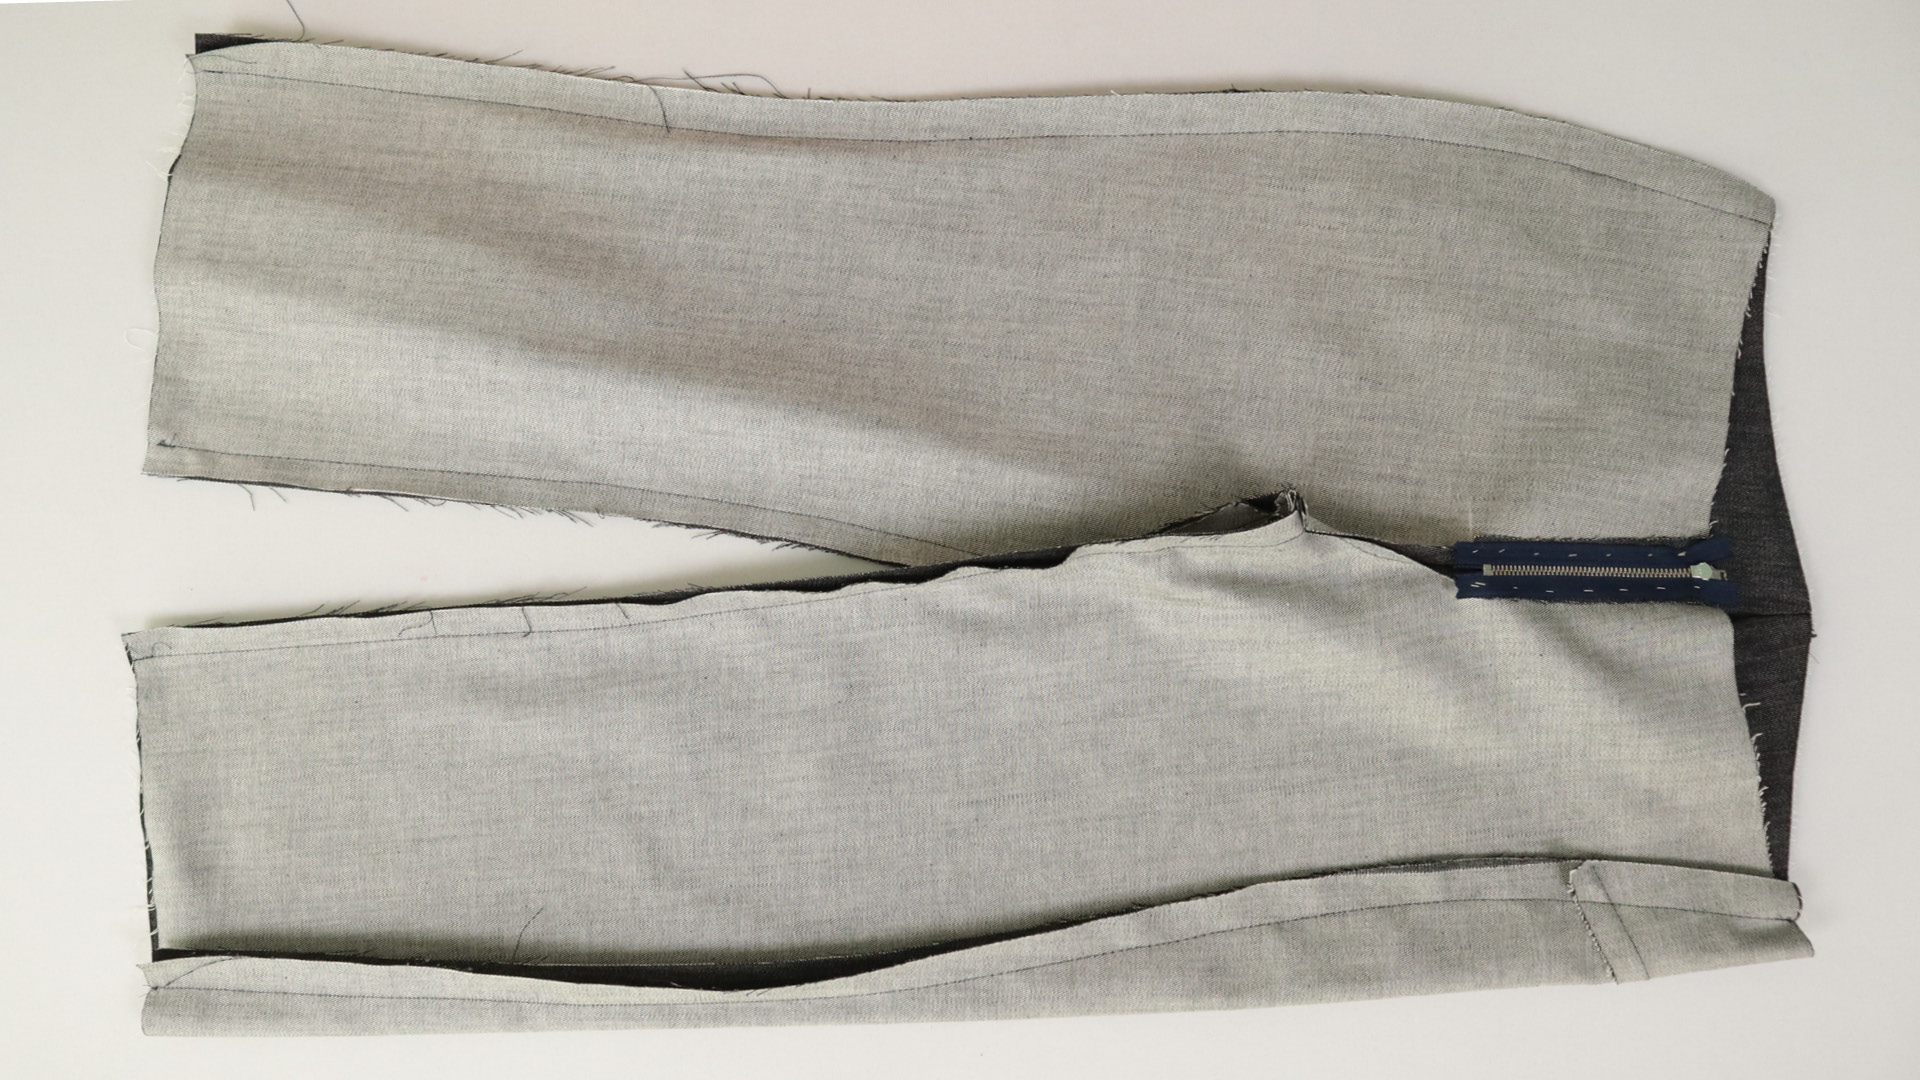
Then the outer and inner leg seams are also joined using a wide machine stitch or a hand-sewn basting stitch.
After that, the trousers can be turned right side out.
8. Sew on the hem
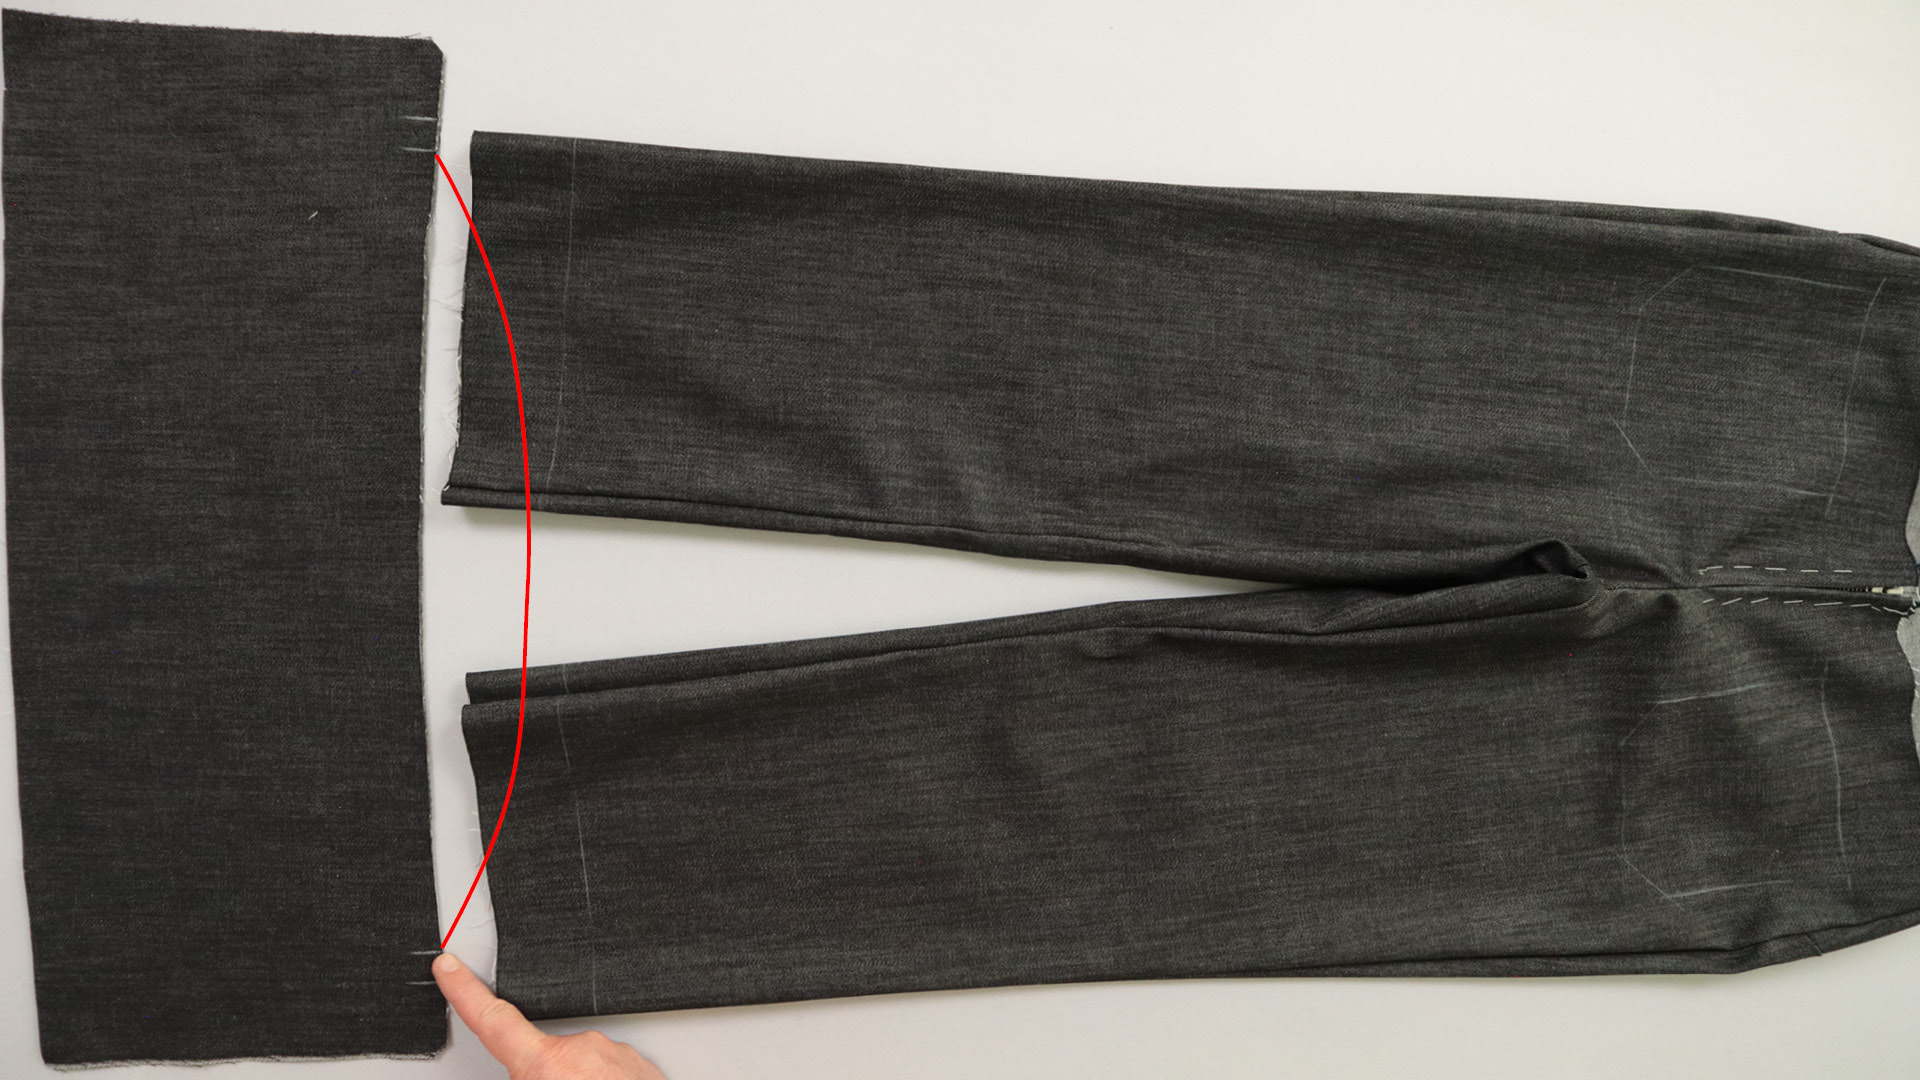
There are two notches at each end of the top edge of the hem pieces. The outer notches indicate where the edges of the slit will be folded over later. The inner notches mark where the ends of the hem piece will meet when joined to form a ring.
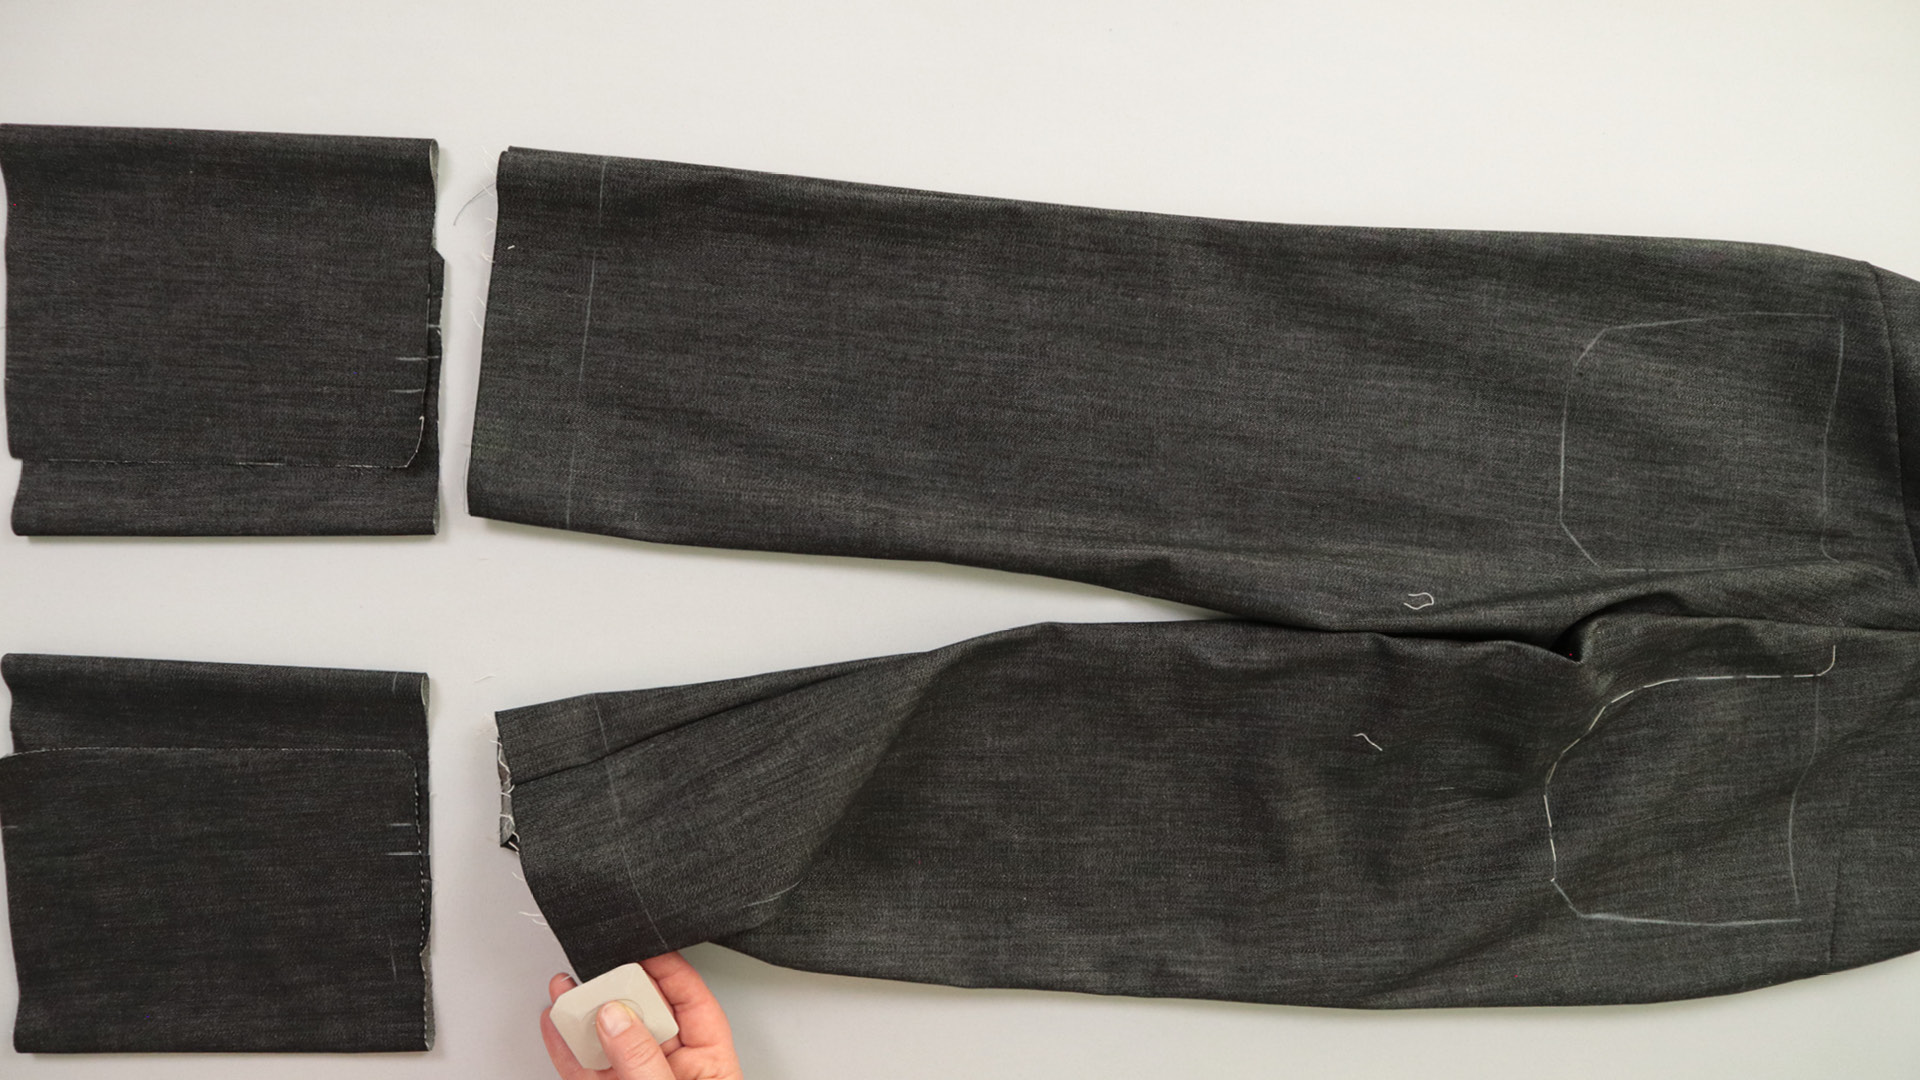
I’ve arranged the two hem pieces as mirror images of each other, with the ends overlapping to form a ring and the inner notches aligned.
I then mark the approximate position of the centre of the slit on each trouser leg. This allows me to see how the slit will look during the fitting.
You can position the slit at the centre front, centre back or side seam, for example.
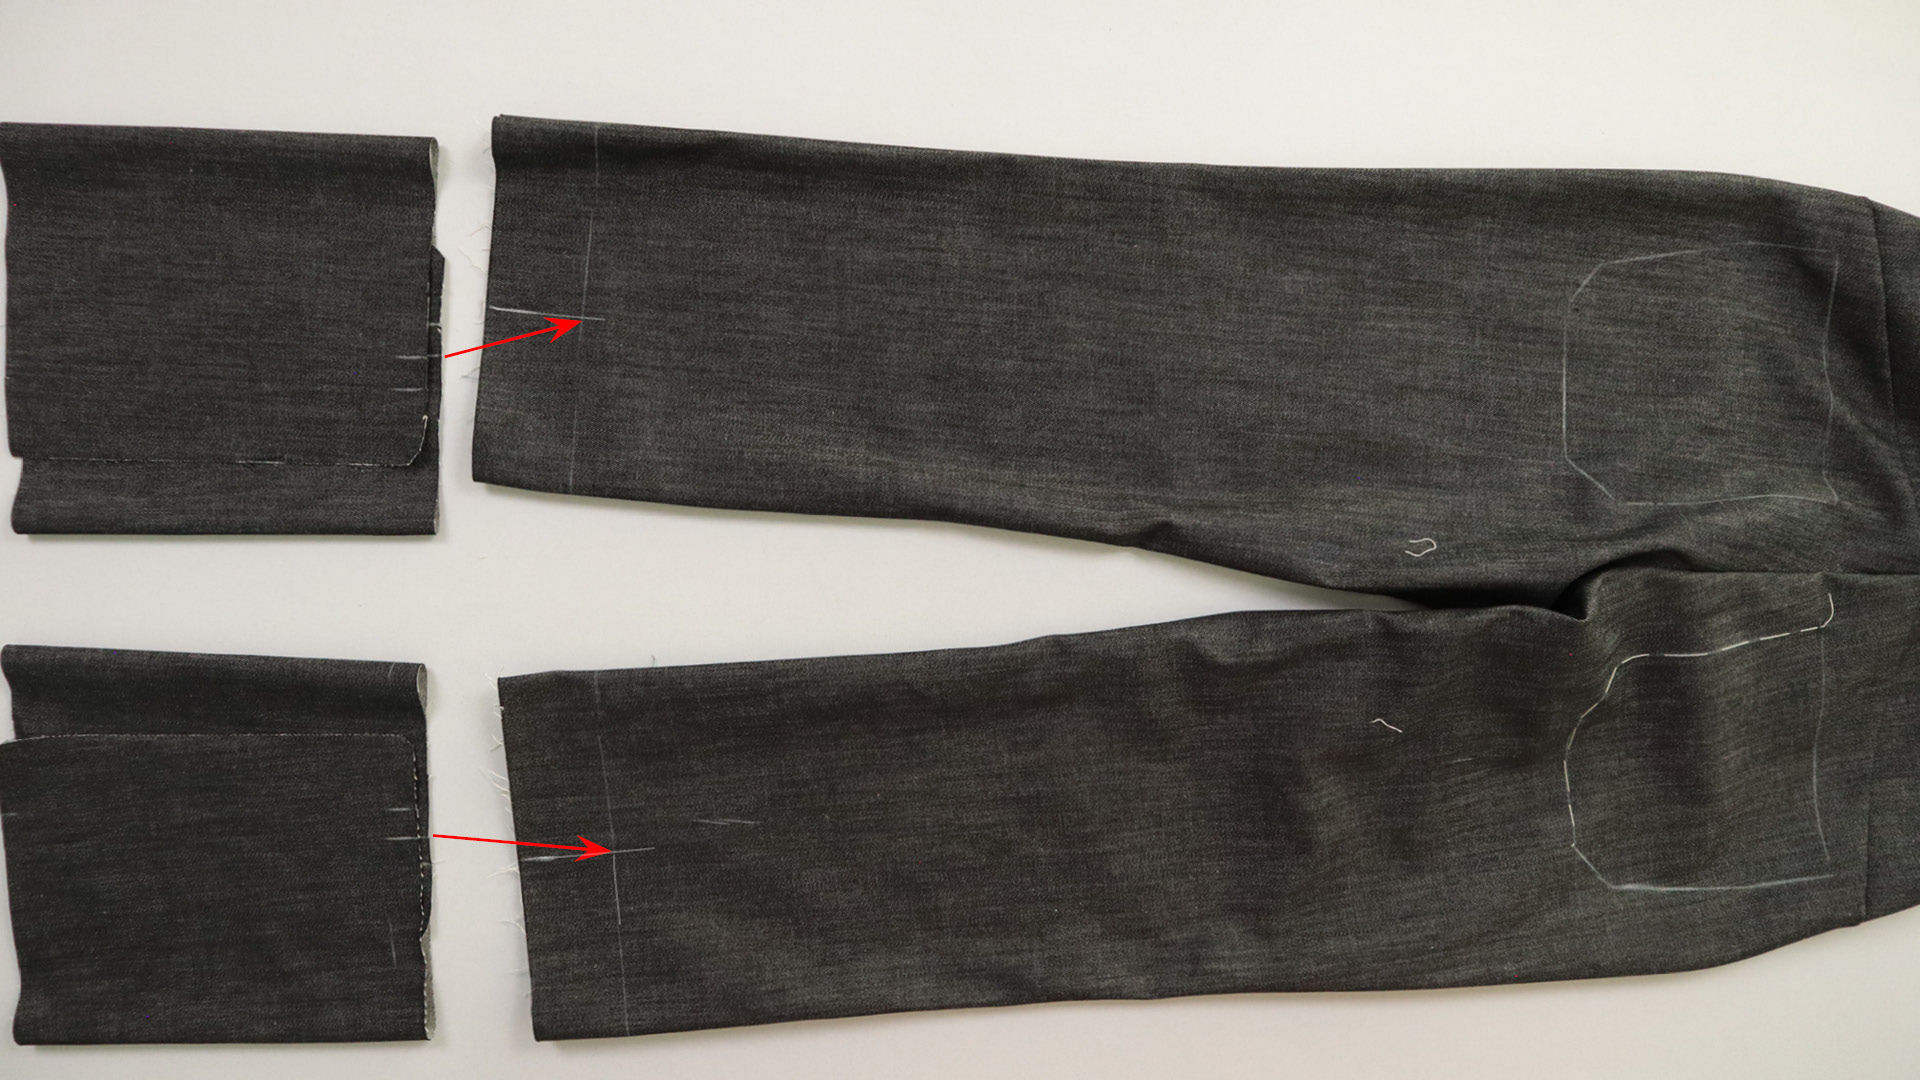
For the fitting, tack the hem to the trouser legs, aligning their top raw edges with the markings 5 cm above the bottom raw edges of the trouser legs.
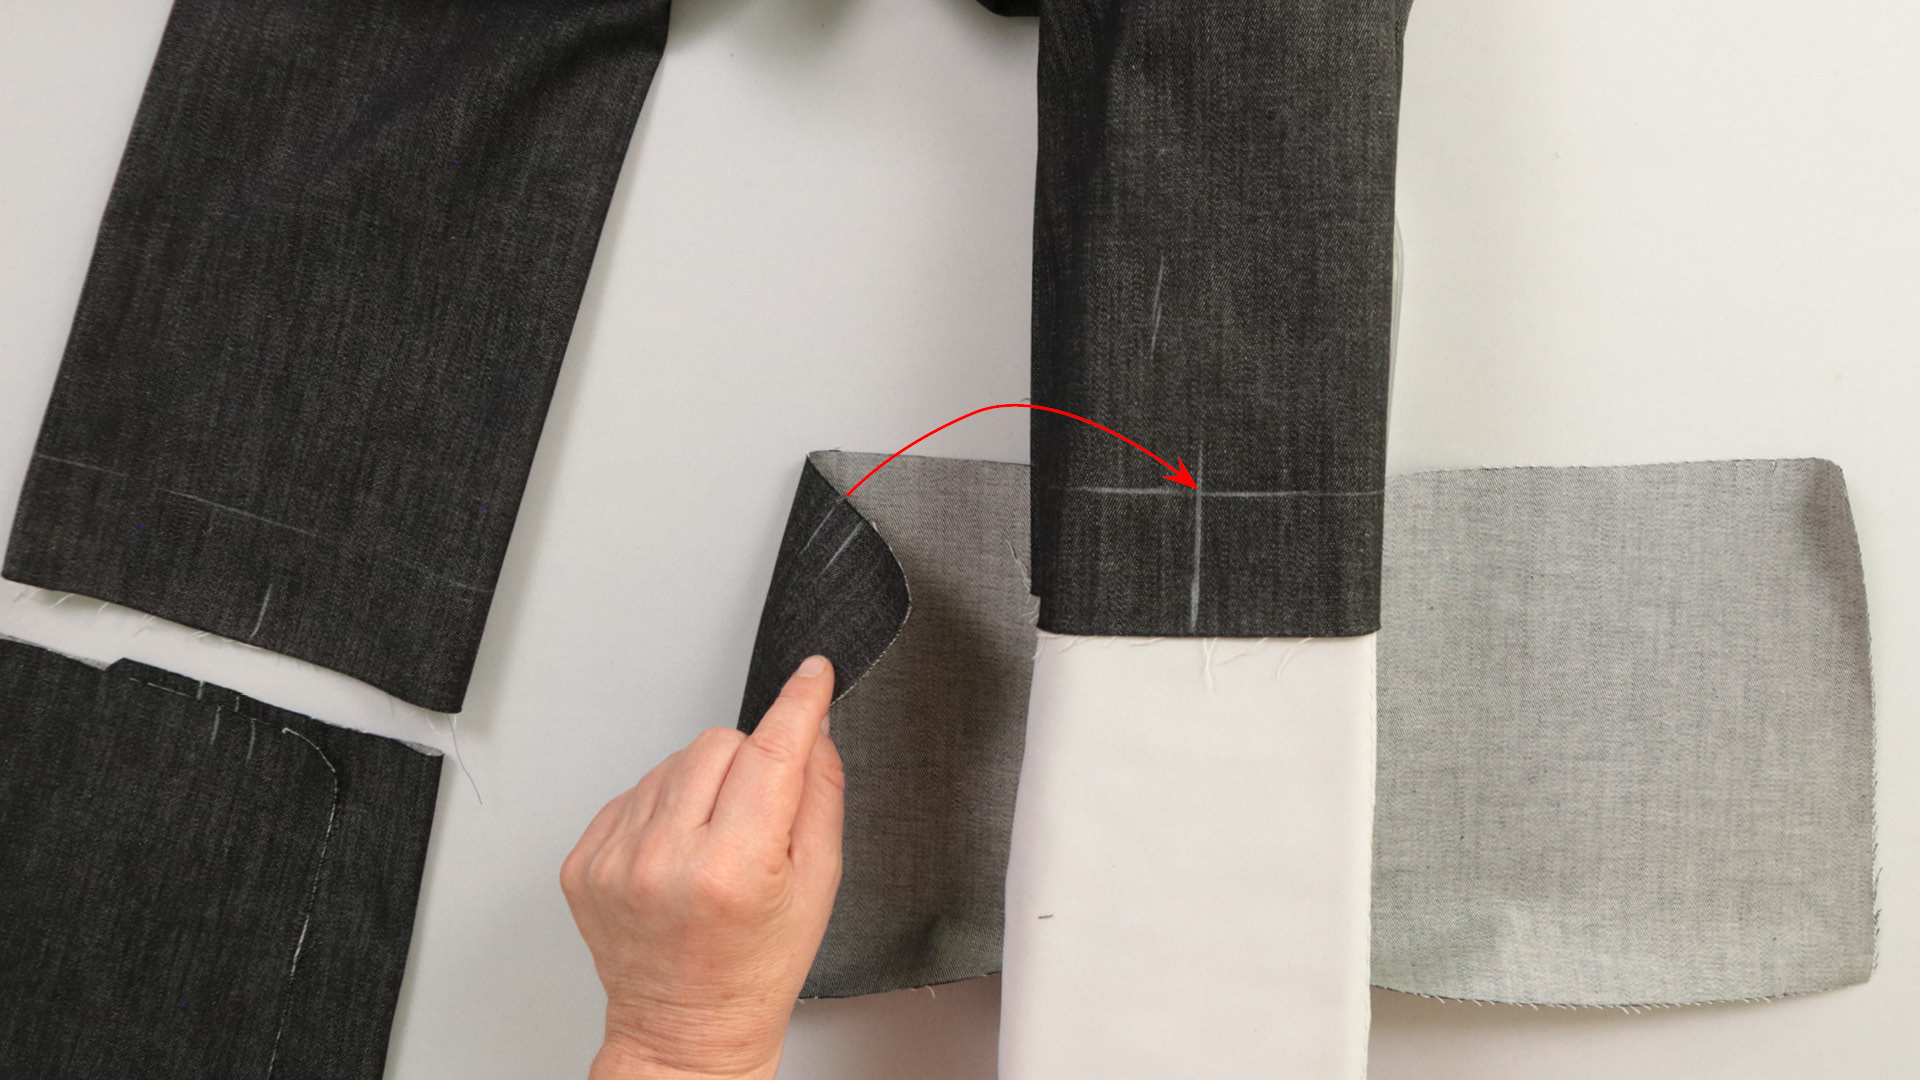
To pin the hem piece to the legs, I use my sleeve board and pull the leg over it.
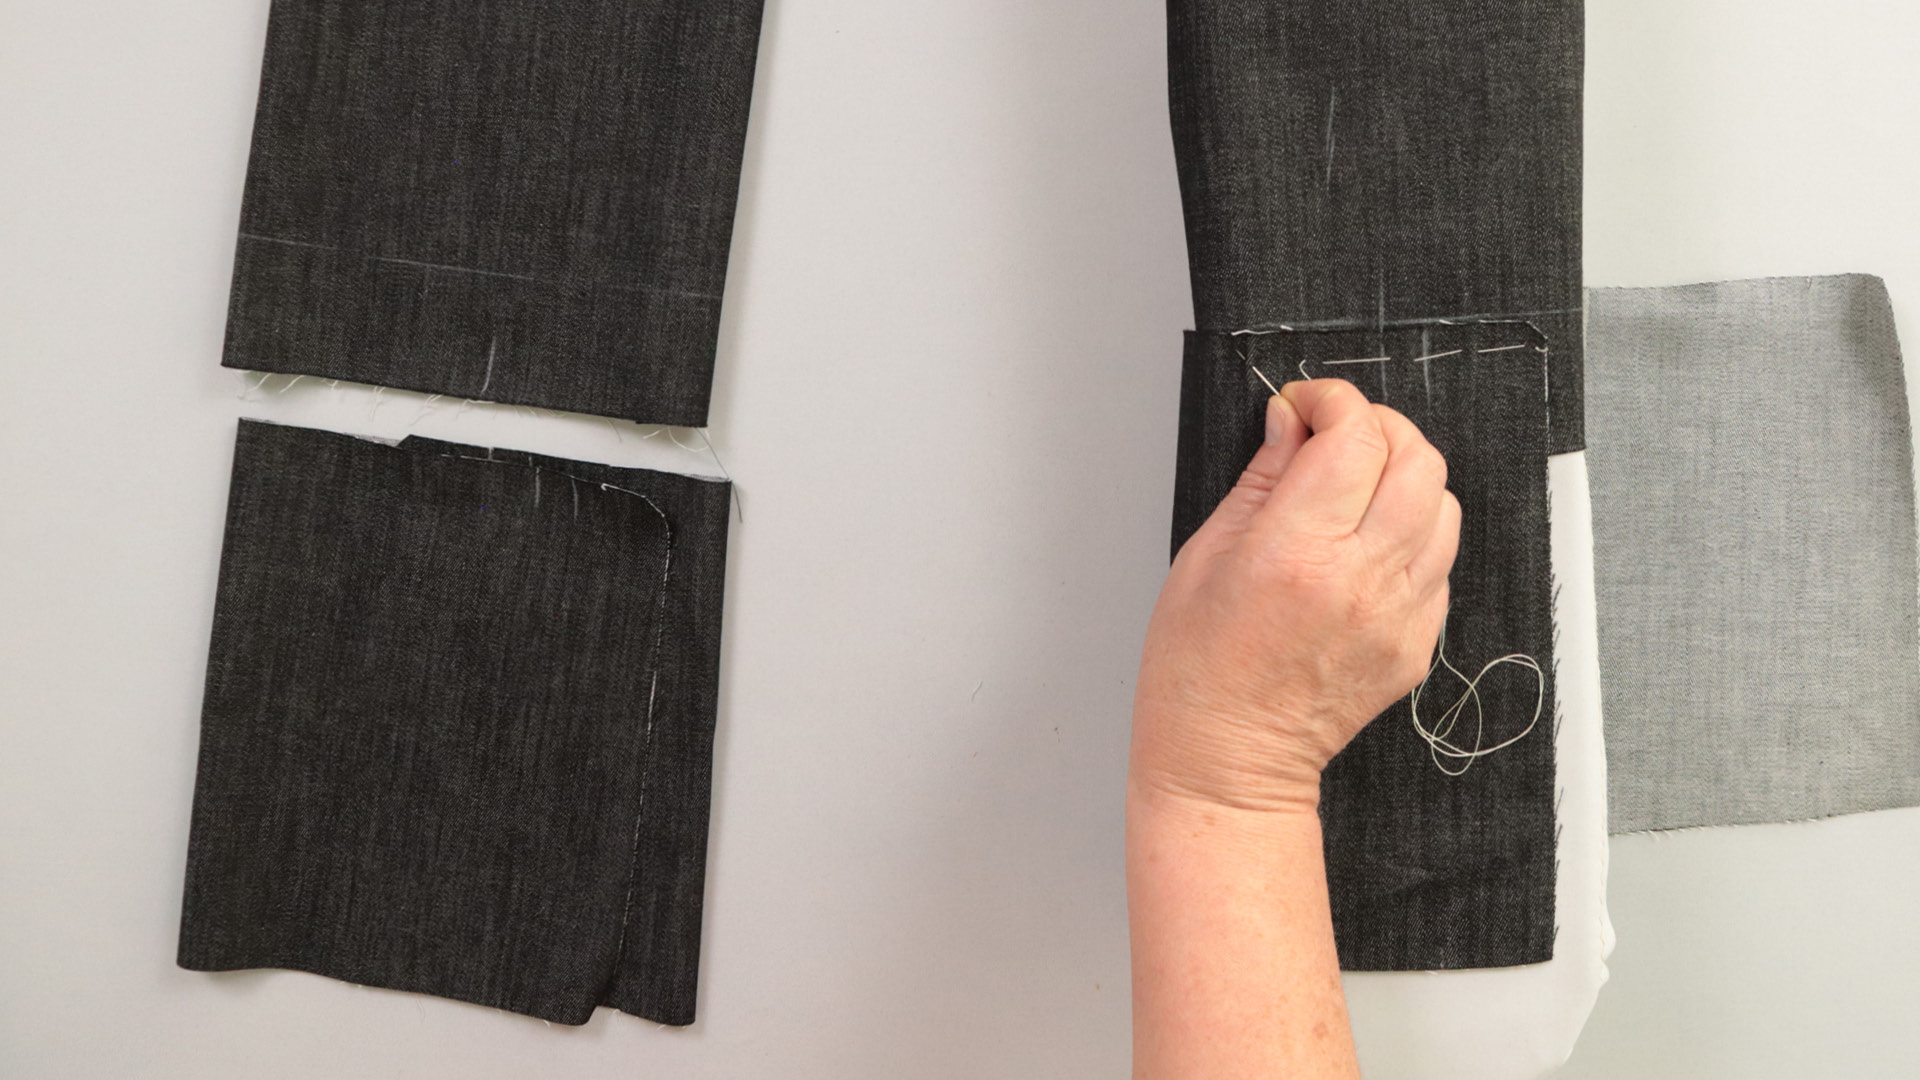
I align the hem band with the markings all the way around the trouser leg and pin it in place. To avoid accidentally piercing the fabric cover of the sleeve board, you can place a ruler or something similar underneath.
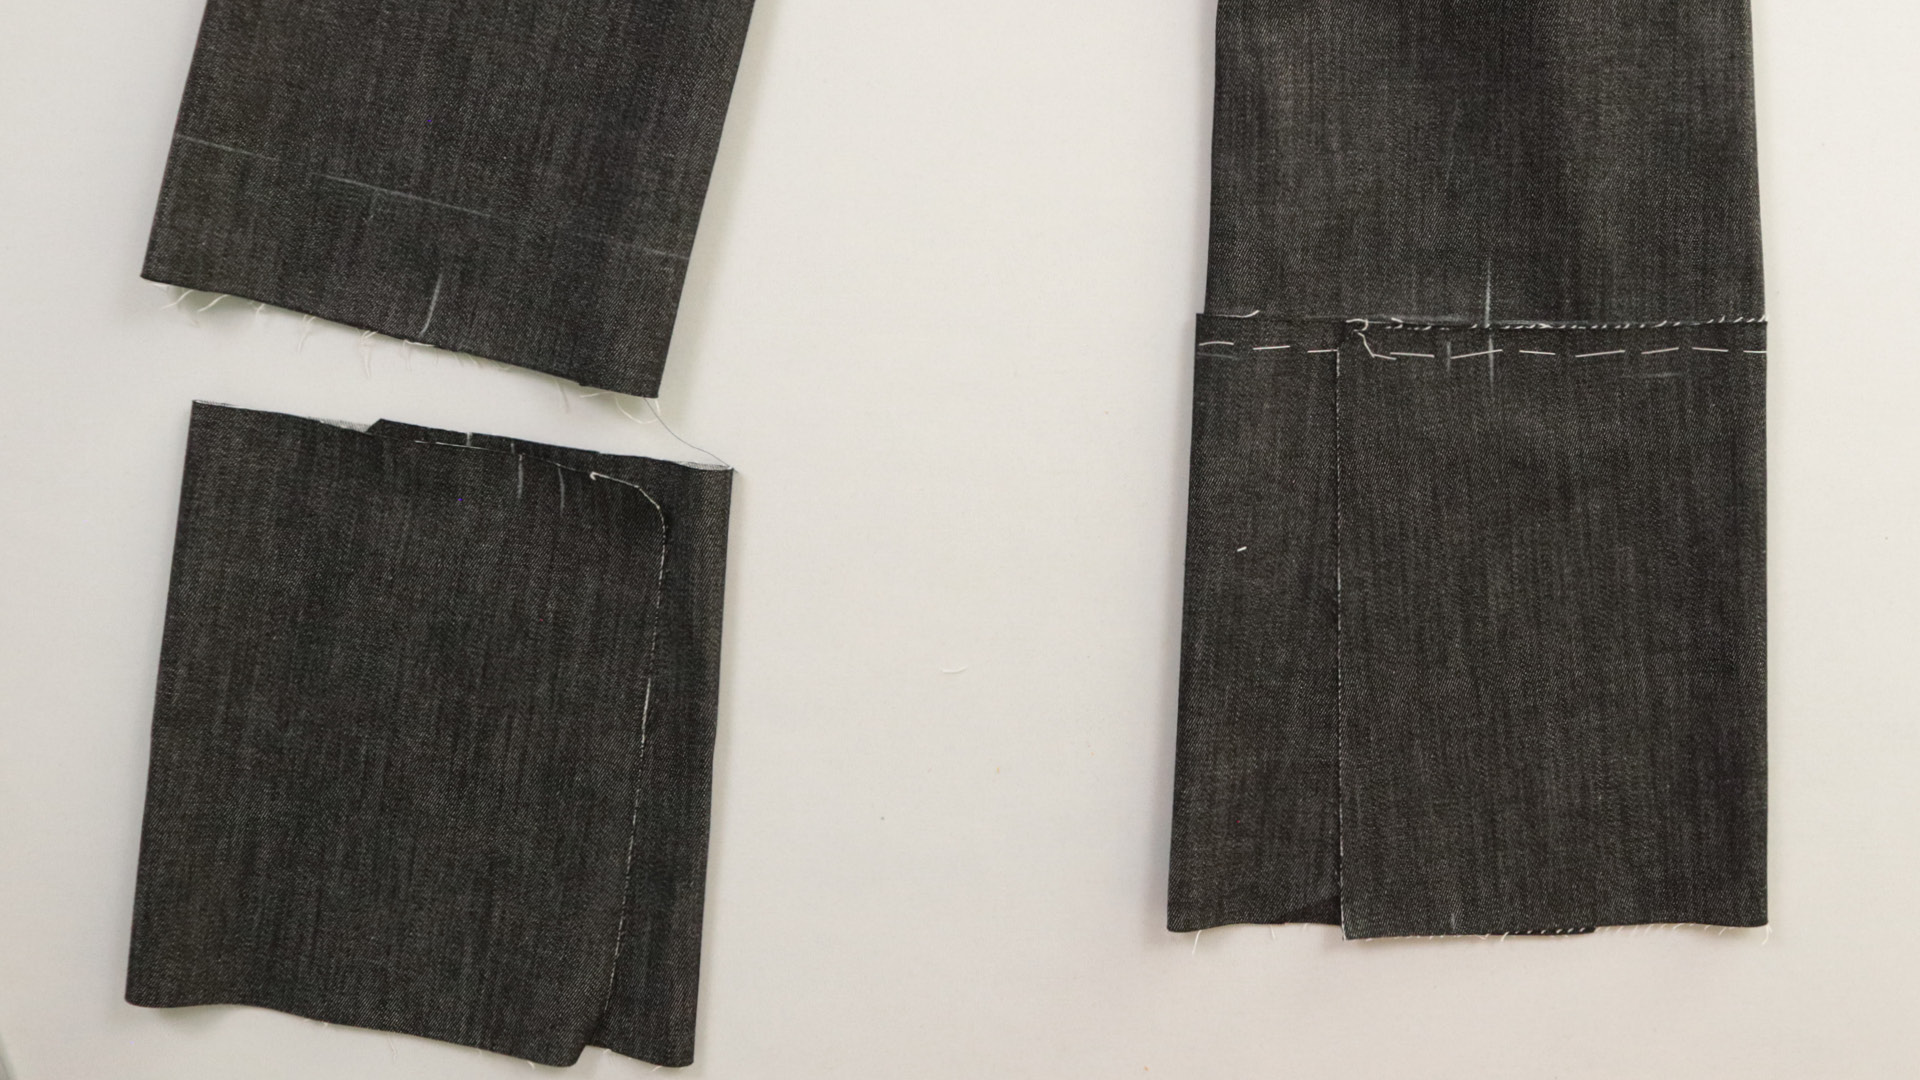
This is what it looks like when a hem piece is tacked to a trouser leg.
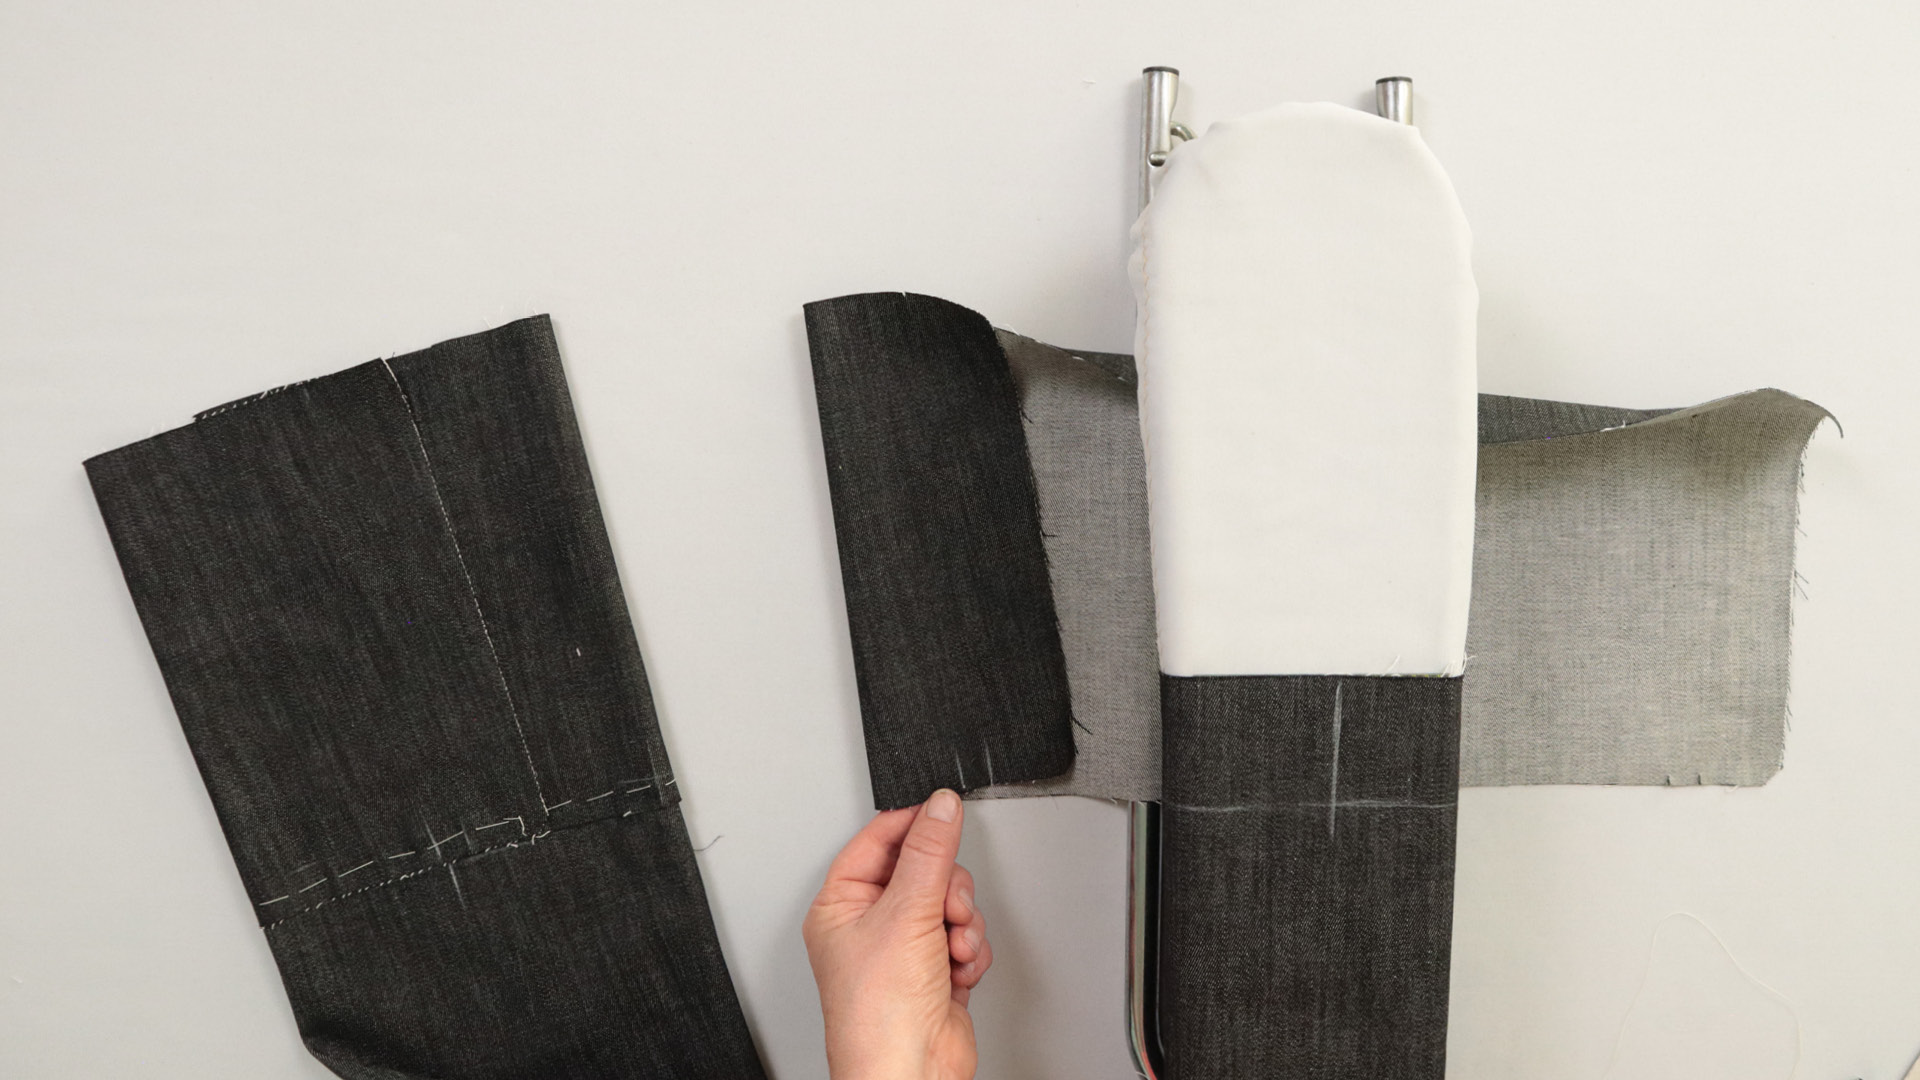
On the second trouser leg, I repeat the steps in reverse.
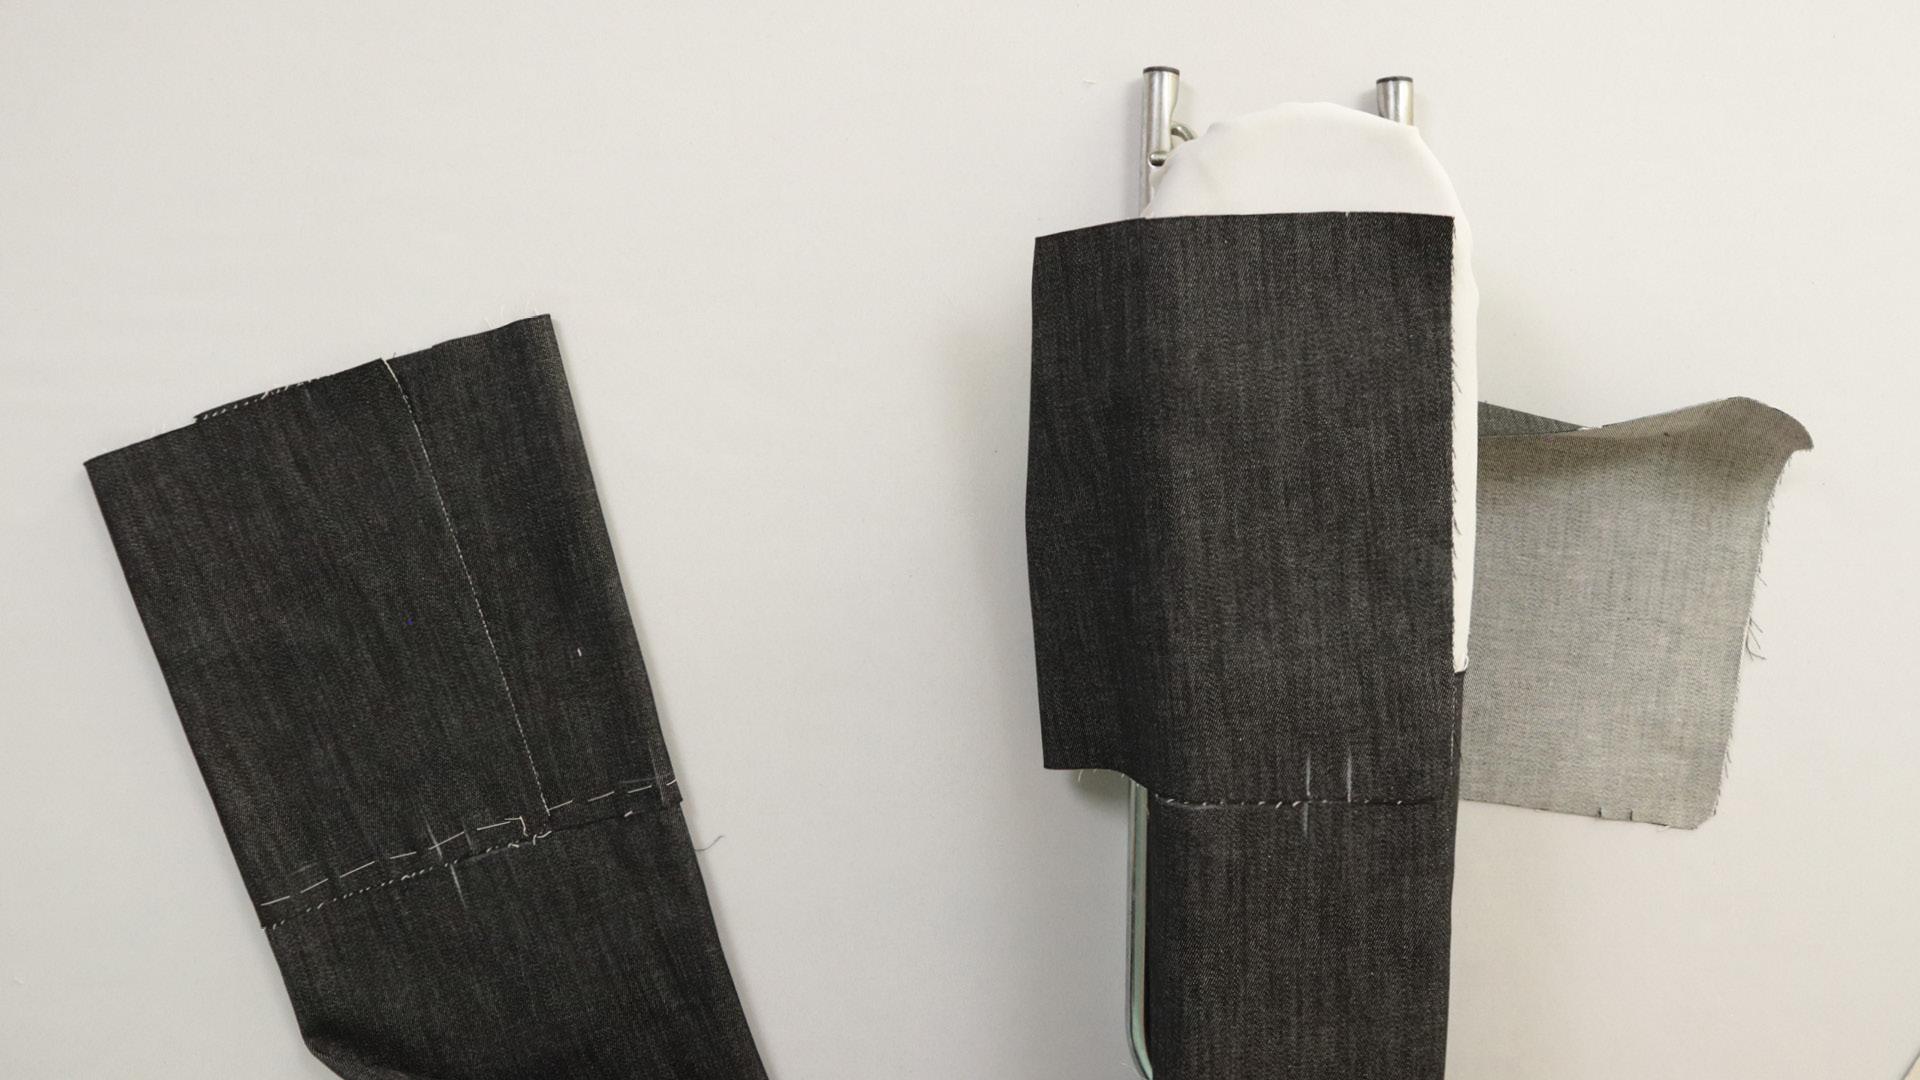
Here you can already see that, on the second trouser leg, the other side of the hem piece will be at the top of the slit.
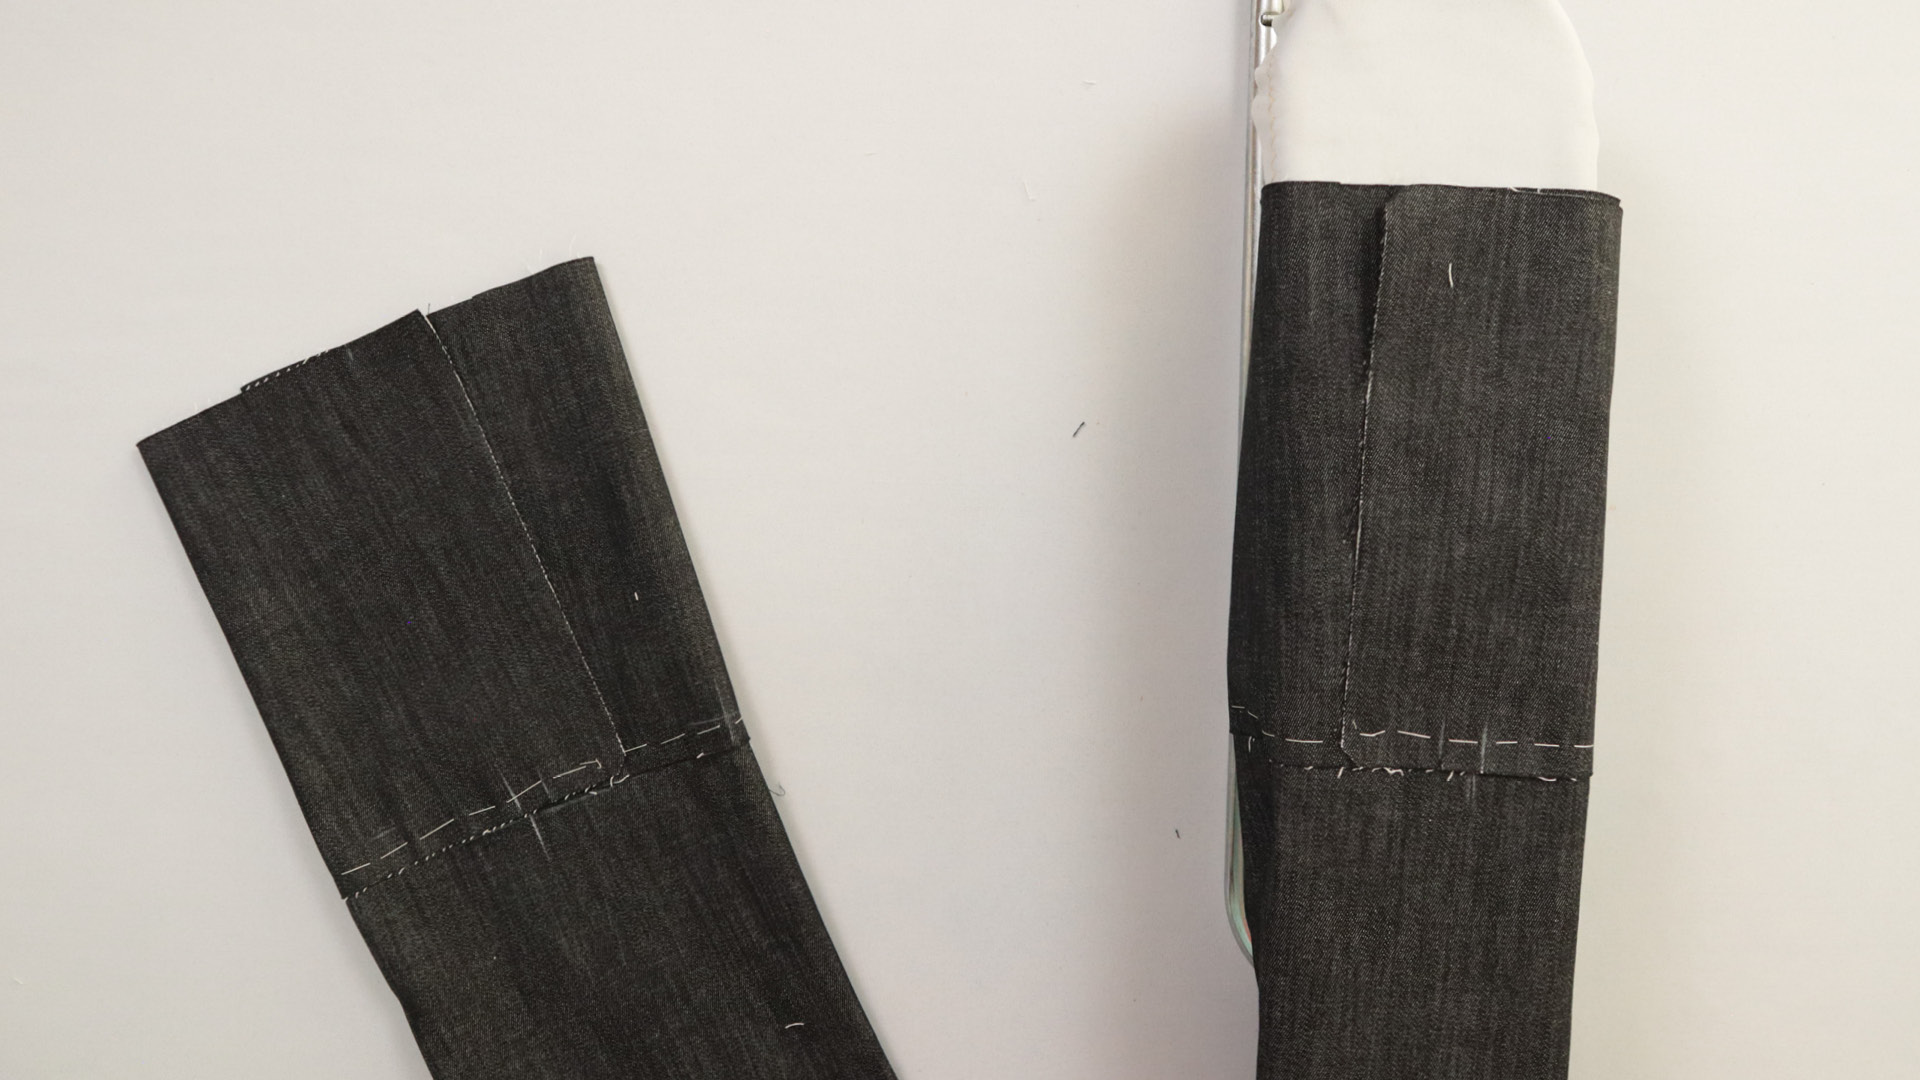
I then tack the second hem piece all the way around the trouser leg as well.
9. Prepare the waistband
It’s important to attach the waistband before trying on the trousers. Without it, the trousers would appear much too loose, especially if you’re using a contoured waistband. It would also be difficult to judge whether the trousers sit at the correct height during the fitting.
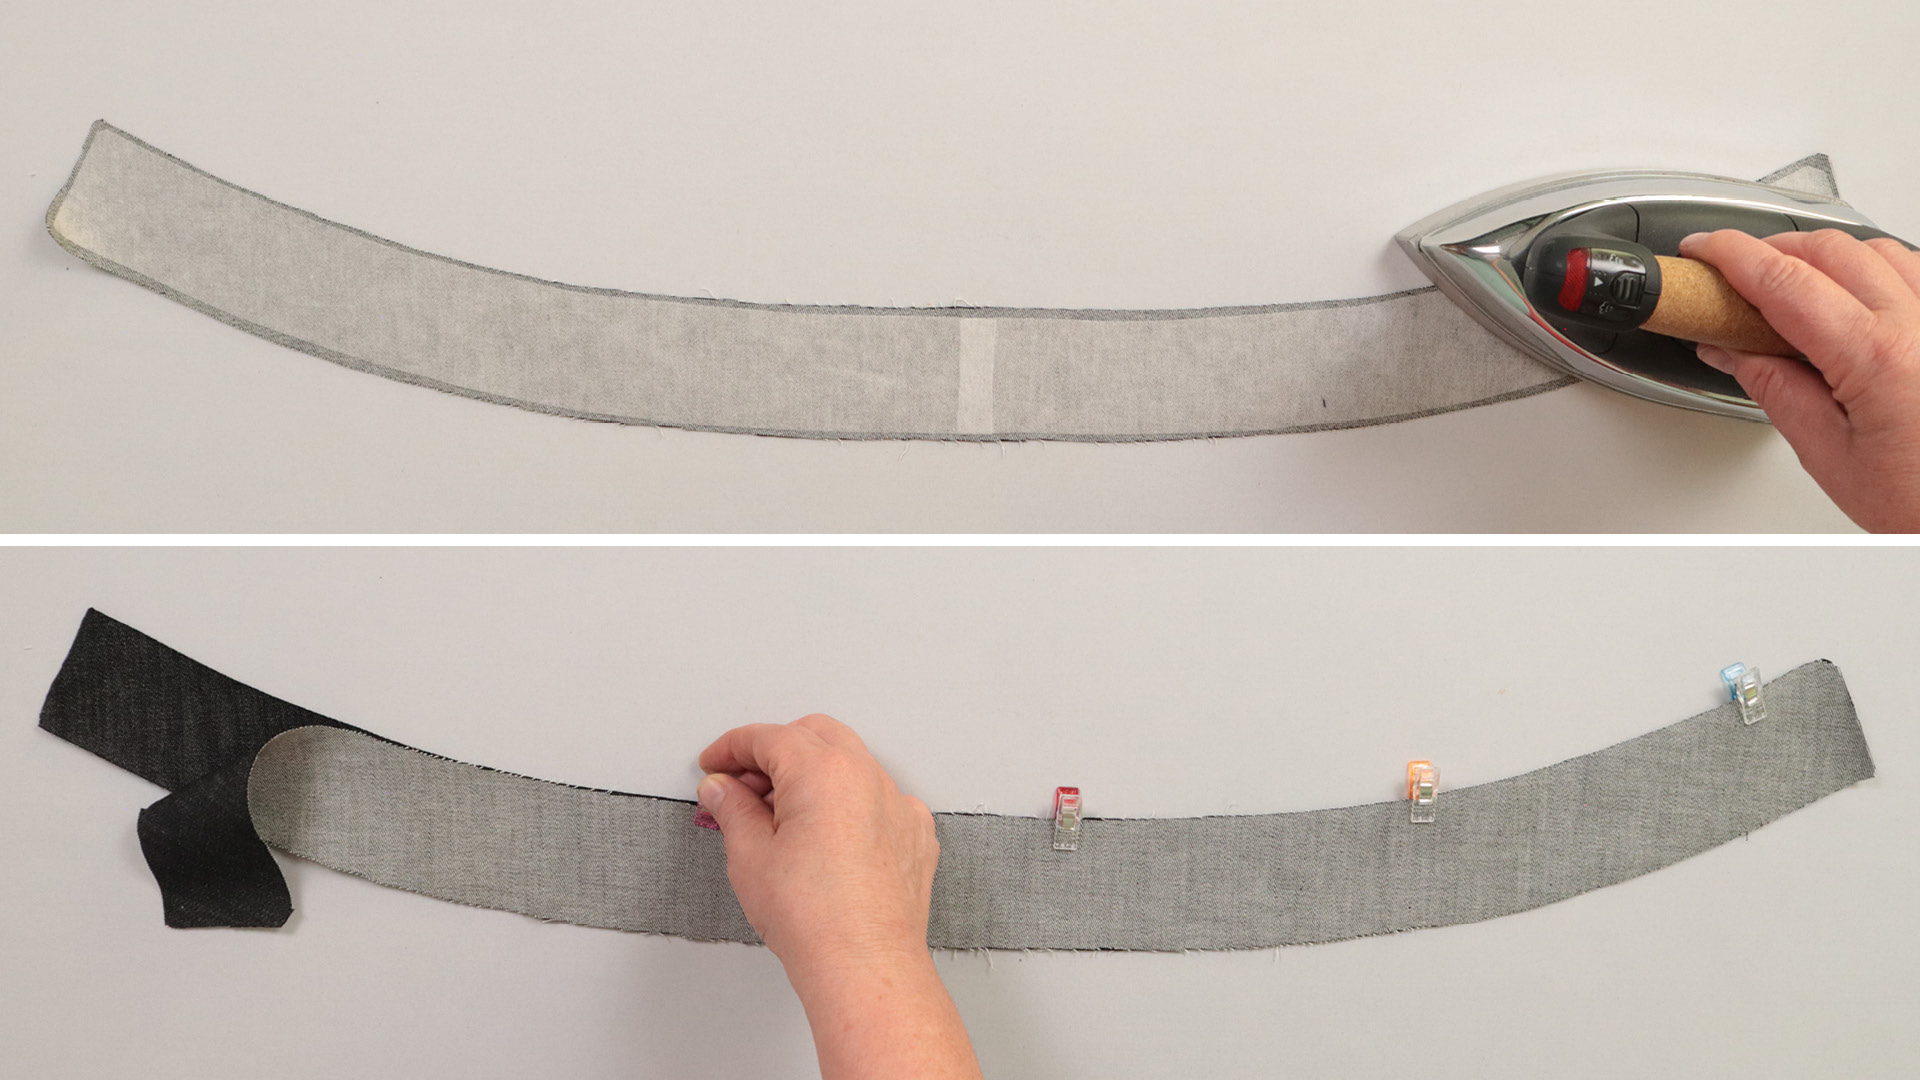
Before I can attach the waistband to the trousers, I need to prepare it. This means bringing forward a step from the waistband construction instructions.
I lay one of the waistband pieces in front of me, wrong side up, and fuse the interfacing to it. This will later form the outer waistband.
I’ve cut the interfacing in two pieces because it’s usually not wide enough to cut on the fold. The two pieces overlap slightly at the centre back.
Follow the manufacturer’s instructions for the temperature and pressing time when applying the fusible interfacing.
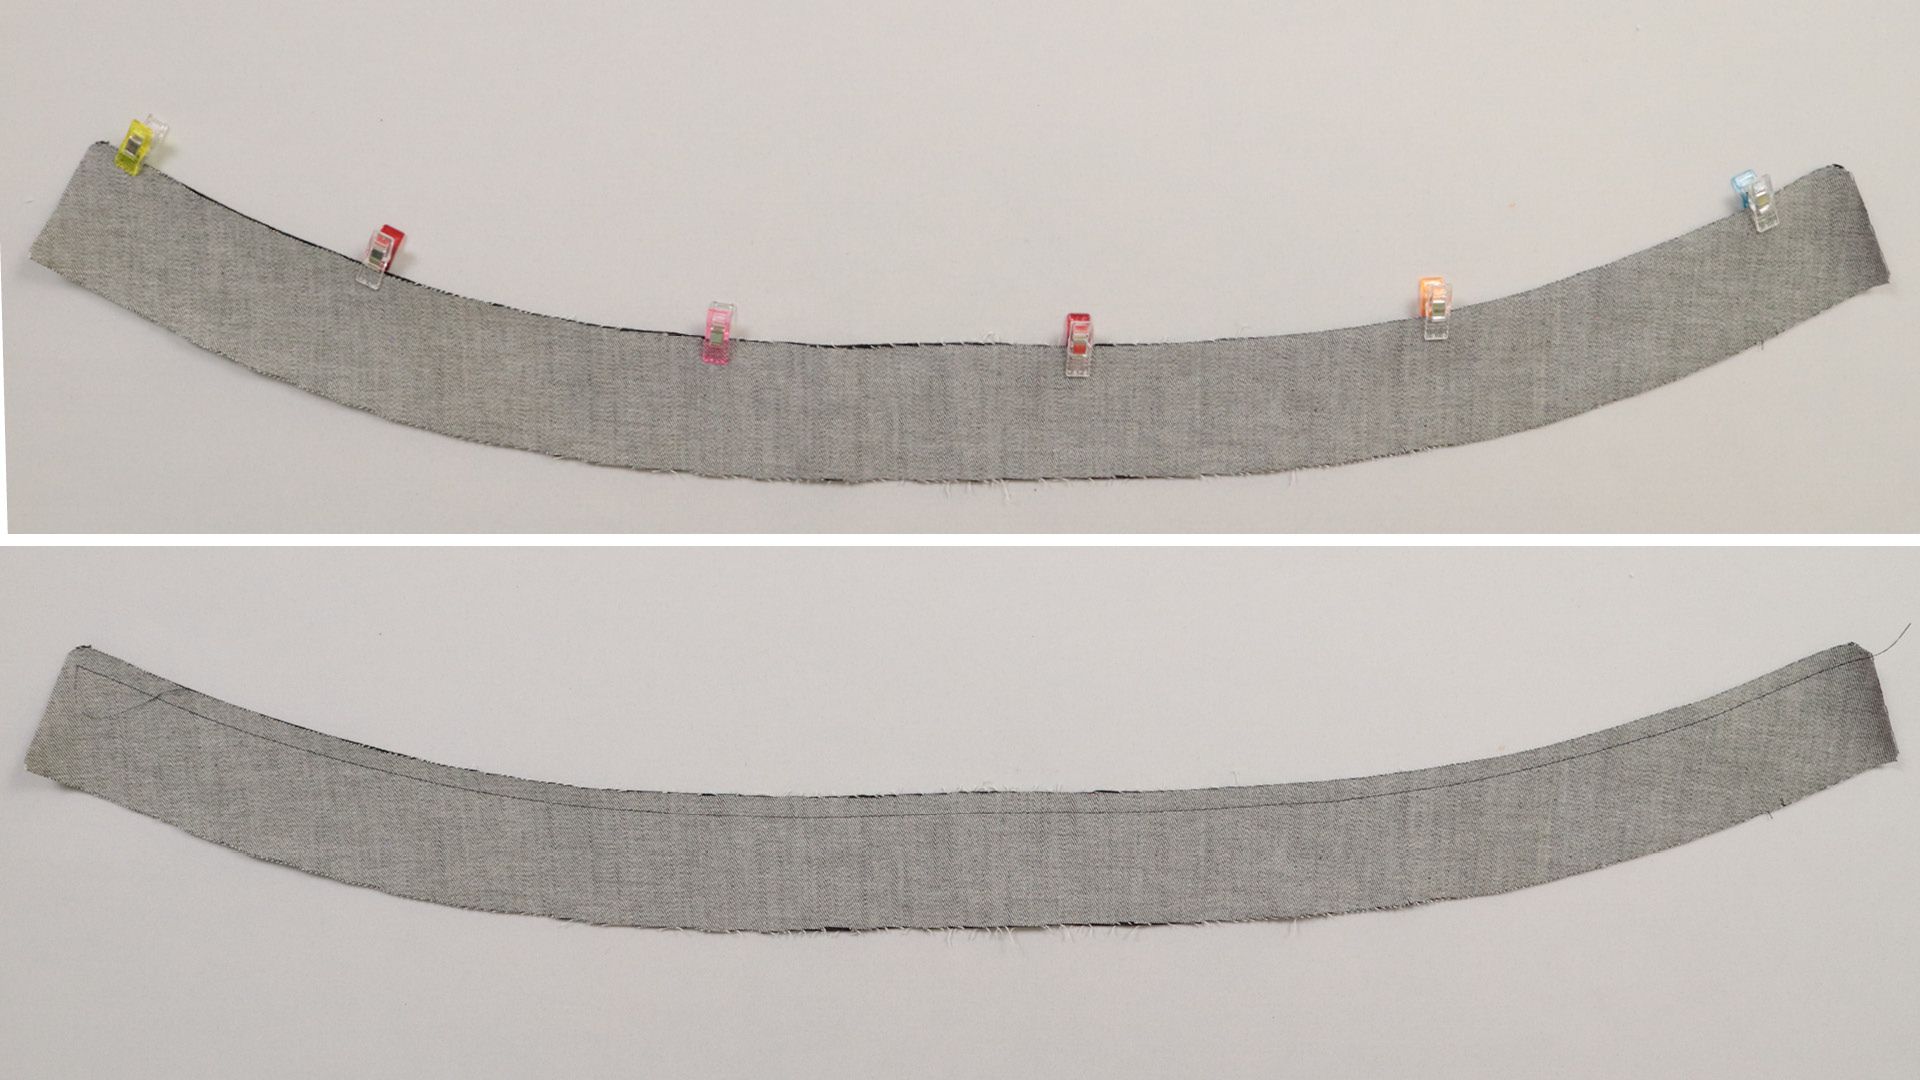
I place the waistband pieces right sides together and pin them along the top edge. On a contoured waistband, the top edge is shorter than the bottom edge. You can also tell by the angled corners at the narrow ends.
Since this seam along the top edge won’t be completely unpicked, I sew it together with a 1 cm seam allowance and a normal stitch length. I start and end about 1.5 cm from the long edges. I don’t backstitch at the beginning or end of the seam, since I’ll need to unpick a short section later – depending on how the corners are finished.
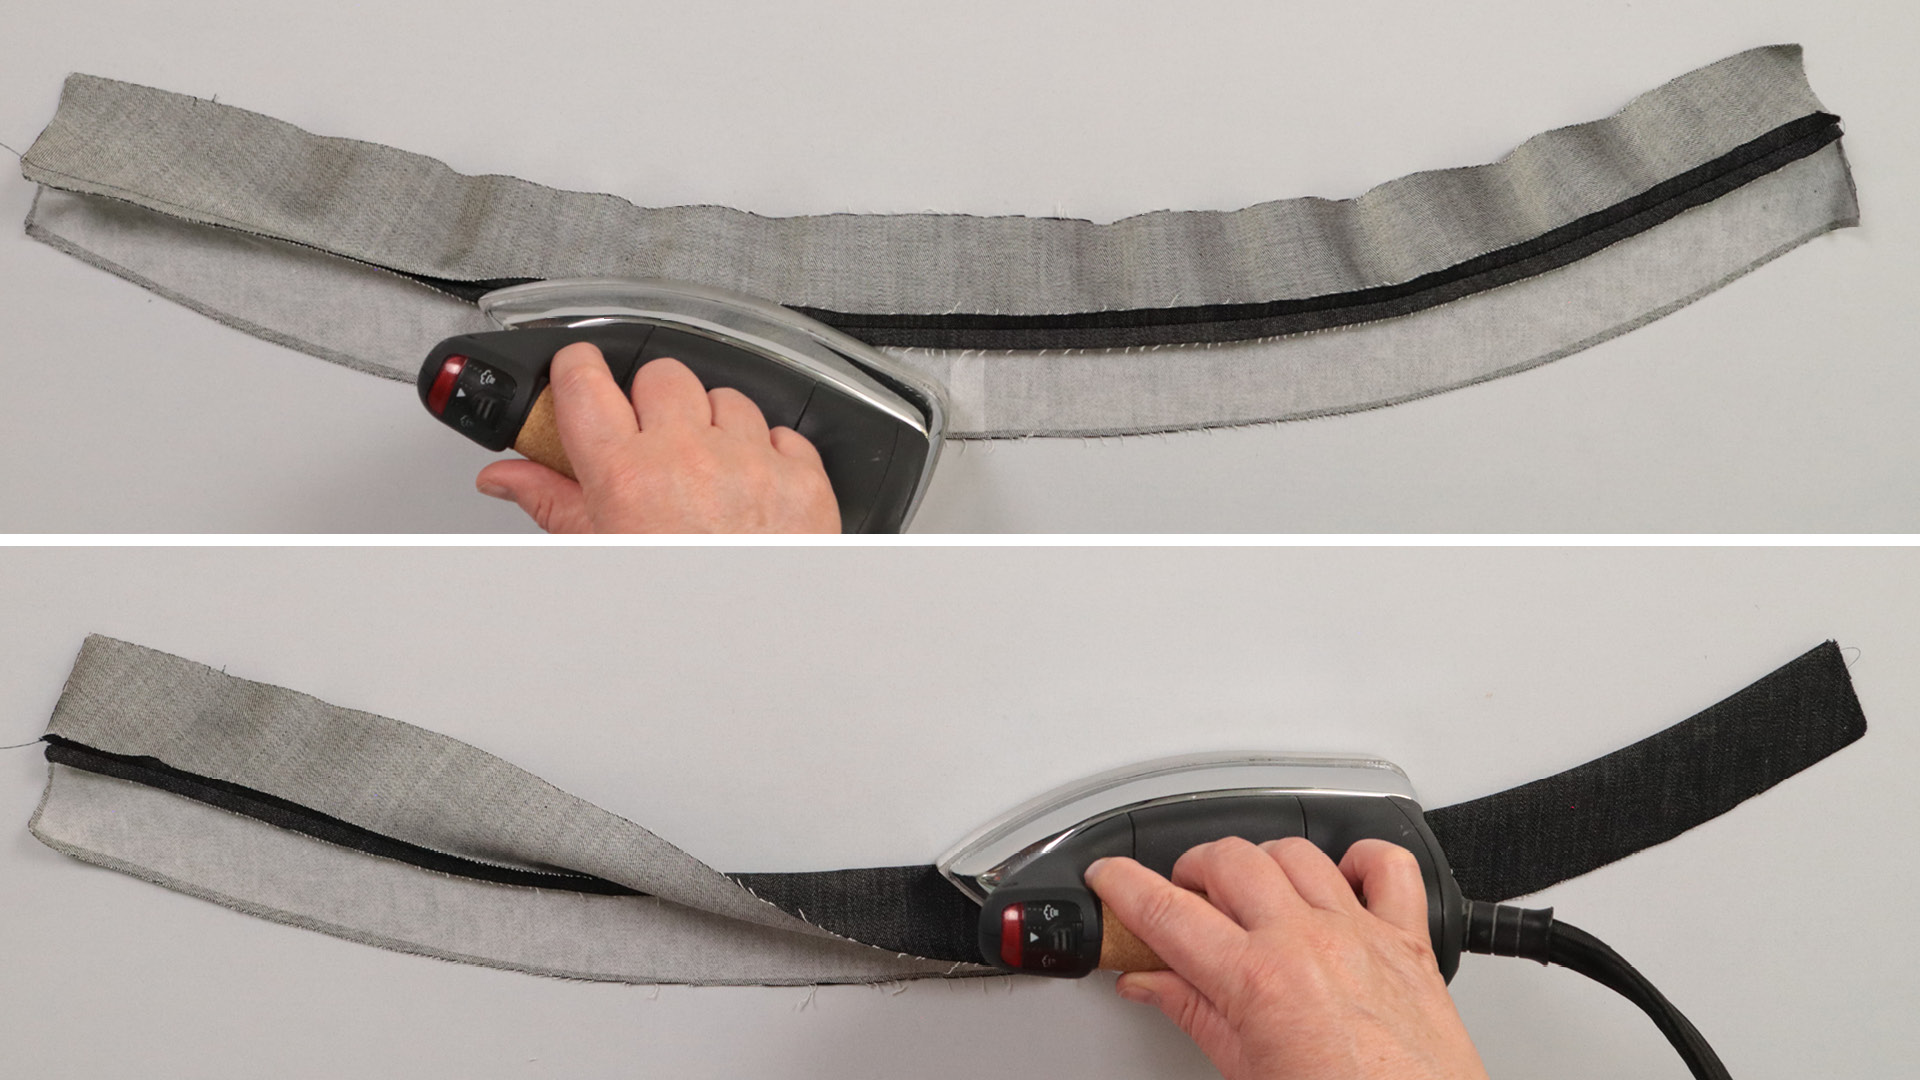
Press the seam allowances apart.
Then I turn the waistband right side out and press the seam flat, making sure that the inner waistband rolls slightly towards the inside and isn’t visible from the outside.
Transfer/check notches
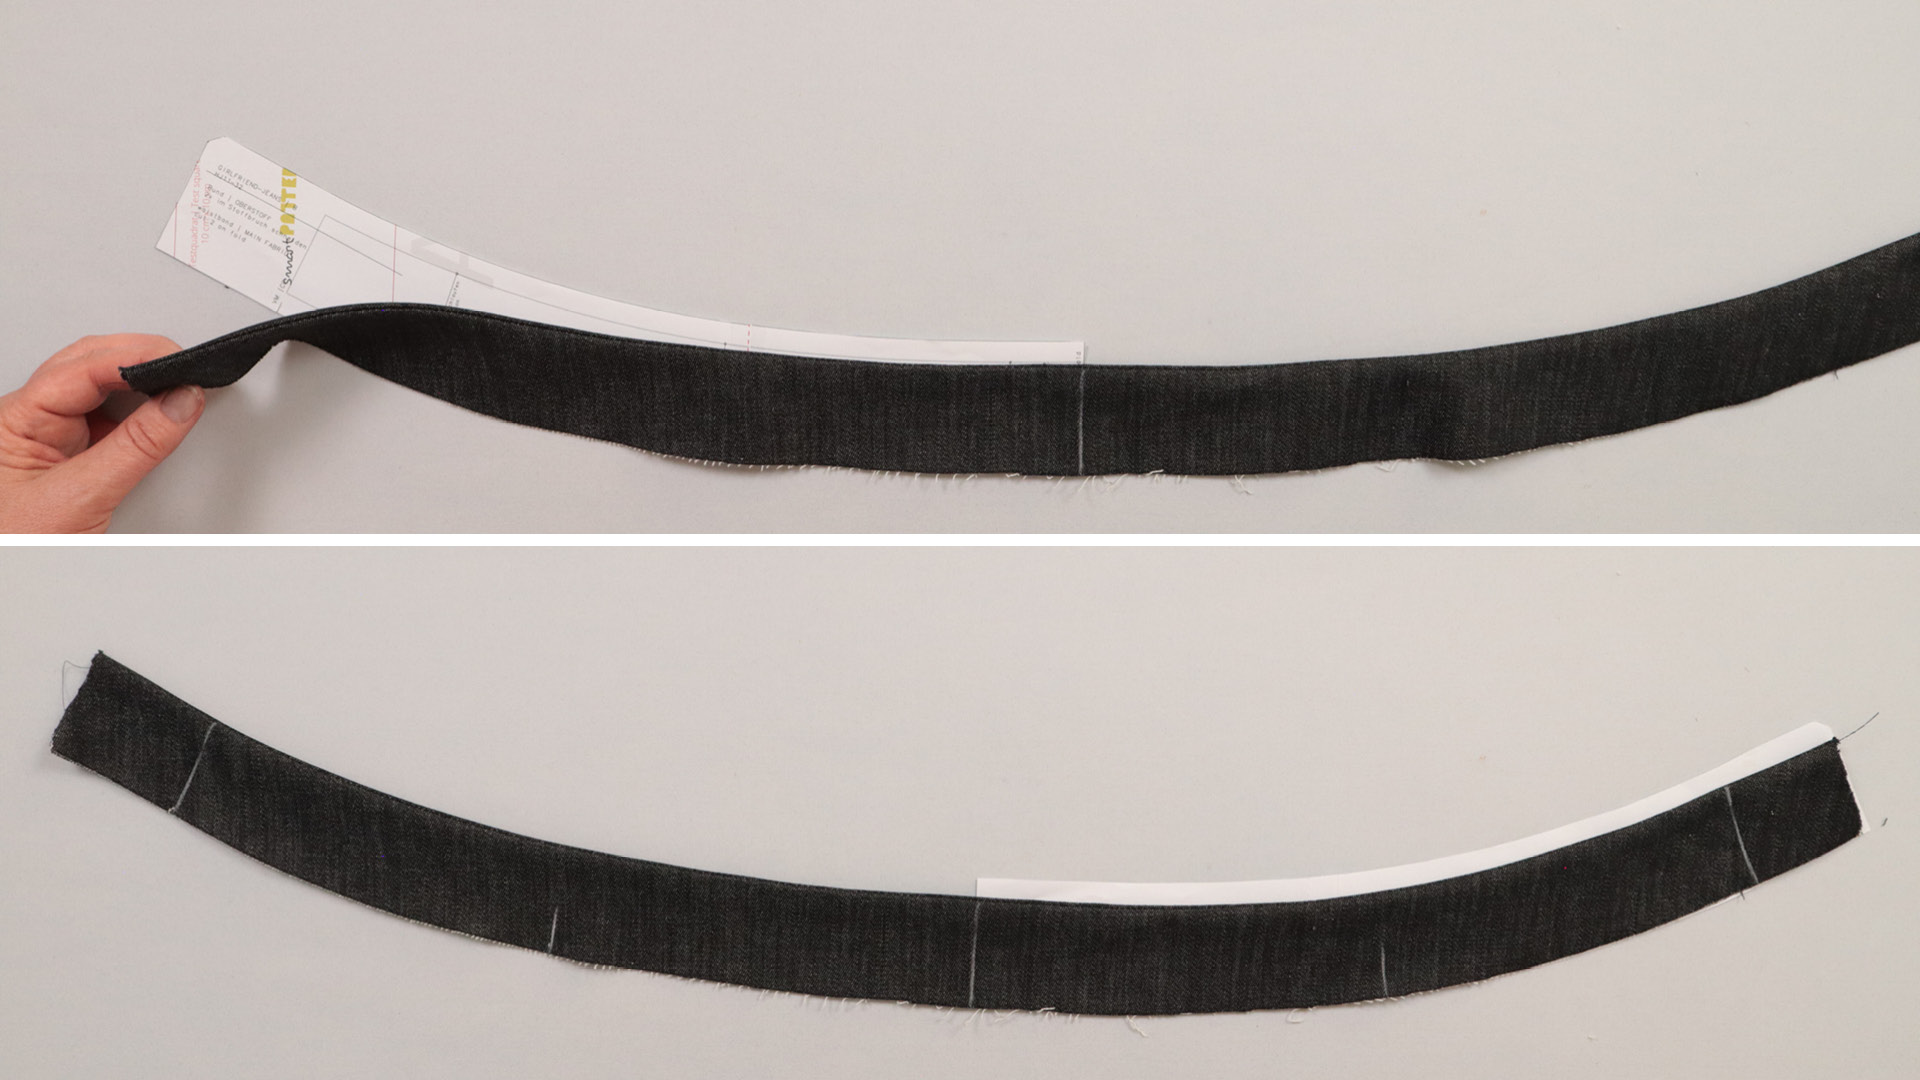
If you haven’t already done so while cutting out the pieces, you’ll now need to mark the notches for the centre back, the side seam, and the centre front on the outside of the waistband. This is also a good opportunity to check whether the waistband is still the same length as the pattern piece.
Pressing on the interfacing and sewing may cause the waistband to stretch or shrink slightly. Therefore, if you’ve already marked the notches when cutting out the pieces, you should check their position again at this point.
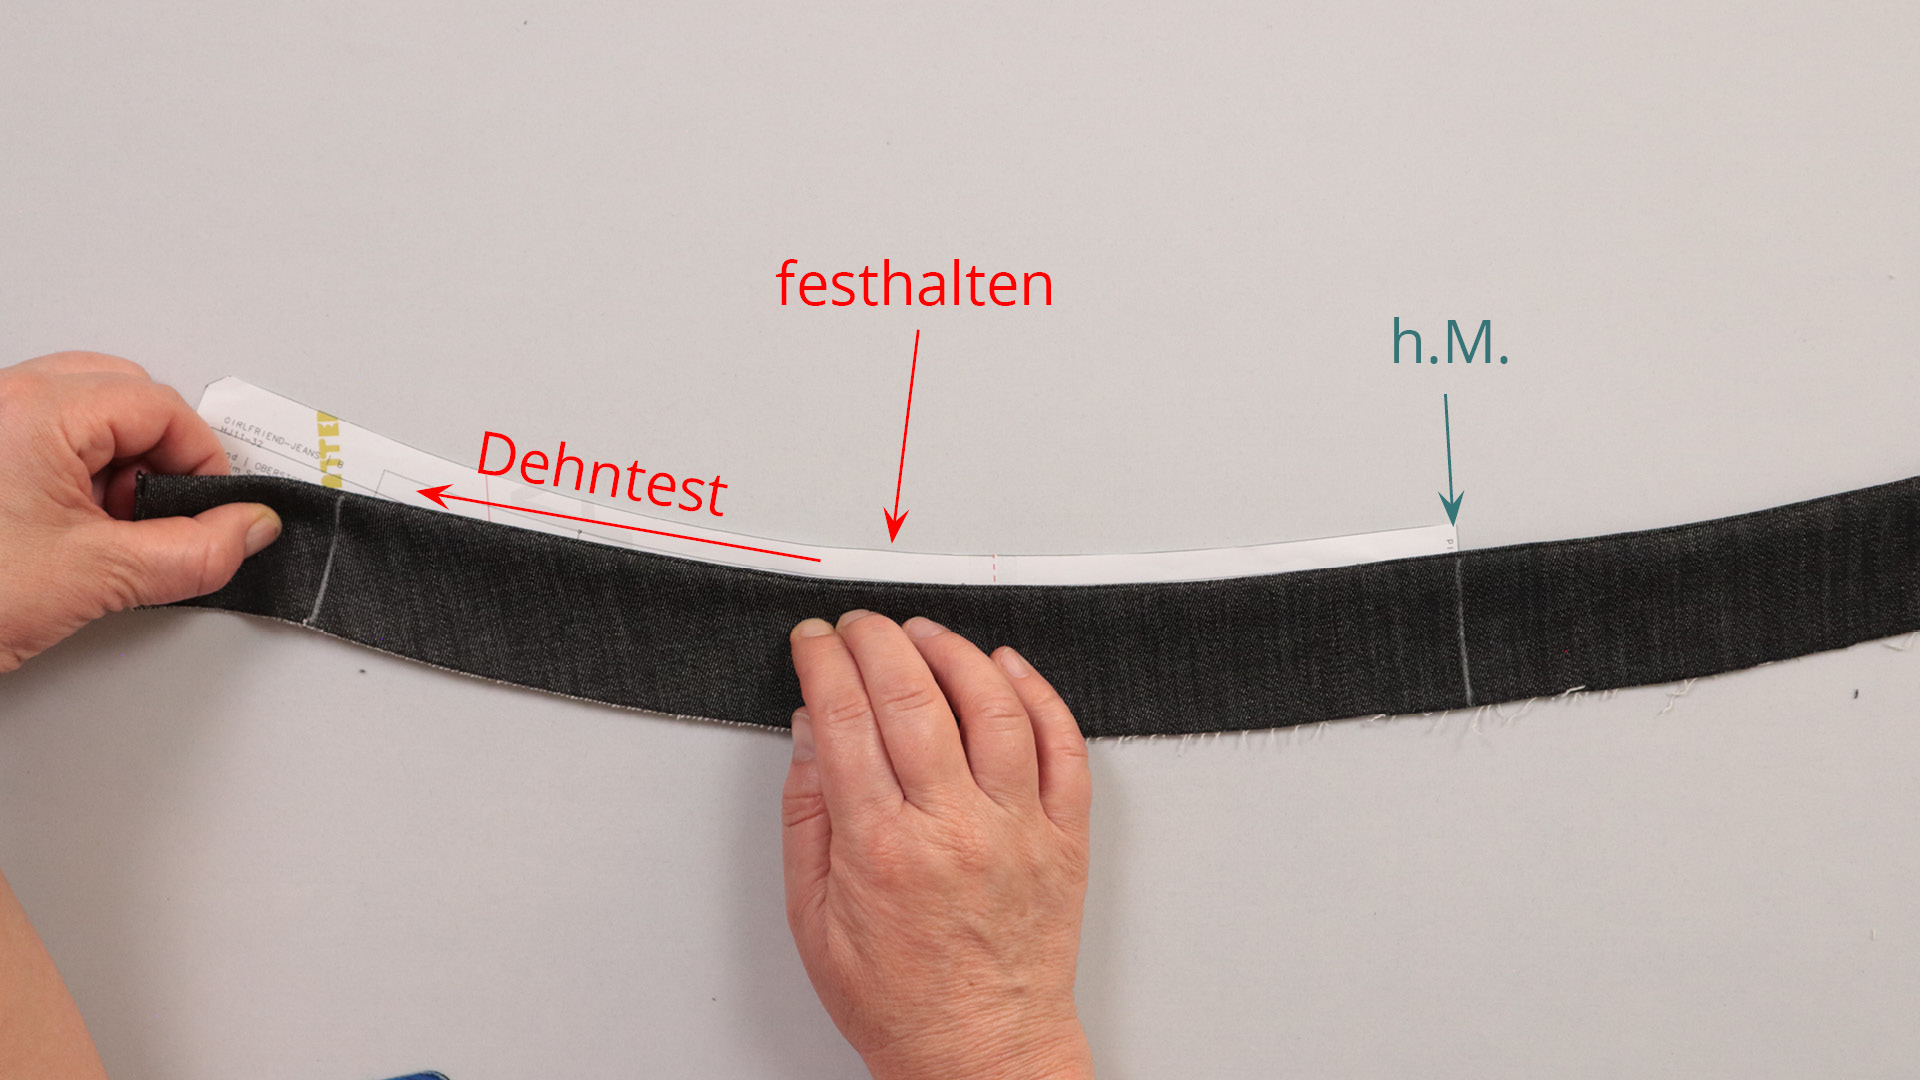
With a shaped waistband, I also check whether the seam in the front section – where the fabric runs on the bias – is still stretchy.
10. Pin the waistband to the trousers
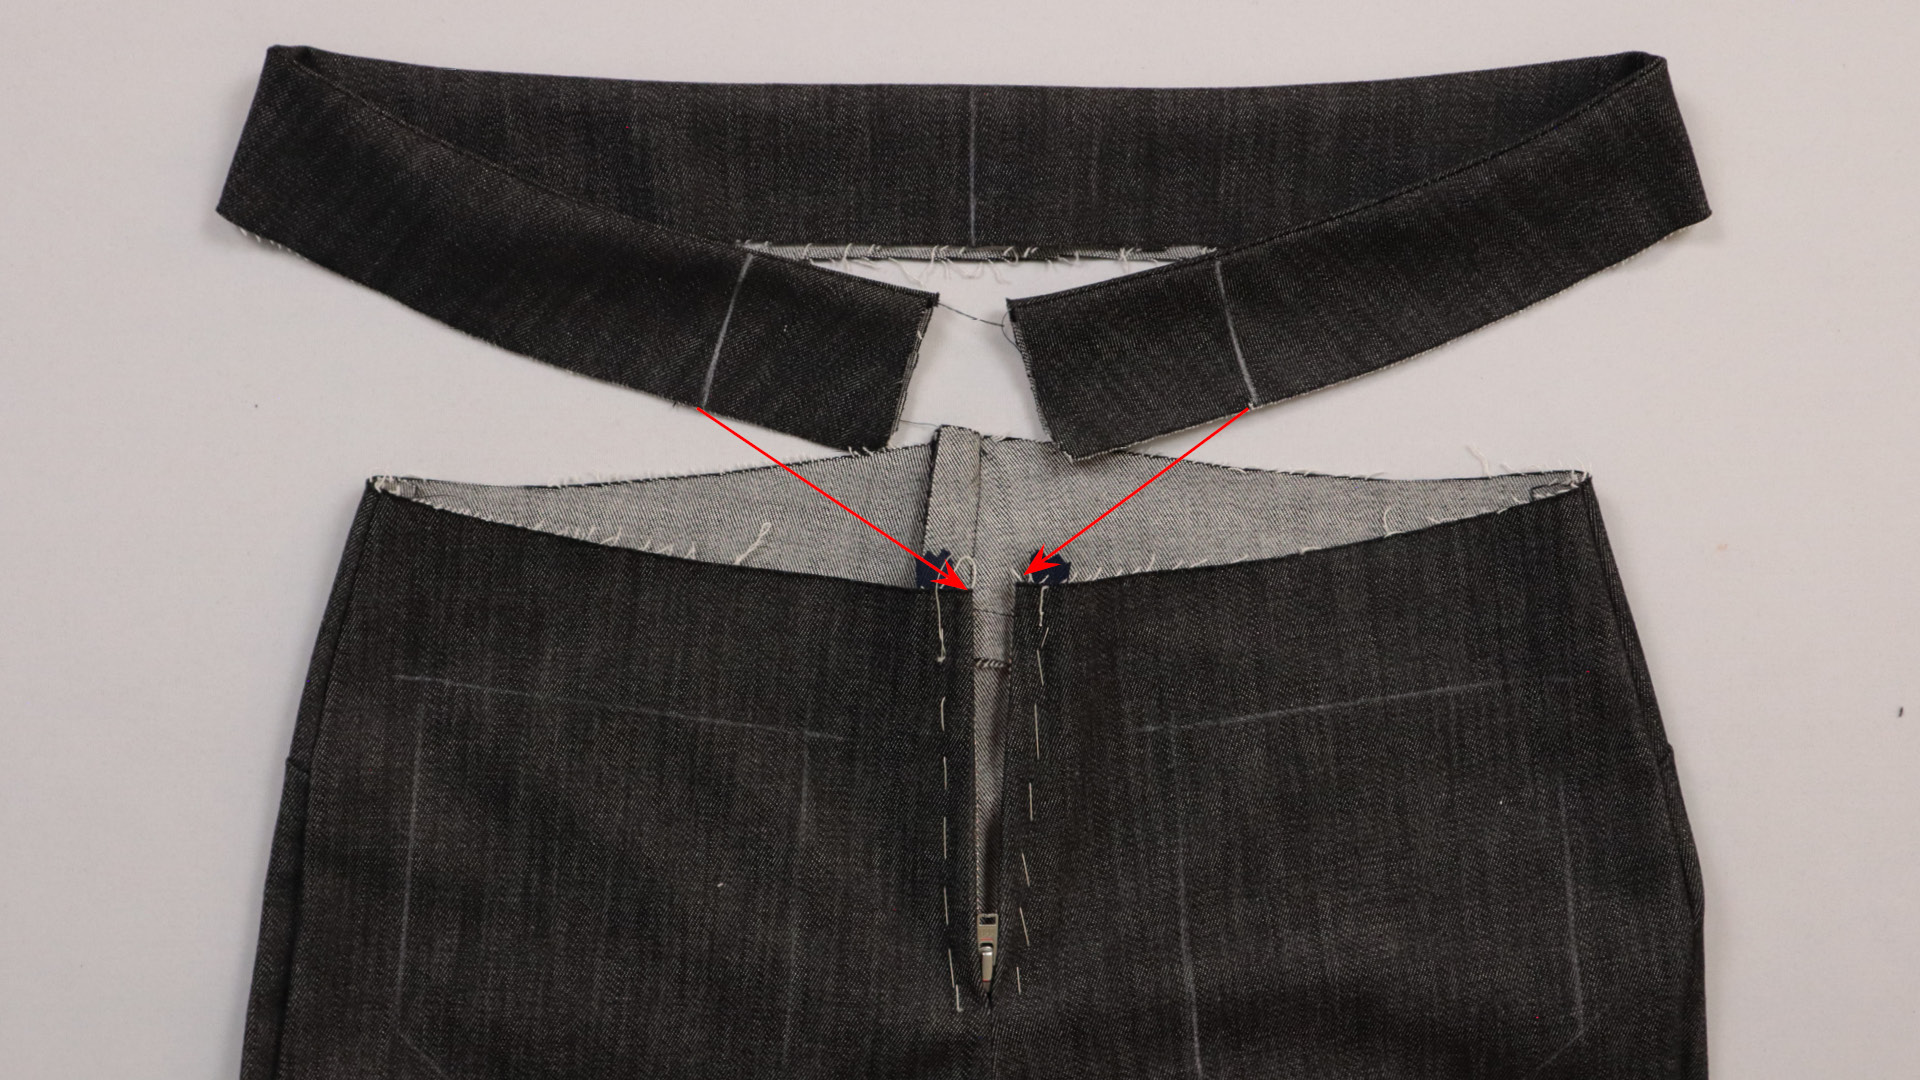
First, I position the waistband on the trousers as it will be attached later.
The notches along the lower edge of the waistband mark the centre front on both sides. Don’t let the protruding ends of the waistband confuse you – I’ll explain those later.
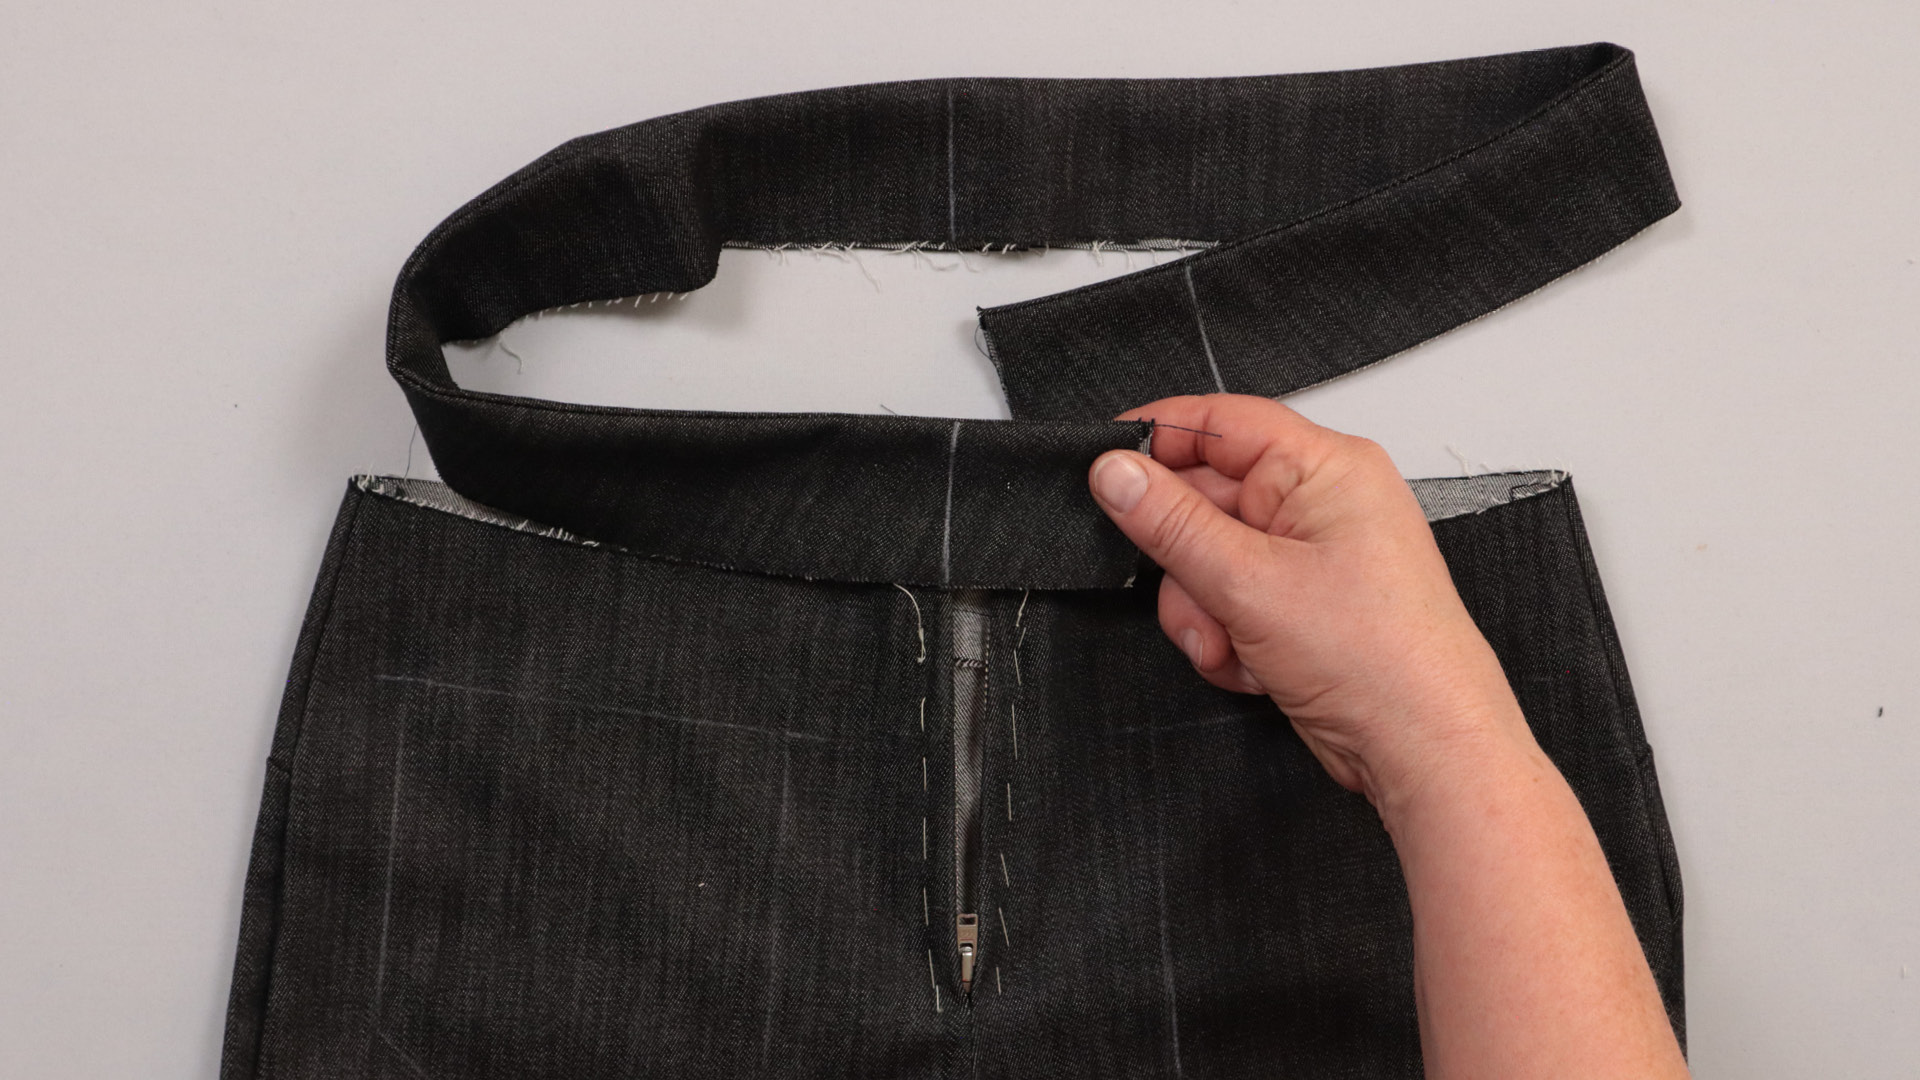
Starting at the centre front, I pin the waistband all the way around the top edge of the trousers, with the raw edges facing upwards.
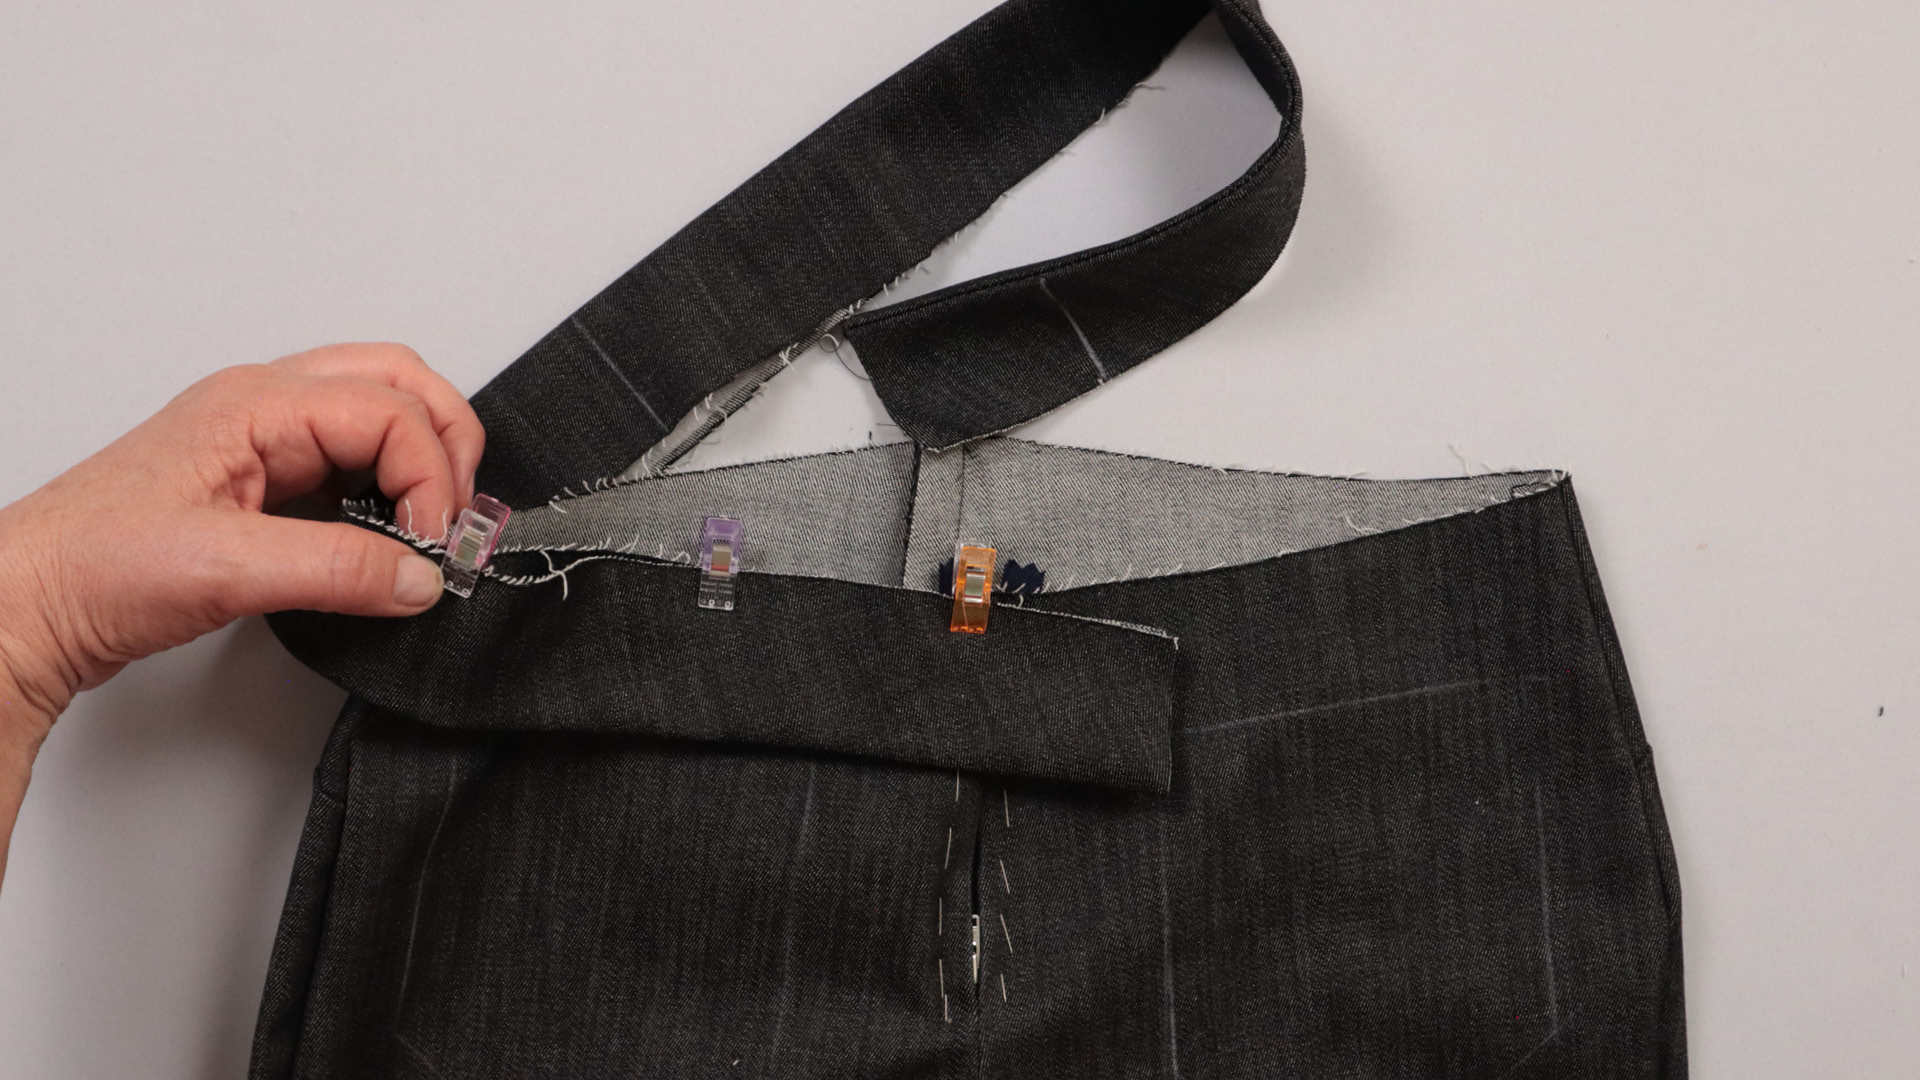
Make sure the notches at the centre front, side seams, and centre back line up with the corresponding seams.
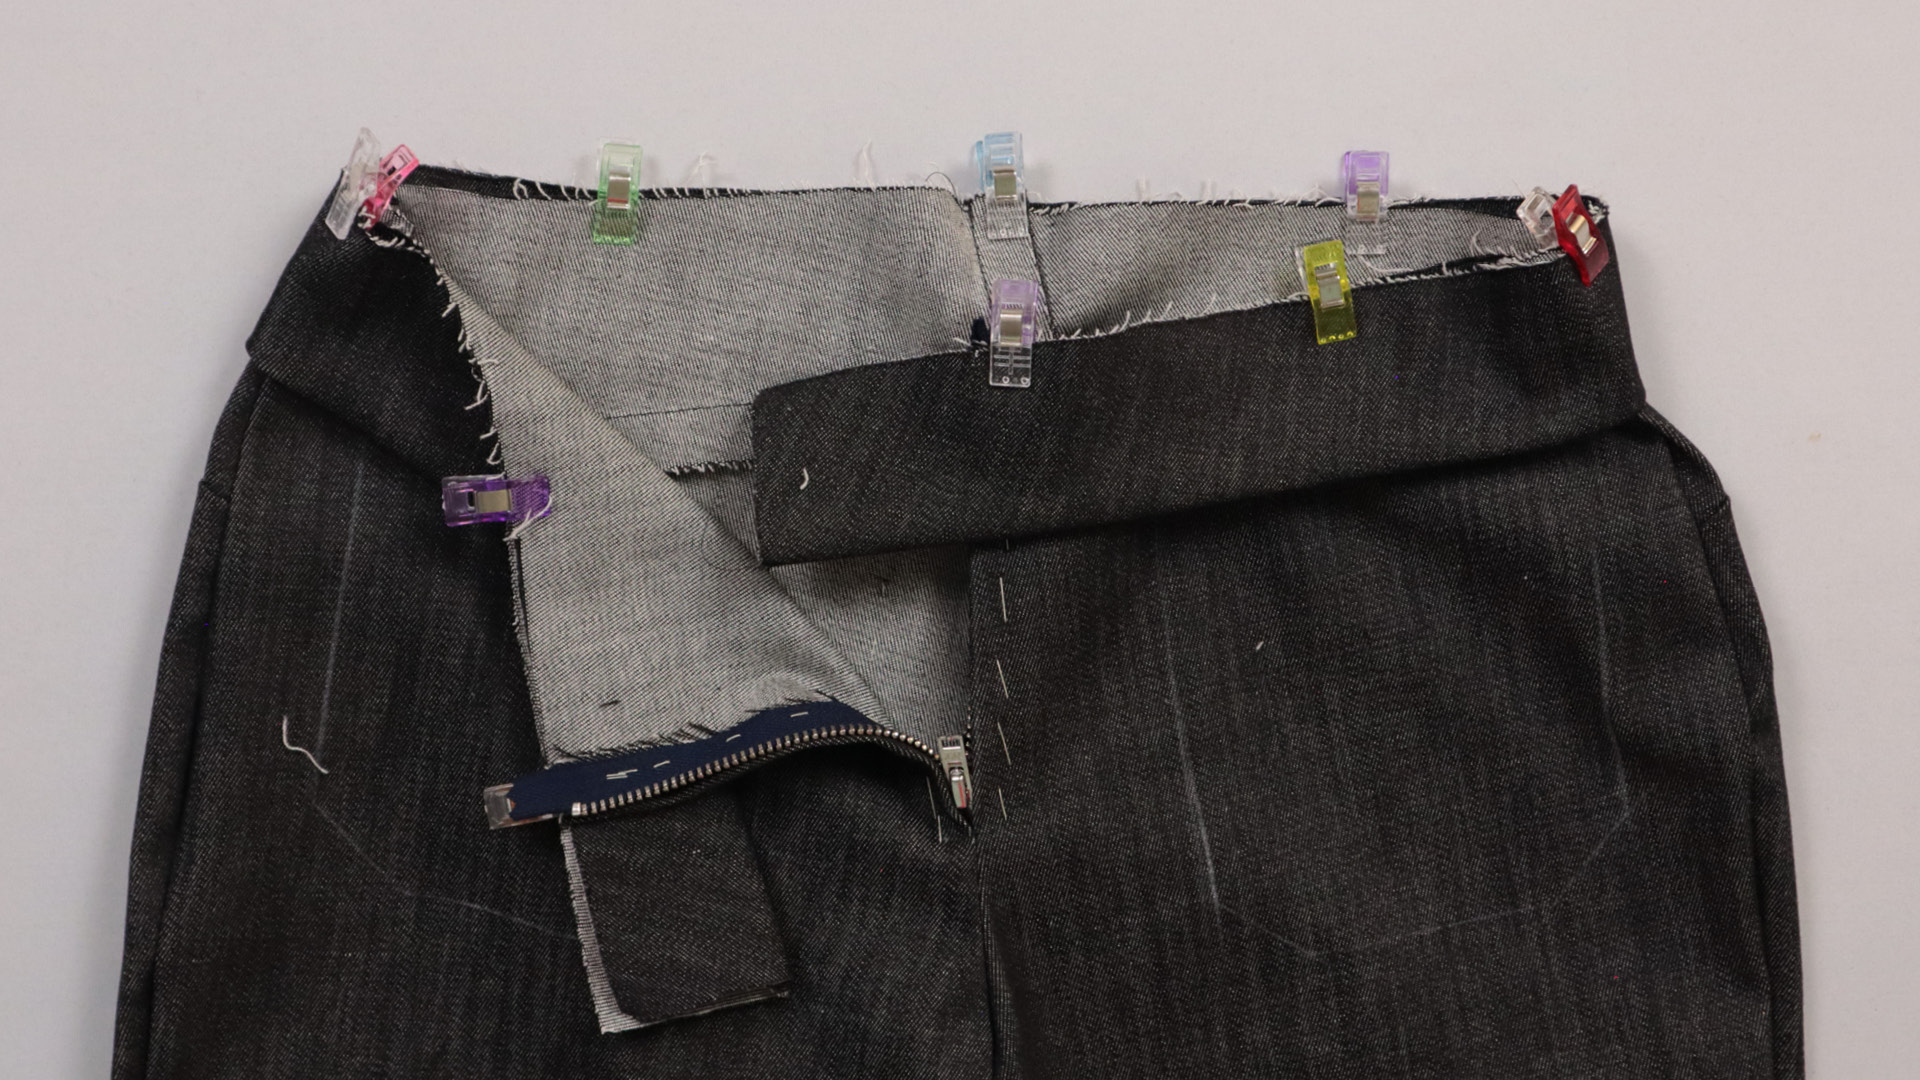
I distribute the fullness of the trouser fabric evenly between the notches, keeping the waistband slightly taut as I go.
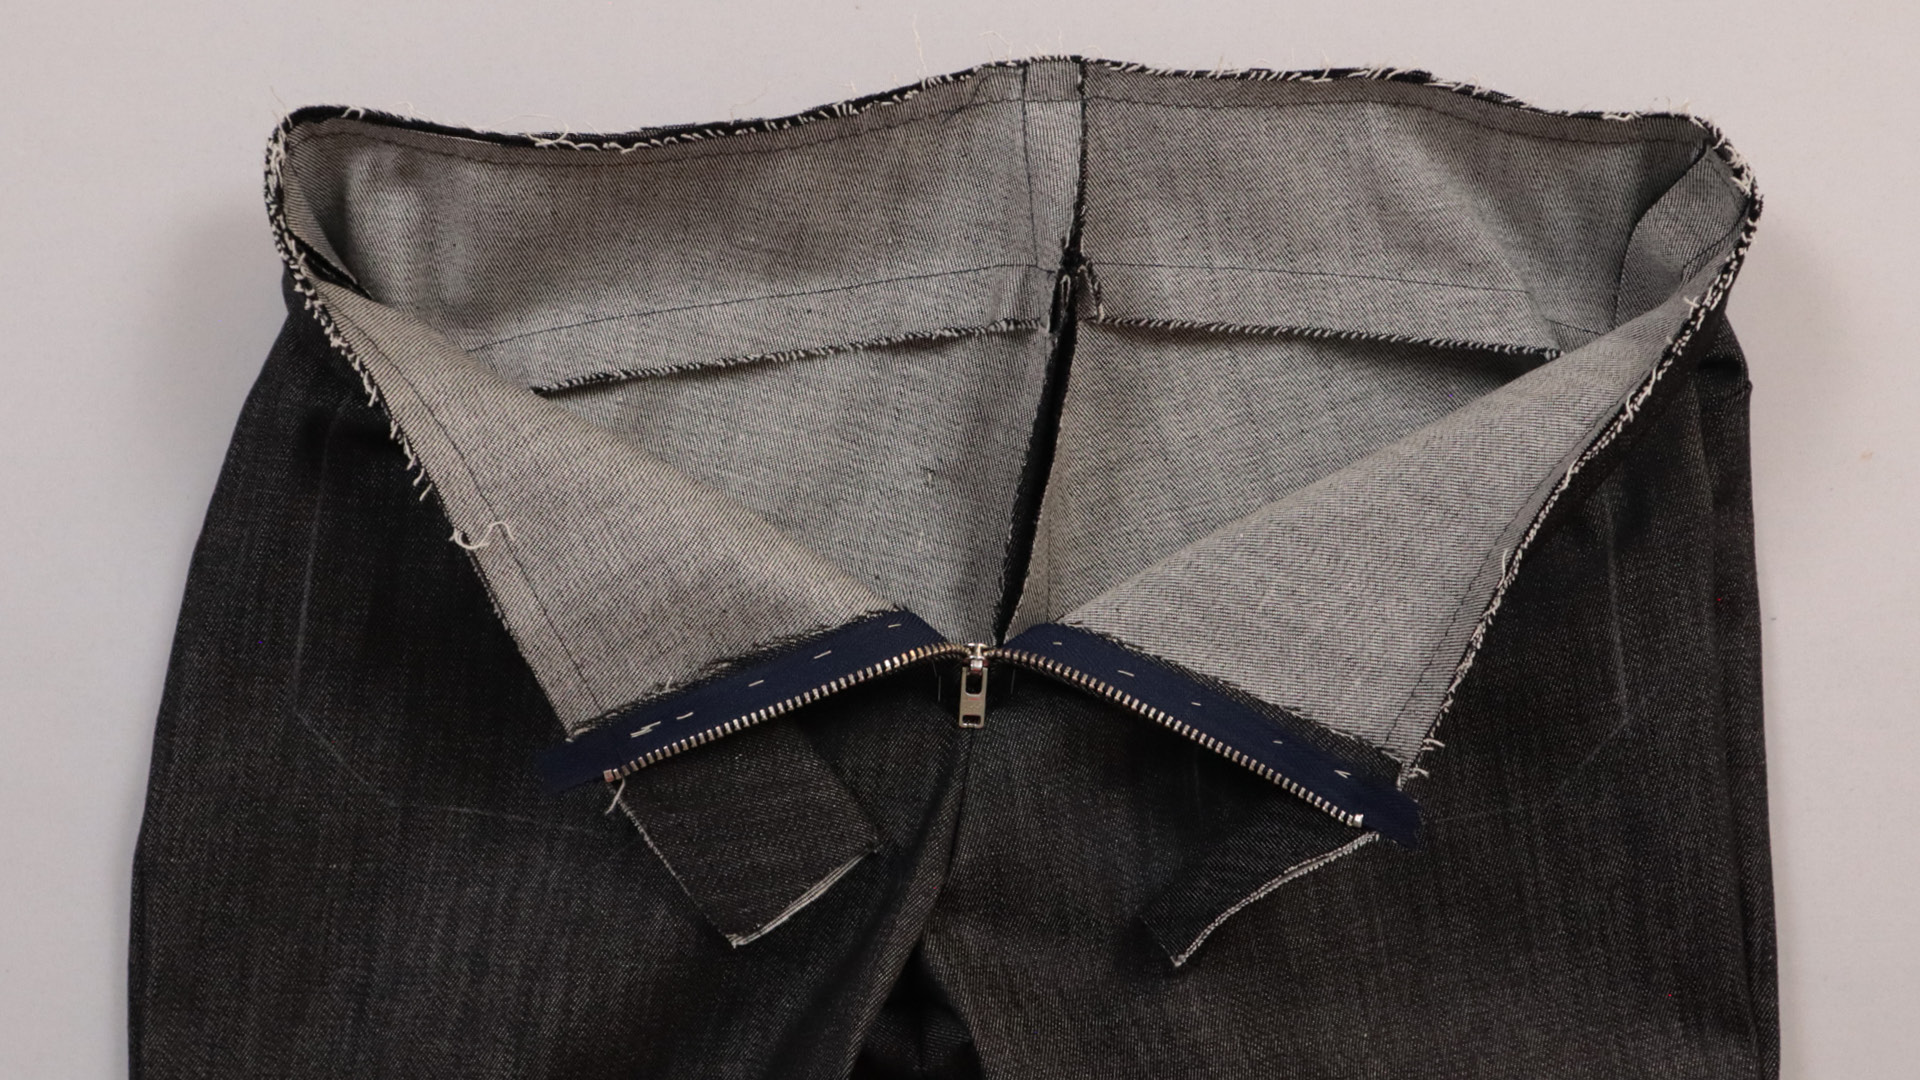
I’ll now sew the waistband to the trousers with a 1-centimeter seam allowance. To do this, I’ll use a long machine stitch again or baste it by hand.
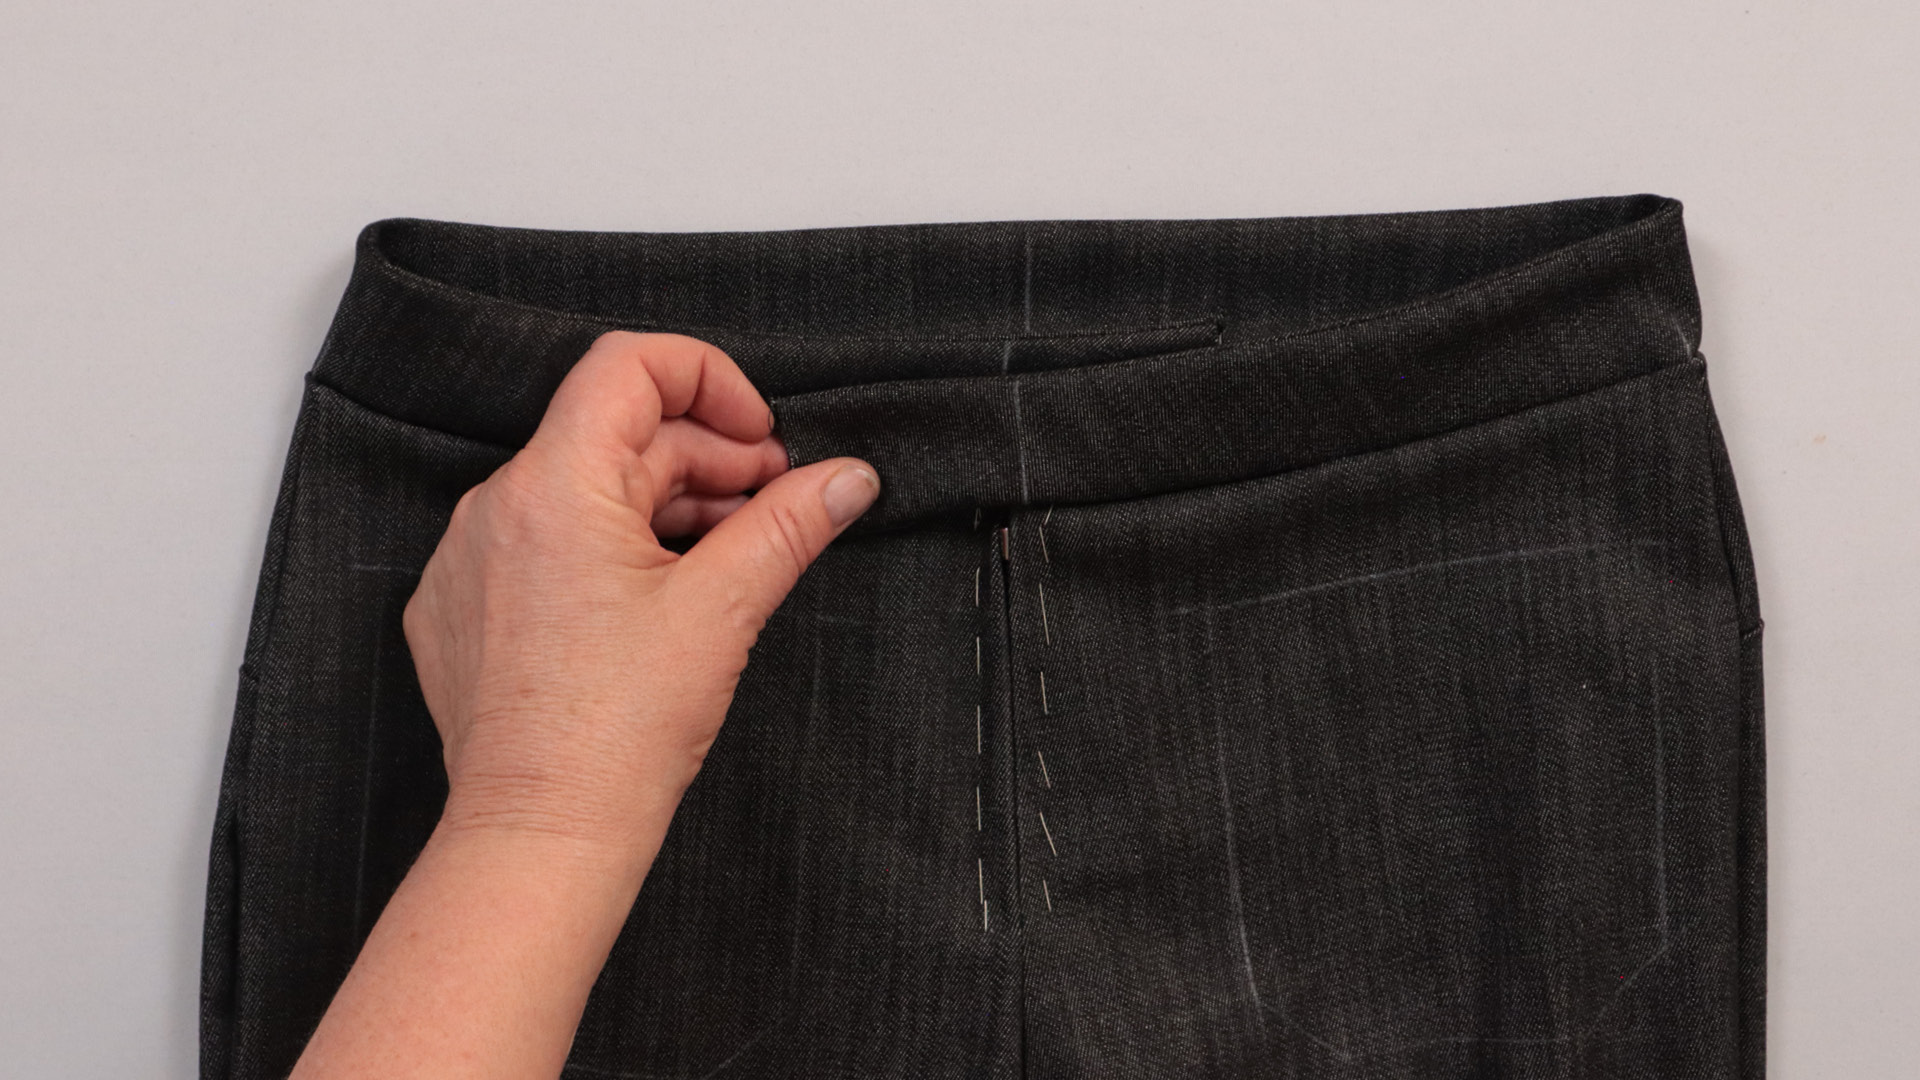
Now your trousers are ready to try on!
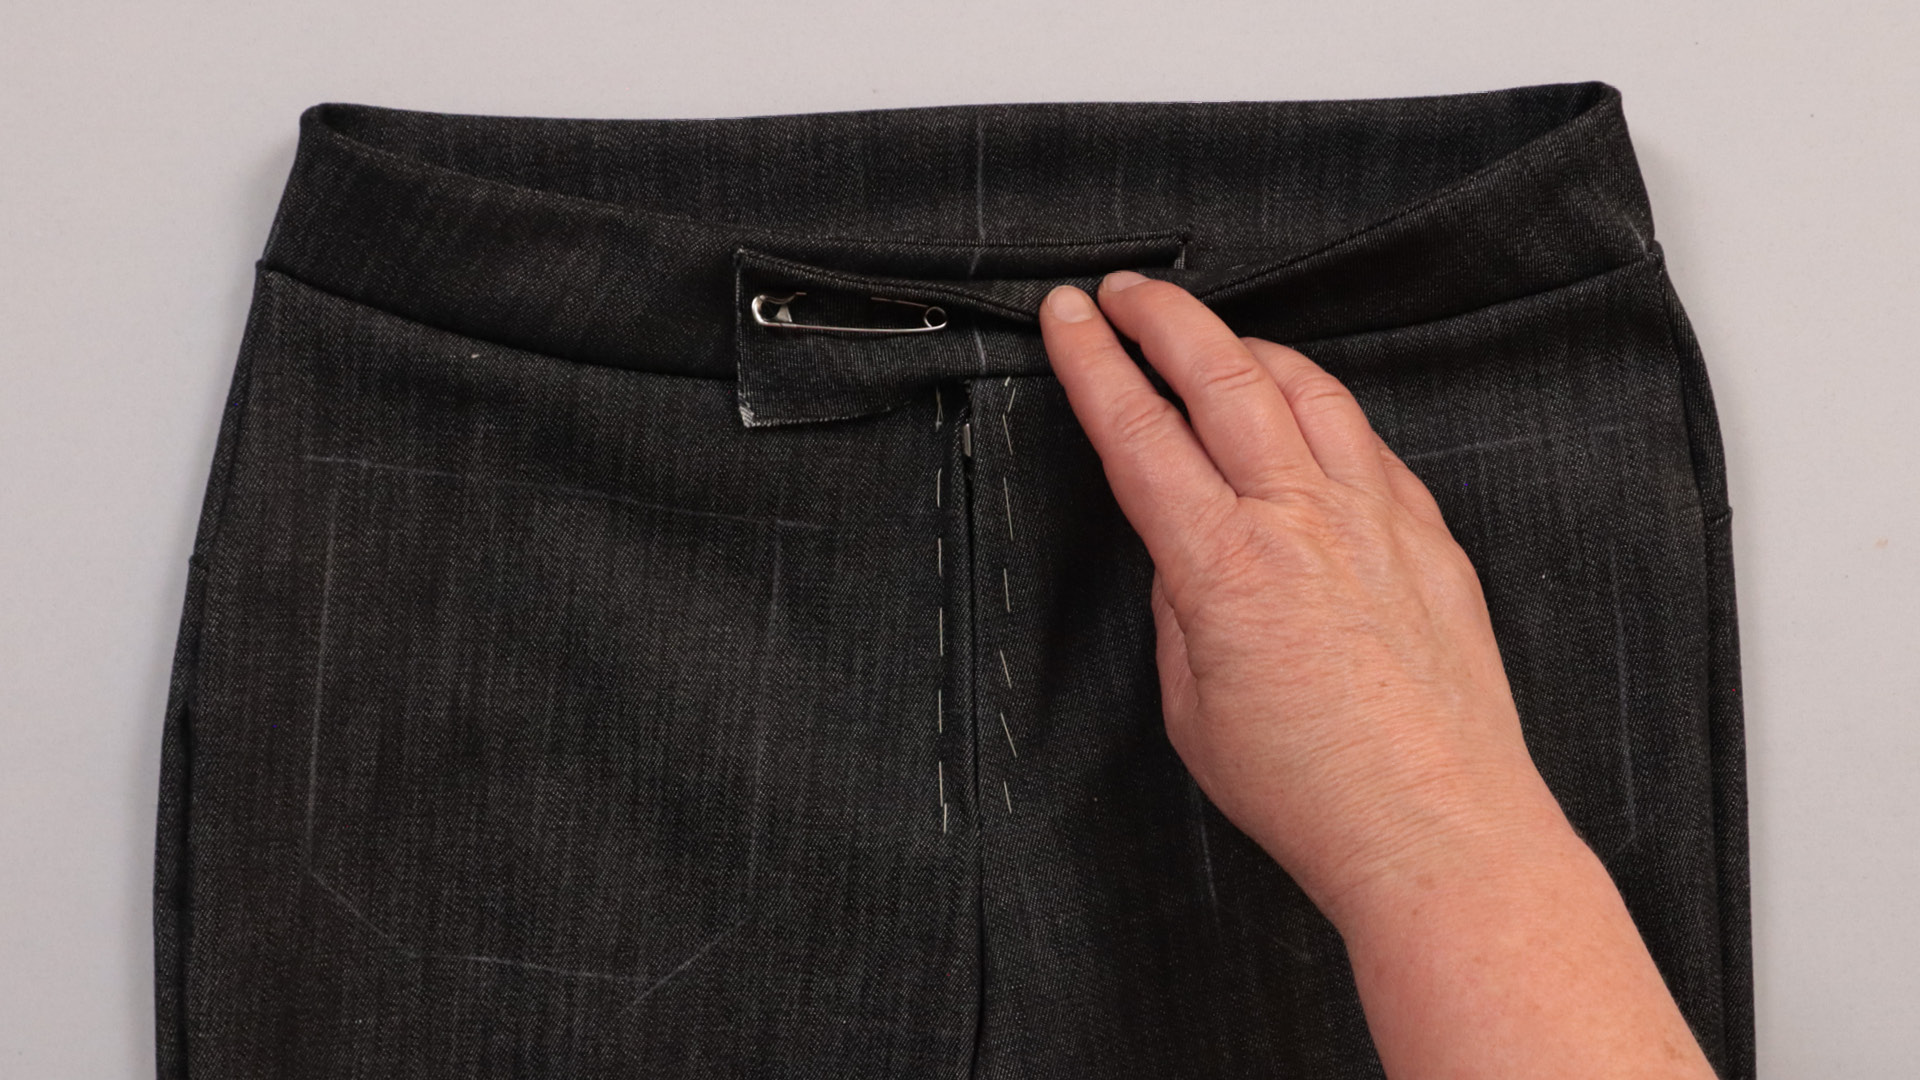
When trying them on, make sure the centre front-markings line up exactly, and fasten the pants with a safety pin.
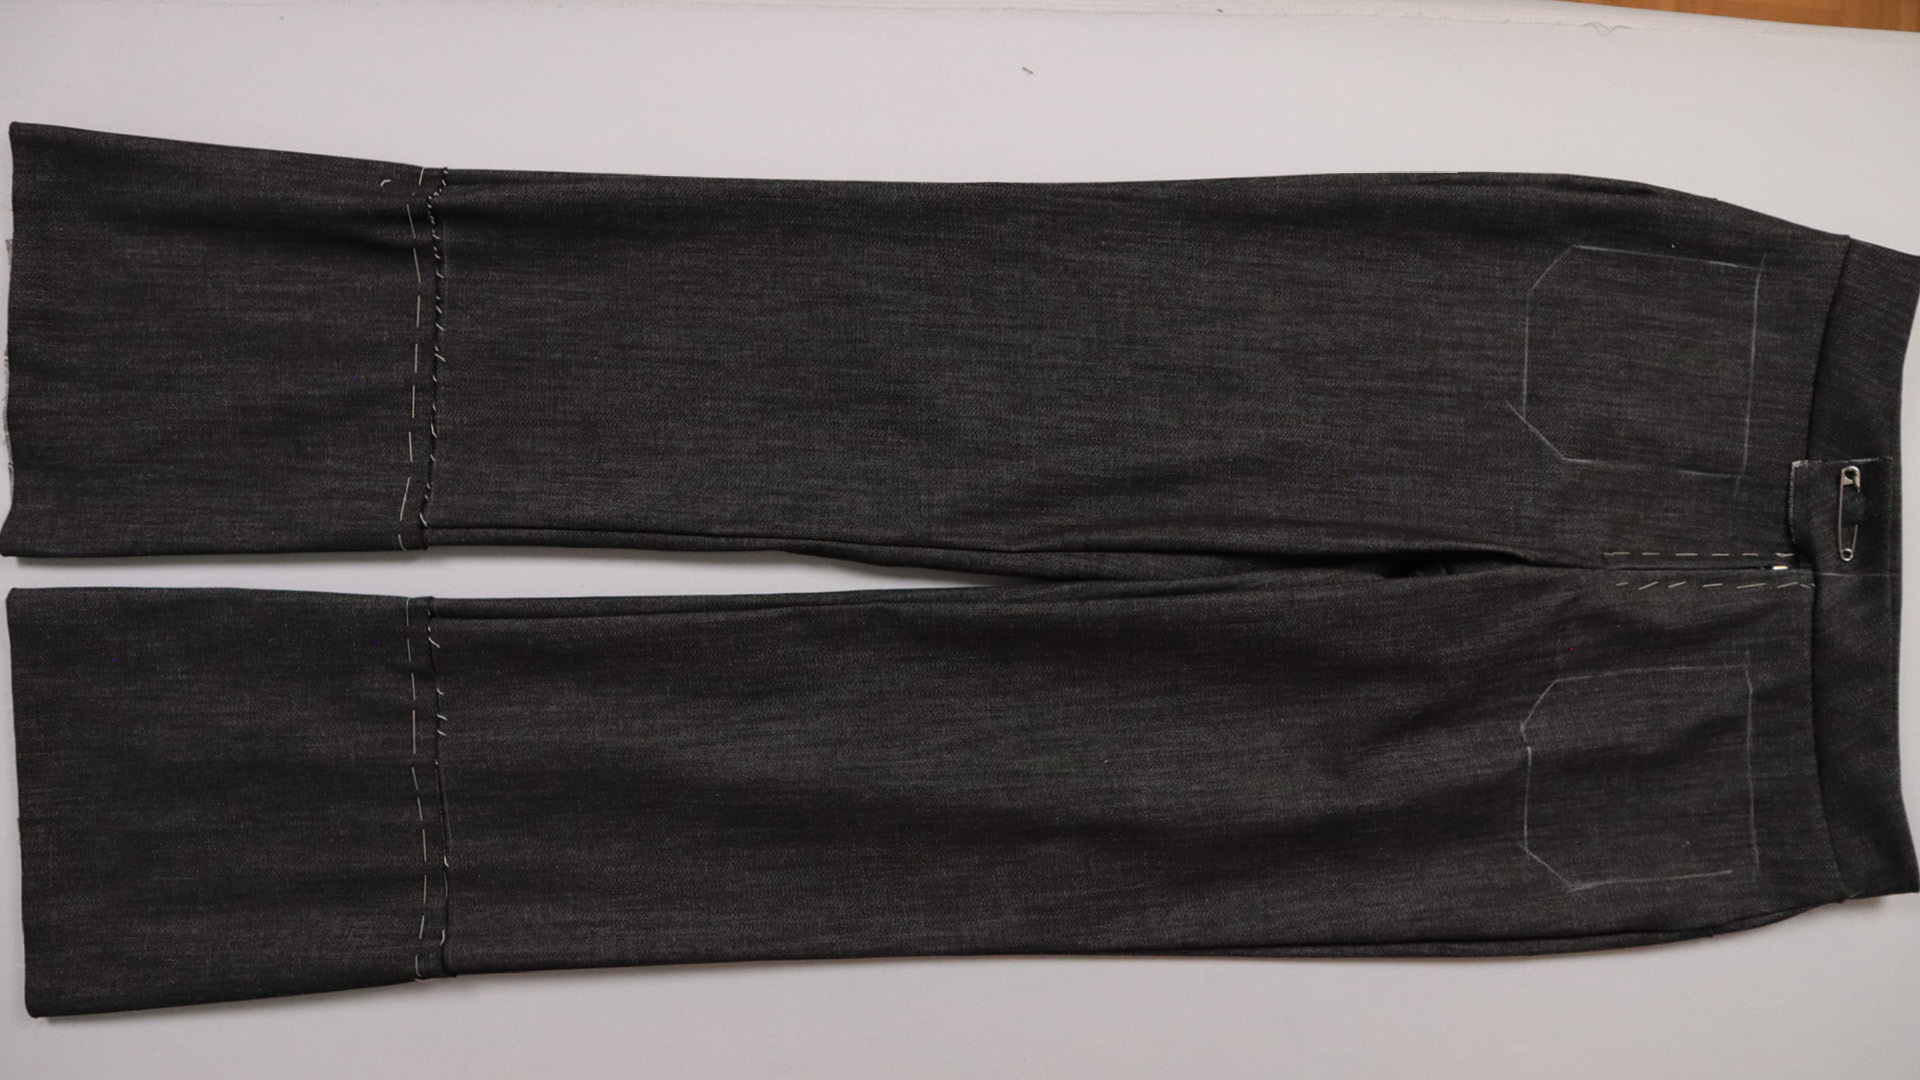
Here’s another view of the trousers from the front, all set for the fitting…
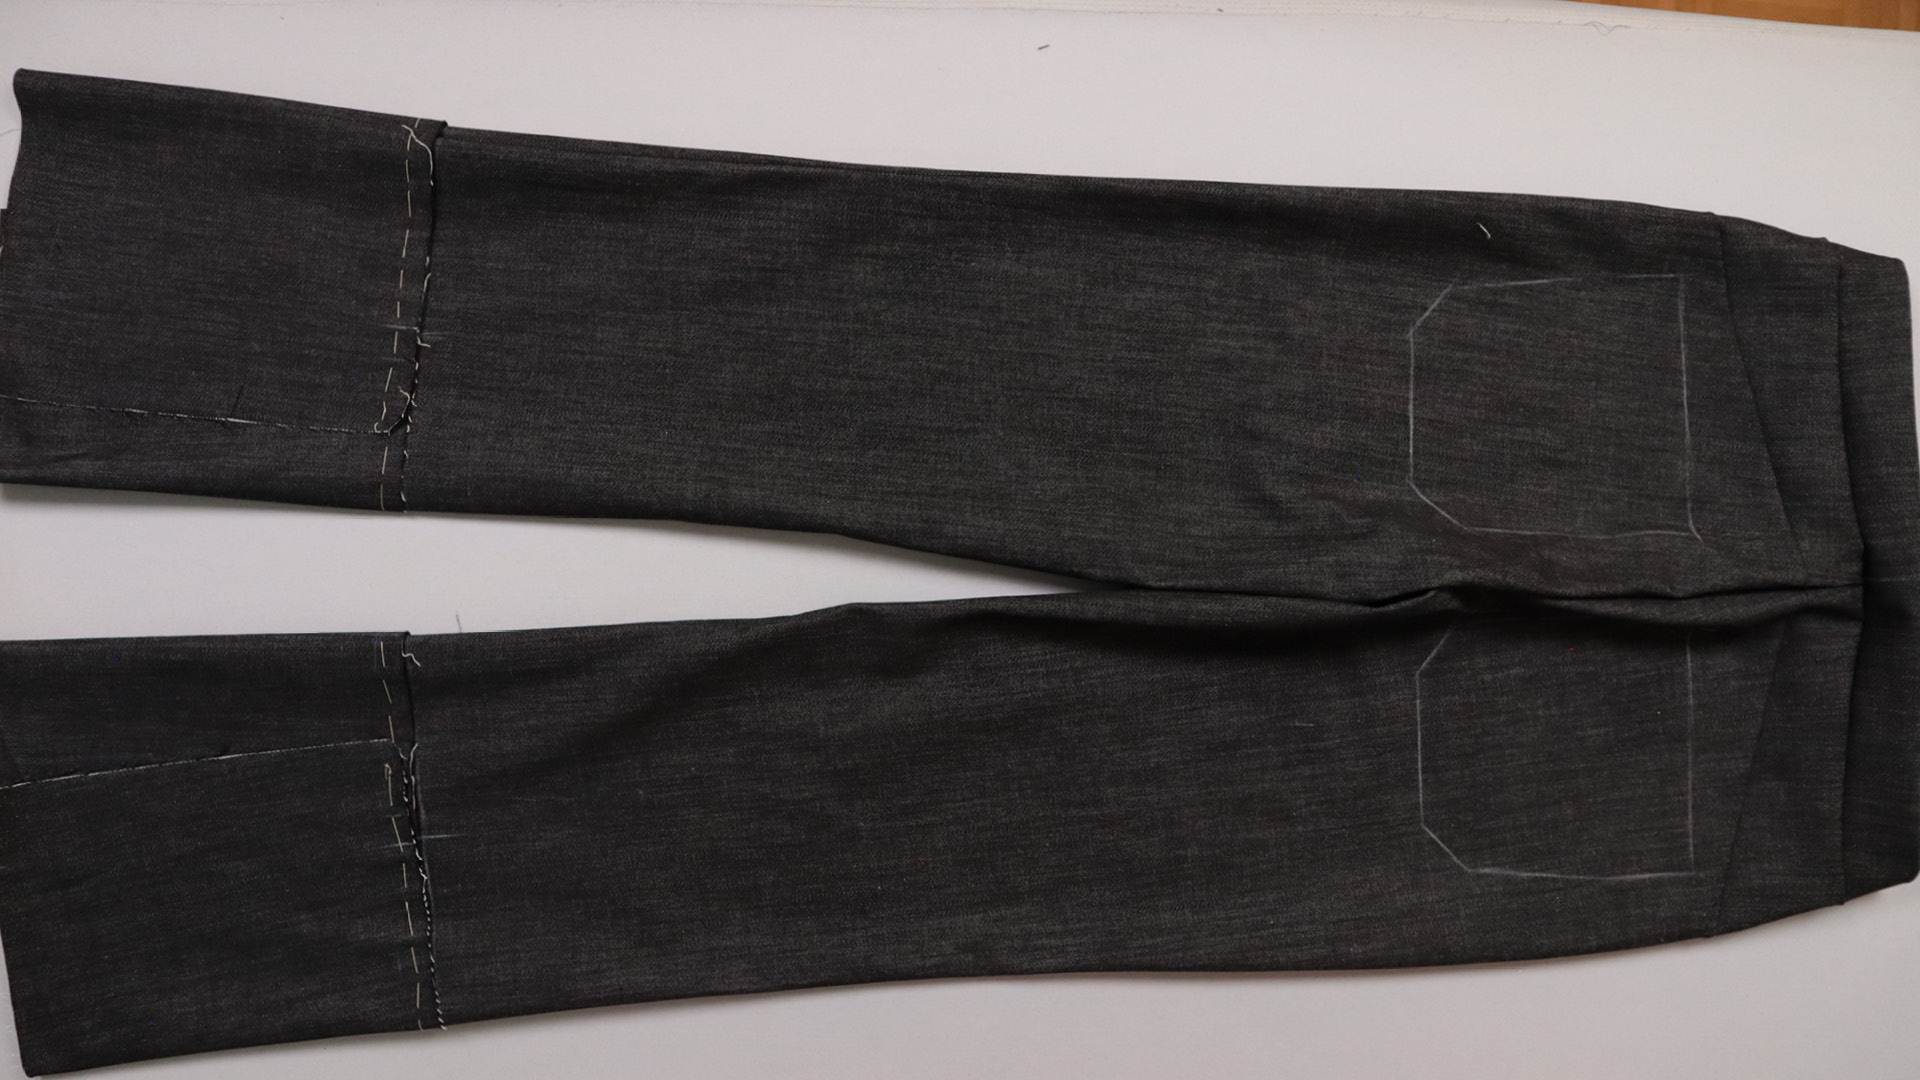
and from behind.
11. Trying on the trousers
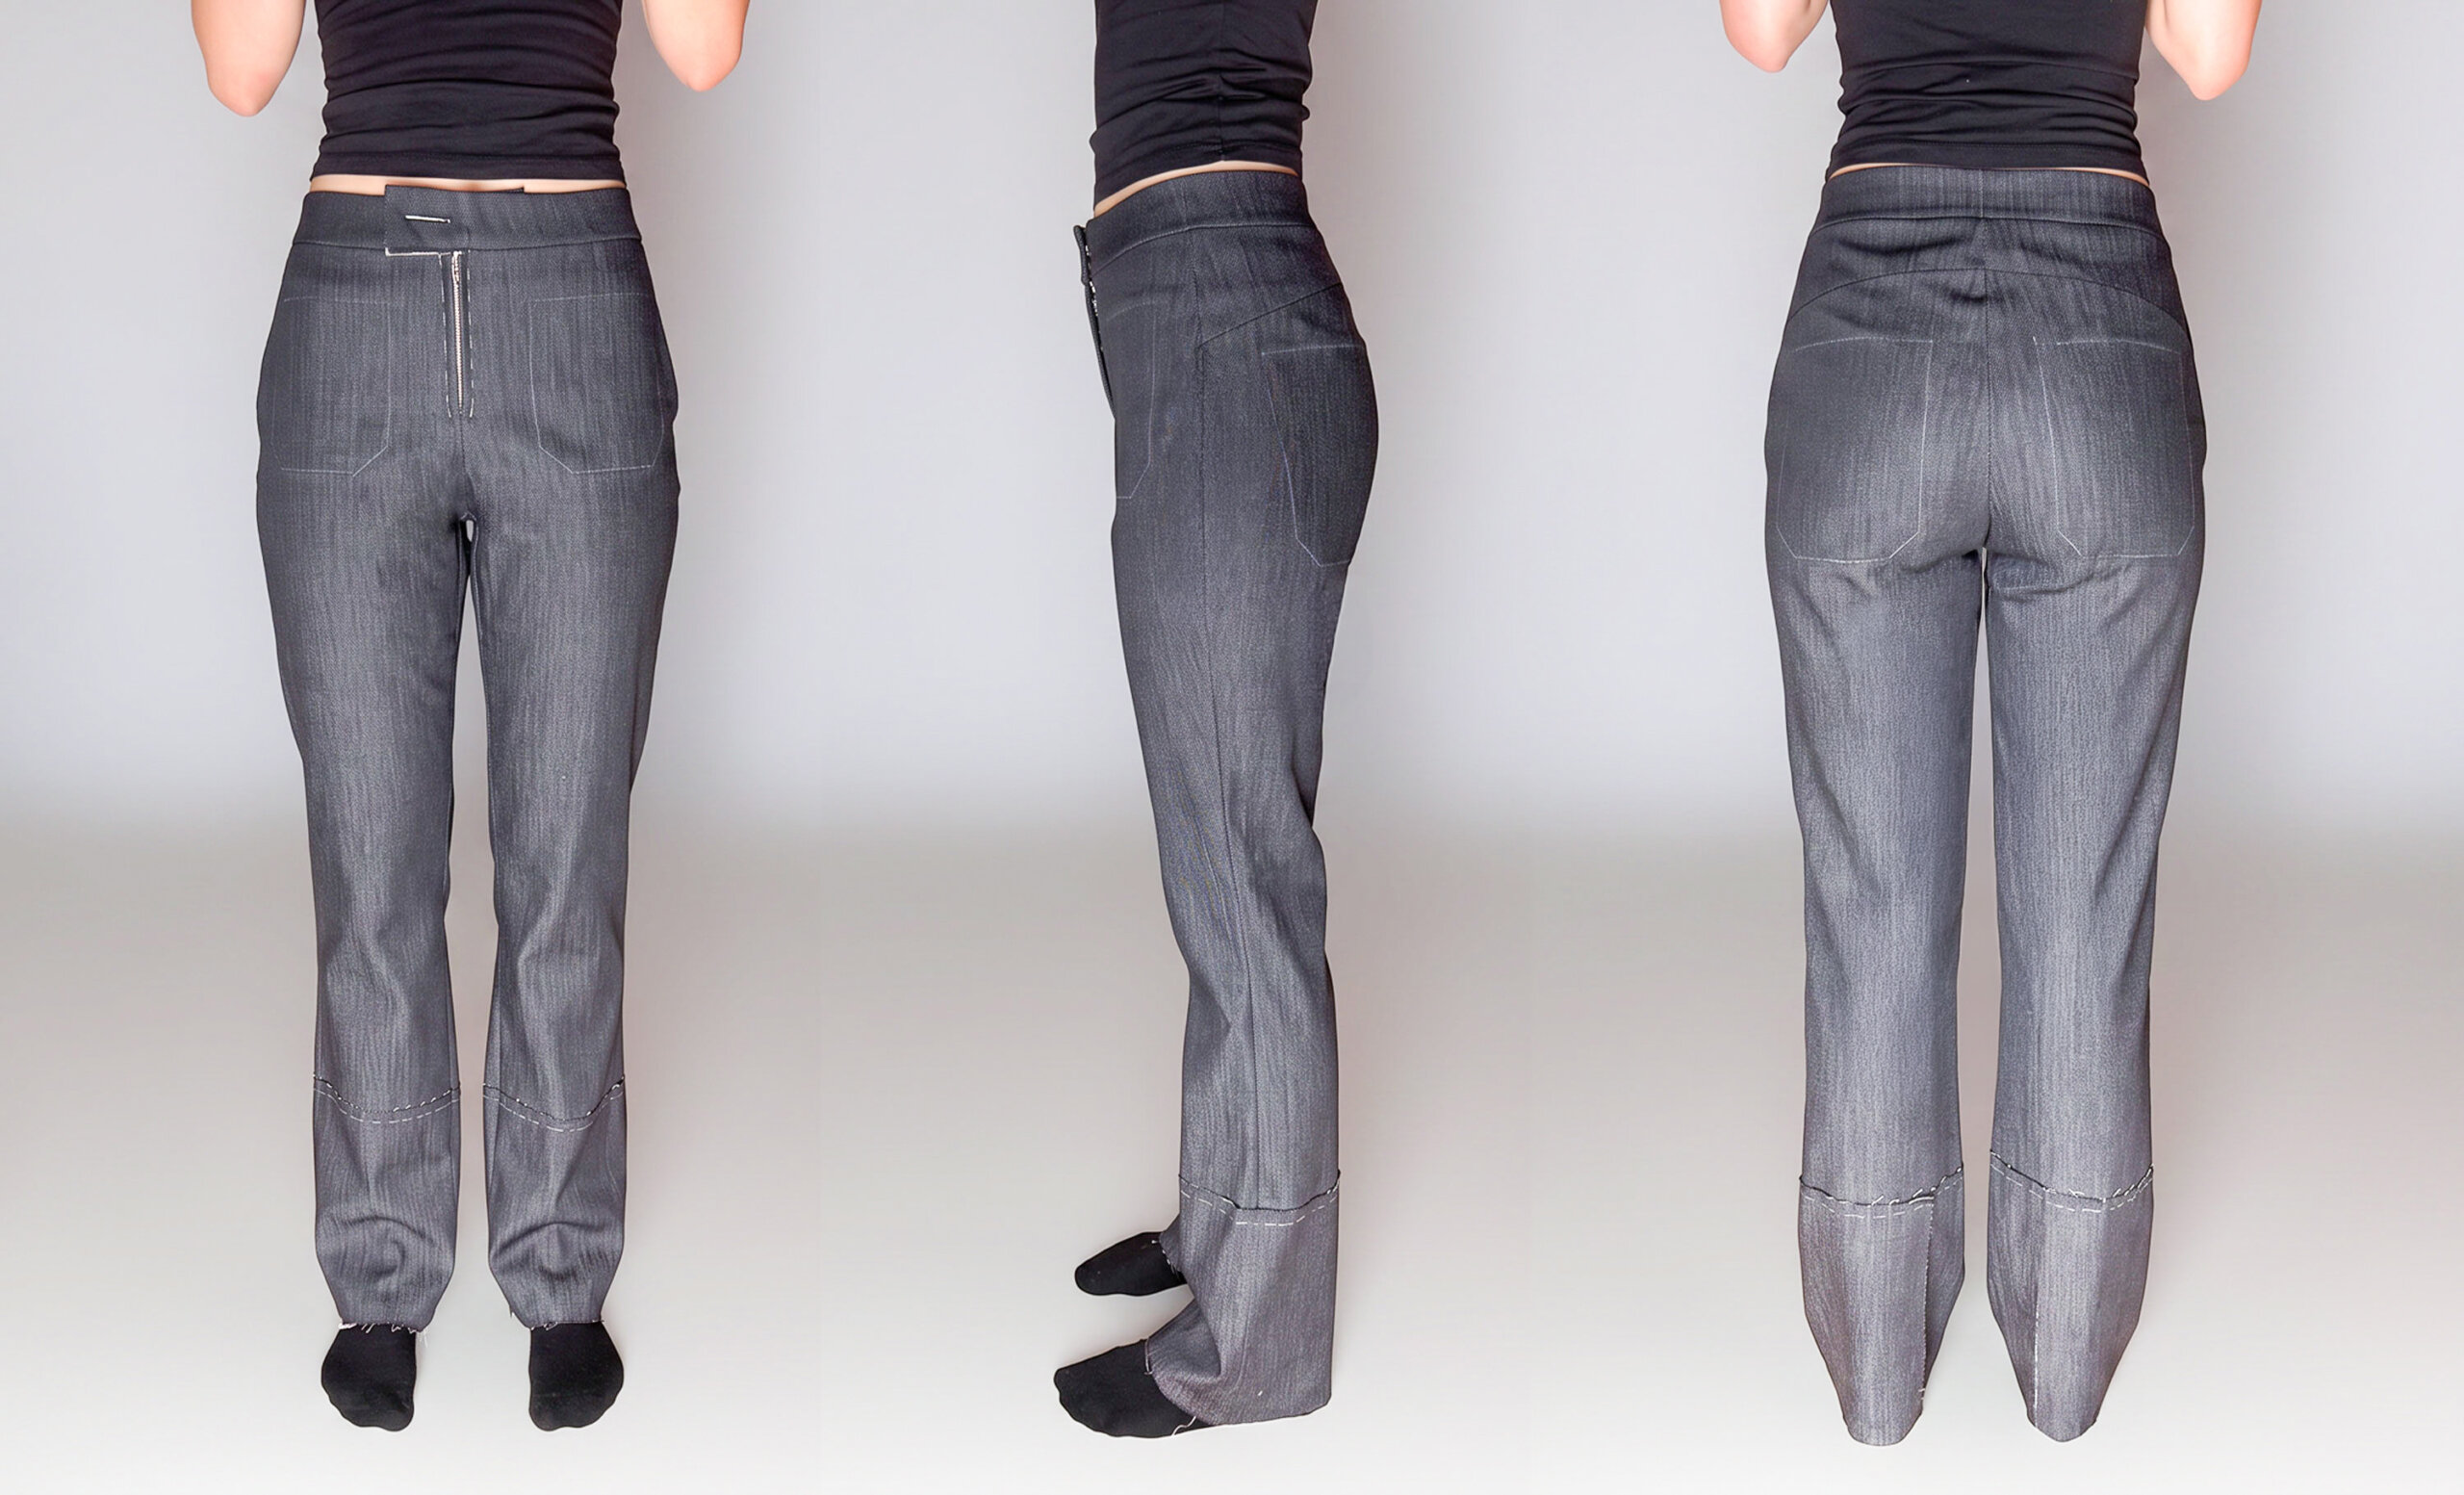
To get an impression of how the pants fit, I recommend taking photos that include at least the three perspectives in the picture above. You should take the photos as straight as possible – i.e. not at an angle from above or below.
Here are a few tips on what you should bear in mind when trying them on:
- The tighter the fit you’ve chosen and the less stretchy your fabric is, the more likely it is that the trousers will form some wrinkles on the back of the legs. This is because the trousers have some “extra length” in the back, which you need so you can sit comfortably.
- Wrinkles sometimes look worse in photos than they actually are. Be sure to take another look in the mirror to see what it really looks like.
If you still have problems with the fit, please send me an e-mail with pictures of the trousers worn (see above). Then I can give you a few more tips on adjustments if necessary. This works much better at this point than at a later date.
12. Waistband Adjustment Options

If you notice during the fitting that the waistband is too tight, you can use the seam allowance at the side seam.
Once you’ve reached the section on waistband construction, keep the following in mind: You can use the seam allowance on the left front—which would otherwise be trimmed off—to create the extension. The notches at the bottom edge of the waistband will then be moved accordingly.

If the waistband width is correct, mark a 1 cm seam allowance at the left center front and cut off the excess waistband.

Before cutting, make sure that the interfaced outer side of the waistband is actually on the outside.

I’m now unpicking the waistband from the trousers.

Then I fold it right sides together and press it again.

On the shortened side, I cut open the waistband about 1.5 cm for later corner finishing.
When you arrive at the instructions for waistband processing, you can start immediately at step 4.
If you need to make further adjustments to your trousers, transfer these to your pattern and take them into account during further processing. I now separate the test pants again and continue with point 4 of the instructions for closing back yoke and seat seam.
Here is the link to the next step. Select the link that corresponds to the bag shape you chose.
If you’re not quite ready yet and perhaps want to start at the beginning, you’ll find some links here: